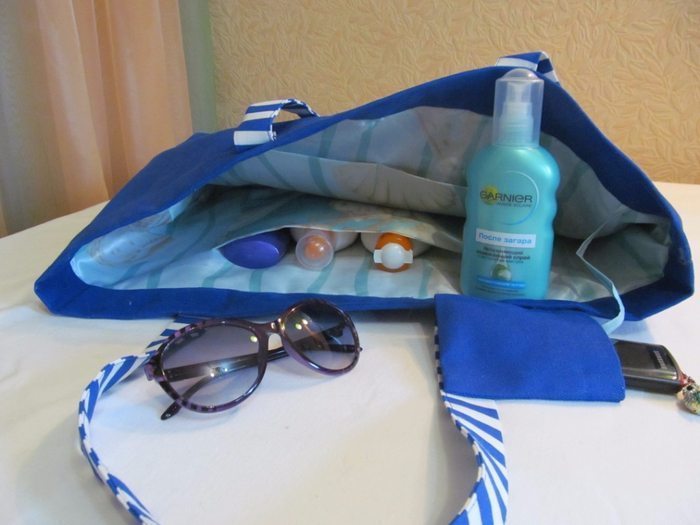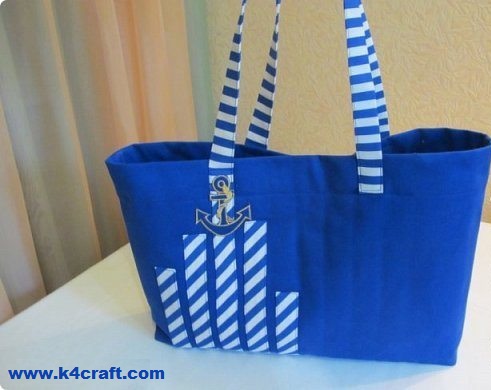
I sewed just such a beach bag, because soon the sea – this time, the magazine asks if anything new – and the two have not done anything interesting – three. Here again, “Three Nuts” for Cinderella … The trend, however …
That’s what we will say:
Well, could not you show your supervisor observer … best humor, looking at it … I ironed the bag, and he just does not reduce the eye with iron. .
Well, more to the point ..
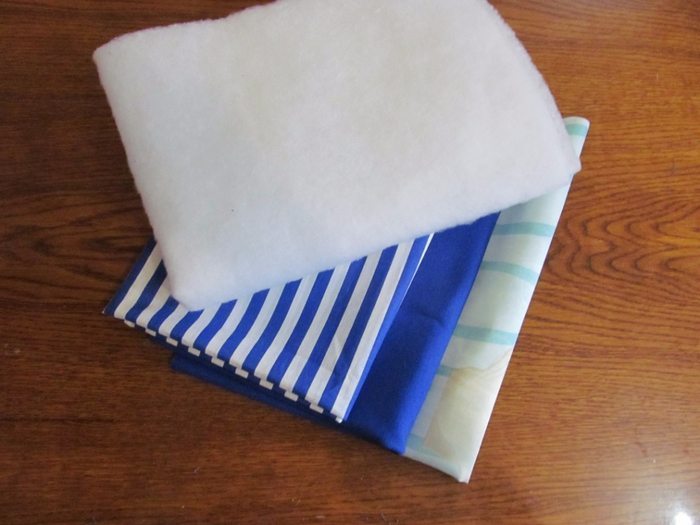
We need:
Fabric dense -I have something like x b, or electric blue jeans – 60 cm and a width of 140
Cotton white and blue stripes – 0.5 m at 110 cm width
Sintepon density of 100 (that is, do not know, sintepon nepushisty, about 0.5 cm thick
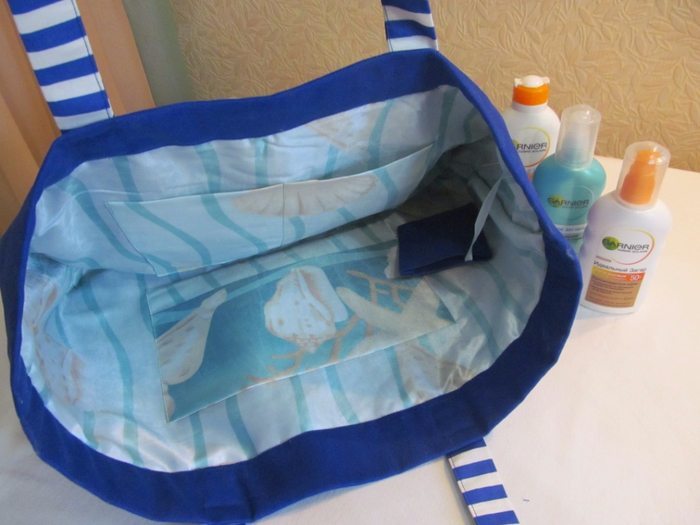
Lining – I took the b y fabric shower curtain, which was on top in excellent form, and the bottom … well, just throw away – which I did. I think we can take Bologna, can be dome from an old umbrella, if not a little – well, I was looking for waterproof, and can in principle be anything that comes to fabric bags.
Nonwoven different thickness: very thick, that is called a hat – on the bottom of the bag, the average density in the pockets. And appliqué cotton and a tight – in handle.
Threads and tools – of course …
Immediately utochnyu- add: can not take it, do not look for such companions, to simplify the problem, if we take the underlying tissue a little more 1 meter – for the eyes, even in the makeup stays, and buy a suitable webbing to taste – about 1.5 meters. I had a problem that the fabric is bought for a long time and a very different bag, it is not enough to handle.Absolutely. Therefore, it is looking for the fabric, but such that it was possible to put on the finishing.
First cutting. Dimensions of parts give allowances without taking for granted that the allowances laid already and everywhere equal to 1 cm. Fractional passes downwards details – any details.
From outer fabric:
panel – 58 cm x 38 cm – 2 pieces
bottom – 46 cm x 10 cm 1 piece (I had to do two pieces)
handles – 76 cm x 9 cm – 2 pieces (I – from finishing)
Lining of nepromokashki (I turquoise):
front and rear panel – 58 cm x 30 cm – two pieces
the bottom – 46 cm x 10 cm
pockets – I have two of them: 30 x 38 cm – 2 pieces. If the lining is the direction of the figure, keep in mind that the details on the pockets are folded, finished pocket is 28 cm x 18 cm, with the top edge of the pocket – fold.
Sintepon: 58 cm x 31 cm – 2 pieces
Braid or fabric for trim strips: approximately 18 cm long, 20, 23, 25, 28 and the shelf width 3 cm, 5 cm in cutting.
sewing sequence.
1. Start with a lining.
Pockets. Details pockets folded in half and one half of each glue interlining medium density, then Sew the two halves of the details, leaving the seam slit for eversion. Do not forget to cut the corners close to the line, so that the pocket was well decorated. Release, sweeping over the edge and to iron. Baste lining panel to the details so that the fold was on the top parts (pocket entrance), and the pocket was clearly in the middle of the sides with respect to the future bags and 7 cm from the upper edge:
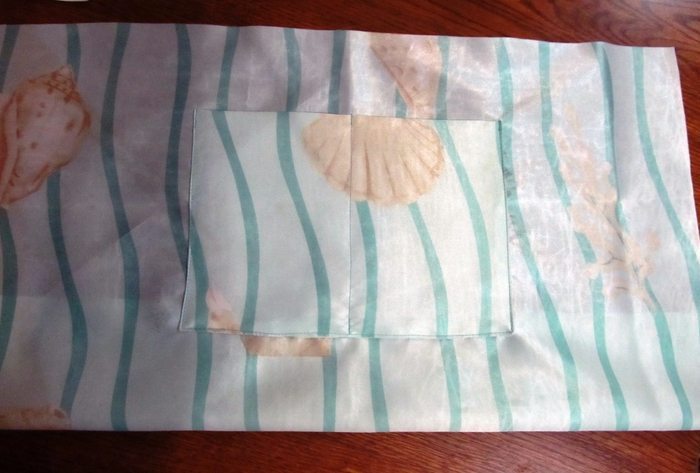
Stitched, not forgetting to do tack at the beginning and the end. I divided the pocket into two parts – for sunscreen and tanning oil, for example …))) The second pocket is performed in exactly the same, but in 2 parts I was not shared – to leave more. I sew it on the second panel. From a small piece of outer fabric sewn pouch for your phone – its size + 2 cm in width – is at the discretion.
When the pockets are ready to connect the parts lining on the sides, allowances press them apart, do not forget to tack – it’s important. Then mark the center of each panel along the bottom, from the middle to put both sides at 23 cm.
Pay attention to the pair of panels of sizes and floor: panel width = length + width of the bottom of the bottom. In other words, the panel is cut 58 cm wide, 2 of them went to see the allowances, is 56, divide in half – 28 minus 23 (the bottom half of the length). The residue was 5 cm on each side – half the width of the bottom. If such a narrow bottom not like it, or shorten it to 4, for example, see, and then you can cut out of its width of 13 cm, or add to the side panels bags at 4 cm per panel and the bottom, too, cut 13 cm. In the event of a change bag sizes Remember to count the size of all the components.
That’s mate is very important – if not then flog. At discrepancy of the size of the bag will slash-curve …
Thus, the marked out panel, marked out the middle of the length of the floor on both sides and the middle of the narrow sides of the bottom. Begin alignment with the long sides. We combine labels of means and the bottom panel, fix the beginning and the end of the bed with the marking points, shear pins. Repeat all this from the second panel and the second side of the bottom. . You can scribble Again note: start and finish line is necessary at combining – for allowance of the short sides of the bottom of the bag no scribbling !!!
. See the picture – it is clear that the long sides of the bottom of a line begins and ends exactly at the bottom right corner.
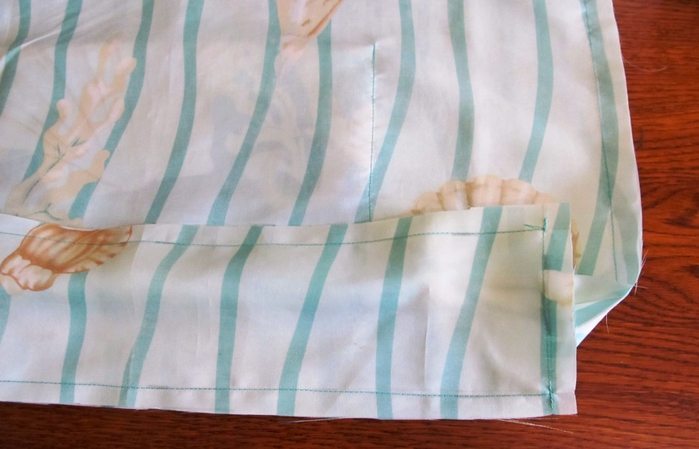
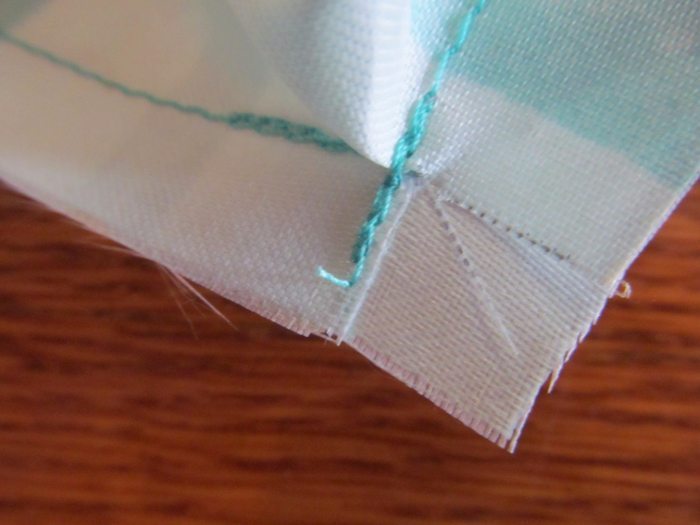
Now a little “piece of work”: allowance bag walls is necessary to make an incision at the exact beginning and end of the line (see photo). Once notched, short sections of the bottom right will be easy and convenient to the sidewalls Stitch – and here it is already possible to make a small tack on allowances.
On the lining, I specifically 1mm captured area (see zazhimchik?), To hedge themselves from the hole in the lining. But the outer part of the bag will not tolerate – remember: a perfect match at the corners.
Lining can be put aside and start working with the outside of the bag.
A little will go back, why start with padding. First, the exterior and interior of the bag sewn in different threads, and so as not to rearrange the thread back and forth, at first I did all the work of turquoise, and then all the work went blue. Secondly, small errors lined excusable and be corrected, the same on the outside of the bag or errors should not be, or not patches are welcome (depending on the tissue), so it is best to practice on the lining, and then sew the top of the bag. Well it is, thinking “in the course of play” …)))
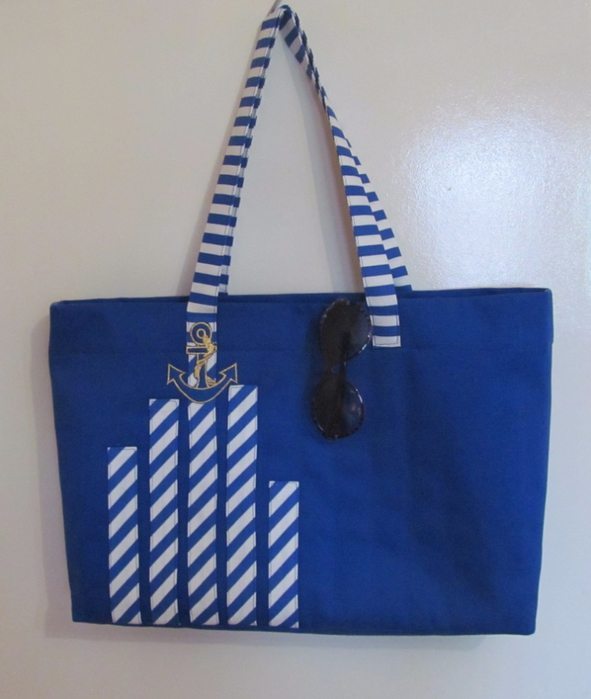
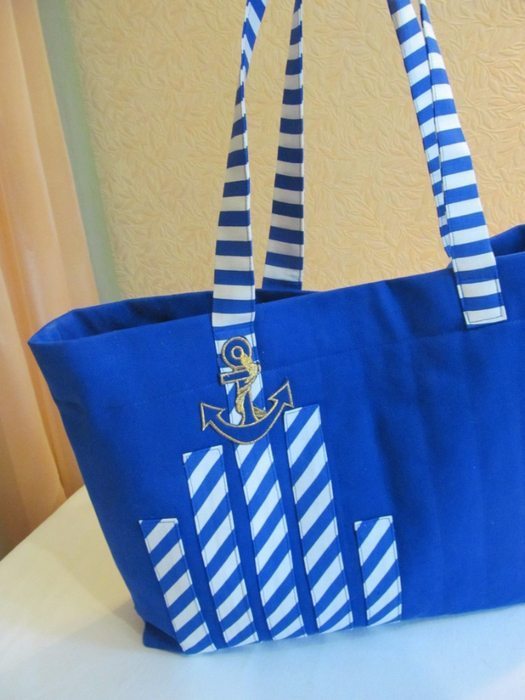
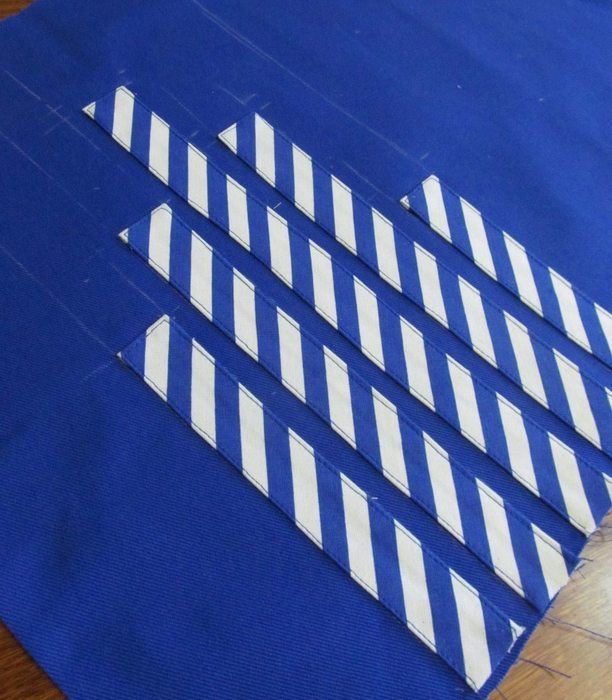
The front panel of the bag lay on the table face up, take soap or disappearing pen and start rascherchivat trim from the center of the panel put the first finishing strip, skip 1 cm – the second, etc. The height of the bars is arbitrary, as you like. The only thing you should pay attention to: the highest band must be from the middle of no more than 8 cm, because pens we sew it at such a distance from the center, therefore it is desirable to take into account docking handles and the highest strips. Either make them all not higher than 25 cm, so that the strip is not docked with the handle.
Nastrachivaem strips around the perimeter, tucking sections. At the bottom of the short sections of the bag was left open.
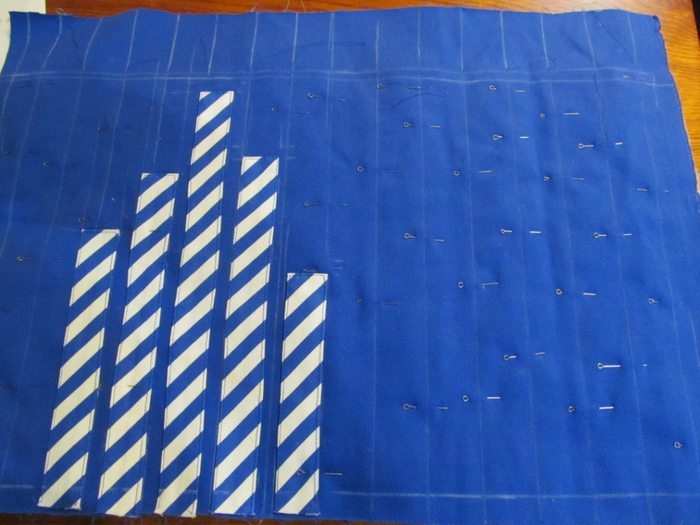
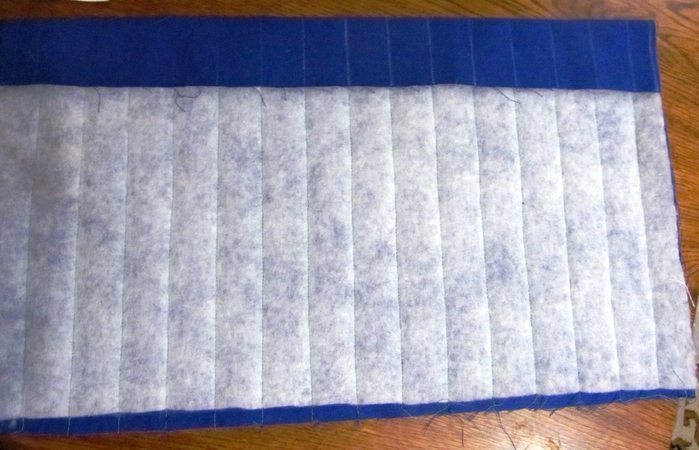
Now rascherchivaem stitch. I took a step in the lines of 4 cm – can be less or more. On the underside of the details to make padding polyester, with the bottom sintepon does not cover the allowance for sewing the bottom and at the top it does not reach the upper edge 7 cm shear sintepon and upper part bags starting from the center -. This is important . Smoothes out the details on the table with respect to each other and transverse shear pins (see photo). This sequence will prevent or minimize the formation and progress syntepon ugly blisters on the bag.
Stitch stitch is necessary in the face and also from the center to the edges.
That’s what happens. See photos:. Up-down allowances available without padding polyester, and the side seam allowances to close slightly sprawled synthetic padding.
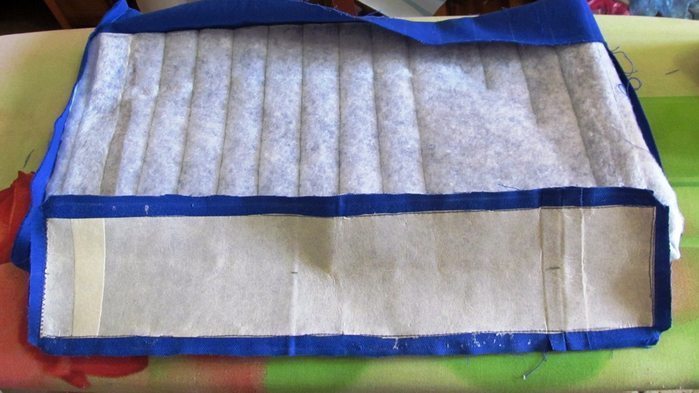
This is nothing to worry about, after grinding , grabbing sintepon, parts bags we pruning it literally right up to the line, so that the seam was not on the extra thickness. Then sew the bottom just as it sewn into the lining. Just do not forget: first glue on the bottom of the piece fleece hat firmly against the bottom of the finished bags, ie 46 x 10 cm It should look something like this.:
Otutyuzhivaem all seams as the assembly of the bag.
Now, without twisting the bag and removing the lining, we put it on the bag. Oversize bags on top of 7 cm turn down, mark up from the fold 5 cm sections buckled inward and put lining sections at the top of the single cut the piping bag. At the same time put shnurochek small telephone pocket.
Otstrachivaem on the edge of the piping, completely finishing the bag.
It is possible to postpone. Details for pens, because I was thin cotton, fully taped average density and interlining hemstitch their external stitching (folding piece in half along the length, each half still in half slices go inside, stitch along the edge of the handle). Ironed.
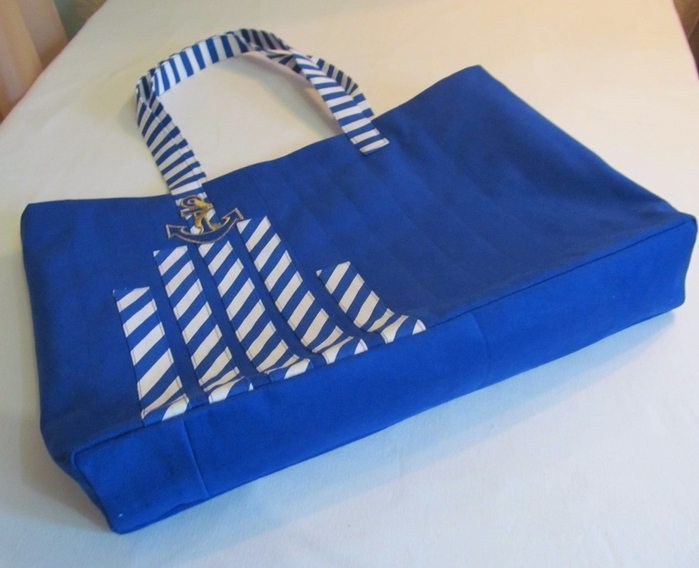
From bags center mark up the position of the handle at a distance of 8 cm each, ie . Between the ends of the handles 16 cm from the top of the bag handles are sewn 5 cm sew like this: loop handle pointing down, the tips – up to flash a tack through the stitching single cut the piping bag, clipped allowance, unscrew the handle up and vystrachivaem rectangle mounting knobs. closing blade handle oversize the first line: clean and tight.
One pen tip on the front side in the highest match finishing strip butted. At the junction of the adhesive paste the apllikatsiyu – anchor.
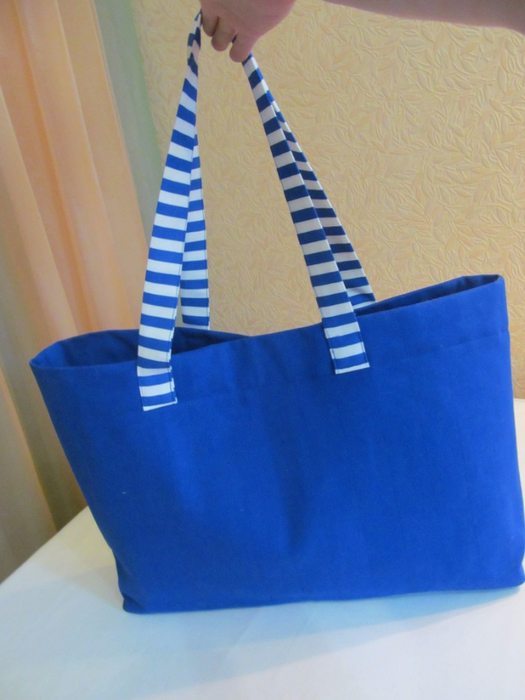
Once again otutyuzhivaem bag with oparivaniem simultaneously remove steam soaps markup – and admire !!!!
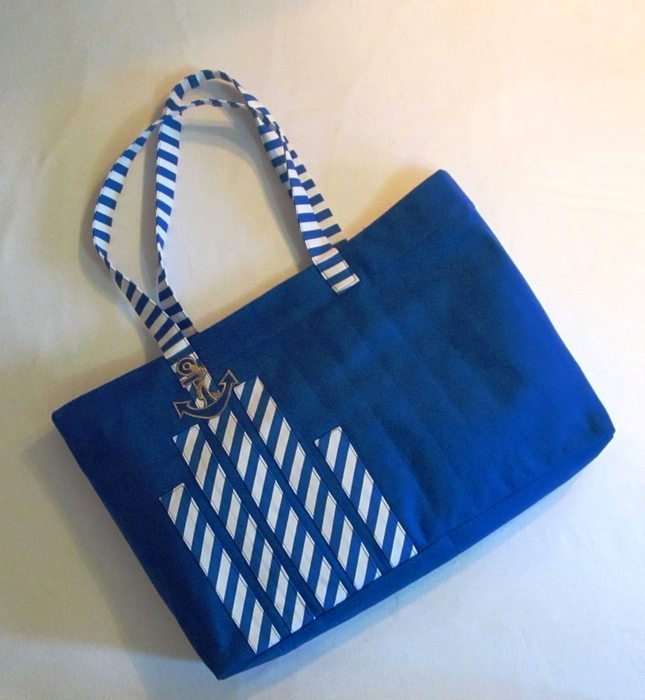
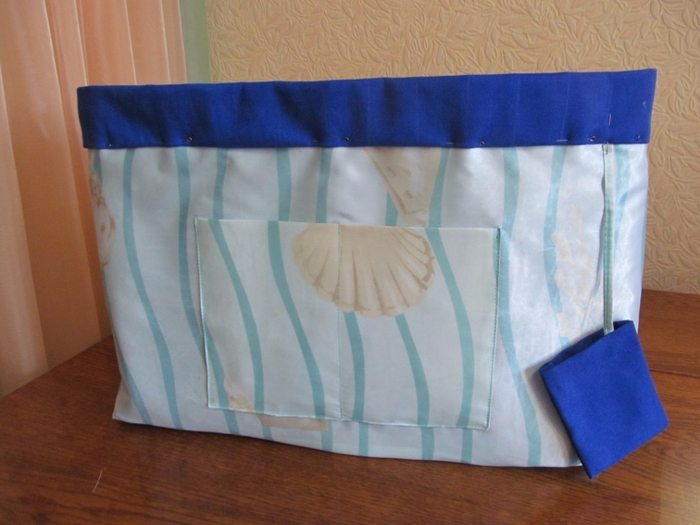
The back side of the bag – it is without finishing. You can do the same thing on the right side, but I did not bother ..