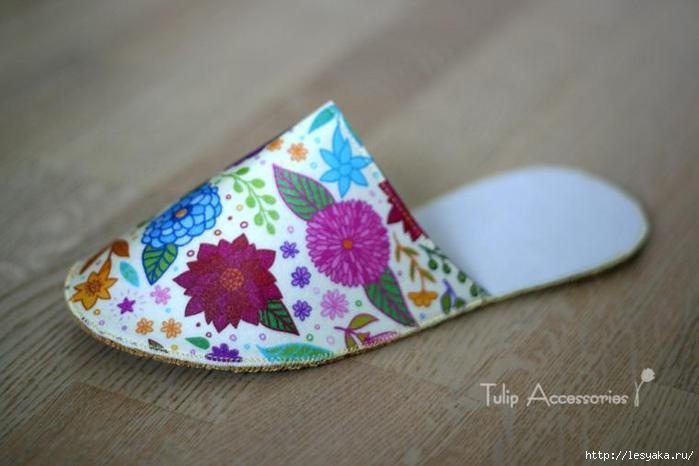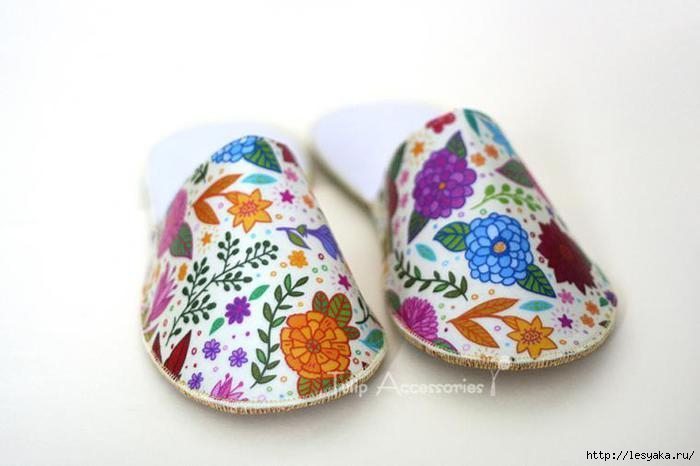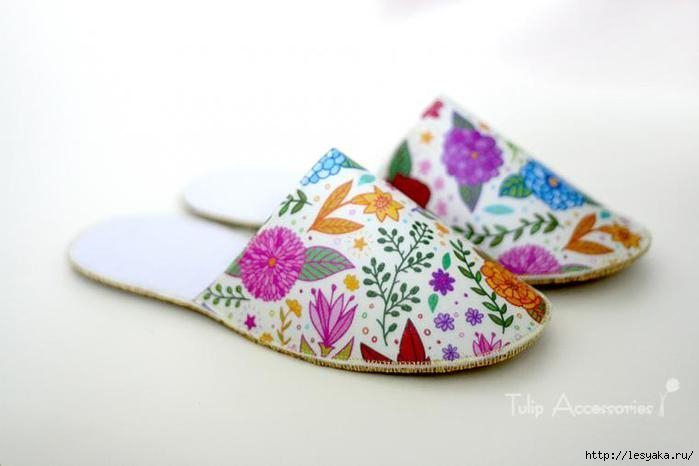
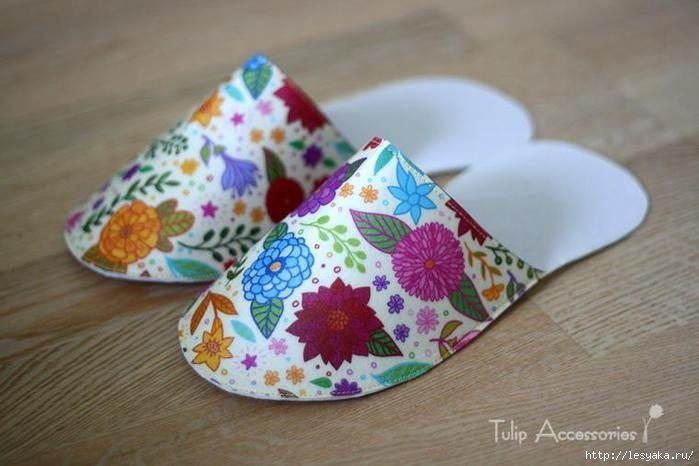
Ready to present to the readers the result of all my torment – a fast, easy way to make a budget and original, bright, comfortable, and most importantly, it is sturdy and socks home tapuli 🙂
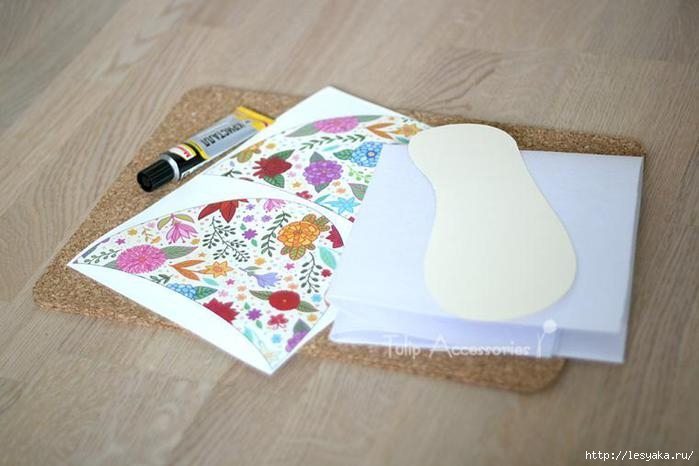
To make them, I prepared a special the pattern to be printed on thermal transfer. Its use greatly simplifies and accelerates the process and reduces practically to zero all possible difficulties and errors when cutting parts.
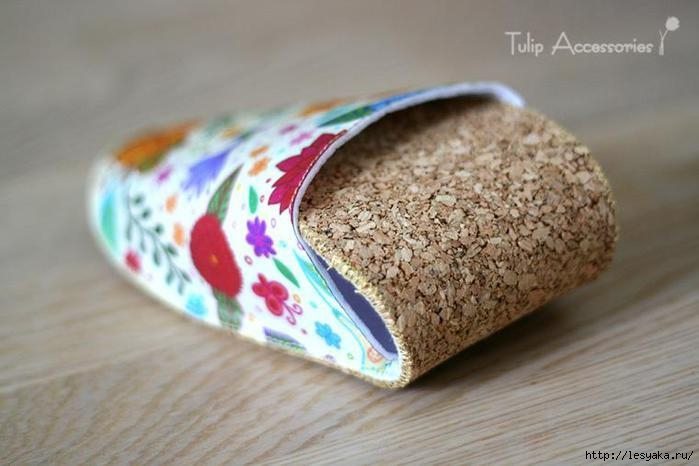
In addition to the light pattern need felt for the transfer of transfer, any suitable (I only had white today) felt for insoles, and my main inspiration this week – cork sheet. In this case, 3 mm thick. Well, glue, I liked most of all to use the moment of the crystal.
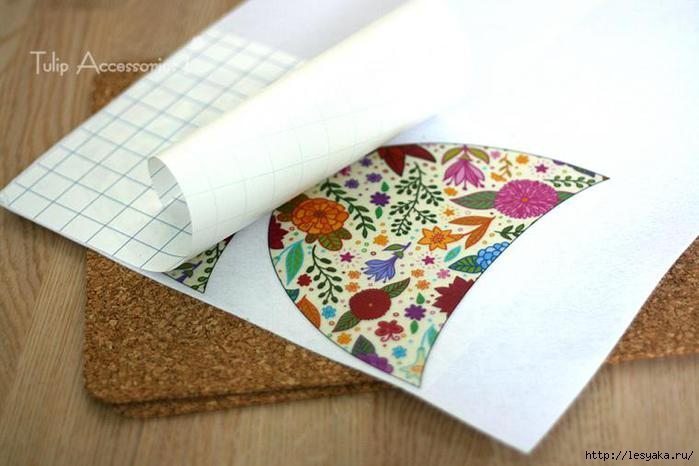
The first step will transfer the pattern on the felt. Due to the fact that in recent years I began to ask more questions about the transfer of technology, I allow myself a little bit more to say about it today.
First, we need to arrange the pattern face in felt and heat the iron to nearly the maximum temperature. Hot iron begin carefully ironed sheet, not missing the edge corners.
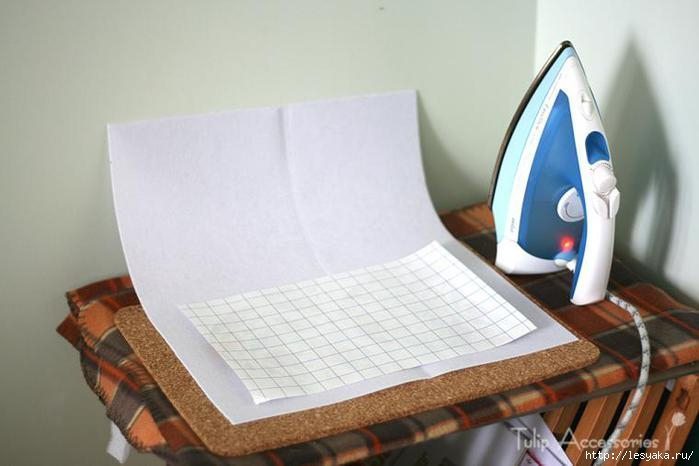
In my opinion better than some overheated iron during ironing noted that Felt began podplavlyatsya (this is not an instantaneous process and you will always have time just to weaken the heat, nothing bad will happen) than pat all the cold iron and obtain a fragmentary translated image, the and thus spoiling the pattern, and felt.
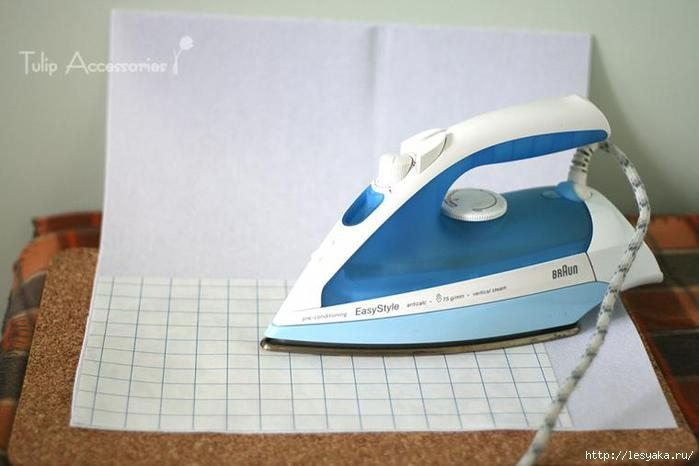
Pat about a minute the entire structure, then cool for her to just warm to the touch and remove the top layer of paper checkered. Picture translated.
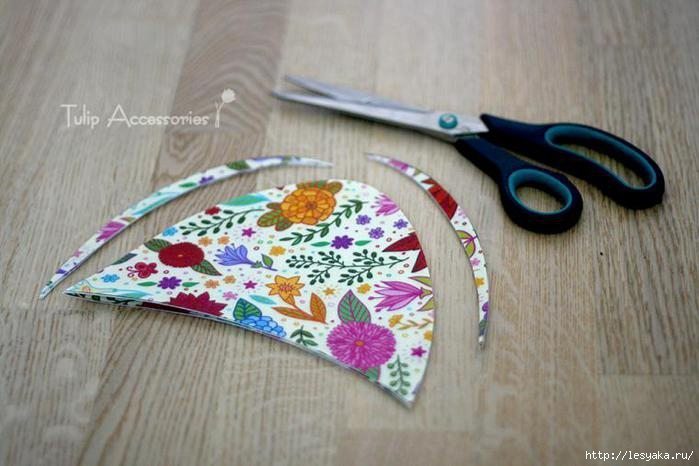
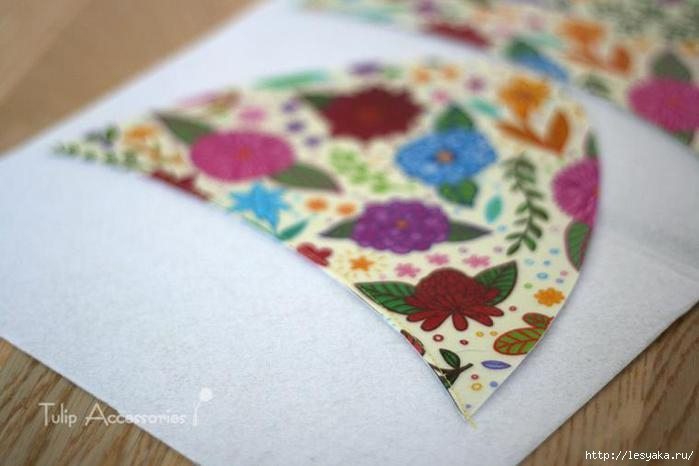
Cut parts slippers without seam allowance.
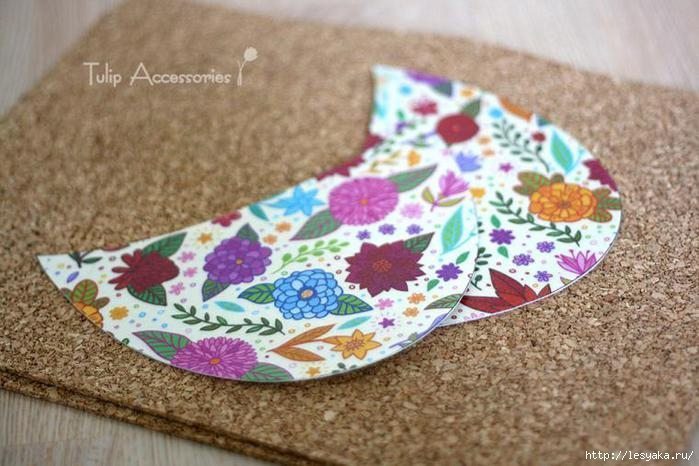
Since the pattern I made the most versatile, it adhered to the principle of “more is better than less.” Therefore, at this stage, I recommend to try it at least about, and if it would be more than necessary, trim the side , as shown in the photo. The size of the top and bottom, as a rule, there is no need to reduce, only if it will be slippers for the baby.
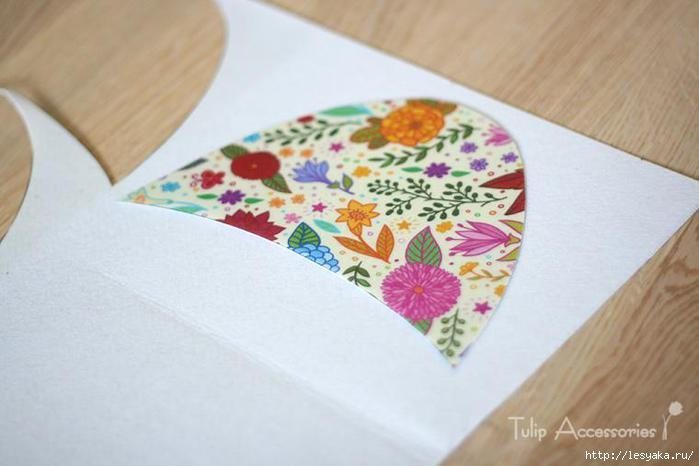
Patterns for both slippers place on the felt sheet. It is not necessary to take the white, can be any color.
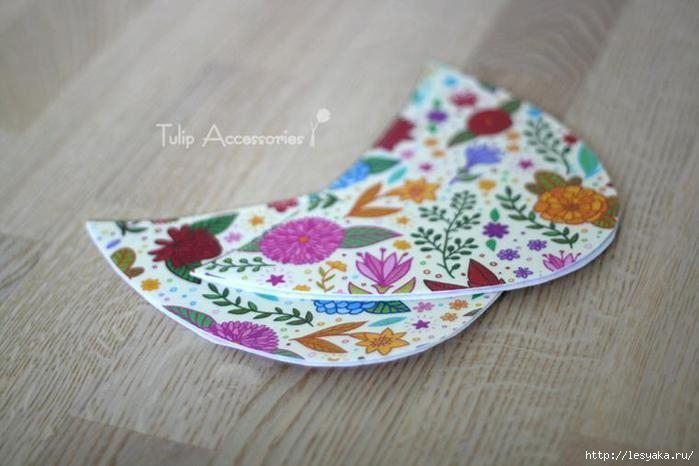
And sew a semicircular seam details. Only the top.
Now cut out the contour of Circuits, getting a double top for future slippers.

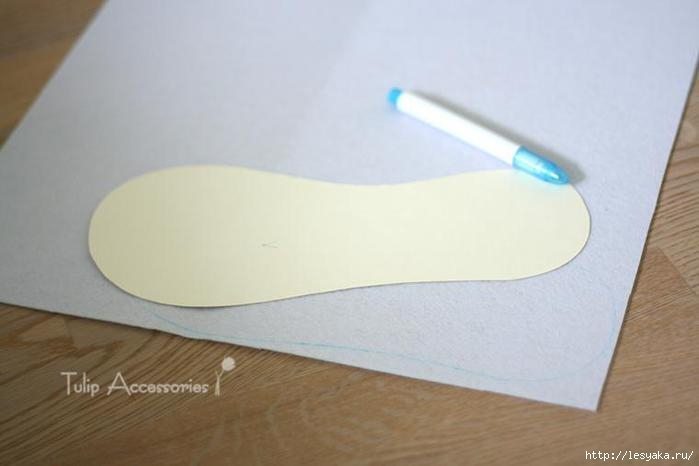
Now we need a pattern for the insole. Its very easy to get. Simply cut around his foot on a piece of paper with a decent margin, or simply ready to take any slippers that you feel most comfortable and circle them sole.
Insoles only contours, but not cut. I turned out to be more convenient to sew, in that order.
Now tack double-top sneakers. Two tack approach since each of them from the middle of the sock.
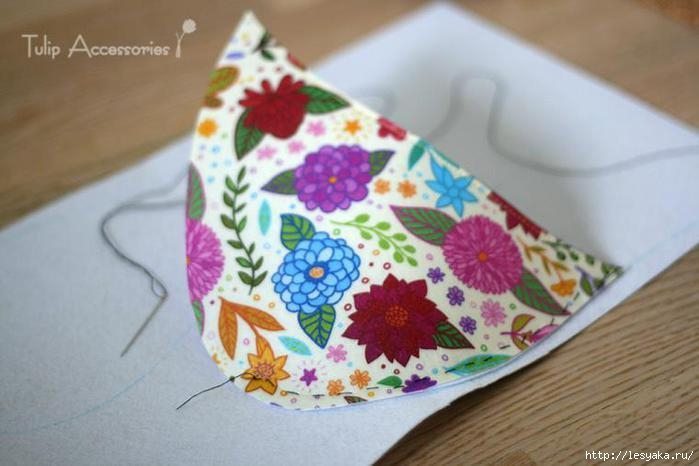
According to Smetana will be very easy stitched top. After the machine stitches can pull Basting thread.

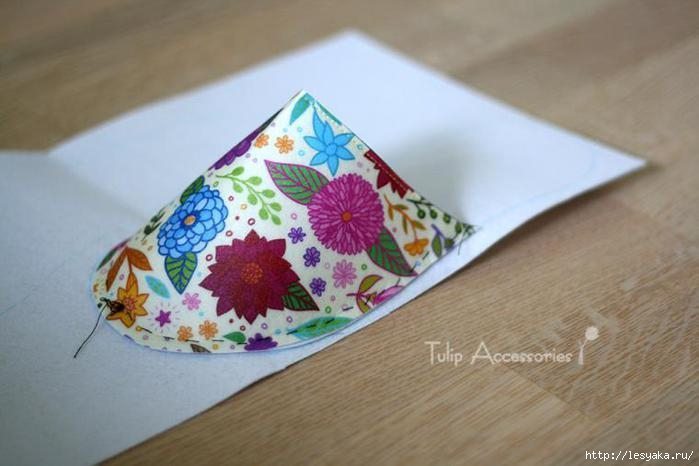
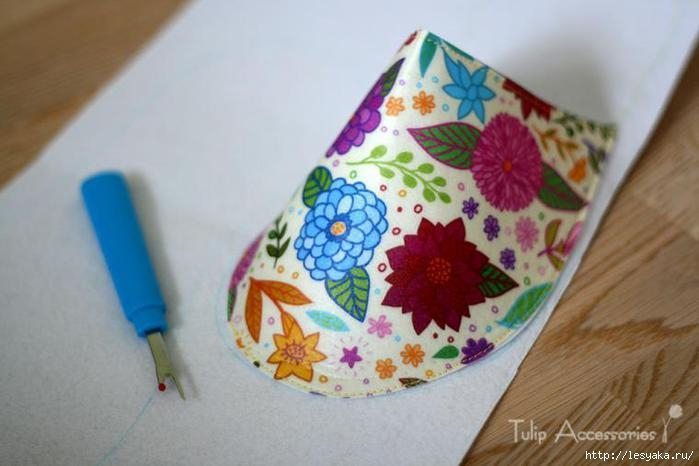
Now Slippers with insole can be cut, retreating 2-3 mm from the edge of the line. We do the same with the second and slippers.
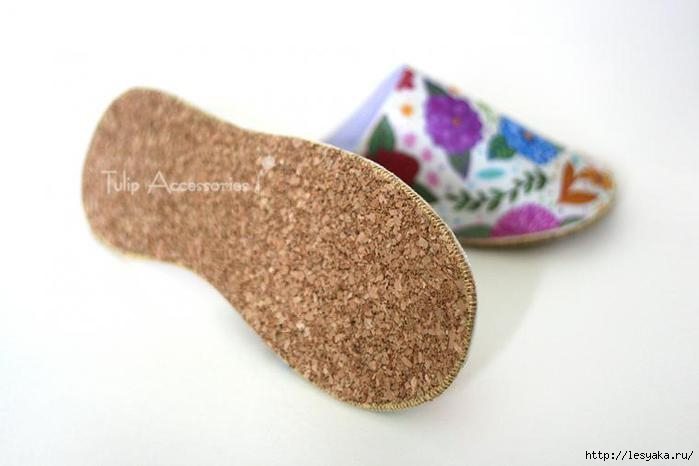
Now the time has come to proceed to the final stage. We will make the sole slippers. After various searches of suitable material, I stopped at a traffic jam. Experience has shown that it is quite easy to use and very easy. The wearing it is very practical, especially in the taped version. Do Tube good cushioning properties, and even a thin layer of it is sufficient to use slippers to be comfortable.
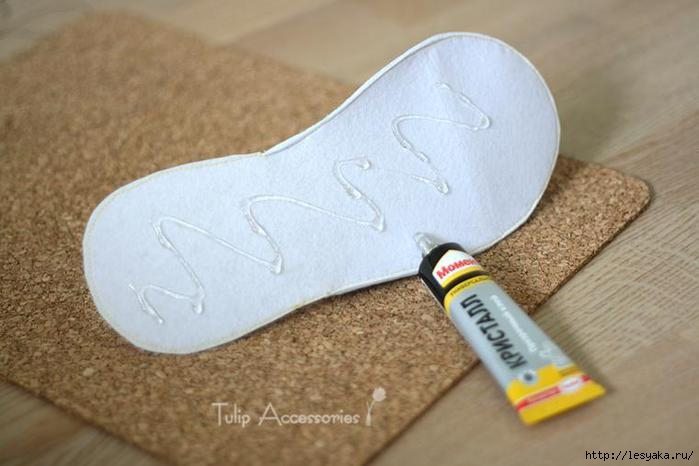
Take the glue and properly lubricate the bottom surface of the felt soles. Clay, among other things, stabilizes the fine tube, reducing its brittleness and preventing the possibility of cracking at bend further.
Glue insole to sheet stoppers. Cut it quite rude, just to be able to put the clip.
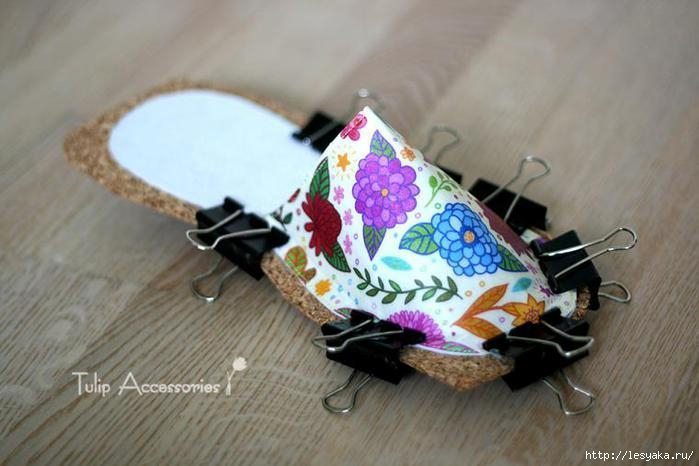
Cork glued well and quickly, after the glue has firmly grasped, it is possible to remove the clip and cut along the contour of the insole slippers.
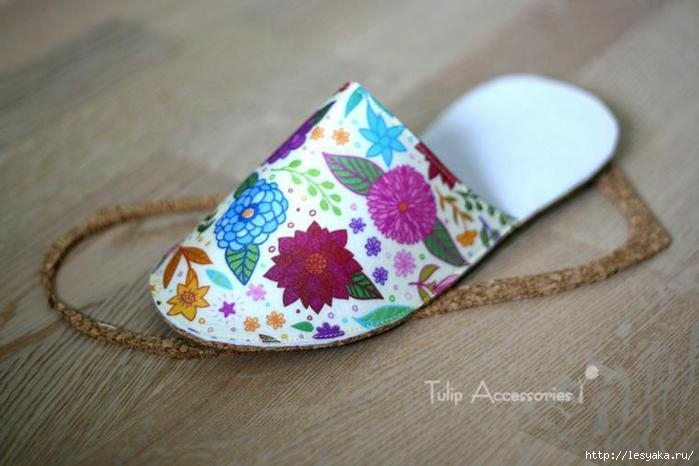
You can stop at this stage or further stitch perimeter slipper on the sewing machine. Cork sewn very easily, in spite of the thickness.