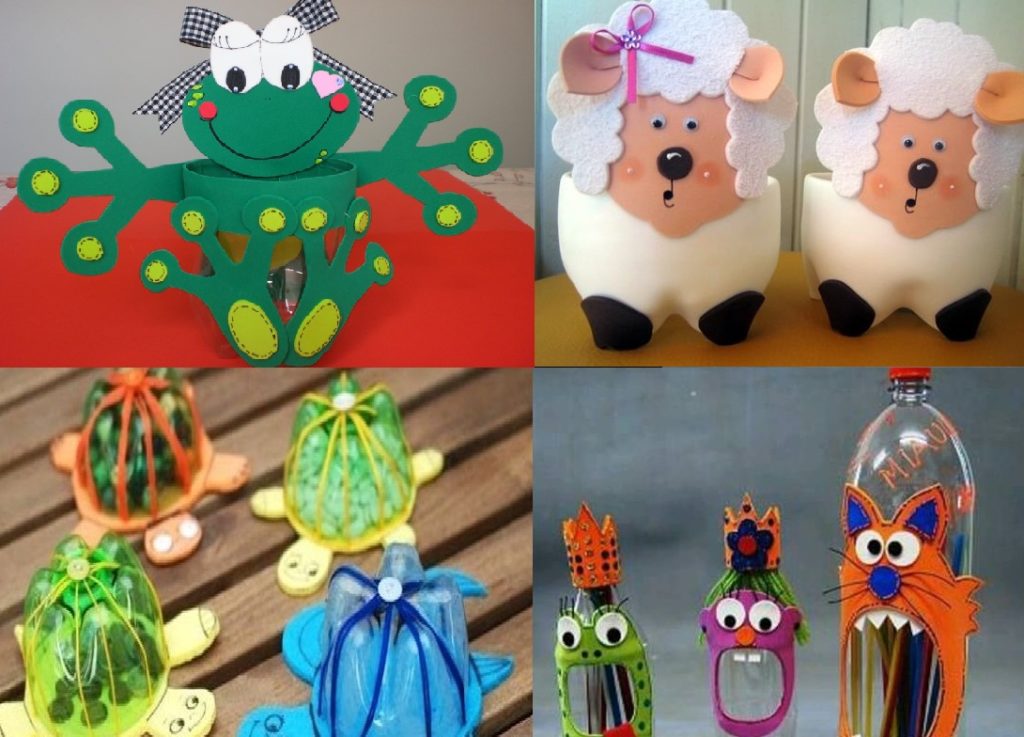
Posted onFebruary 18, 2017inBest out of Waste, DIY, Ideas, Kids Crafts 22 crafts made with EVA and Plastic bottle
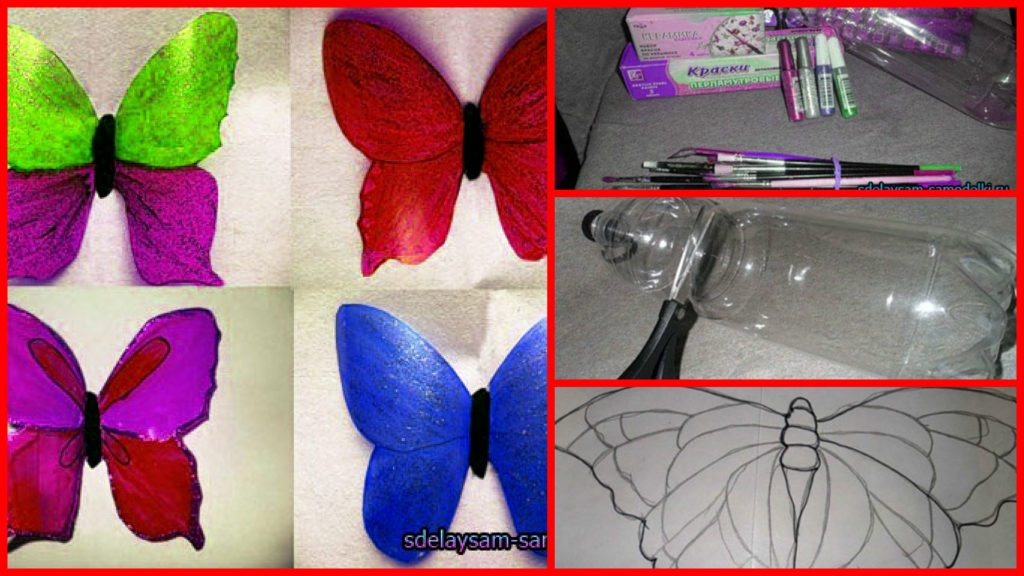
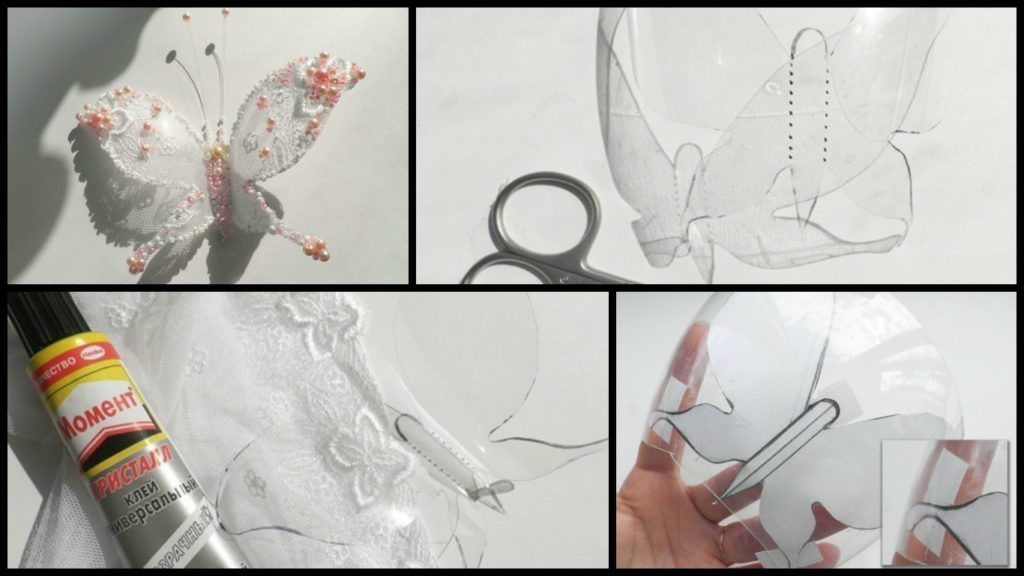
Posted onFebruary 12, 2017February 12, 2017inBest out of Waste, DIY, Home Decor, Step by step, Tutorial How to make beautiful plastic butterfly
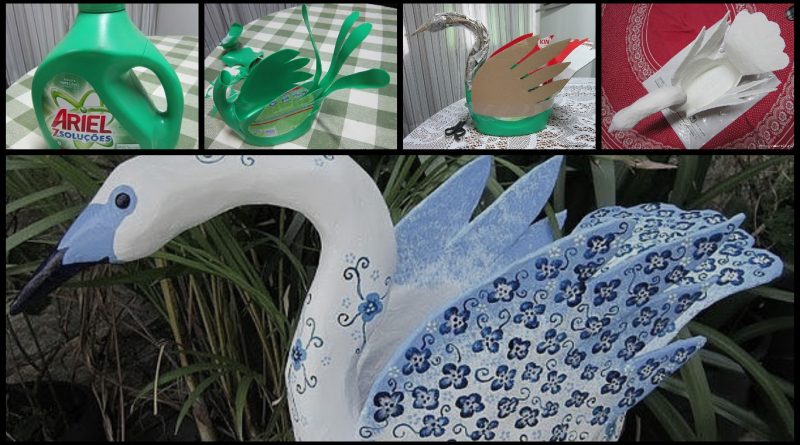
Posted onFebruary 9, 2017inBest out of Waste, DIY, Home Decor, Step by step, Tutorial How to make swan of plastic bottle
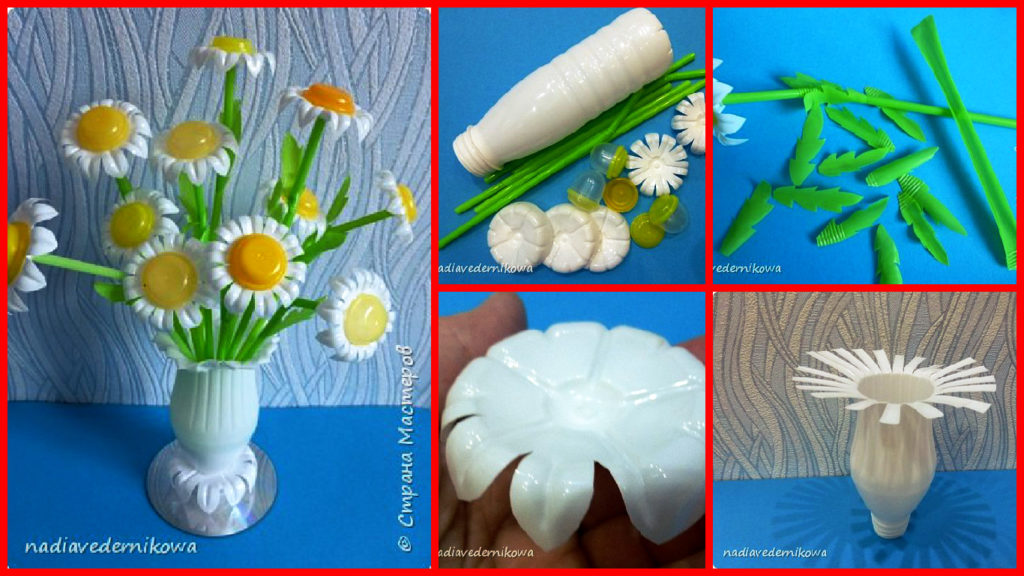
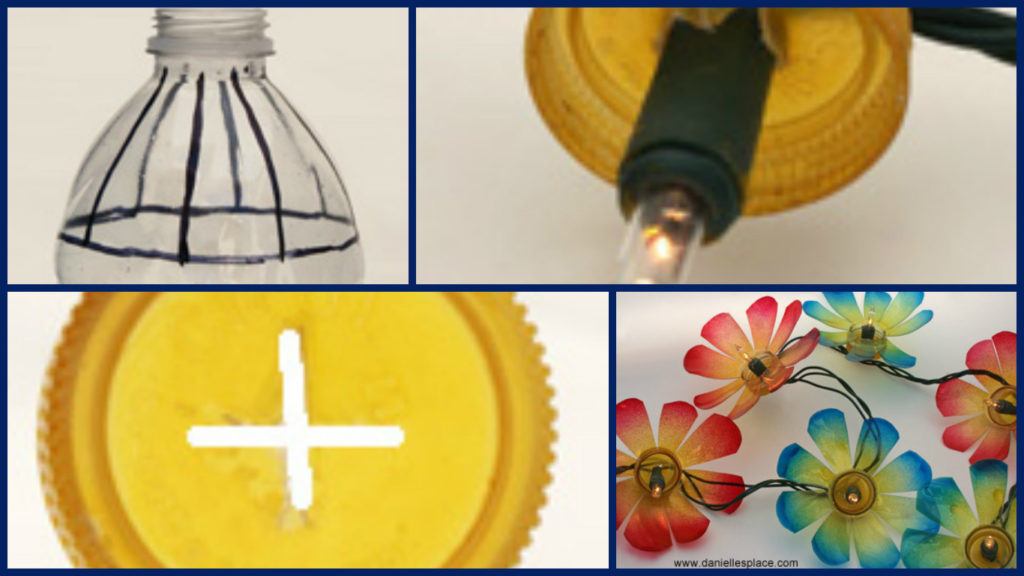
Posted onFebruary 7, 2017inBest out of Waste, DIY, Flower Crafts, Home Decor, Step by step, Tutorial Creating daisies with plastic bottles Tutorial
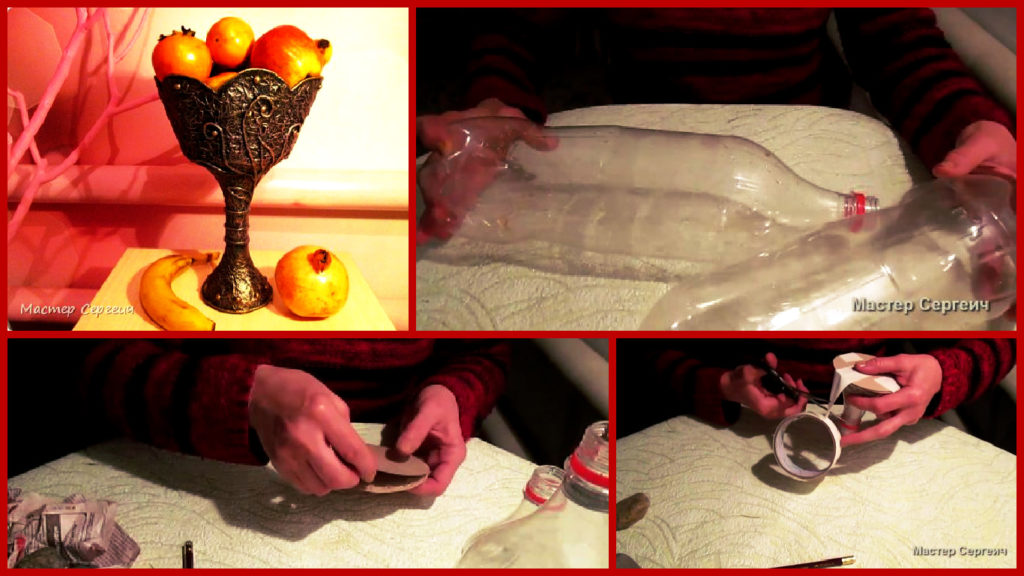
Posted onFebruary 7, 2017inBest out of Waste, DIY, Home Decor, Step by step, Tutorial DIY: Hamdmade vase of plastic bottles for fruit
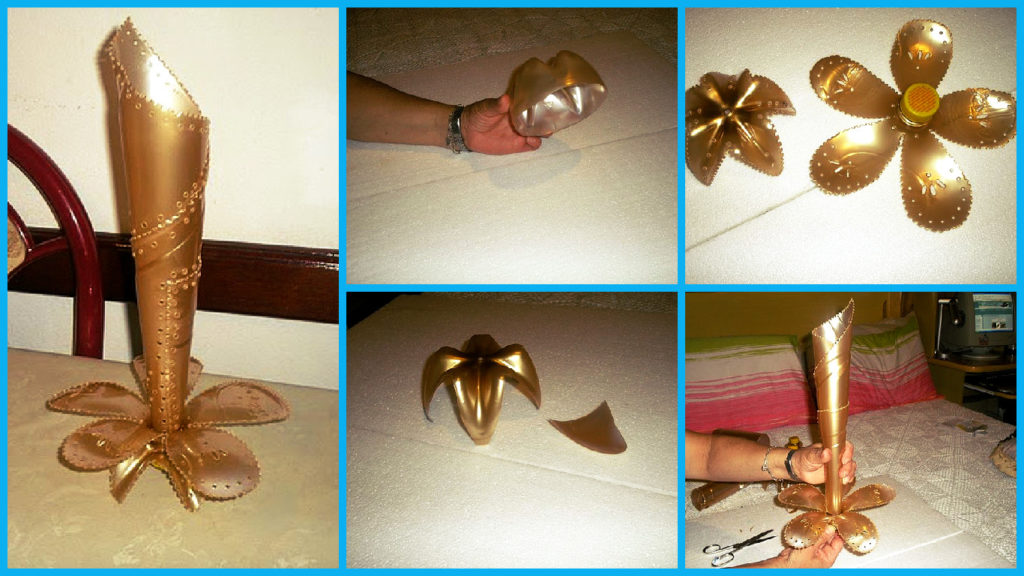
Posted onFebruary 6, 2017inBest out of Waste, DIY, Home Decor, Step by step, Tutorial Beautiful vase from plastic bottles
Posted onFebruary 1, 2017inBest out of Waste, DIY, Home Decor, Step by step, Tutorial How to make butterfly from a plastic bottle
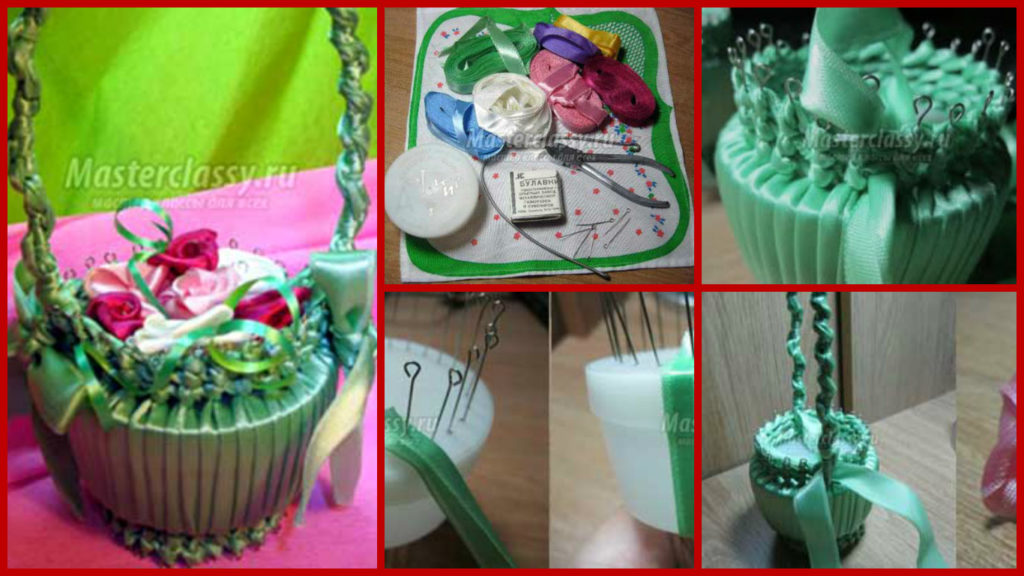
Posted onJanuary 31, 2017inDIY, Step by step, Tutorial DIY: Beautiful basket with flowers ribbons and plastic boxes
Posted onJanuary 28, 2017inBest out of Waste, Diwali, DIY, Home Decor, Step by step, Tutorial How to make garland of plastic bottles
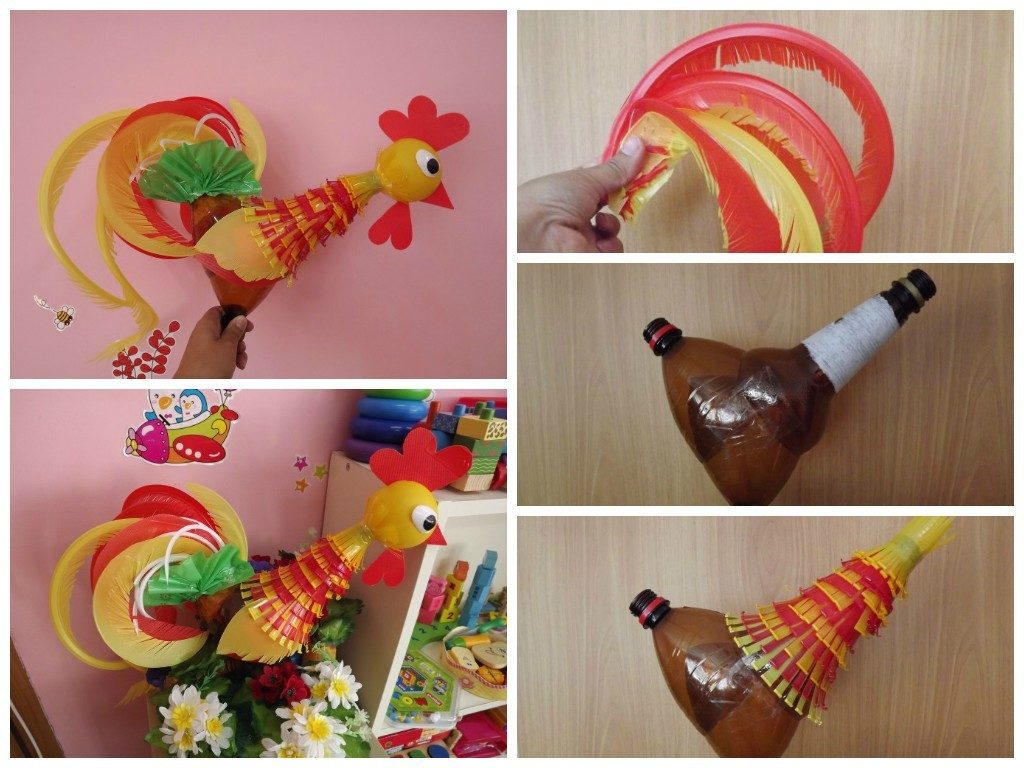
Posted onJanuary 22, 2017inBest out of Waste, Step by step, Tutorial DIY Cock from plastic bottles and disposable tableware