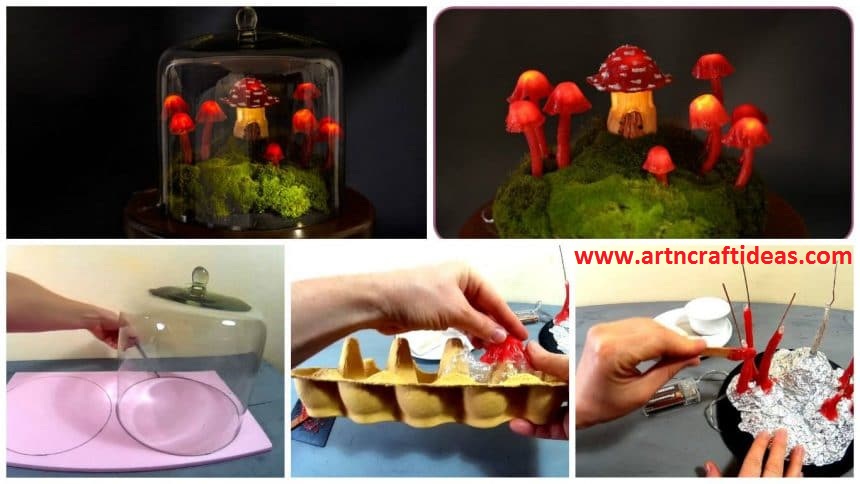
DIY Miniature Fairy Garden Terrarium – Enchanted Mushroom Lights
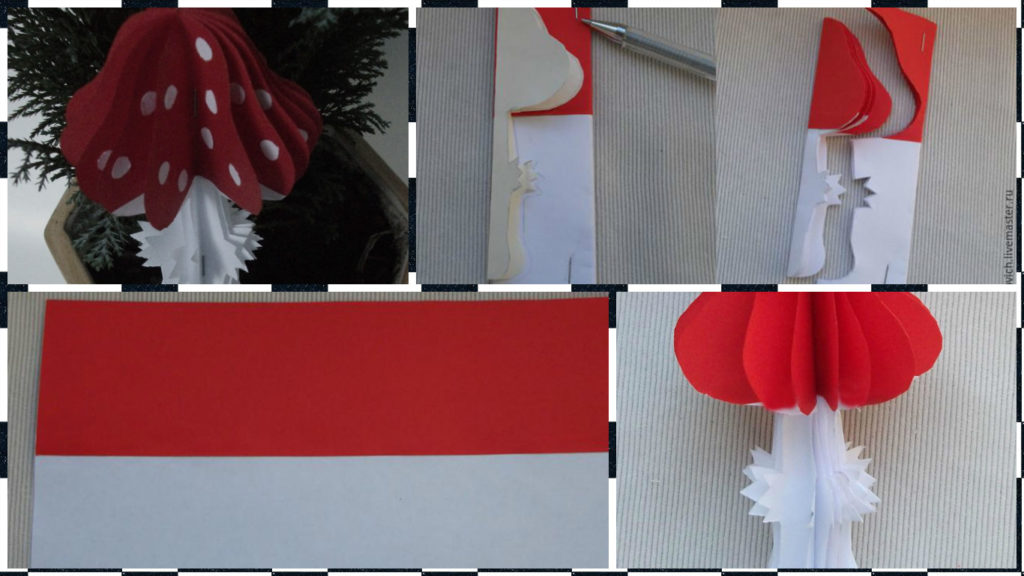
Hi, in this tutorial I made a fairy garden terrarium with mushroom lights and a fairy mushroom house. I used some extruded polystyrene (xps styrofoam), battery operated led lights, transparent sanitary silicone sealant, tin foil, copper wire, hot glue, a little bit of polymer clay, moss and acrylic paint. I also used a glass cake cover. Step 1: Preparing the Board I first cut the styrofoam board to fit the glass cake cover. I adjusted the corners with a cutter, then I painted it black. Step 2: Adding the Lights


I then glued the lights to some pieces of copper wire. I made the wires in different lengths and also left more wire on the upper side (that will be helpful when making the mushroom caps). I glued the copper wires to the foam board with hot glue. I added some volume to the board using tin foil and hot glue.

Step 3: Making the Mushrooms

I mixed some red acrylic paint with silicone and made a paste. I applied the paste on the wires and leveled it using soap and water. For making the mushroom caps I used the silicone paste and wrapping foil. I applied some paste on the plastic foil and covered it. Then I started shaping it into a mushroom cap. For making the round shapes I used the cones inside of an eggs carton. I also covered the tinfoil base using the same silicone paste in black. Using some tin foil I made a cone and covered it with polymer clay. I sculpted a little house, baked it and painted it with acrylic paint.

Step 4: Moss and Details

I placed the moss over the board, carefully mixing the patches and used toothpicks to fix it in place. I also made some cute white dots on the house using white silicone.

I love the result!

DIY: 3D Paper Mushroom Tutorial

mushroom paper in 3D 1

1. From a sheet of white paper on the long side, cut two strips 8 cm wide, and from red paper – two strips of width by 6 cm (red paper must necessarily be two-sided). 2. Red and white stripes of glue pairwise (width allowance of 5 mm) and fold each blank three times in half (width). Pattern (full size) 3. Pattern mushroom attaches to the fold of the resulting “little book” (hat – on a red field, foot – on white) and draw. To make it easier to cut several layers stapled divergent corners of paper, then cut along the contour. 4. Get two piles, each with four mushrooms. 5. pile straighten, fold together and stapled to the leg and a hat. 6. It remains only to volumetric spread all the layers stick white peas, paste skewer and put our mushroom grow under the Christmas tree. The same principle can be made bright and juicy fruity.Tolko to uncover an interesting way to do applique “in the context of” closing its metal parenthesis. That pattern (full size):