How to Decorate Easter eggs with sequins
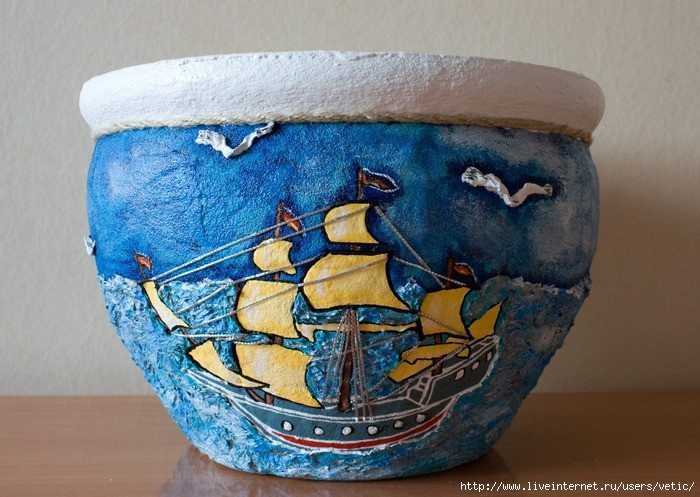
Easter eggs with sequins 1

For manufacturing and decorating Easter eggs will need:
foam or polystyrene foam;
scissors;
universal glue;
Sew mosaic flowers light pink color;
pins with colored heads (white, purple);
pliers

For Easter egg additionally need:
sew sequins green flowers
In this egg, a height of 6 cm, will take about 120 pins. Before starting work, prepare the pins. Such pins long needle, so the pliers need to bite these needles 1/3 of their total size.

After all that- strung on each sewing sequins flower.

Take a piece of foam (polystyrene) in length and 6 cm in diameter. Cut so that it would turn the egg. Cut with scissors, safely shred it at the beginning. This is the end you will tinker with it, cutting off little by little and little.
And now, begin to permeate prepared with needles, styrofoam egg. Perhaps it will be easier to start from the middle of the top of the eggs.

When threading with white and purple heads alternate, so that they were mixed.

If you are going to do on egg then should not the lower part of the egg close with sequins.

Easter eggs can perfectly serve the same plastic box. The only thing it needs to be a little decorate.

And this will help the same sew sequins flowers only green. According to the outermost rim, apply a universal glue and lay. At some time, and when the glue is completely dry, you can proceed to the final stage.

The final stage of the most pleasant, because in a few minutes you will see the result of your work. He will not disappoint you.
And here’s the result – easter egg in all its glory!

How to decorate flower pot

Decorating flower pot 1

I had a clay pot – good and solid. But over time, it looks like something appeared unsightly stains, faded paint and I decided to design it in a marine style while combining different techniques.

As a result of my work has appeared here such a handsome man, who serves as the perfect setting my favorite .

Floats on the sea space ship of dreams.

And somewhere at the other end of the world dreams of a beautiful mermaid in the sunset.

Before proceeding to implement the ideas for decorating, I wanted to get rid of the old decor pot of various irregularities and depressions on the surface. For this, I carefully wiped with an alcohol swab pot (thereby degrease it) and missed the wall with white glue, carefully sprinkle the surface of the pot semolina. Munk had to apply two coats, as one layer was not enough to hide the old decor. After semolina dry out, I covered it with clear lacquer in a single layer. The fact that semolina (no matter how well it does not dry out) feature has constantly showered with further her work. I wanted to avoid this and I was pleased to note that the nail perfectly fulfilled its function.

(Unfortunately, I was so fascinated by the process that completely forgot about the step by step photos, so I can not give you the first photos of the pot.) Thus, the surface of the pot is ready – it’s time to decor. Then I turned to the internet, so as absolutely can not draw. I found I liked the coloring of the frigate, to work in Photoshop on its size and printed the ship. Cut out the contour drawing, I put it to the pot and began to translate circuit pattern on the wall of the pot. For this I used the pen and stylus pen just broke through the paper into the ground trace, drawing so directly to Manco. As for the mermaid, her figure, I also found on the internet and decided to transfer the image of a girl on the pot using decoupage. Processed image in Photoshop (size and picture resolution), I pasted on a sheet of A4 (plain, which make a printout) top layer napkins. I previously shared a napkin into 3 layers, it will give me the opportunity to do one of 3 print napkins and nothing goes to waste in vain .. I want to draw your attention that by numerous experiments and tests on an inkjet printer, I came to the conclusion that the size wipes should be slightly smaller than A4. Napkin should stick along the contour is not right to the edges of the sheet, and slightly deviate from them (especially in a place where the printer grabs the sheet at the beginning of the press (about 2 cm). This will allow you to “trick” the printer, and he thinks that directly  paper prints and not a napkin. Thus, you can avoid it, “WRINKLE” and breaks. print the image of a mermaid on a napkin, I cut it on a path and attach to the pot. Noting pencil zone to be covered with a printout, I painted it white, gave the paint to dry and proceeded directly to decoupage. Again, referring to the numerous attempts to find their best way of gluing the printed image on the printer to the desired surface, I would say that neither diluted PVA glue for decoupage or are not suitable for this task. they contain water, and she – the worst enemy of printouts. In contact with water colors the printer they “flow”; alas, it was ruined by a few of my ideas, but I found an acceptable solution. This lacquer for furniture (in my case, a colorless, glossy, nitrile). With a printout of the surface of the pot, I coat with a brush to polish the image from the middle to the edges, gently stroking pattern. (I must admit that often have to use your finger, for best results, but it is almost always happy!) Here’s what happened as a result.

 I really wanted to make the surface texture of the pot. Munk gives a lovely texture to the sky, but it seemed to me that it is not quite suitable for simulating waves. Here I decided to try and portray waves using toilet paper and PVA. The technique of using toilet paper, I peeked at one of the masters (sorry, can not remember the name), but they do implement the paste. To me, I confess honestly, it seemed that there is no need to cook the paste in the presence of PVA (I previously bought a large jar of glue at the hardware store). Pouring glue into the bowl, I carefully lowered into it the pieces of toilet paper , slightly rumpled them, squeeze and spread on the walls of the pot. Similarly, shaped and gulls. After the work was finished, I again went through the “wave” brush generously soaking them with glue. Fingernail gives the surface undulations and left to dry pot. For complete drying glue took about 2 days. Here’s how rough the waves look around after drying.

Before you start coloring, I make a rational decision about the colors. Before, I always bought acrylic paint in jars (set or individually), but they had a property very quickly (and usually does not end in time). Constantly buying new is not always possible, and not cheap. This time I decided wisely. At the hardware store I bought a big jar of white acrylic paint and a few cans of tinting pastes of different colors. Now I had the opportunity not only to mix colors, but get different shades of the same color. This is very convenient, fun, interesting, enjoyable and most importantly, all came together much cheaper than acrylic paints of different colors! Now there is no need to run to the store for a desired color or fear that the paint will end out of time !!! I strongly advise craftswomen to use this idea. Spreading in the palette I needed tone and shades, I painted the ship, gave paints dry and started coloring waves. Used 5 colors (blue, blue, steel, white, green and azure). Each shade is applied on certain parts of the paper invoice (bulges or depressions), the next color – after the previous one has dried. Pick the right colors

Finishing Touches: Rim of the pot, I decided to paint in white and lightly shade the twine (something like hemp to simulate old frigate). Decorative edging silver stylized ropes that hold the sails.

Mermaid I wanted to set off the golden sequins (like the glow of the setting sun). Finally, I covered the pot with two layers of varnish.