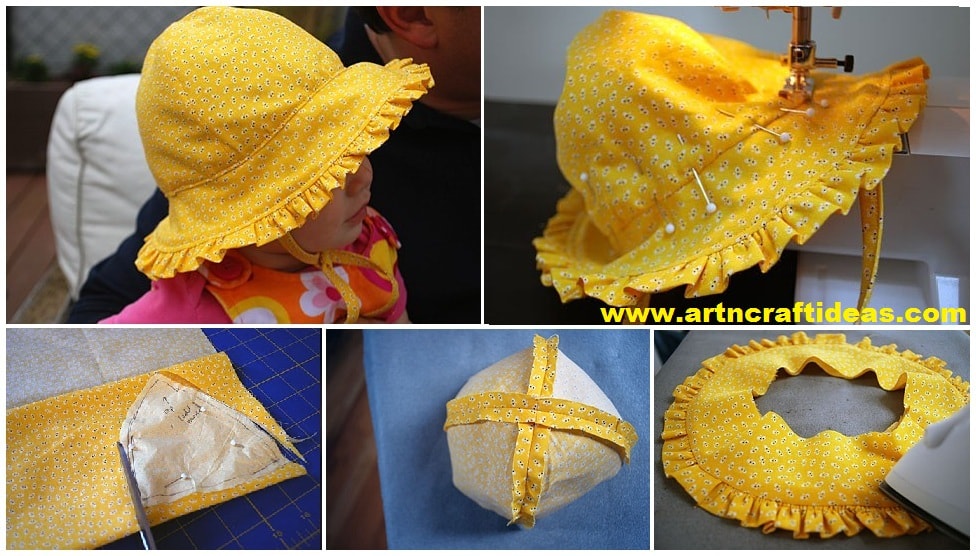
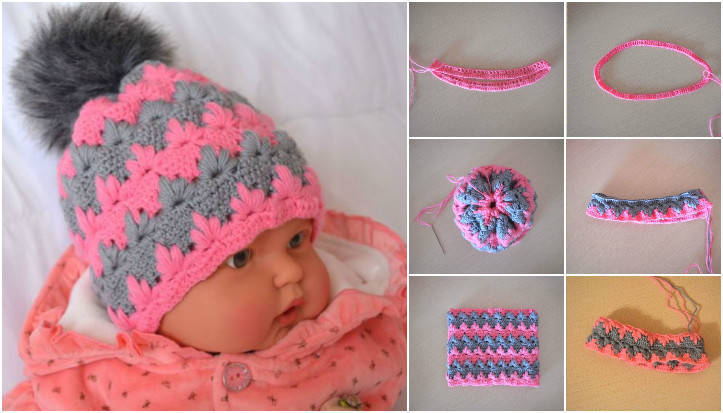
How to Make Baby sunhat pattern with ruffles and ties
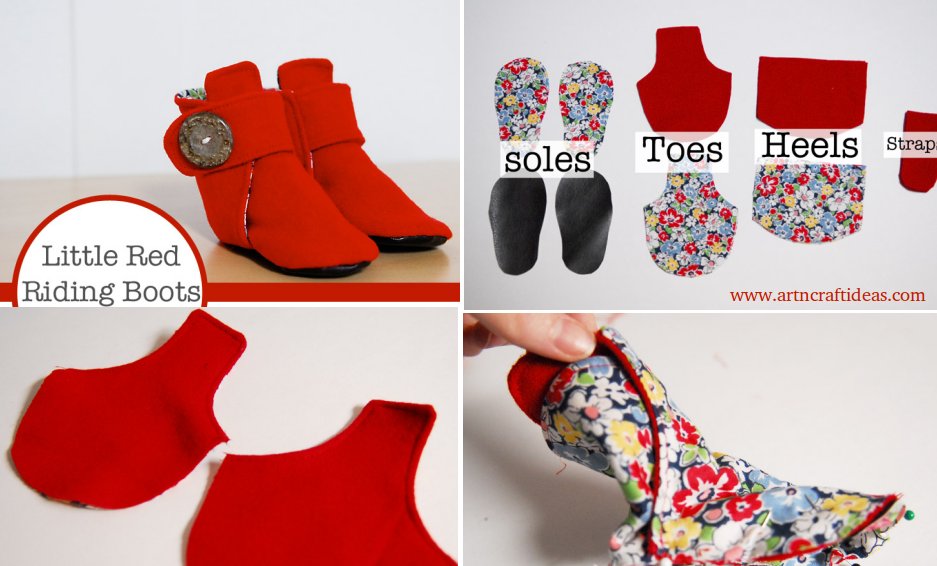
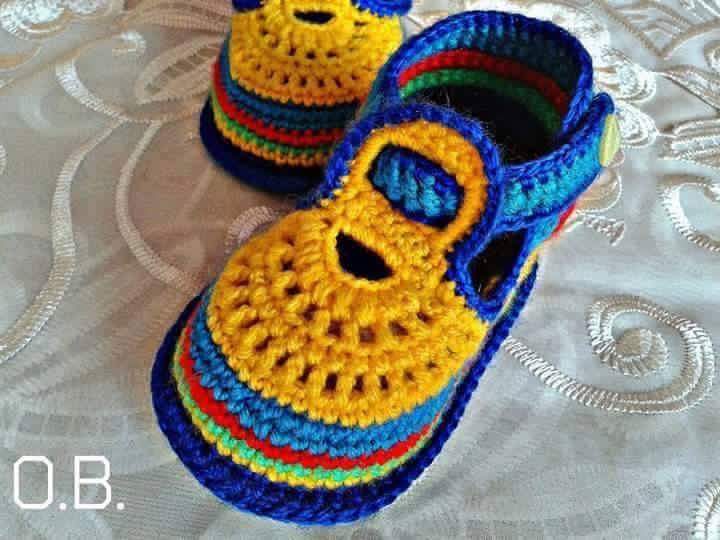
This free baby sunhat pattern should fit a 6-12 month old; Elise is 10 months old and it’s super cute on her petite-ish noggin. Alternatively, you could easily size this hat up or down on a photocopier. Free tutorial, baby sunhat pattern and step-by-step instructions are all below. Bring on the sunshine!

Required Material:

  • Kathy’s free pattern for a baby sunhat with ruffles and ties (PDF – sized for 6-12 months)
  • 1/2 yard of fabric
  • Rotary fabric cutter, self-healing cutting mat and clear acrylic ruler
  • Good fabric scissors
  • Good iron (like Rowenta) and Ironing board
  • Thread
  • Pins (I prefer glass head pins)
  • Sewing machine

Cut your free baby hat pattern pieces
Print my free baby sunhat pattern. It’s sized for 6-12 months so you can scale it up or down as needed. You can use one fabric print or two.

Cut 4 triangles for outside crown
Cut 4 triangles for inside crown lining
Cut 4 brims (2 top, 2 lining) – cut 2 brims right side up, then flip the pattern so that you’re cutting 2 brims wrong side up
Cut 2 strips 16″ x 1″ for the ties
Cut 2 strips 25″ x 2″ for ruffle

For this tutorial you’re going to sew everything at 3/8″ seams. I usually do 1/2″ seams for my tutorials but wanted them to be a bit smaller for Elise’s baby head.

Create the outside crown and crown lining
Take four of your crown pieces. Line up two pieces, right sides together, and sew along the side. Repeat with the other two pieces.

Press seams open; they will be slightly curved. Pin the two pieces together, right sides together. Sew. You’ll now have one sewn crown piece. Press the seam open. Repeat to make the lining crown.

Create the brim
Grab your four cut pieces for your brim. Now because it’s a bit of an asymmetrical brim, be sure to match pieces together so the brim top will match your brim bottom.

Sew two pieces of the brim together to make the outside brim. Press the seams open. Repeat to create inside lining brim.

Create the ruffle
Sew pieces together on the ends, pressing seams flat. It should look like a large circle. Iron the circle in half, wrong sides together. The right side of the fabric will be on top and bottom now, and there’s now a finished edge and a raw edge. Using a basting stitch, sew two rows of stitching around the raw edge of the circle. I stop at the seams and then start again because I find it’s easier to gather (in the next step). Match the seams of the ruffle to the seams of the brim. Pin. Pull the gathering threads gently to gather the fabric into ruffles. Pull it until it’s the same size as the outside of the brim. Pin the ruffle onto the edge of the brim, raw edges together. Sew the ruffle onto the brim. Place the other brim piece on top of the ruffle piece you just sewed, basically making a ruffle sandwich with the two right sides together. Pin and sew. Turn right side out and iron. Finished brim is 18 inches circumference. Topstitch the brim near the ruffle edge. Sew the brim shut by sewing close to the inside circle edge.

Take out any basting stitches that show (yikes, I had a lot on this one …that’s what I get for sewing fast during naps).

Attach hat crown to the brim
Pin the crown onto the brim, right sides together matching seams. Sew around the crown to attach it to the brim.

On the right side of the hat, iron the seam open so the raw edges are up inside the crown. It’s starting to look like a hat now, yes? Make and attach ties
Fold ties in half and iron. Fold raw edges into that center crease. Iron again. On one end, make a triangle with the ends and fold in. Sew along the open edge of the tie to sew it shut. Repeat for the second tie. Now you’re going to attach the ties to the hat. Find the two sides of the hat. Pin the raw edge of the tie to the raw edge of the crown at the side seams. Sew back and forth a bunch of times so it’s secure. Repeat on the other side. Attach hat lining
Turn lining under 1/2″ along the raw edge and iron. Turn the lining so the wrong side is on the outside. Pin the lining inside the hat, matching seams. Put your pins on the outside of the hat because you’ll be sewing from that side to make sure it looks nice on the outside. And here’s what it looks like inside… Sew it all together, stitching close to the brim, catching the lining underneath as you go. I’m not a huge fan of blind stitching like this but it’s the way I figured out how to do it, so there you go. Suggestions welcome. Tie that hat on and go outside!

Courtesy: Merriment Design

DIY Felt Baby Booties Easy Pattern (Tutorial)

I saw the tiny toes of my newest nephew, i wanted to make him some booties. Without knowing how to crochet or knit, i went with my favorite medium: felt. i winged it with the pattern, but i’m pretty happy with how they turned out! tiny shoes are just the cutest.

Required Materials:

  • 1 sheet colored felt
  • 1 sheet white felt
  • 1 sheet black felt
  • white embroidery floss
  • 40″ of white cord, cut in half

  • cut out pieces according to pattern.
  • punch holes for lacing (i used a leather punch)

  • blanket stitch the sides and top edge of back panels.
  • overlap the toe cap 3/8″ from the edge of the tongue. blanket stitch pieces together.
  • blanket stitch around the tongue

  • mark the center back of back panel with a pin.
  • fold the loops in half lengthwise and stitch to center back, using an X.

  • sandwich all 3 layers of the sole together. use pins to mark where toe cap placement.
  • baste around the toe cap, 1/8″ from the edge.

  • gather basting stitches and pin to the sole, lining up with markings
  • stitch toe cap to sole, going through all layers.
  • once around the toe cap, reverse stitch back through all layers.
  • remove basting stitches. fill toe with tissue and press the seam allowance so it lays flat.

  • pin center back of back panel to center back of sole.
  • starting where the toe cap ends, stitch sides and back panel to the sole, going through all layers.
  • when you reach the toe cap on the other side, reverse stitch back through to the beginning.
  • lace up and slip in your tiny toes!

Hope you like this tutorial.

Source: whatido.com

We would love to hear your thoughts in the comment section below. And be sure to like us Facebook for more ideas!

Thank you for visiting our website. Keep Creating with Art & Craft!

Little Red Riding Baby Boots Pattern Tutorial
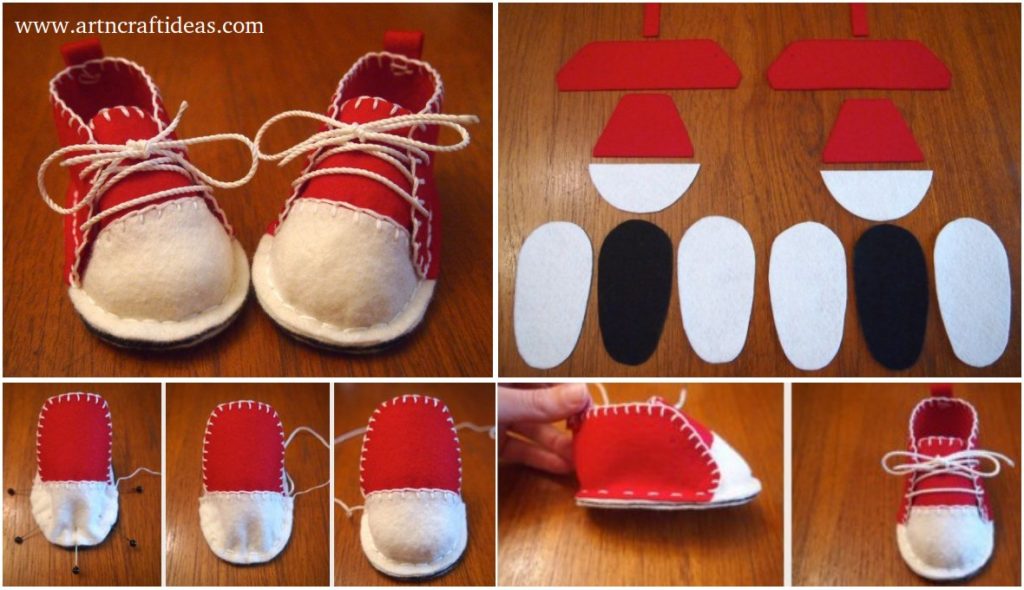
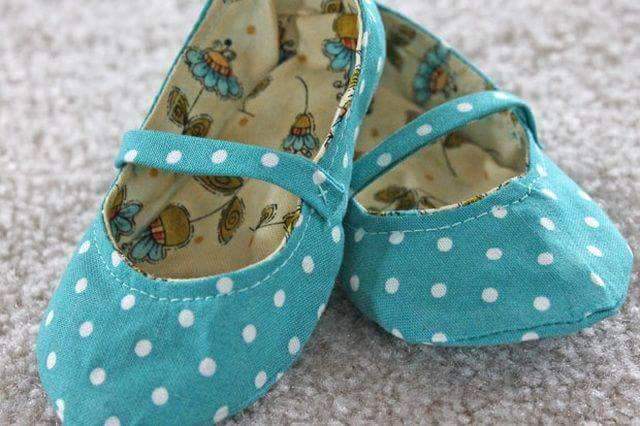
The free pattern today is a sweet little pair of boots. Because every baby needs some boots. This style is simple and clean and could easily work for a baby boy or girl.I just love boots on babies especially young babies because they stay on better when there is something wrapped around the ankle.

They are soft and comfy with a strap and snap closure.

The button is just for looks but you know I love a button 🙂
It includes 0-3m 3-6m and 6-12m

Cut out your pieces. You will need 4 soles (2 reversed so you have a right and left foot) I used pleather for the outside sole since I think it holds up a little better. Then 4 toe pieces two outer and two lining, 4 Heel pieces two outer two lining, and 4 straps 2 for each shoe.

Start with the straps. Sew two right side together along the sides and curve. Then turn right side out and top stitch. Repeat with both straps.

Next for the toe pieces. Sew one lining and one outer piece right sides together along the grey dotted line. Clip the corners and the curve.

Turn it right side out and top stitch. Repeat with both toe pieces so you have two.

Next for the heels place the strap down near the top of the curved edge and have the raw sides together. Then place the lining right sides together, sew along the sides and top.

Clip the corners and curve then turn the heel right side out. You want two heel pieces like this but you want them to be reversed so the straps are opposite each other.

Then pin the heel in place to the soles (which should be wrong sides together) Sew the heel in place.

Then add the toe piece to the front. Sew in place. Clip all the curves on the sole.

Then turn the boot right side out and add a snap to the strap and side of the boot. Sew on a button for decoration and you are good to go.

Now you have some adorable little boots to keep those little toes warm.

Hope you like this tutorial.

Source: shwinandshwin

DIY: baby booties crochet for beginners

Booties 11

Needed yarn and 5 needles (I semenovskaya Olga yarn 100g / 392m, needles №2)
Dial loops 40, 10 on each needle
Knit pattern:
1, 2 row – facial;
3 – purl;
4 – with two front, nakida, etc .;
5 – face;
6 – purl;
7, 8 – facial;
Then repeat 3 times 2 – 8 rows.
Next 2 rows knit facial;
In the next row each spoke vyvyazat 2 “holes” (on each spoke 1p.- knit front and two together as the front, nakida, 3n -. Face, the two together as a face, nakida, 2n -. Facial).
Next 5 rows knit facial loops.
Then knit tab:
On a working number knitting needle 2 move 2 more loops with needles number 1 and number 3, received 12 loops, the remaining 28 should be postponed or so and left them on three needles (№1 – 9 loops, №2 – 12 loops №3 – 9 loops, №4 – 10 loops) or transfer them to other circular needles (and line) or the pin knitting.
On 12 loops (spoke №2) knit pattern:
1, 2 row – facial;
3rd row – along two front, nakida, etc .;
4, 5, 6 row – purl;
Next 3 times repeat rows 1-6.
Next 4 rows stocking st (on the front side – the front surface of) .Poluchilas upper part of the foot.
Dial on the lateral parts of the newly connected top of booties on 10 stitches and put into operation the remaining loops, distributing them on the needles as follows: on the first spoke 10 loops (toe), the second and fourth of 20 loops (lateral parts), the third spoke 10 loops (the heel). A total of 60 loops.
Knit 12 rows garter st in a circle (alternating rows and rows backstitches facial loops).
Next 7 rows stocking st, 8 th row.
Snap to the first of the 7-series. I tie this way: on the extra needle loops dress series, which binds the base web. Then I provyazyvayu 2 loops at the same time, with 2 spokes.
Temporarily put aside all the loops, except the 10 stitches middle portion (heel) and knit them out of the sole. Knit the front stitch, at the end of each row of the last loop of the sole provyazyvaem together with the next loop of the number of pending, is obtained from left and right. When all loops are knit side parts, close the loop toe and heel loop, sew the edge of a knitted stitch (you can twist on the wrong side and knit series in the two loops together, one at a time with the other spokes with spokes №2 №4).