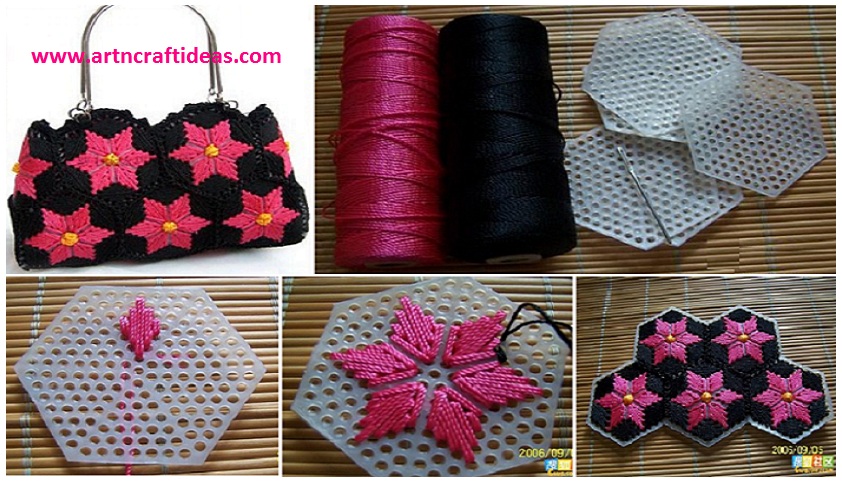
Posted onJuly 10, 2017July 10, 2017inDIY, Fashion, Tutorial How to Make Pretty Hand Bag from Stitch on Plastic Canvas
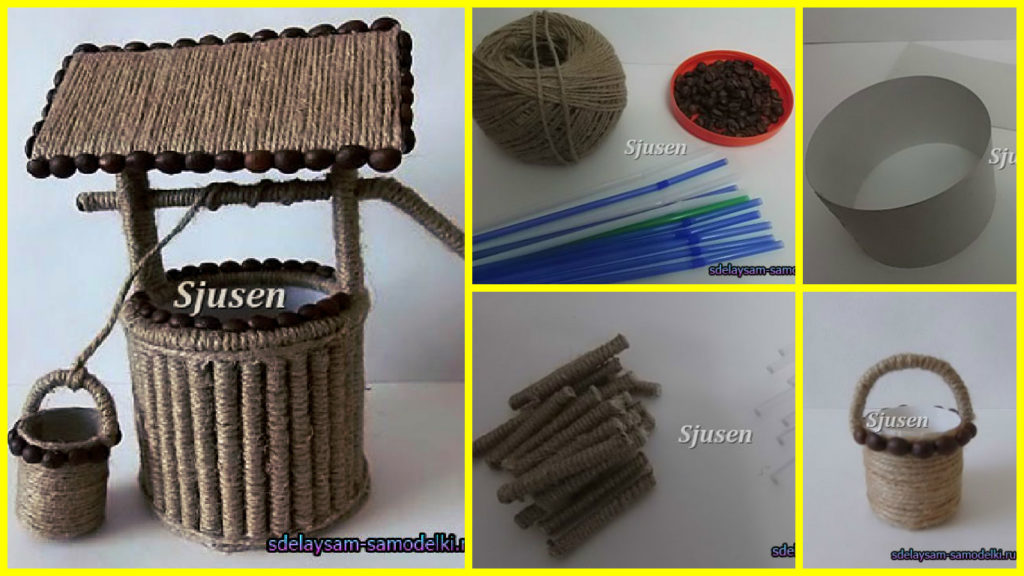
Posted onFebruary 6, 2017inBest out of Waste, DIY, Home Decor, Step by step, Tutorial The well from yarn (twine)/rope/string
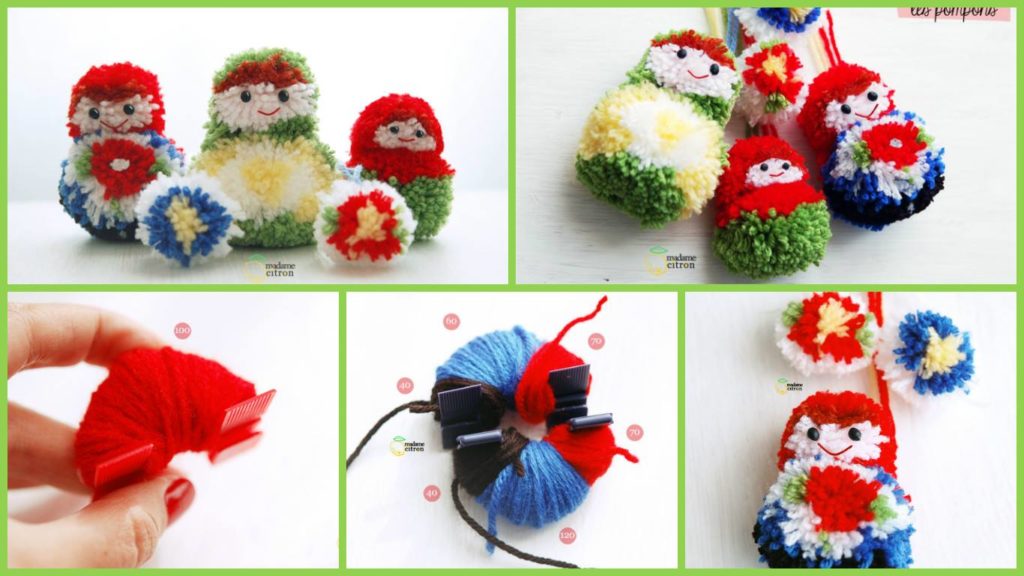
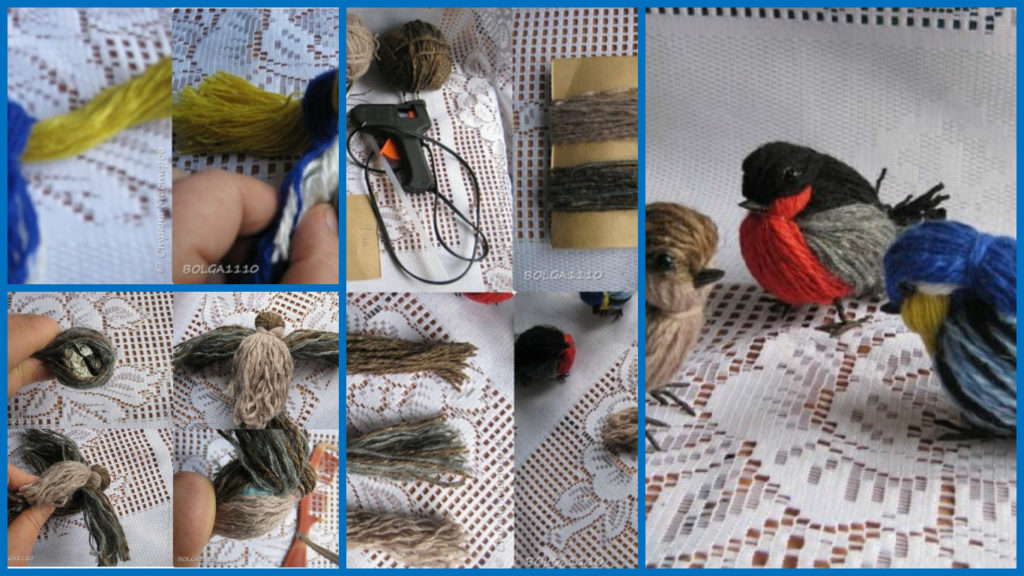
Posted onFebruary 4, 2017inBest out of Waste, DIY, Step by step, Tutorial DIY: Yarn sparrows and bullfinches
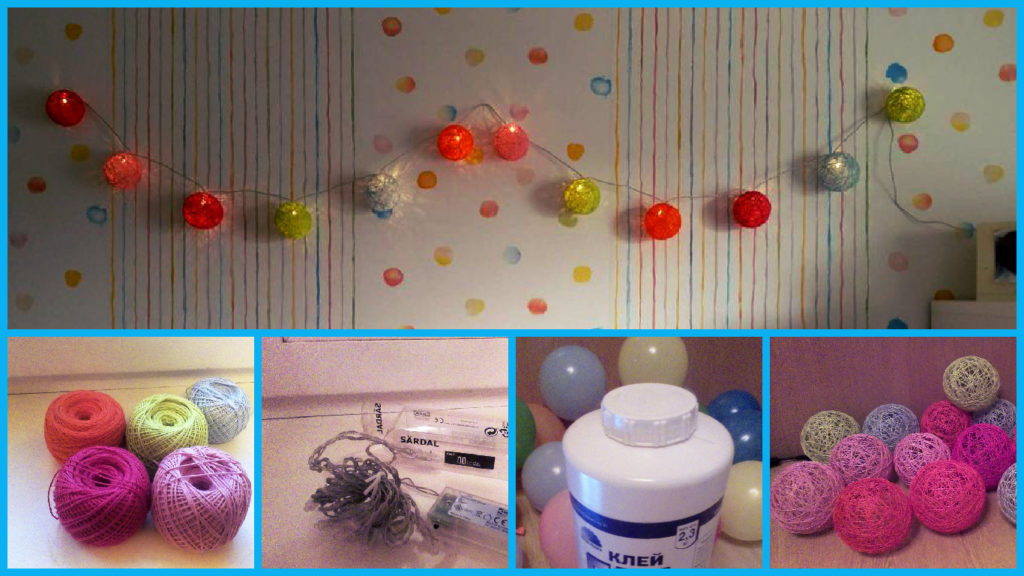
Posted onJanuary 31, 2017inBirthday, DIY, Easter, Home Decor, Step by step, Tutorial DIY: Glowing garland with balls of yarn
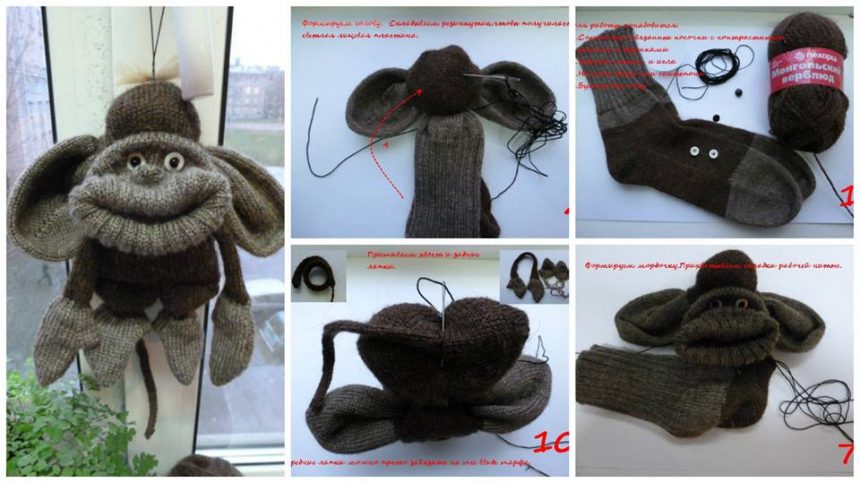
Posted onJanuary 20, 2017inBest out of Waste, Step by step, Tutorial Funny Monkey made from socks and yarn – Step By Step
Posted onJanuary 7, 2017July 7, 2017inDIY, Flower Crafts, Step by step, Tutorial Beautiful Crochet Yarn Flower