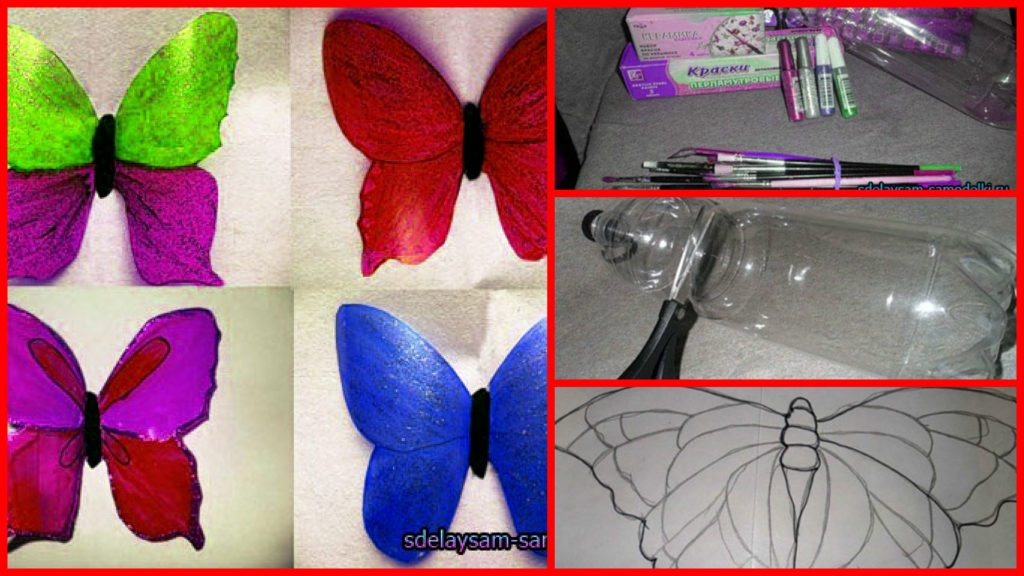
Posted onFebruary 12, 2017February 12, 2017inBest out of Waste, DIY, Home Decor, Step by step, Tutorial How to make beautiful plastic butterfly
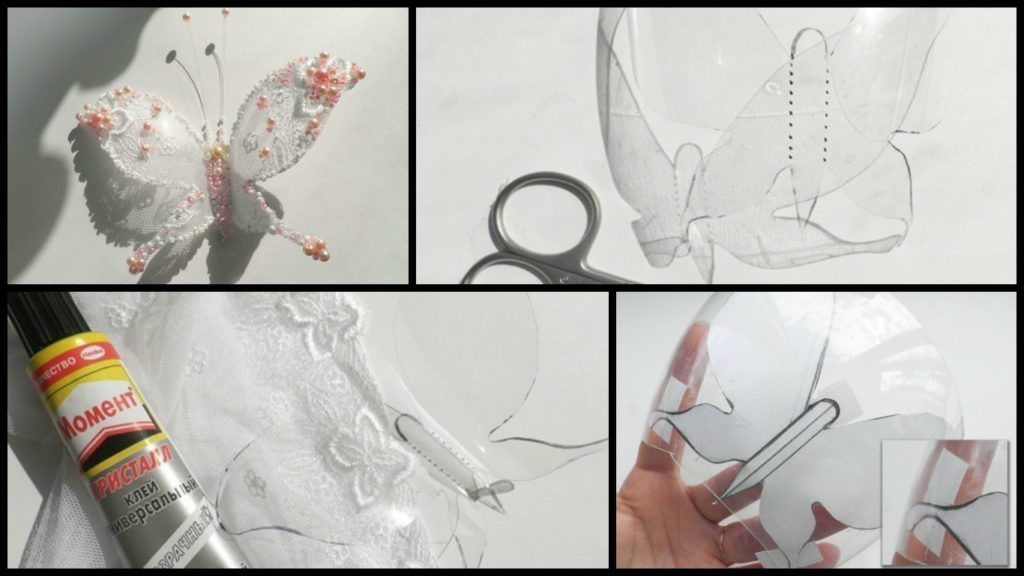
Posted onFebruary 1, 2017inBest out of Waste, DIY, Home Decor, Step by step, Tutorial How to make butterfly from a plastic bottle
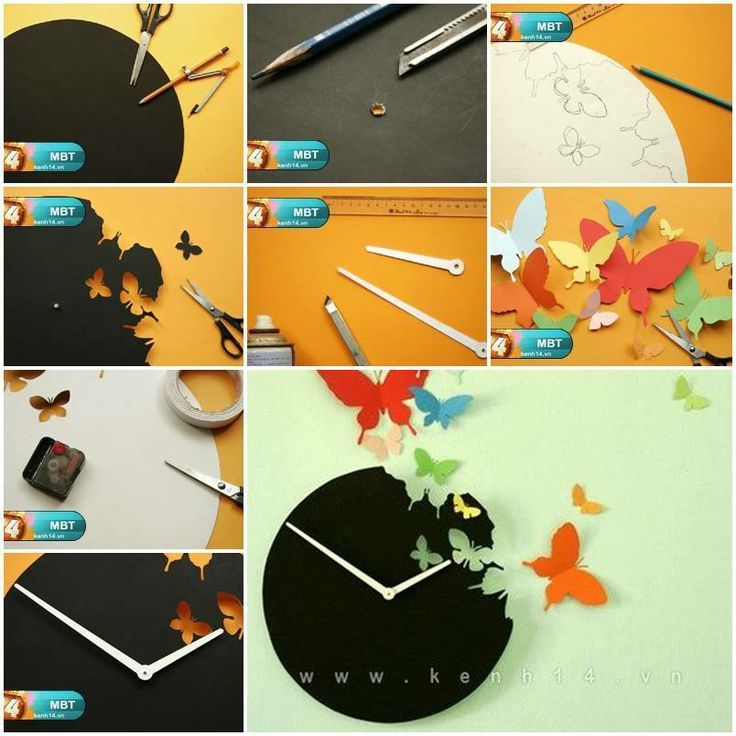
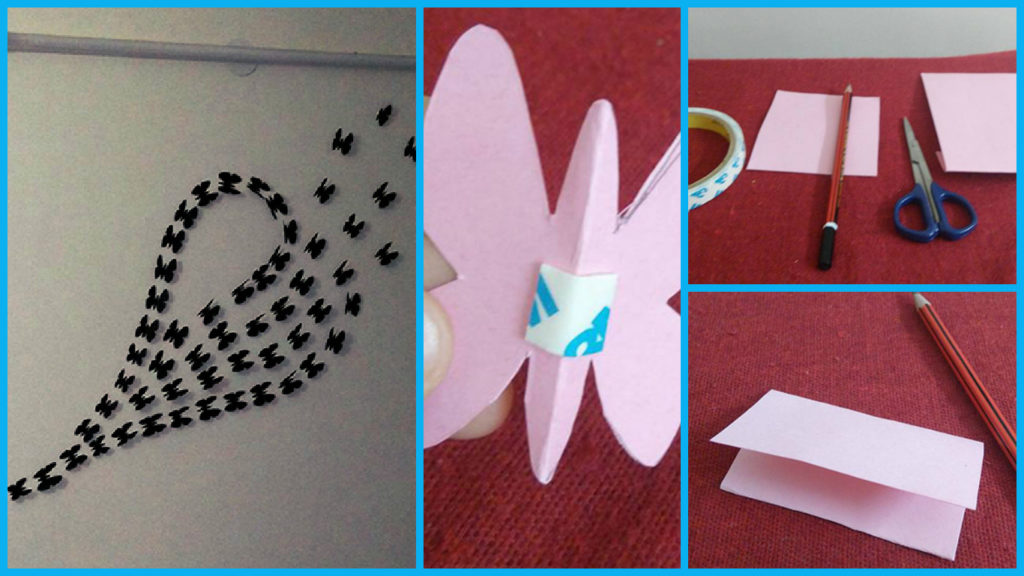
Posted onJanuary 31, 2017inBest out of Waste, DIY, Paper Crafts, Step by step, Tutorial Beautiful butterfly wall art
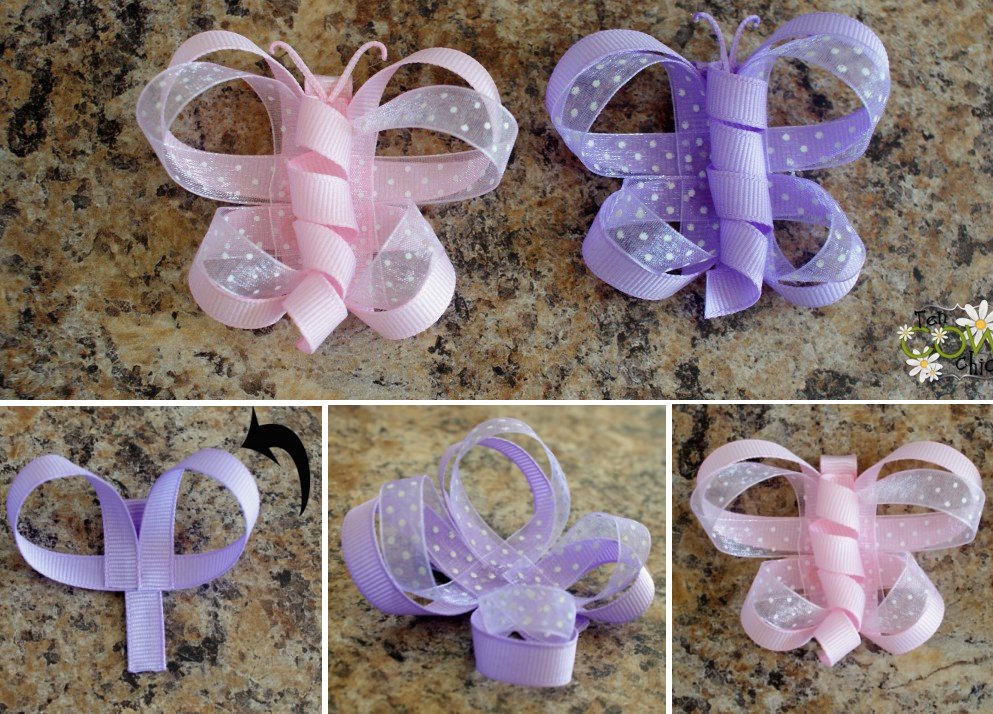
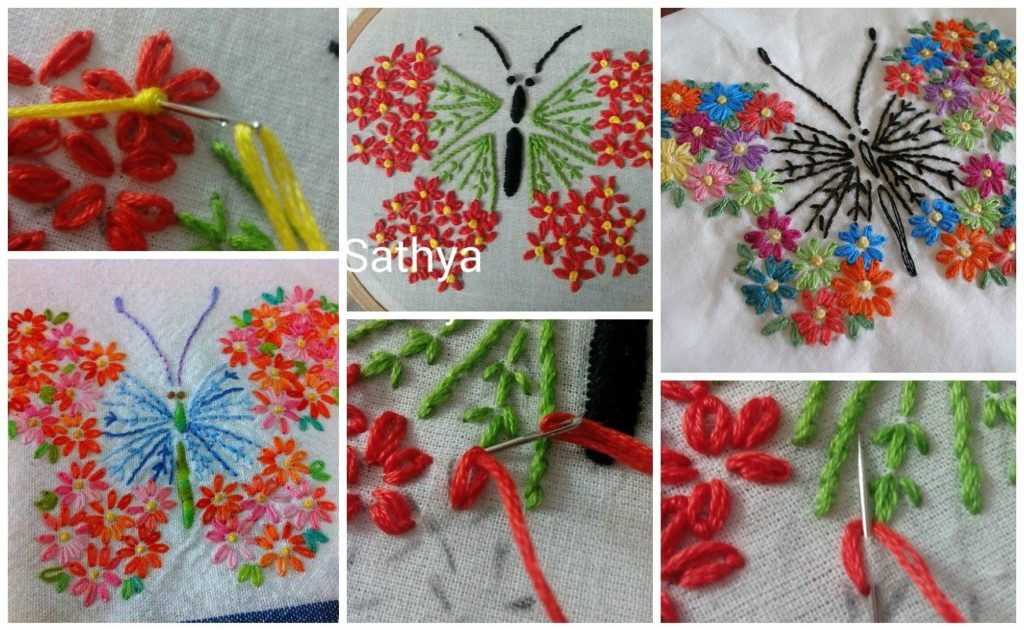
Posted onJanuary 22, 2017inEmbroidery And Sewing, Step by step, Tutorial Beautiful Butterfly from satin stitch
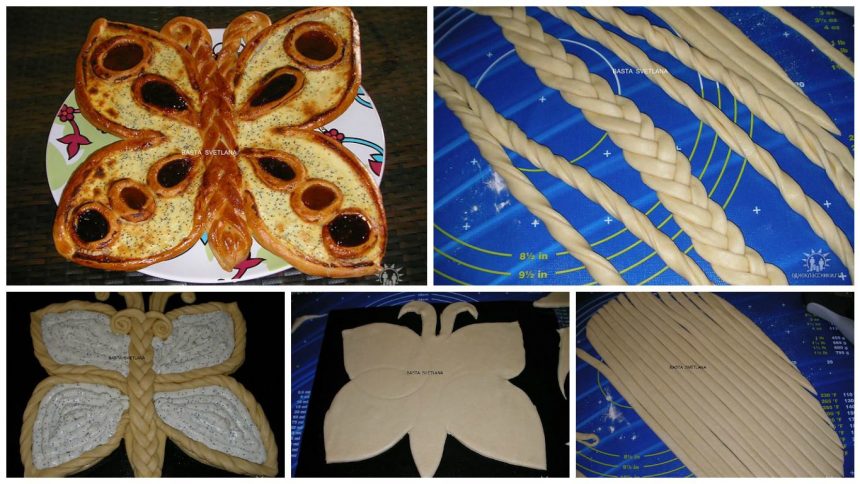
Posted onJanuary 19, 2017inFood Decoration, Step by step, Tutorial How to make “Butterfly” with curd cream and jam – Step By Step