How to Make Different Kinds of Sleeves

Sleeves are such an important part of clothes as it is one of the first things you see in a garment. They should fit properly and be comfortable to wear as well. Sleeve styles vary greatly with time and fashion.

Fashions of sleeves come and go. One moment a particular sleeve may be in fashion but then they disappear completely for decades to resurface later and become a rage again. I remember wearing loose puff sleeves in my teenage years as it was in fashion; now I cannot imagine wearing them, one because it absolutely kills my body shape and two they are luckily not in fashion

STYLISH MEHNDI DESIGNS FOR HANDS IN DIFFERENT STYLES

Mehndi designs are more popular in India, Arabic and Pakistan, women’s and girls adorn mostly on wedding occasions, some special events like birthday or parties, Also applying mehndi henna tattoo is very simple major work goes in creating the designs that suits your foot and hands, mehndi comes in varieties of color options like black, red, stones, glitter and more.

Currently its grabbing more attention in international  countries like USA, UK, Canada and more, So to get you a helping hand on mehndi design we have listed  outstanding 20+ designs of henna tattoo specially for hands which will surely make your day by attracting all attention to you!

Hope you like these mehndi designs.

We would love to hear your thoughts in the comment section below. And be sure to like us Facebook for more ideas!

Thank you for visiting our website. Keep Creating with Art & Craft!

Fashionable Kurtas with Palazzo Looks that You Love To Wear
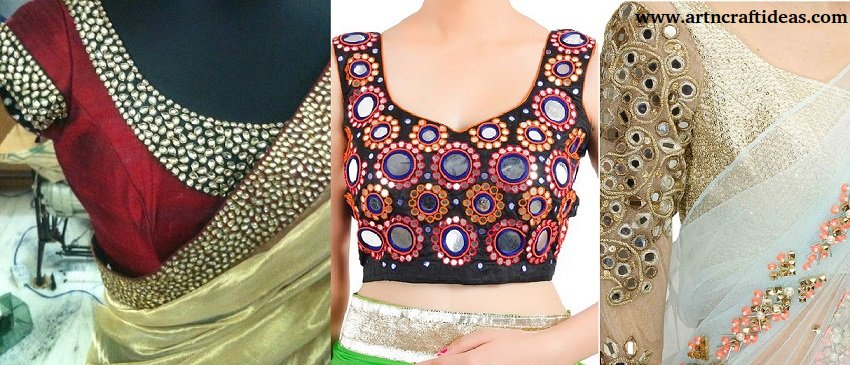
The fashion of kurtas with palazzo is adored in the recent times because the combination grants everyone with a complete outfit. Who wants to lack behind in the fashion league when the latest trend has been introduced.

To let you be at ease when it comes to traditional wear we have found the best of kurtas that will blend with your bottoms without a doubt.

Hope you like these Stylish Kurtas with palazzo.

We would love to hear your thoughts in the comment section below. And be sure to like us Facebook for more ideas!

Thank you for visiting our website. Keep Creating with Art & Craft!

Most Popular Embroidered Sarees Blouses Trends for Women
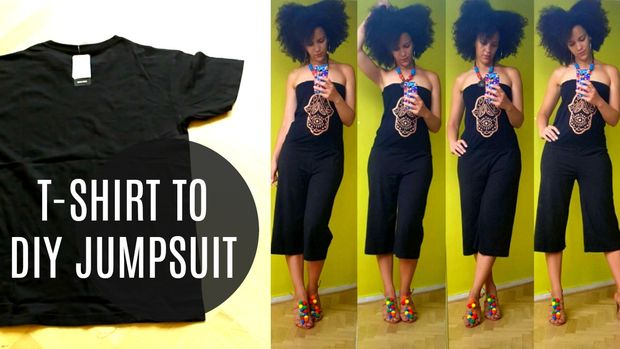
Saarees are simply a charm to the eastern couture and wardrobe. Emblem of traditional Indian culture, Sarees are loved by all at all occasions. These sarees are now designed in a variety of new ranges and style. Sarees are designed both for the formal and the casual wear.

So if you are a saree lover, then this article is going to bring you loads of exciting insight and knowledge about five most famous and beautiful styles of embroidered sarees and blouses for brides. If you are a newly married bride, then you can carry each of these for all those special occasions.

1. MIRROR WORK EMBROIDERED SAREES:

2. STONEWORK EMBROIDERED SAREES:

3. ZARDOSI WORK SAREES:

4. KUNDAN EMBROIDERED SAREES:

5. CUTWORK SAREE’S BLOUSES:

Hope you like these Embroidered Sarees Blouses.

We would love to hear your thoughts in the comment section below. And be sure to like us Facebook for more ideas!

Thank you for visiting our website. Keep Creating with Art & Craft!

Recycled Craft: T-shirt to DIY Jumpsuit in 20min

DIY Jumpsuit that you can make in 20min with 2 T-shirts!! T-shirts are a great DIY Tool to work with because there are so many creative ways to transform it

And we all have 1 or more old t-shirts laying around that we’re not using so let’s be creative and make beautiful DIY Clothes with it

Required Material:

  • 2 T-shirts
  • pins
  • fabric scissors
  • paint brushes
  • paint palette
  • Palett Fabric Paint
  • elastic
  • thread
  • sewing machine (I use Brother DS140)

Step 1: You Need 2 T-shirts

Step 2: Cut the Sleeves, Top and Side of Your Shirt

Step 3: Pin & Sew the Legs

Step 4: Cut the Top and Sew the Sides

Step 5: Add an Elastic on Top

Step 6: Pin the Top on the Bottom

Pictorial DIY Jumpsuit in 20min

Watch Full Video Tutorial:

BEAUTIFUL LEHENGA DESIGNS THAT ARE KILLING IT IN 2017
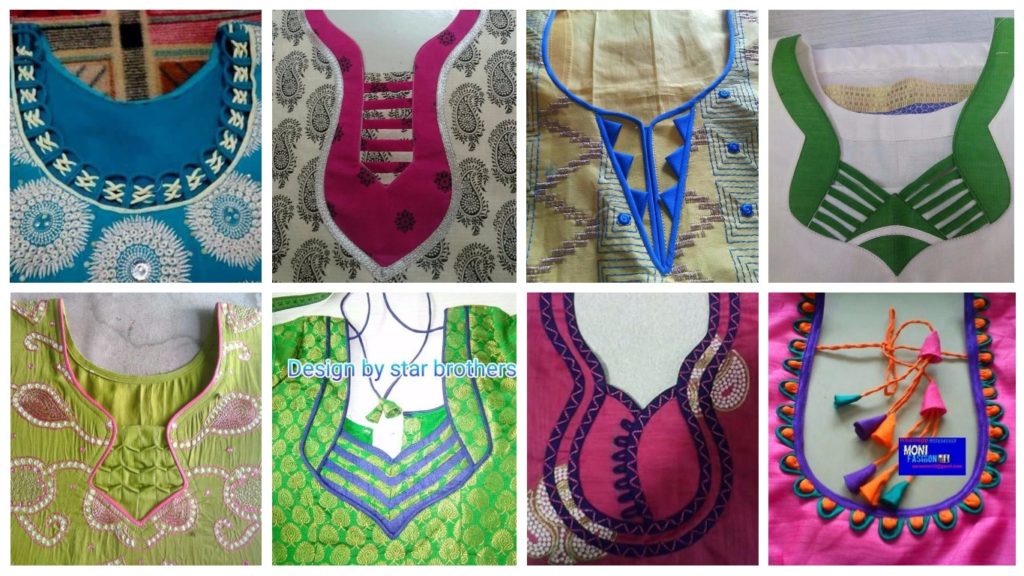
The Pinks, Reds, Oranges and Peaches used to be the unusual lehenga designs a few years back, but now they are a part of the mainstream colours these days. If you are a bride-to-be, you must be looking for some fresh and unique lehenga colour combinations to spot at your wedding.

You may like this:

Purple with Shades of Blue

White lace

New Trends Designer Lehenga Cholis

Anarkali New Style Frocks Designs 2017 for Young Girls

Mint with silver

Lucite green with silver

Icey grey with olive gold

Turquoise with beige

Hope you like these Lehenga designs.

We would love to hear your thoughts in the comment section below. And be sure to like us Facebook for more ideas!

Thank you for visiting our website. Keep Creating with Art & Craft!

How to Mend Jeans Holes in Cutest Way

Mending or a hole in your pants doesn’t have to be ugly! There are so many fun ideas out there to patch a hole. Here are some properly mended pants as well as some super silly mending. From patches to pom poms, you can sew just about anything in, over or behind a tear to make it look fun and playful.

Use this as a way to incorporate your child’s personality into their clothes. Ask them what they might like, and do the job together. Not only is this a way to recycle clothes, but it is a way to spend time together instead of being at a shopping mall.

Hope you like these cute ideas of mend jeans holes.

We would love to hear your thoughts in the comment section below. And be sure to like us Facebook for more ideas!

Thank you for visiting our website. Keep Creating with Art & Craft!

Different Types of Neck Patterns to Try in your Kurtis
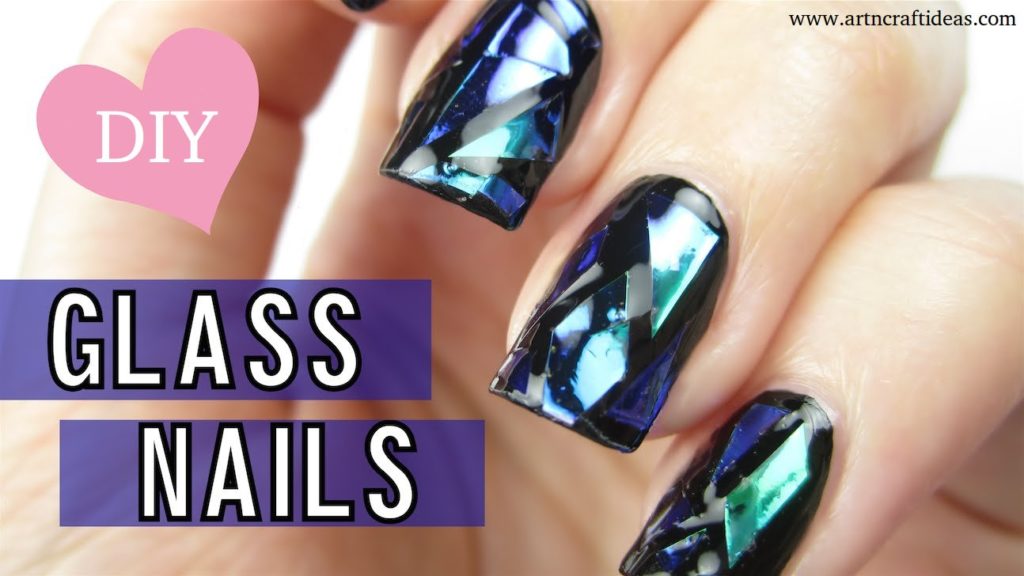
Kurtis has become a very integral outfit it Indian fashion industry. From parties to casual wear for your work every day, Kurtis has become a big fashion statement. Kurtis have become handy.

There are various neckline designs in the Kurtis that give you a look ranging from ravishing to a perfect traditional blend. Let us have a look at what necklines you must find and go for at various occasions.

Hope you like these Stylish Kurtis Neck Patterns.

We would love to hear your thoughts in the comment section below. And be sure to like us Facebook for more ideas!

Thank you for visiting our website. Keep Creating with Art & Craft!

DIY Shattered Glass Nail Art – Step by step Tutorial

This tutorial shows how to DIY shattered glass nail art with this step-by-step. There are so many great trends and looks to try that we can’t help but write about all of them. So, bear with us as we fan girl for a bit about shattered glass nails and how it’s, quite possibly, one of the most inventive trends of the social media age.

Step-1: Every manicure begins with soft, moisturized cuticles, so grab your favorite cuticle oil and massage those cuticles like your life depends on it.

Step 2: Once the oil has been absorbed by the cuticles, wipe off any excess oil on the nail with rubbing alcohol. Removing the oil from your nails will make the manicure last longer without chipping.   Be sure to only remove the oil from the nail, not the cuticle.

Step-3: Let’s start with a base coat. The one used here is Quo by Orly Strong Bond.

Base coats help nail polish stick to the nail bed for a longer period of time, so be sure to always use one and apply a thin layer.

Step-4: After the base coat dries, apply black nail polish as your base color. The nail used in this tutorial is Formula X by Sephora in the color Dark Matter.

While this look can be done with any base color, the most striking shattered glass effect is with black. Feel free to use white, emerald green or neon pink. A viewer recommended trying this look with matte black polish in order to make the glass even more pronounced.

Step-5: Now we’re going to create the shattered glass effect. First, pick up a packet of iridescent cellophane from your local craft store.

Next, cut the cellophane into small triangles (these will be your “shards”). The triangles can be in a variety of sizes and triangular shapes. Don’t be afraid to get creative.

Careful not to cut yourself now.

Step-6: Before applying the shards, apply a clear top coat.

Step-7: Now we’re getting to the fun part: the cellophane shards! Pick up each shard with a wax pencil or wet toothpick.

When placing the shards, leave a little space between each one to make it genuinely look like broken glass.

Step-8: Snip any outlying edges of cellophane off your nails.

Step-9: Now it’s time to seal the deal with a top coat. The top coat in this tutorial is Gel-Setter by Essie.

You may need to apply two coats to keep the shards in place.

Consider your nails shattered.

Watch the full video tutorial here:

We hope you liked this Glass Nails tutorial.

Image source: Cute Polish

We would love to hear your thoughts in the comment section below. And be sure to like us Facebook for more ideas!

Thank you for visiting our website. Keep Creating with Art & Craft!