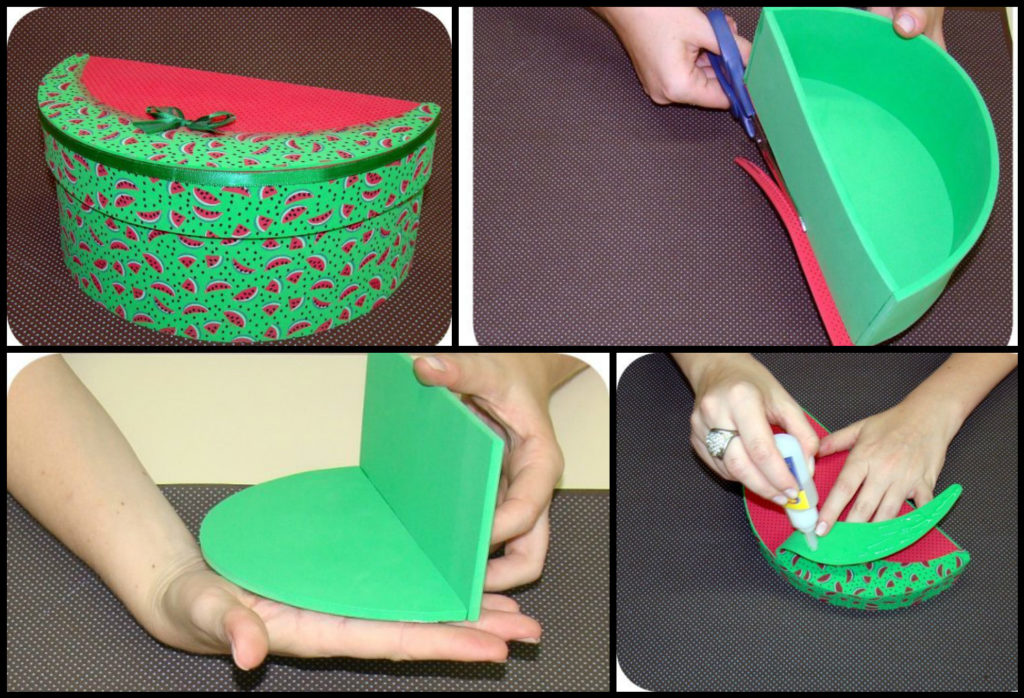
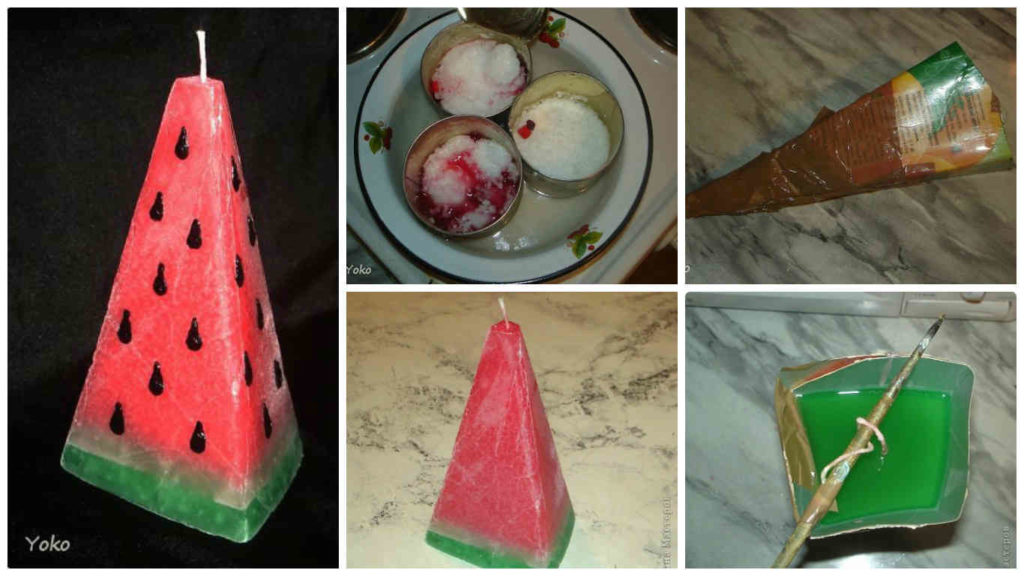
DIY: Beautiful Watermelon Box

Watermelon box 2

You can make a beautiful watermelon box to give a loved one and make the greatest success.

Tips to Make Cash Watermelon

To do this piece you will need:

1.Green satin ribbon;
2.EVAs with colors: red with black polka dots, green, EVA stamped with watermelons;
3.universal glue, glue for EVA glue all or hot glue gun, glue depending on their preference to work with EVA;
4.Stick BBQ;
5.Scissors;
6.Molde (image below).

Start by transferring the mold parts to the respective colors of EVAs, with the help of stick BBQ. Then, with the mold parts already cut, join portions of the bottom side of the EVA and the case back using the glue you prefer to work with EVA. Then apply glue around the edges, uniting the parts already assembled, forming the structure of the box. Soon after, paste the structure of the box on the EVA with the balls, but with an upward pattern and cut out the excess. Now start gluing the side finishes in watermelon EVA from the center side of the background. Cole involving the entire side of the structure, and if there are leftovers, cut, making the finish. Glue the cover piece on the poá, leaving the dots to face down and cut out the excess. Then paste watermelon strip around the lid, as you did in earlier body structure. Press the strip in the corners, so it does not drop. Soon after, paste the watermelon detail on the cover Now, to finish your piece, decorate the cover with a tie and finish around the cover seam with green satin ribbon. And you are done!

How to make beautiful watermelon candle

watermelon candle

As a form as usual using the box of juice 1.5 liter: cut the length and form a “bag”

4 Form a face like that. Firmly connect the tape.

Insert the wick. I fixed the tip follows that the wax does not flow: obmatala tightly with tape, then the reliability of all obmatala tightly with cling film in several layers (in the photo without the film). Wrapped right to the end of the form, or paraffin and melted bitter will run into any crack

Wax melts, add the desired color crayons

Strengthens the wick and begin to fill: red, white, green. Each subsequent layer after drying the previous pour

We are waiting for the complete drying of the candle and release from form. Carefully prune irregularities and wick. Here I made a mistake, do not repeat it: because candle cooked at night, anxious to look at rezuttat for faster solidification put the candle on the balcony, in the cold. The result you see in the picture: the wax during solidification gave cracks. Paraffin – no soap, you can not speed up the process of hardening the cold !!!

Bones candle with black paint marker

And here is the result. Voila !!!’

Thanks to all