Posted onNovember 12, 2017November 19, 2022inMehndi, Tutorial, Video Learn To Draw Basic Bridal Mehendi Designs On Hands – Step By Step (Tutorial)
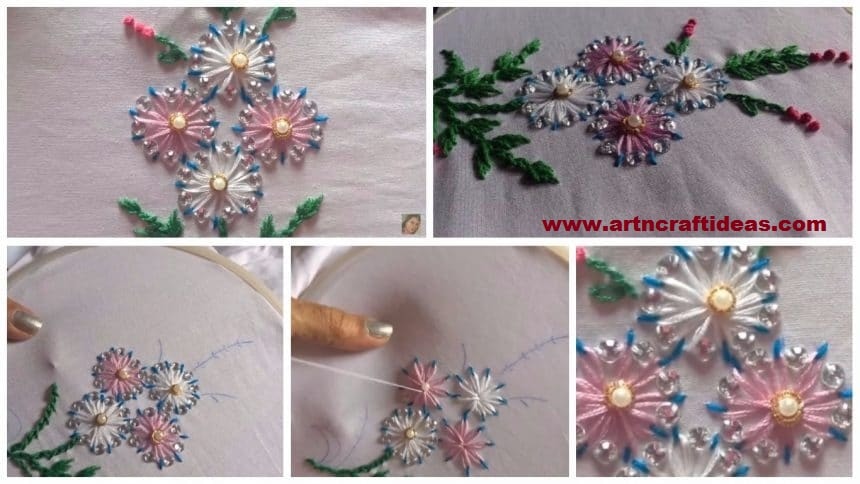
Posted onJuly 2, 2017inEmbroidery And Sewing, Tutorial, Video Basic Hand Embroidery Stitches Tutorial
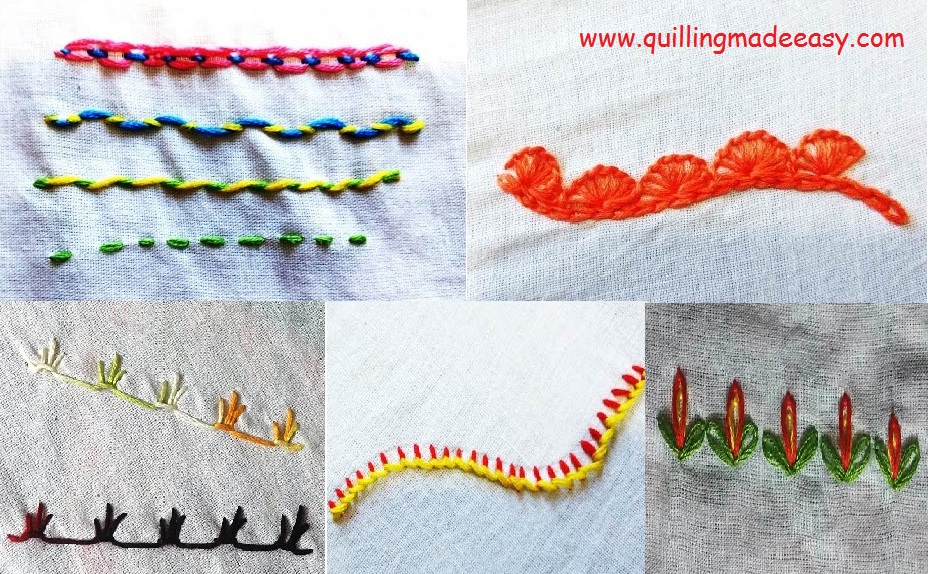
Posted onFebruary 19, 2017inEmbroidery And Sewing, Tutorial, Video Basic embroidery stitches tutorial for beginners
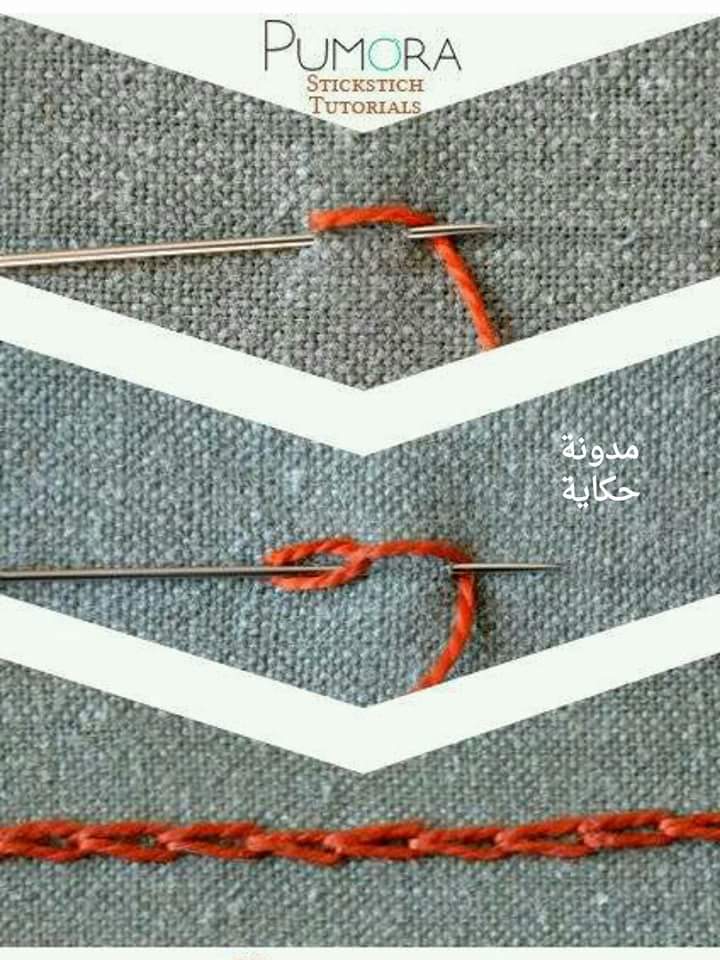
Posted onJanuary 25, 2017inEmbroidery And Sewing, Step by step, Tutorial Hand embroidery for beginners (Tutorials)