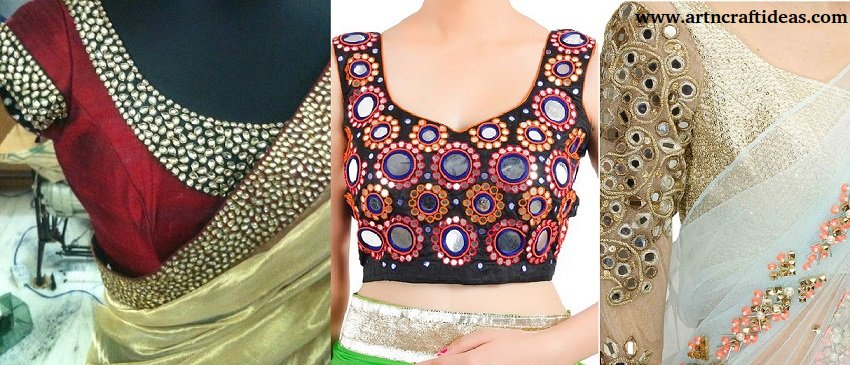
Most Popular Embroidered Sarees Blouses Trends for Women
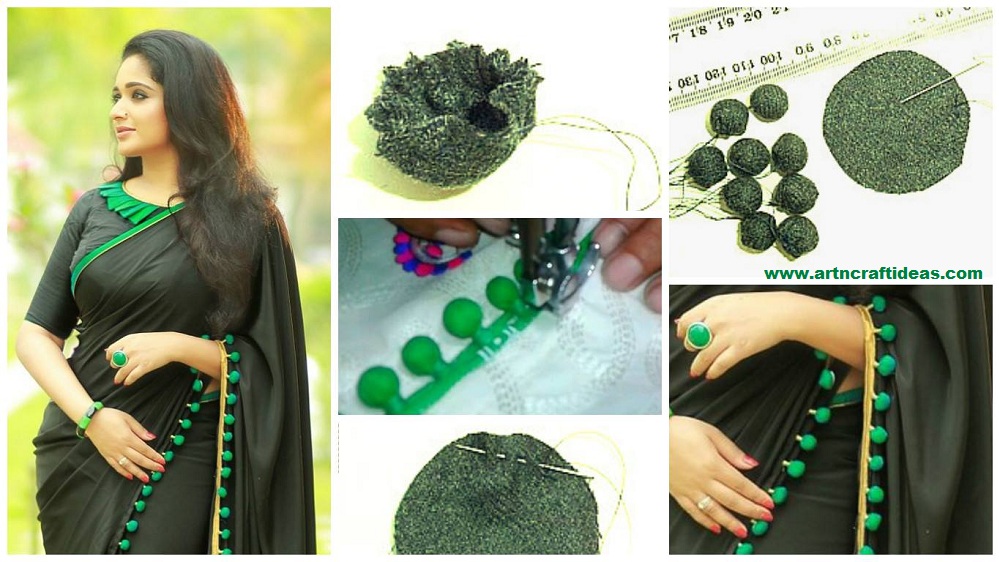
Saarees are simply a charm to the eastern couture and wardrobe. Emblem of traditional Indian culture, Sarees are loved by all at all occasions. These sarees are now designed in a variety of new ranges and style. Sarees are designed both for the formal and the casual wear.

So if you are a saree lover, then this article is going to bring you loads of exciting insight and knowledge about five most famous and beautiful styles of embroidered sarees and blouses for brides. If you are a newly married bride, then you can carry each of these for all those special occasions.

1. MIRROR WORK EMBROIDERED SAREES:

2. STONEWORK EMBROIDERED SAREES:

3. ZARDOSI WORK SAREES:

4. KUNDAN EMBROIDERED SAREES:

5. CUTWORK SAREE’S BLOUSES:

Hope you like these Embroidered Sarees Blouses.

We would love to hear your thoughts in the comment section below. And be sure to like us Facebook for more ideas!

Thank you for visiting our website. Keep Creating with Art & Craft!

How to decorate saree from fabric pompom
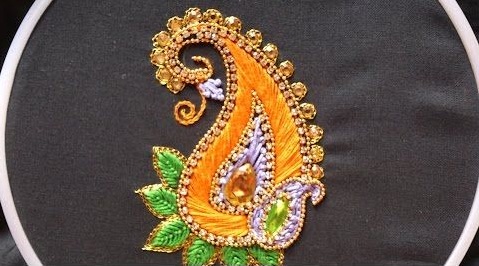
What you’ll need : :

  • Scrap fabric pieces measuring at least 2″x 2″ each
  • Purchased Pompoms
  • Pearl Cotton or DMC embroidery floss
  • Sharp scissors and an embroidery needle
  • Note * Click on any of my images for a larger picture

Making the Fabric Pompoms : :

1. Place the pompom in the center of the fabric scrap 2. Fold the edges of the fabric up around the pompom 3. Wrap the floss around the fabric right above the pompom 4. Knot thread ends together well, trim, and trim the fabric ends even Continue making your Fabric Pompoms until you have the amount you need. Fabric Pompoms Details : :

I’m adding mine to my Fabric Lover’s Apron, any item will use these same instructions.

1. Layout your design 2. Place the Fabric Pompom onto the item 3. Using a needle threaded with floss and knotted at one end, insert the needle at one side of the pompom pulling up through the back of the fabric item 4. Pull thread all the way through until it catches the knot 5. Insert the needle on the other side of the pompom, pulling back though the fabric so the floss is holding the pompom tightly in place 6. Knot well, close to the fabric, and trim away excess floss Continue until all of your Fabric Pompoms are attached. Voila! You’re finished!  Variation ideas : : You can reverse how you attach them so only the Fabric Pompom ball is showing for a less funky look. You can add them to a pillow this way or attach these just as you would purchased pompom fringe. Here is an example of that on a pillow of mine from Pier1. I hope you enjoy this tutorial!!! This Fabric Pompom detail is something I’ll certainly be adding to the edges of many of my own handmades!