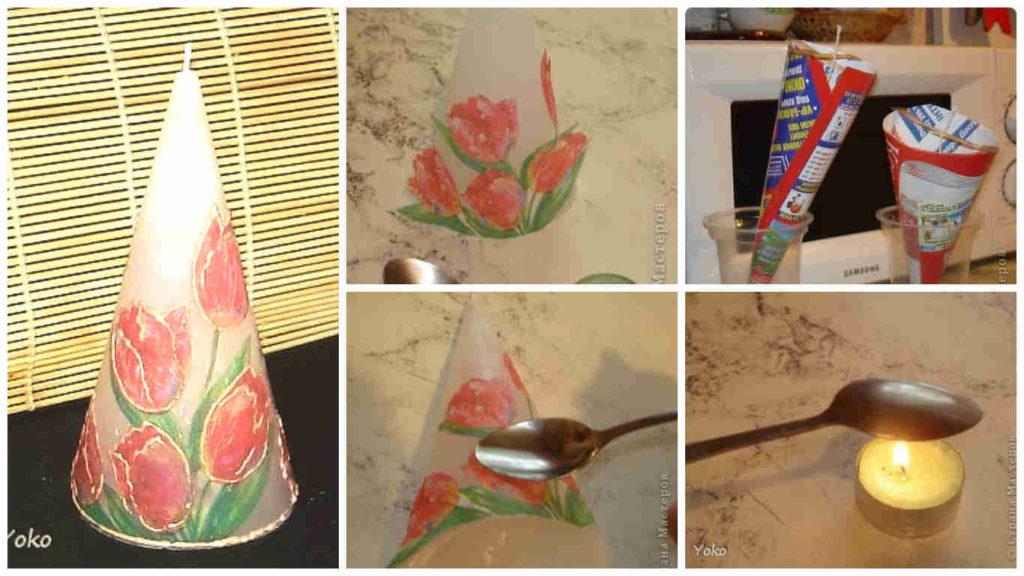
How to make decoupage candle – Step By Step

decoupage candle 1

We need the pages of a glossy magazine, wick, wax, scissors, tape.
Decided to form a cone-shaped. To do this from the magazine “kulechki”, after inserting the wick, the whole construction fix tape. Is melted paraffin and fill the blanks. We are waiting for complete solidification.

Here are our candles (wanted to make a series of different-sized candles, united by one pattern, but unfortunately my long candle fell during solidification, so I will digest it) chose to decoupage napkins with a floral pattern (tulips)

Cut along the contour drawing is applied on the candle so as we would like it (I like the flowers will grow from the bottom to the fetelku candles). For the most decoupage we need a candle and a spoon.

Heat up a spoon over a candle on the inside (note the spoon is smoked, so we will smooth the napkin convex side of the net), and gently begin to smooth circular drawing motion, starting from the middle. Under the hot wax begins to melt spoon and a napkin as if fused into the candle. Similarly, I am doing the back side of the candle

We get the result. In principle, everything is ready, but I wanted to give the amount of the drawing using a wax marker: the bottom of the candle and surveyed the contour color gold color.

It seems to be not a bad second candle melted down and make them even third – the baby. Result later