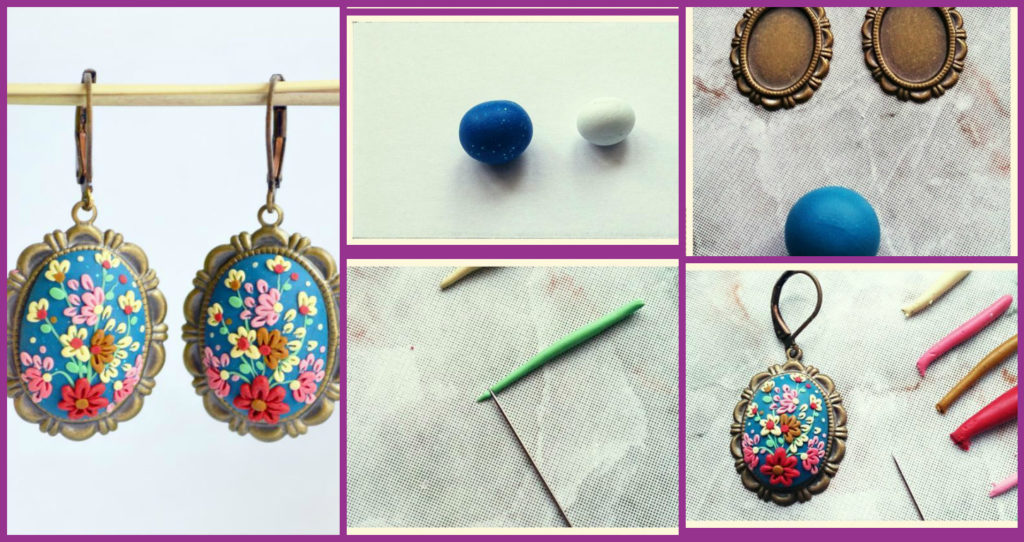
I am personally very inspired by her work, sometimes I dare to repeat her motives, but of course up to its level I still have to grow.
Today will tell and show you how to make my jewelry.
Create ornaments from polymer clay filigree technique or, in other words, the application requires: accuracy, patience, sense of color and skill.
To create a view of earrings we need:
- metal base for earrings – 2 pcs;
* shvenzy – 2 pcs (I immediately took the assembled version of Basic);
* Bake polymer clay Fimo (in my opinion, it is best here). For the base colors that ar needed: blue with sparkles (I took Fimo Effect № 302), white and olive. For flowers chosen by mixing the following colors: rich pink, pink lighter, brownish-gold, cool green, dark red, light beige to yellowish. In the photo colors will be clearer.
* needle;
* stationery knife;
* solid smooth surface to work with clay (eg, tile);
and, of course, our pens 🙂
* Prerequisites: the purity of the hands and the work surface.
Let’s get started. Mixed colors for the base of the blue and white clay, roughly in proportions as in the photo.
Now we use our fingers and palm as much as possible. Take one ball is rolled it between his palms up
domestic fundamentals size and attached to it. So with the second ball.
We perform all also from the second base.
At a forum on needlework, I read that some people think that is the flat and smooth surface of the clay is obtained only by pre-baking or sanding. In my experience, if you do the things as mentioned above, the pre-baking or sanding is required. Of course, the presence of the setting of the base simplifies the smoothing process.
So we’ve got here are the “canvas” for creativity.
Repeat the process with the second substrate.
As a result, you should get something like this.
Differences in earrings will always be because we are not robots 🙂 But they look harmonious.
There has come step baking clay. We put earrings on a glass surface (or foil) and place in the oven, preheated to 110 degrees for 15 minutes. It is important to set a timer or put the alarm clock.
Take out of the oven earrings and give them cool completely. You can put them in cold water for rapid cooling.
Now separate the frozen clay on a metal surface. Sometimes it moves, sometimes to hook your fingernail or a needle, main is done carefully and in an inconspicuous place (eg at the bottom of earrings).
After applying the adhesive on the metal base are putting on top of the clay and pressed gently with your finger. Give time to grab – for about three minutes. It is important to make the clay just right, as the reaction proceeds rapidly.
And earrings are ready!
Hopefully, the lesson was useful to you 🙂
Thank you for attention!
Best regards
