First, you must select the fabric for curtains tailoring. Beautifully will look fabric with metal overflow. Well look contrasting transitions in tone.
In the present master class puffs sewn on the cornice of 1.3 m. For this you need a piece of fabric at a ratio of one to two, or 1 to 2.5 relative to the length of the cornice. We eaves length 1.3 m – needs a piece of fabric 3.25 +0.5 (allowance at side seams), only 3.3 m.
In width:
• 0,65 m 3-band (as in the diagram), the height of product in finished form 0.45 m;
0.83 m • 4-band products in finished form height 0.55 m;
• 1,01 m-5 strips off the shelf height 0.65 m.
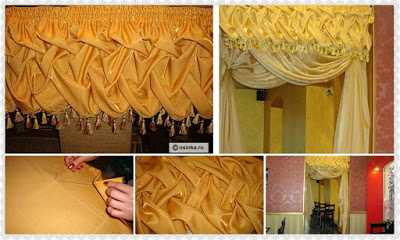
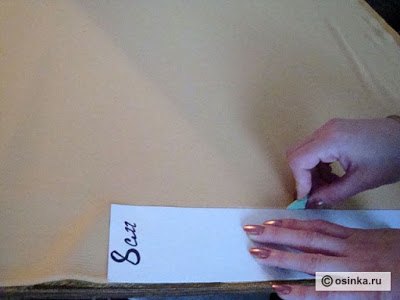
Learn, please scheme. See photos. he harvested tissue peruse for defects, check the length and width, steamed iron. The sides of the future curtains See photos. For comfortable work and avoid errors, you need to make patterns out of cardboard.
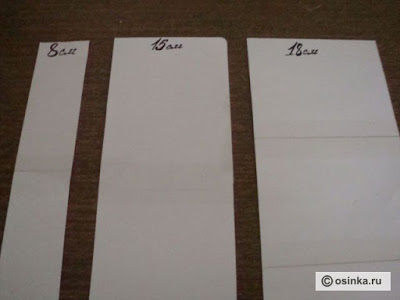
1. №1 = 8 cm (6 cm – width webbing + 1 cm seam tape+ 1 cm volume)
2. №2 = 18 cm;
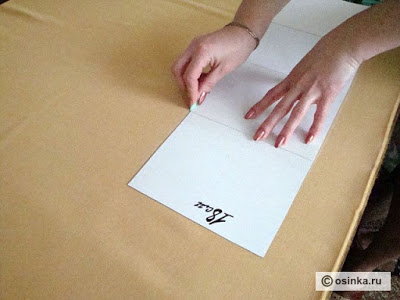
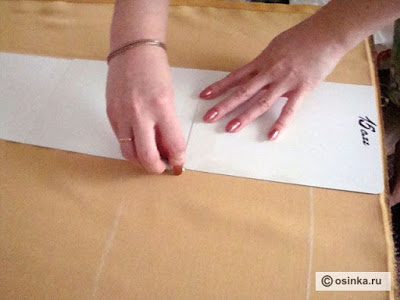
3. №3 = 15 cm. Choose a place where we are going to create your masterpiece. Ideal – a large table. It decompose and flatten stripped cloth. The fabric should lie face down.
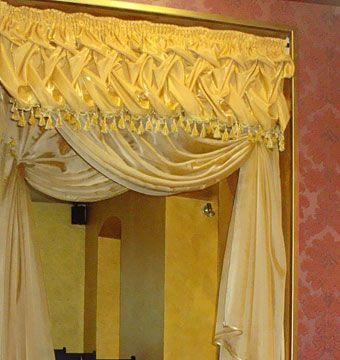
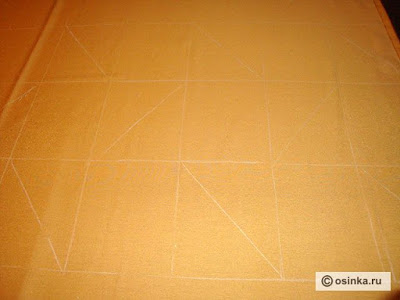
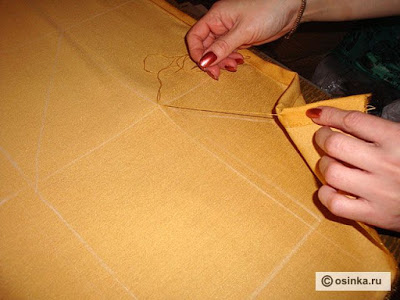
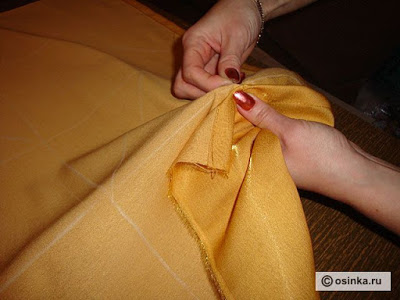
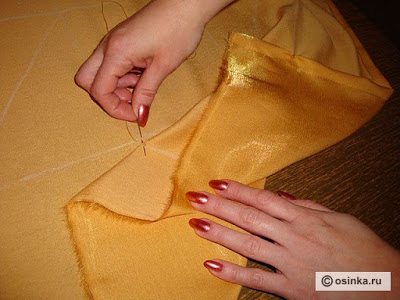
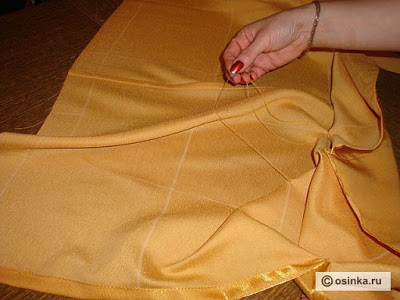
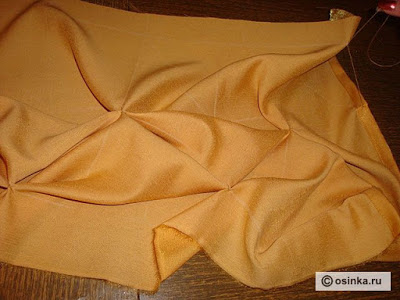
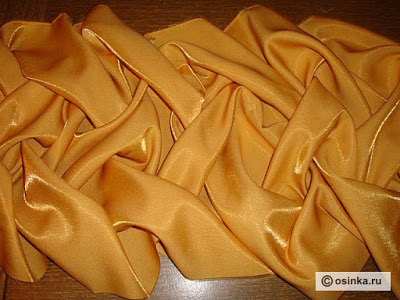
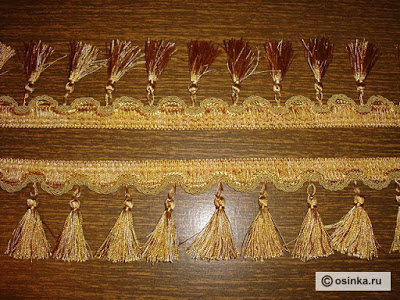
Take the mold 8 cm wide (№1) applying it to the upper tissue slice. Now, take the curve №2 (width 18 cm), apply to have the line drawn by again drawing a line along the entire length of our fabric. Repeat this process three times. We have to be parallel to the line width: 8 cm, 18 cm, 18 cm, 18 cm Take curve №3, we are putting any of the side seams and perpendicular lines to the already drafted. We get the mesh. To make it convenient to work in the cells draw a diagonal, as shown in the photo. Take the needle and thread in tissue tone, and at the cell diagonally fasten the first puff. Stitches tacks do five – six times. Secure all puffs for this series. The next series begin to fix on the side where you’ve finished the first row whip. Follow the scheme. Third row starts where finished second whip. And so all the rows under the scheme. Be careful. This is the result of the first phase of your work. The truth is impressive? The bottom of the curtains in our master class we will process the fringe. In fact, the methods of processing weight: seam in the hem, processing piping, lace, beads …
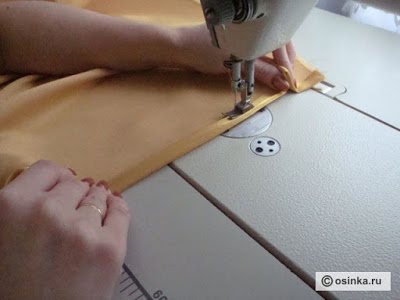
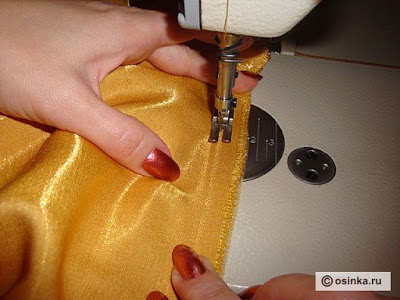
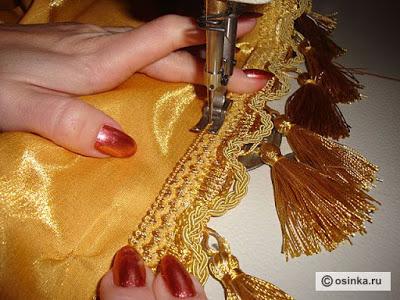
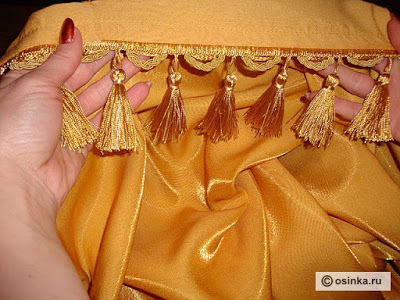
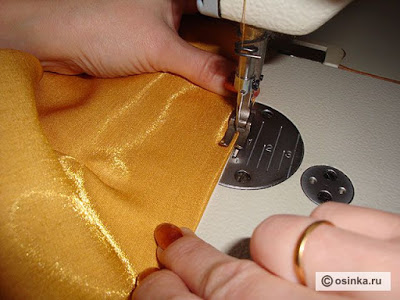
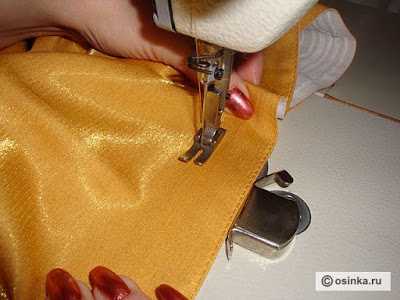
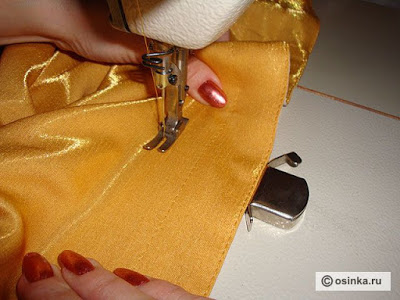
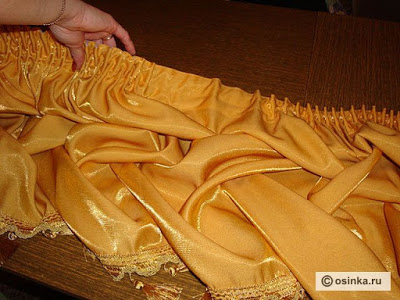
like fabric, you need to advance to steam and smooth We are putting a fringe to the bottom edge of the curtains. We combine slices. Fabric and fringe wrong side together. Sew, Now, gently loosen the fringe on the front side. Do this for the entire length of the edge of the fringe and paving machines line. Bottom curtains ready. Look inside out – it’s perfect. It remains to handle the upper section of the curtains. Take special braid for processing top curtains. Put them to the wrong side of each other. Pre-need to hem curtains and braid 1 cm. Sew their machine stitching. Lay the second parallel line is strictly for lace center. Line lay on the front side. The ends of the thread carefully hide. Run the same parallel line on the edge of the tape. Gently pull the fabric by hand. Contractible four strands to braid. Puffs acquire a very different kind. And then, finally, the result of work. Beauty, is not it? So, this curtain looks in the doorway.