


We shows you, who want to learn how to embroider a simple sewing machine.

You can embroider any lock stitch sewing machine, in which you can adjust the tension of the upper and lower thread. The most convenient – a foot Central bobbin sewing machines, which are free to work with both hands embroiderers. You can use the old machines, you inherited from grandmothers and great-grandmothers.
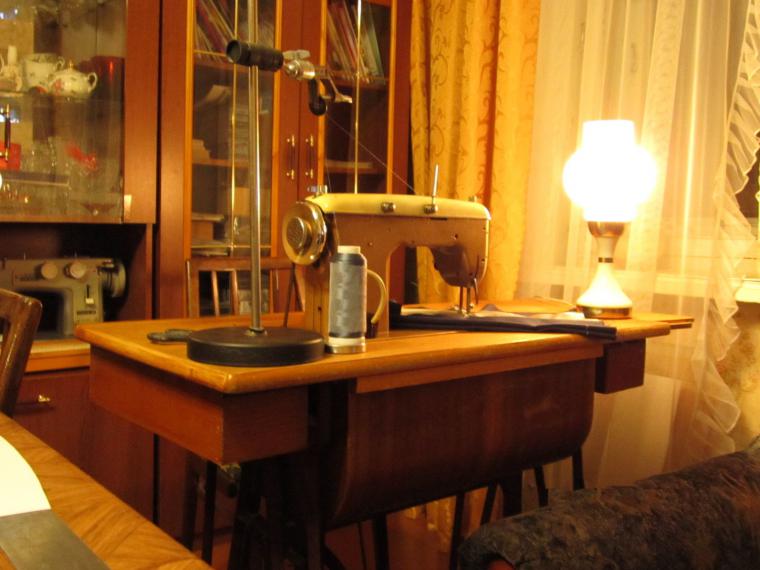
Modern cars are driven by an electric motor, and we need to get in the machine was manual or foot drive.
Unfortunately, embroider on a typewriter with an electric motor can not be! The fact that at low speeds (with low pressure to the pedal) of the motor shaft rotates unevenly jerks. If your machine rheostat (device in the pedal that changes the voltage) will provide the slowest rotation of the flywheel, and at the same time the needle movement is smooth, without jerks, it will be your incredible luck! My “Seagull” can not! And, frankly, I do not know of such cases, when the machine with electric allowed to do embroidery. A embroider can only be a small number of revolutions of the machine, since the movement of the embroidery frame may only be used between the needle punctures the fabric. For consistency of the hands and feet, which is sure to appear over time. And at the very beginning of your right hand will be almost constantly lying on the flywheel to make punctures tissue needle most accurately, according to the lines of the embroidery pattern.
It is important to set up and prepare the machine for embroidery. Let us deal with that!
Setting the machine to embroider
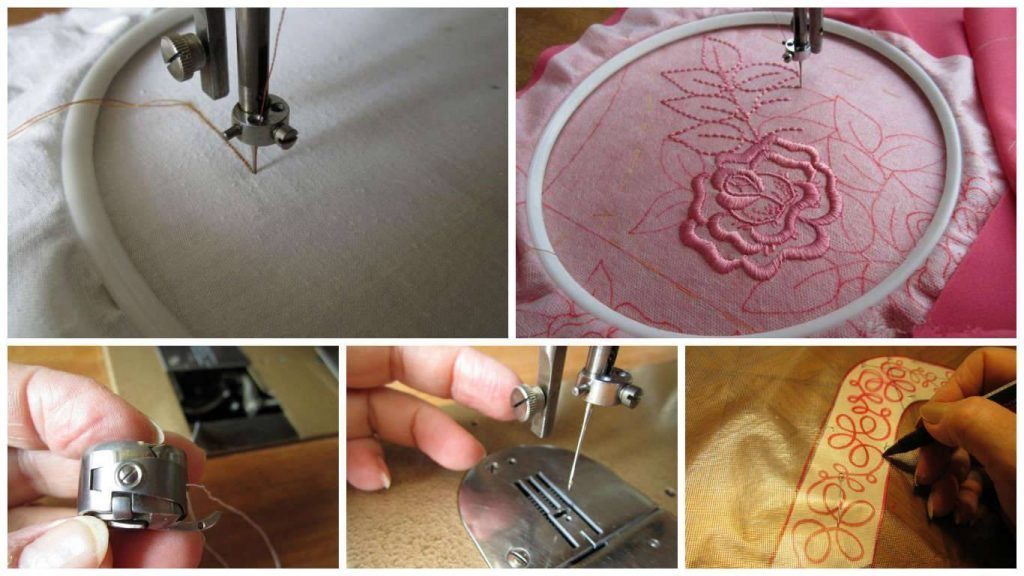
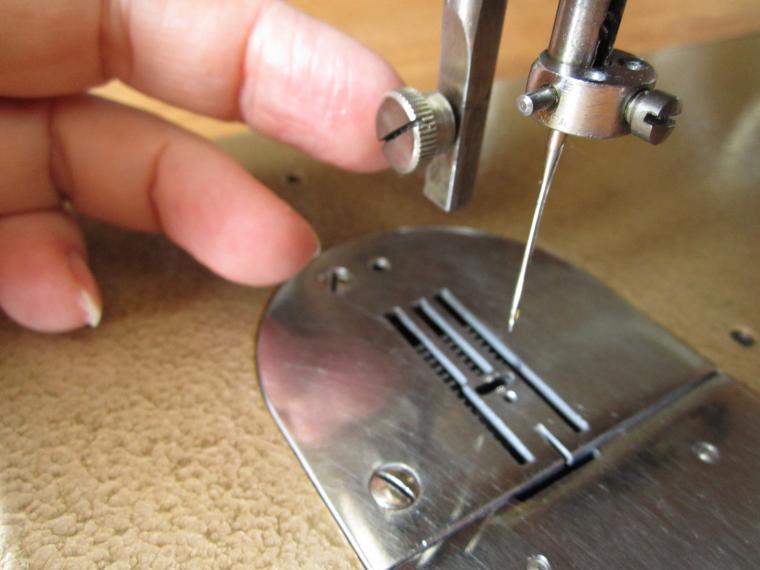
1. Remove the presser foot.
2. Lower the teeth tissue engine or completely remove them, if in the future you will be using the machine for embroidery only.
3. Adjust the tension of the upper and lower thread.
The tension of the upper thread when embroidery is weaker than the bottom, as the interweaving threads with embroidery should be on the wrong side of the fabric and not in the middle of tissue (s), as required by sewing. Knurled nut at the lowered presser foot rod is rotated counterclockwise.
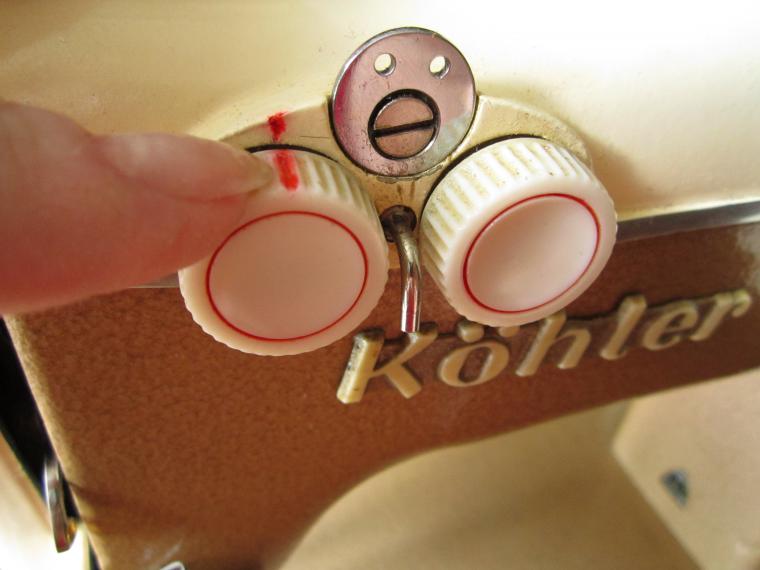
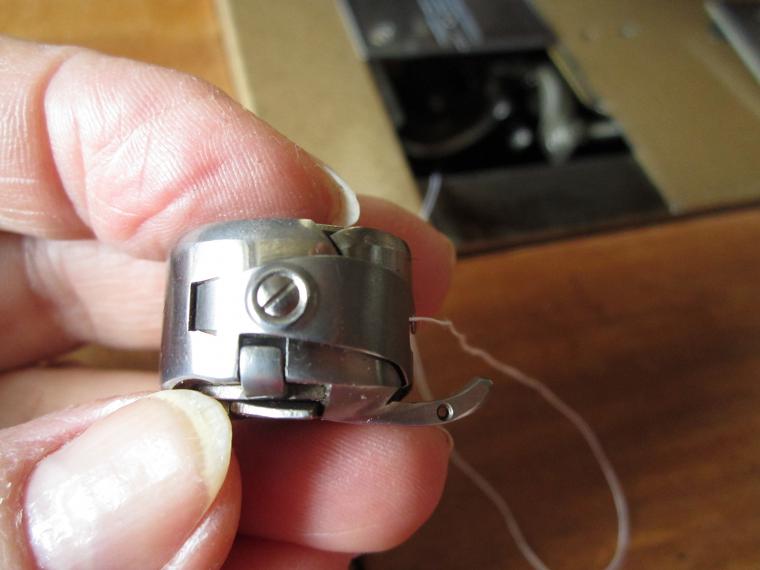
Lower thread tension is adjusted by the screw on the bobbin case.
4. Install a needle that is appropriate to you. Needle number must match the thickness of the fabric and embroidery thread. (I should needle №90, as I usually do the embroidery on the average thickness of the fabric).
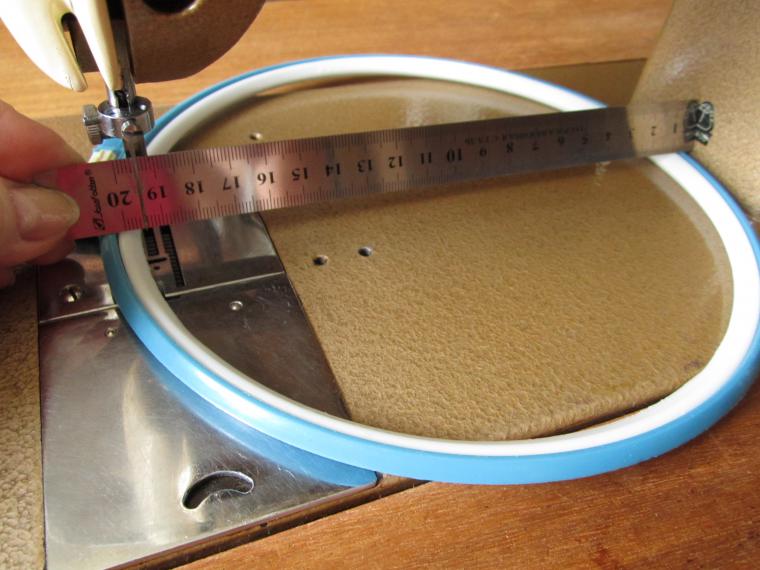
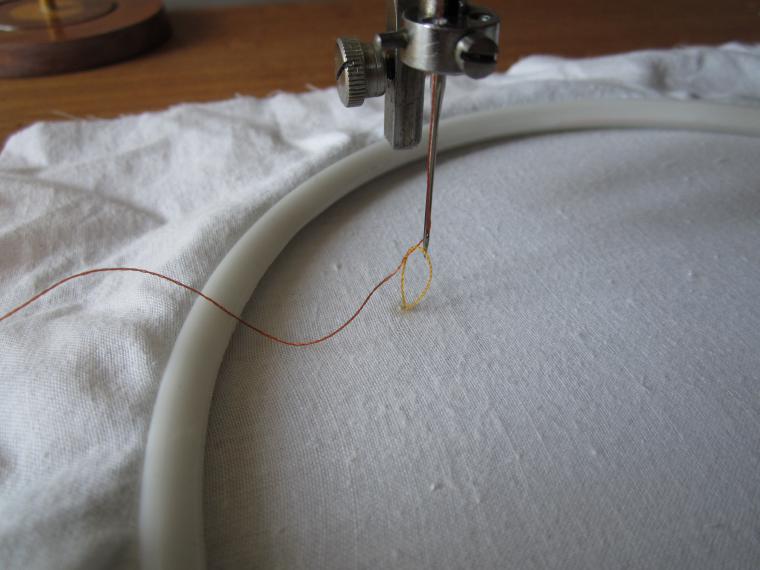
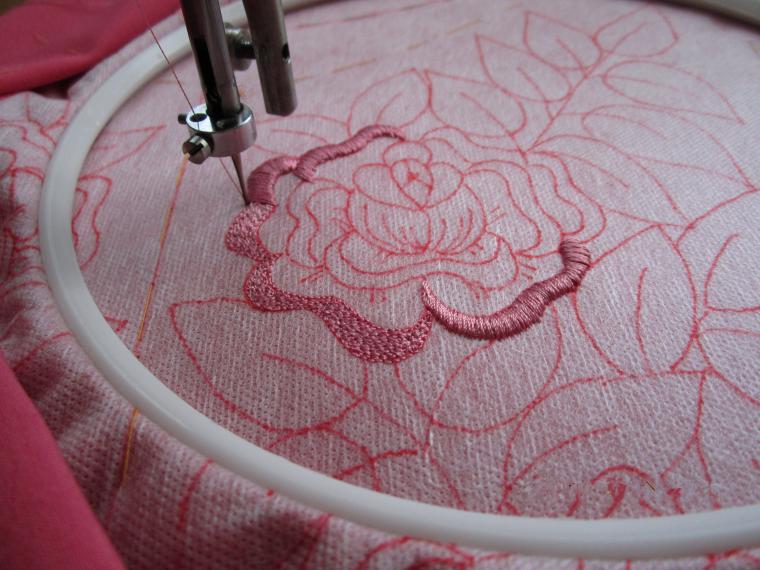
5. You will need round hoop with a low rim and a small diameter, which should be less than the sleeve machines or equal to that in the performance of embroidery is always enough room for torsion hoop.
Figure 6. embroidery that you want to do, it is best to run on water-soluble stabilizer .
The use of carbon paper or drawing transfer on fabric by priporashivaniya, when there is such fine material as a water-soluble stabilizer, it is the last century. Why I do not recommend these two methods?
Given the fact that now the majority of tissue in its composition contain elastic strands are stretched, they just, without fixing Dublerin or interlining (which, among other things, a further thickening of tissue), not zapyalit. It inextensible, transparent, water-soluble stabilizer allows you to embroider on and pile knitted fabric!
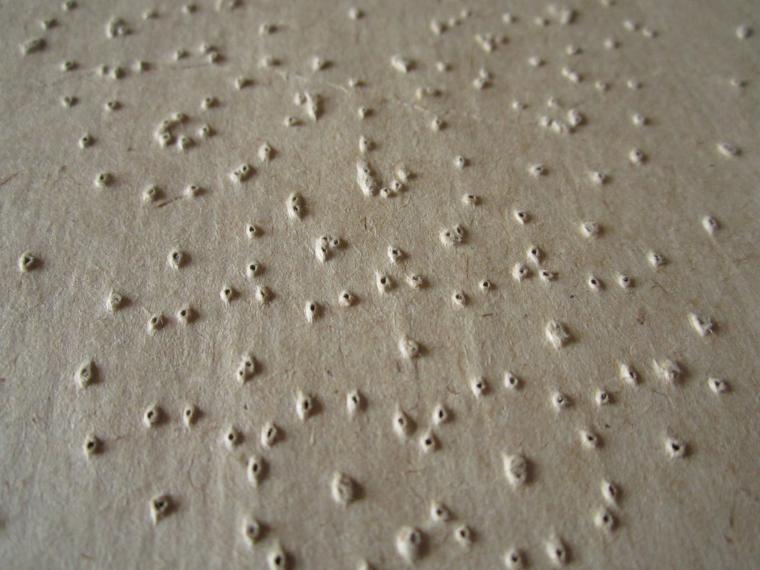
In addition, impaled on tracing paper embroidery pattern being transferred to the fabric with a special mixture of kerosene and tooth powder or blueprints (wherever it even take this bluing?), Is a picture that still need to guess. As I have from the very beginning of studying embroidery (as it was 25 years ago) refused priporashivaniya, I have no confirming my view photos. But, by analogy, look at the photos Skolkov lace insert on the reverse. Try to understand what kind of pattern? Bitmap priporashivaniem around and looks.
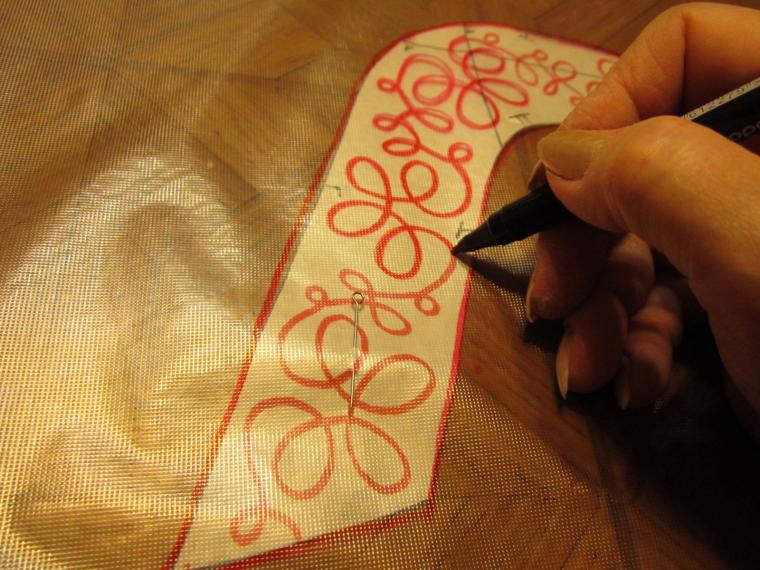
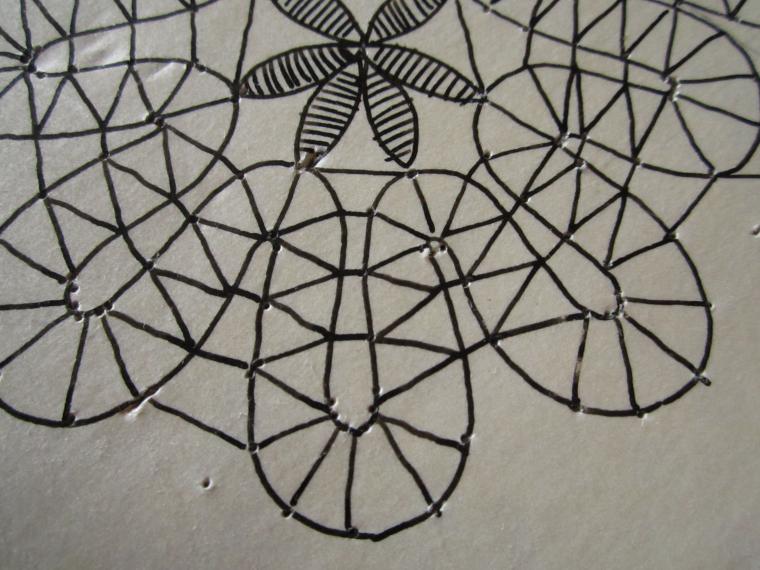
Compare now with a full weave pattern! It is quite another matter!
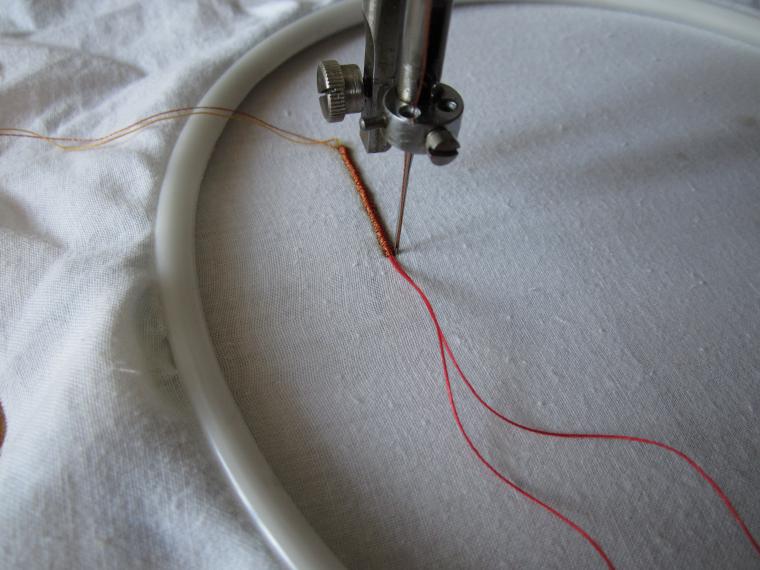
7. Zapyalivaem fabric with printed pattern or a seasoned stabilizer in the hoop.
On the table lay a large outer ring, on top of it – the fabric, and then put it on top of the fabric smaller inner ring, press it while pulling the fabric, carefully observing the squareness of equity and weft threads at an angle. The tension should be very tight as a drum . If the fabric is badly tense, then it will move down-up, together with a needle and suture not work. The needle thread is not grab the bottom of the shuttle will be skipped stitches.
Similarly, there is skipped stitches if the motion occurs hoop lifting of them from the surface of the needle plate.
Attention! Remember at the beginning of the work to lower the presser foot lever! This is very important! Right on the wrong side of the thread starts to zigzag, and you do not see, do not notice is a violation of stitches, yarn entanglement will not be obvious.
And never turn the wheel in the opposite direction! There will be an open thread!
You may need to weight wheel pedal to give it the necessary momentum for the passage of “dead spots.” It took me! The wheel, coming to the “dead point”, not having the right inertia for its passage, stops and starts moving back in the opposite direction, immediately breaking off the thread!

So, before you start checking:
– Correct tension of the upper and lower thread (a needle and shuttle);
– Tension of the fabric in the hoop;
– The position of the presser foot lever;
– To put the stitch length to 0.
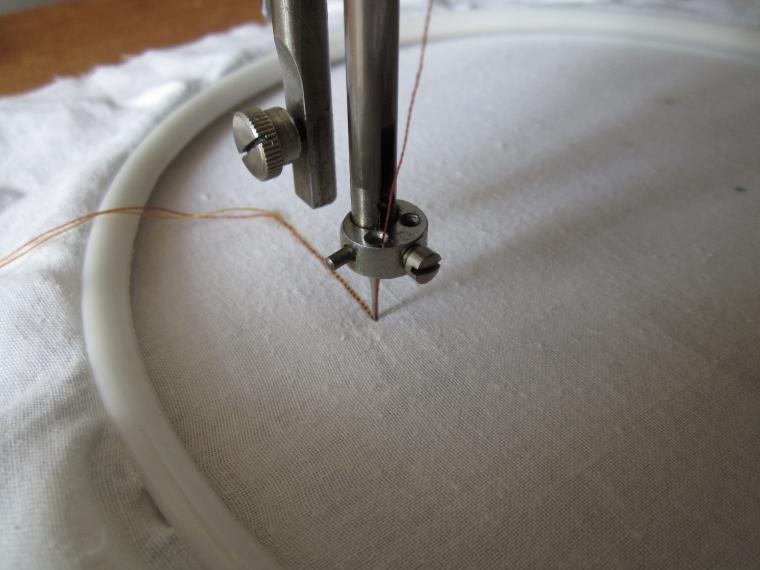
Bring the needle under the fabric in the embroidery frame, lower the presser foot lever, turning the handwheel with your right hand on yourself, do the puncture needle and the tissue, taking the lower thread a needle, pull it up.

Secure the beginning of stitching a few strokes of the needle without moving the fabric, that is, making punctures in almost the same spot.Threads trim small scissors.
Try to scribble in a straight line, making parallel lines, spirals, ensuring uniform, beautiful stitch, without departing from the line drawing figure.
Work patiently until then, until you gain the appropriate skills. We need coordinated work of the hands and feet, and it just does not work!
Quickly working his feet and slowly moving the hoop – get small, frequent stitch. Quickly moving the hoop slowly and legs – get big, long stitches.
Remember that the beauty of your embroidery depends on your accuracy, the accuracy of the figure, the accuracy of your stitches used sutures, stitches, beauty yarn used.
Always simple embroidery pattern is much more interesting, appealing looks in the material!
And how embroidery can enrich, refine and improve your product and even to correct figure flaws, we all know.
Basic embroidery machine stitches
With the machine can perform many embroidery stitches, but it is much faster and easier than by hand.
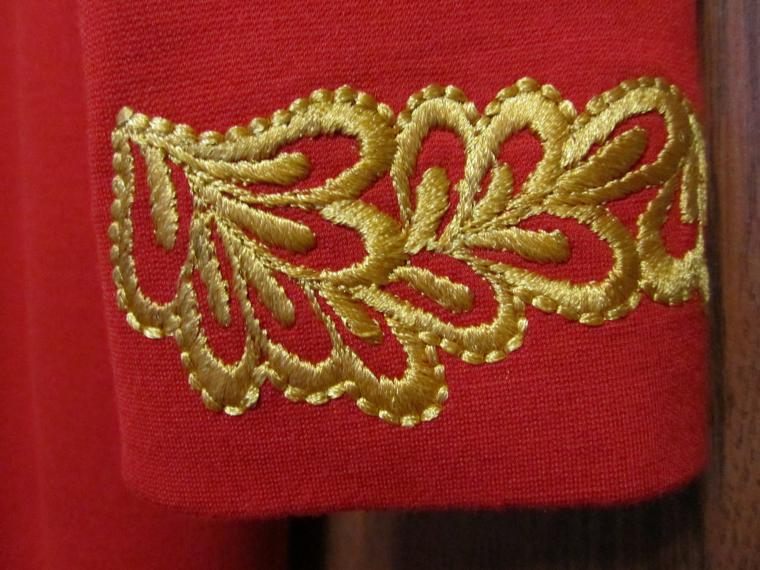
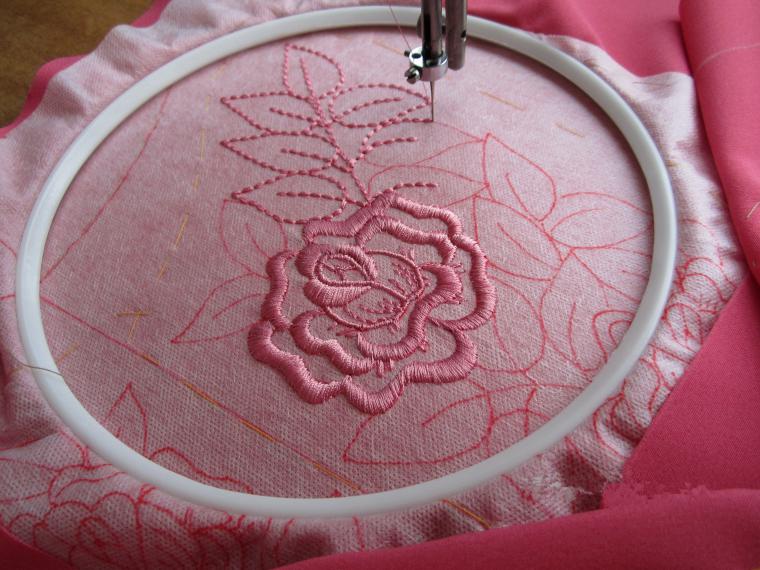
The main seams are stitch and satin stitch roll (cordon).
The lines – this is the easiest type of embroidery: a simple line, vilyushka, loops, spiral mound.
Simple line – this is the most frequently used stitch in embroidery. Maybe self-embroidery.
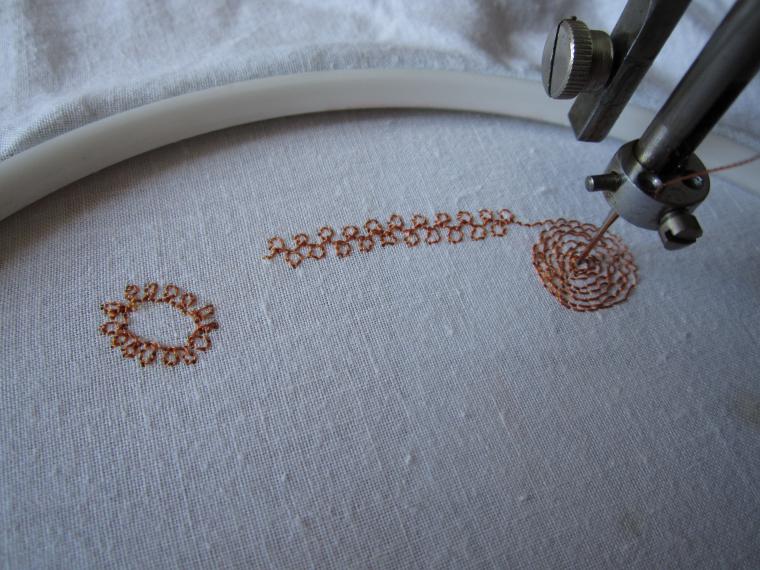
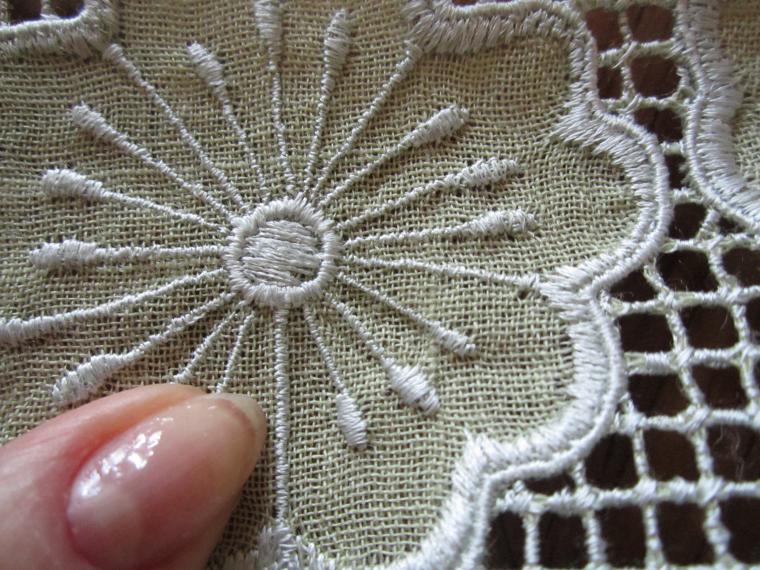
This small, identical, straight stitch length only 1-1.5 mm. Simple stitch embroidery pattern obstrachivayut line, fill the space inside any embroidery fragments make flooring to increase the embroidery stitch, creating shadows with tonal embroidery, portraits.
Stitches “vilyushka”, “eight”, “spiral”, “mound” – also carried out small, identical stitches, eyelets.
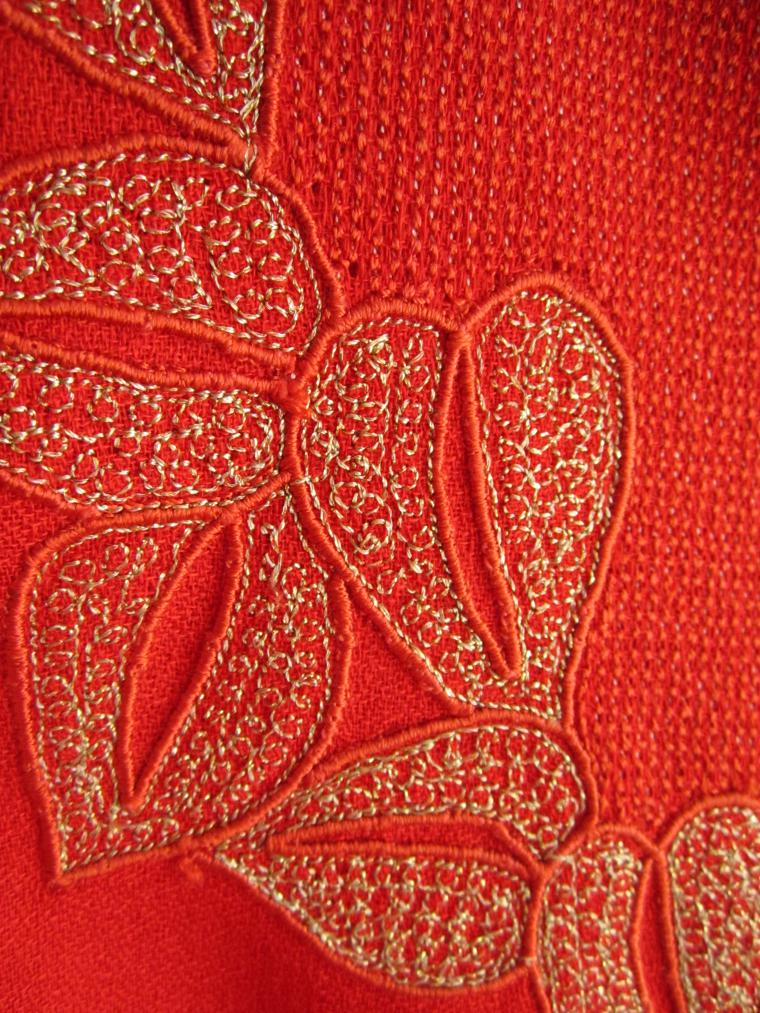
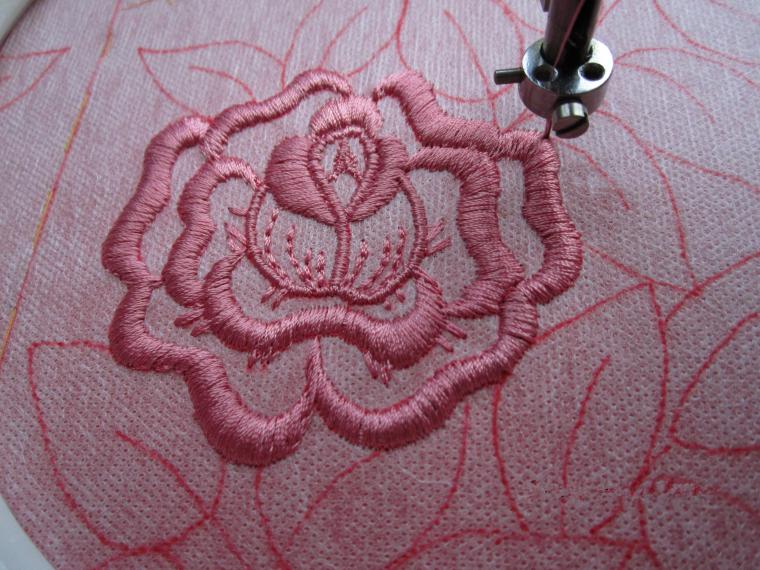
Satin cushion “cordon” is also often used in embroidery. First you need to make a simple line along the contour of the figure, then take the first uncured x / w thread №10-40 in one or double folding and securing a number of blows beginning thread cover its part of the cross, the same stitch, needle punctures trying to do as much as possible close to the cushioning filaments . Overlapping spacer yarn should be so dense that it totally was not visible. And yet it is desirable to pick up the thread in the uncured color embroidery.
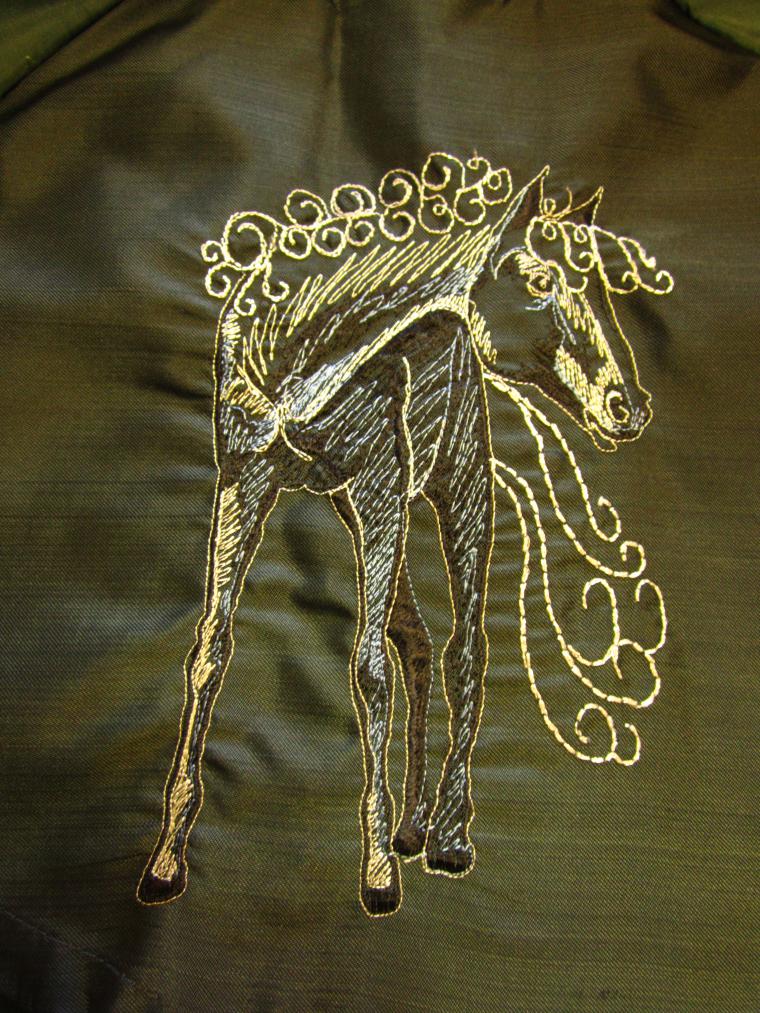
Properly executed satin stitch roll must be flat, convex, narrow and almost no wider than the spacer yarn (or 2 threads).
Spacer thread gives a nice rounded shape roller , while embroidery and scalloped “Richelieu” gives a solid, strong, beautiful land. By the way, for the strength and breed can make a sling spacer yarn and further processing it with a roller.
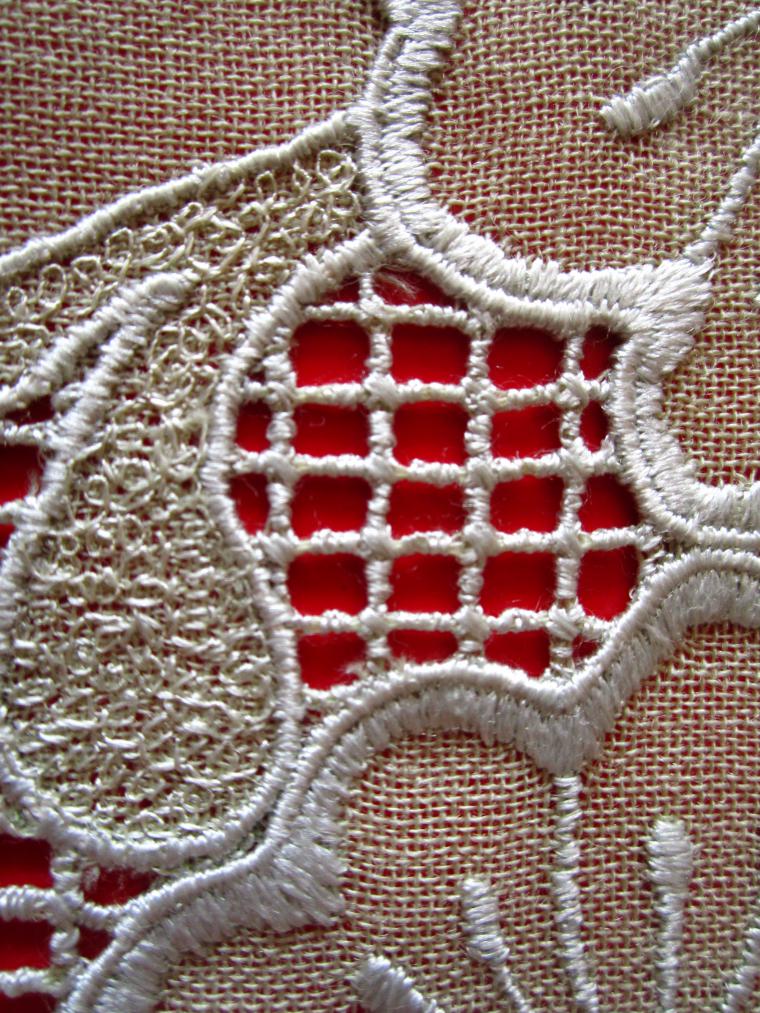
” Richelieu” – this delicate embroidery, which is the pattern of the fabric, satin steering roller, which cut kokrug background. “Richelieu” is not a breed, and Brides.
Brides – is an air line in the embroidery “Richelieu”.
“Richelieu” can be done against the backdrop of strochevoy grid.

To perform strochevoy grid needed to plain weave fabric. If the threads of the fabric in warp and weft of different thicknesses, and the calculation vyderga threads to do different to cells (holes) were square grid. After vyderga reticle of the remaining strands entwine embroidery thread, moving diagonally across the square, starting from the corner.

Glad, poluglad, slotted smooth surface – it’s also very often used in embroidery. Perform expanse of neat, closely spaced stitches arranged parallel to each other or at a slight incline.
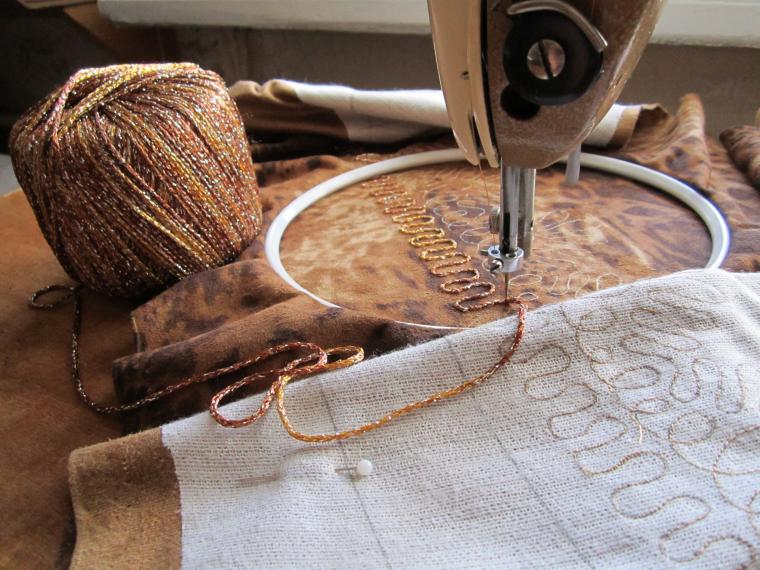
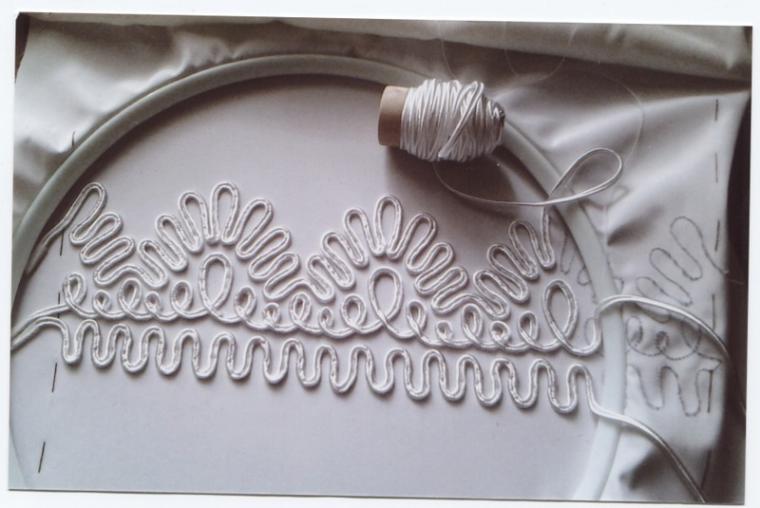
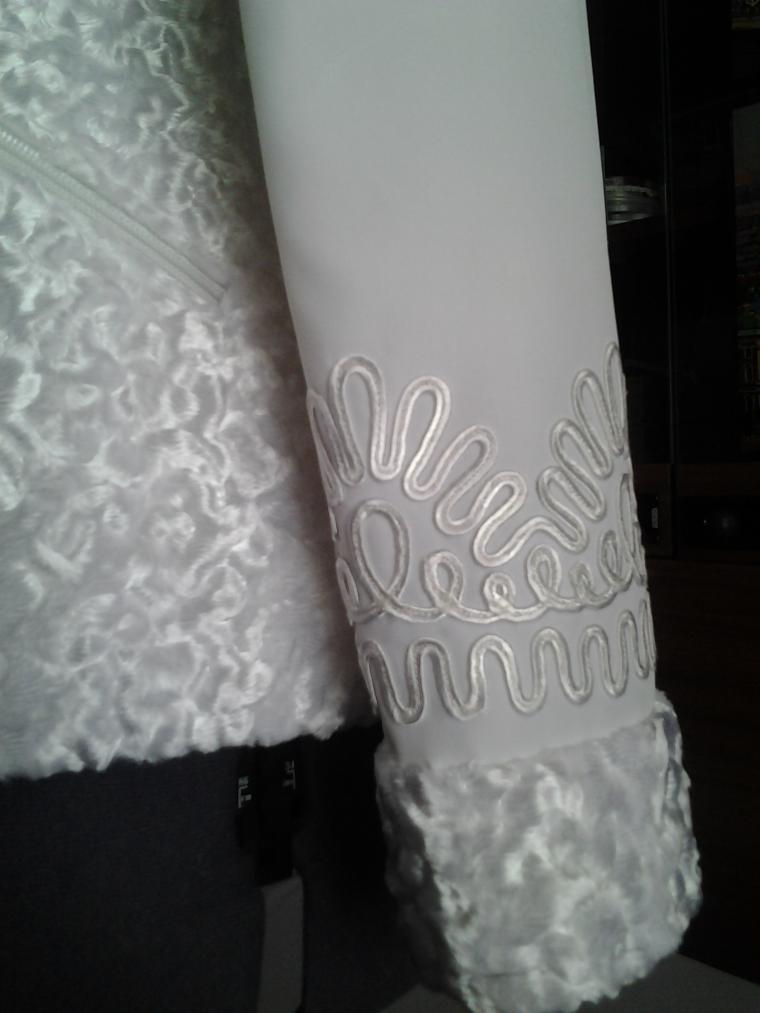
There is a type of embroidery that I really like it – embroidery couched stitch technique. It can be a nice thick thread or twisted shnurochek, soutache lay on drawing.

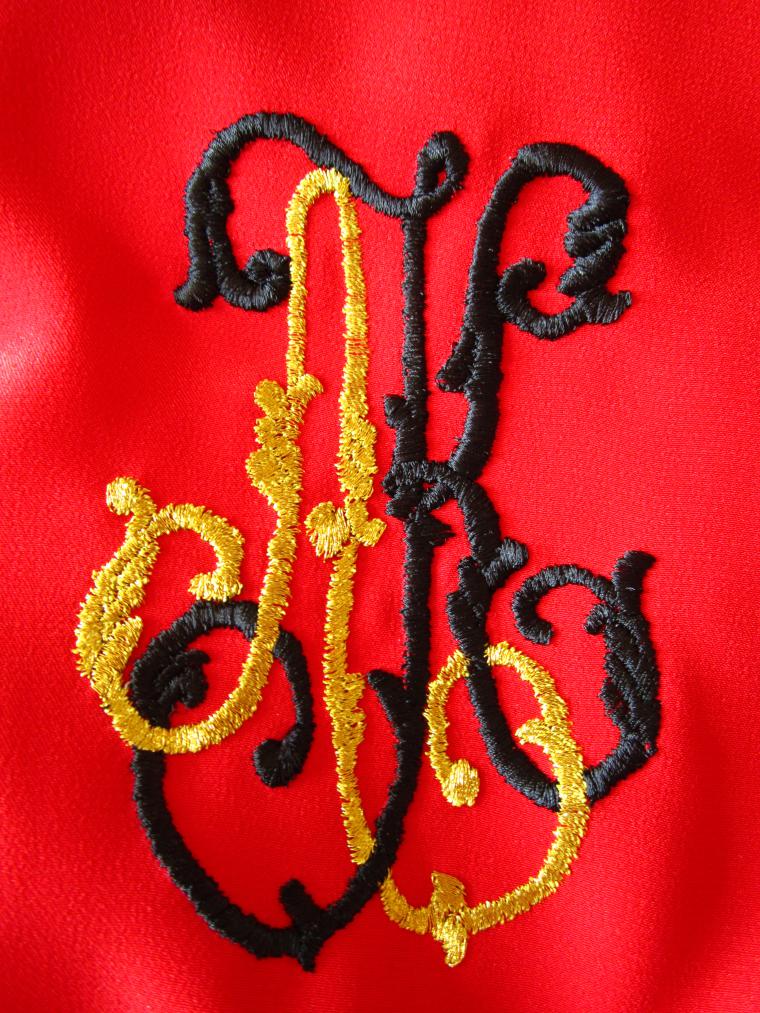
With Soutache. Previously posted small loops Soutache, fixing their hand-stitched, and then made a line on the machine.
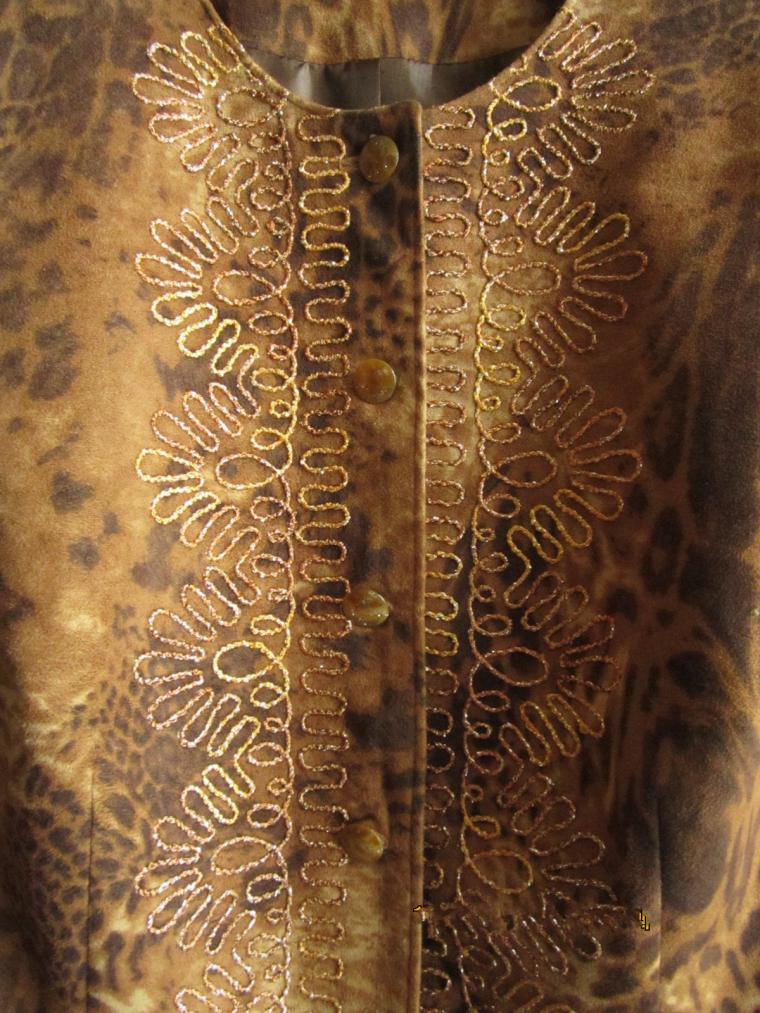
Many types of embroidery (stitching, smooth surface, Openwork, “Richelieu”, lace, appliqué, satin stitch art) in their development and implementation of high-quality extremely expand your artistic, creative possibilities.
I really wish everyone who sews and loves this business, learn how to embroider! The more the greater will be your area of interest, skills, the steeper you’ll be a master! I wish you this!

With love and respect, Thank you.
Source: livemaster