


Today is the story of how they took me to the “weak.” Background to this. My dear husband, watching from the sidelines as I have done for his future workshop organizers, somehow casually said: “A chest of drawers to make the most – weak?”.
And that’s not weak! The idea is good – it is necessary to embody.
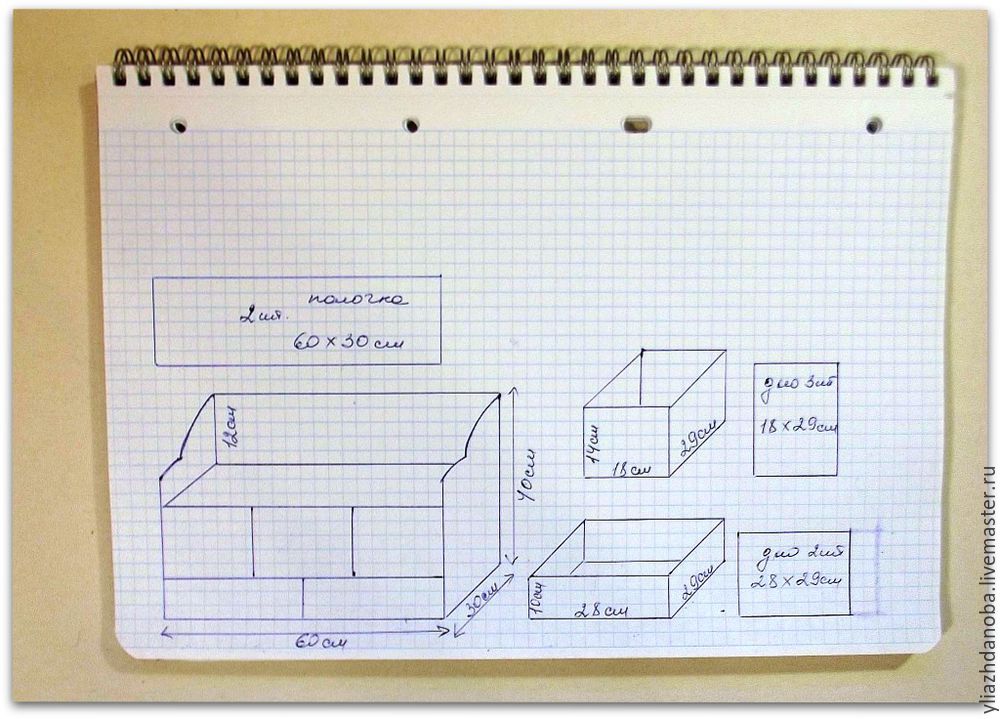
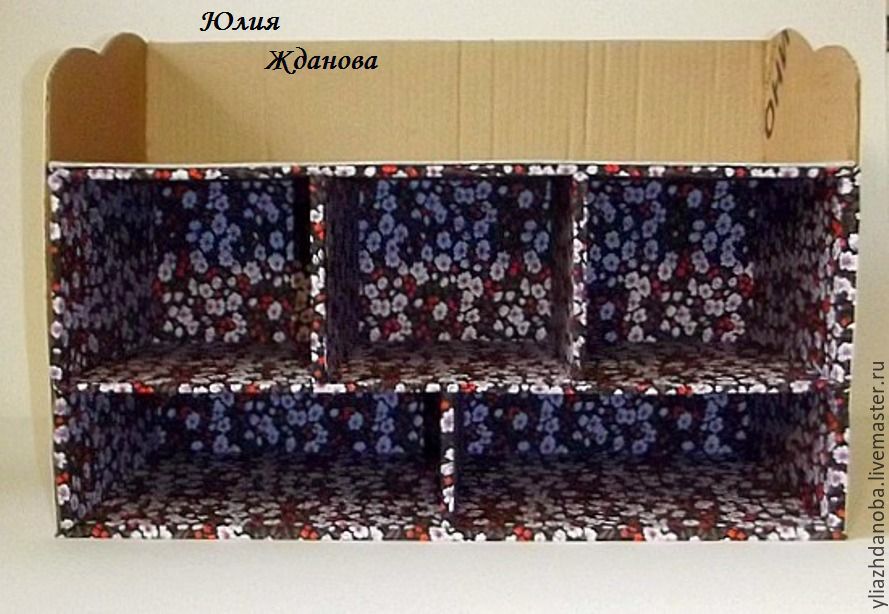
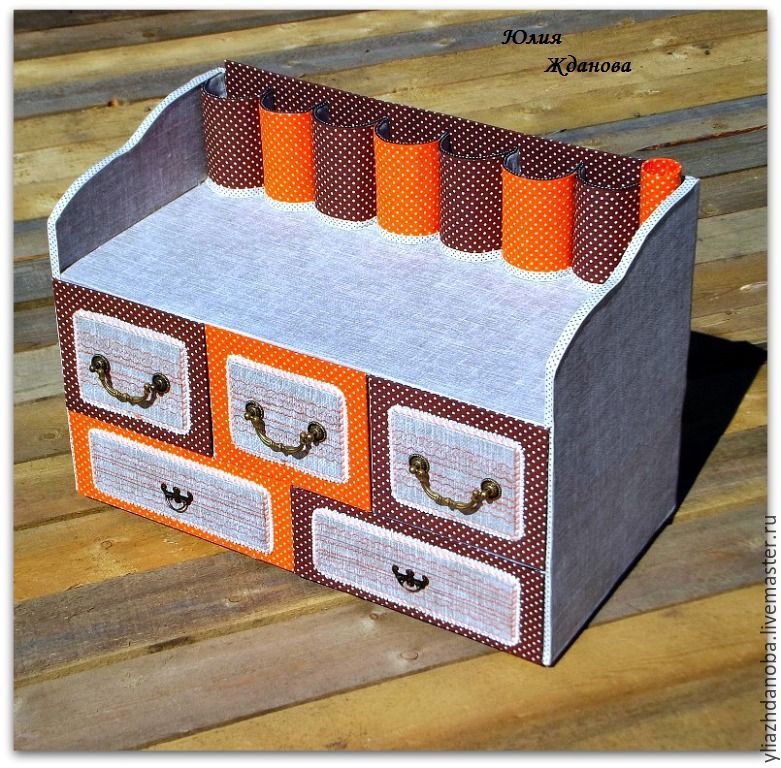
Making it big or small does not want to, so the size is determined to pretty thoroughly, as a result of it I turned 60 cm wide, 30 cm deep, 40 cm high.

Required material for the manufacture of chest:
- Bookbinding, beer and corrugated cardboard
- Kraft paper
- Calico, flax
- Clay time carpenter, furniture PVA glue Moment Crystal
- Decorative handles 5 pieces
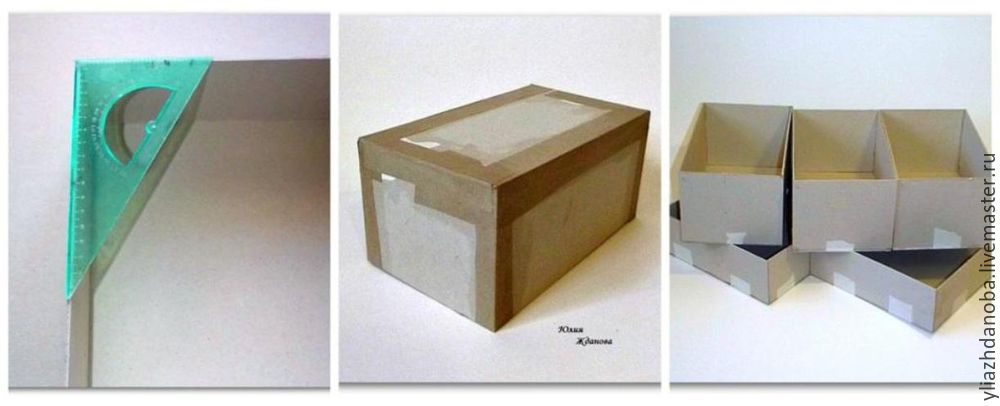
- A pair of scissors, a knife construction, square, steel ruler

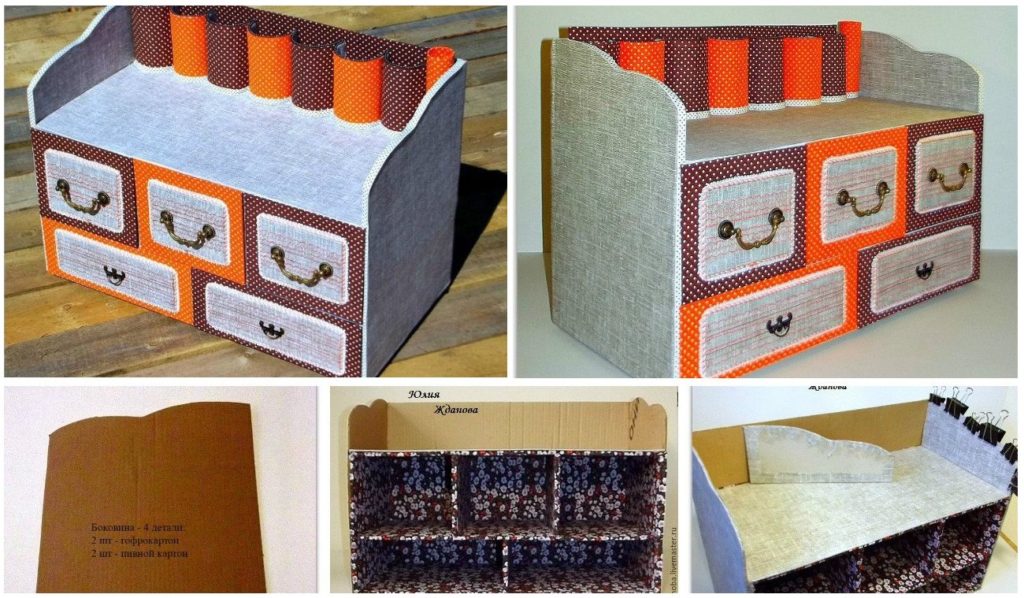
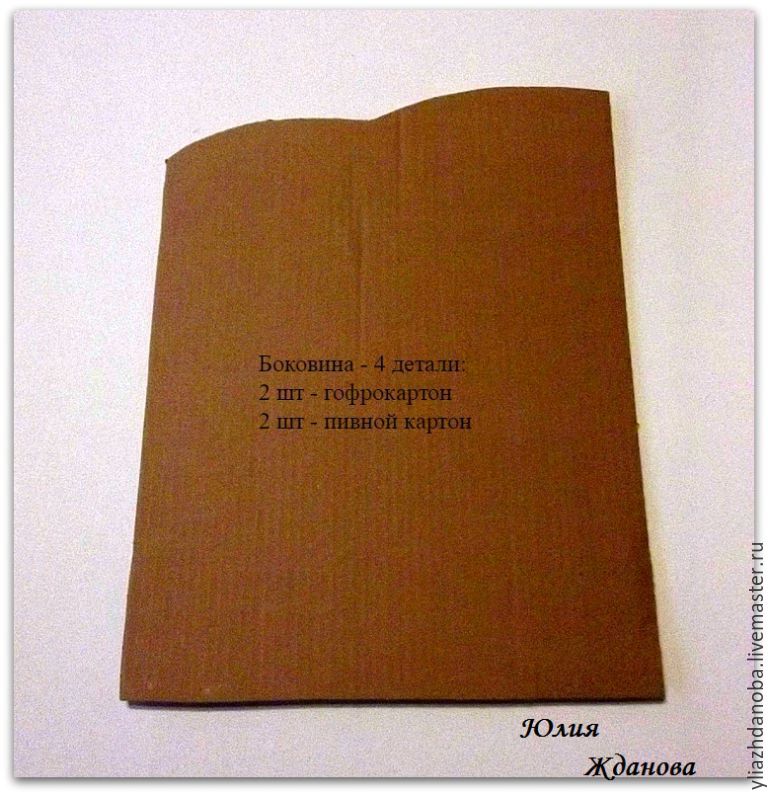
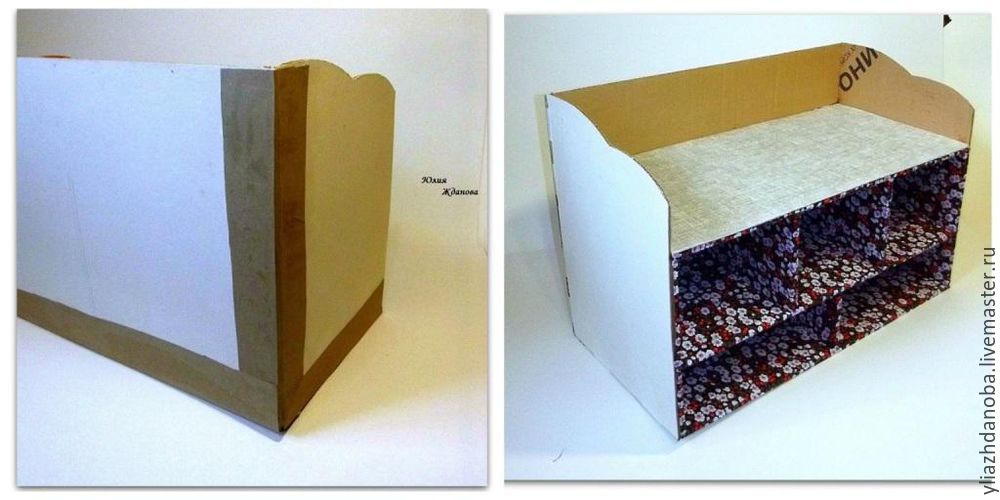
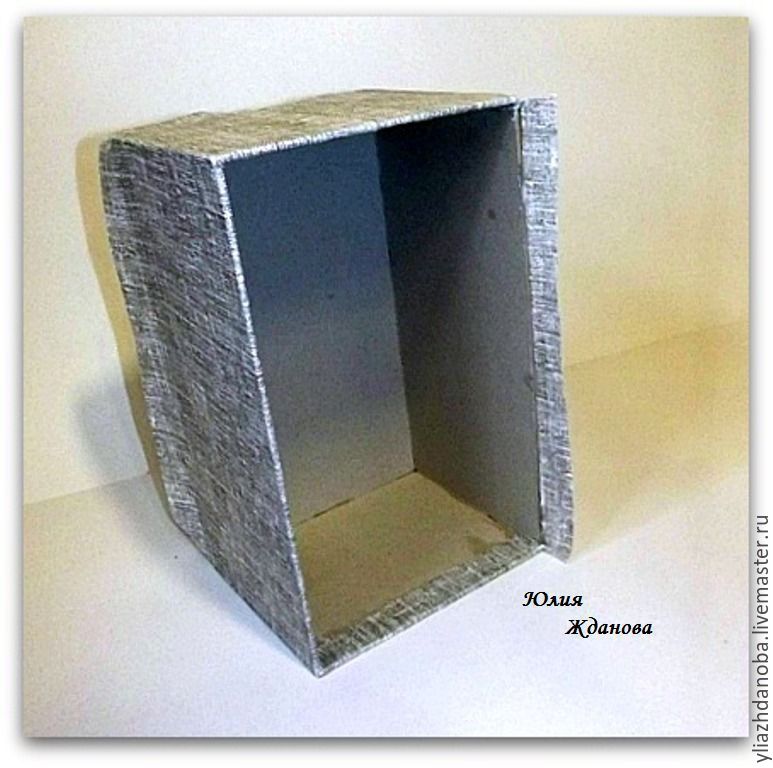
Sidewalls cut out and glued them together Because gofro-beer and cardboard.

Then, under a shelf on which to stand the boxes, I cut out of thick corrugated double extra sidewall (if you do not have a double bellows, then glue the two sheets of corrugated among themselves) in height, they are the future of the boxes, between the sidewalls do gap of 0.7 see – is the thickness of the shelves when they dry out, paste them calico.
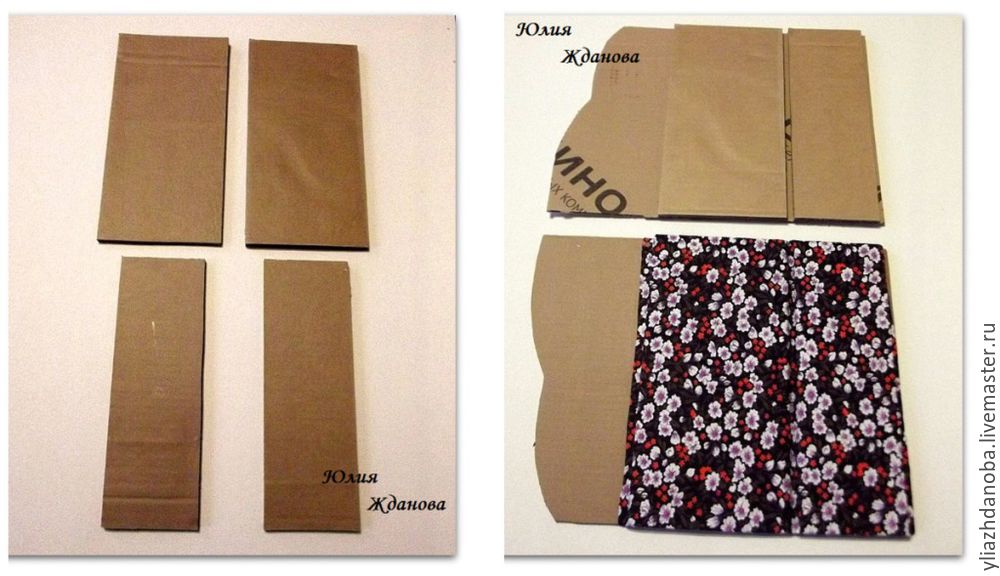

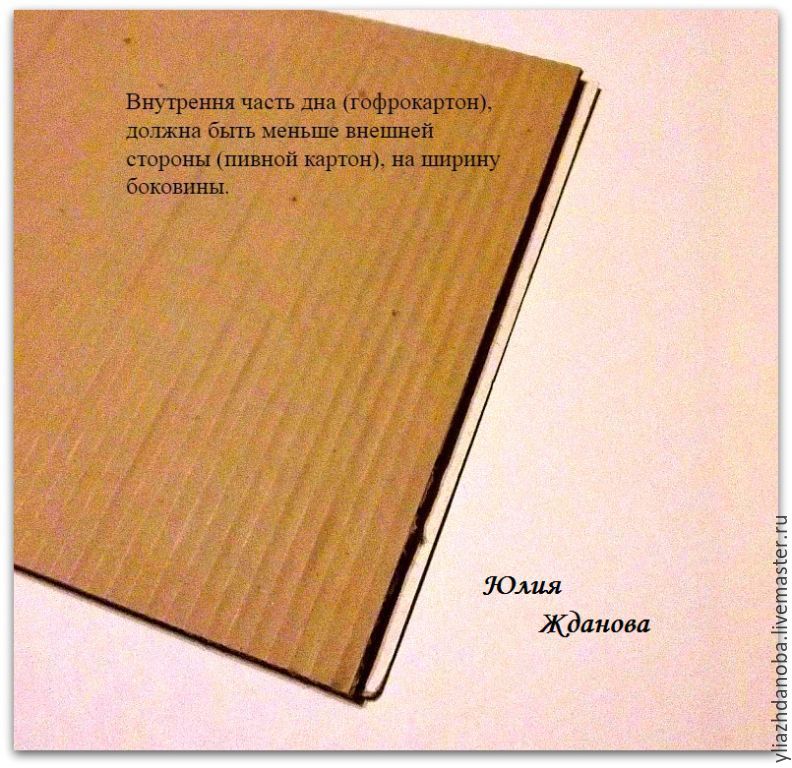
The thickness of the side wall of the chest turned I 1, see, here this centimeter inside of the bottom will be less, and the outer side of cardboard beer more, then the side walls arise, both in the groove and the outer angle is smooth and beautiful.

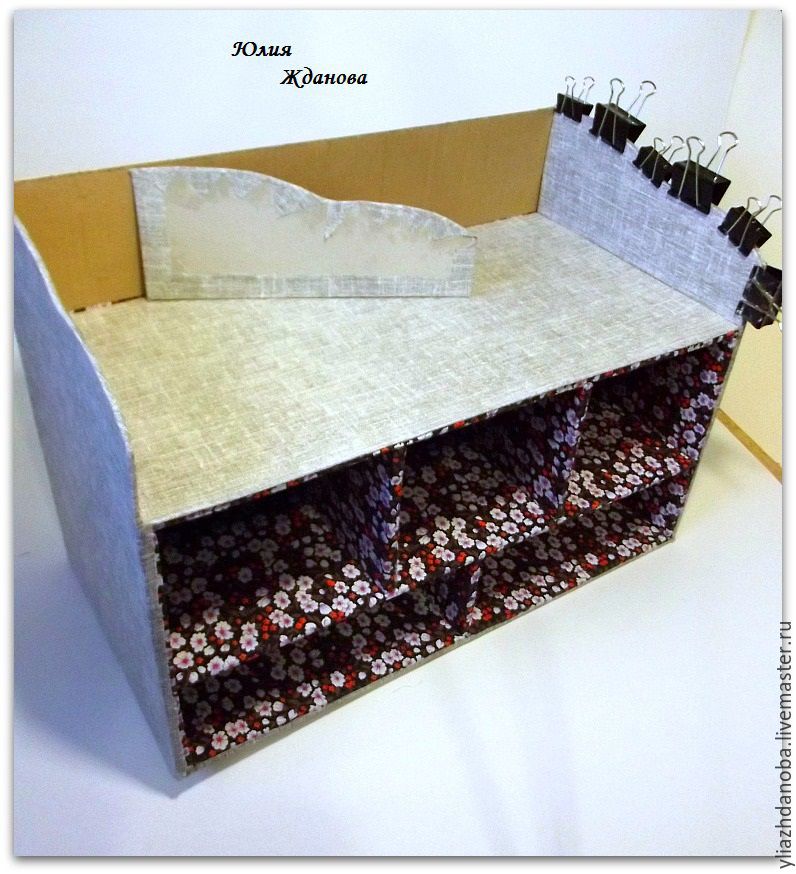
On the back wall pasted an additional panel of double corrugations, it will draw the top shelf, the panel is fitted a calico.
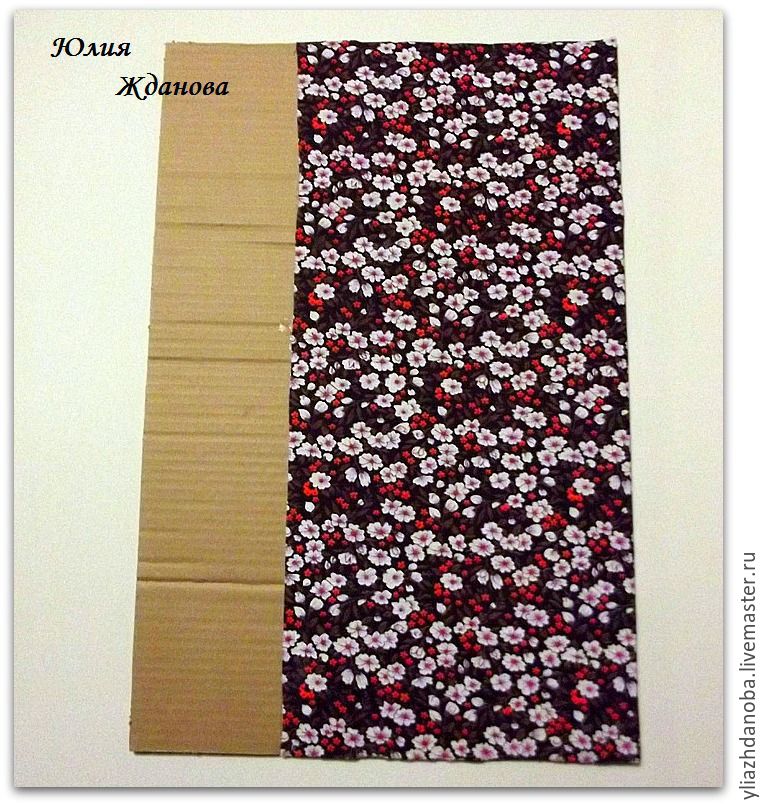

Middle shelf of double corrugations, covered with calico, but the top shelf has turned me into two parts – the lower side (calico) made of corrugated cardboard, and the upper side (county) of binding cardboard. I stuck to the fabric glue PVA furniture, it is quite thick and therefore does not soak the cardboard, besides dries leaves no residue on the fabric.
The slots and the end of the shelves smeared glue Moment Crystal base and gathered chest, here and form emerges. Honestly – time to dry out a lot of details, especially the need to ensure that the details are not led, so they dry under pressure. The main helpers in my dry parts were building a hairdryer and a conventional iron. I dried up details to iron an iron (no steam) and put everything under the press, all the details I then get smooth and the obvious-e-strong Yen.
Jumpers I made of several layers of cardboard – Binding cardboard, corrugated and then back Binding cardboard, fitted a calico and drying again 🙂
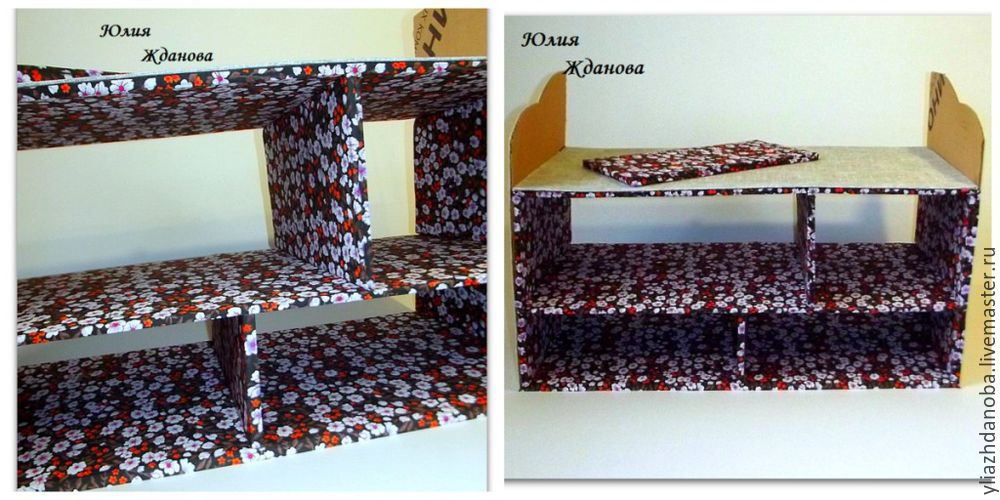

And here is the back wall – and if I had had doubts at the beginning of the production chest, now they are gone, and my husband has a sarcastic smiles, and looks with interest!

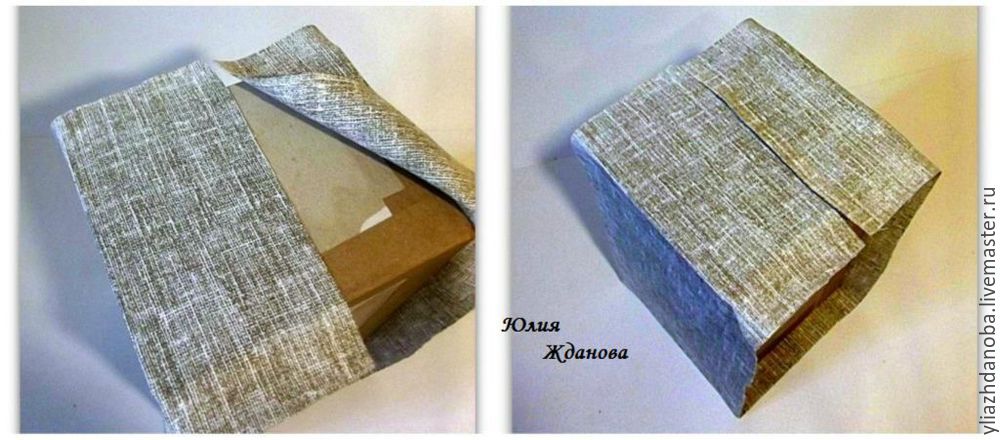
Now pull out a roll of kraft paper – which is an excellent paper, it really helps me in the construction of houses – and here is very, very useful, before she had to beg in the mail, and now it turns out you can buy at any hardware store. All angles on the dresser sizing kraft paper, flat area and at the same time securely fastened. The width of the side wall in my 30 cm, so the flax I cut width of 35 cm, was enough to bend to the rear wall, as well as 0.7 cm on the front side.
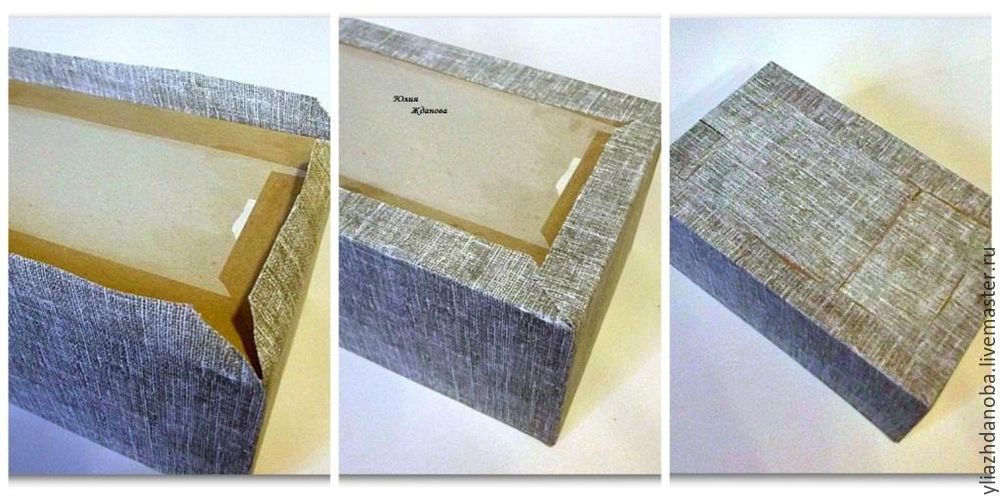
Sizing flax whole stripe – 40 cm + 60 cm + 40 cm, slightly pulling the sides, land dryer, and then makes an incision, but not completely, leaving 0.5 cm Nedorezov strip and are bent inward.
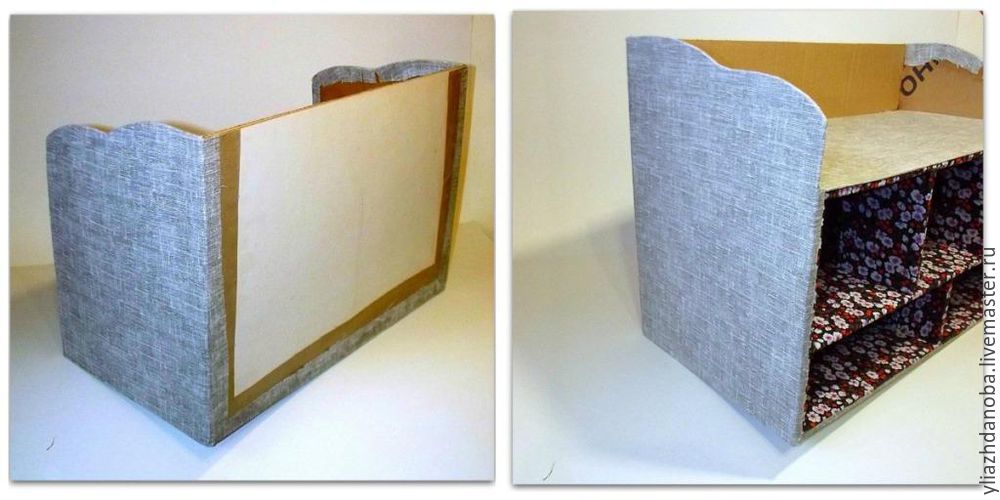
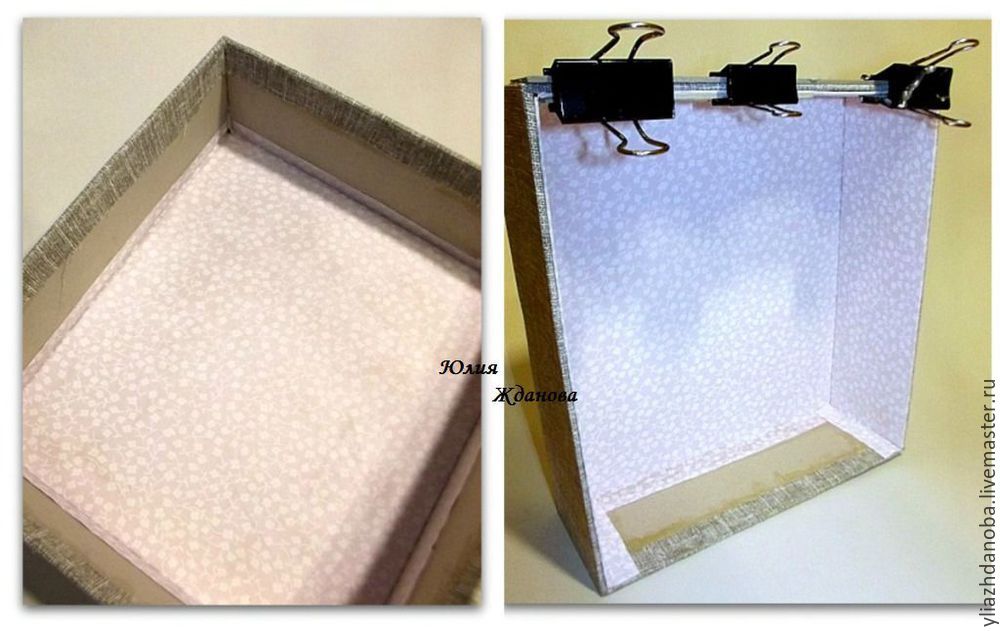
The inside of the sidewall I cut out of cardboard binding and it was stretched linen.

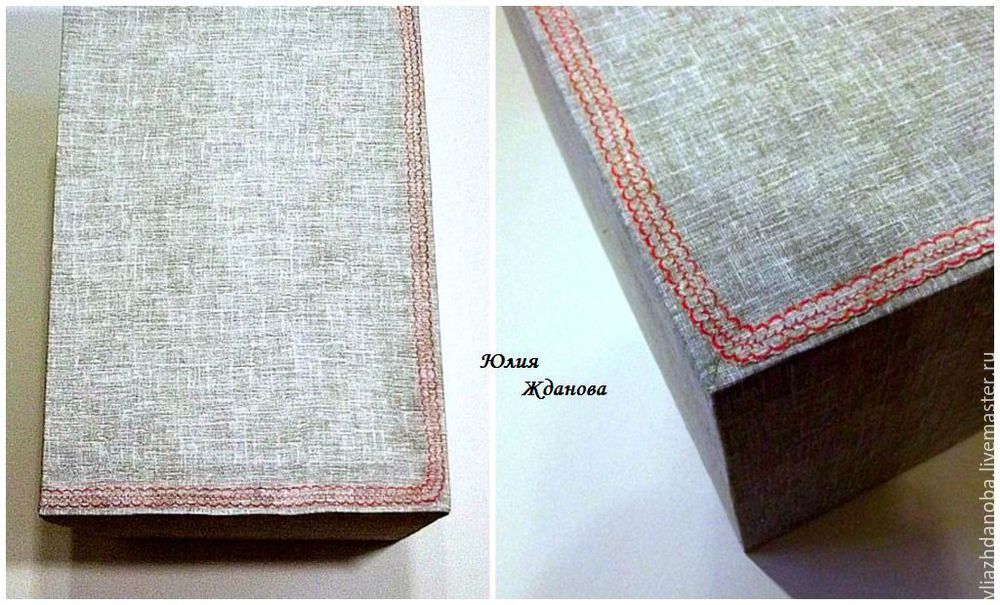
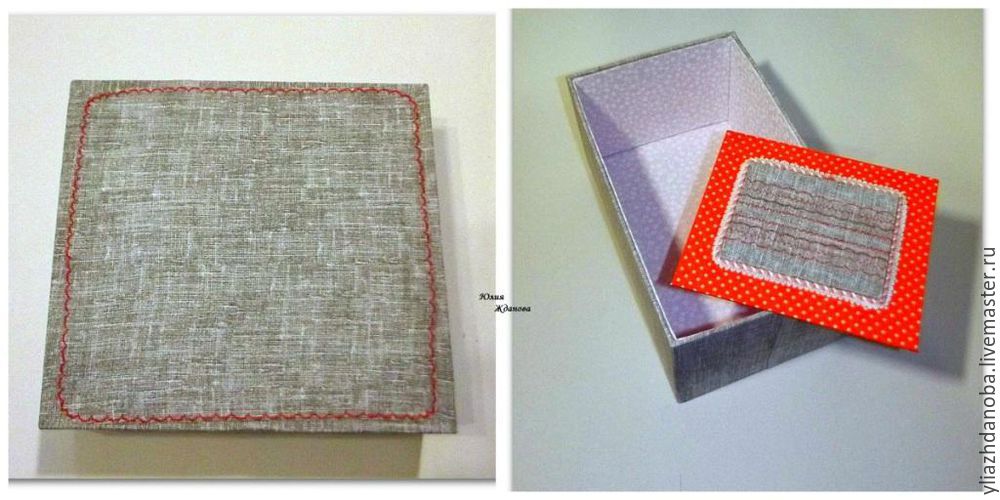
On the back wall, cut a piece of linen, tuck it did not, because getting unwanted thickness, so pull out the sewing machine and shoot on the edge of the rear part decorative stitch, it will prevent crumbling edges, and at the same time decorate the back wall.

Well, the base is almost ready, and I will proceed to assemble the boxes.
Glue them from binding cardboard – glue Moment Crystal, most importantly, to sustain the angle when prikleivaetya bottom off the drawer. After drying, all the corners of the sizing kraft paper and glue Moment Joiner.

Then I take a piece of linen cloth, cut out so that at one end has the edge, paste starting from the middle of the end portion of the box, exactly where I will be out front. The edge should come about 1 cm, overlapping edge strips.

A neat corner is not difficult to obtain, most importantly, do not cut it off from the edge, and leave about 0.5 cm from the corner and glue corner of the overlap, but watch out for, so that an overlap was not large – 0.5 cm is sufficient crop of flax I have not thrown away, they gave me very useful to align the bottom of the box.
When drying linen to become very strong and the box, respectively, too.

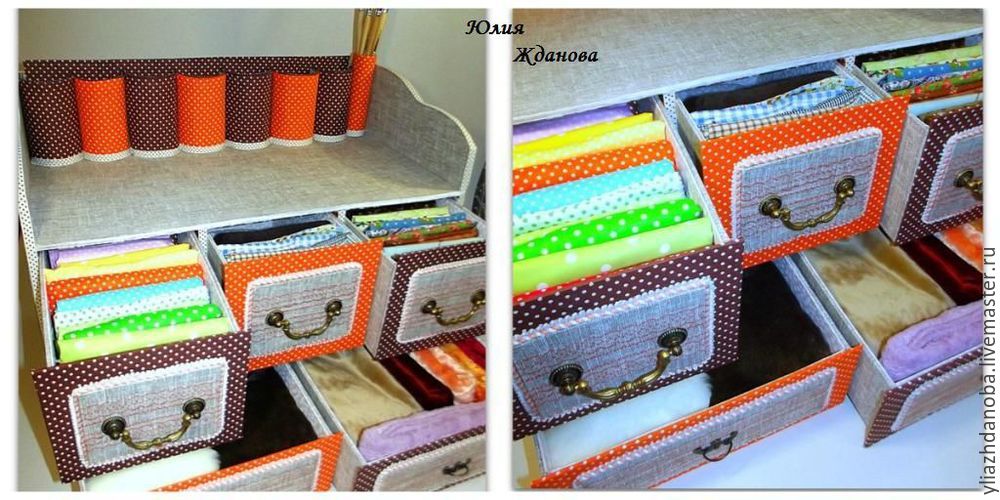
Now the beer from cardboard I cut and paste the internal parts of the bright calico, then pasted them in a drawer – first the bottom edge of the sheeting on the walls of the box infer and also sizing, extra bracing never hurts 🙂 then the side wall.

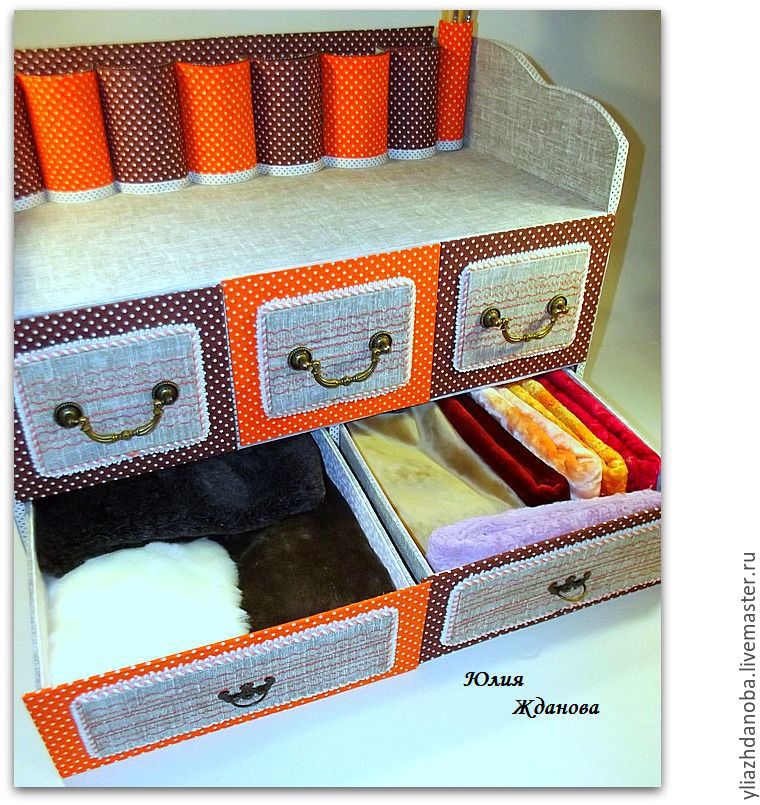
The bottom of the boxes I have to decorate in the same way as the back wall of the dresser – turned out smoothly and beautifully. The front panel is in the boxes will serve about 0.5 cm beyond the edge of the box, I cut them from binding cardboard and fitted a calico polka dot, two tones – red and brown. Decorates the front panel of a small insert of flax, I calculated how long needed a strip on one such box, multiply it by three, added centimeters to bend and cut a single strip of linen, then defer drawing on the machine, and then to cut the strip into three parts drawing all received the same. So I did the same on the lower drawers.
It remains only to paste faceplates on the boxes and screw the knob.

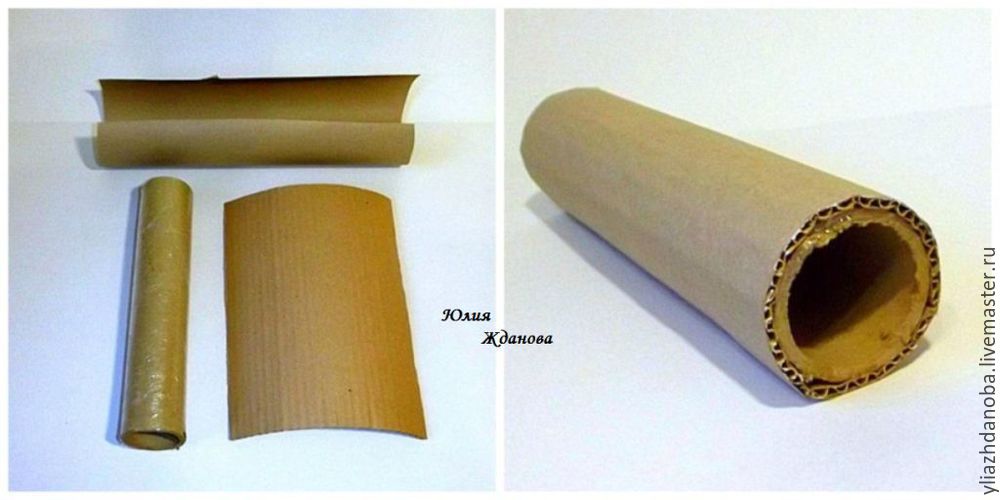
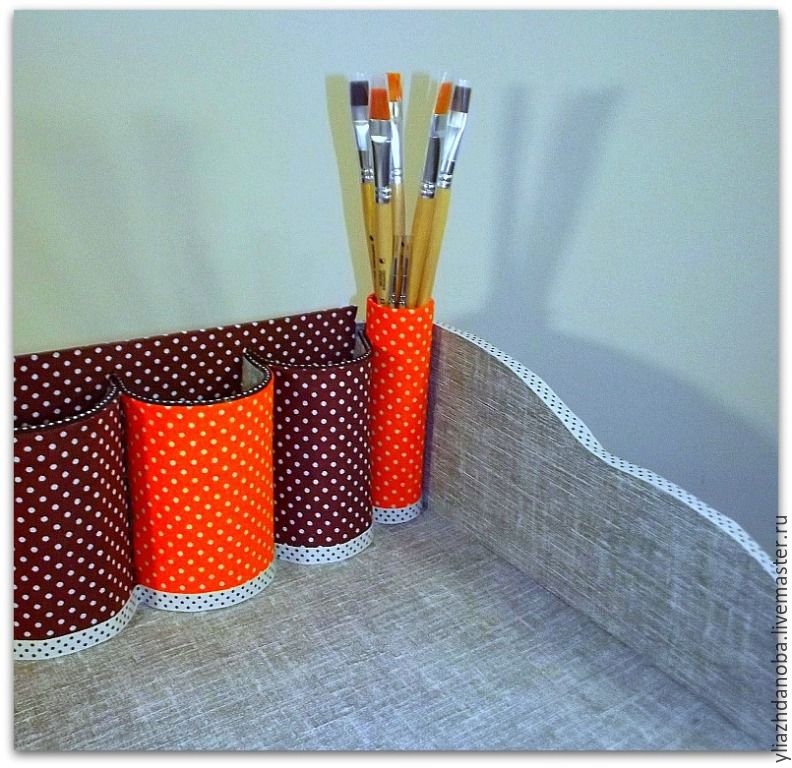
But I also have not yet made a small pocket under the instrument, first thought simply glue the rectangle and in it the cells, but not too interesting turns, and then my eye caught a paper tube, I did an example, look good, but it is only enough to two pockets, and they need me 7-8 pieces, that’s only because of what they do, turn the kraft paper is quite long and dry, again, hard, and then see how the husband gathered up all my scraps of cardboard and tries to shove the stove to clean up the mess and burn! Nightmare! Well, how can you – it’s a building material, my hamster fainted After a brief fight, winning, twist from scraps of corrugated tube!.
How I did it:
- – Cut a strip of cardboard with a longitudinal section;
- – then the strip of kraft paper is twice longer than the strip of corrugated cardboard;
- – are coated with adhesive kraft paper;
- – take the paper tube is wound on her corrugated;
– tightly pressed corrugation to the tube rolling on the smeared adhesive kraft paper, pick up a hot iron and then start to iron for this length of the tube, the corrugation becomes smooth, without corners, kraft paper is securely bonded, and I get a smart, smooth and I desired a strong tube diameter.
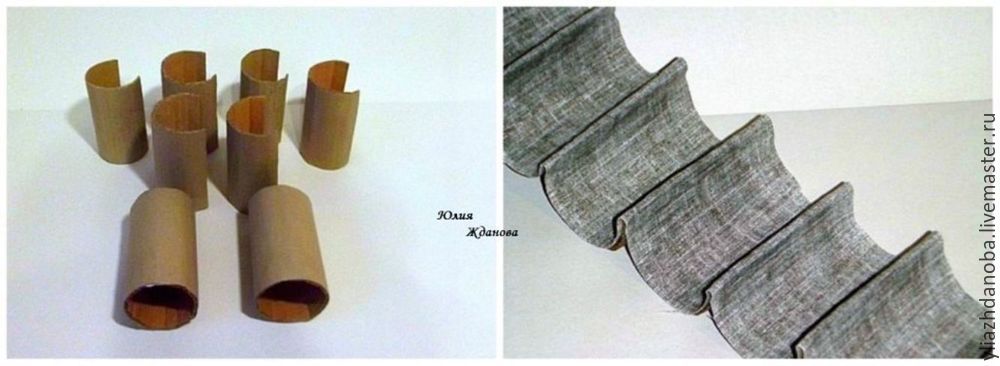
7 do such blanks, then trimmed to 4 cm and a polustolbik receive here. Adherend workpiece between a crystal and an adhesive torque cushioning inner piece flax. Then I got carried away and forgot to take a picture as is pasted strips of peas on the front side, but, in principle, it’s obvious that the edges of the strips come into the fold and they are not visible on the front side. And for the brushes I made a special glass higher.

All end of the rep I plastered my favorite band in the peas.
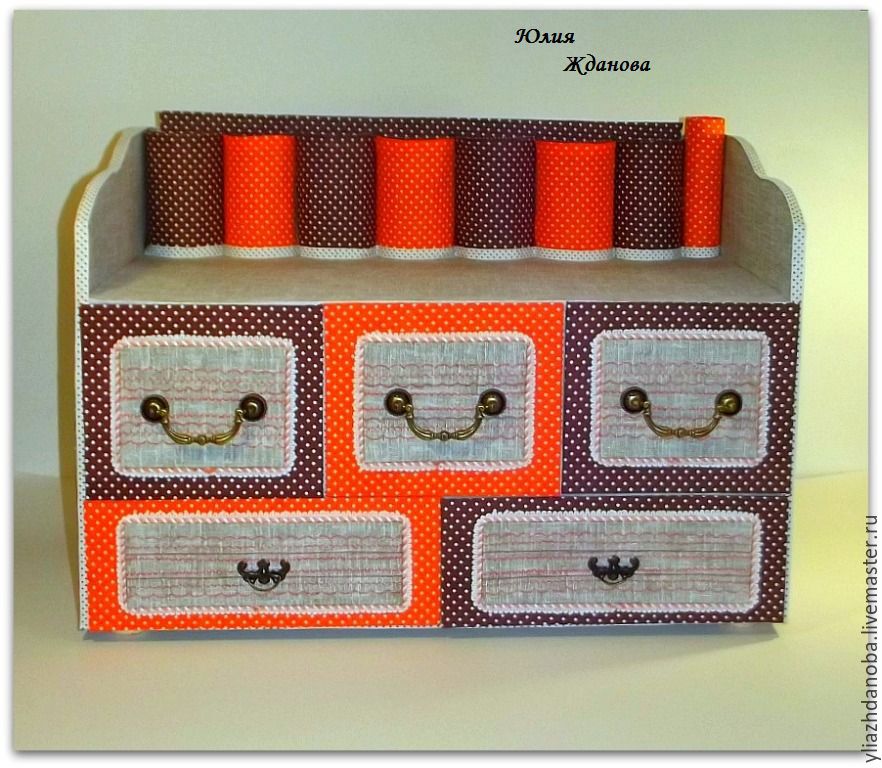

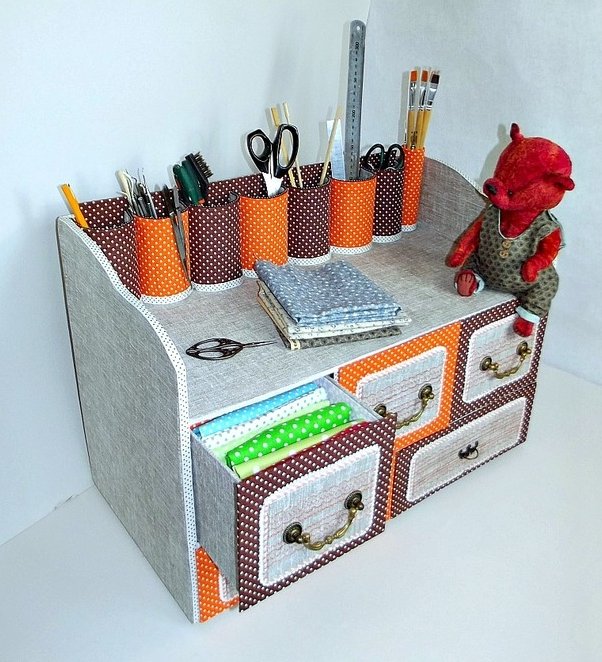
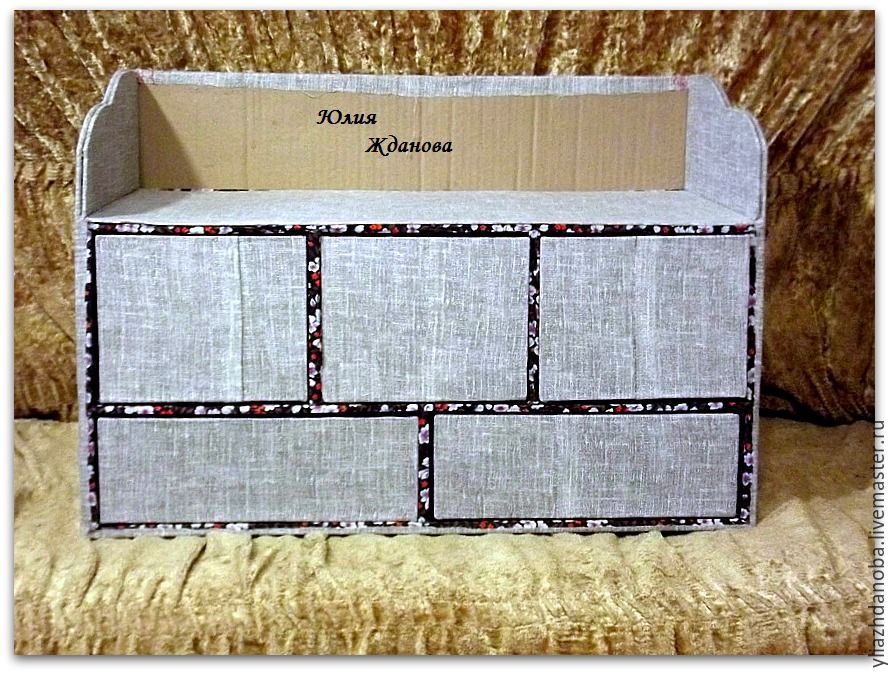
Well, that’s it – my chest is ready! 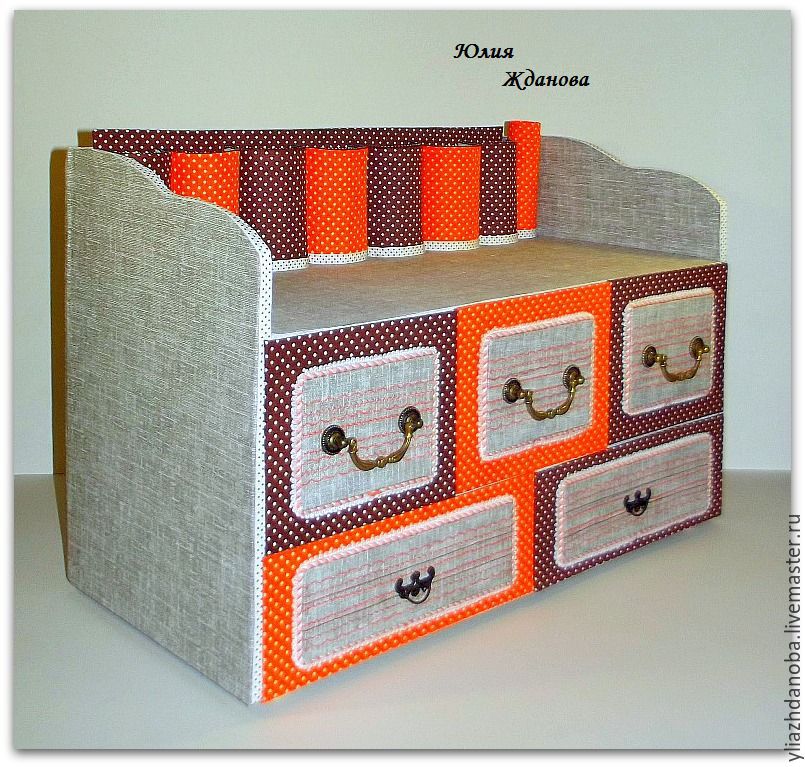

Even high brush finally found my place 🙂
Chest turned out quite roomy, even the fur was a place.

Thank you that you had the patience to watch until the end!
I would be very glad to hear your opinion about this dresser!