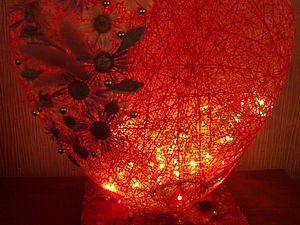
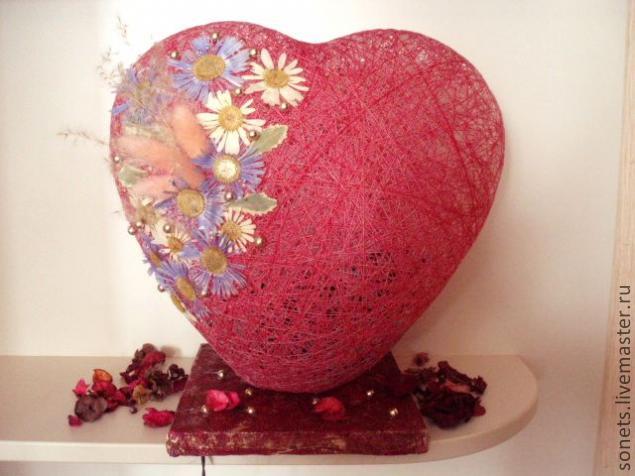
Lamp-night lamp “Loving Heart” (published in w. Master (Belarus))
In anticipation of the holidays, we overcome suffering – “What to give to your loved ones?” I want something unusual, surprising, no matter what do not like. I would like to express our overwhelming feelings, and the words hard to find? Let’s give your favorite marvelous light “Heart”. With this gift, you will be able to say everything without words.
The night can give mothers on Women’s Day, girlfriend or daughter for a birthday, a favorite on Valentine’s Day heart “beats” from the senses and that’s it. Light a lamp in a romantic evening only strengthen your feelings.
And you can just for yourself, your favorite, to create a miracle. The interior of the bedroom, it certainly attracted attention.
everything you need to prepare in advance.
- 1 -2 thread spool (pink or other colors), the color of a lamp depends on your decision.
- 2 PVA glue, not less than 100 ml (not the building!) Adhesive point or hot glue (glue gun)
- 3 thick needle, long
- 4 ball in the shape of a heart (you can make a light and around for yourself). For the master class, we took a round ball.
- 5 square-shaped plate (20 ’20) of a thickness not less than 1.5 cm. You can replace the wooden photo frame with wide planks or solid cardboard box.
- 6 napkin color (can be replaced with cloth or acrylic paint). The stand can be issued and in its sole discretion)
- 7 -tailender a roll of toilet paper.
- 8 dried plants and artificial flowers, beads, feathers, in short, something for decorating our hearts.
- 9 drill
- 10 blinking Christmas tree garland.
- 11 scissors
Getting to the manufacture of
1 First, make shade for our lamp. Inflate balloon heart to medium size. The size of the inflated balloon and will be the size of our lampshade.
2 bottles of glue PVA bottom pierced with a needle with two vdet in her thread.
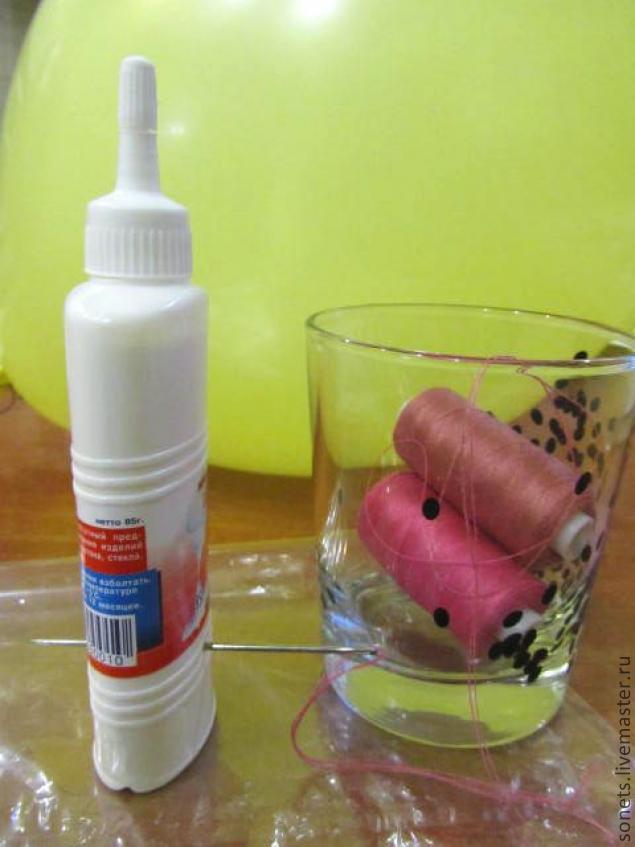
Figure 1) extends a needle through the bank, took out the other side, take out the needle thread. Pierce the bottom necessarily banks unnecessarily. the thread must always be wetted with glue, and the amount of adhesive in the work decreases. For the convenience of working with a thread spool, and a jar of glue put in jars.
3 end of the thread tying the tail of the ball and start winding a ball
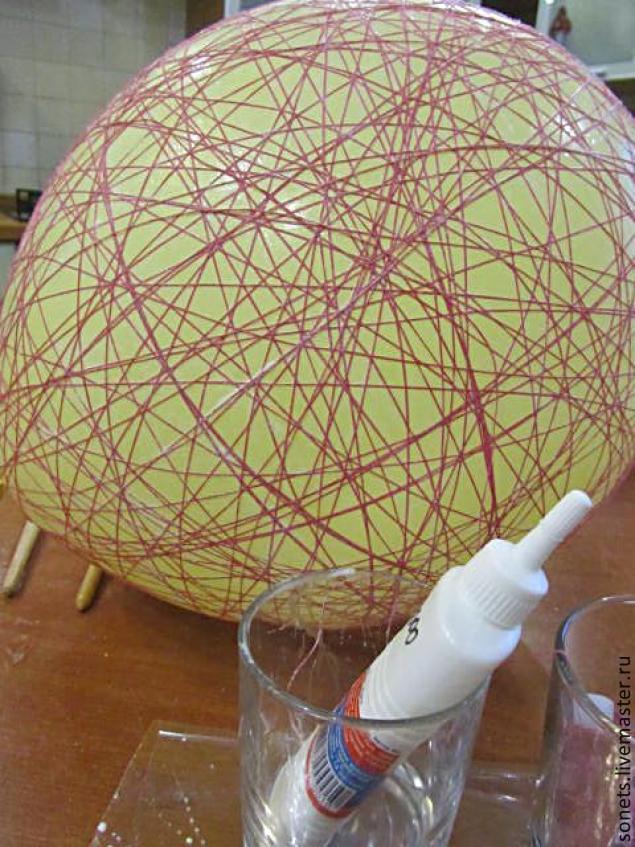 Fig. 2). The thread must always be wetted with adhesive. Initially, it will be inconvenient and thread all the time to slip the ball, but we’re stubborn, hard-working, we will succeed!(Figure 3) tauten thread diagonally lengthwise, crosswise. After 10 min, the winding becomes easier. (Fig. 4)
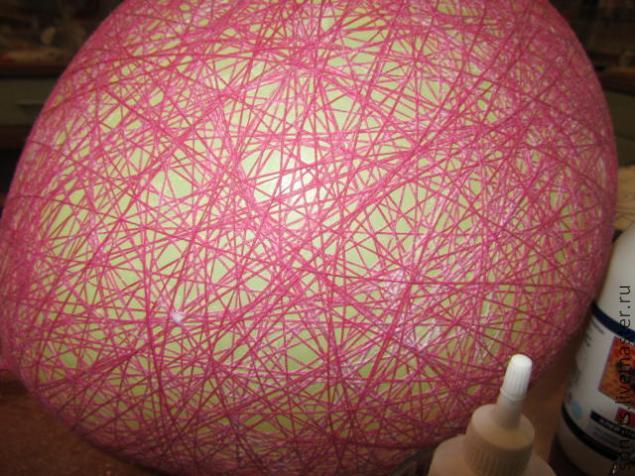
First, we get the hand and understand the principle, secondly, the thread stops the slide, unnecessarily. It will cling to the wound.
Roundball winding easier than the “heart”. The “heart” do not forget to wrap the “ears”. Look where we are sending to the emptiness and thread. Drum thread pool is not empty. If the glue is ended earlier thread, just it from other banks. That wound ball (Fig. 5) Leave it to dry. When the thread is almost dry, punctures the ball. Threads will be tough and will keep the shape.
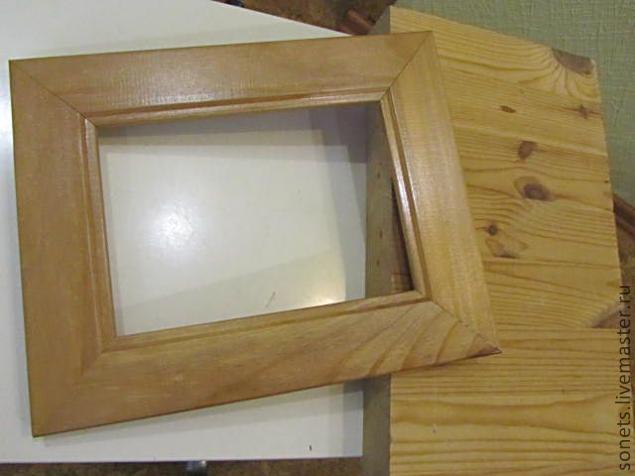
4 Getting manufacturing base. I took a stand for the tablet. Drill a hole in it (you can help one of the men, but not one for which it will be a surprise. Although …. Maybe he was. He did not even guess what it is and why.) The hole should be of a diameter that through it might get through Christmas tree garland. Instead, you can use a thick plank picture frame, replacing the glass with a thick cardboard. Or, in extreme cases, try the box with a thick, dense cardboard, not too thin. (Figure 6)
 5 over the aperture ring of glue cardboard, cut from of roll of toilet paper. We attach it with glue well bay. Outside strengthen a strip of paper, grabbing one corner of the ring, the other coming on board. The board. I pasted cloth (PVA) and a bit overshadowed gold acrylic paint. (Figure 7 and Fig. 8 and Fig. 9).
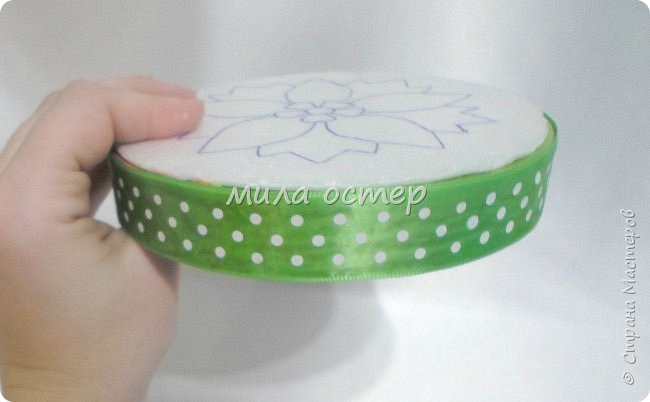
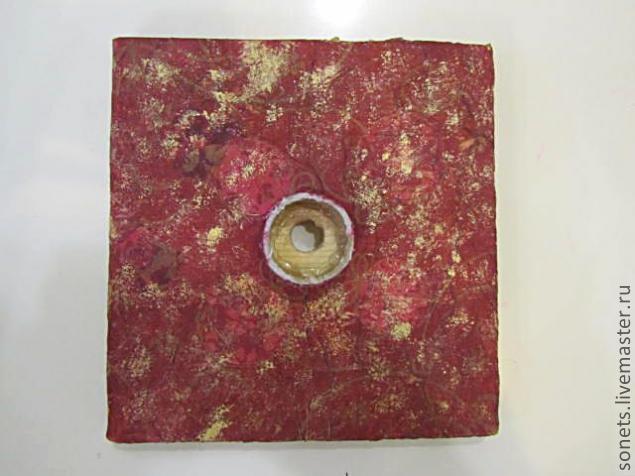 On the reverse side, plates make a groove for the wiring from a garland (Fig. 10)
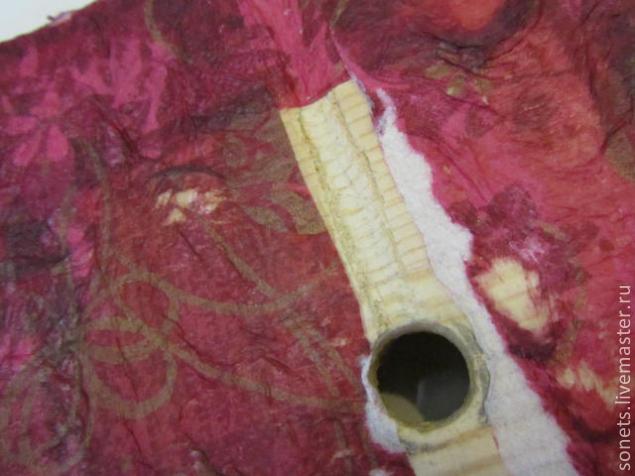 6 Threads almost dried up? Punctures the ball. The ball should unstick itself from the thread. Therefore, it is not necessary to wait until dry. If the ball has dried thoroughly and piercing not unstuck from the thread, will come to his aid. Through the thread is passed a pencil or any wand inside her trying to unstick the ball. If the thread balloon wrinkled, pressed, then we, the same wand inside his straightened, but still try to do everything patiently and carefully. The ball was torn inside the thread. (Fig. 11)
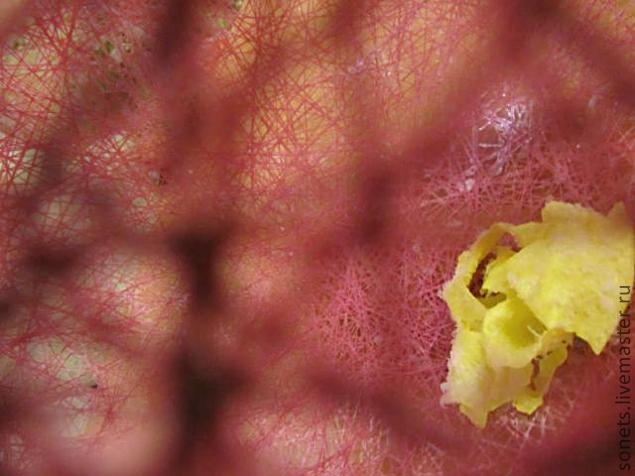
We’ll get it through the skin. It is more convenient to do it with tweezers.
7 At the bottom of the ball (where was the tail), cut out a hole in the form of a lotus. (Fig. 12).
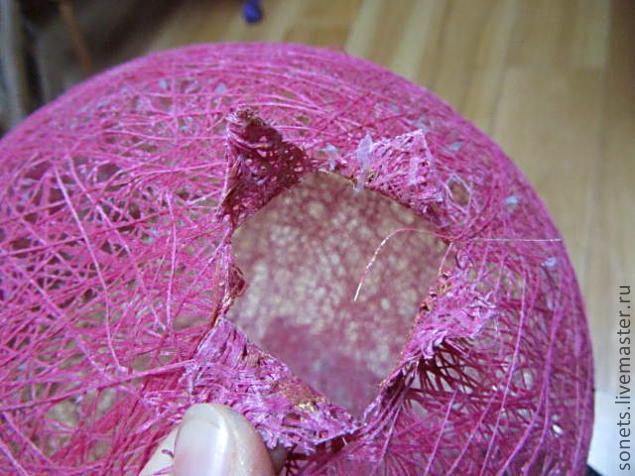 The hole diameter should be with our ring. And it sits on must be tight. (Figure 13).
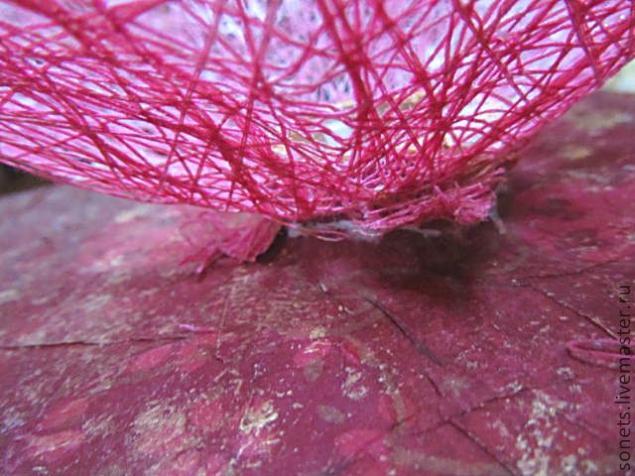 Dress up the ball on the ring, pouring glue. The petals are glued to the outside of the ring. Then you will feel that the ball as if he falls, and “asks” on the stand. Just press it and the place where he sat down on the stand we coat with glue. Just make sure that the lamp was flat, not tilted. (Fig. 14)
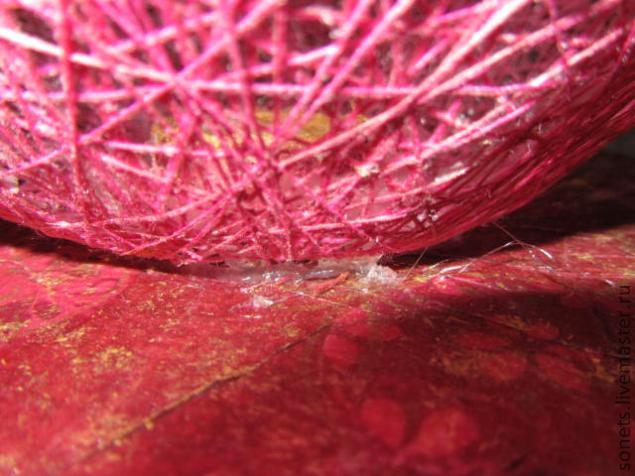 8 Zadekoriruem our “Heart” (in our version, to explain the ball.) I used dried flowers. But you can come up with something of their own. Stick to your decor thread, make “heart” of the most beautiful and loving. (Fig. 15)
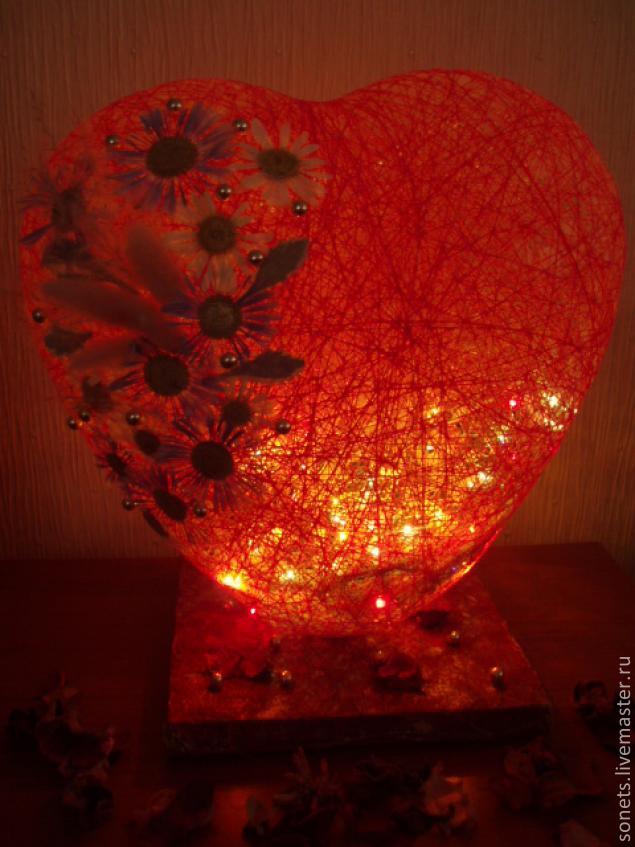
 9 Bottom stand pokes through a hole in the “heart” of Christmas garland. Outside the reserve wire that embarks on the groove and attaches it with glue or adhesive tape.
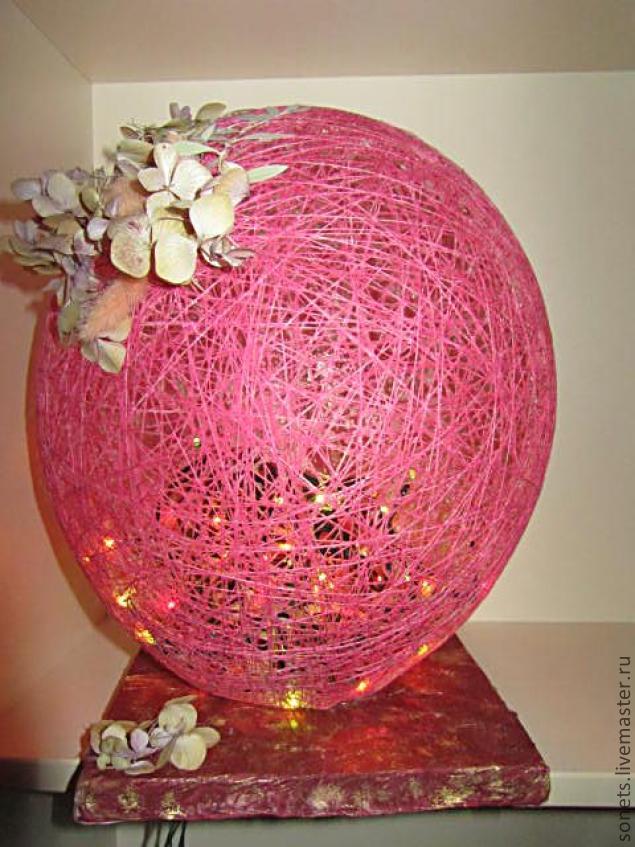 Enjoy your evening
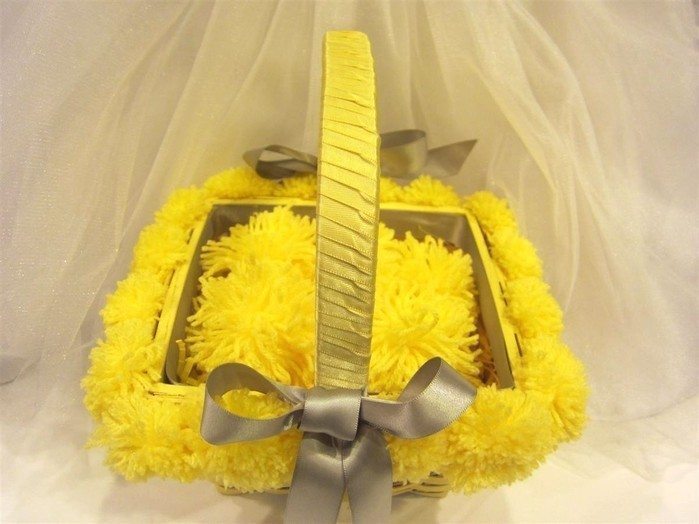
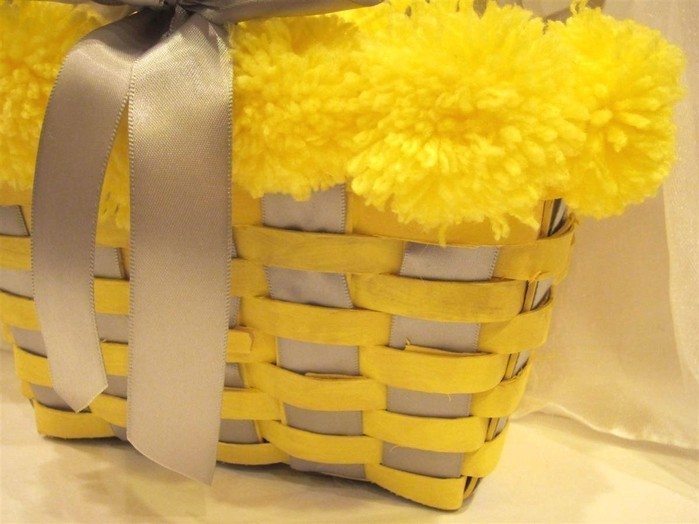
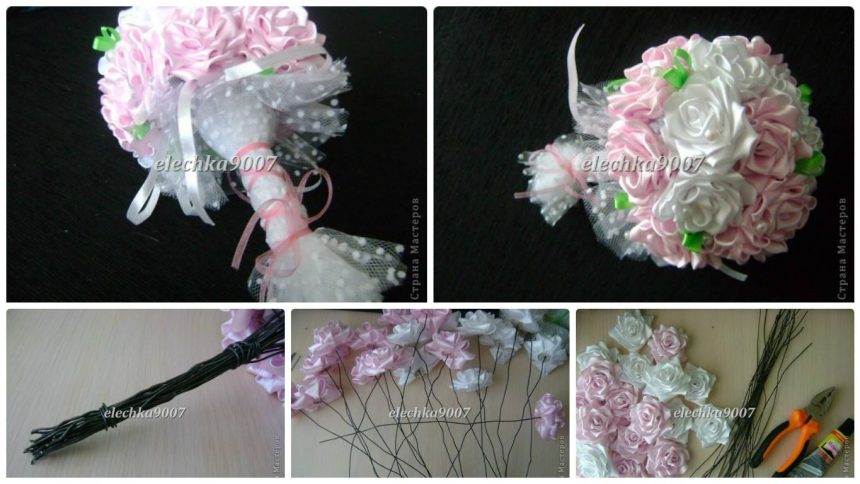
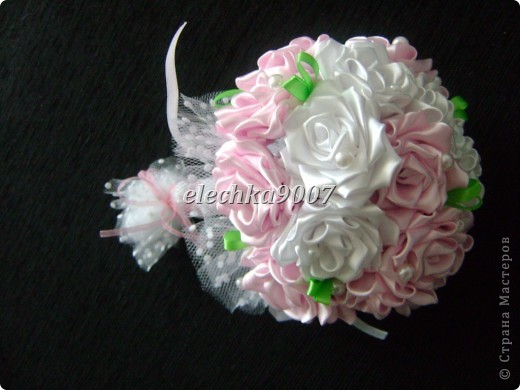
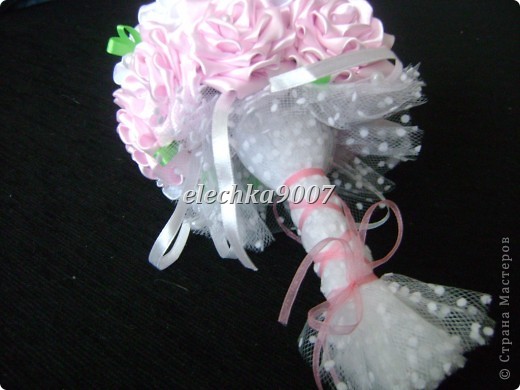
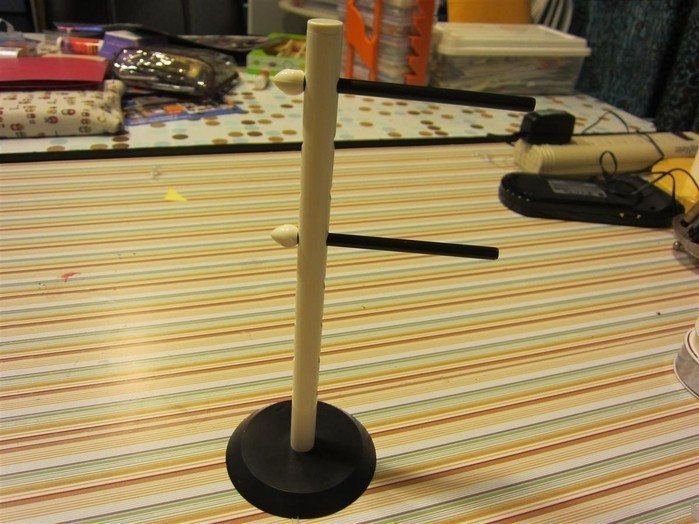 Pompons used for half-woolen yarn from the yarn winding amount depends on the value with fluffy pompoms
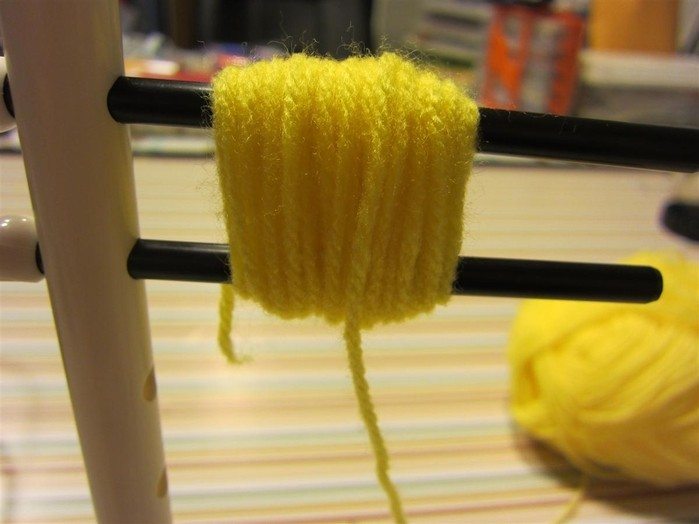
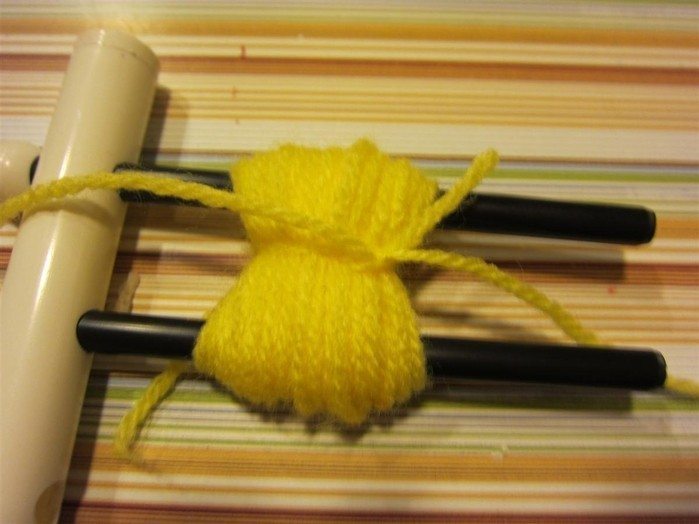
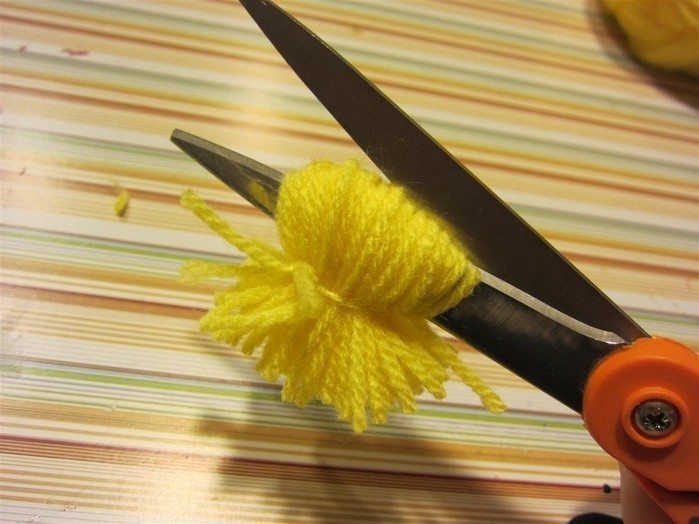
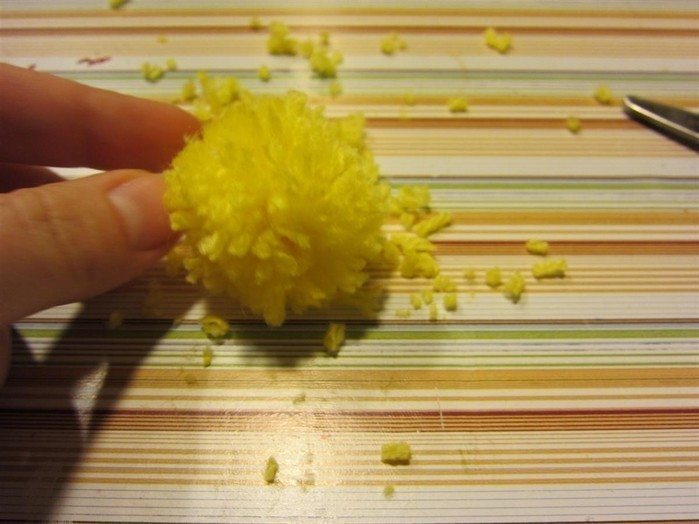 Whichever way you did pompom, cut it will still have)
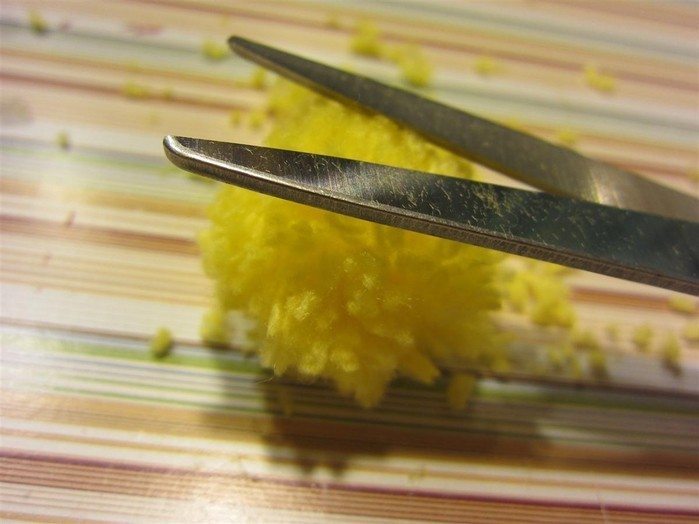 Basket is painted in the color of pompons. You can use acrylic paint, but I would advise a car spray. It lays down exactly, painting over all the hollows and crevices
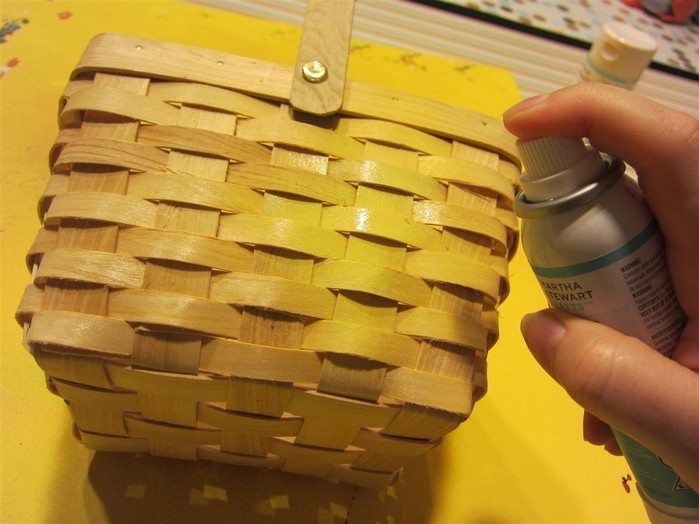 Take the ribbon color, combined with a touch of pompons and sticks to braid as shown in the picture
 Handle wrapped with a ribbon basket
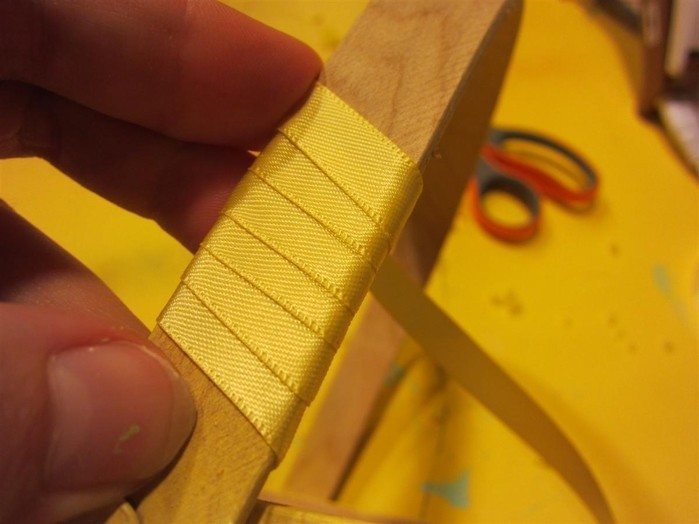 Pompoms to basket glue hot glue or glue Moment “Crystal”
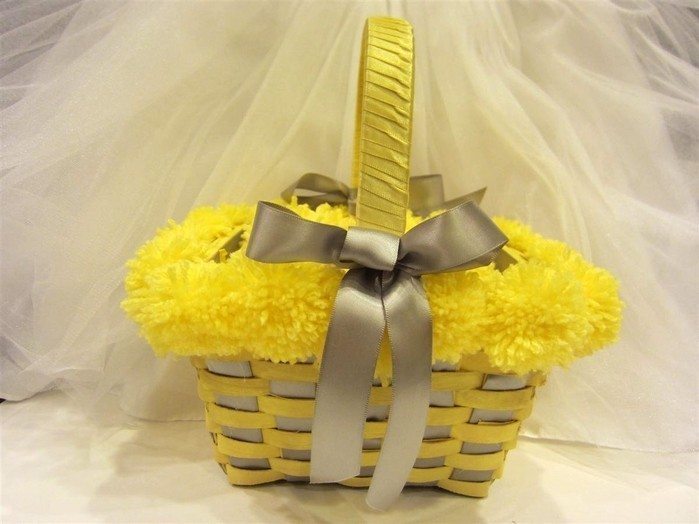
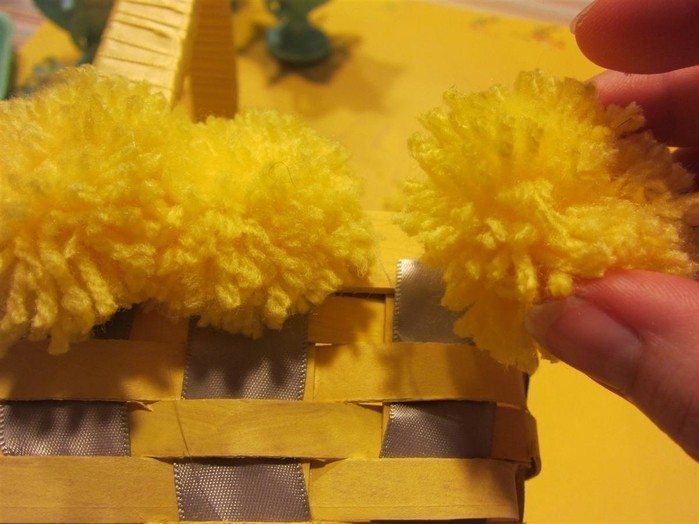 From inside the basket and paste ribbon. You can lay out the bottom and silk
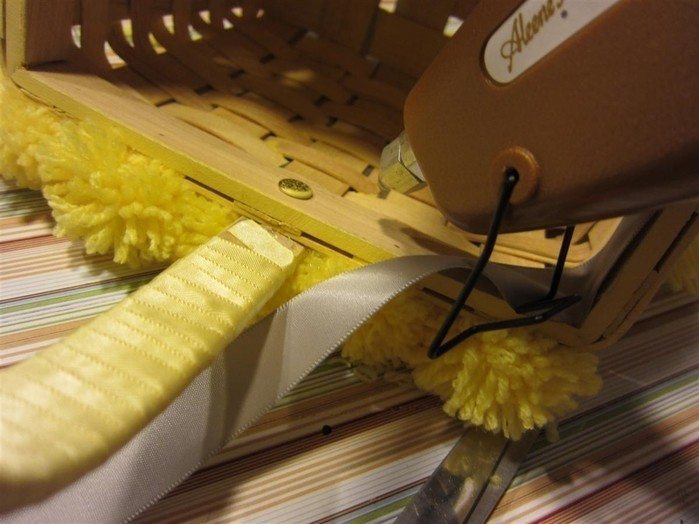
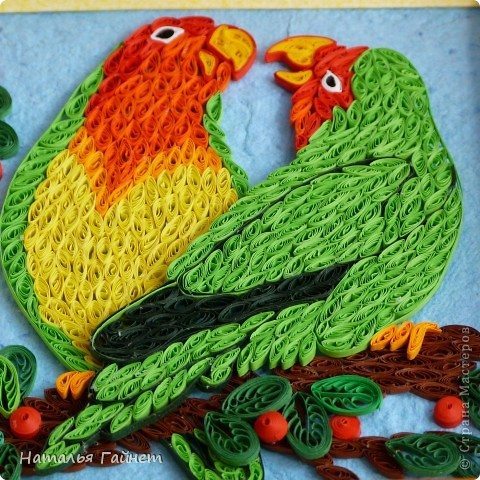
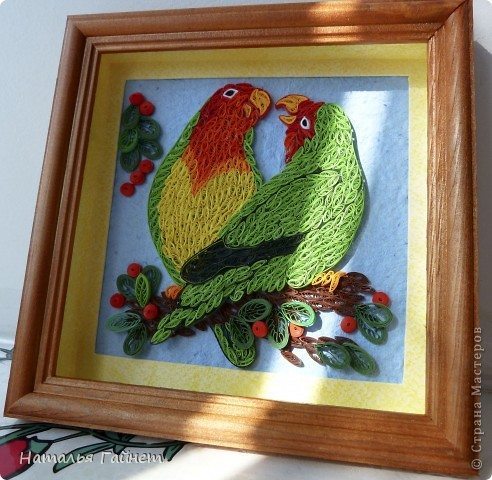
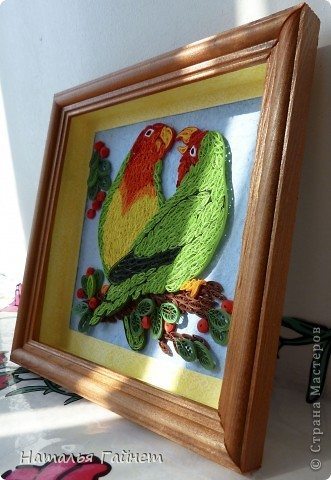

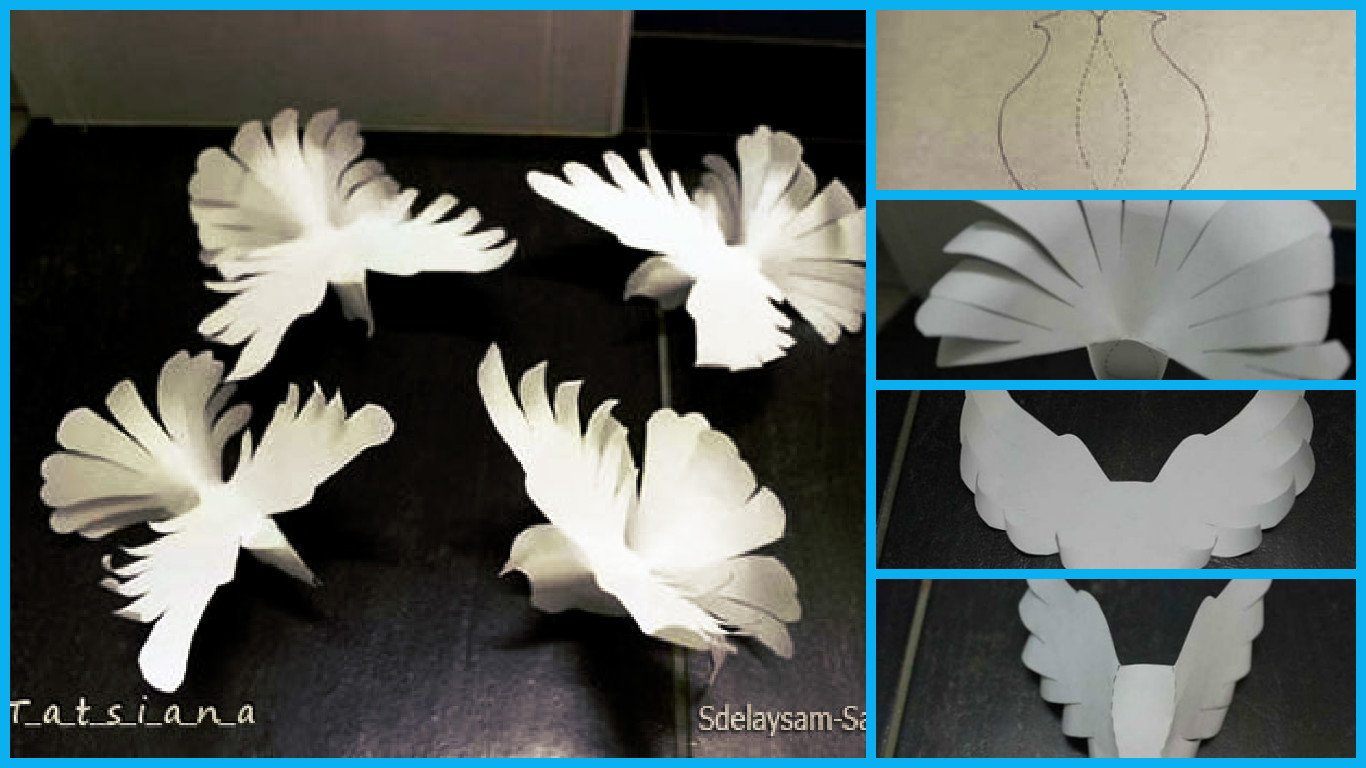
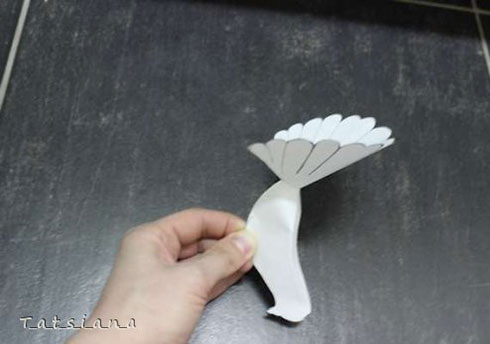
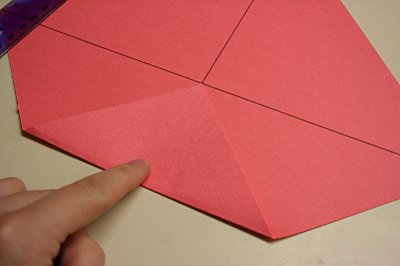
 For the manufacture of the birds of the world need a little patience, inspiration and some materials: A4 sheets, stationery glue, scissors.
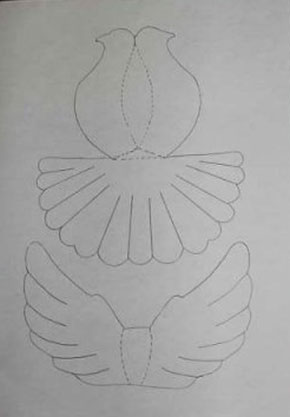 2. Now you have to slowly cut the workpiece. It is necessary to very carefully cut along the lines of the tail feathers of a bird.
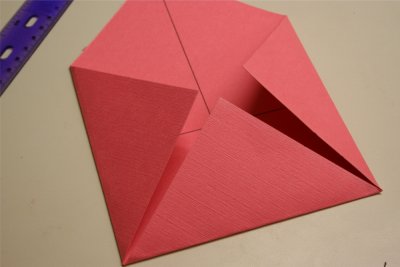
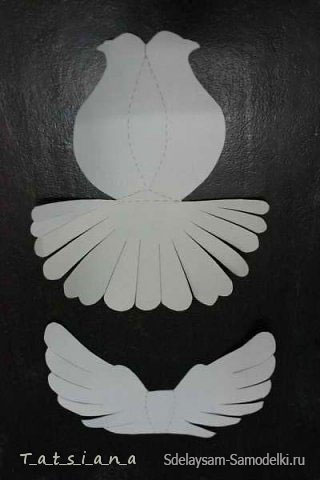 3. On the dotted lines need to perform the necessary bends
 4. Rotate the blank outwardly so that the dashed lines are not visible. As a result, bends should get a volume figure of a dove
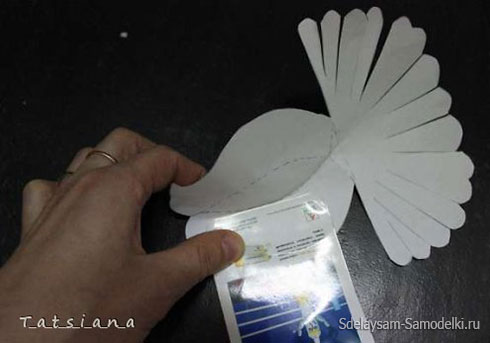
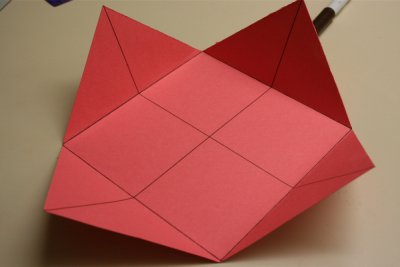
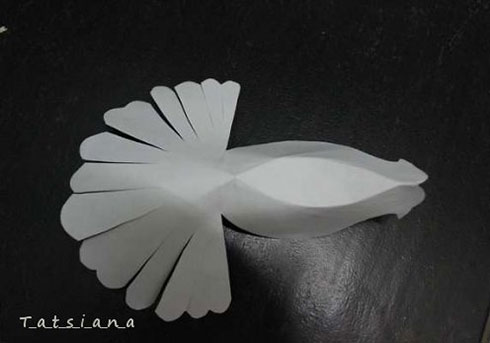 5. Now is the time is taken by the tail. It is necessary to spread the adhesive PVA triangle in the bird’s tail and put a pigeon on the tail. As a result, we turned tail beautiful round shape
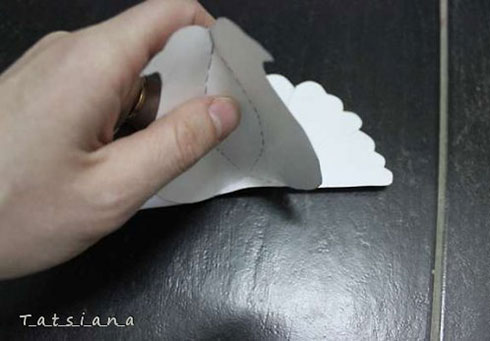
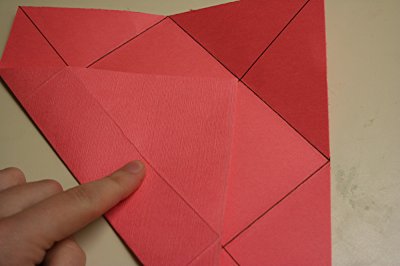
 6. If desired, you can make the tail raised. To this end, using scissors perform quick movement up the tail feathers. Perform this action so as to preserve the integrity of the tail, that is, not to tear the paper. If in doubt about your abilities, leave the tail intact.
 7. Now glue the head and breast of a dove
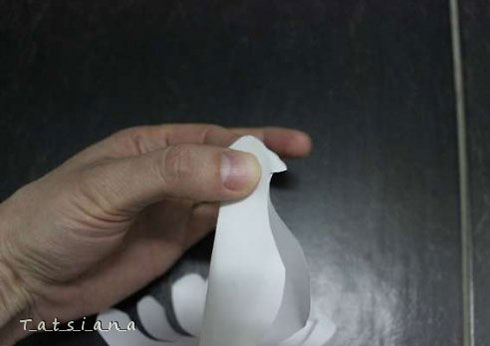
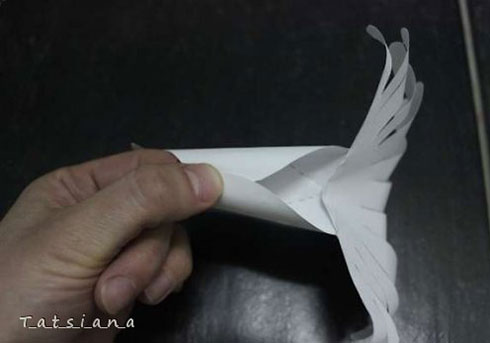 8. Now you need to pay attention to the wings of a bird. They have carved separately and were waiting for their turn.
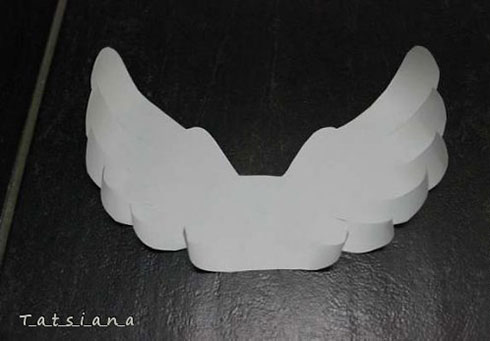 9. dotted lines again to make the necessary bends. The feathers of the wings curls with scissors
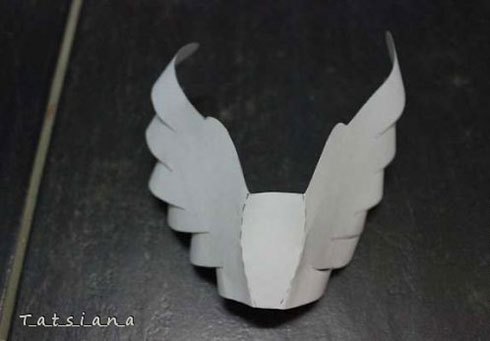 10. Now turn the wings so that the dashed lines were not visible and glue the wings to the body of a dove. Somewhere in the middle
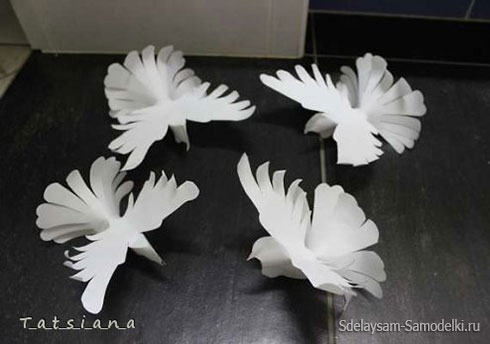
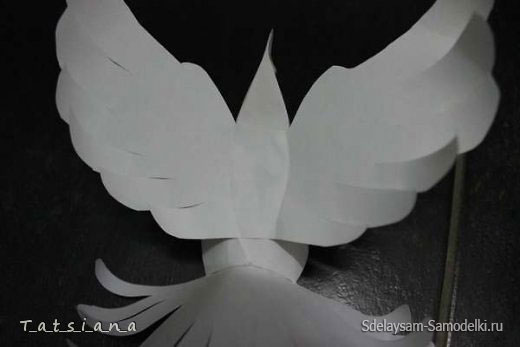 11. Must get a dove
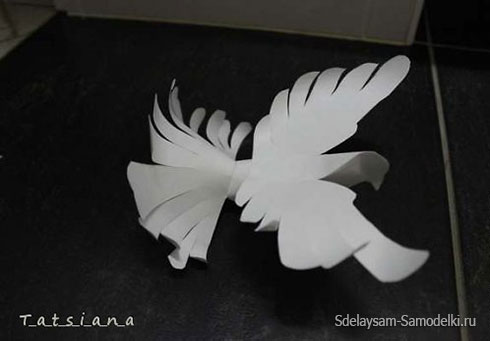 But so far only to him has nothing to do, in the same way, we create a pigeon flock.
 Such pigeons can be used to decorate the banquet hall during the celebration of weddings, proms.


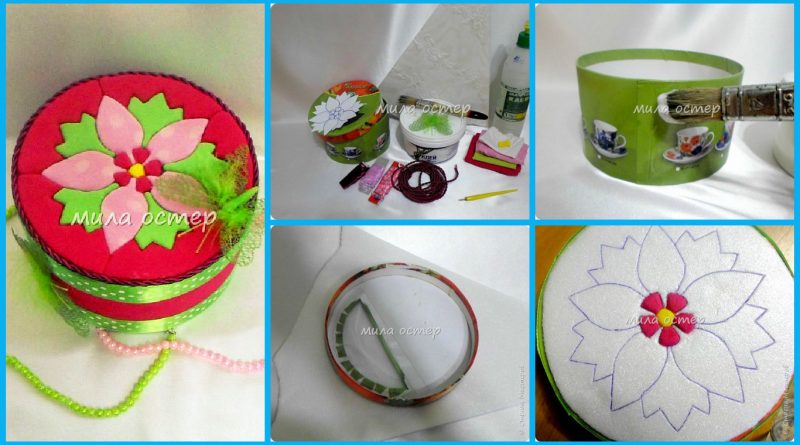
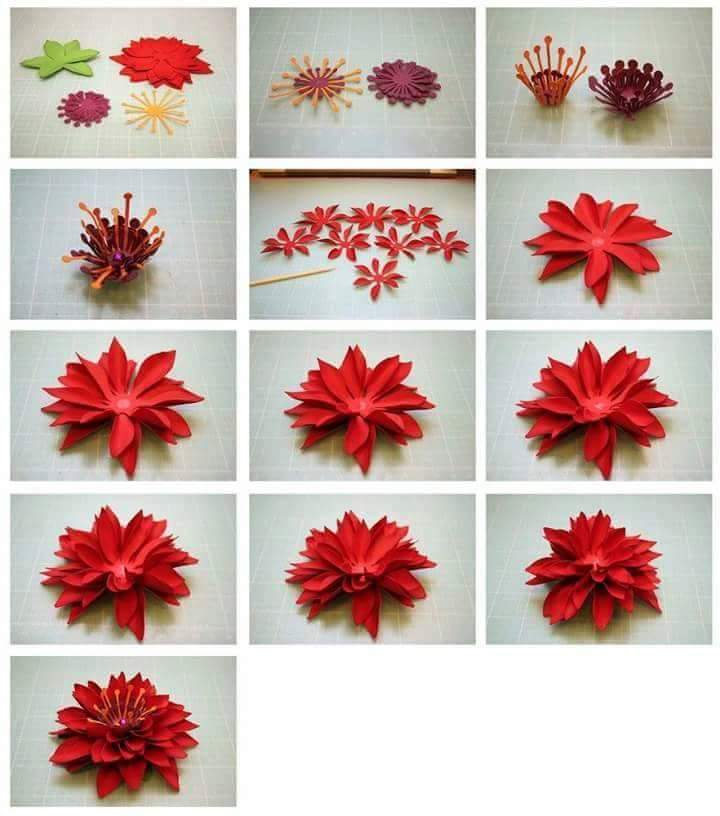
 Required Materials:
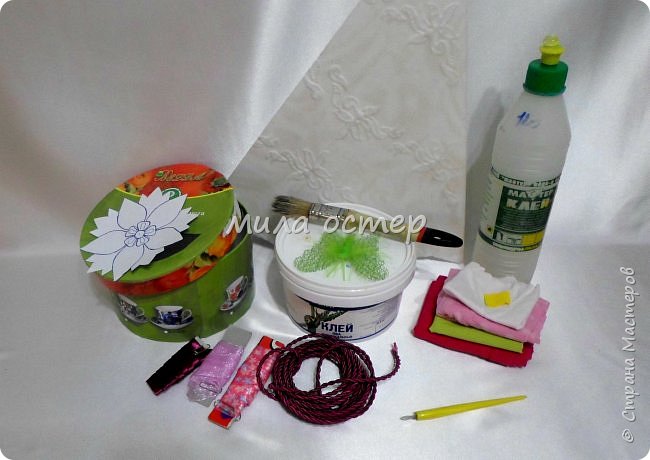 Encircles the lid on the tile. But I made a circle on the tile smaller diameter. Somewhere on 5 mm less than that than to stick the cord.
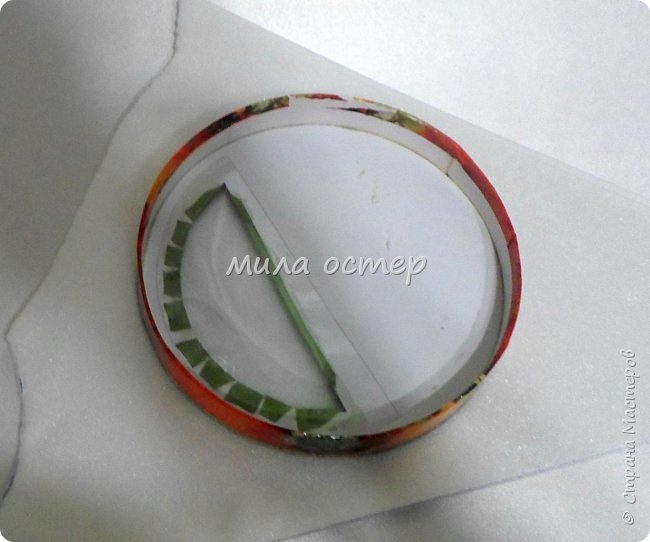 Draw drawing. Here we see that the circle cut from a tile smaller than the lid.
 Prikleevaem tiles to the lid.
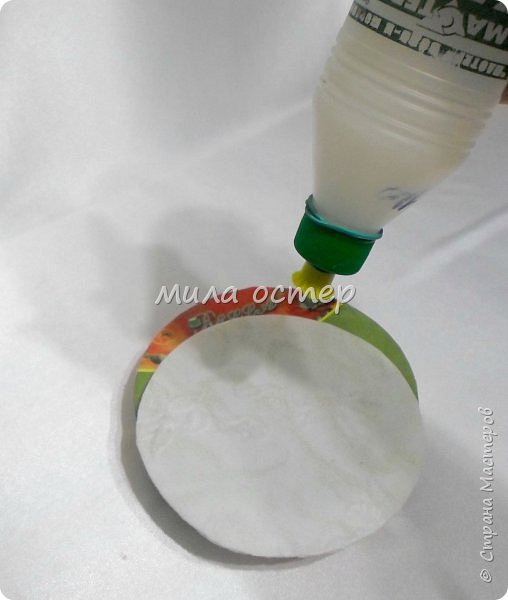 Pressed down and wait until skeleta.
 In the meantime, you can future casket. Clay PVA glue.
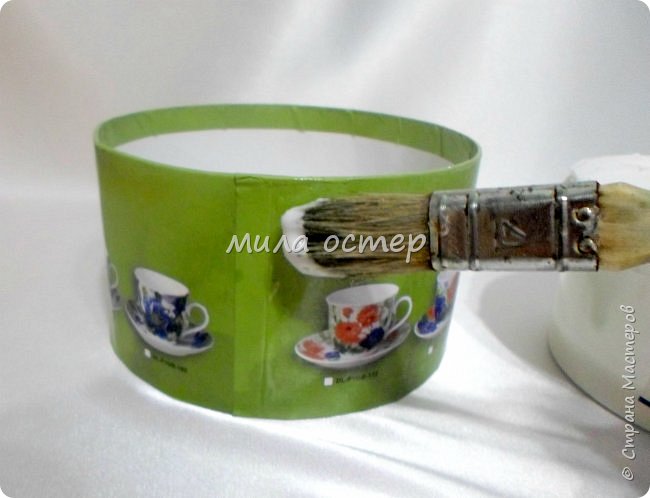 Here the selected piece of fabric already glued at the edges and the adhesive tape to close the fabric roughness.
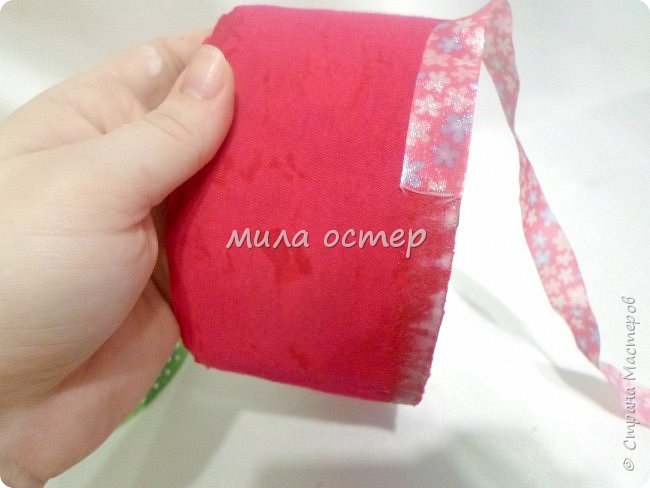 But here there was. Tape planned to cover the same as on the box – pink. But it turned out to be less than the width. And I had to run faster and look at their holdings something suitable. It was found so that’s light green polka dots and went perfectly in size and color.
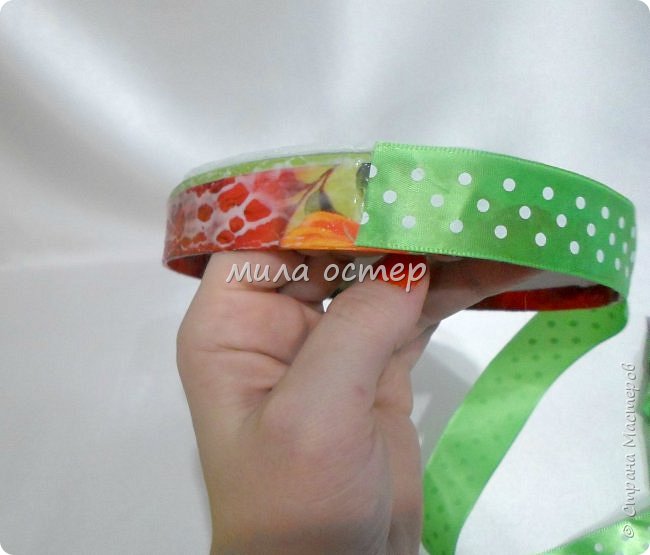
 And that box …
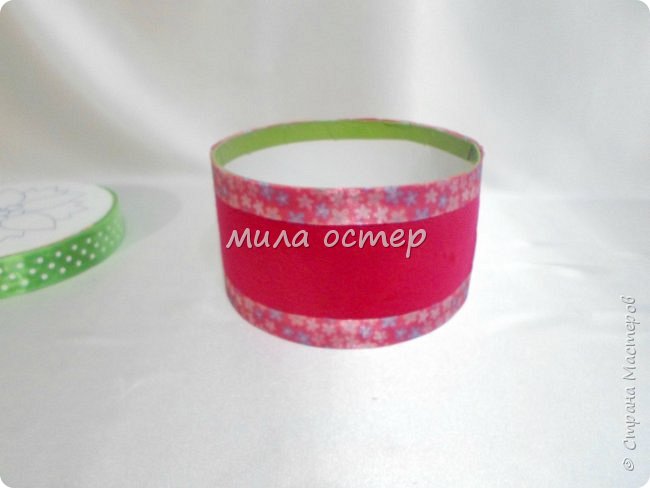 The stationery knife cuts through all over the picture.
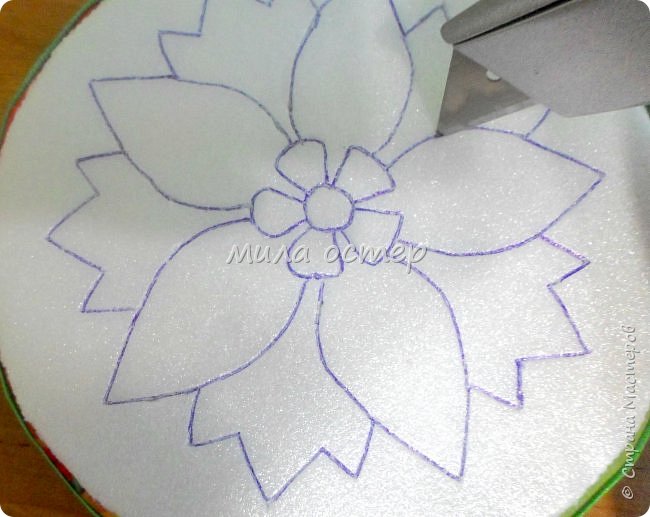 And we begin to tissue slices to cover our drawing.
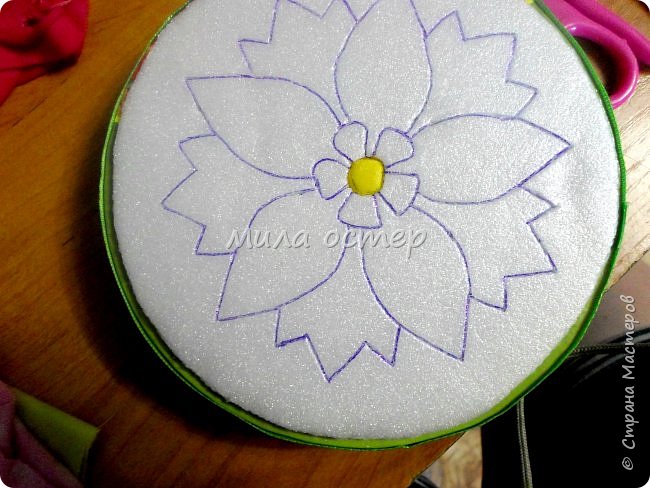 Cut off about a planned Circuits appropriately sized piece of cloth.
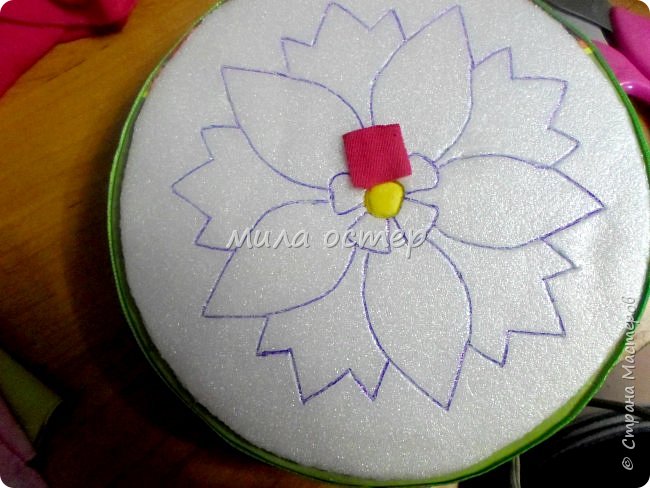 And with the help of sticks in the slots put cloth. Cut away the excess fabric.
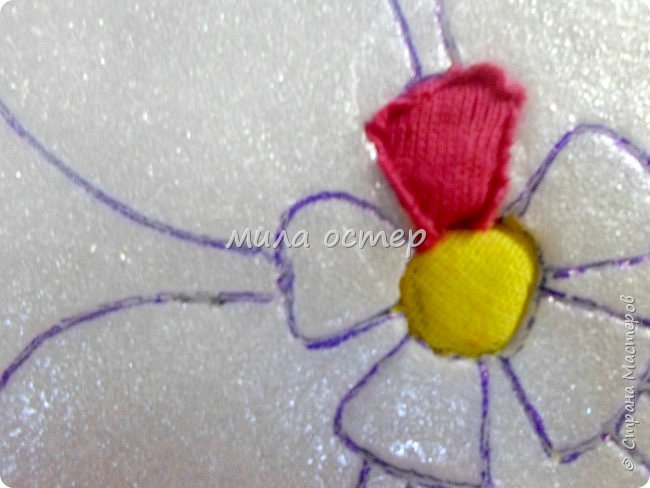 Like this.
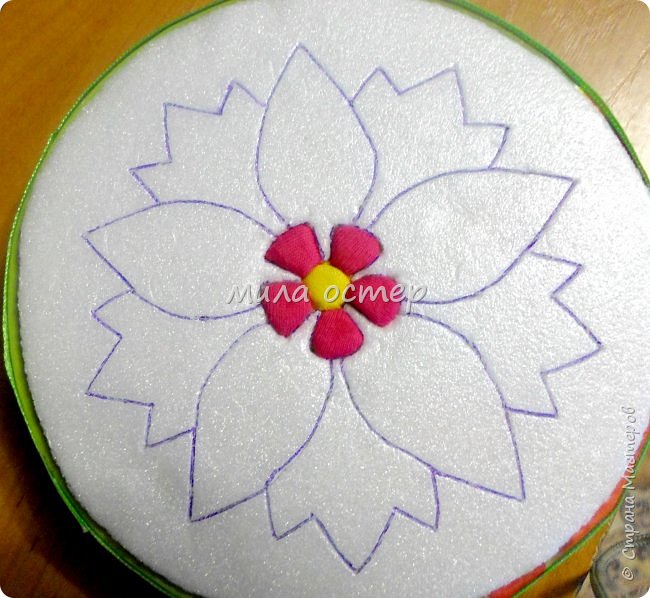 And then I got carried away and forgot much work still to do at least a couple of photos.
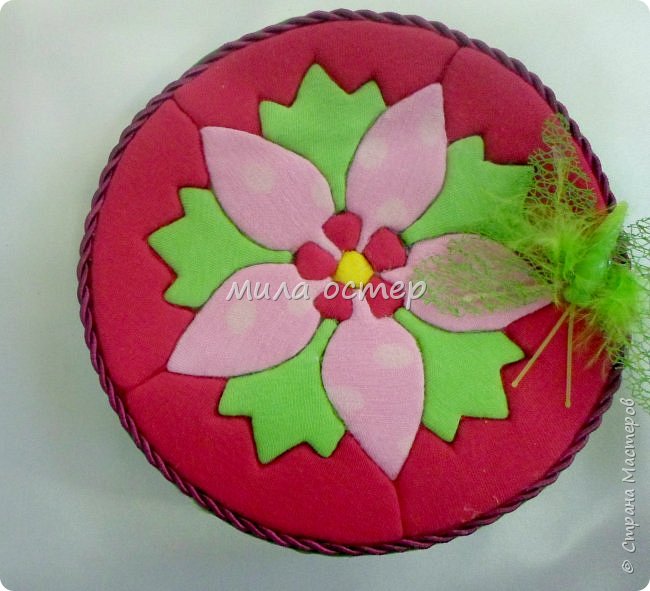 Inside painted with acrylic paints.
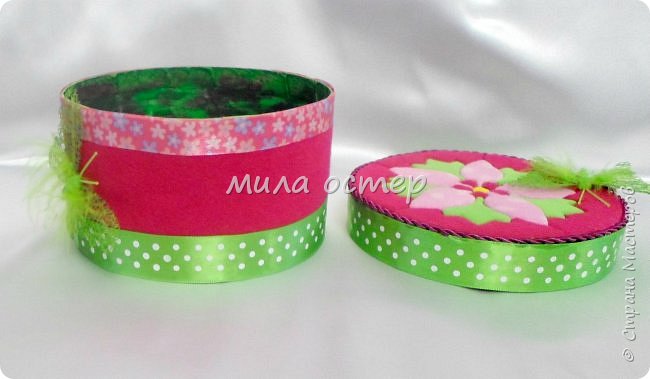 I like and I am very happy.
 Lids certainly not perfect and master this technique will notice the flaws, but I and forgive me)))))))))
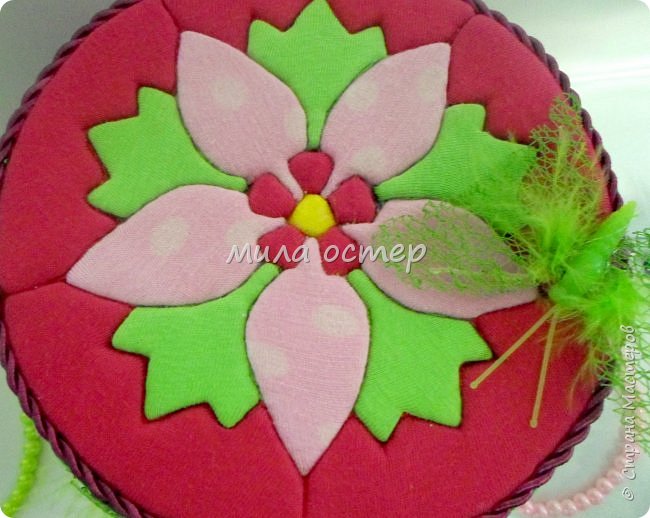 on the other hand
 Our two lucky moment already went to wait on December 31 !!!!!!
 That’s it. Thanks to everyone who has paid his attention and looked at
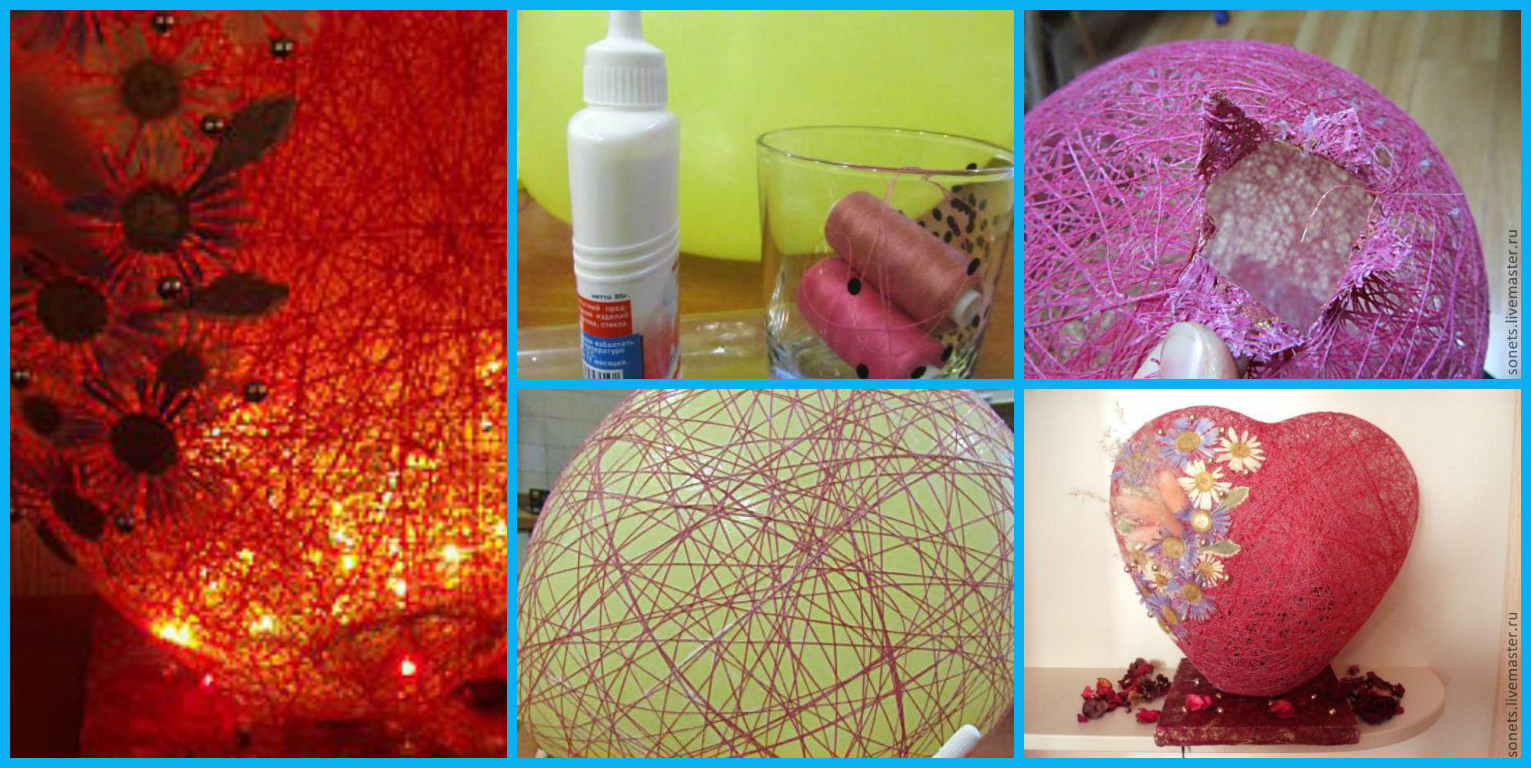


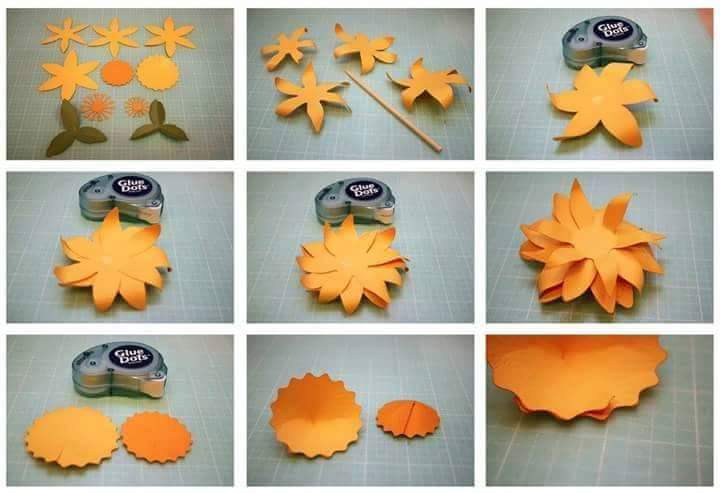
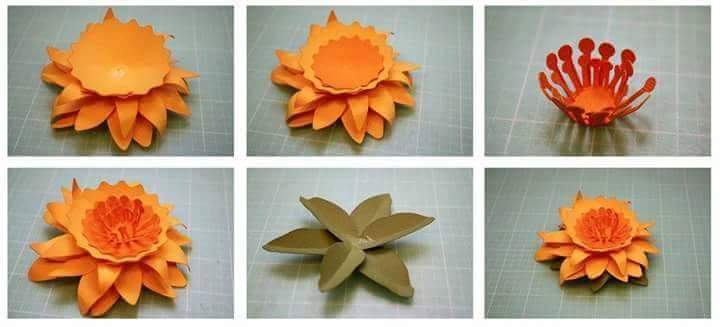
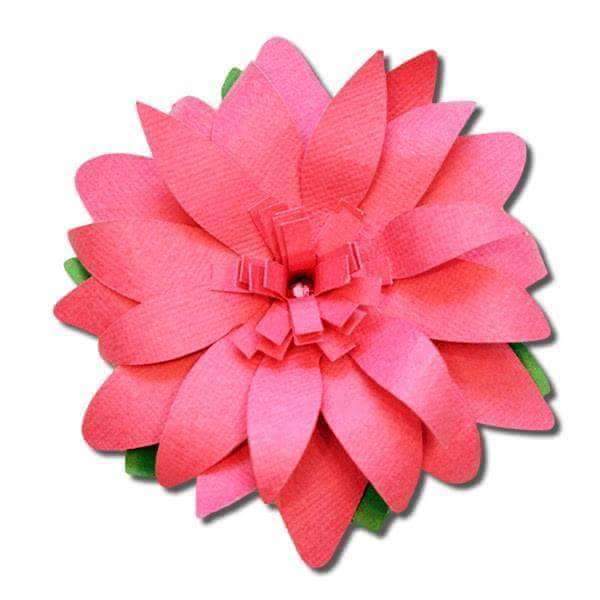

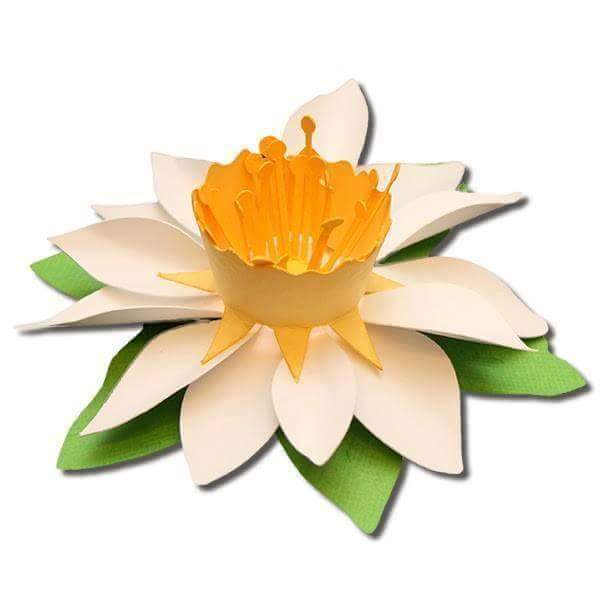
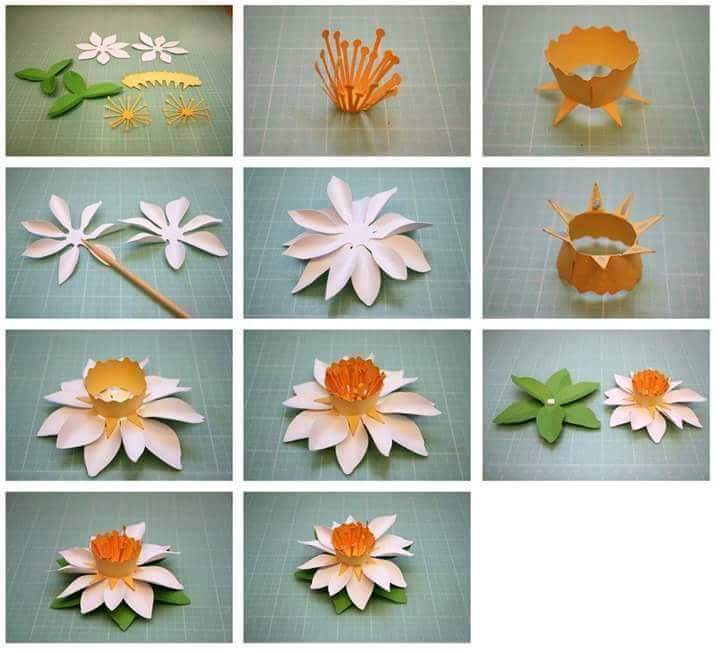
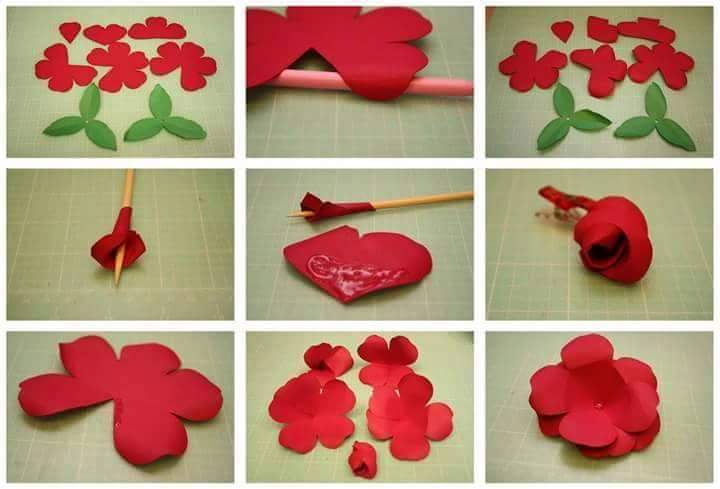

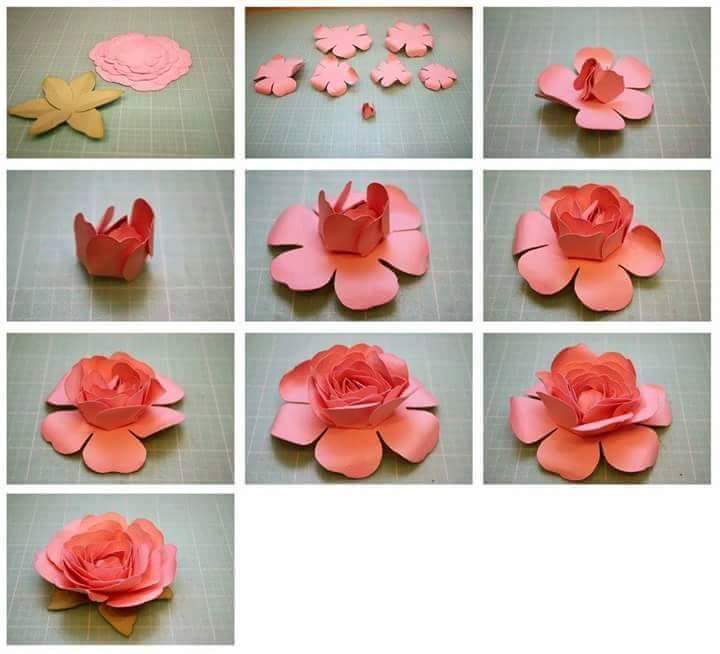


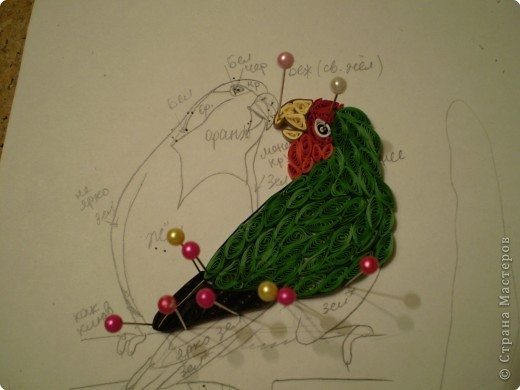
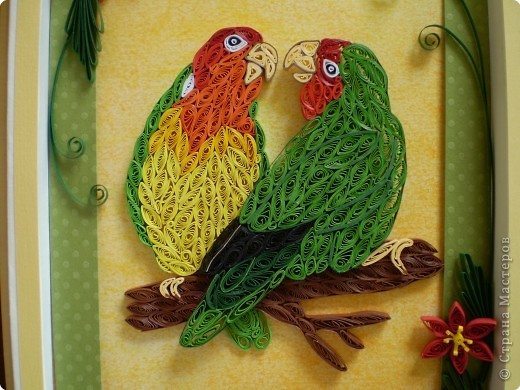
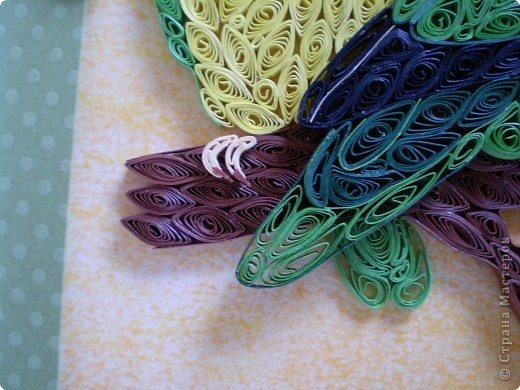
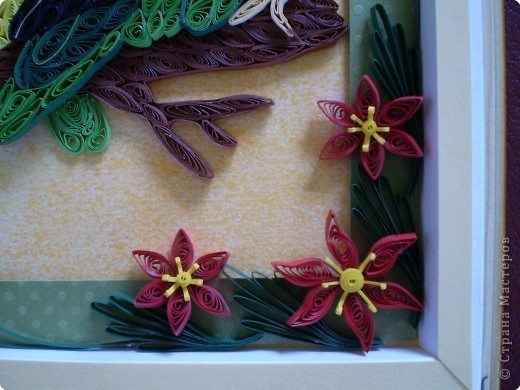
 Required Material:
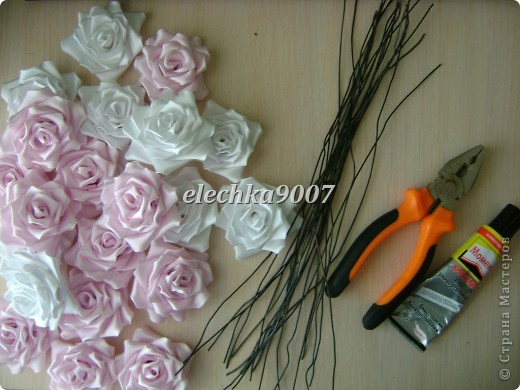 2.
2. 3.
3. 4.
4. 5.
5. 6.
6. 7.
7. 8.
8. 9.
9. 10.
10. 11.
11. 13.
13.