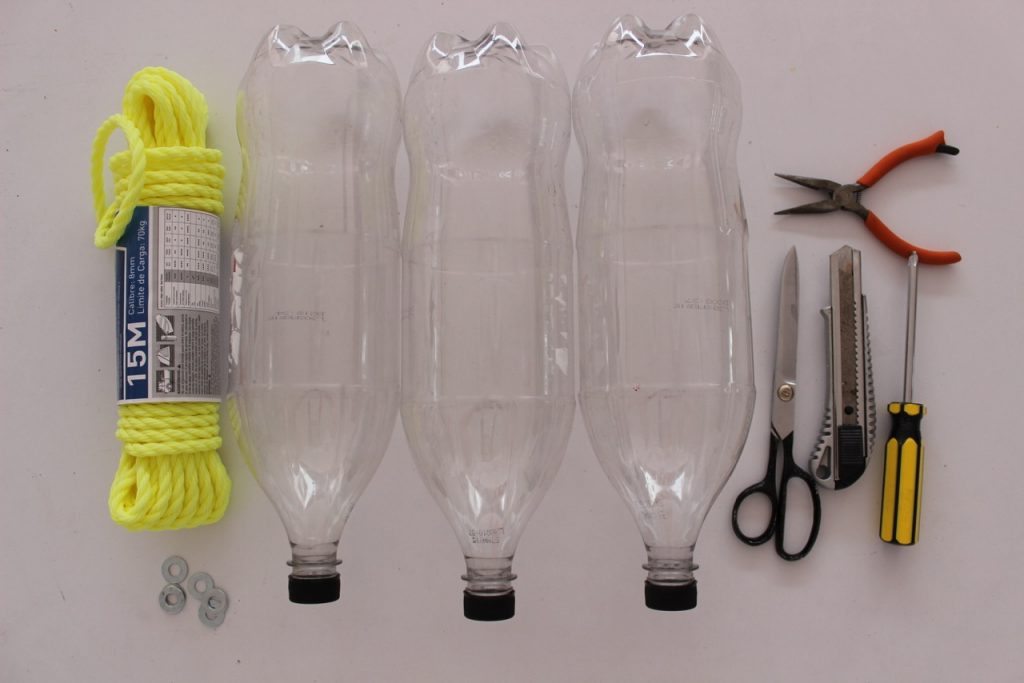
The materials are very basic, it’s a matter of making the list and going to a hardware store or a warehouse where tools and construction materials are obtained. The most important thing is to have on hand:
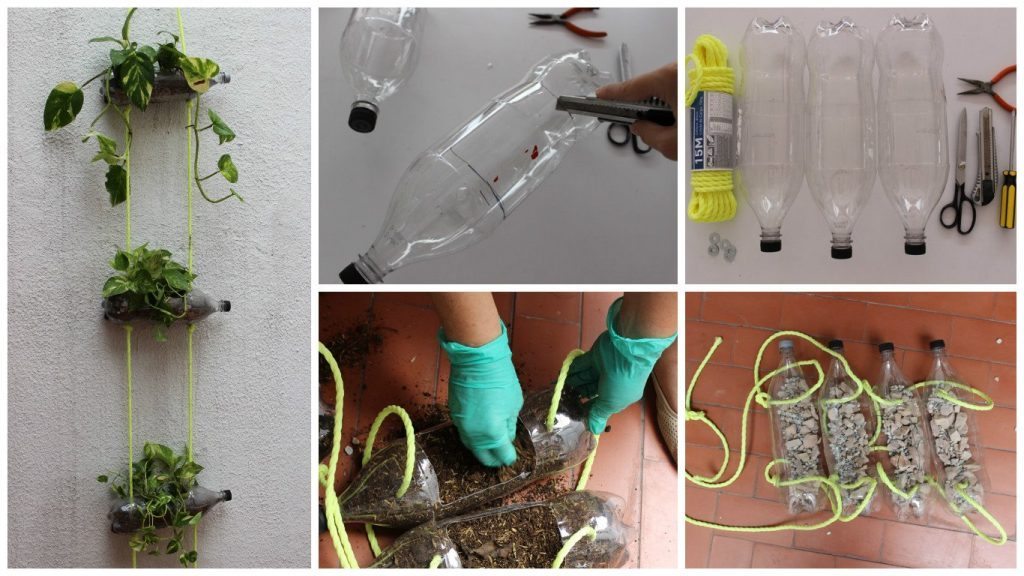
A couple of plastic bottles, all the same size. I thought the 2-liter ones were perfect.
- Plants that are easy to care for, depending on the climate of your city.
- Plastic noose, because that of natural fibers deteriorates when in contact with water.
- Flat metal washers. The size varies according to the thickness of the rope.
- Scalpel, scissors and a permanent marker.
- Screwdriver and pliers (just in case).
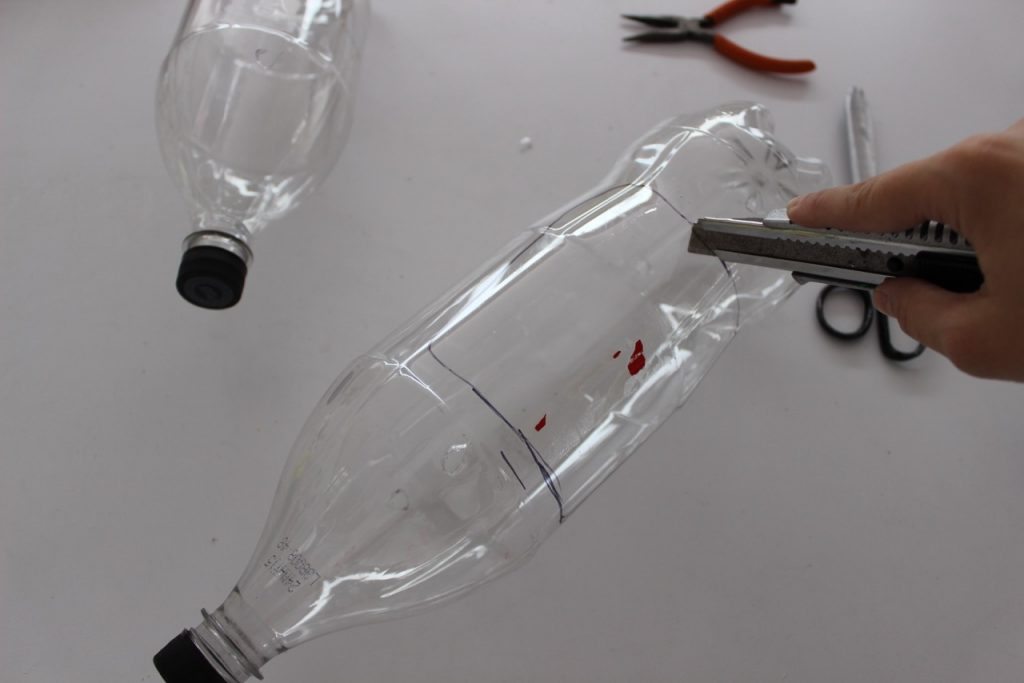
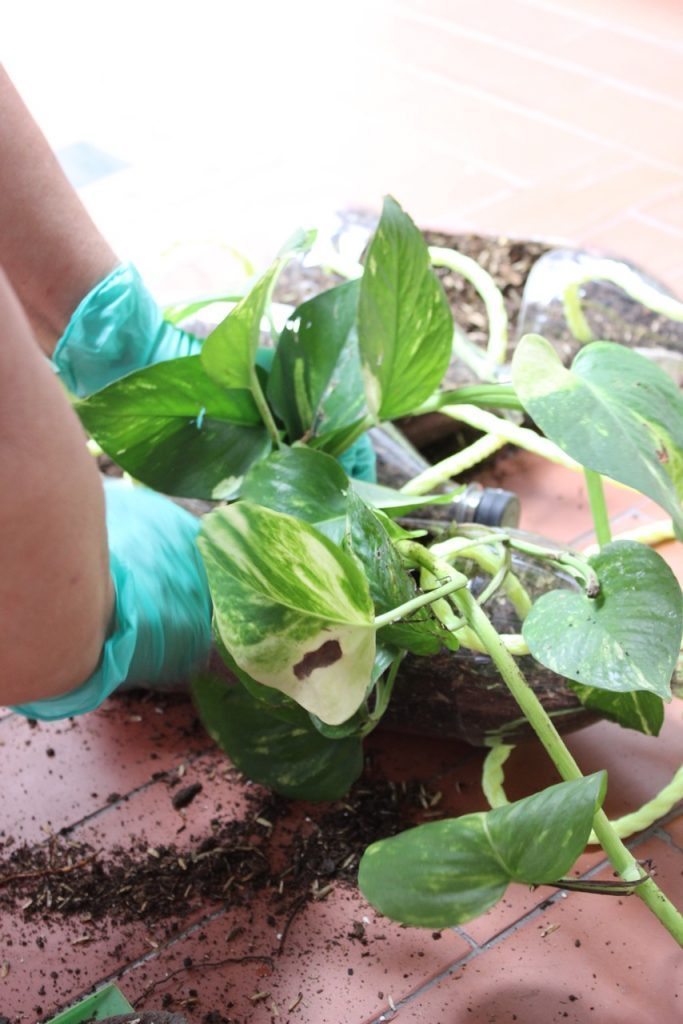
We removed the labels from the bottles and cleaned them. It is not necessary to waste time removing the remaining glue because we can cut that area further.
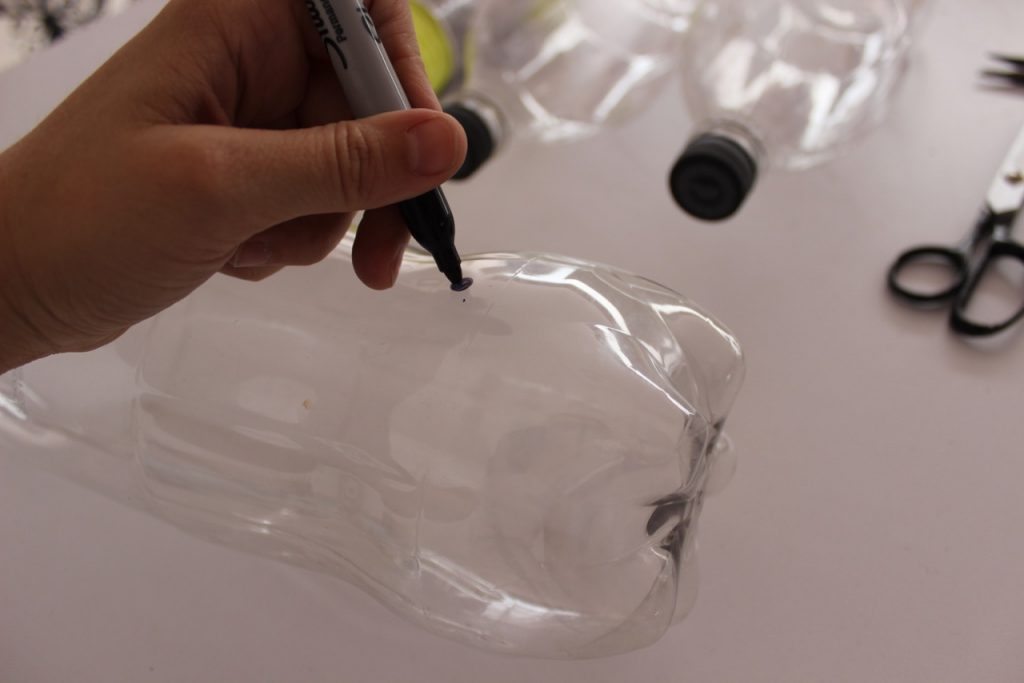
We mark a point on each side of the bottle where we will pass the rope, so they must be aligned (parallel) so that there is no inclination.
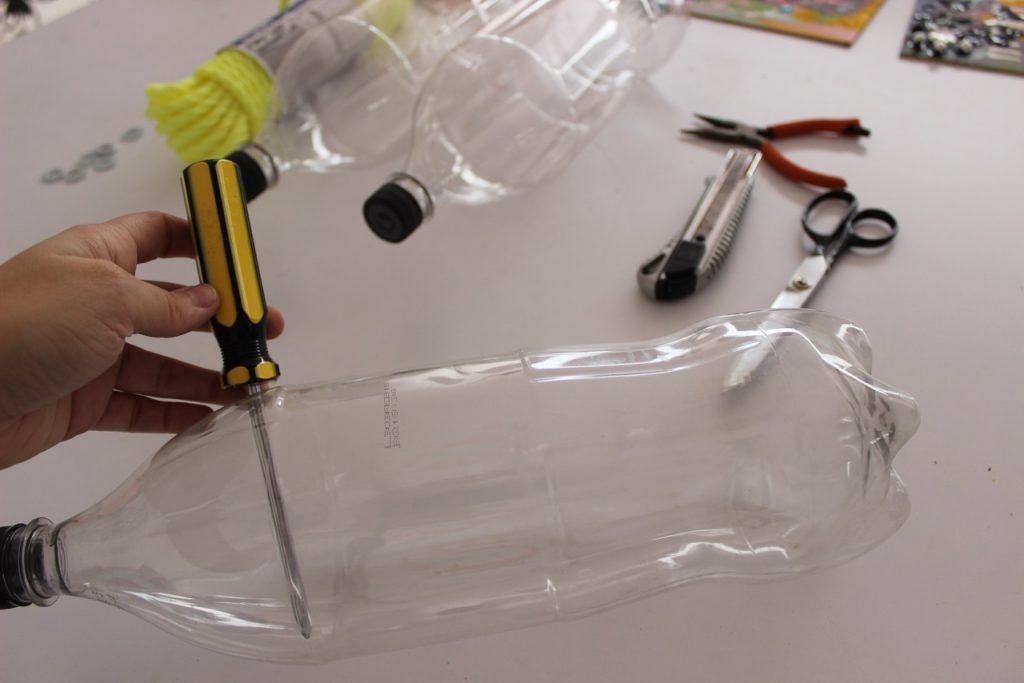
Open the holes with the tip of the screwdriver, just in the place that we mark the point, drilling in a straight line the plastic to the other side.
When the holes are ready for the rope, with the marker, we delineate the space that we are going to cut where we will plant our plant. And we cut very carefully. We can make a small cut with the scalpel to insert the tip of the scissors and cut more easily.
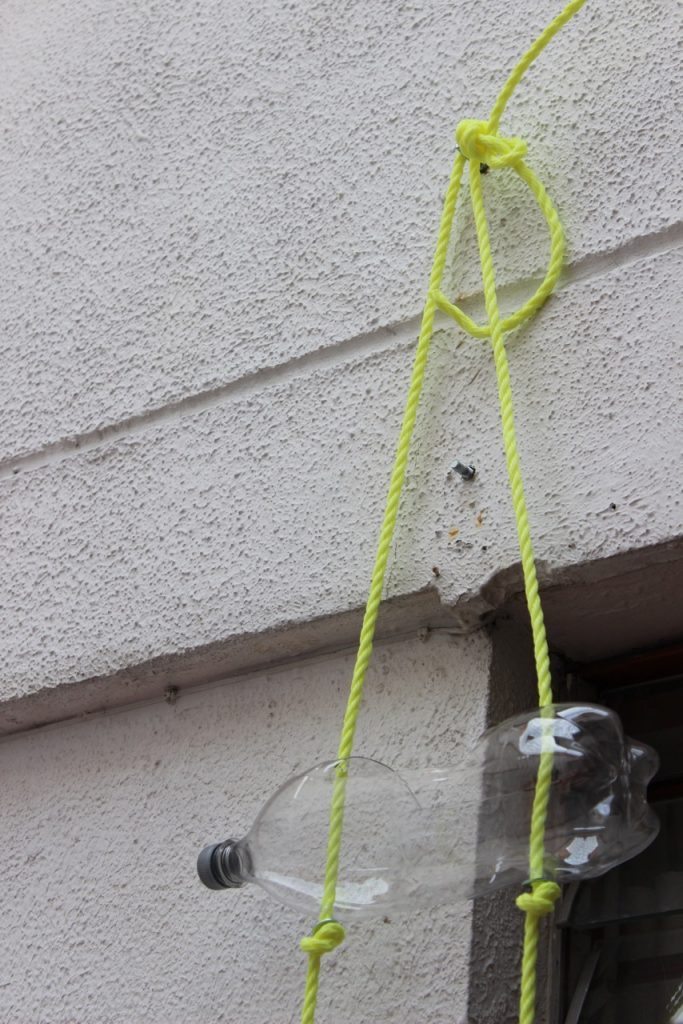
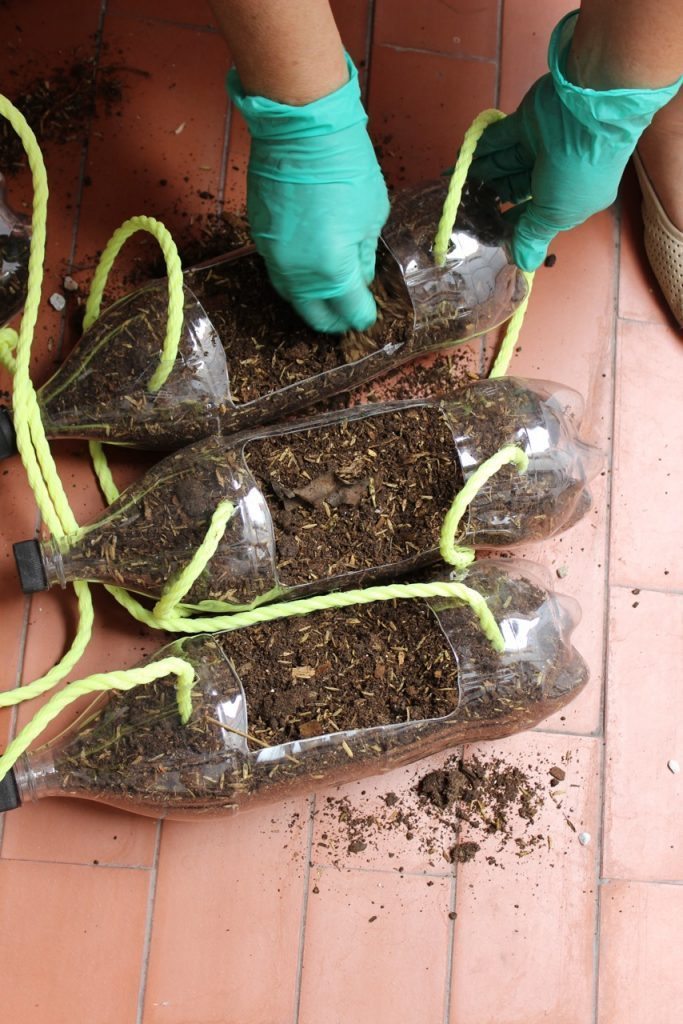
With all the cuts made, we measure the space in which we are going to hang our future garden, to know the length of the rope. We begin to insert the rope, fixing the height we want with knots, always with a washer between the bottle and the knot to avoid falls.
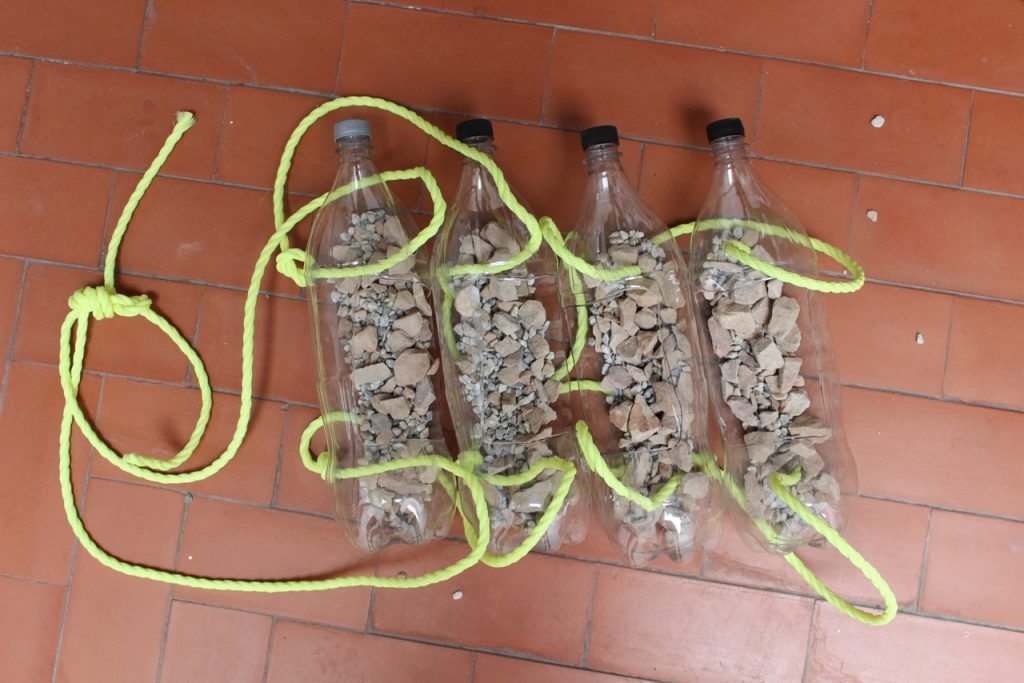
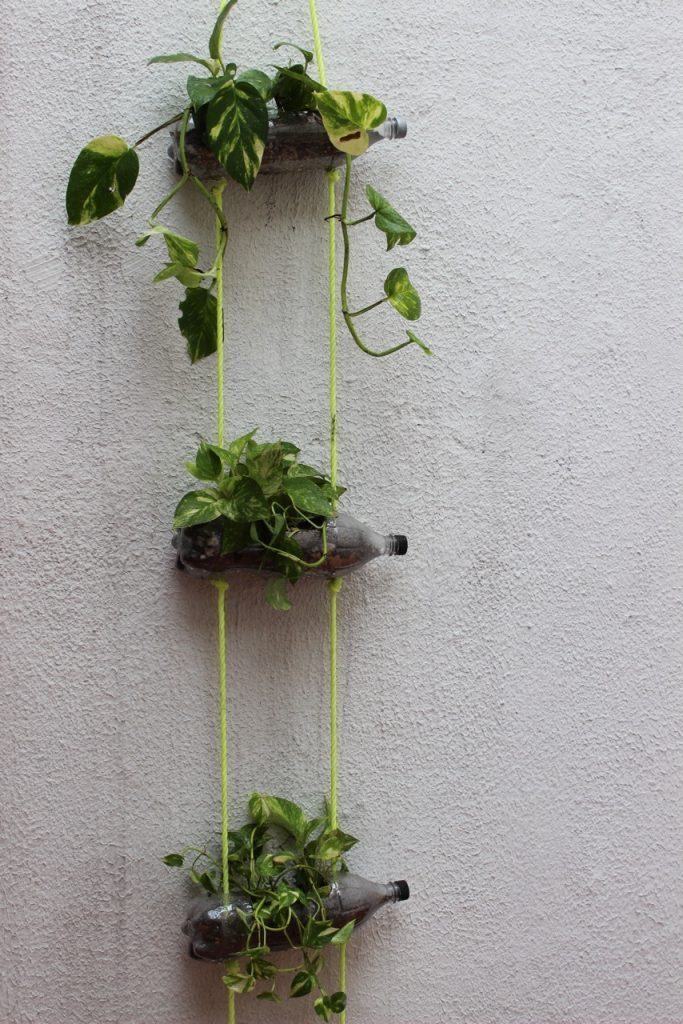
I made my garden of 4 levels or “bottles” and chose a neon rope that contrasts with the spots in the leaves of the plant that I chose, commonly called Potos or Photos. I left about 40 cm. Between each bottle because this bush grows and its leaves hang.
When all bottles are moored and secured, we plant our bushes with the soil moist to make it easier to handle. It’s going to be a bit heavy, so it’s good to have someone close to help you hang your new, and spectacular, vertical garden in place.
This is for me the first of 4 “green stairs” I want to make to put on a whole wall of my patio. I love how it looks, and I feel very proud because I thought I needed an expert to achieve it, and I love the touch of the recovered bottles. How do you think it was?
I worked in my yard, so after sweeping the soil off the ground, we mopped up with a bit of Fabulous Fruit Passion to freshen up, even more the atmosphere.
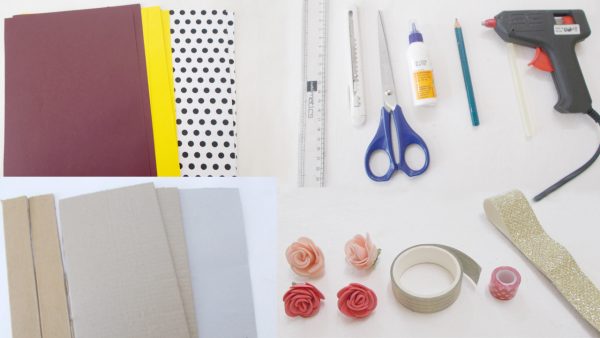 Cut diamonds on the cardboard, to the size of your preference, to be the dividers of your organizer. Cut two opposing spikes from your diamonds.
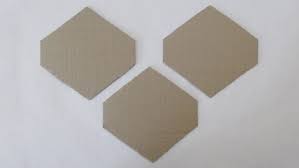 Cut into one of the chosen papers the same amount of diamonds cut into the cardboard. Glue the paper lozenges to the cardboard lozenges.
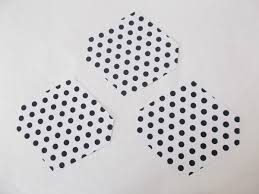 Continuing with the preparation of your vertical organizer step by step , cut strips into another structured paper.
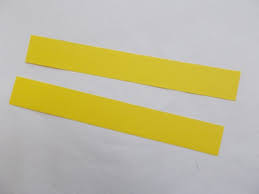 Glue the paper strips to the bottom of the dividers.
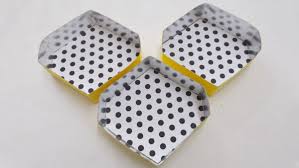 On cardboard, cut strips with the width of the cut nozzle of the dividers and glue these strips on the sides of the pieces, creating the structured one of your organizer. Coat the paper strips with a paper of your choice.
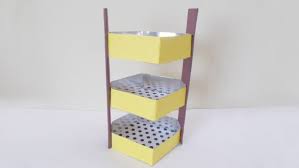 Cut another strip onto the cardboard, cover it – and glue it to the top of your organizer.
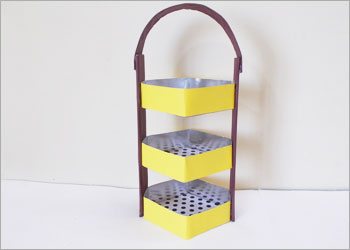 Pass pieces of adhesive tapes through the dividers and the handle of your organizer. To finalize your piece, decorate your organizer with the materials you want. And it’s ready!
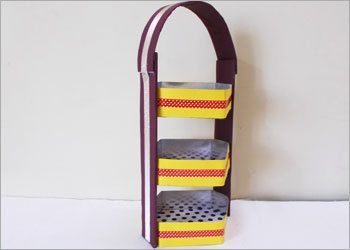 (Photo: recyclart.org)
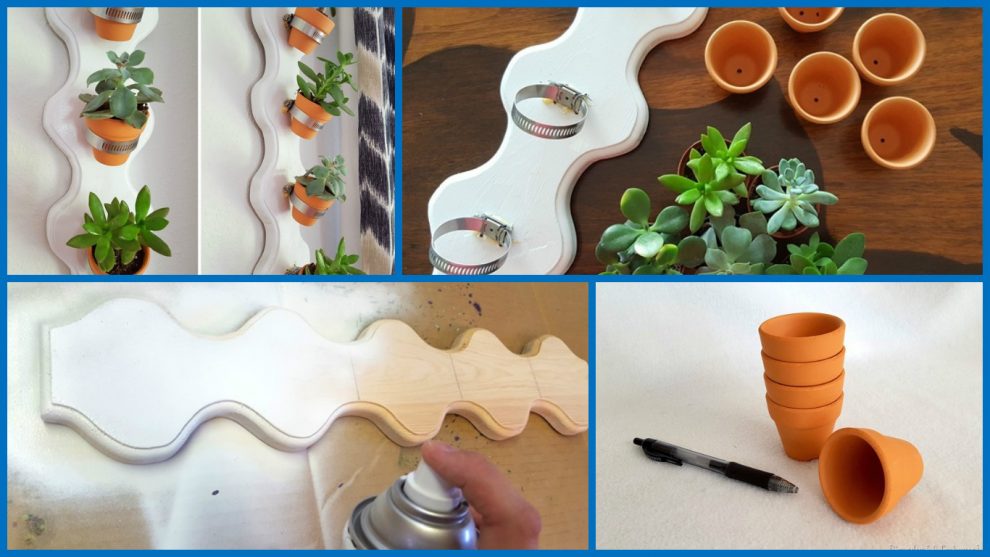


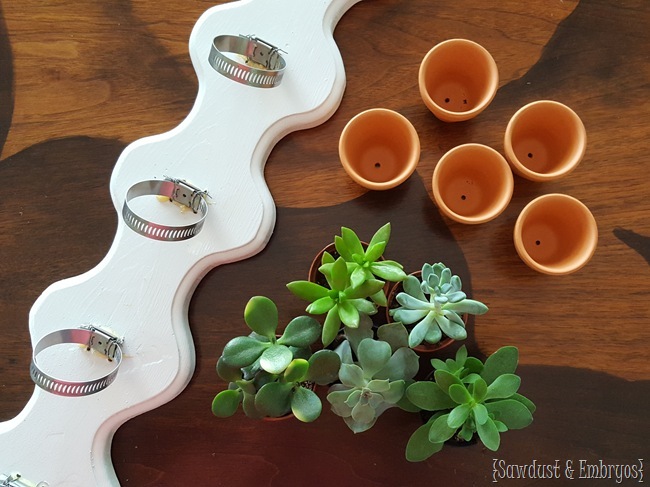
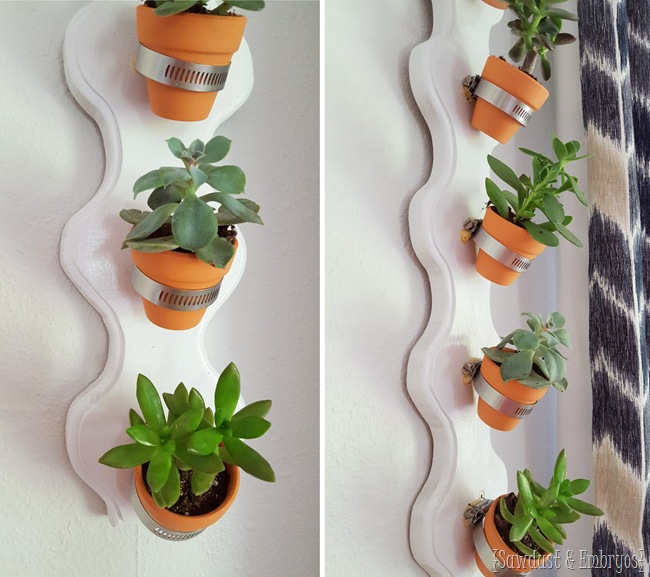
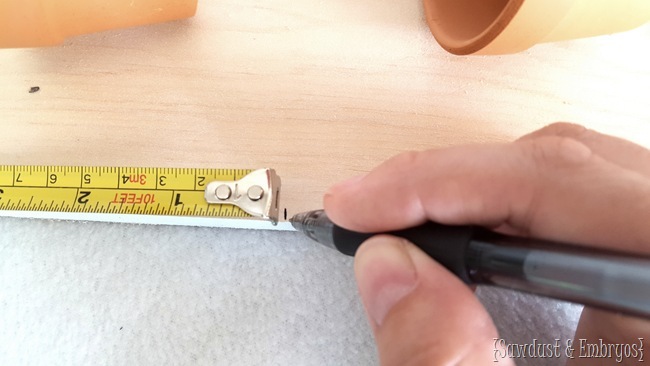
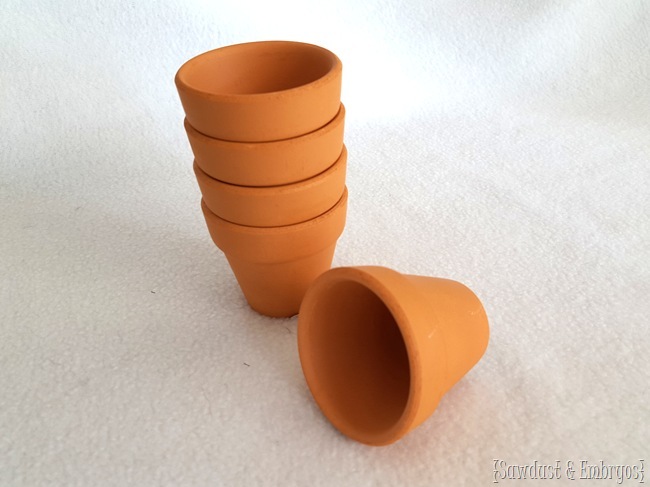 These are, very tiny), the pots will be used in the work. Note the photo below – compared with a ballpoint pen, you can judge a number of pots – they are quite small.
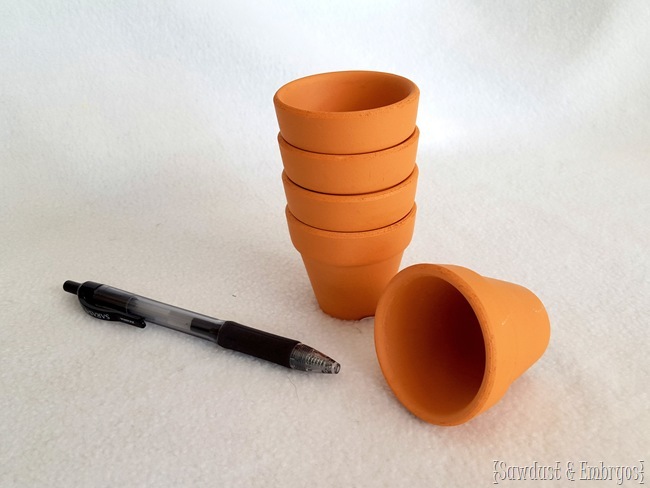 In this embodiment, we used wooden board – 23 by 5 inches to 5 pots. With the size of the board and the number of pots, you can decide for yourself.
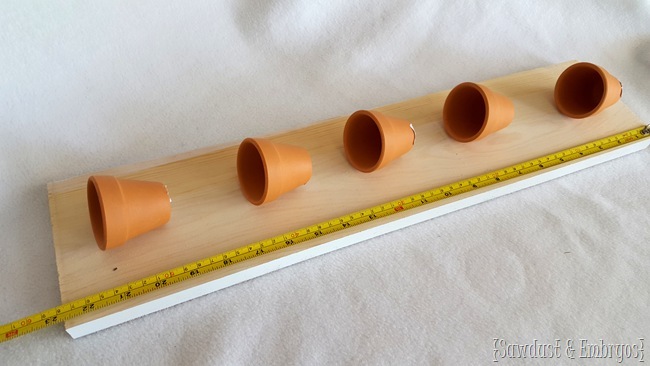
 Shelve we figured, this cardboard cut out the template and rascherchivaem board
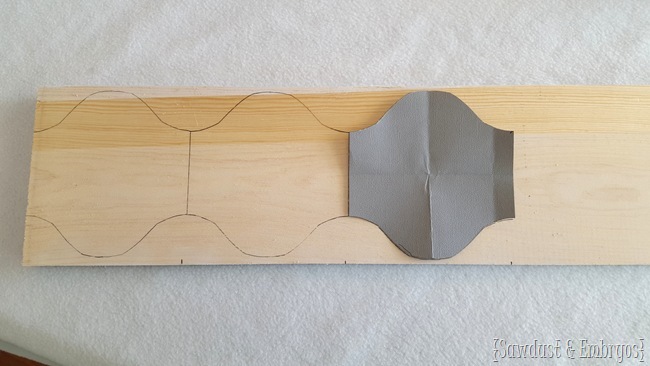 Scrollsaw shelf and process it at the edges
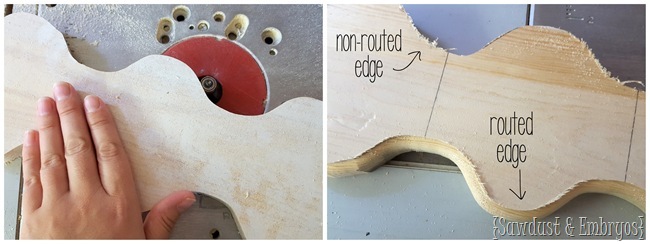
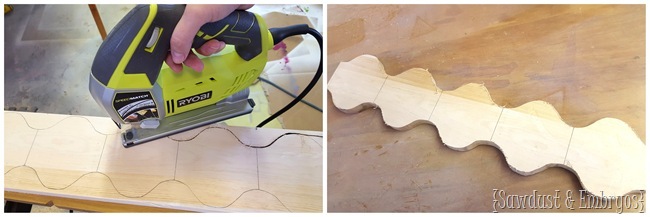
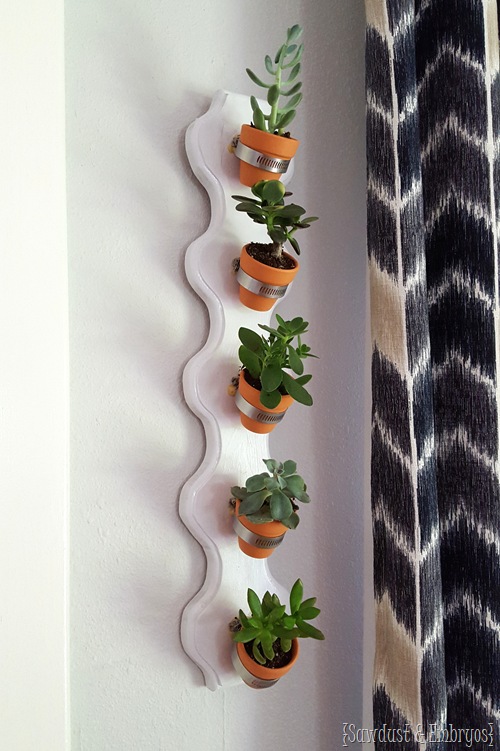
 Paint any paint for wood. The color of the shelf is to match the interior room
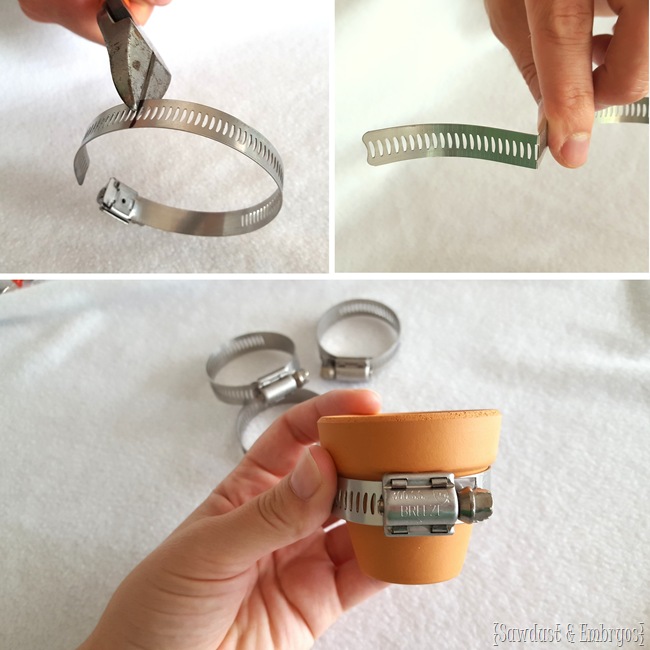
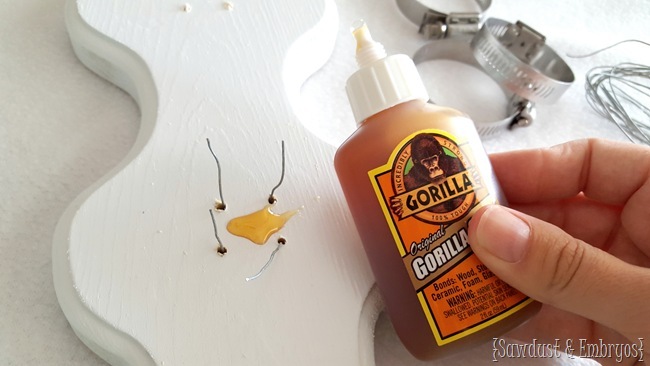
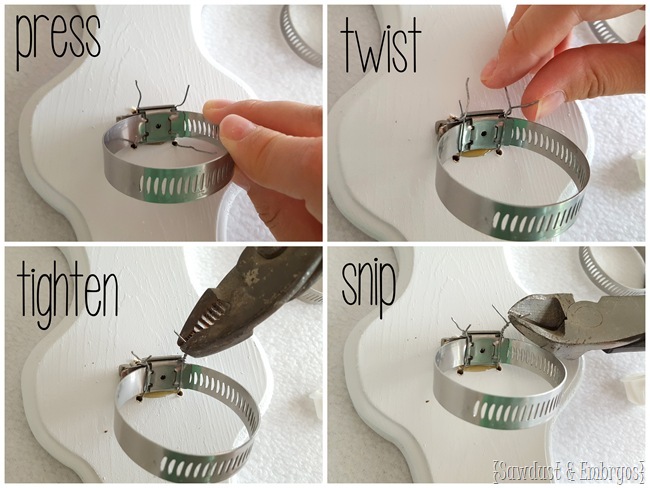
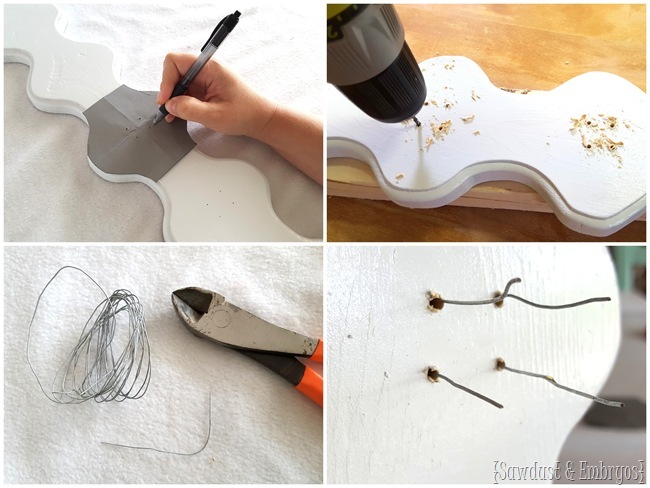 Pot will hang on the shelf with metal clamps. For clamps drill holes and insert the wire