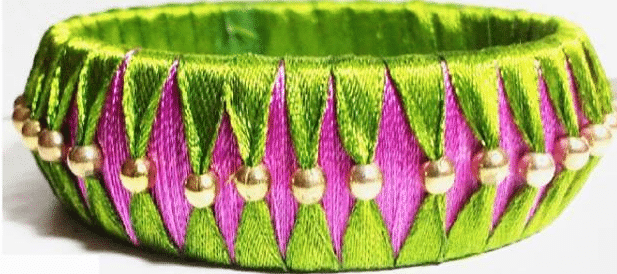
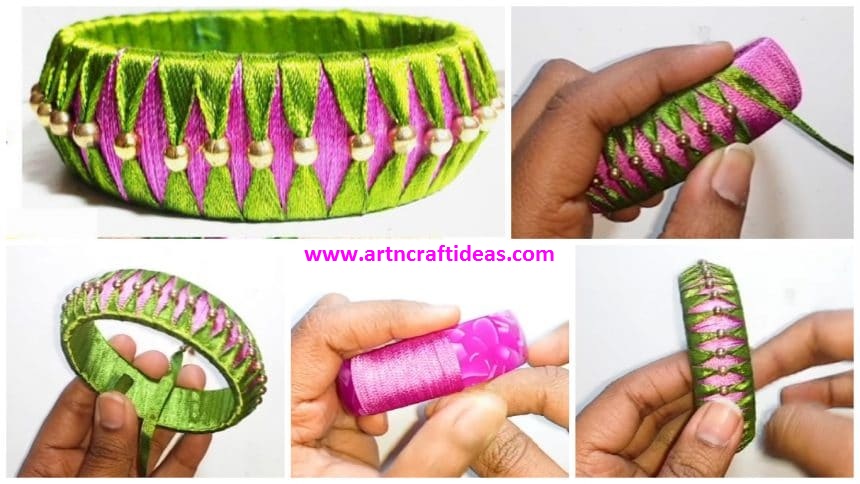
Explained how to make silk thread bangle using ribbon and beads.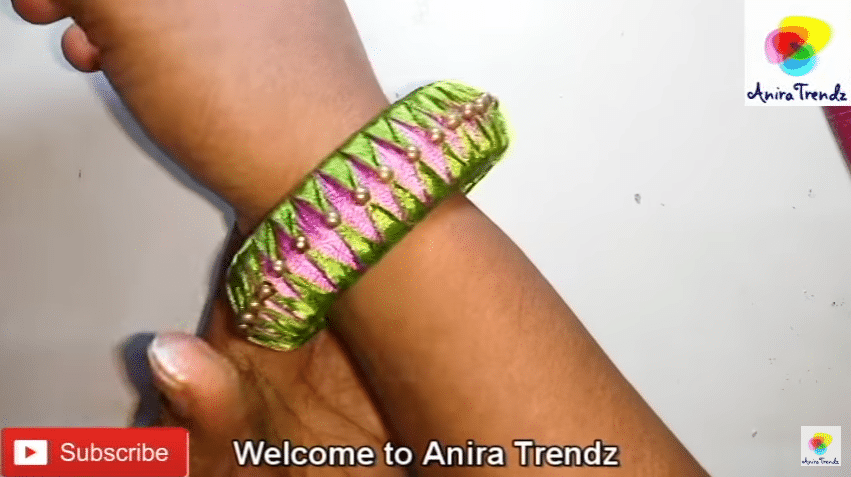
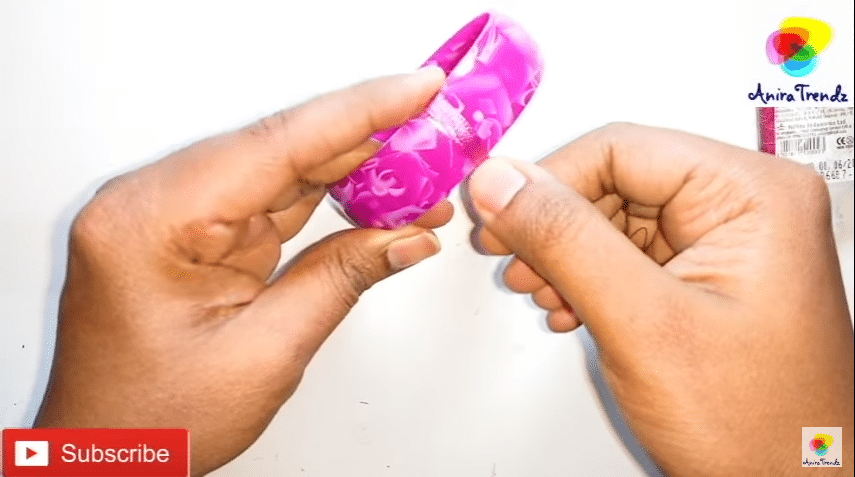
 Required Material:
- Ribbon (1cm or below)
- Silk thread bangle
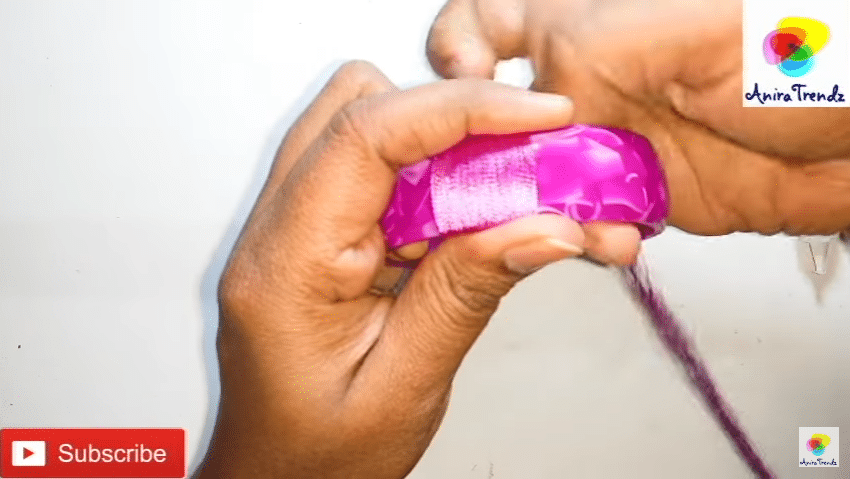
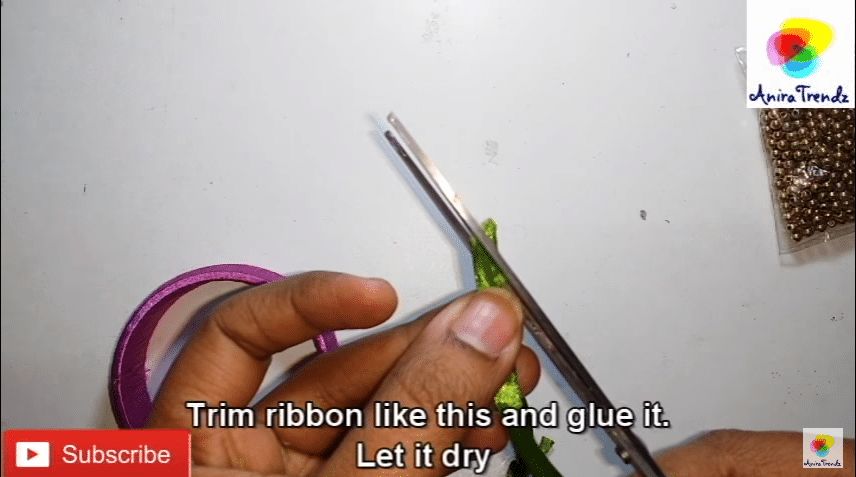
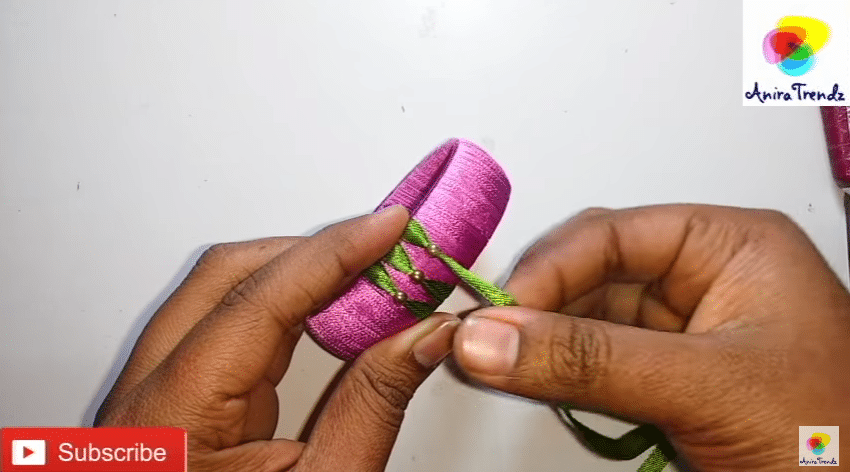
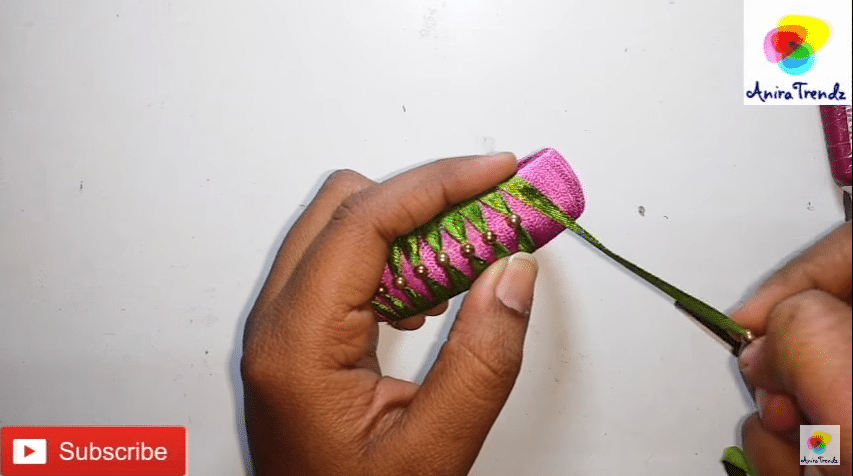
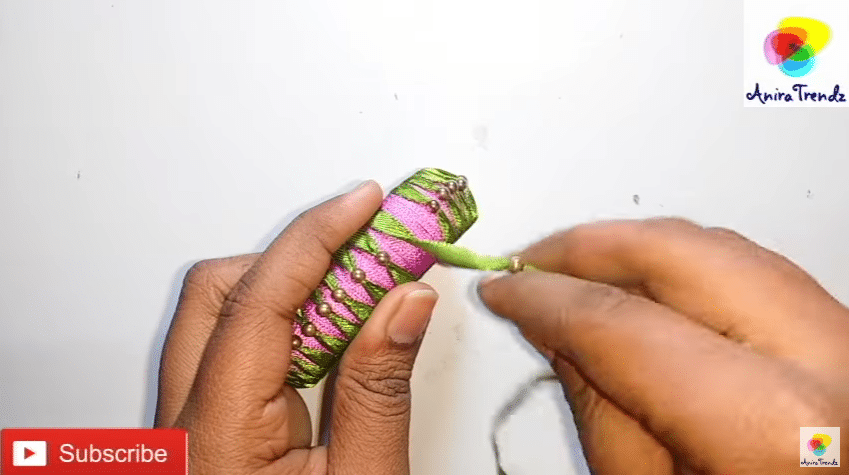
Beads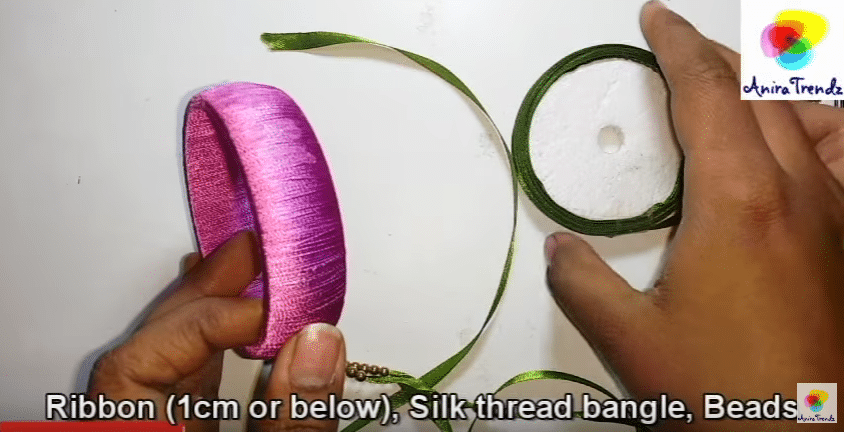 Trim ribbon like this and glue it.
Let it dry.
 Here is the finished bangle.
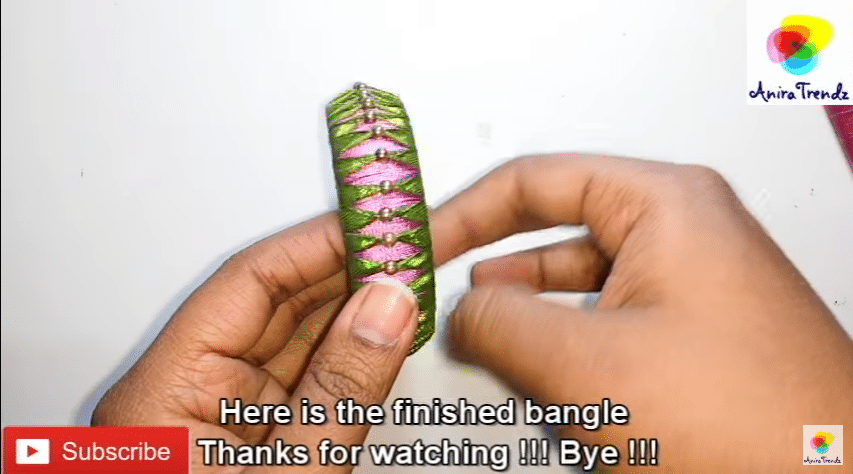
Get Daily Art and Crafts Ideas & Tutorials…
Explained how to make silk thread bangle using ribbon and beads. Required Material:
Beads Trim ribbon like this and glue it.
Let it dry.
Here is the finished bangle.
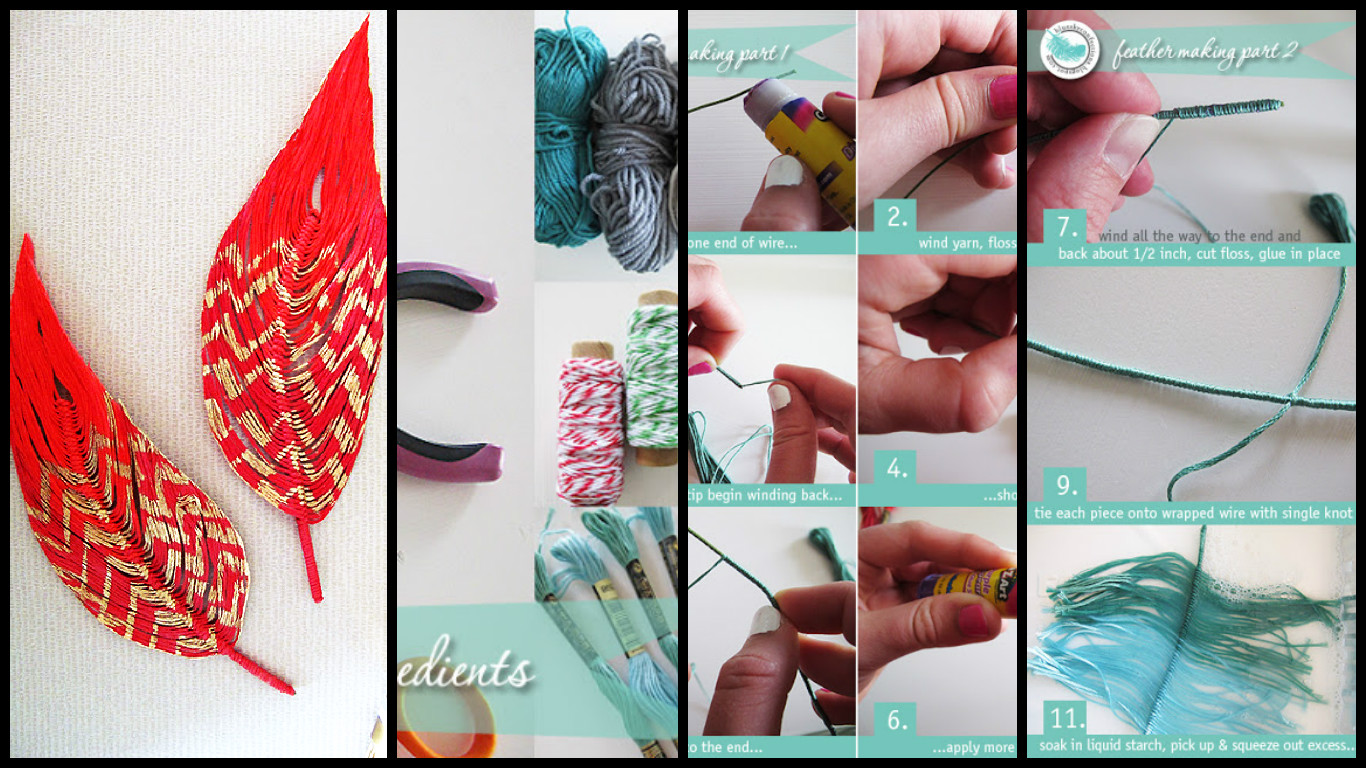
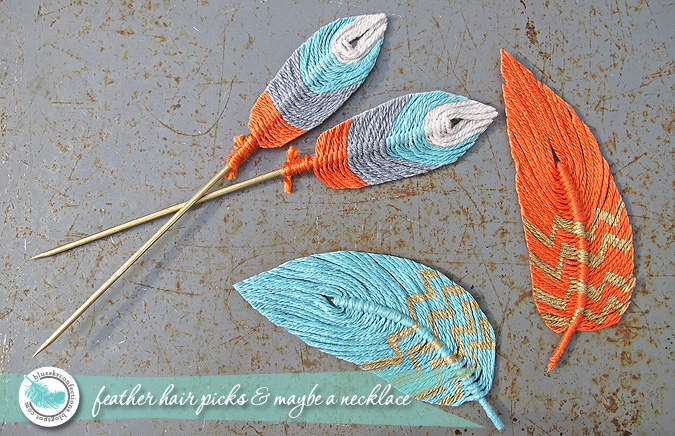
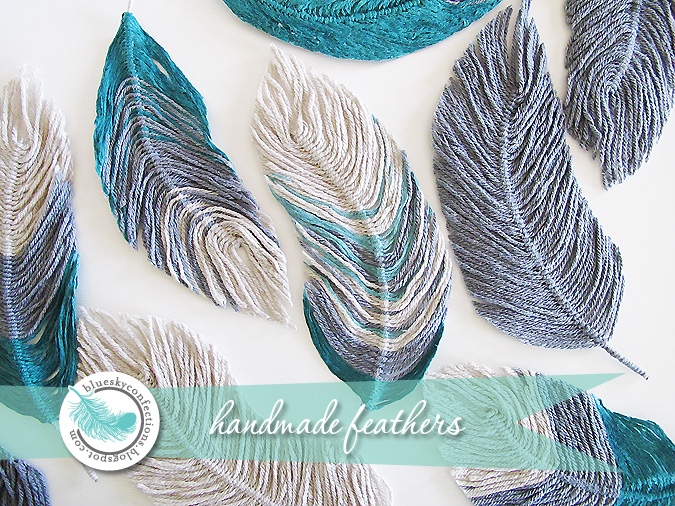
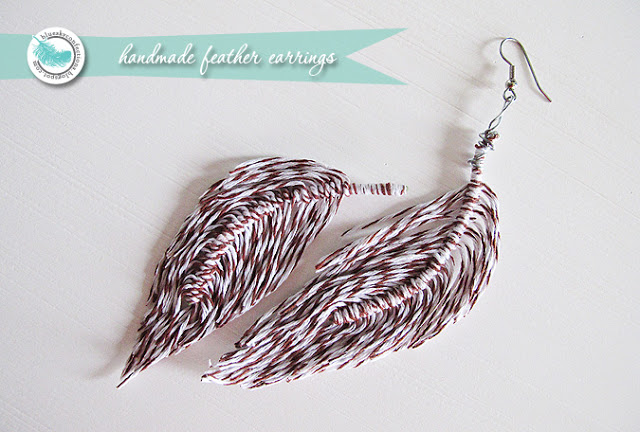
Now I’ll show you how to make handmade feathers.
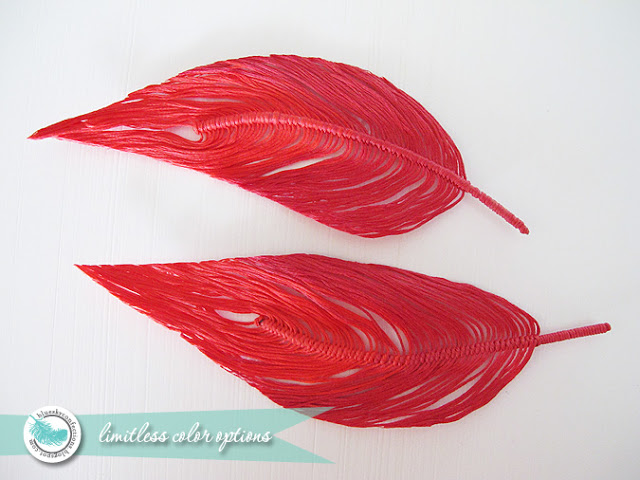
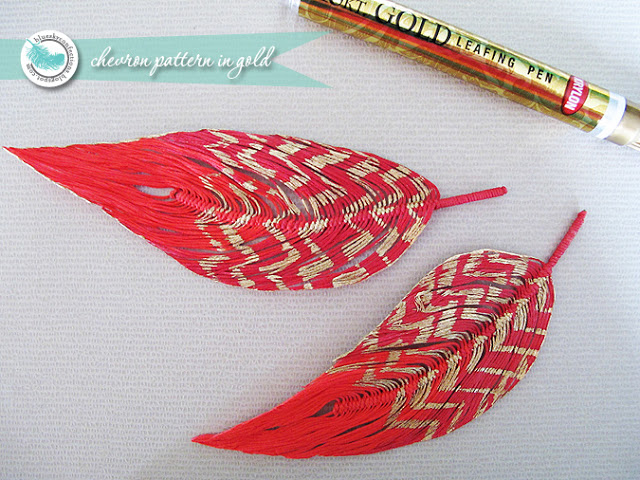
For we used threads, but you can c / b twine or wool. Colour threads of your choice.
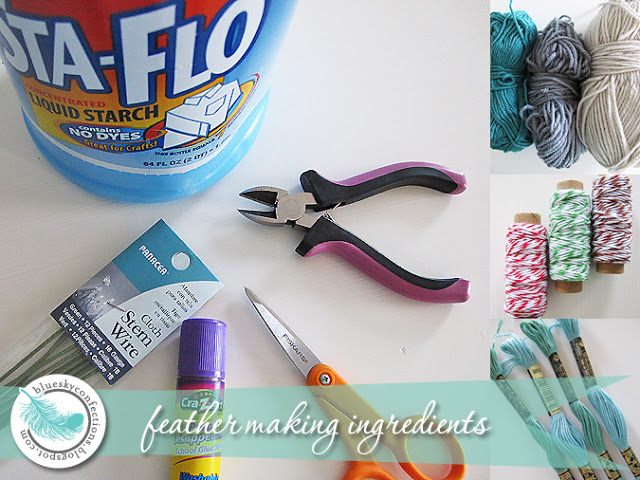
What you will need:
1. In the wire-based, pre-wire smeared with glue, and retreated about a centimeter from the edge, beginning to wind the thread.
And when they came to the edge, we turn and shakes to the other end. We got to the other, turned and wound another centimeter in the opposite direction. So we hide the ends of the thread. The tip of the wire and the tip of the thread good sizing.
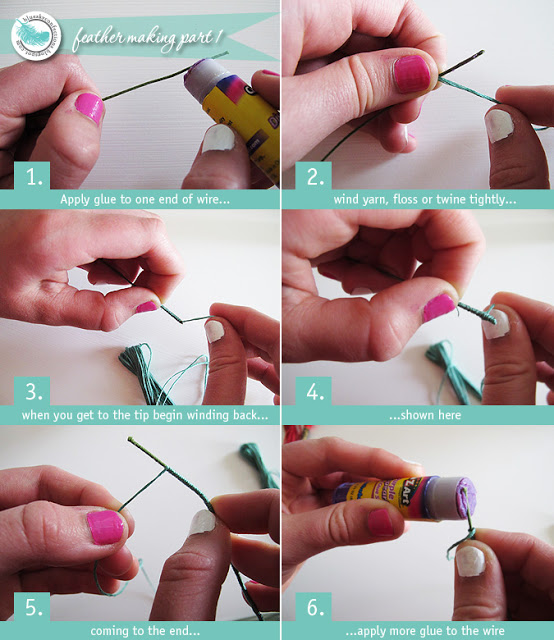
Next of selected thread is cut into pieces about 3 cm long
On the basis of a feather are starting to impose our segments close to each other in the usual single-node
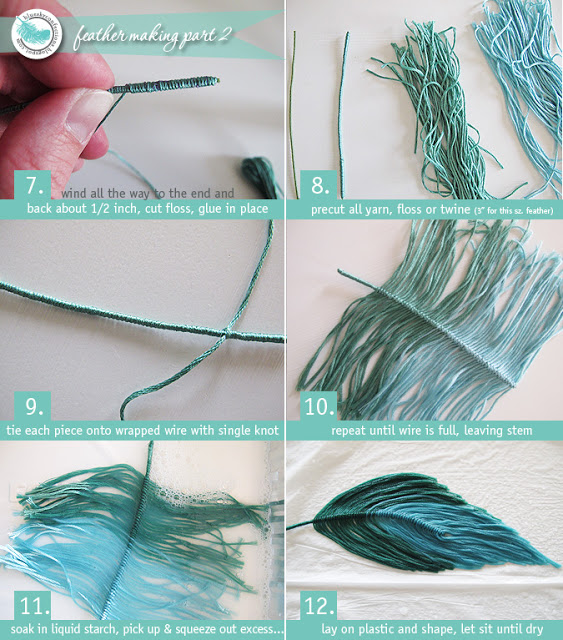
Now cook the starch
That proportion: half tablespoon topless on a cup of water (~ 250 ml)
For those who are not on the subject: first dissolved starch in cold water, then put on a small fire and bring to a boil/transparency / thickening, well you understand – get jelly)
Next, in the resulting “jelly” intensively we bathe our feather to thoroughly wet the threads.
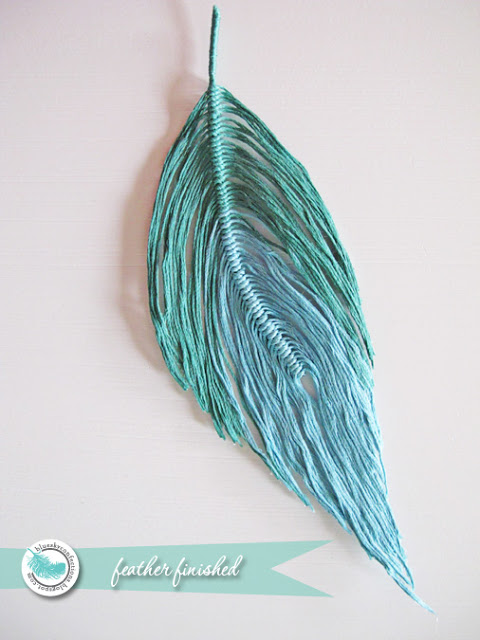
We take out a feather from starch, squeeze, and spread on any smooth surface.
Then gently straighten the skin, smoothing them with your finger. Optionally, you can bend the wire to give the pen an arc shape.
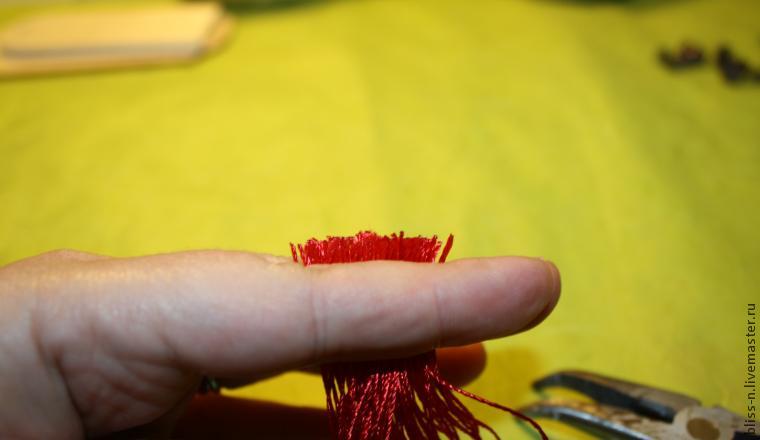
When the pen is dry, Let us give him a neat appearance. Make a haircut with scissors.
Now, our pen is ready and can be used in various design compositions.


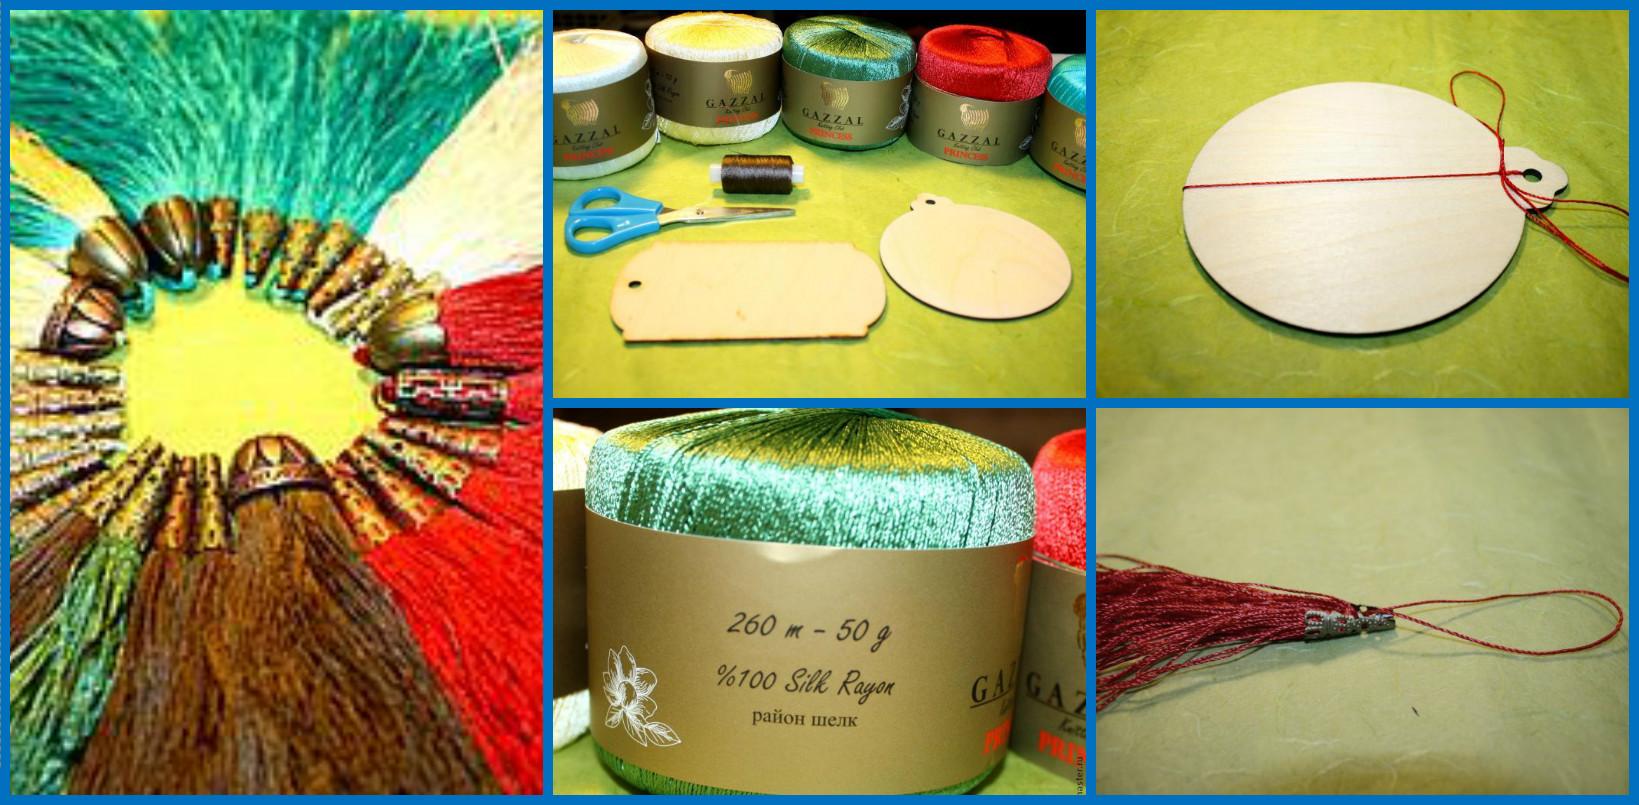
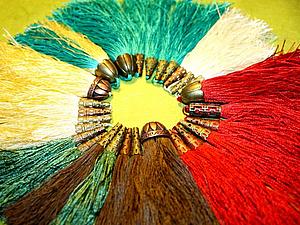
Brushes are very often used by us in the interior. They are in vogue for centuries and are always a decoration of our house.
Often we, master, use a brush to decorate their works. Looking for beautiful hands, I came across a very poor range and decided to make the brush itself.
So we need to work:
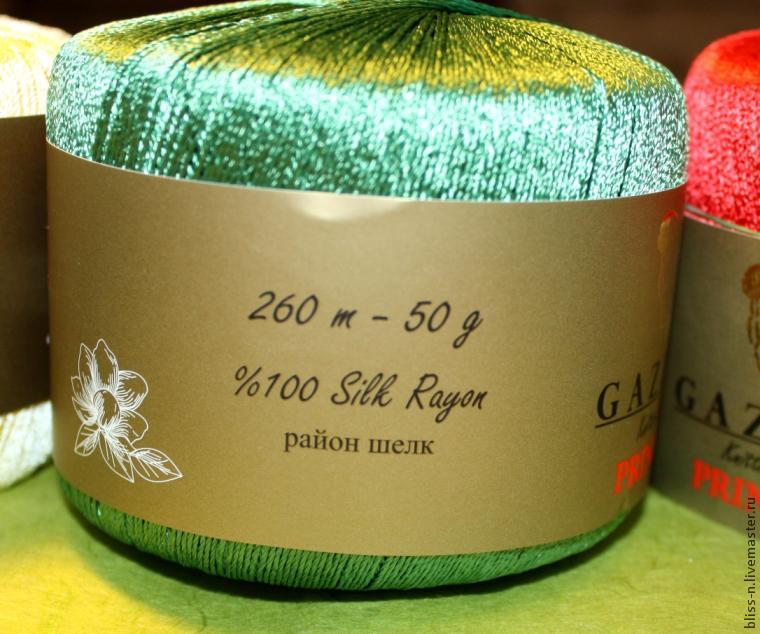
1. Threads of silk or nylon.
2. plank.
3. Scissors.
4. Thin hook.
5. Super glue gel.
6. Caps for beads.

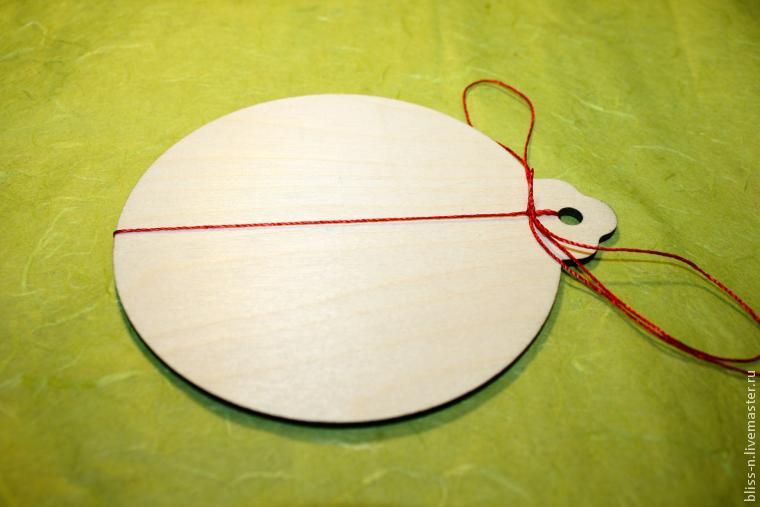
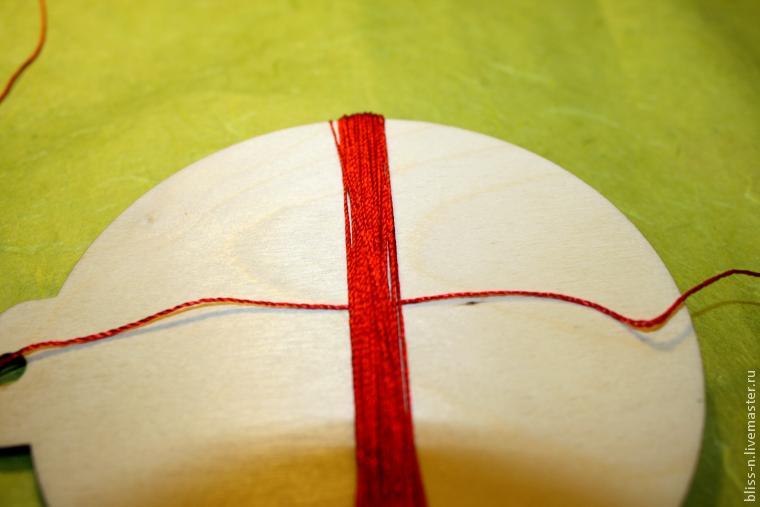
Step №1
I want to draw your attention to a thread. After a long search, I stopped here on such a silk thread, which is very beautiful shine. Also in this master class will be used nylon threads for shoes (brown).
Step №2
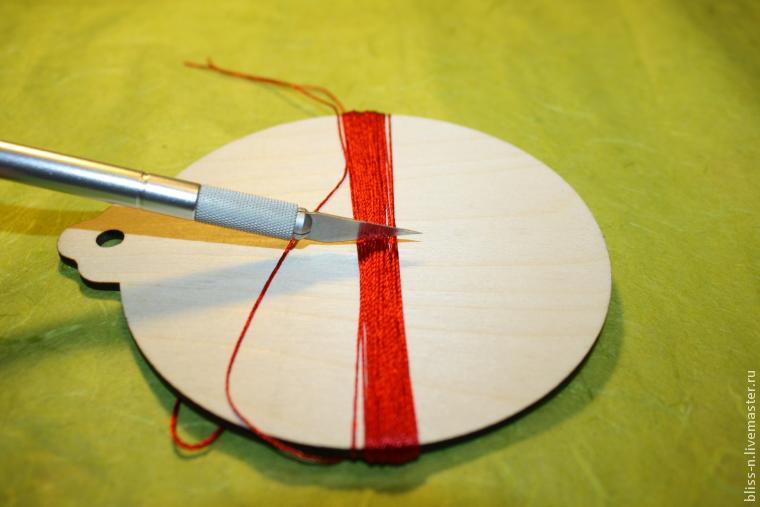
Cut the thread, in the threaded hole and is fastened on the bow tight side, so we do not interfere with the knot in the winding thread.
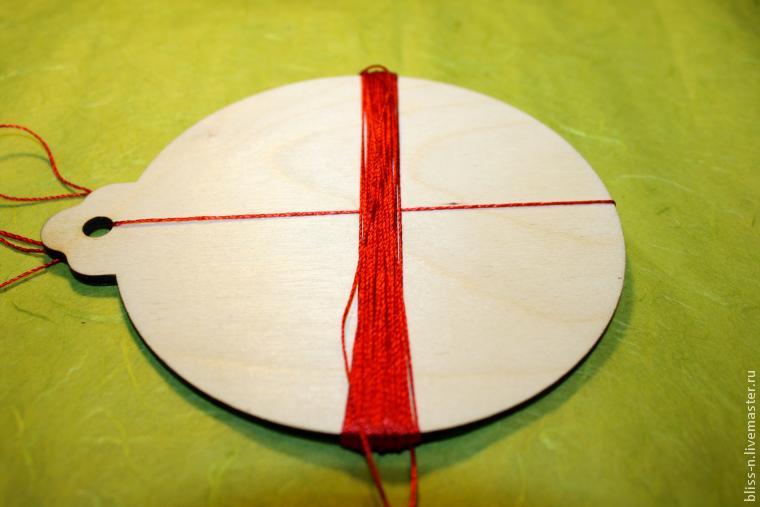
Step №3
Overturn bundle and begin to wind down the strings.
Step №4
Next, untie the knot side and take out the thread.
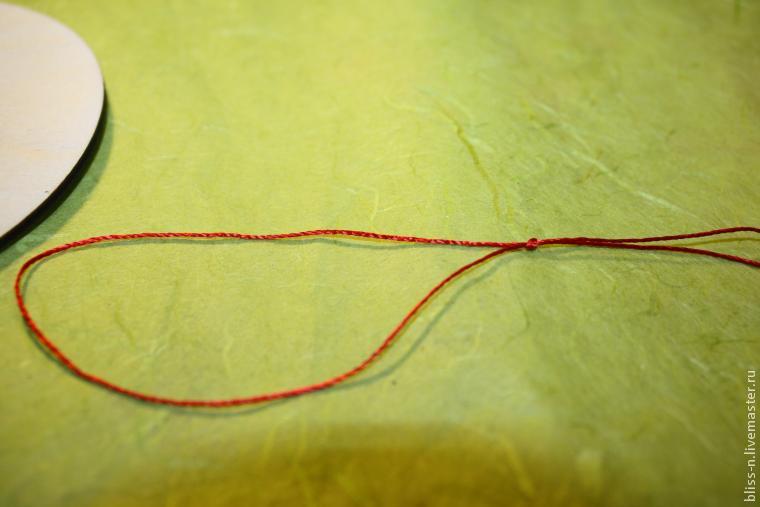
 We tie a double knot.
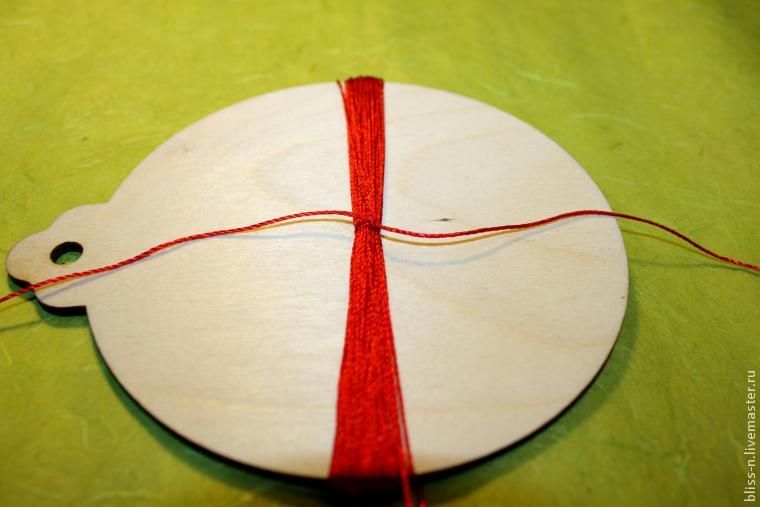 Then drip on the bundle drop of super glue.
 And tying another knot. This is necessary because the silk thread is very smooth and have the ability to come untied.
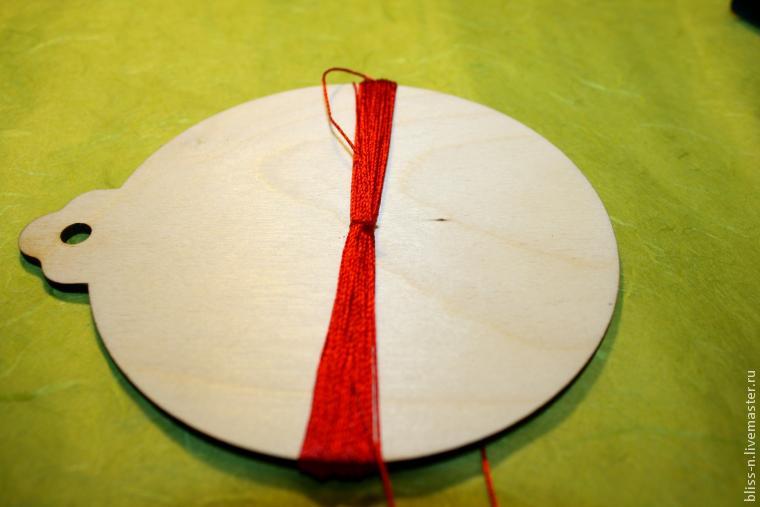
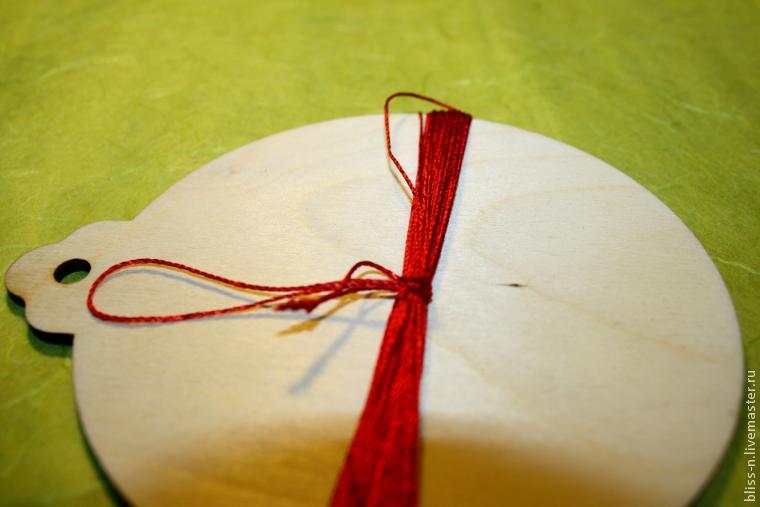
Step №5
To make a loop – hanger for our brush – cut the extra thread and tying her knot, forming a loop.
 Also, we fix the knot with glue and cut the unnecessary tip.
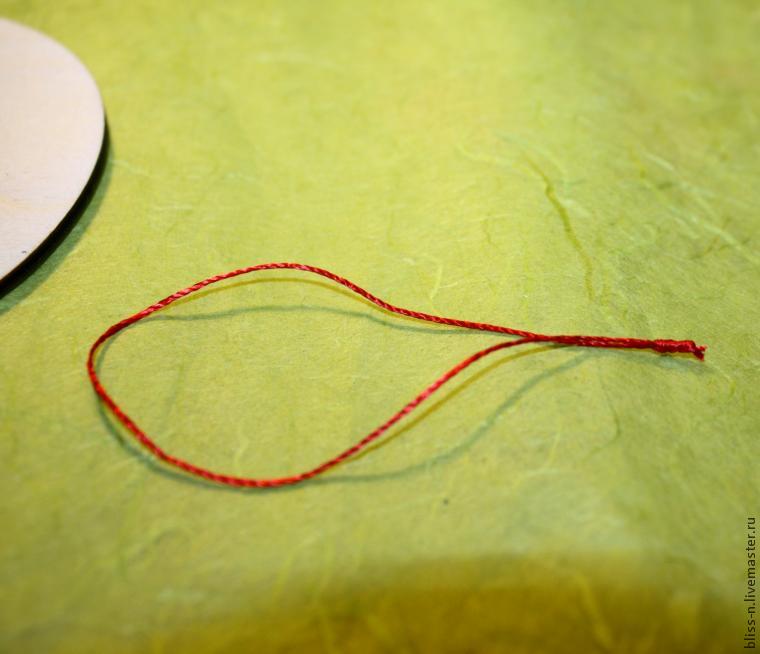 Is passed under the wound.
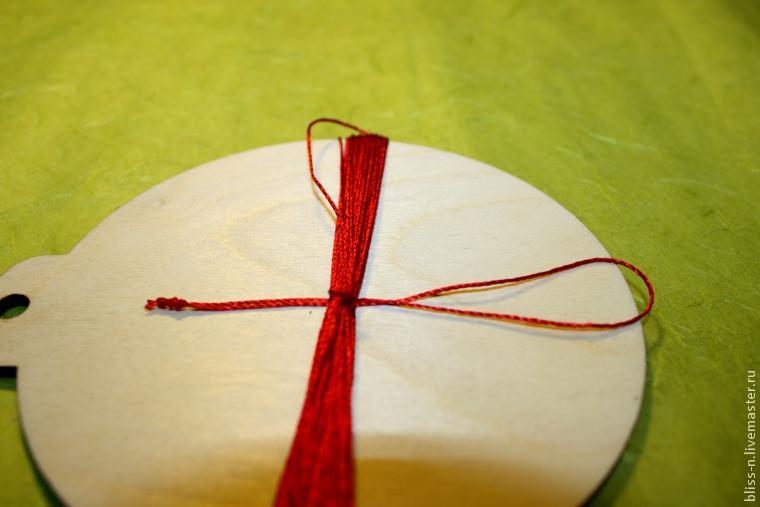
 Tighten the loop.
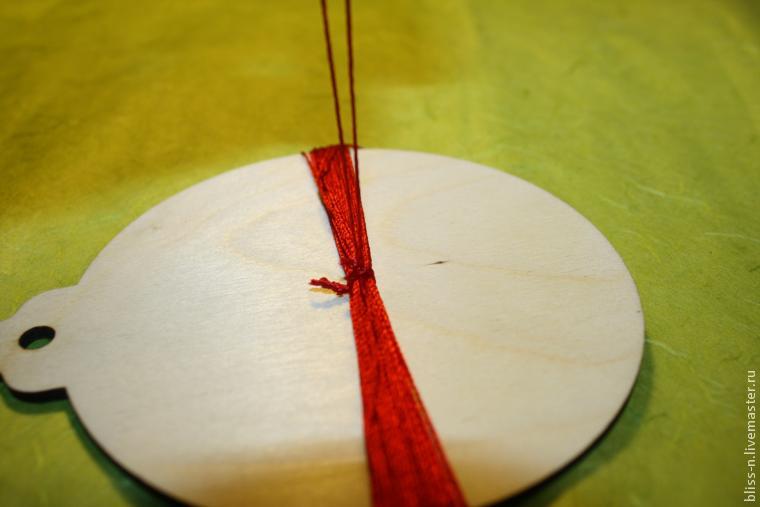
Step №6
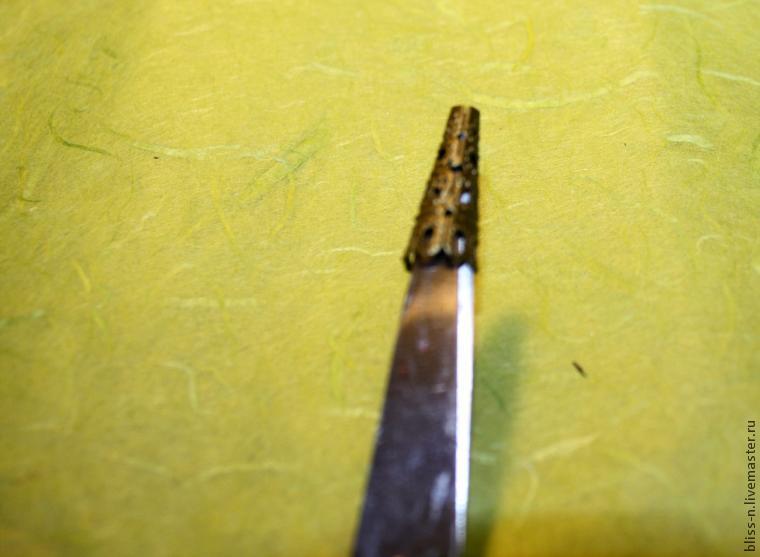
Overturn of wood and cut the thread with a sharp knife.
 We get just such a brush
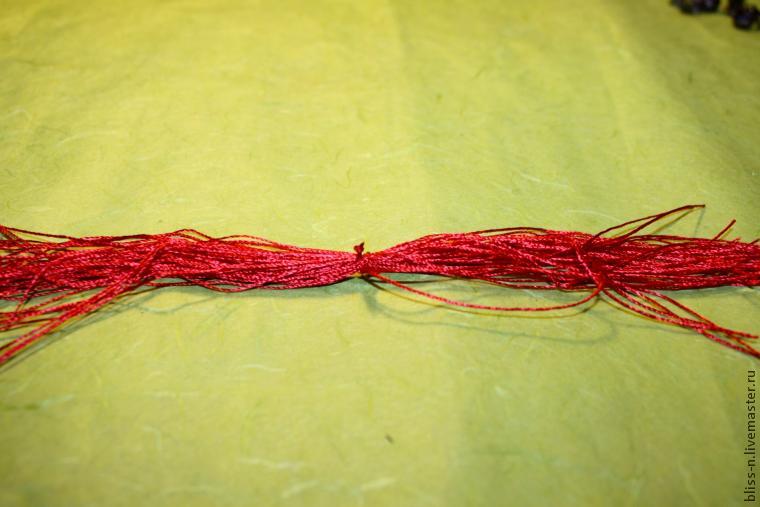
Step №7
Take the cap for beads. I have a different, preferably take them longer.
 Insert the scissors in it and decompress.
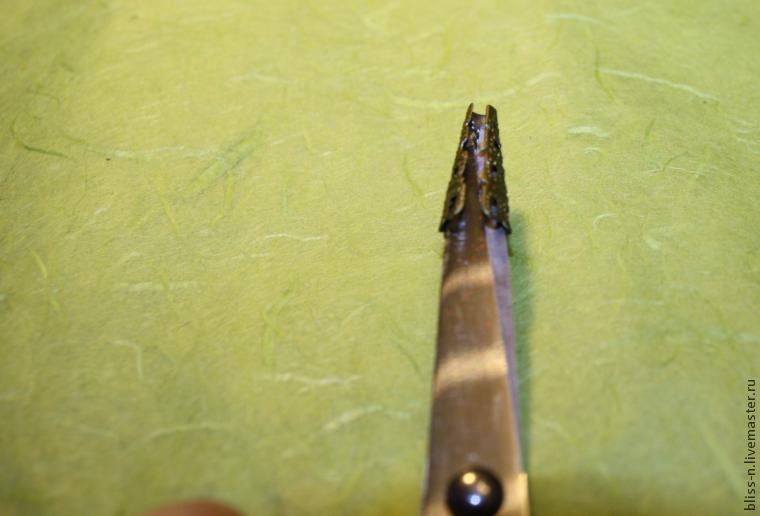 We turn off the brush in half, is passed in the cap.
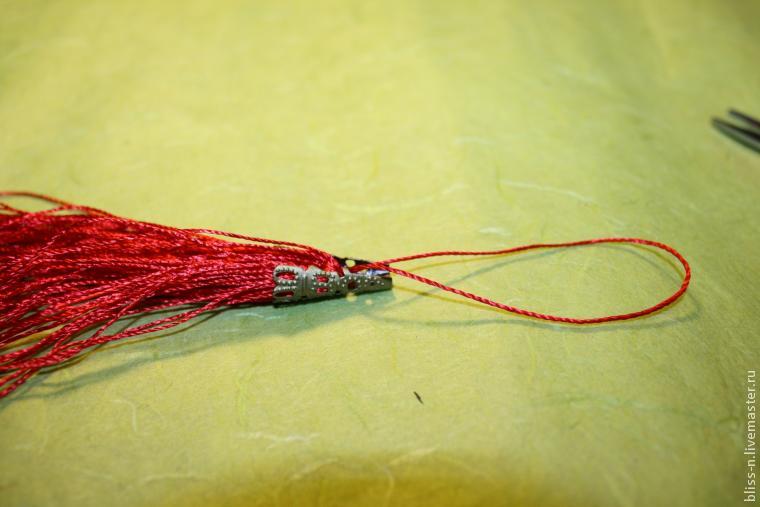 Hold your fingers, tucking and hiding our strong knots.
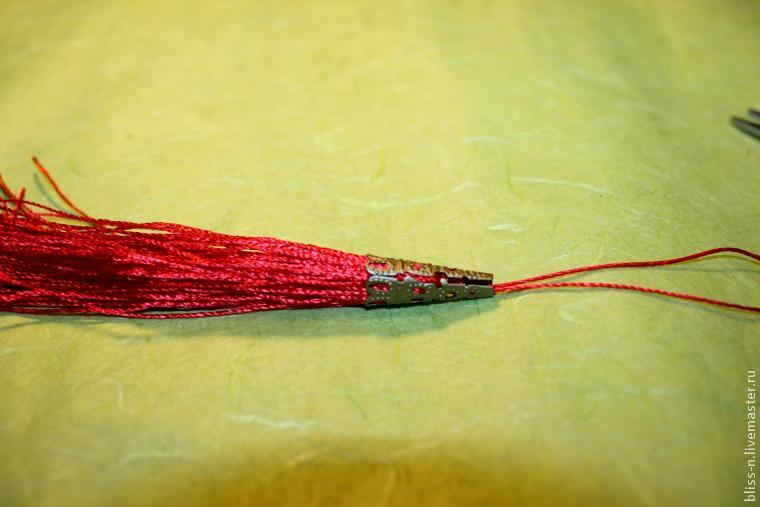 Then stifle stronger.
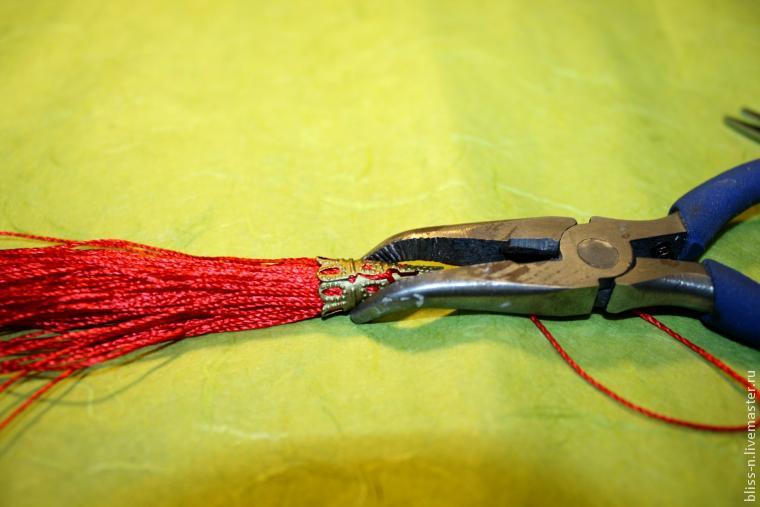
 We get just such a brush:
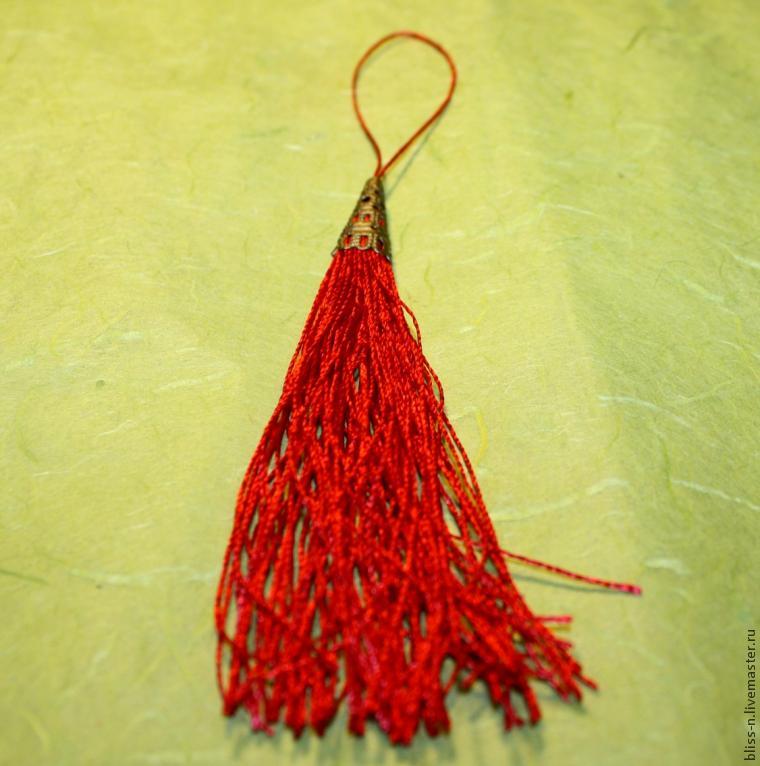
A few tips:
In order to thread the hanger into a large cap for beads, use a small hook.
If the strings are not wrinkled or smooth, they can be steam the ferry
The ends of the thread can be toned bitumen or ink, they will become more vintage.
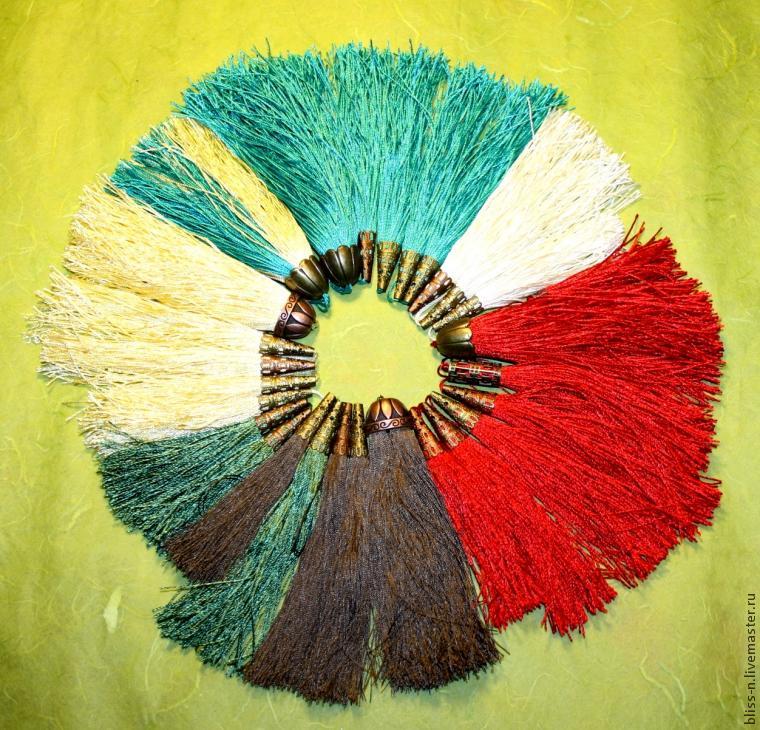
Instead of caps for beads can sheathe beaded tassels.
Thread-hangers can be made from beads.
Instead of silk thread can be used thin twine, then you get a very different, but also a beautiful result.
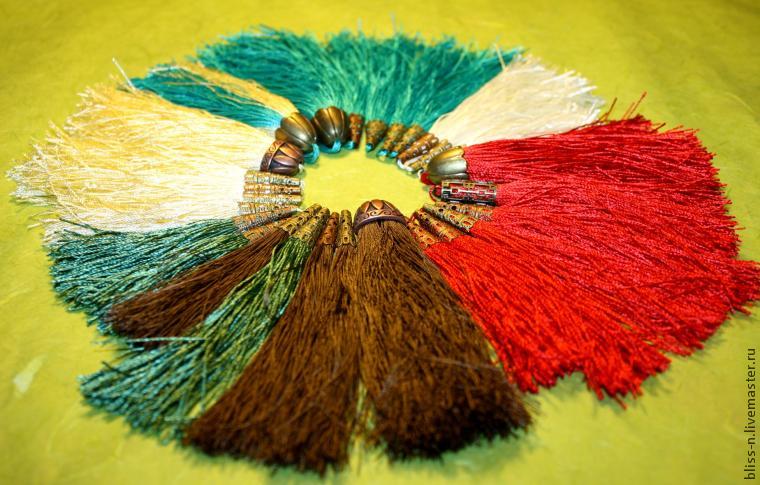
So, after spending one night here we get a supply of beautiful brushes for our work:
 Thank you very much for your attention!
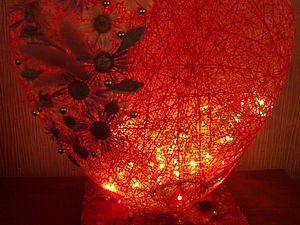
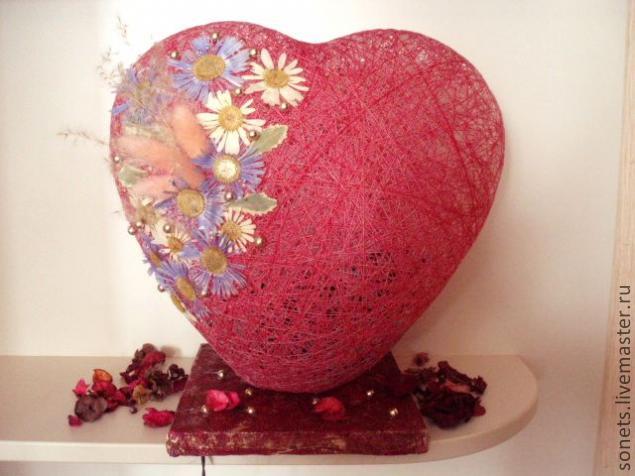
Lamp-night lamp “Loving Heart” (published in w. Master (Belarus))
In anticipation of the holidays, we overcome suffering – “What to give to your loved ones?” I want something unusual, surprising, no matter what do not like. I would like to express our overwhelming feelings, and the words hard to find? Let’s give your favorite marvelous light “Heart”. With this gift, you will be able to say everything without words.
The night can give mothers on Women’s Day, girlfriend or daughter for a birthday, a favorite on Valentine’s Day heart “beats” from the senses and that’s it. Light a lamp in a romantic evening only strengthen your feelings.
And you can just for yourself, your favorite, to create a miracle. The interior of the bedroom, it certainly attracted attention.
everything you need to prepare in advance.
Getting to the manufacture of
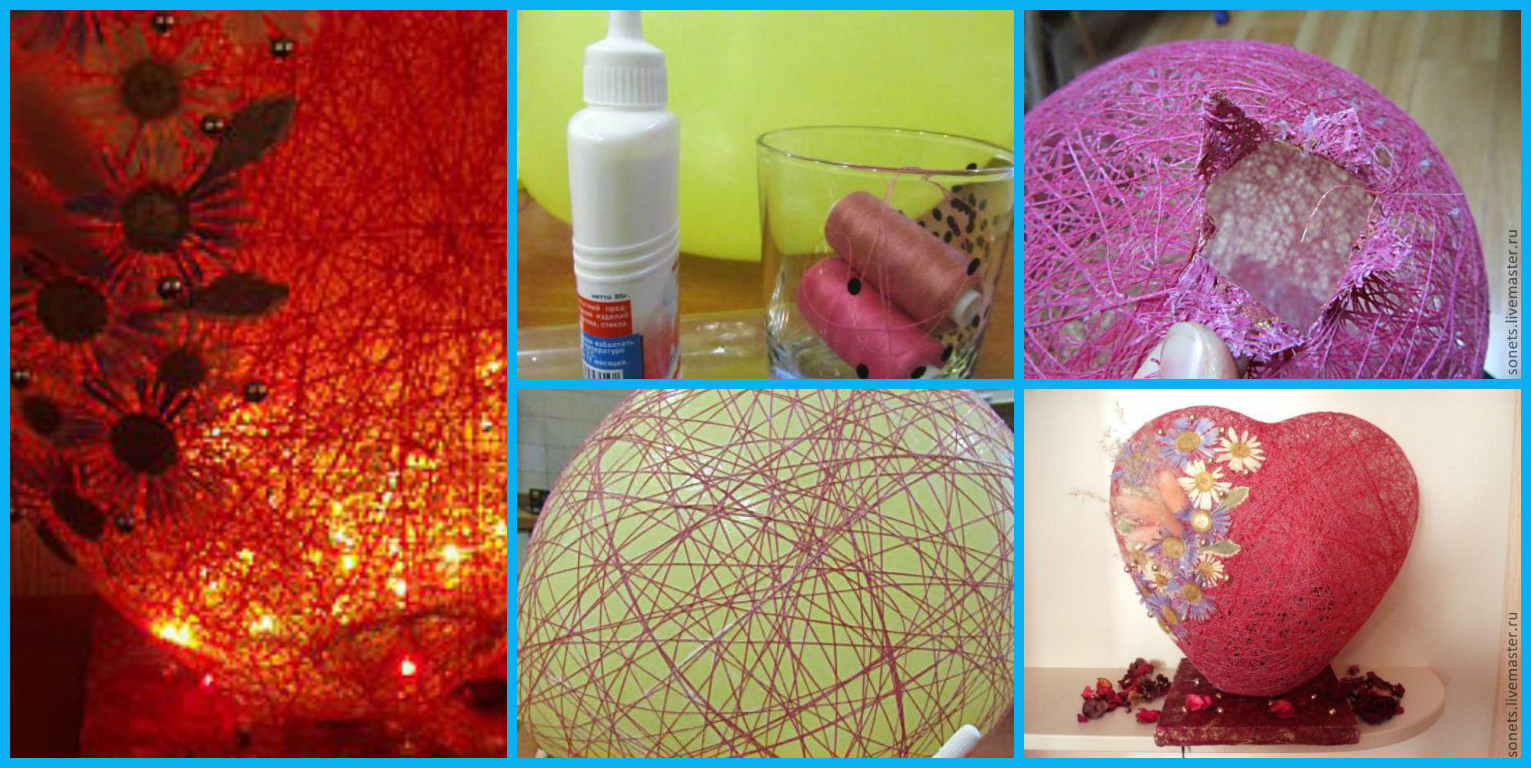
1 First, make shade for our lamp. Inflate balloon heart to medium size. The size of the inflated balloon and will be the size of our lampshade.
2 bottles of glue PVA bottom pierced with a needle with two vdet in her thread.
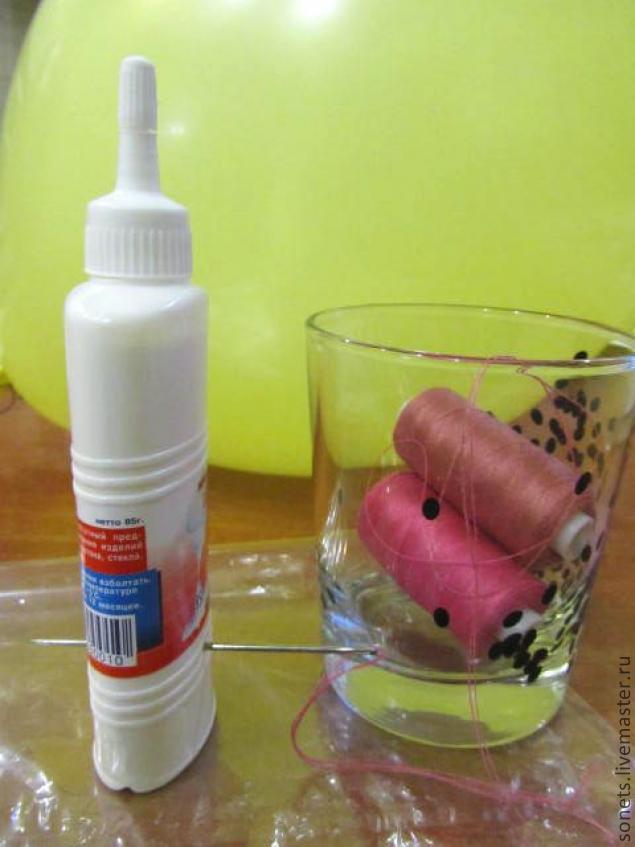
Figure 1) extends a needle through the bank, took out the other side, take out the needle thread. Pierce the bottom necessarily banks unnecessarily. the thread must always be wetted with glue, and the amount of adhesive in the work decreases. For the convenience of working with a thread spool, and a jar of glue put in jars.
3 end of the thread tying the tail of the ball and start winding a ball
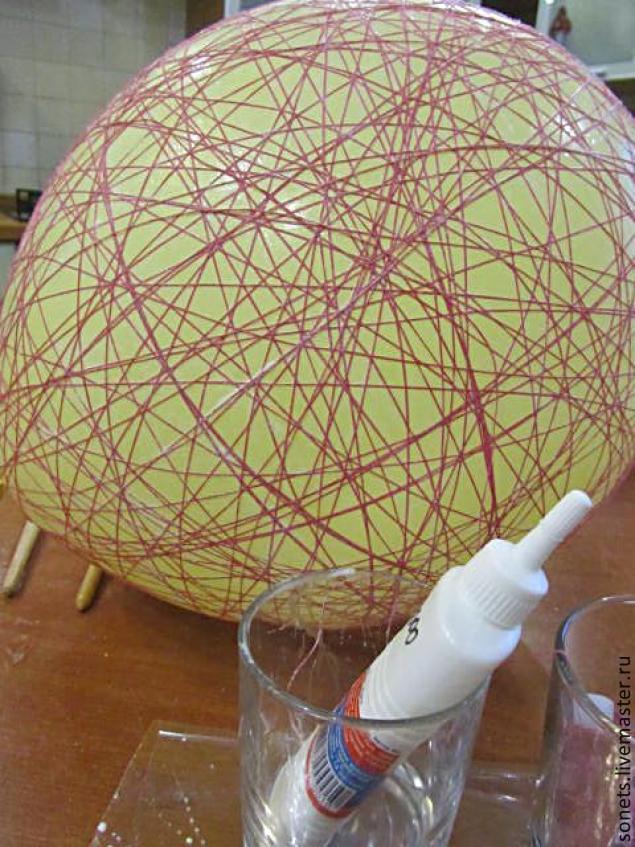 Fig. 2). The thread must always be wetted with adhesive. Initially, it will be inconvenient and thread all the time to slip the ball, but we’re stubborn, hard-working, we will succeed!(Figure 3) tauten thread diagonally lengthwise, crosswise. After 10 min, the winding becomes easier. (Fig. 4)
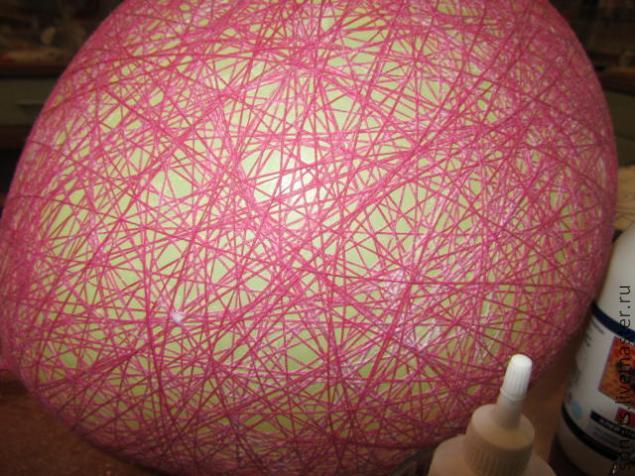
First, we get the hand and understand the principle, secondly, the thread stops the slide, unnecessarily. It will cling to the wound.
Roundball winding easier than the “heart”. The “heart” do not forget to wrap the “ears”. Look where we are sending to the emptiness and thread. Drum thread pool is not empty. If the glue is ended earlier thread, just it from other banks. That wound ball (Fig. 5) Leave it to dry. When the thread is almost dry, punctures the ball. Threads will be tough and will keep the shape.
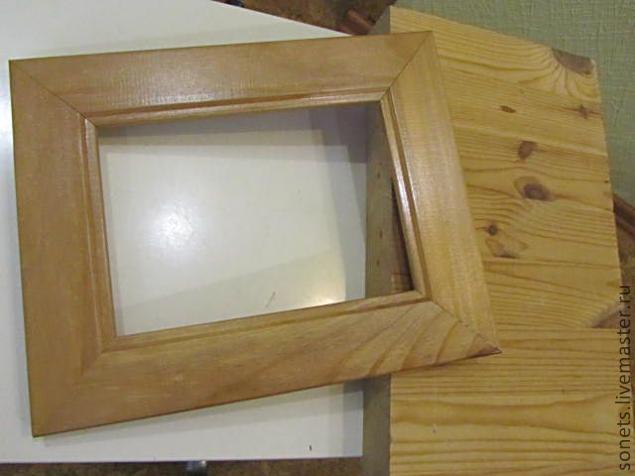
4 Getting manufacturing base. I took a stand for the tablet. Drill a hole in it (you can help one of the men, but not one for which it will be a surprise. Although …. Maybe he was. He did not even guess what it is and why.) The hole should be of a diameter that through it might get through Christmas tree garland. Instead, you can use a thick plank picture frame, replacing the glass with a thick cardboard. Or, in extreme cases, try the box with a thick, dense cardboard, not too thin. (Figure 6)
 5 over the aperture ring of glue cardboard, cut from of roll of toilet paper. We attach it with glue well bay. Outside strengthen a strip of paper, grabbing one corner of the ring, the other coming on board. The board. I pasted cloth (PVA) and a bit overshadowed gold acrylic paint. (Figure 7 and Fig. 8 and Fig. 9).
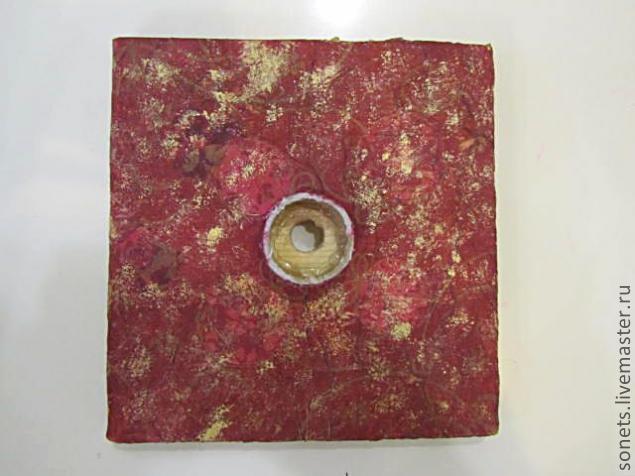 On the reverse side, plates make a groove for the wiring from a garland (Fig. 10)
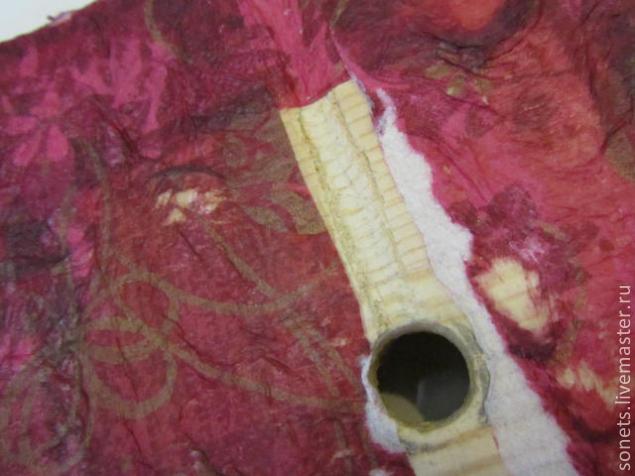 6 Threads almost dried up? Punctures the ball. The ball should unstick itself from the thread. Therefore, it is not necessary to wait until dry. If the ball has dried thoroughly and piercing not unstuck from the thread, will come to his aid. Through the thread is passed a pencil or any wand inside her trying to unstick the ball. If the thread balloon wrinkled, pressed, then we, the same wand inside his straightened, but still try to do everything patiently and carefully. The ball was torn inside the thread. (Fig. 11)
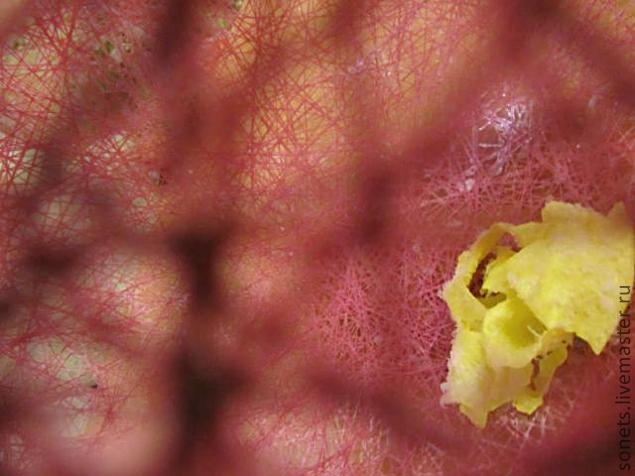
We’ll get it through the skin. It is more convenient to do it with tweezers.
7 At the bottom of the ball (where was the tail), cut out a hole in the form of a lotus. (Fig. 12).
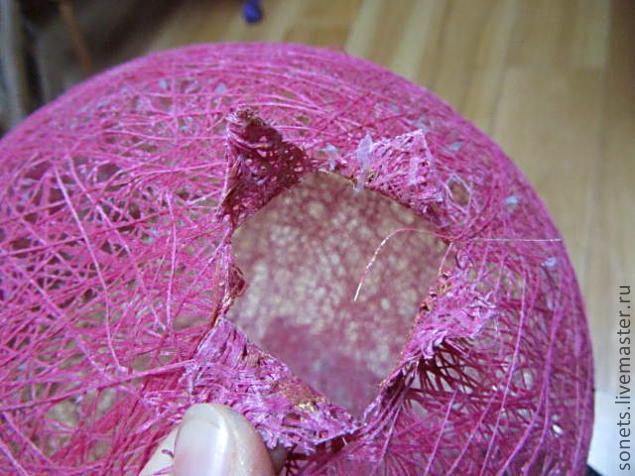 The hole diameter should be with our ring. And it sits on must be tight. (Figure 13).
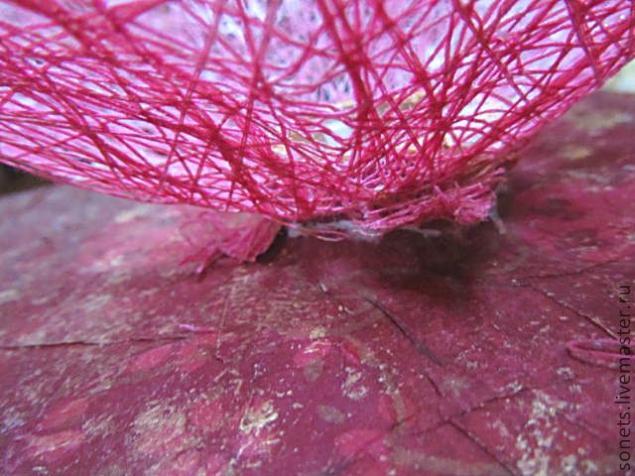 Dress up the ball on the ring, pouring glue. The petals are glued to the outside of the ring. Then you will feel that the ball as if he falls, and “asks” on the stand. Just press it and the place where he sat down on the stand we coat with glue. Just make sure that the lamp was flat, not tilted. (Fig. 14)
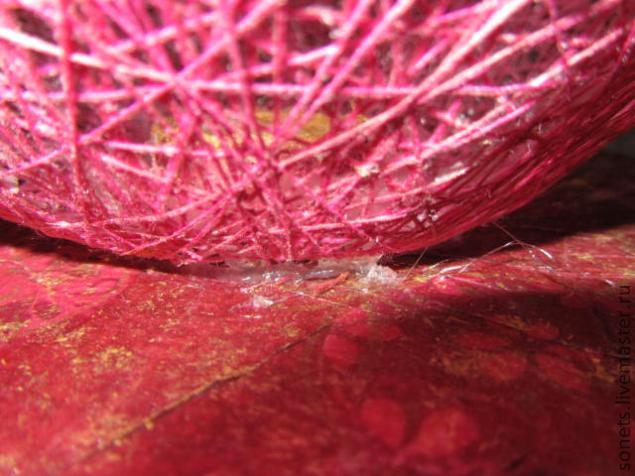 8 Zadekoriruem our “Heart” (in our version, to explain the ball.) I used dried flowers. But you can come up with something of their own. Stick to your decor thread, make “heart” of the most beautiful and loving. (Fig. 15)
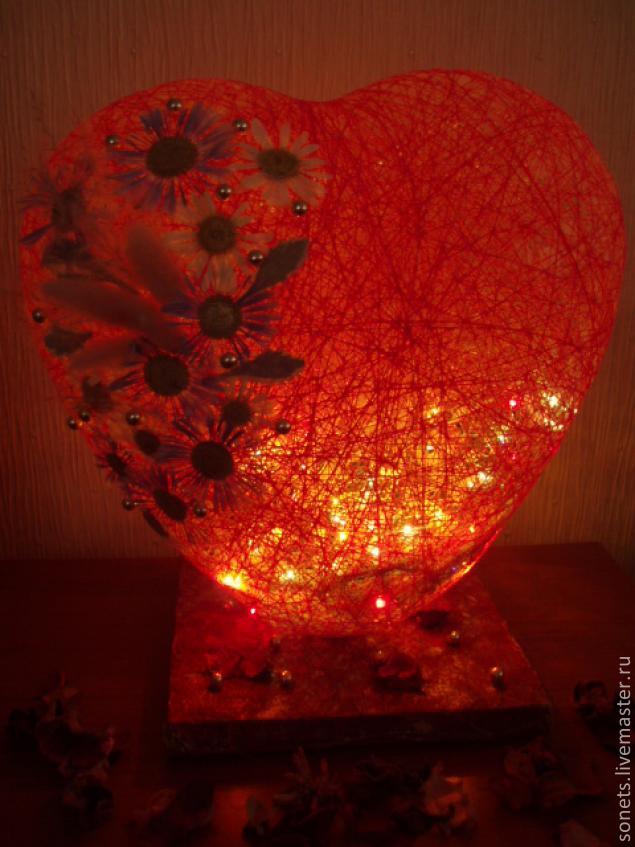
 9 Bottom stand pokes through a hole in the “heart” of Christmas garland. Outside the reserve wire that embarks on the groove and attaches it with glue or adhesive tape.
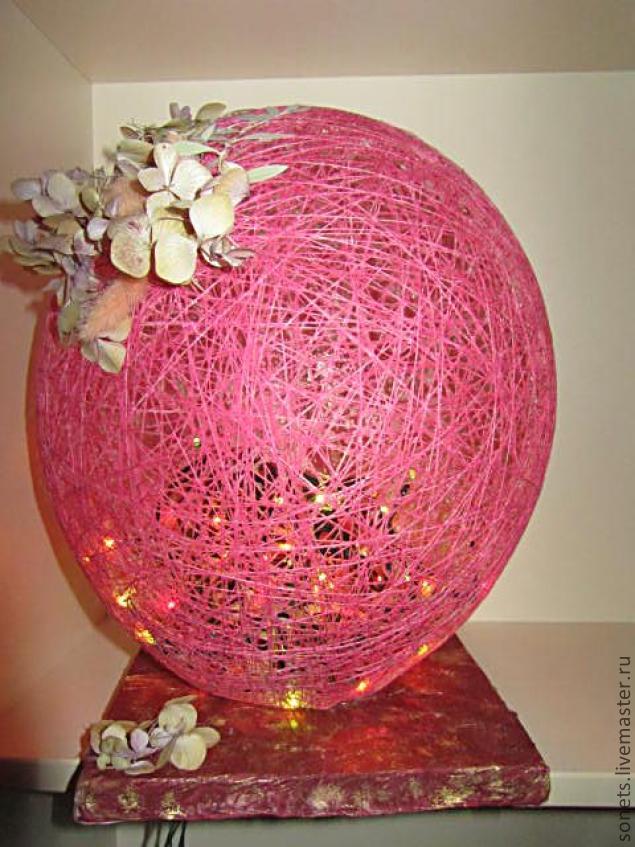 Enjoy your evening
Application of the thread is one of the most popular among children in the arts and crafts. This is explained by that love, especially the use of soft-touch material and the ability to create it using a variety of figures. Just like applications can be attached to the children’s envelopes that would decorate them, which are designed to extract the baby from the hospital or just used in everyday life. Going to the official store Choupette, you will find a large selection of such envelopes. There are reasonable prices and the best quality of items to suit all tastes.
In addition, the application helps to develop perseverance, accuracy, logical thinking, imagination, attention.
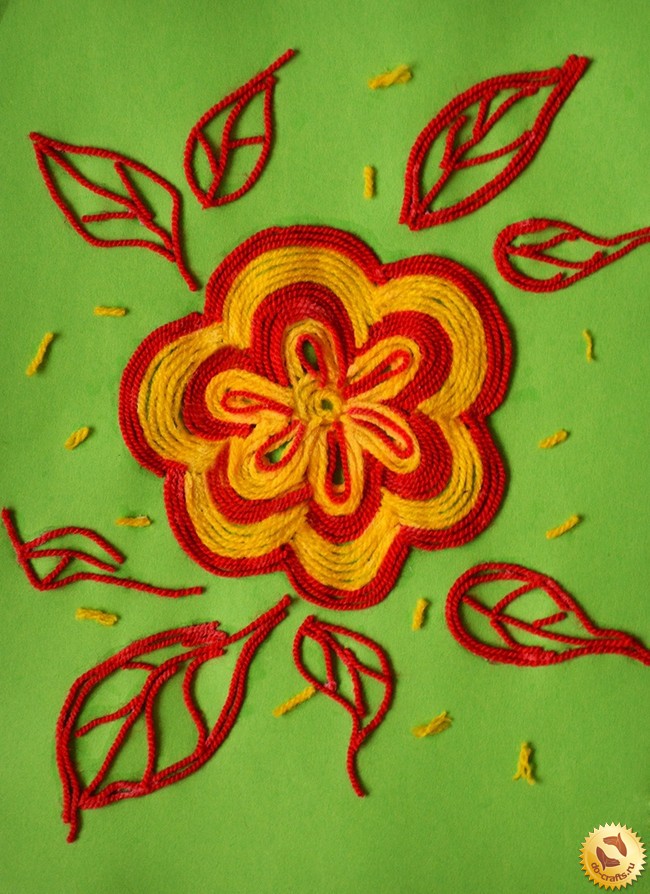
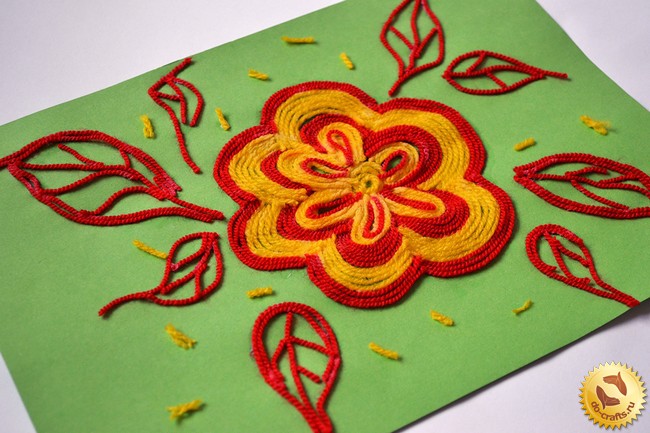
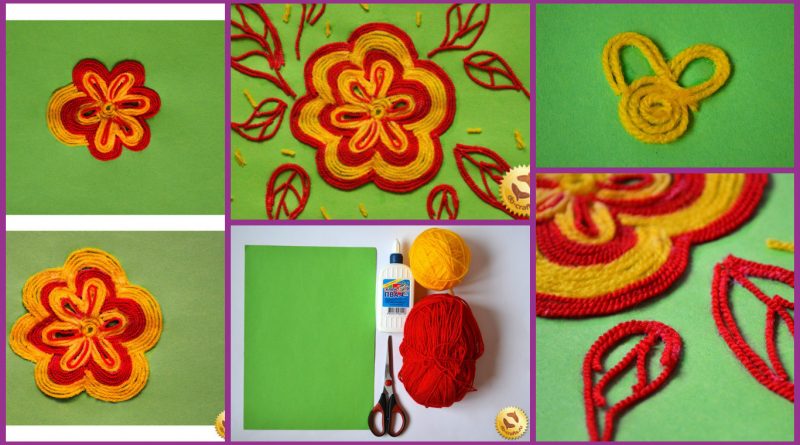
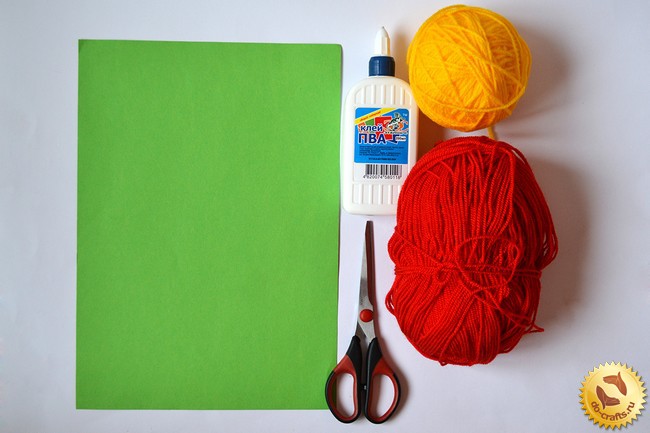
Let’s look at how to make a flower applique from threads for children 4-5 years old with his hands. Before that, we check the availability of all the necessary materials:
1. Color cardboard (green, A4);
2. PVA glue;
3. Scissors;
4. Wool thread (red and yellow).
Now we start to do applique:
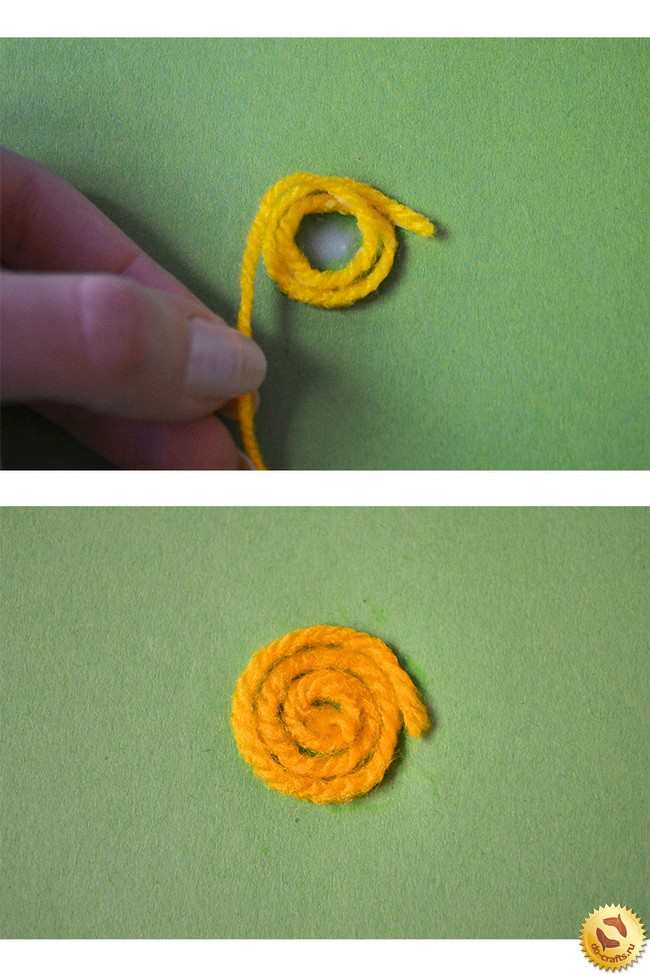
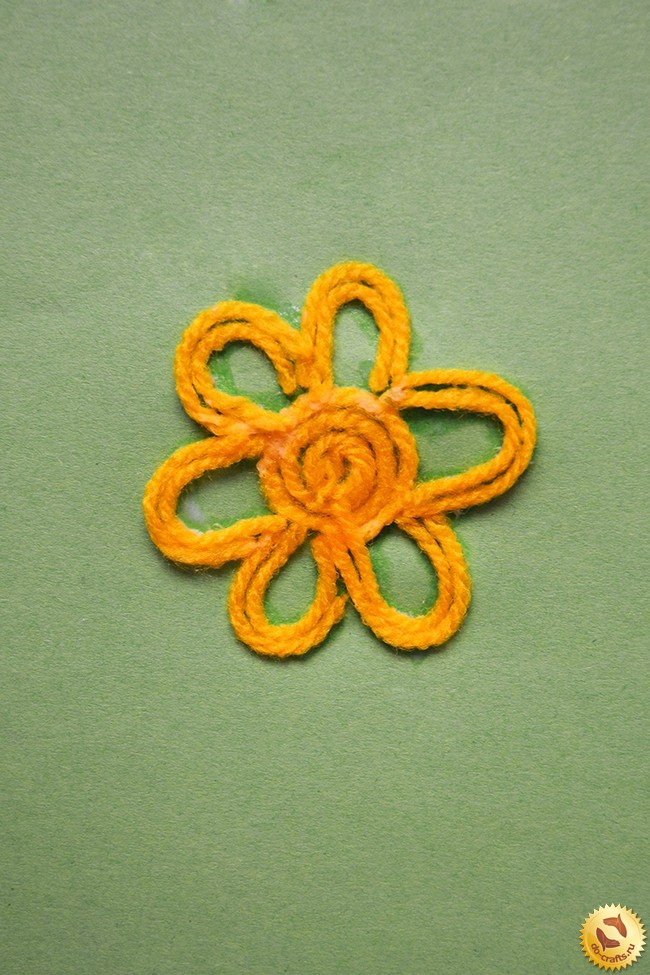
1. In the middle of the sheet put a drop of glue PVA (approximately 1.5 cm in diameter). Then take a yellow woolen thread and wrapped with a spiral in this area.
 2. Next, draw with glue of our first petals of a flower . You can do this by eye, and can be pre-lightly to shape a pencil.
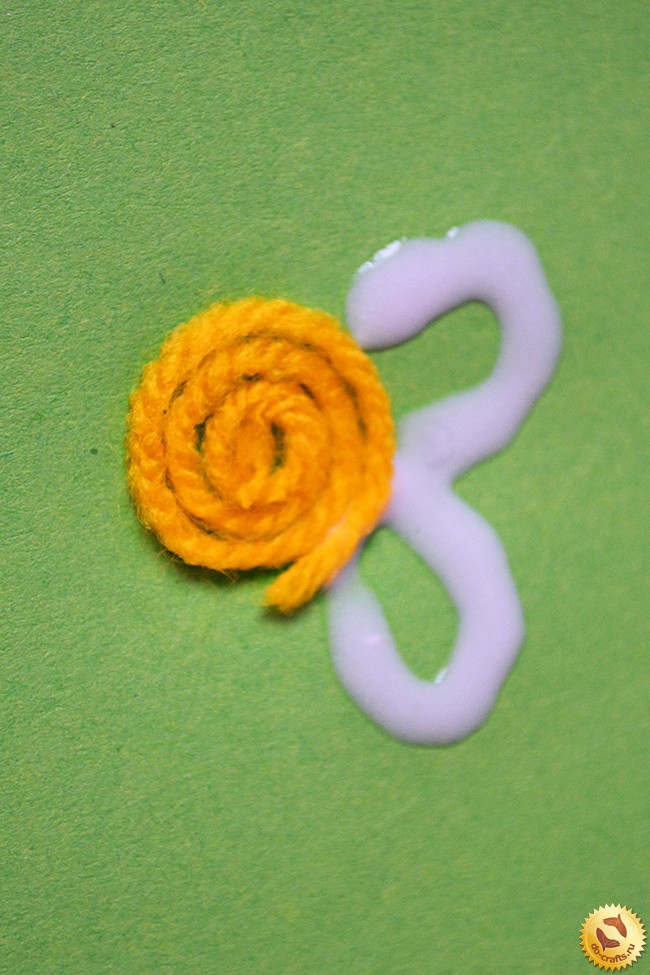 3. Cut stubby strings. Again, it is possible for the eyes. In the process of bonding threads on board, we have them cut to the required length.
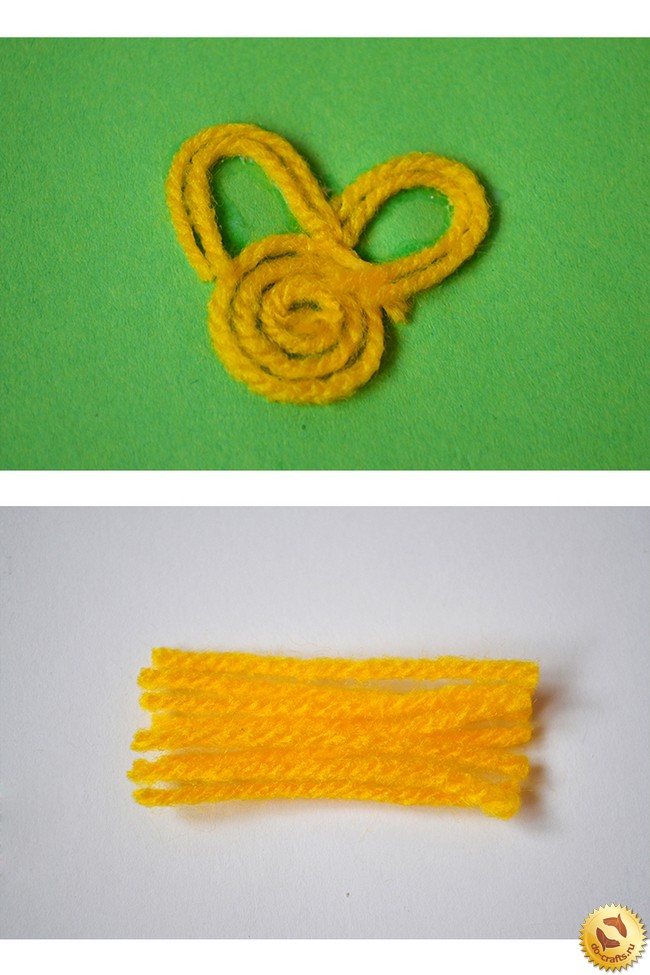 4. Base flower is ready. Now go to the red thread.
 5. Repeat the process of glue and spread on top of the red woolen thread yellow.
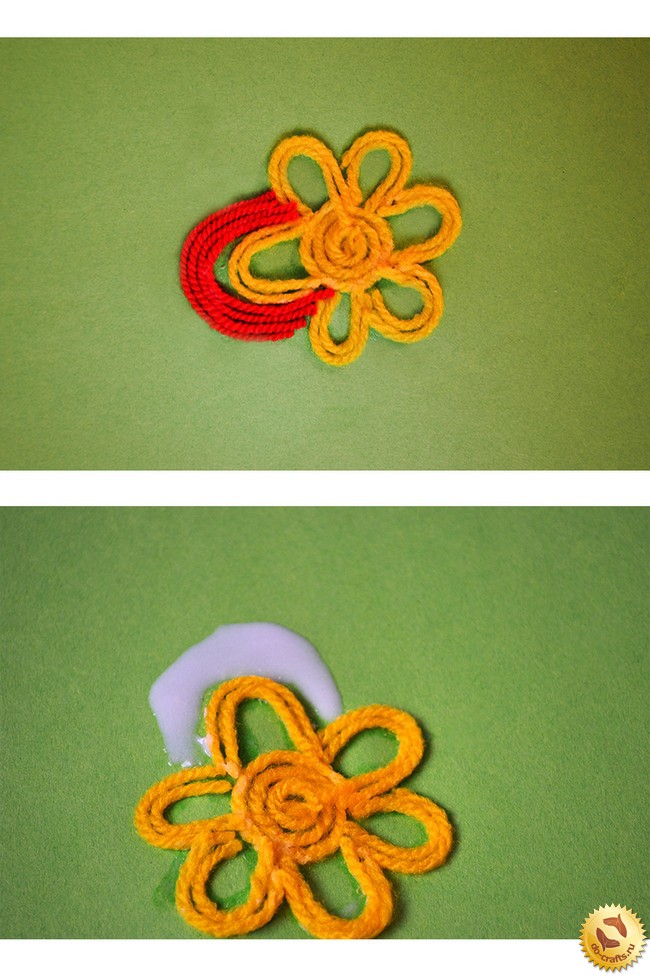 6. Once all the red petals we are ready, we can slightly adjust the home-made.
 7. Fill in the gaps with yellow and red threads.
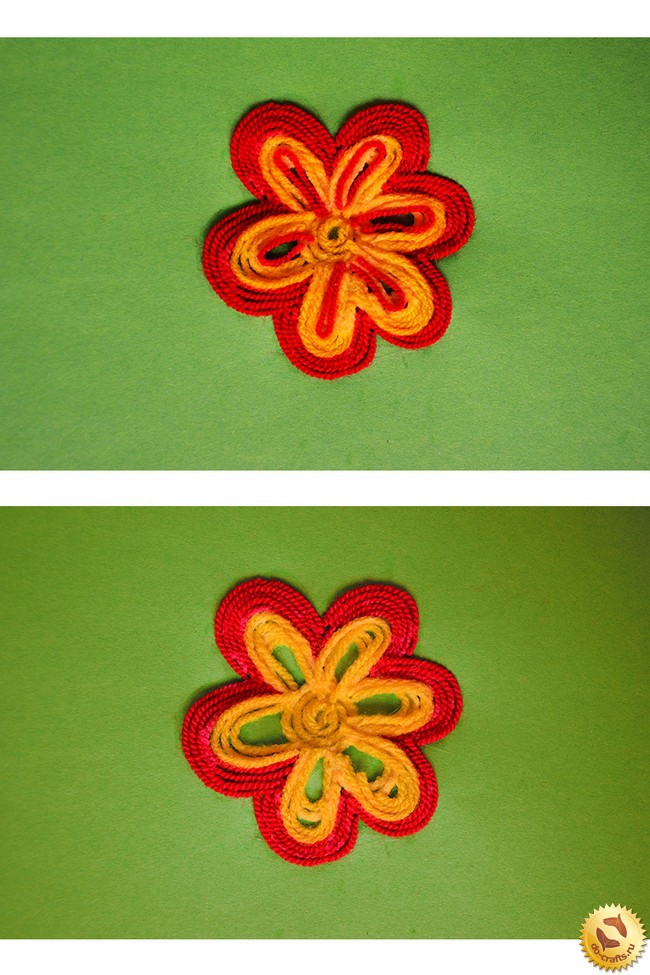 8. Continue to increase the pitch. Glue the yellow threads.
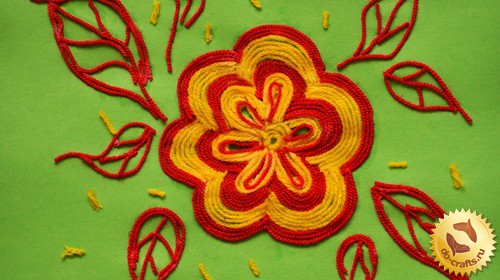
 9. At the end make a red outline of a flower .
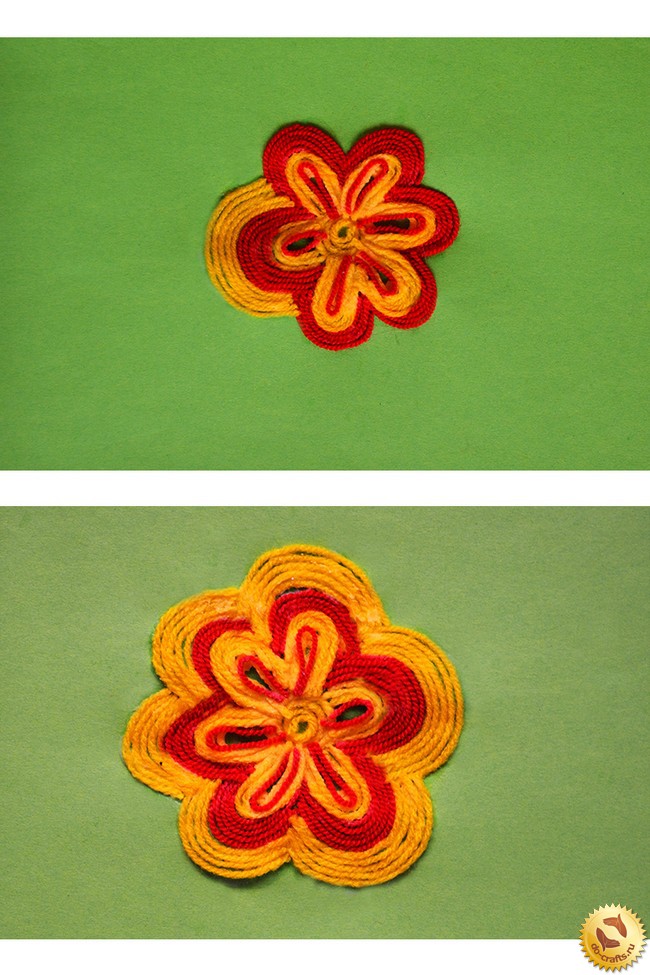
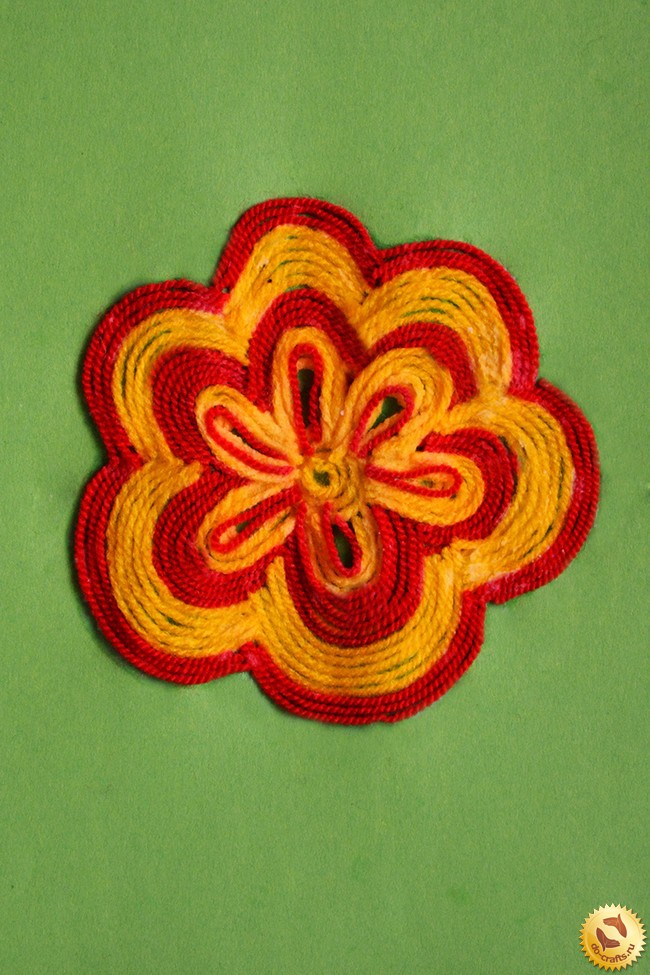 10. After the artifact is ready, paint the leaves of different sizes. Place each leaf may be different and depend on the center of the composition. Very often kids shift from the center of the image that should be considered. Then the number of leaves may be more than one party. Also, it is necessary to explain the kiddies that large leaves are better placed at the bottom of the format, and balance them more small.
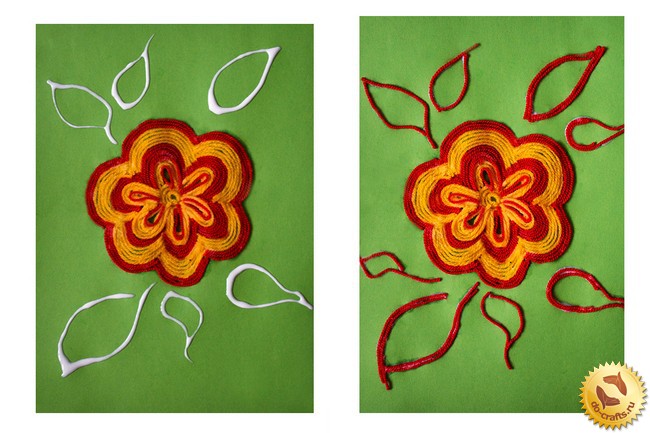 11. Once the contours of leaves glued, making streaks. Upon completion of the work set around a flower drops of glue, cut the yellow thread length of approximately 0.6 cm and glue them. Thus, we make a simulation of pollen floating in the air.
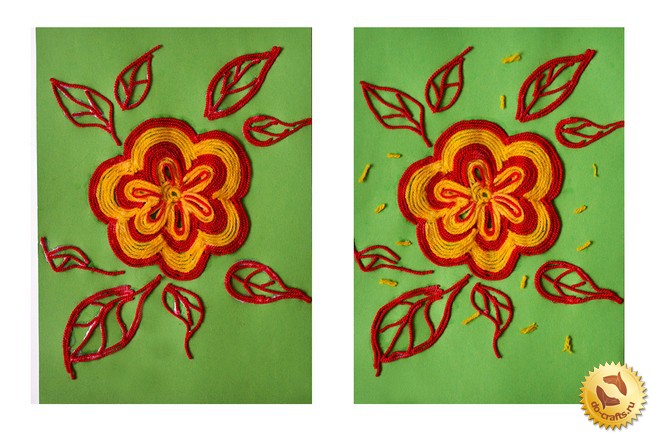 Applique Flower from threads ready!