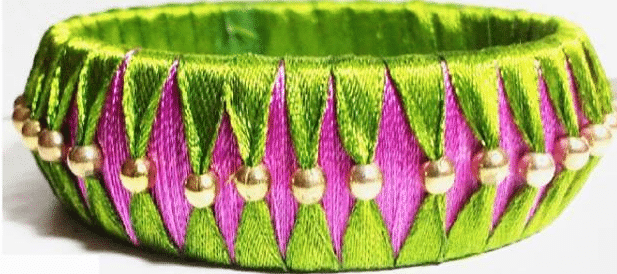
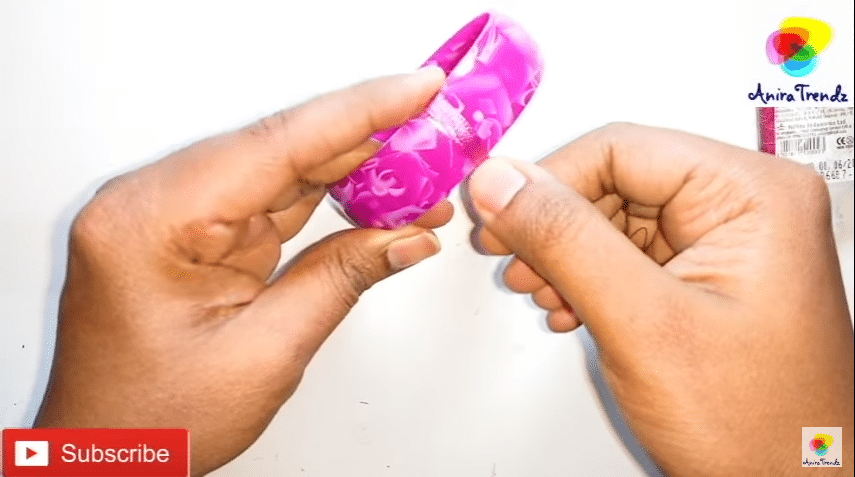
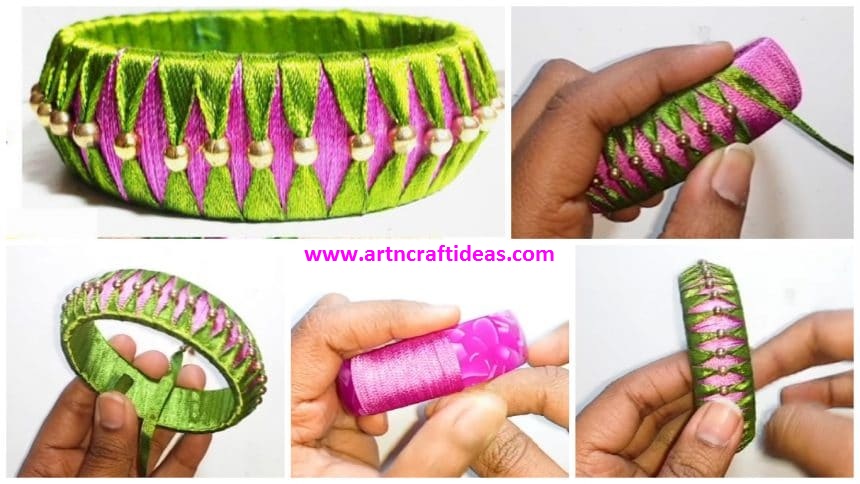
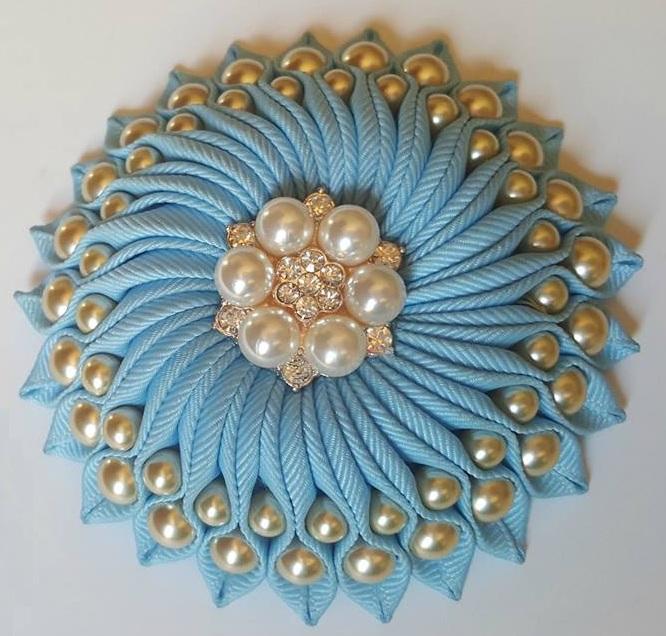
Explained how to make silk thread bangle using ribbon and beads.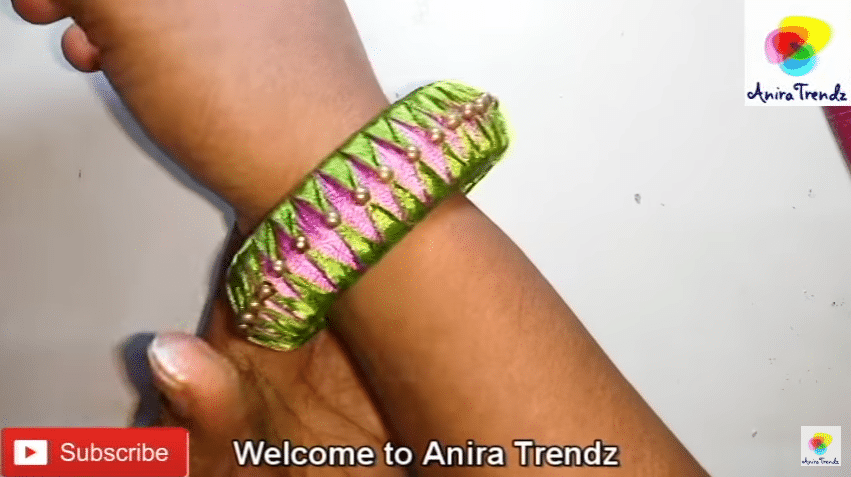
 Required Material:
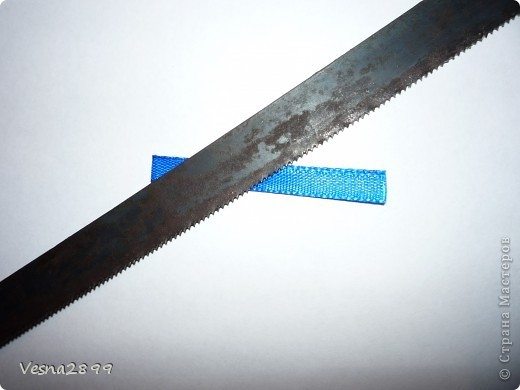
- Ribbon (1cm or below)
- Silk thread bangle
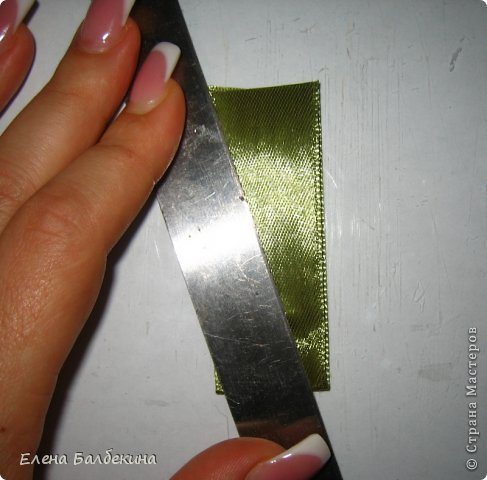
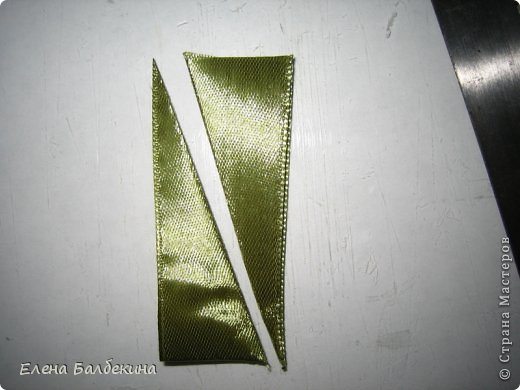
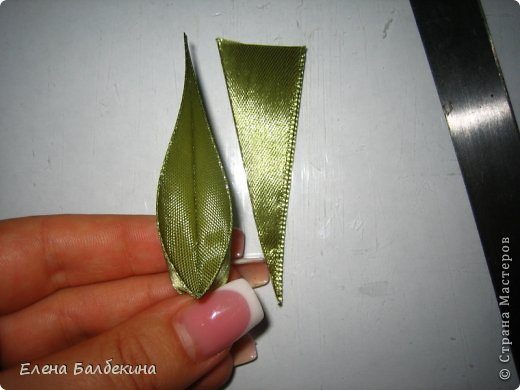
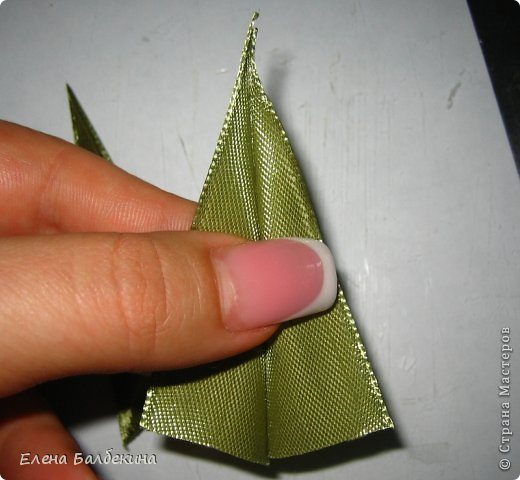
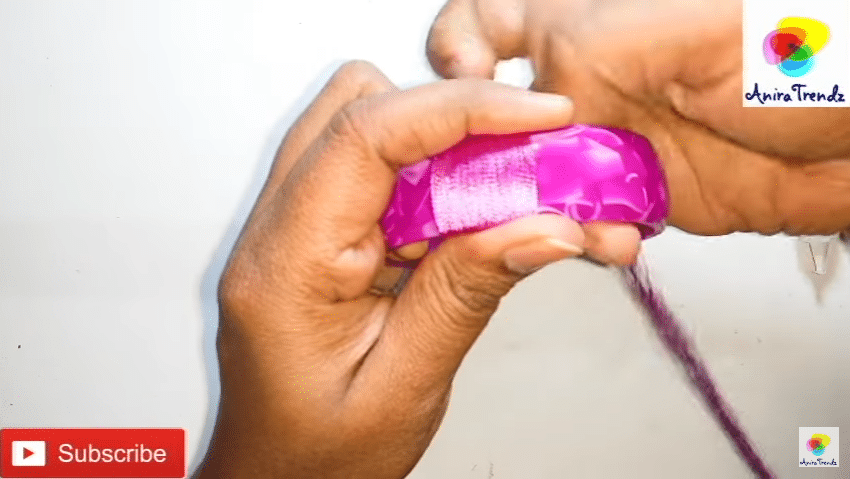
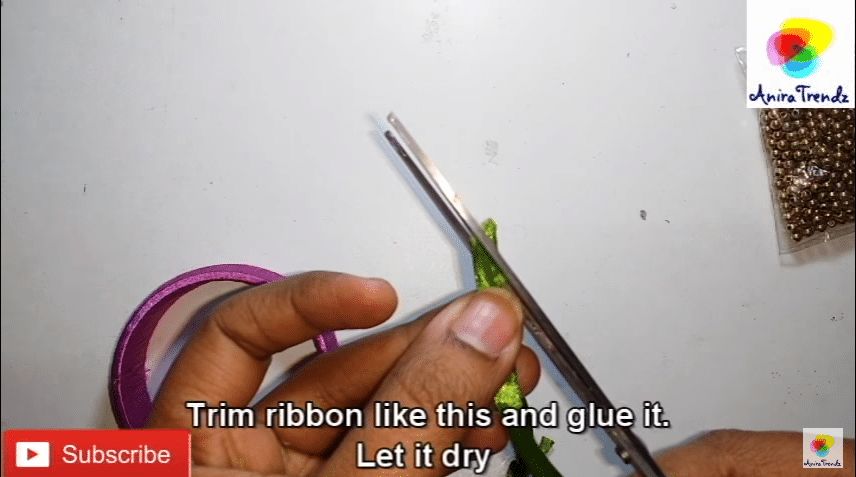
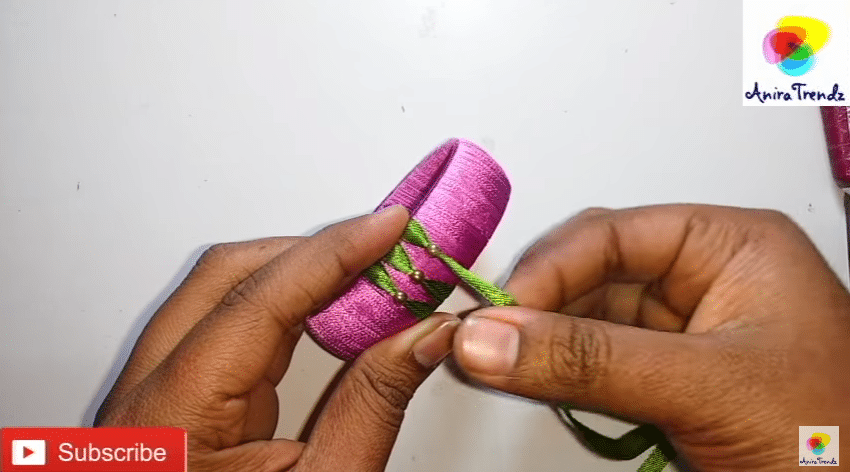
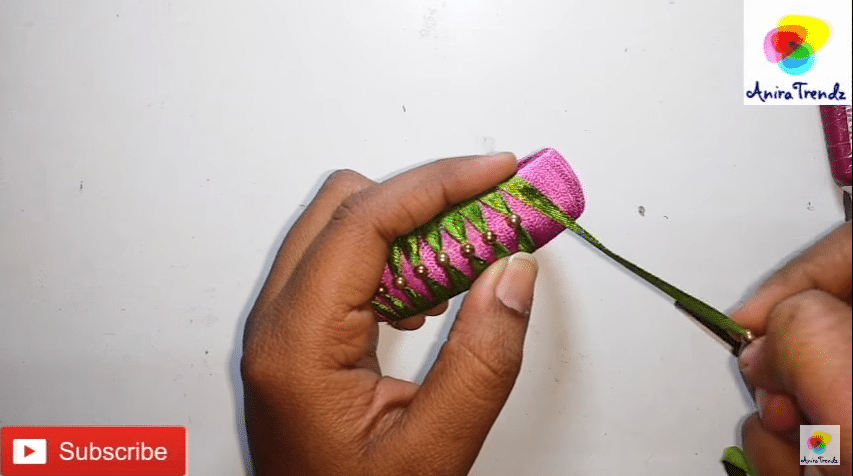
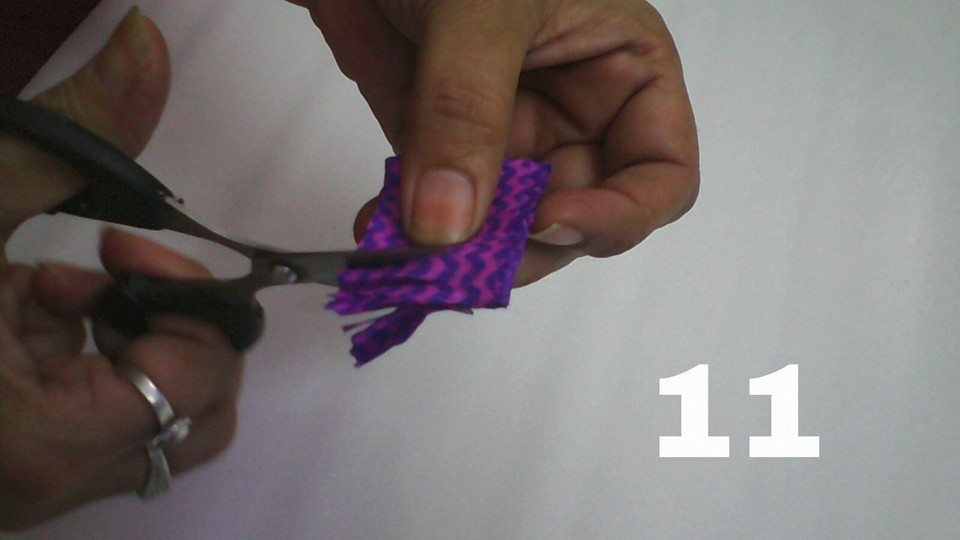
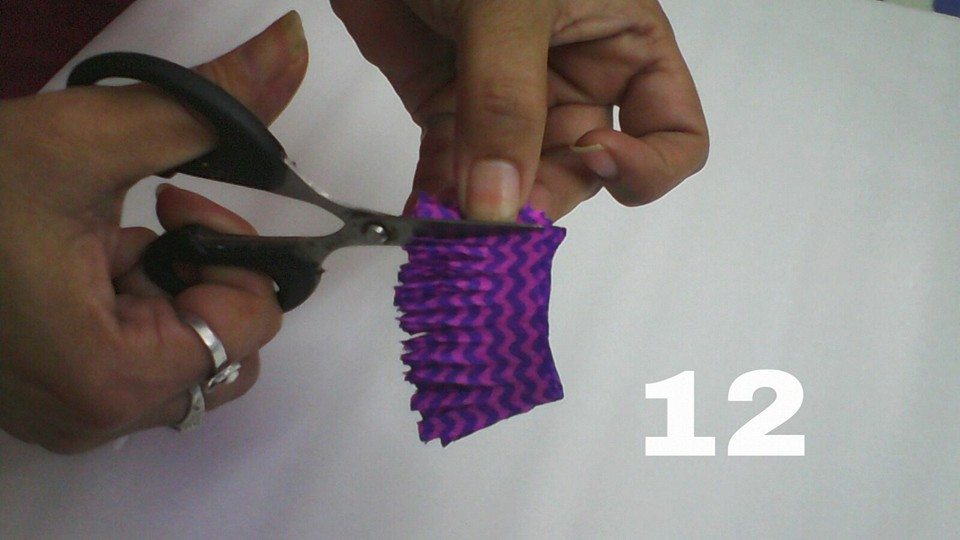
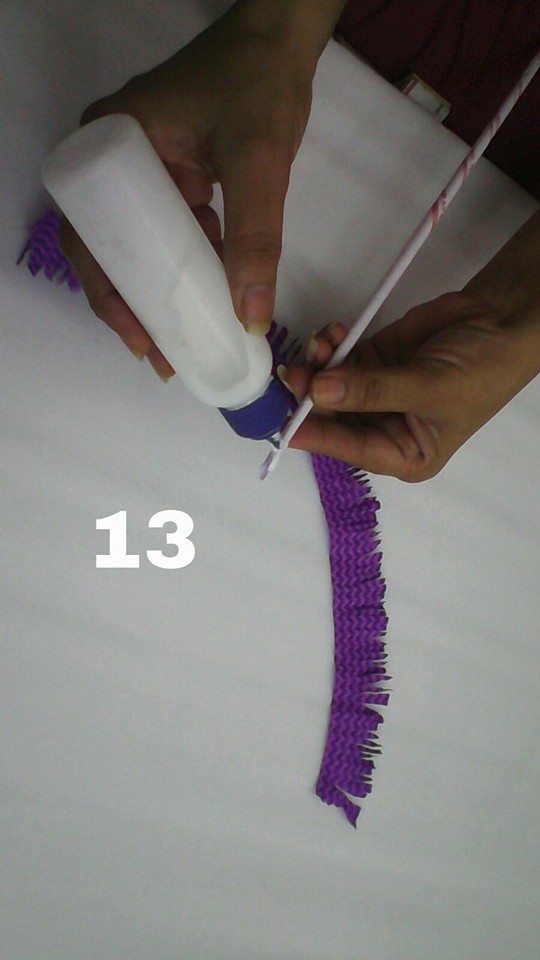
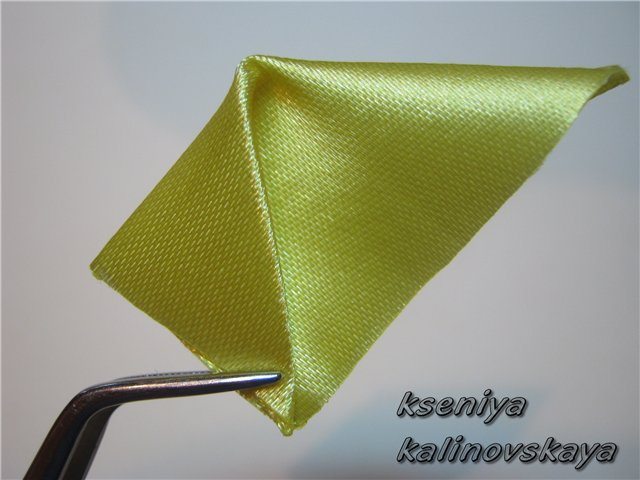
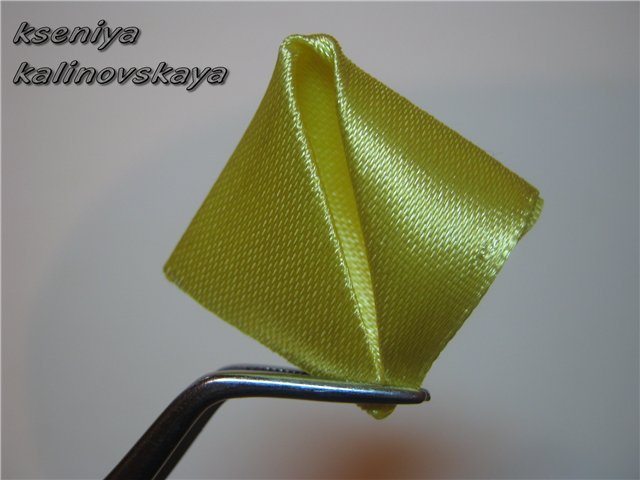
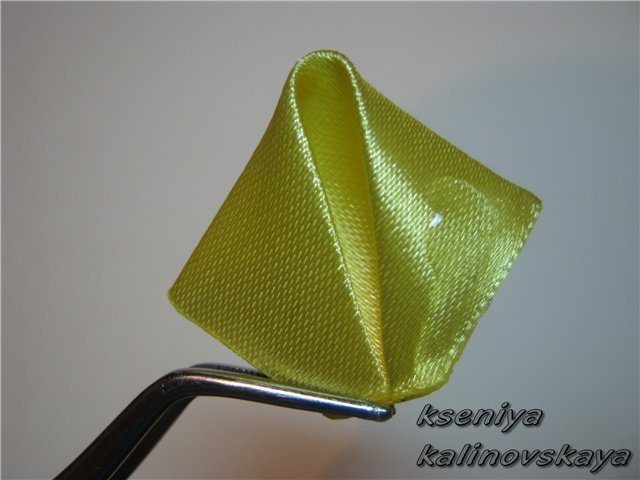
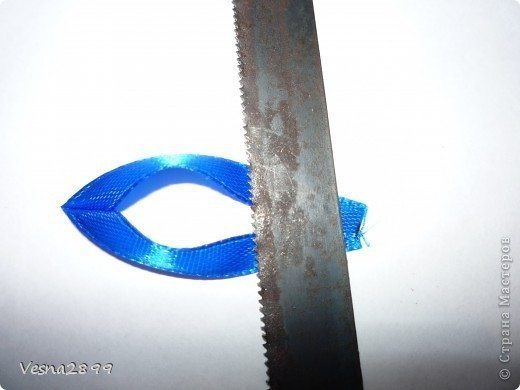
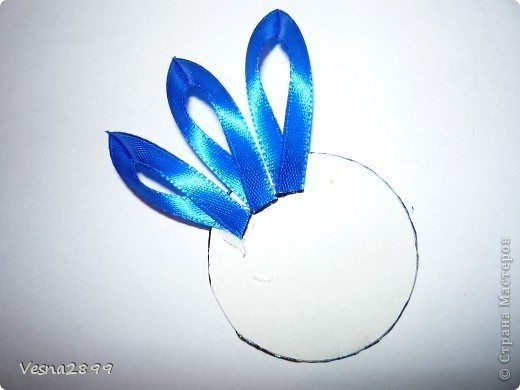
Beads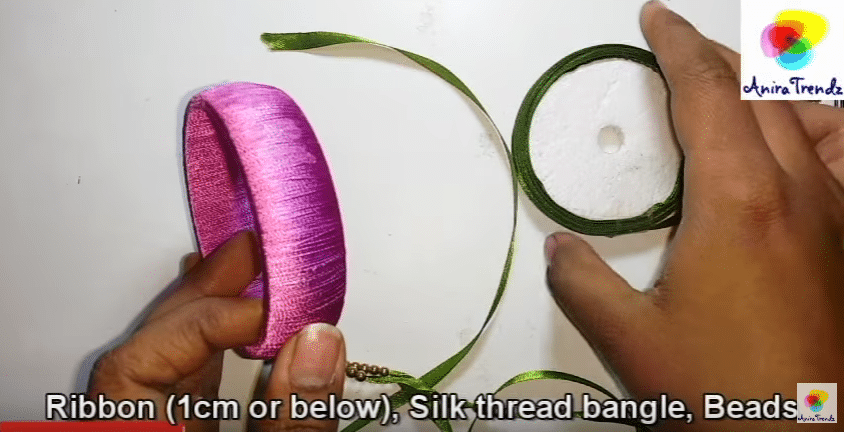 Trim ribbon like this and glue it.
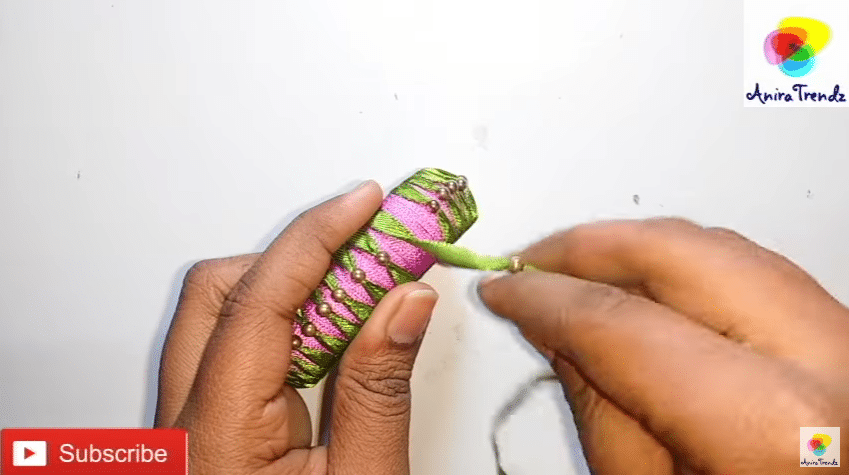
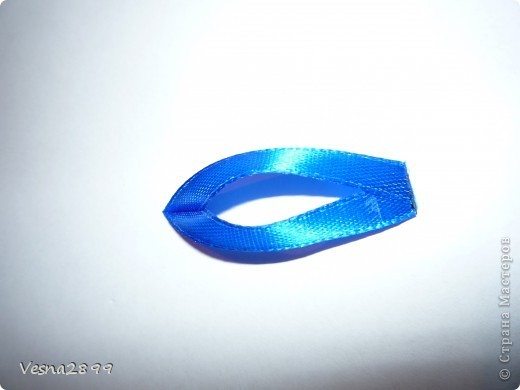
Let it dry.
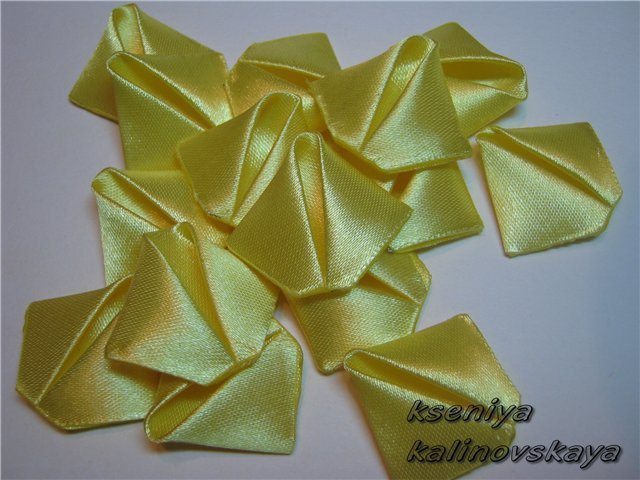
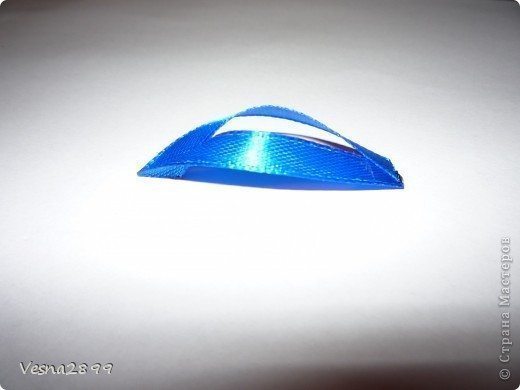
 Here is the finished bangle.
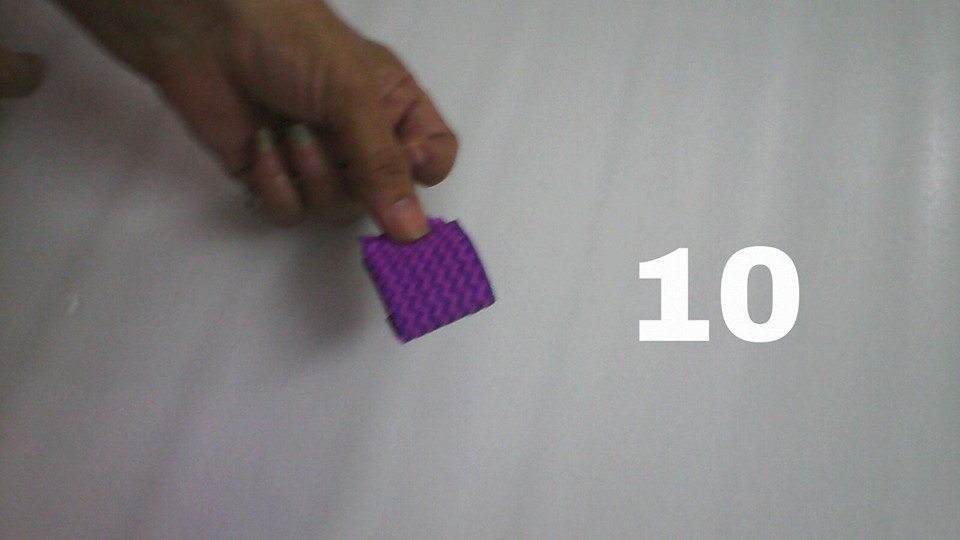
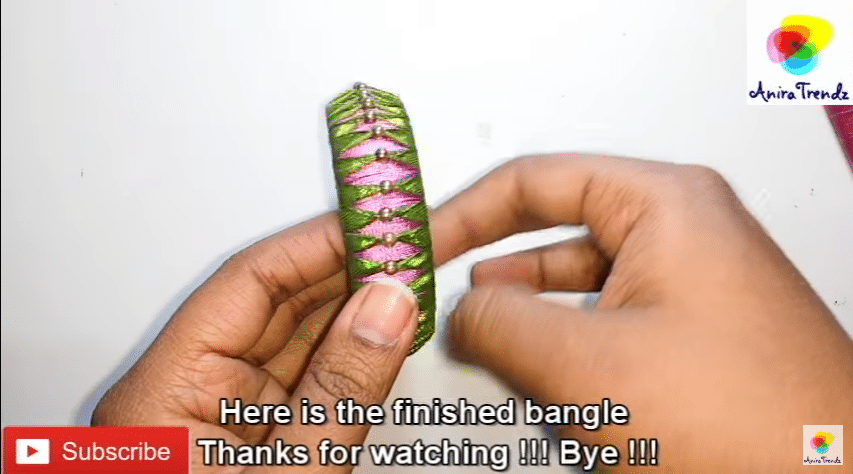
Get Daily Art and Crafts Ideas & Tutorials…
Explained how to make silk thread bangle using ribbon and beads. Required Material:
Beads Trim ribbon like this and glue it.
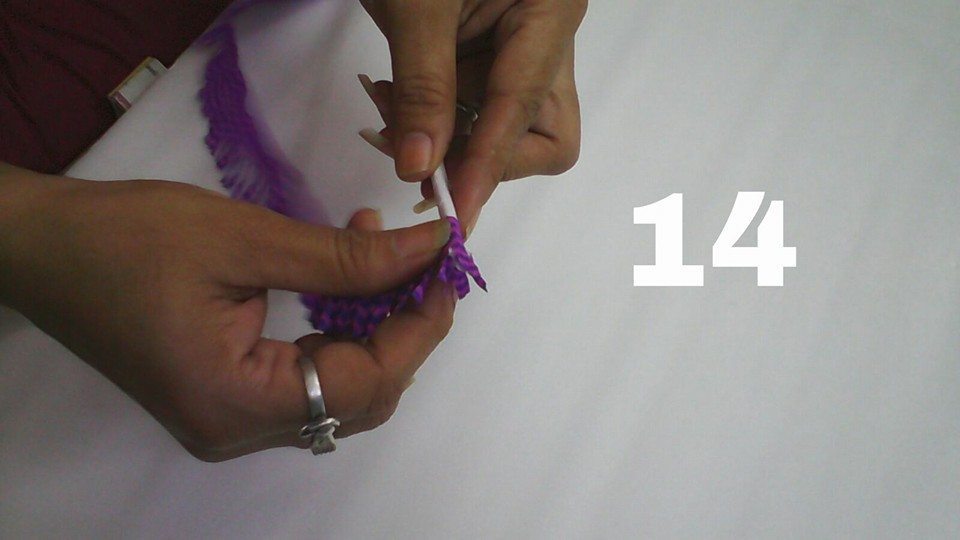
Let it dry.
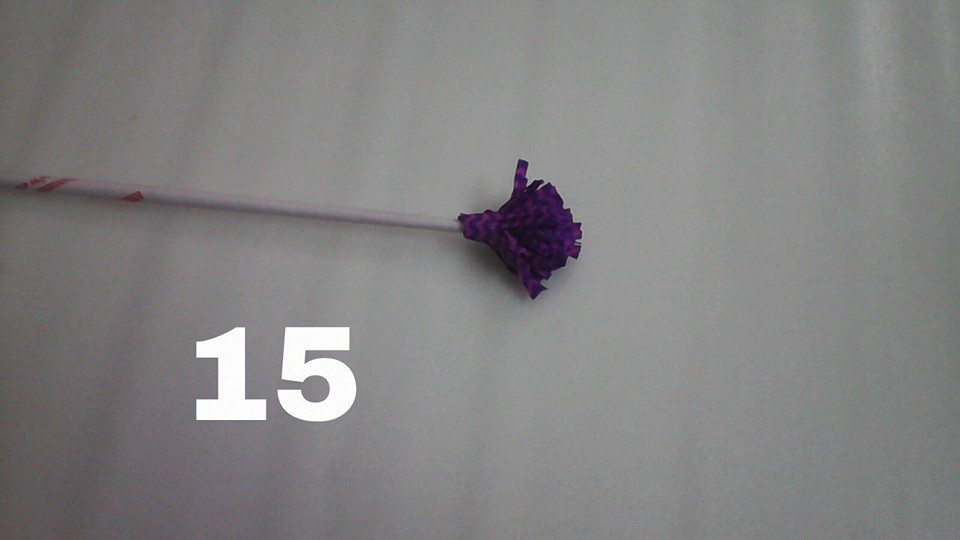
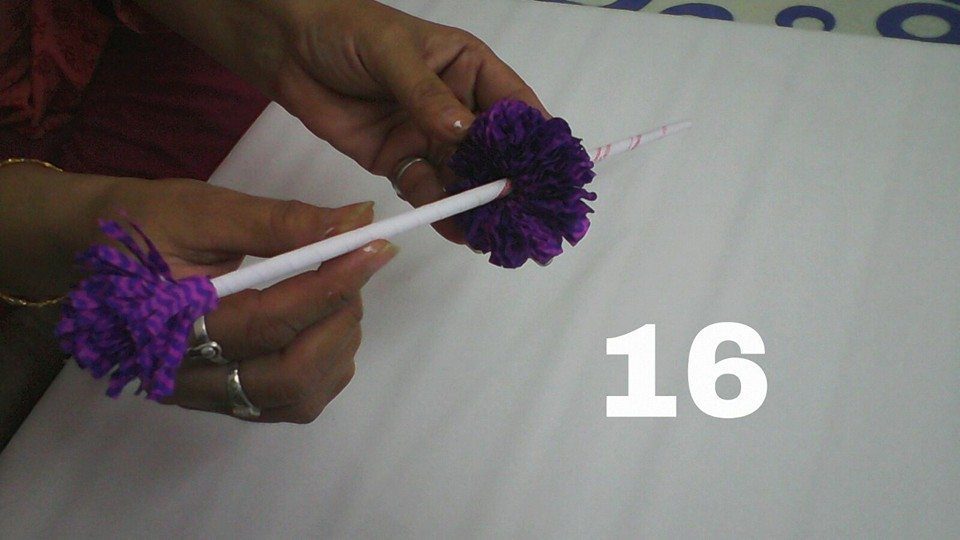
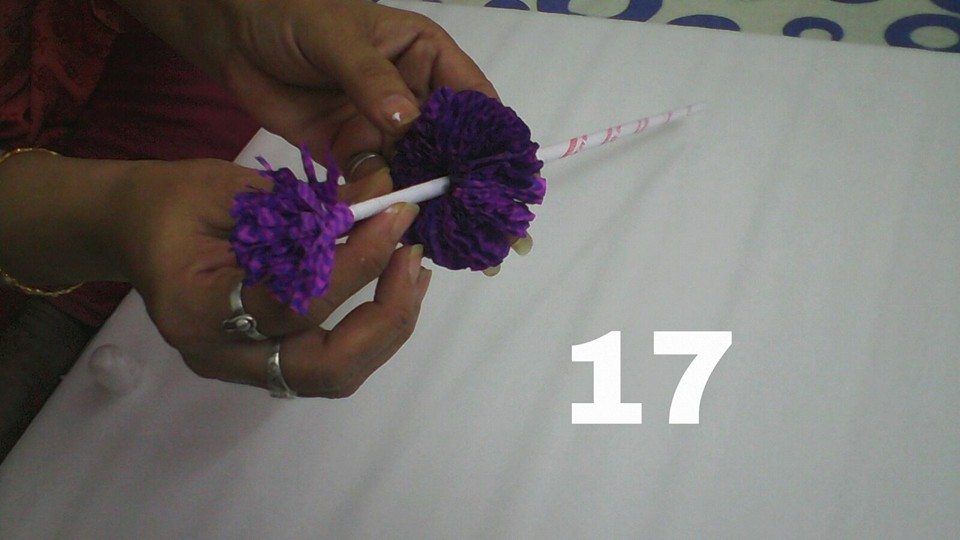
Here is the finished bangle.
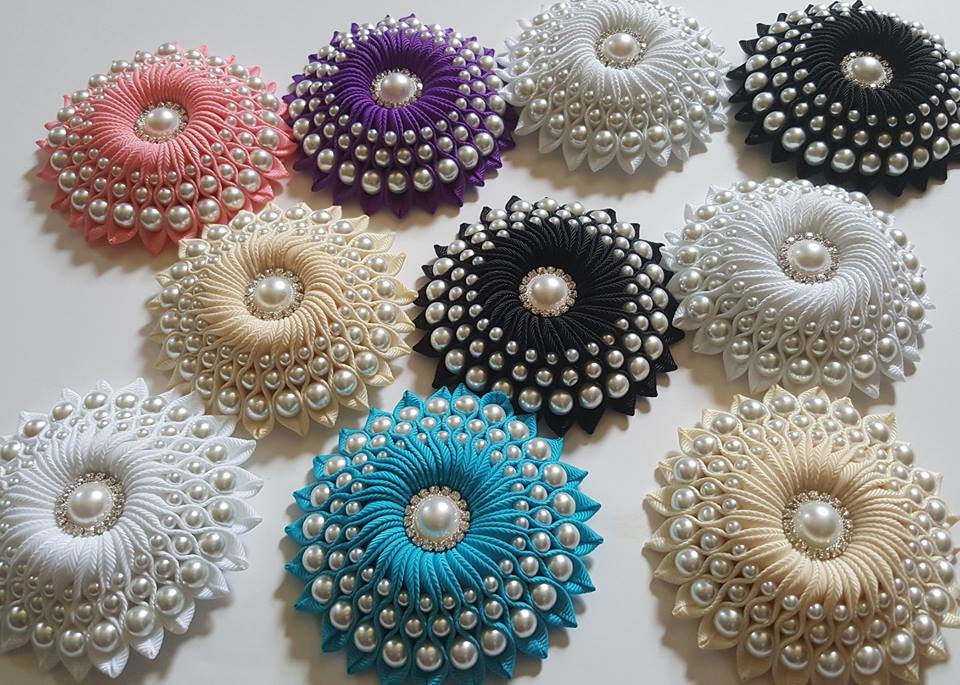
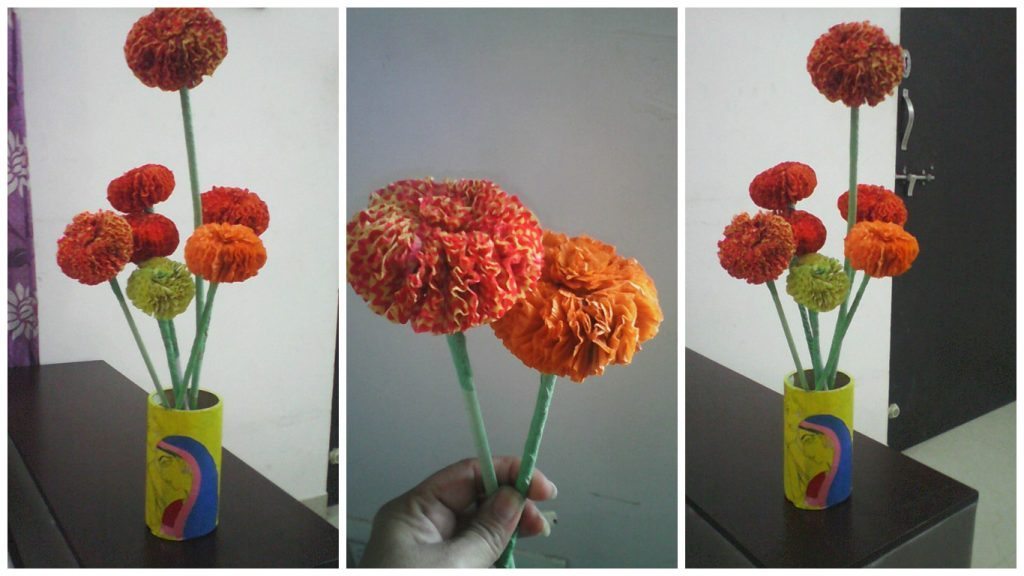
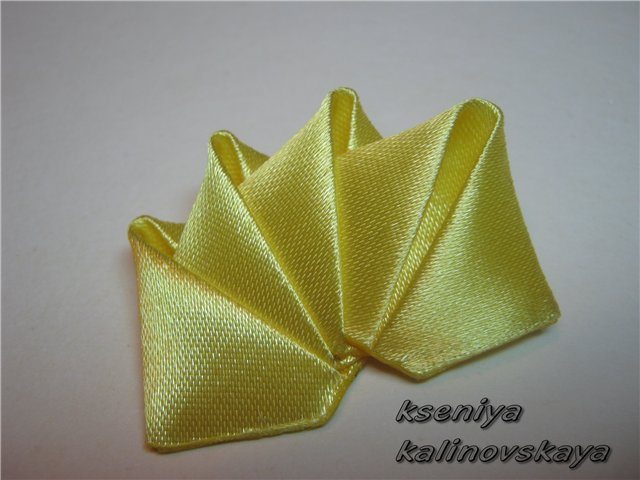
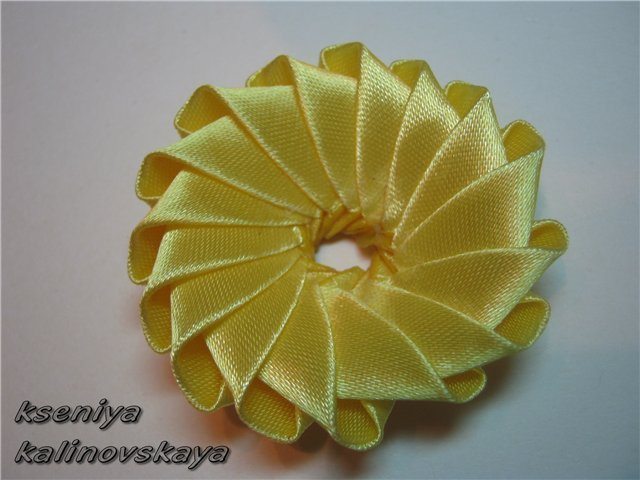
DIY Ribbon flower with beads / grosgrain flowers with beads tutorial: This is an art and craft idea that makes for an absolute Quick and simple DIY Project. That you can use in a variety of ways. These DIY Ribbon flower with beads are an awesome idea that make for an awesome Gift Wrapping Project and also appropriate for your DIY Sewing Projects.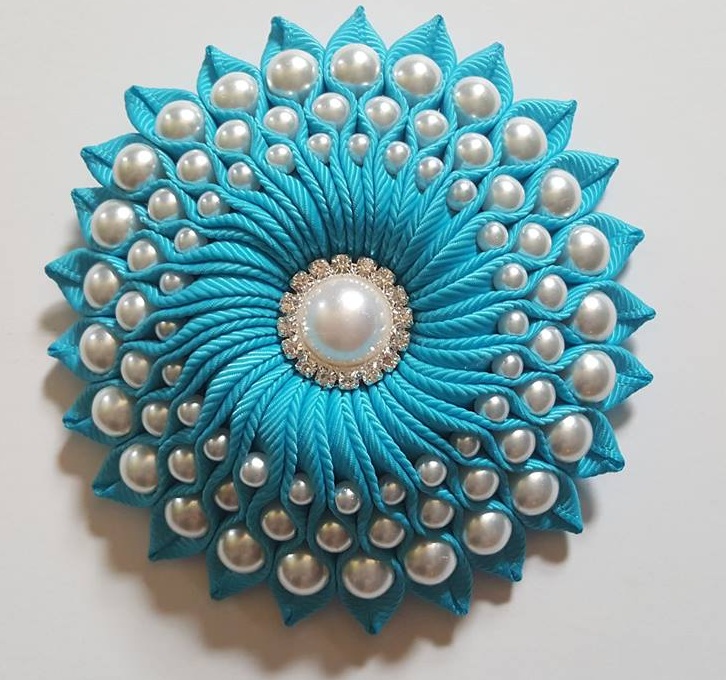
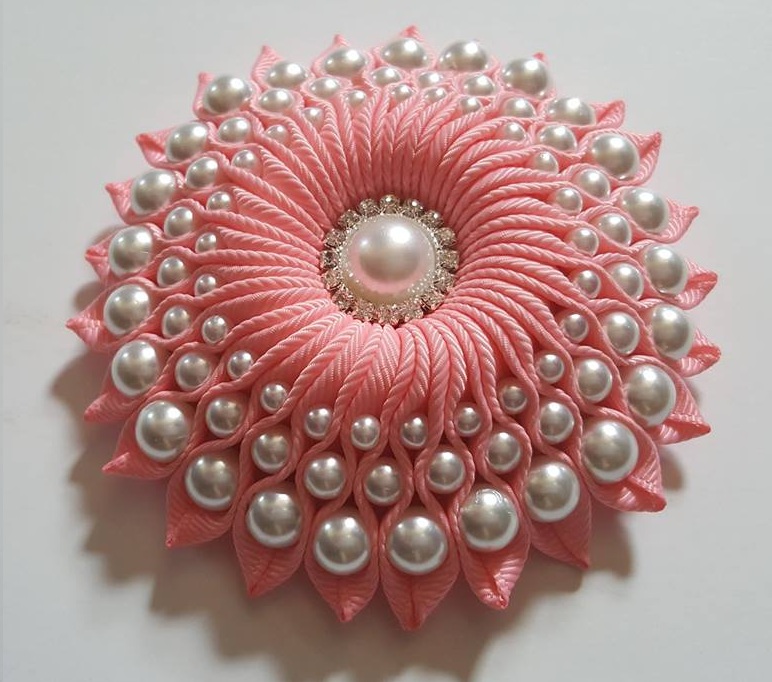


There is absolutely no need for any craft supplies that you need especially to make these fabulous DIY Ribbon Flowers. Just a few Satin Ribbons in different colors!
You can watch the complete video tutorial here:
Hope you like this tutorial. Please share in your social circle.
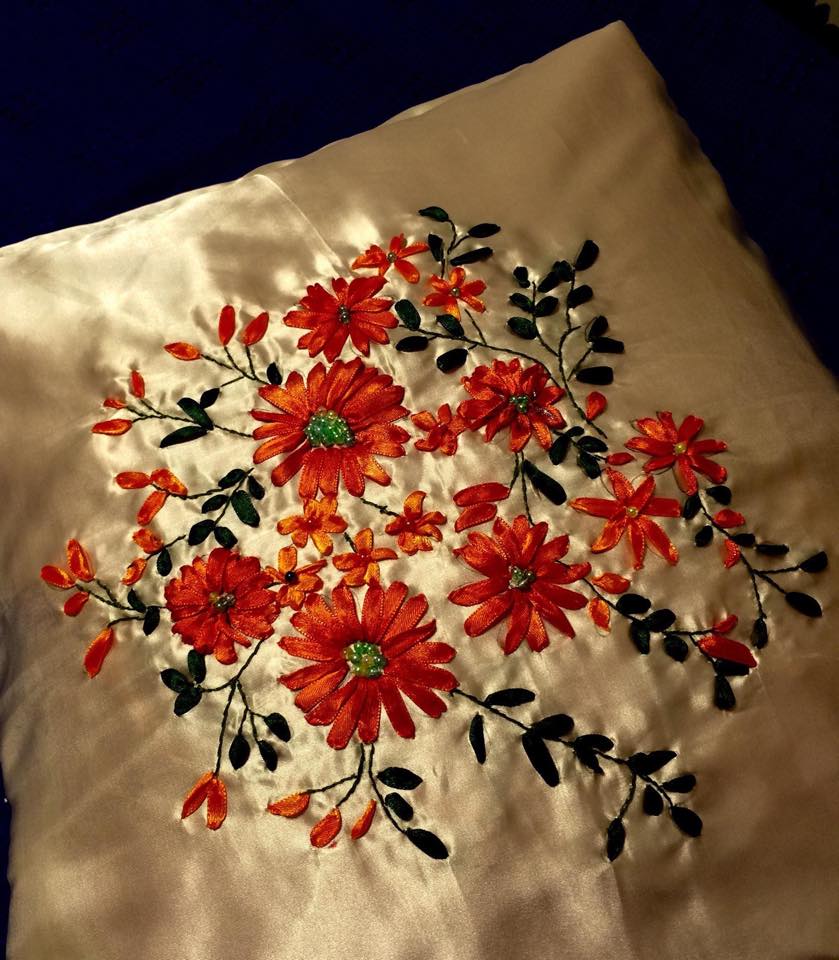
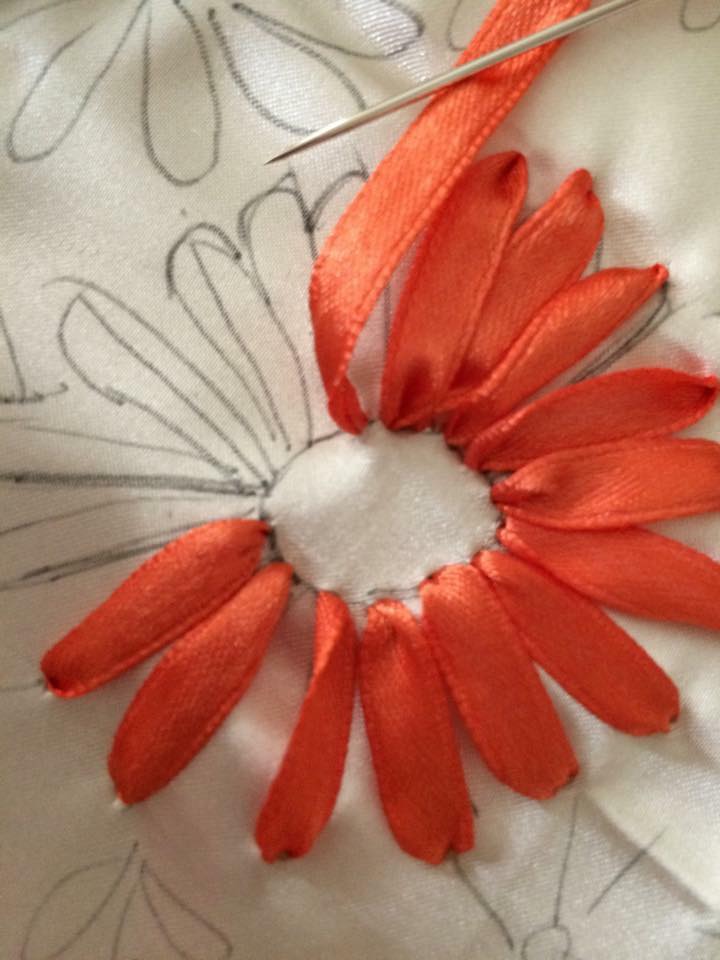
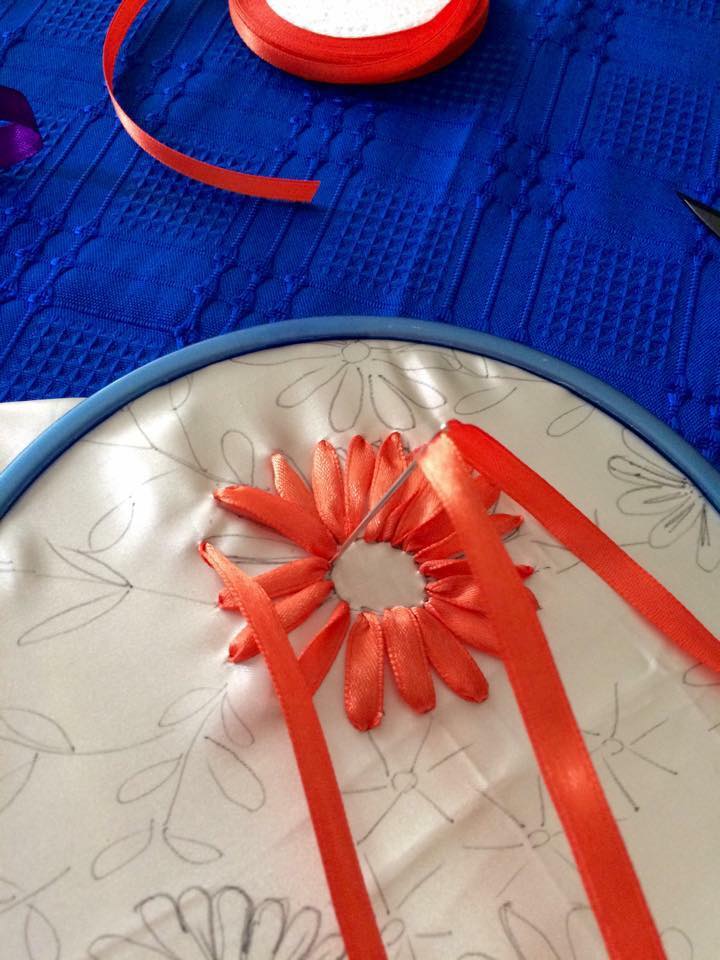
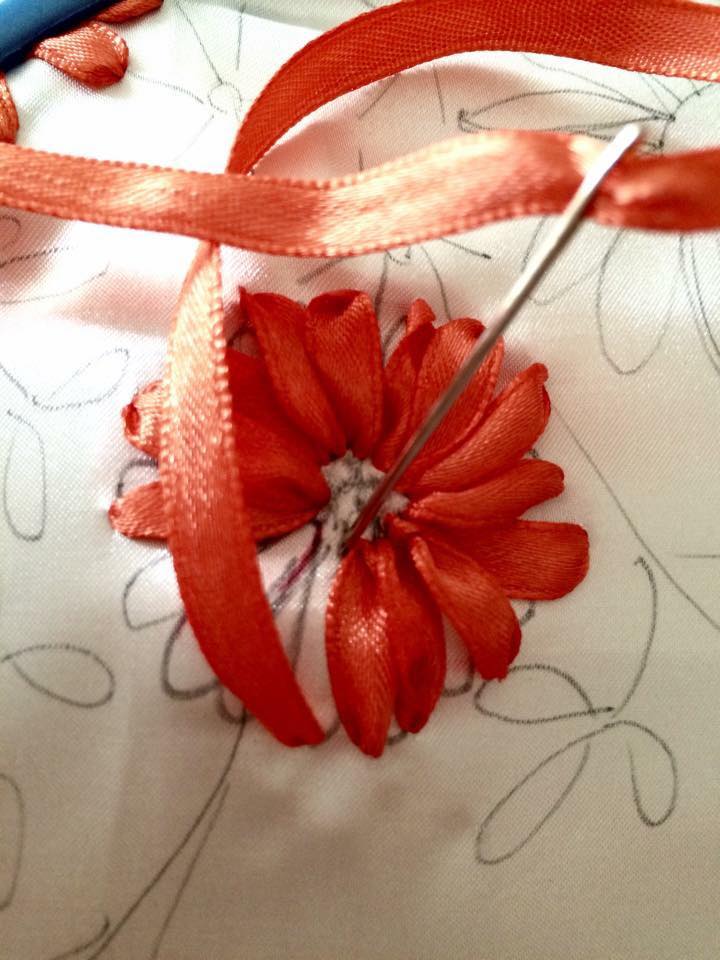
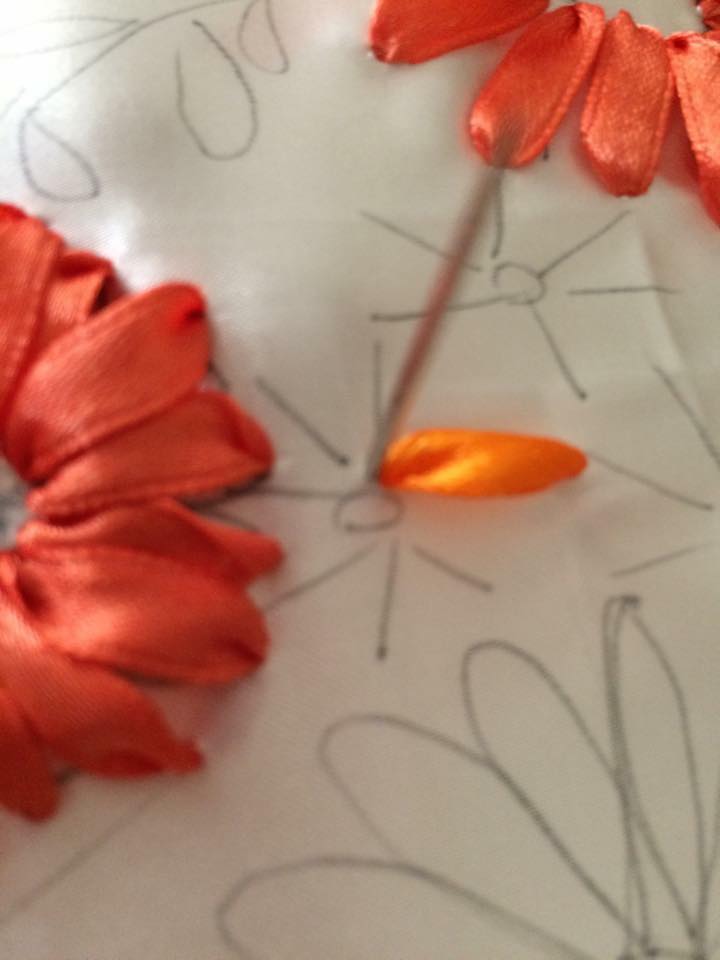
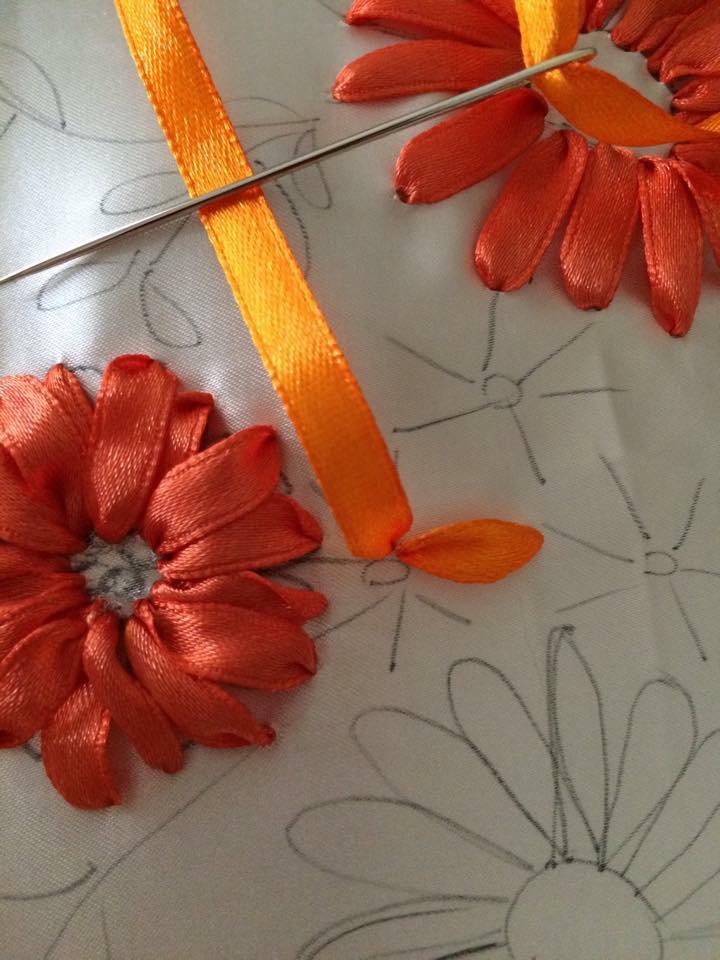
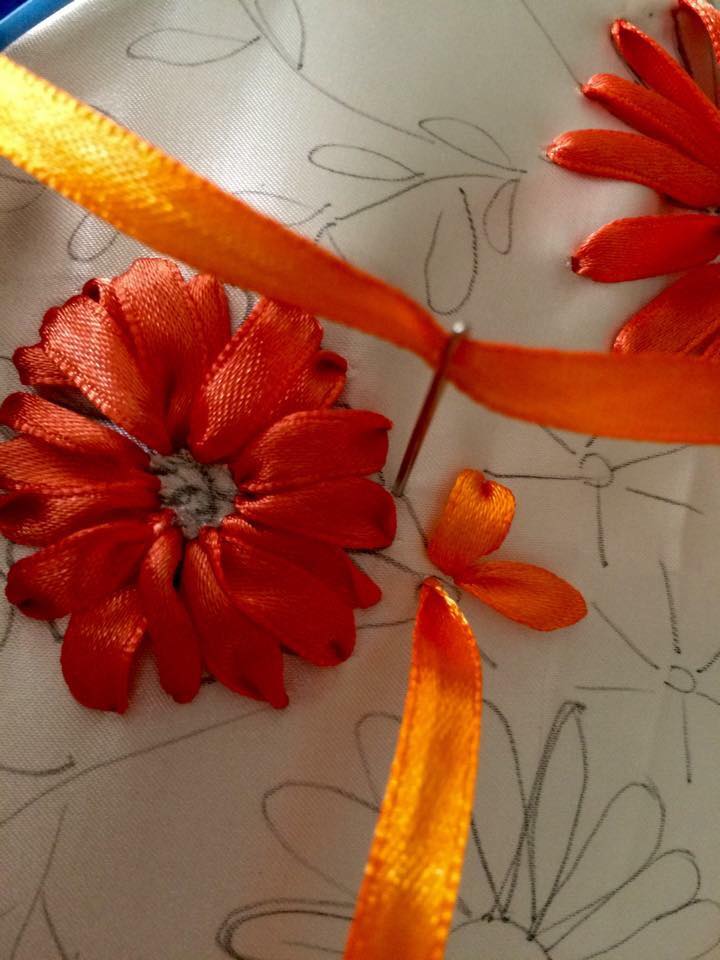
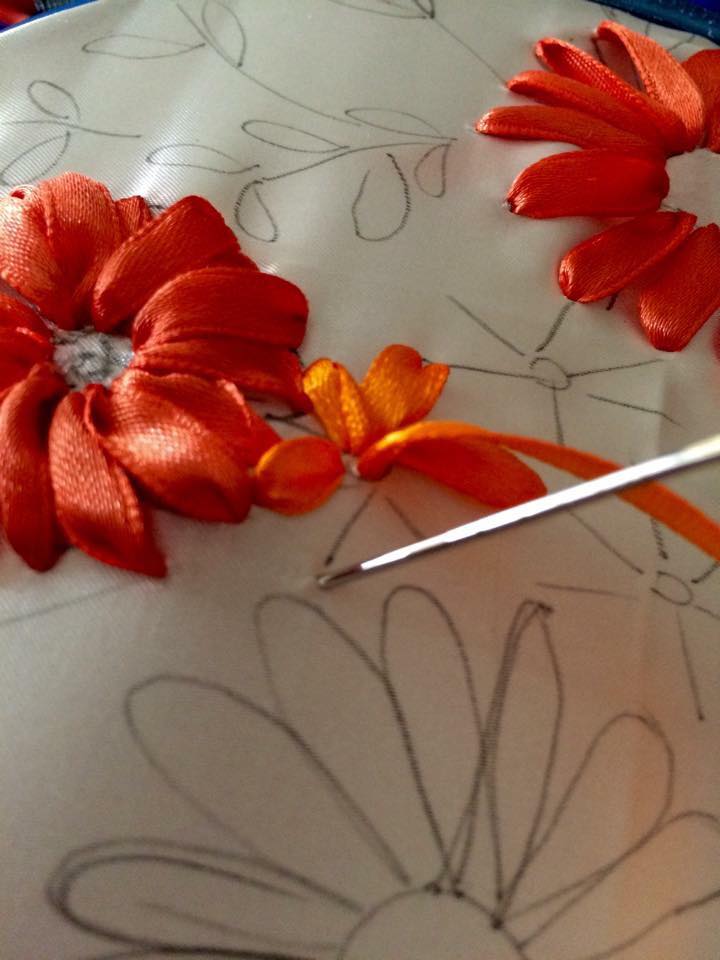
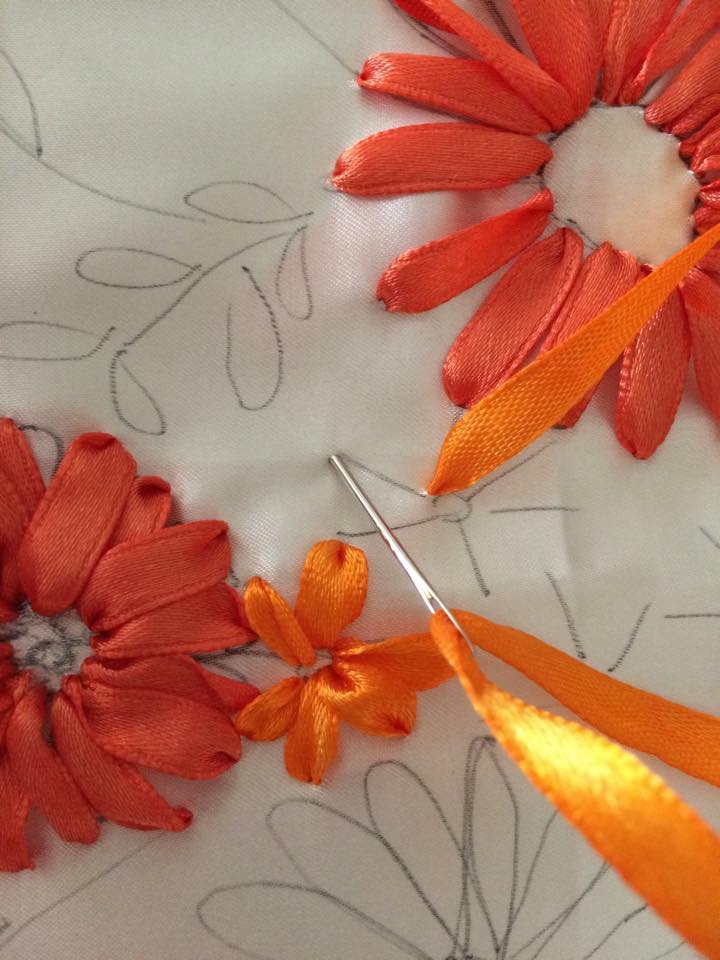
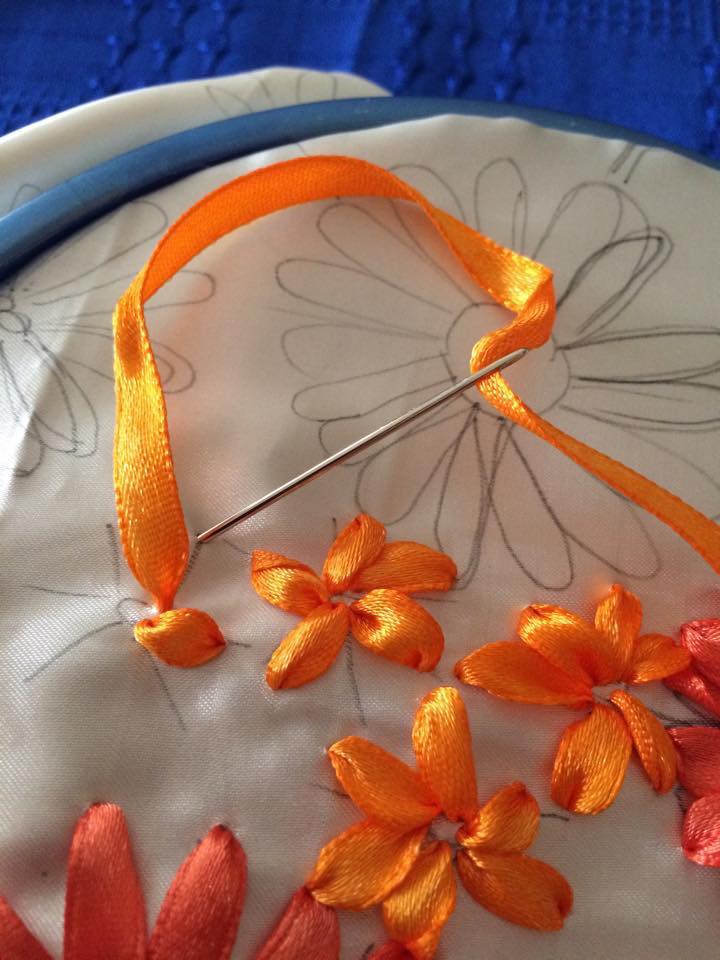
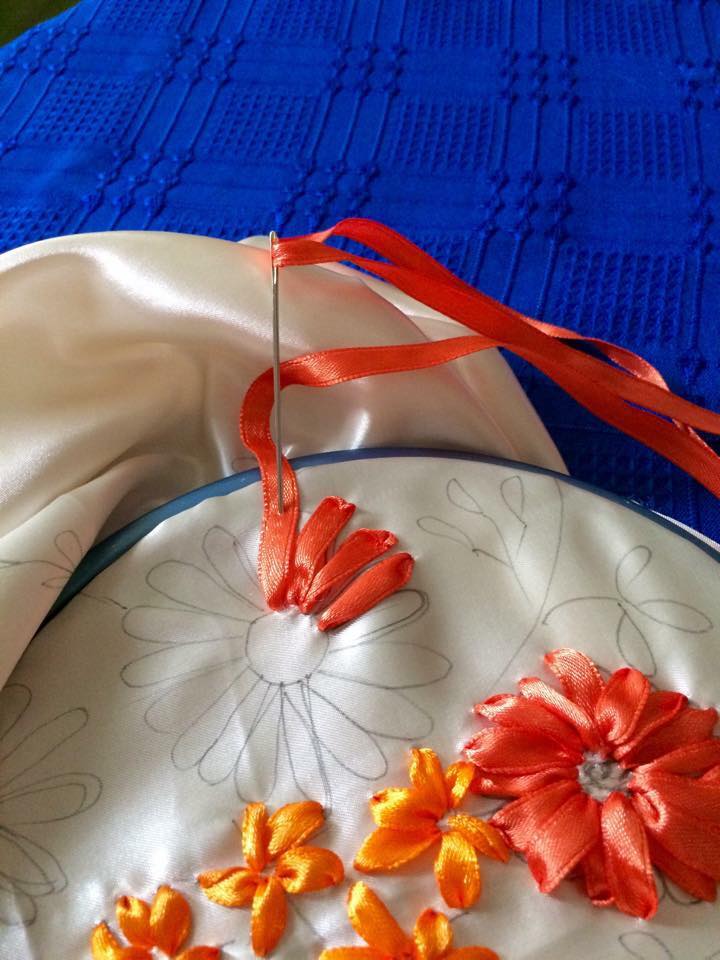
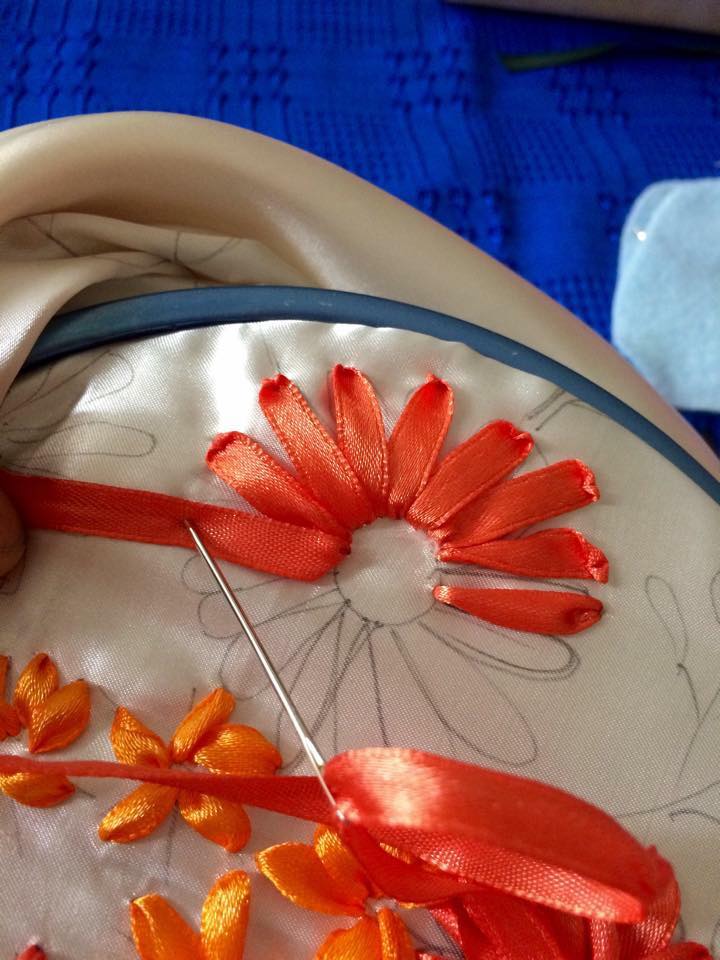
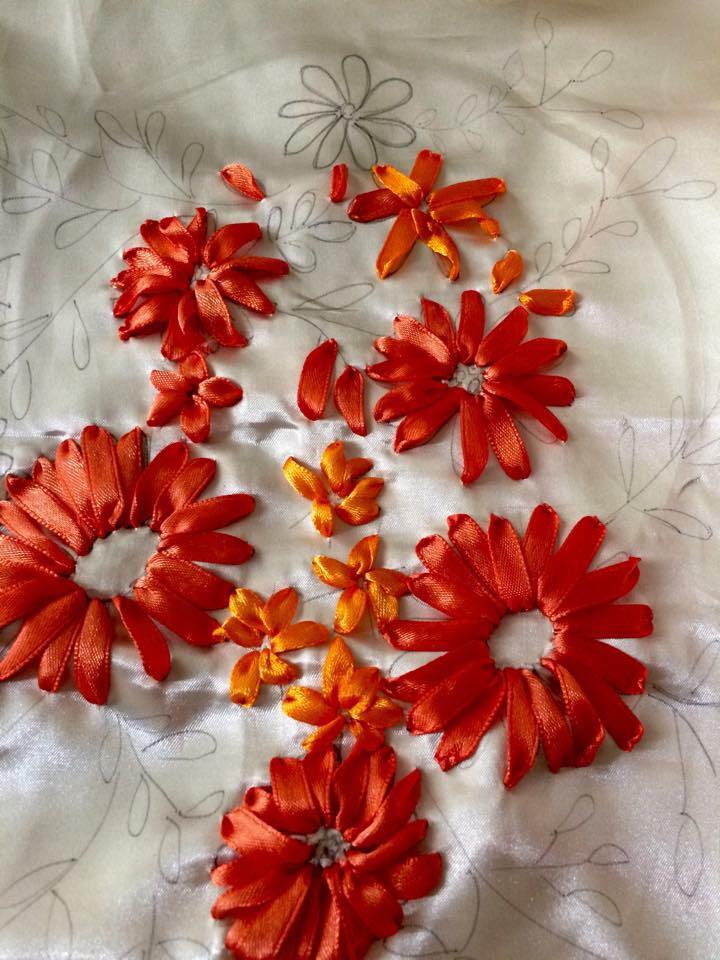
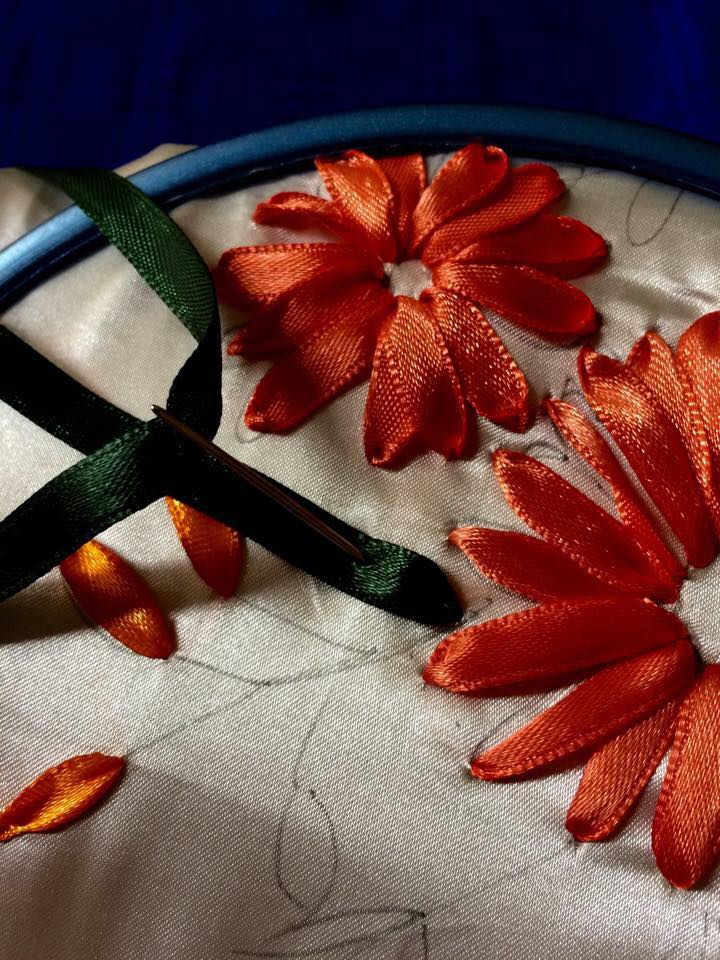
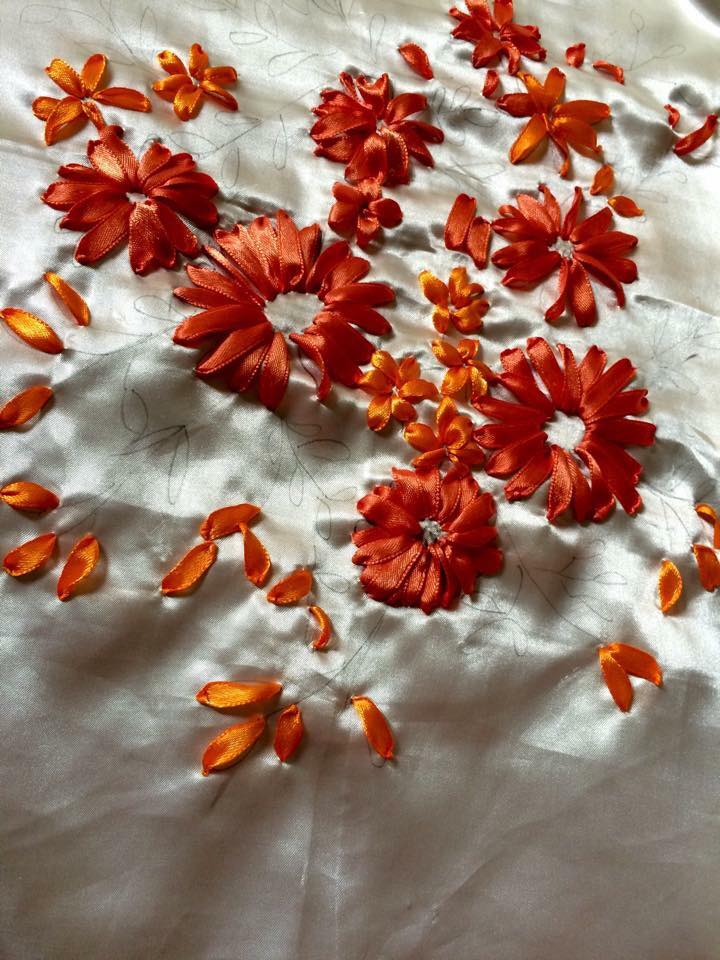
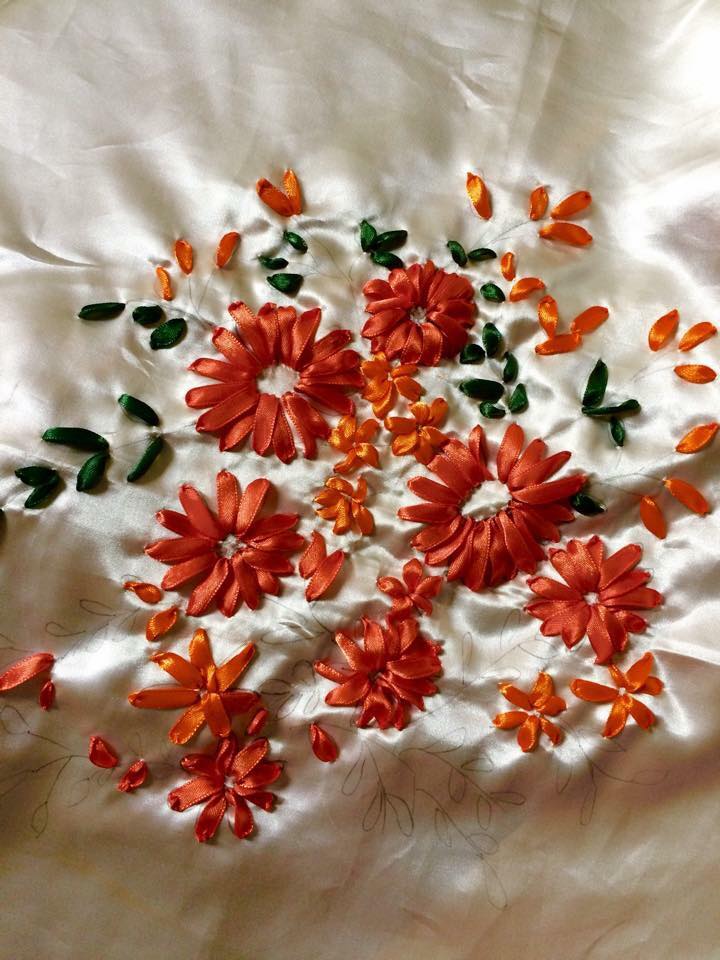
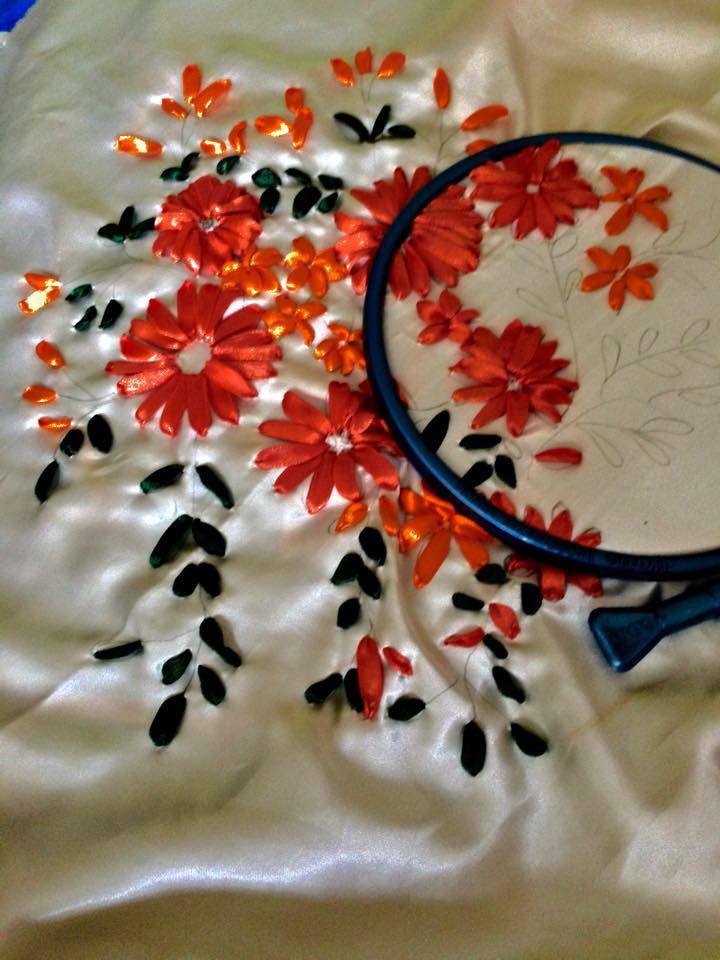
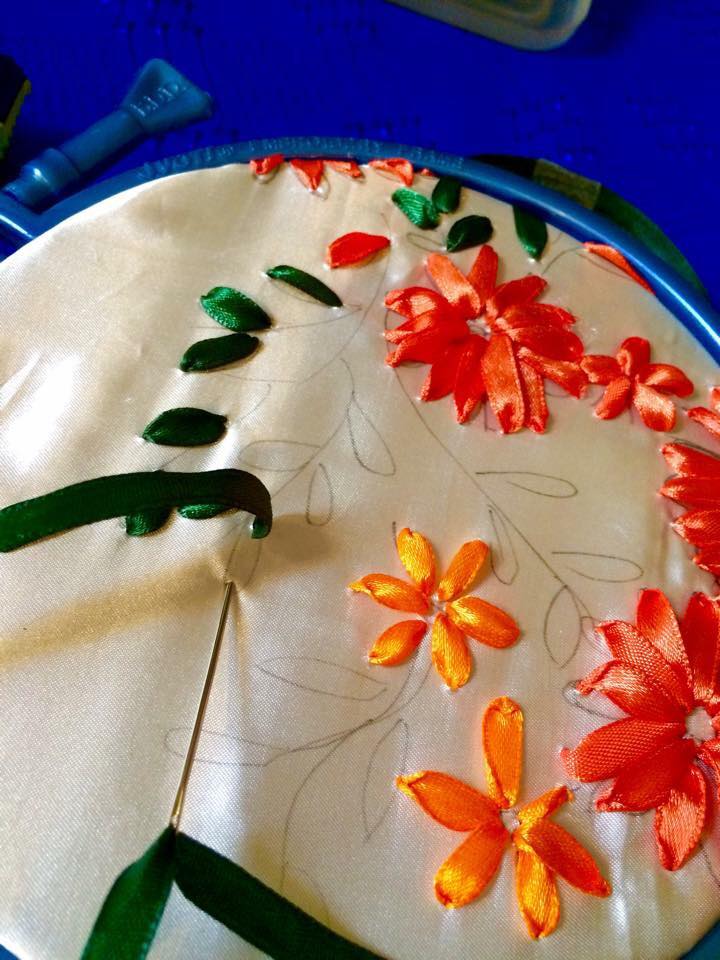
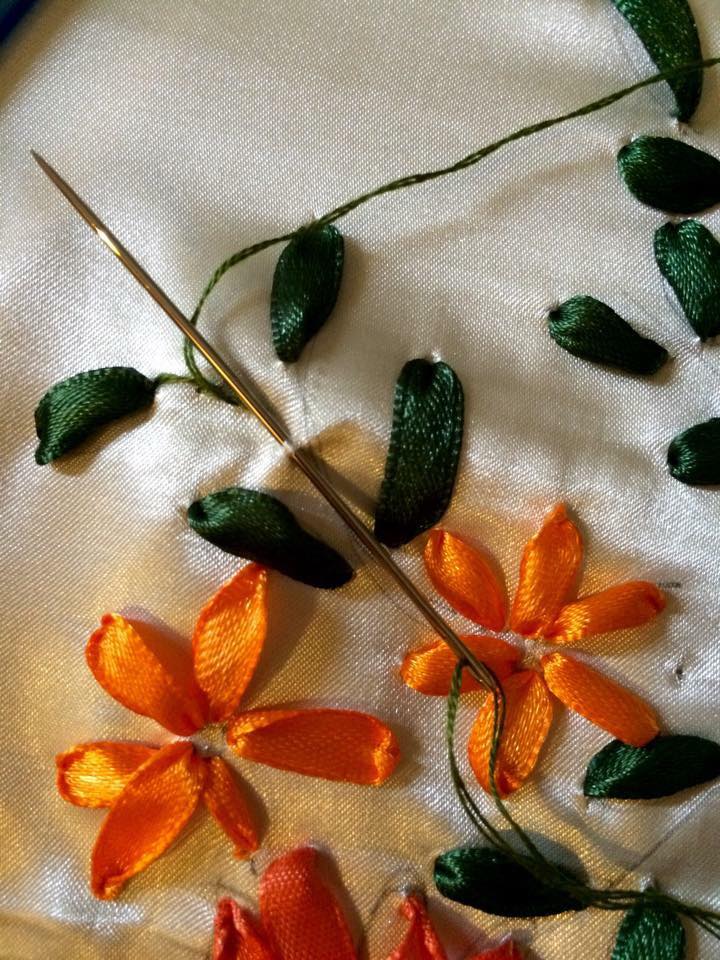
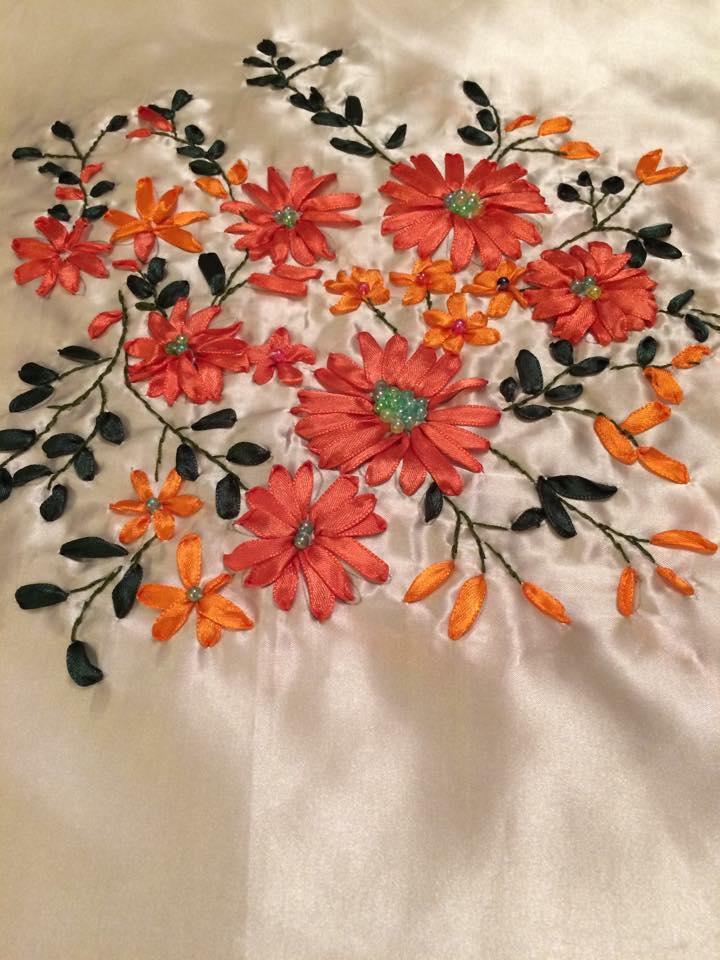
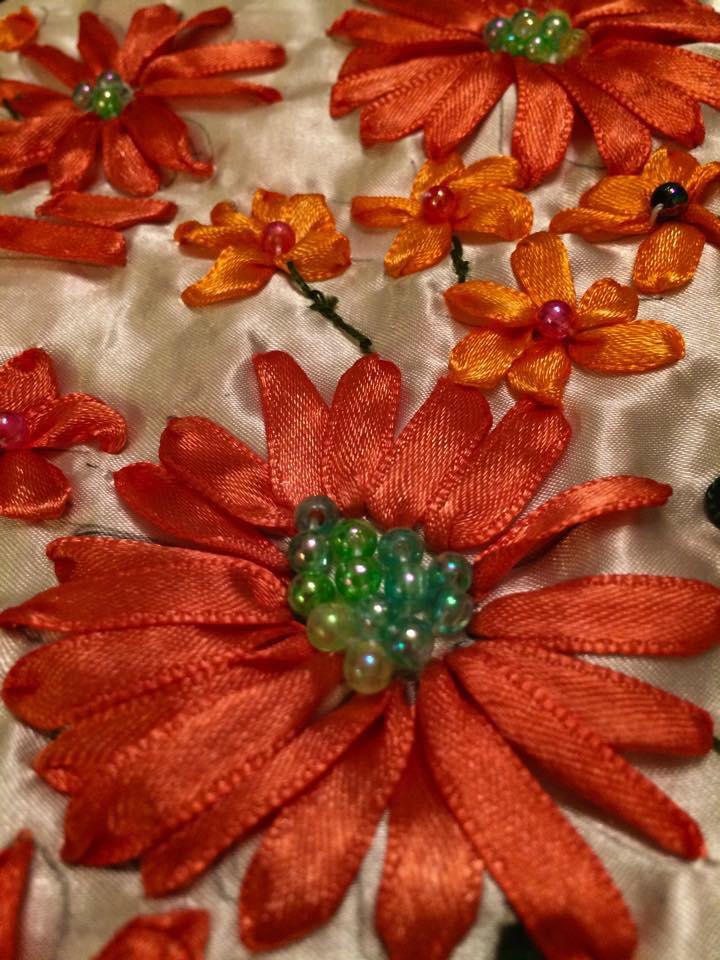
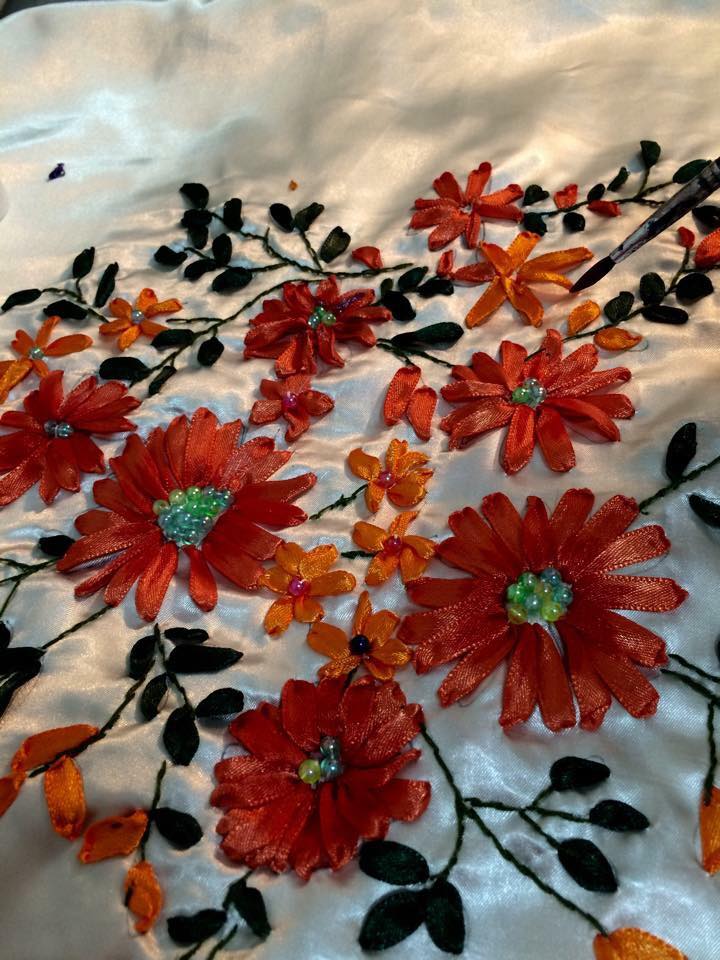
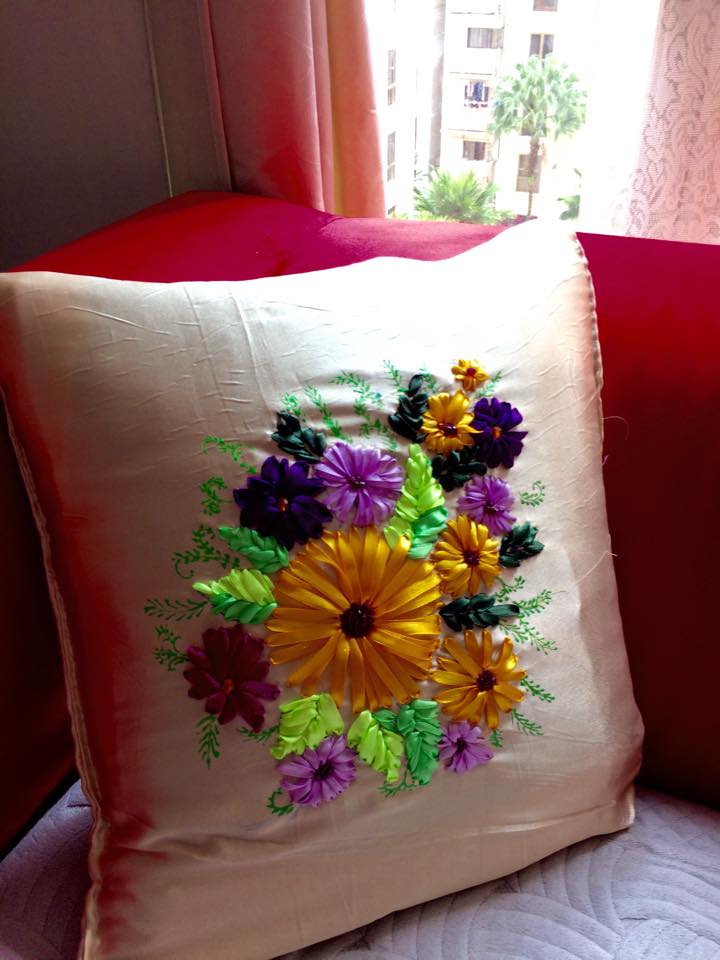
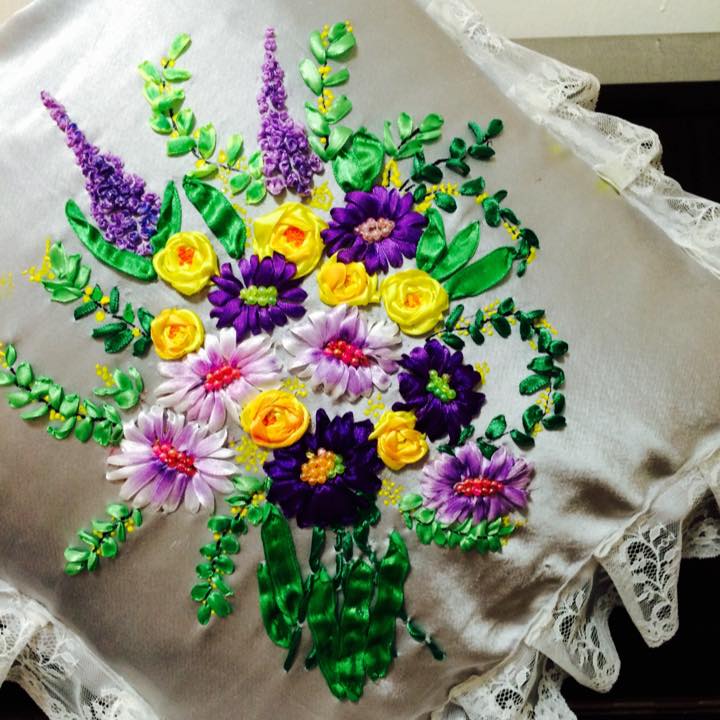
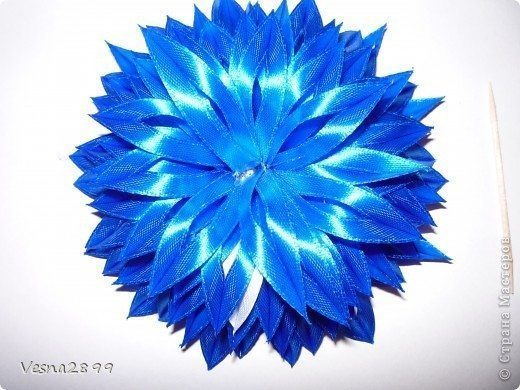
Ribbon embroidery is a romantic, old art that uses ribbon, embroidery floss, and perle cotton to work beautiful floral motifs and decorative stitch patterns by hand on garments and accessories.
I love the antique quality of this form of embroidery, and I use it to embellish crazy-quilted bags and purses,contemporary garments as well as cushion cut from a single fabric. Ribbon embroidery is easy and fun to do, and even a novice embroiderer can create elegant floral arrangements and beautiful patterns with some simple stitches.
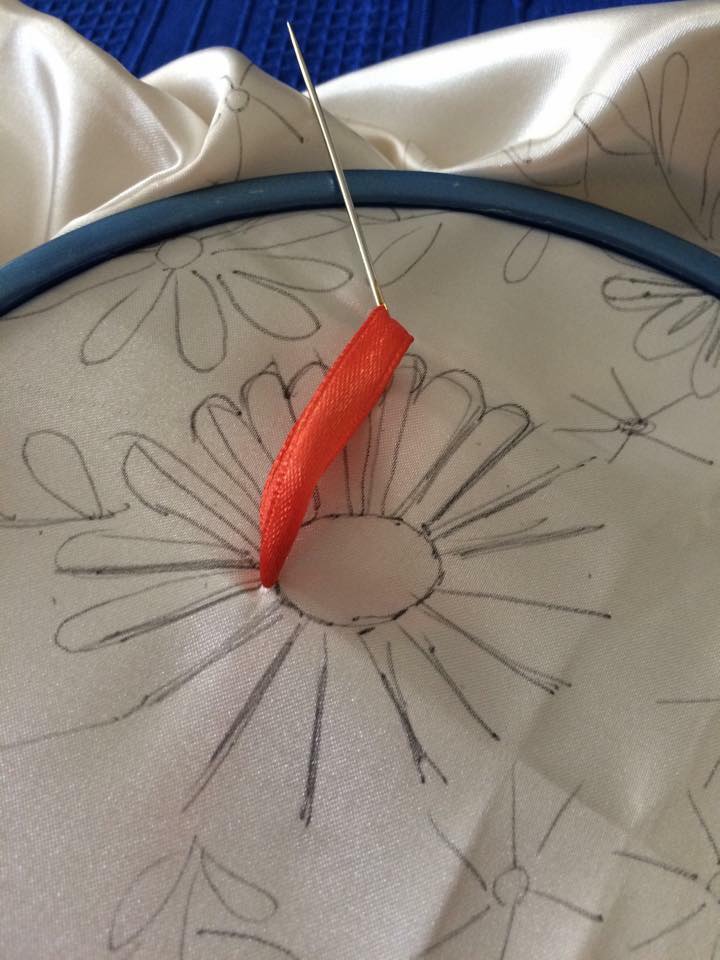
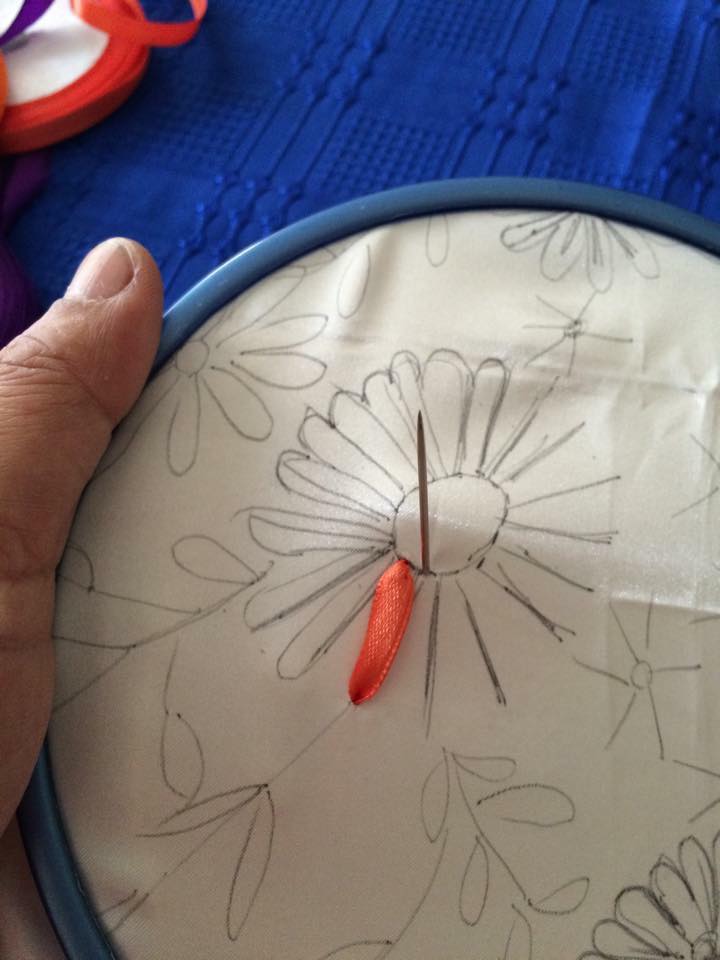
Ribbon embroidery is a form of needlework that uses ribbon instead of thread. It can be used to create a variety of designs, from simple to complex.
Ribbon embroidery is a relatively easy form of needlework to learn. The most basic stitches are the straight stitch, the chain stitch, and the satin stitch. These can be used to create a variety of simple designs. More complex stitches can be used to create more detailed designs.
Ribbon embroidery can be used to embellish clothing, linens, and other items. It can also be used to create stand-alone pieces of art.
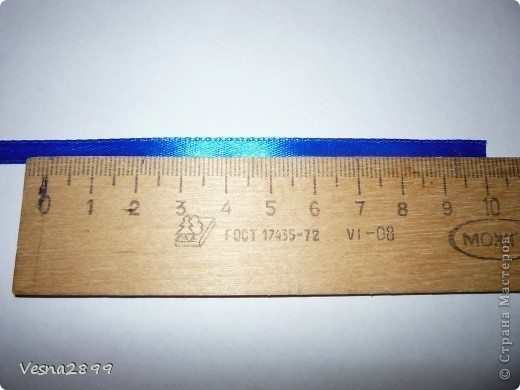
Ribbon embroidery Step By step guide


If you’re interested in learning ribbon embroidery, there are a number of books and online resources that can help you get started. Once you’ve learned the basic stitches, you’ll be able to create beautiful designs that will add a touch of elegance to any project.
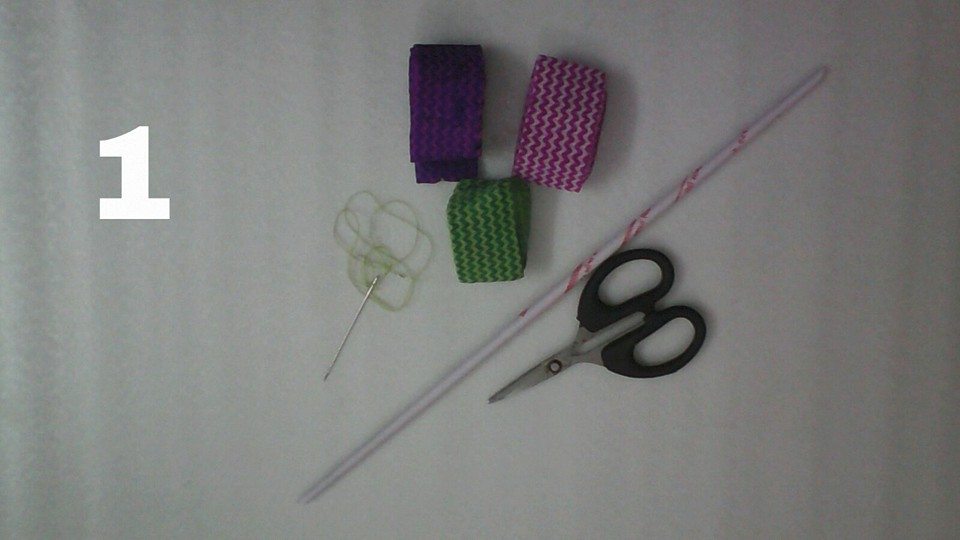
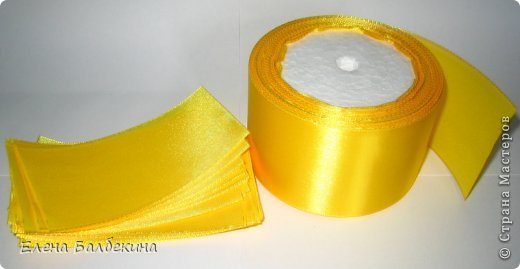
 Tools and materials:
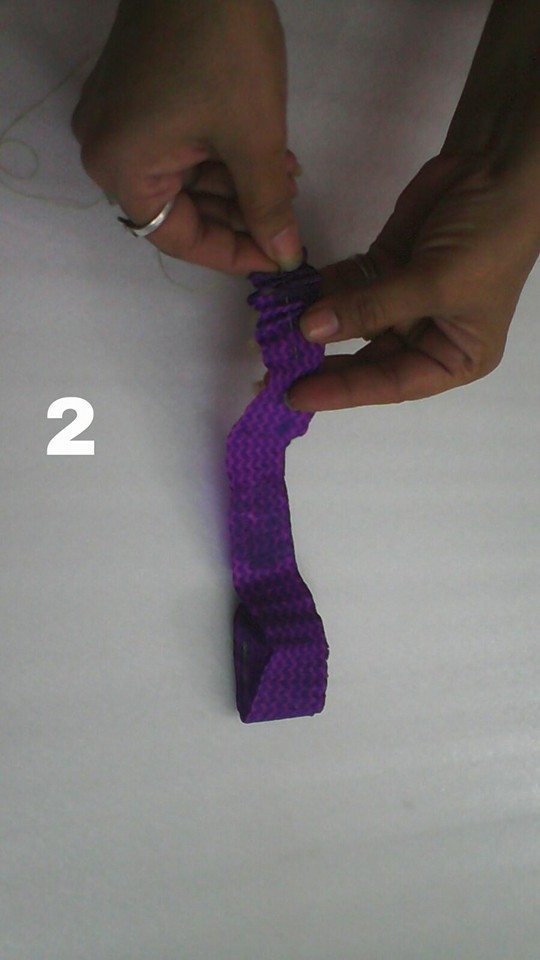
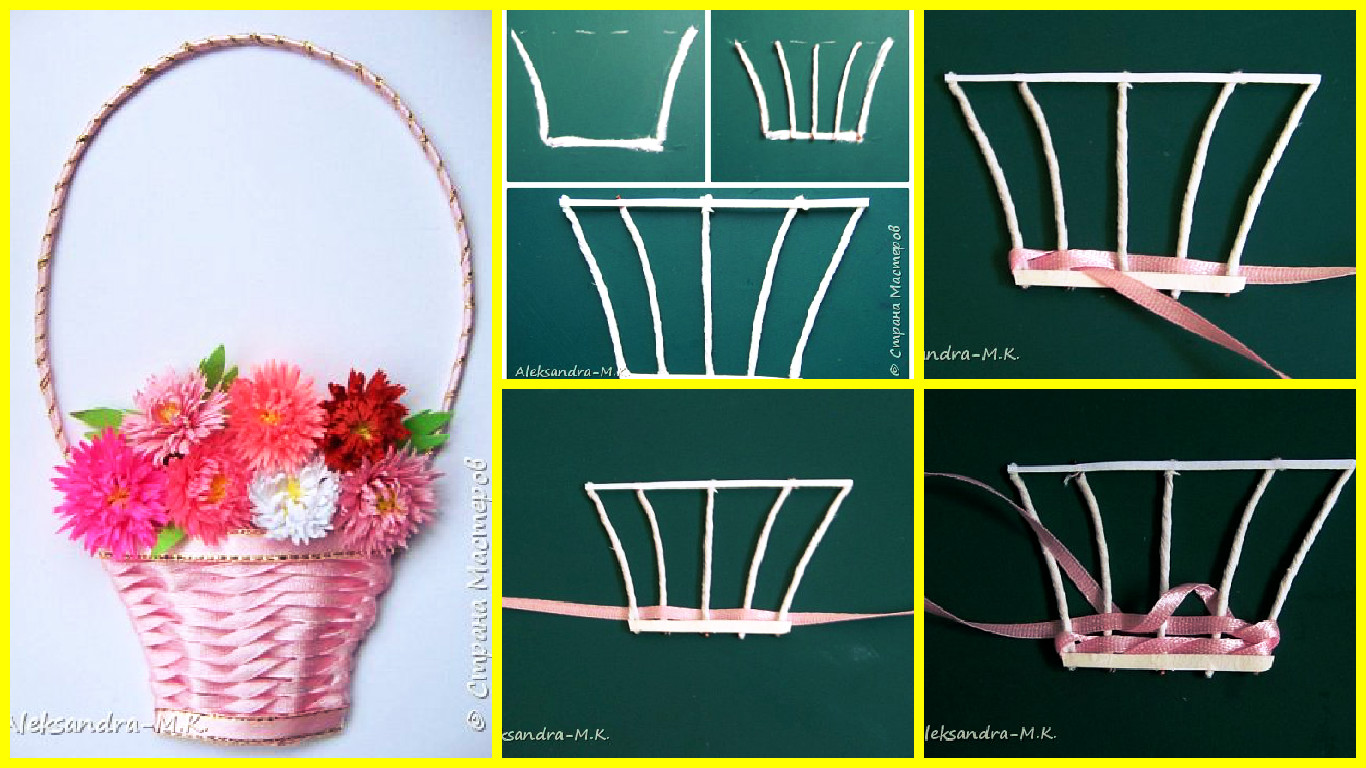
Draw the desired shape of the basket, twigs do (I have this wire, wrapped with corrugated paper) and glue the top and bottom of the narrow strips of cardboard for binding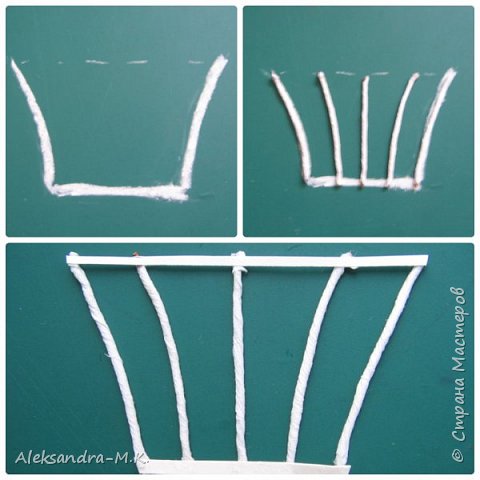 Now we need ribbon
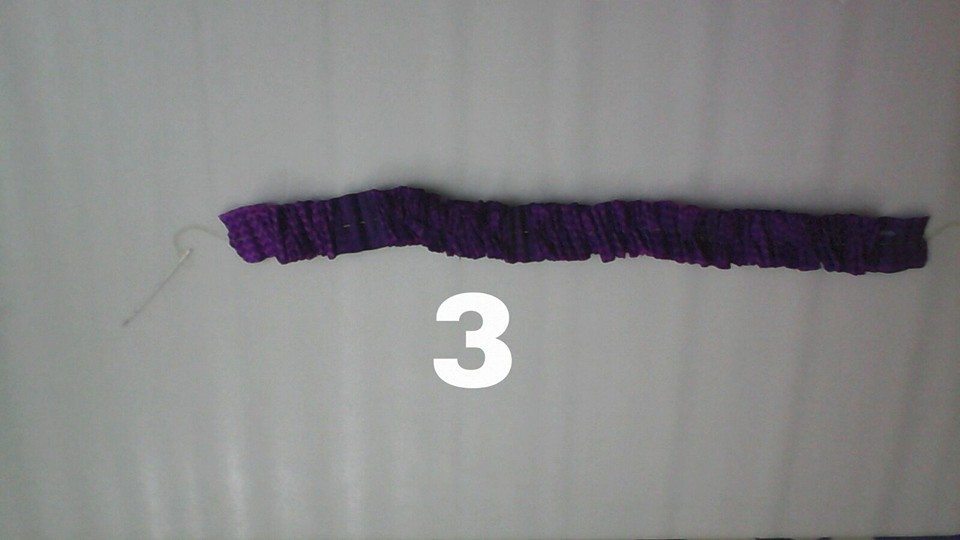
one end inserted into our frame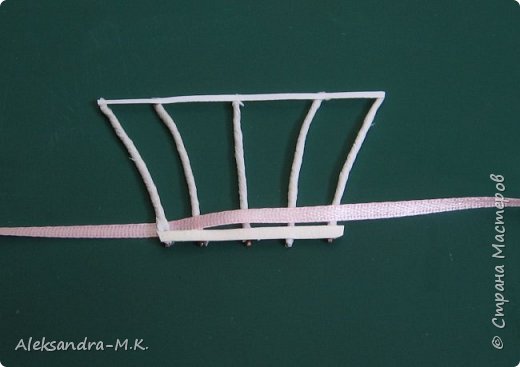 And weave as in the photo
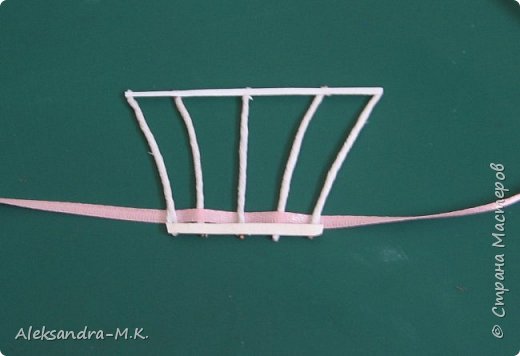 Then take the other end of the ribbon and weave as in the photo
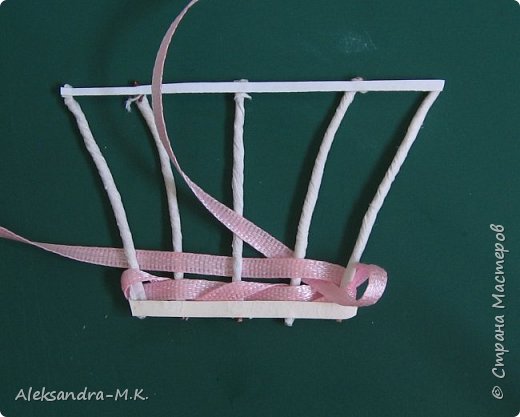
For better convenience, insert the needle ribbon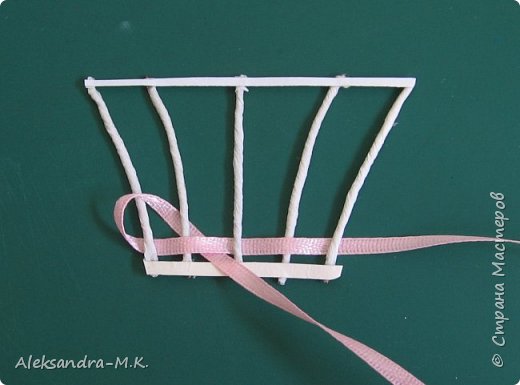 protract
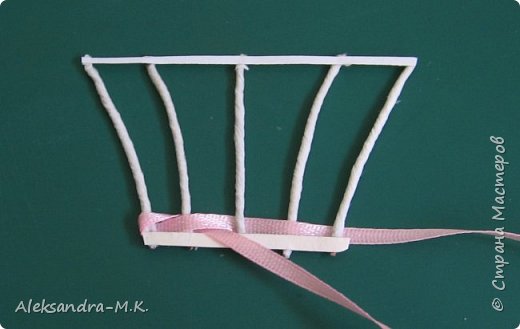 Then in the same way: enter the ribbon on the first tape to the riser and display them at the bottom of the tape
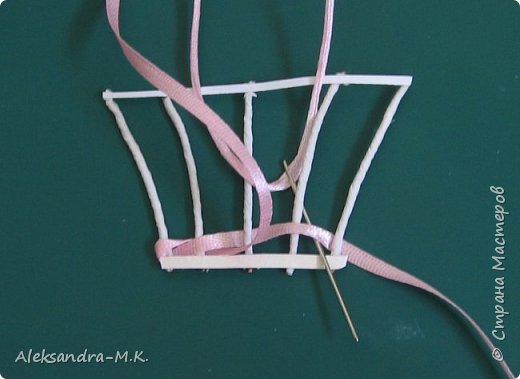 Gently tighten the ends of the
start of the second series, and now the same end of the weave as well as that over, then under the riser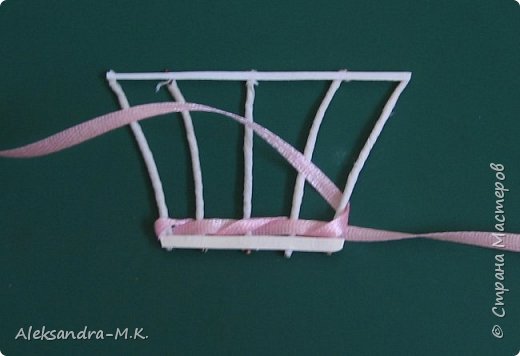
 So weave until the end
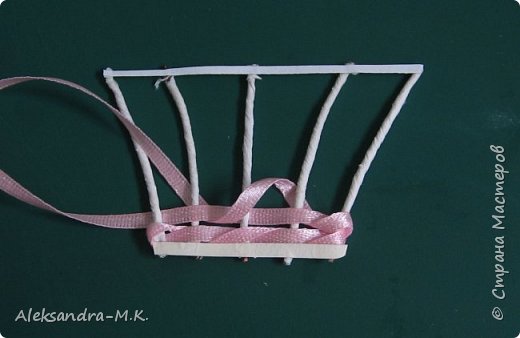 Dopest last row and carefully cover their tracks on the wrong side
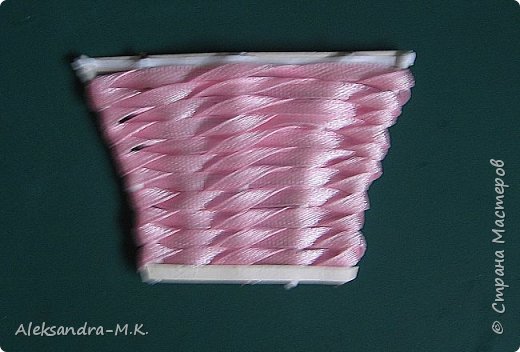 Next, you need to decorate the top and bottom baskets
 To look basket volume it needs to be stuck on a piece of cardboard in several layers
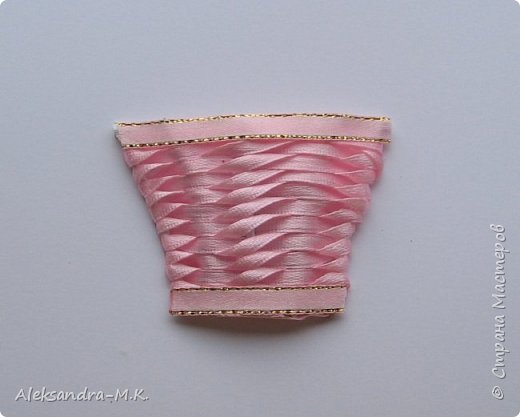 Adding wire Tape
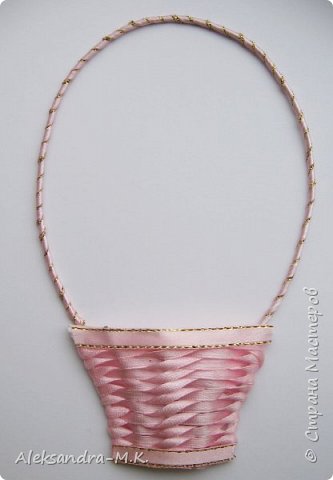 Basket ready and it can be filled with flowers
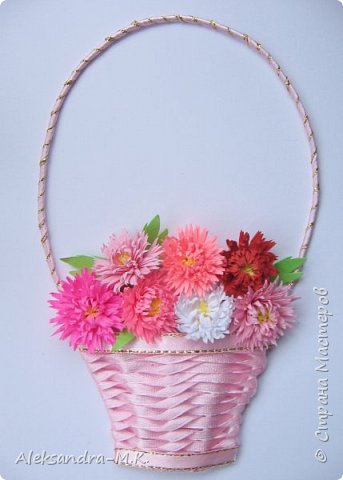
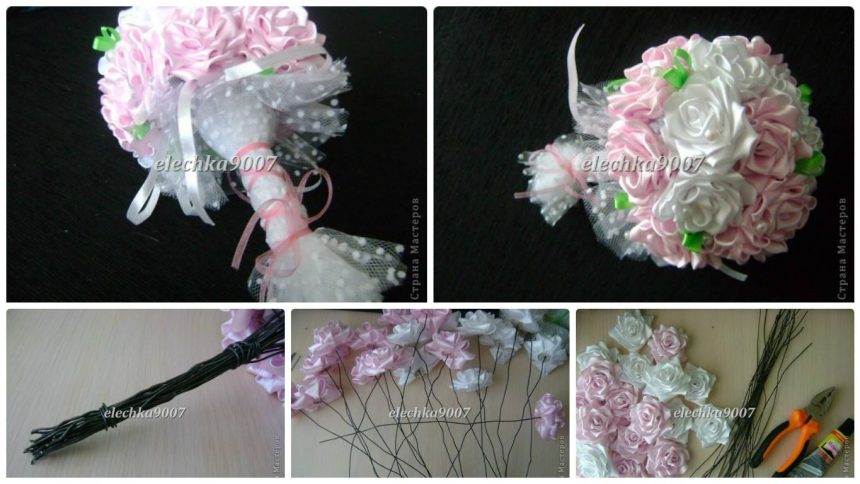
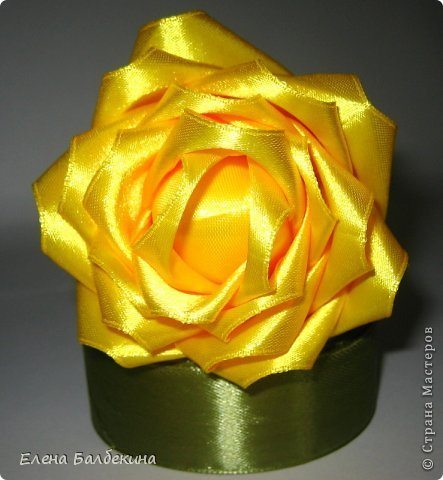
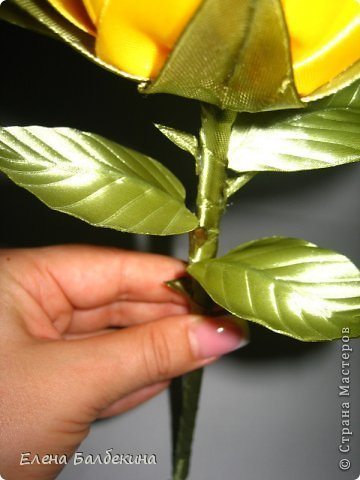
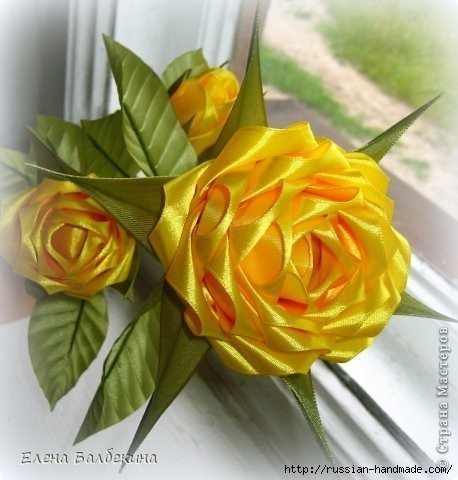
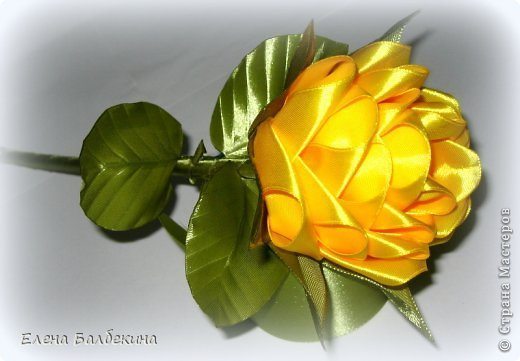
 Required Material:
-Finish flowers (we have it rose)
– Wire (knitting better, it is not like the STI, it does not break!)
– glue
– wire cutters
– fabric or mesh
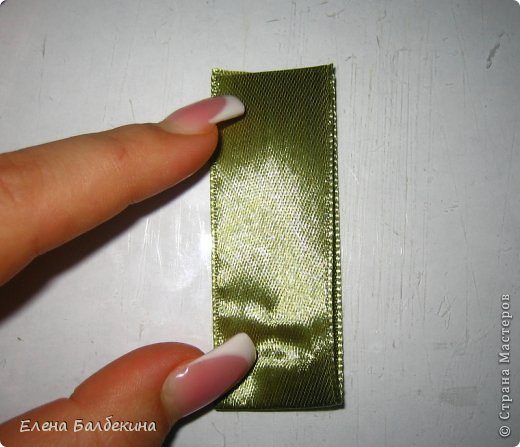
– tape
– bias binding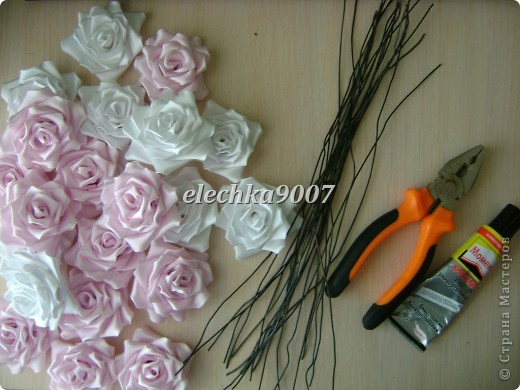 2.
2.
we do loop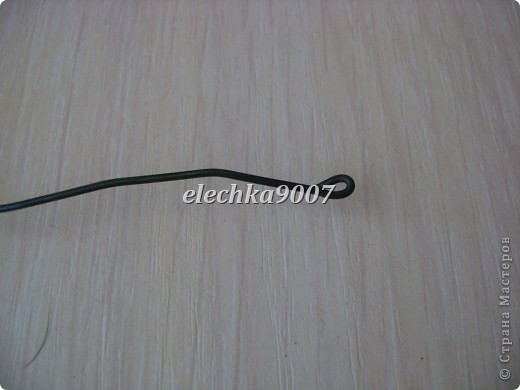 3.
3.
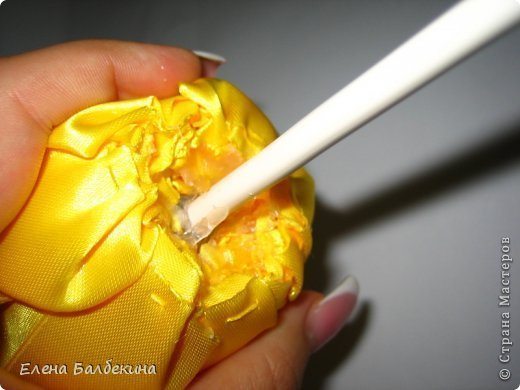
insert the wire in the middle of the flower and dripping a drop of glue on the loop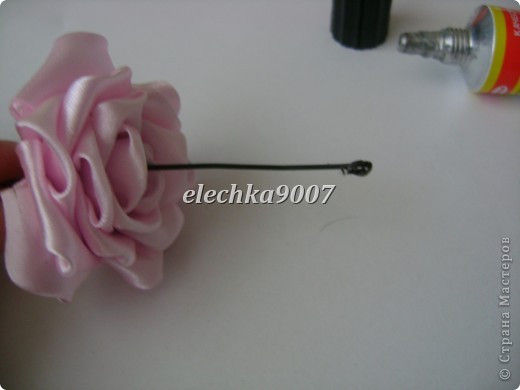 4.
4.
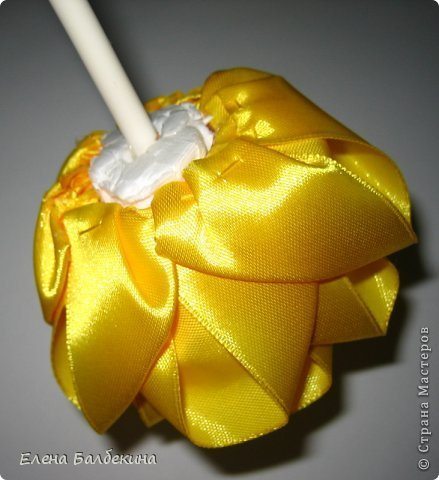
carefully so as not to stain the flower glue stretch wire
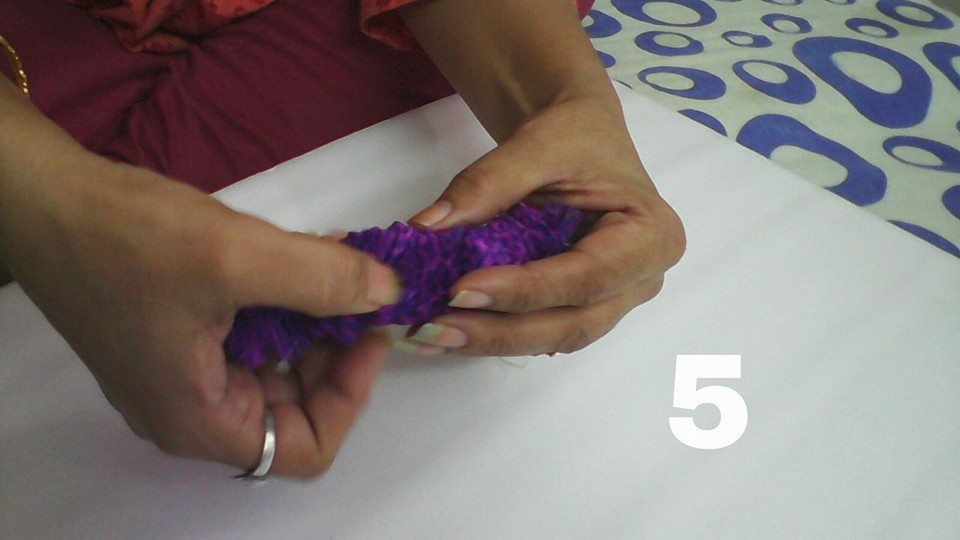
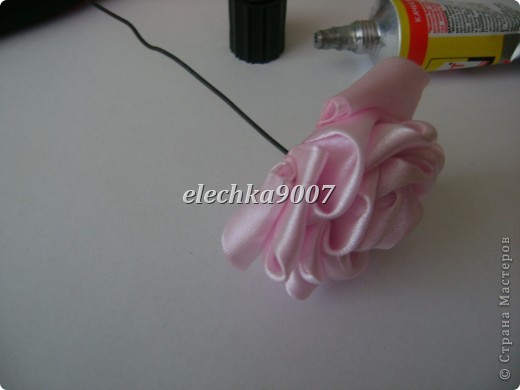 5.
5.
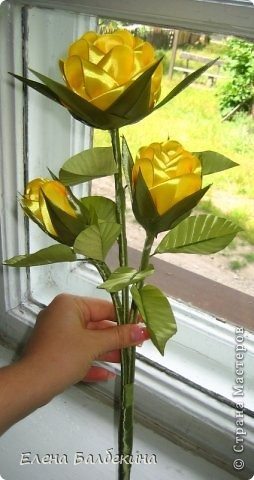
that’s what it turns out!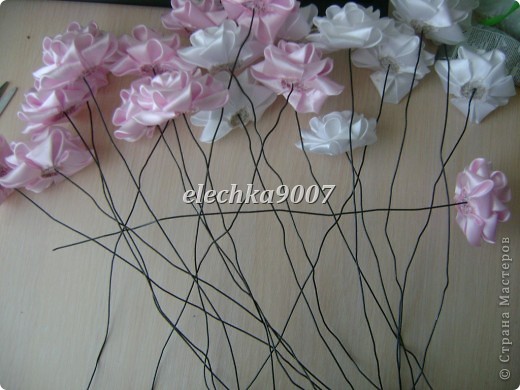 6.
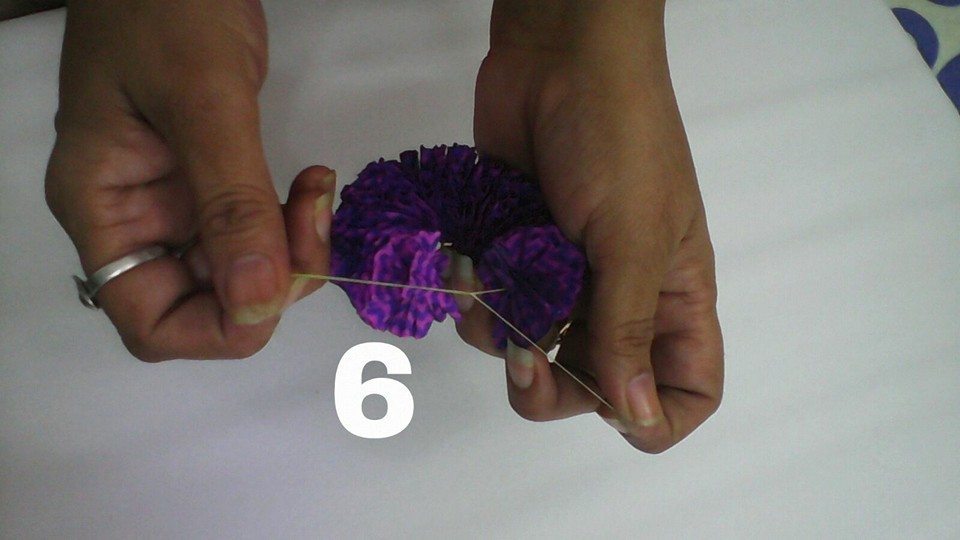
6.
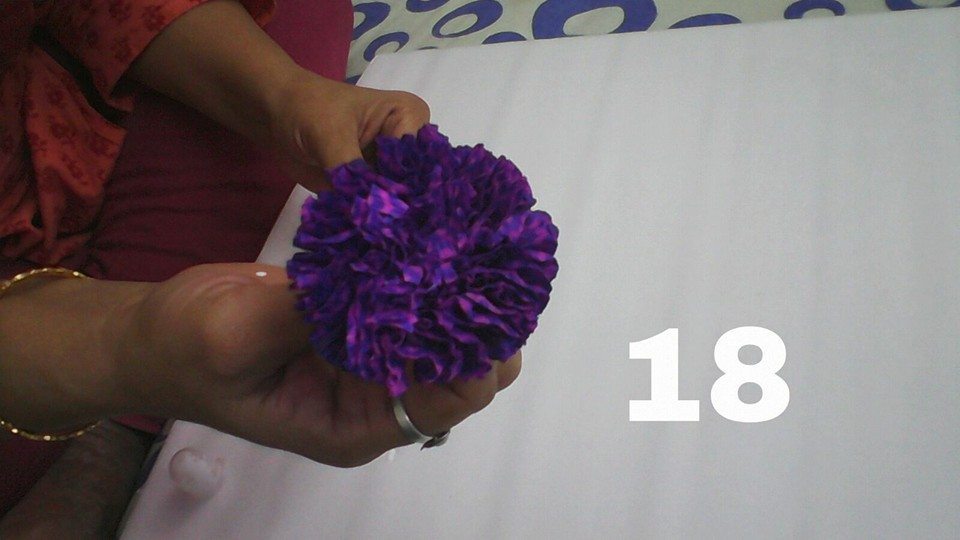
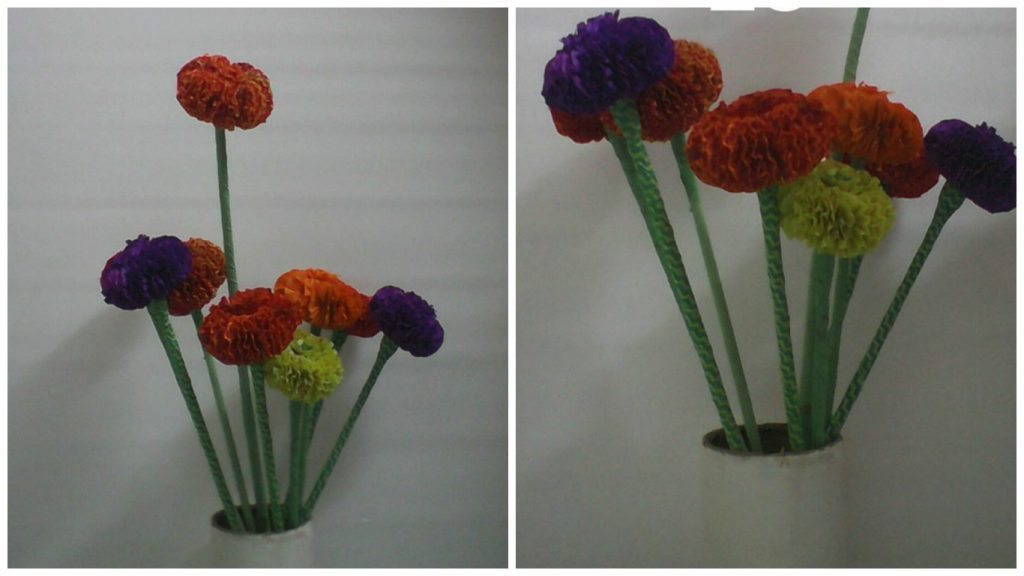
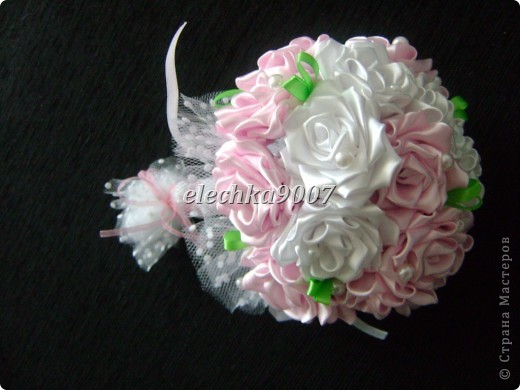
begin to collect a bouquet! Flowers slightly buckled, so that eventually turned the spherical shape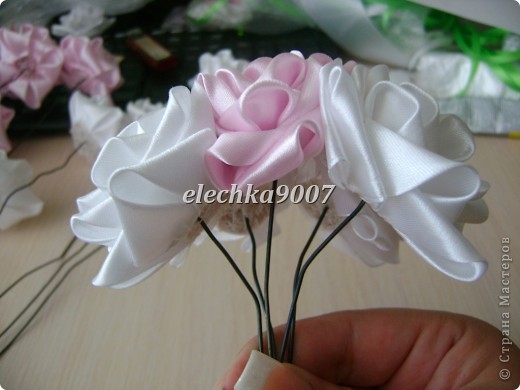 7.
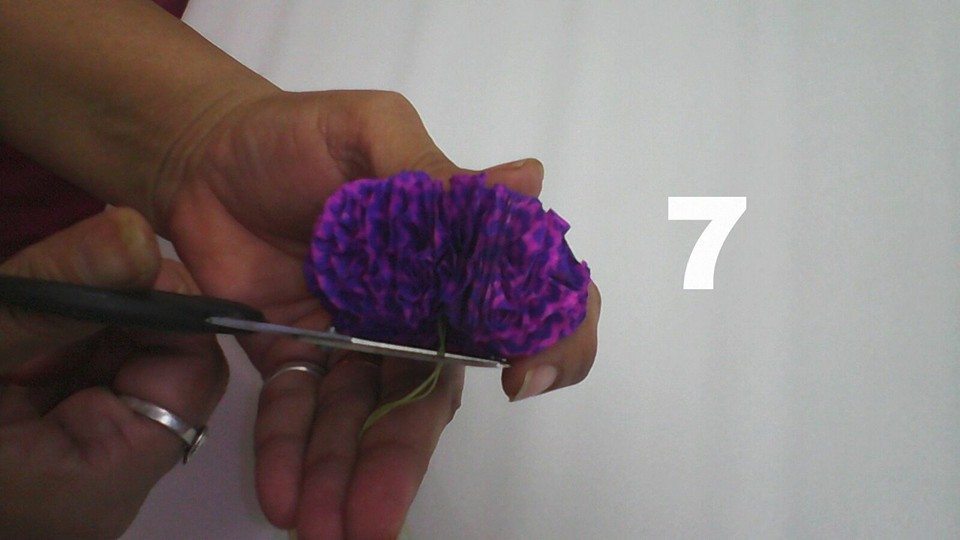
7.
when all the flowers are gathered, we fix them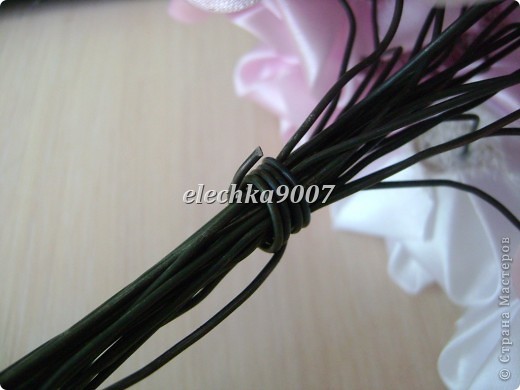 8.
8.
and form a ball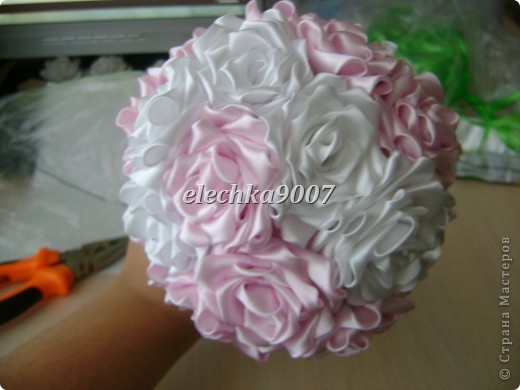 9.
9.
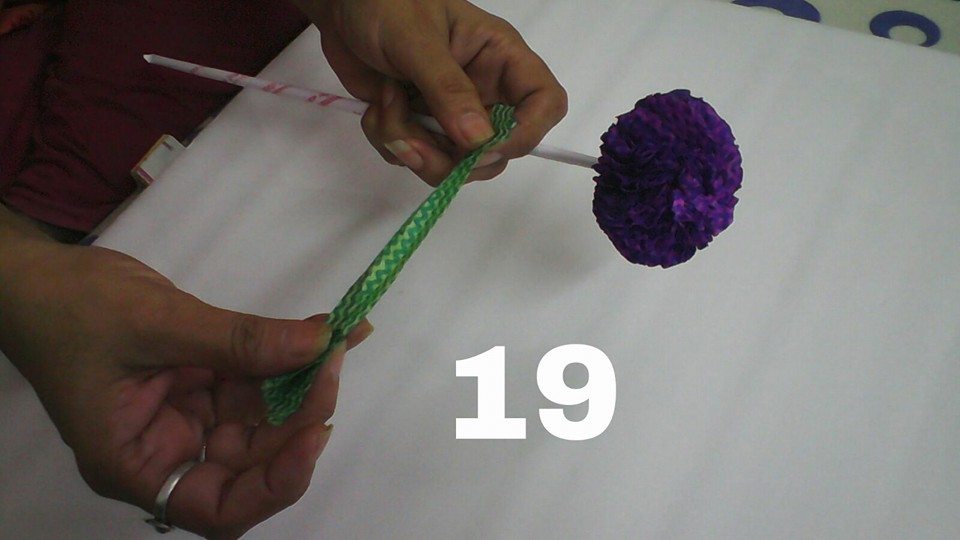
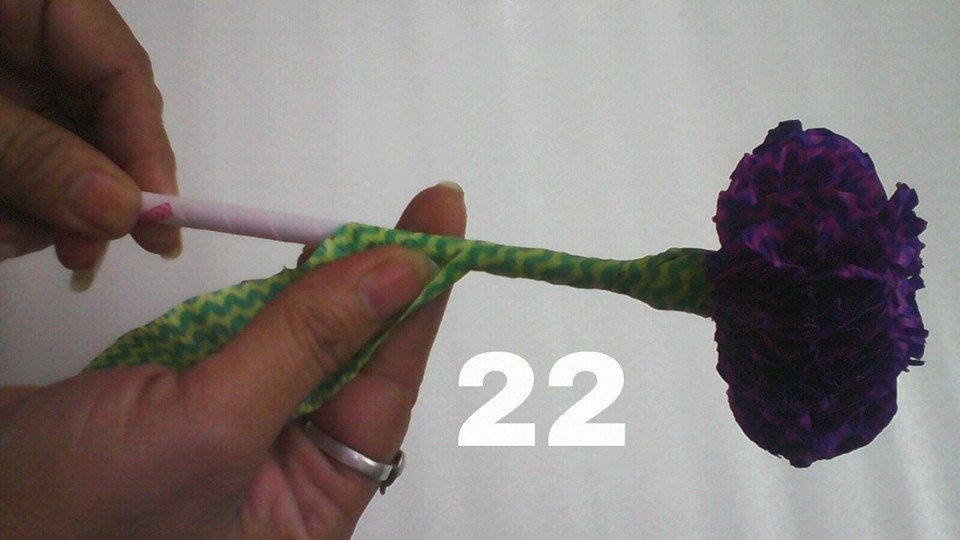
You can add green or anything else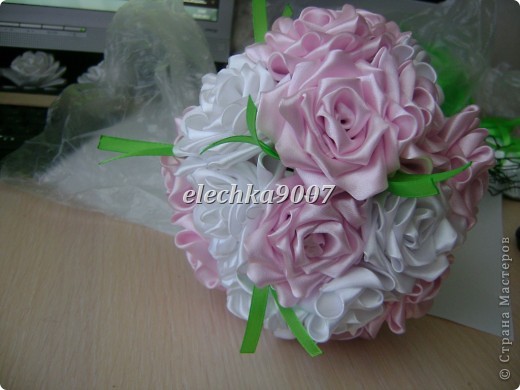 10.
10.
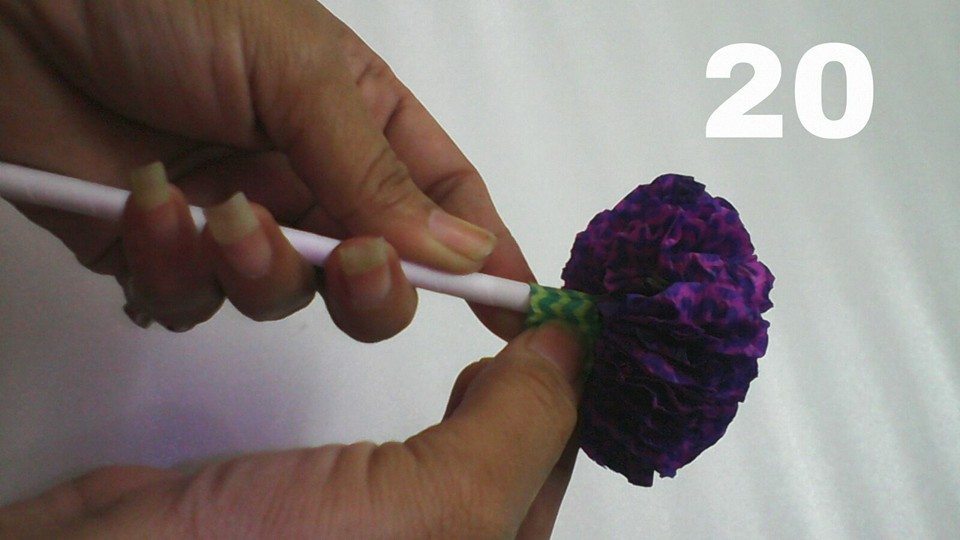
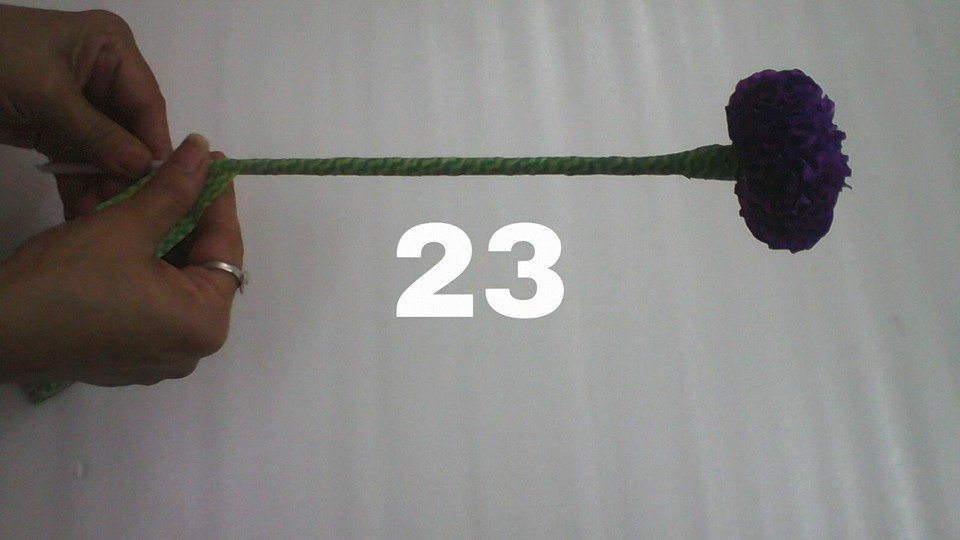
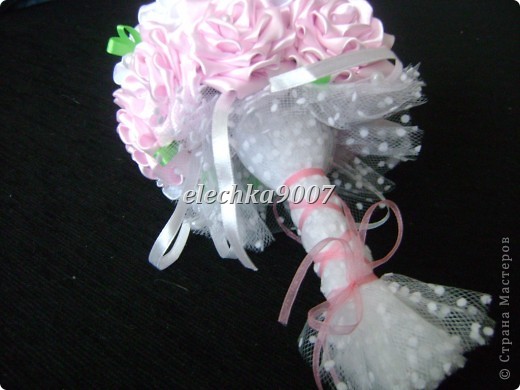
cut the required length and anchoring tip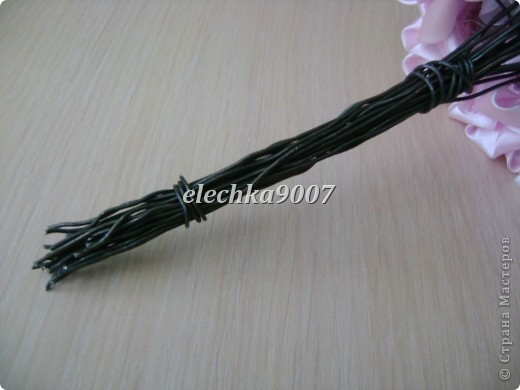 11.
11.
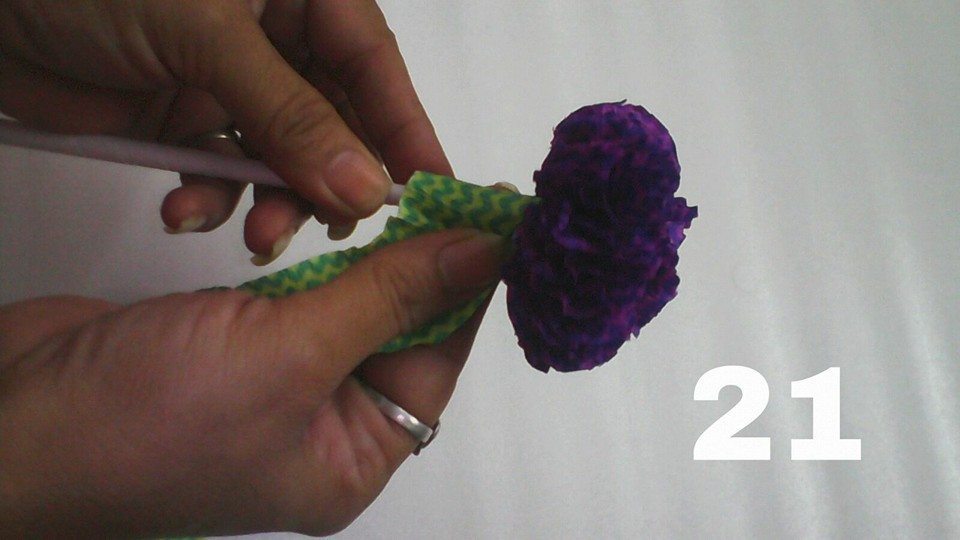
little trick! so that when winding the handle are not tormented with the tip can make such a pocket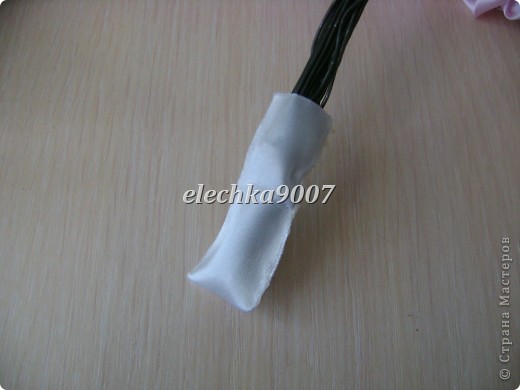 13.
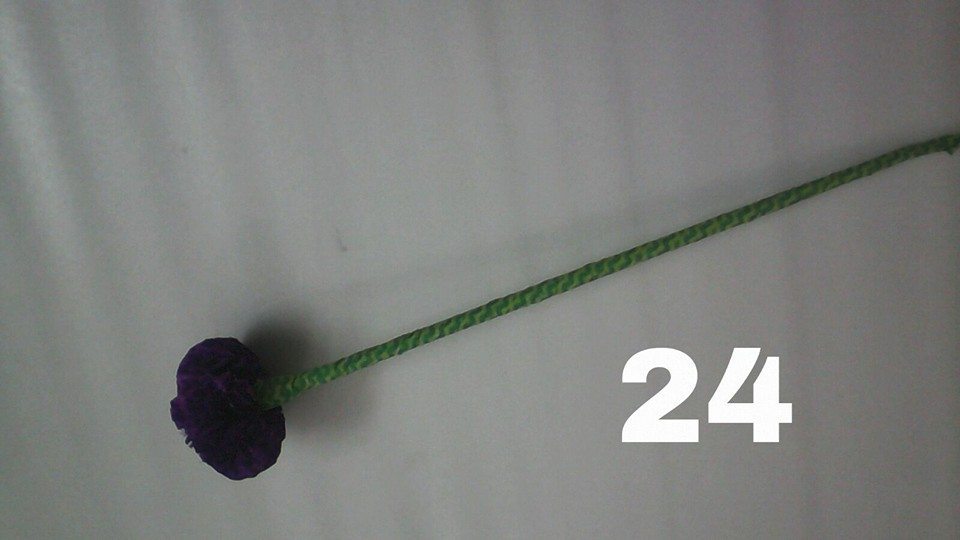
13.
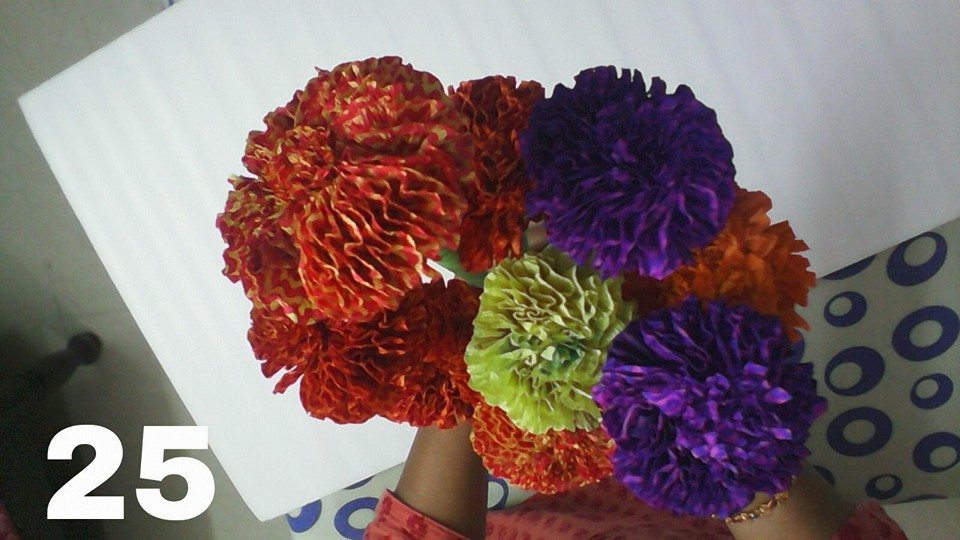
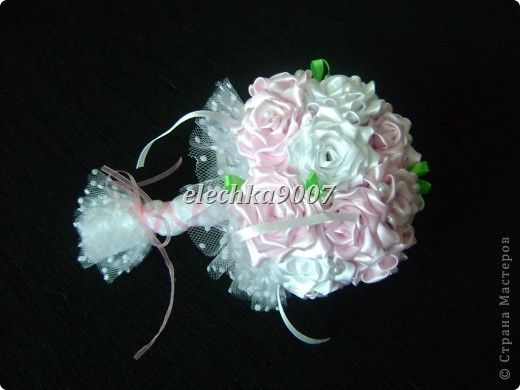
make out on the taste and bouquet of our ready !!!)))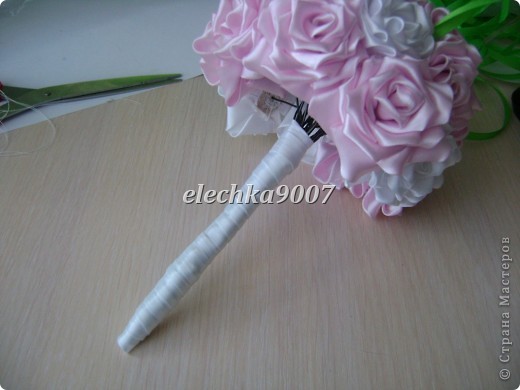


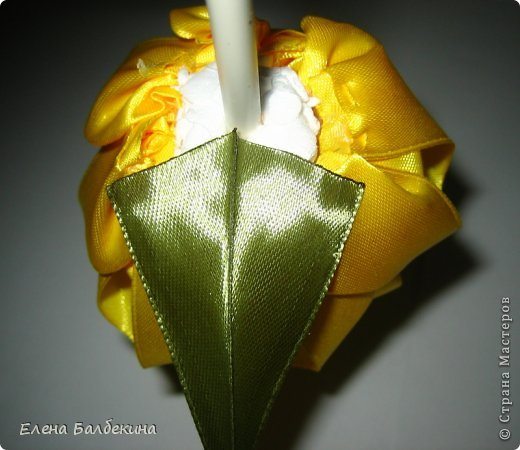
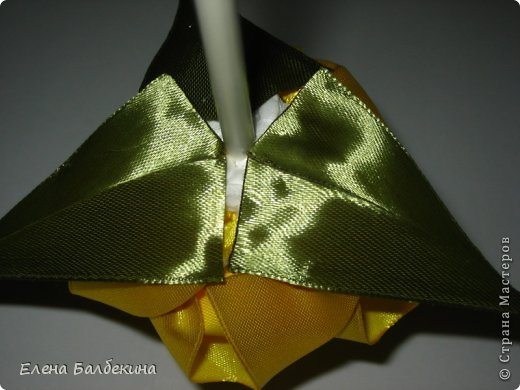
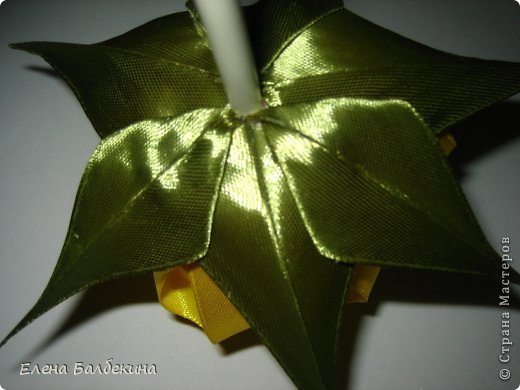
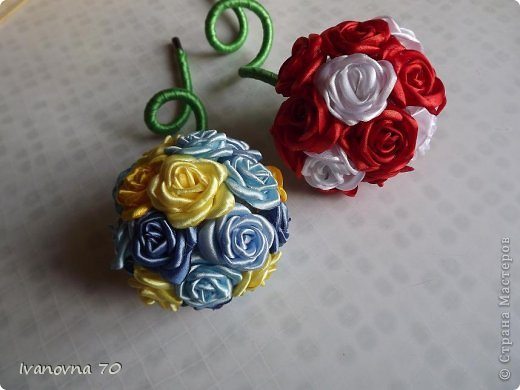 For work, we need the traditional kanzashi set of materials and tools: tape, glue, candle, scissors, wire, tweezers.
The picture just tape them today protagonists on our pink ball.
I have them 2.5 cm wide, and can be 5 cm .
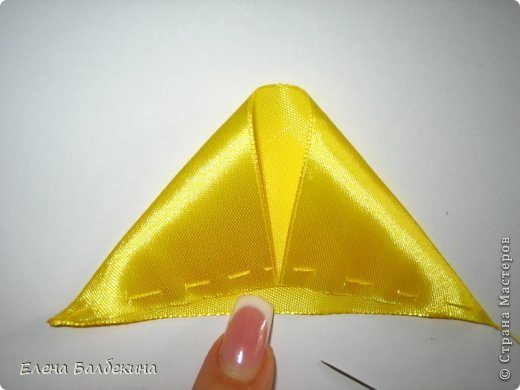
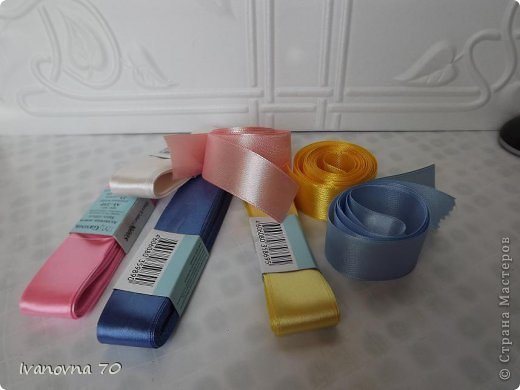 The most time-consuming for me has always been cutting … yes … the pattern decided to do without shabolonov !!! Take several strips of different colors, I cut “by eye” of approximately 2 cm in one pile. To make it clear, at all stages of the photos spread out in rows.
1ryad Cut several strips.
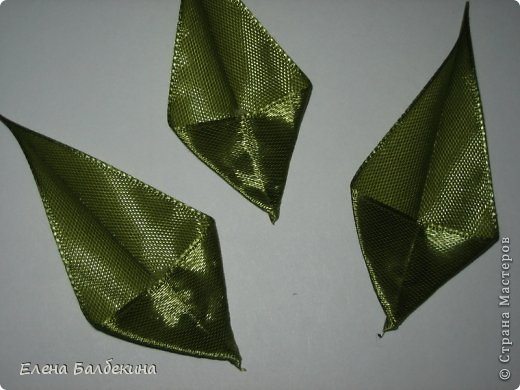
2ryad Slightly round out the two brackets (also pile at once). Note that the tape edge is always the side and top and bottom sections.
3 row melted over fire. Horoshenechko melted so that the petal slightly curled. Bottom nado.Vidno not melt the front side.
4 number of petals.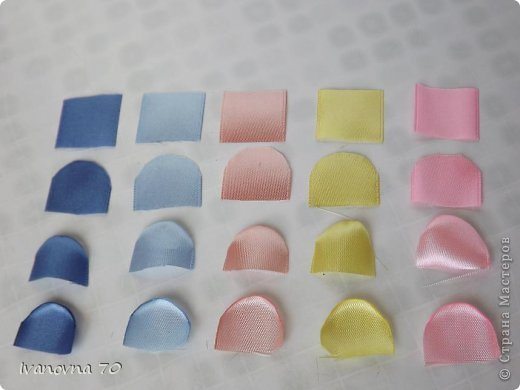 Do not be afraid number. It’s not scary and not long! Melted need only one side.
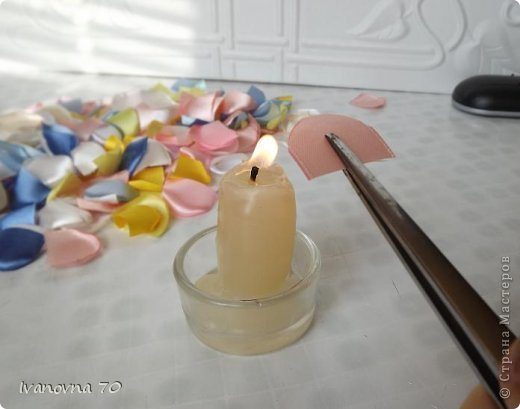 That’s all done! We do not even tired!
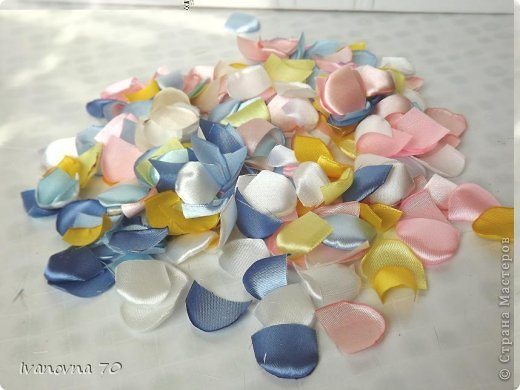 You remember that we’re going to the prom?
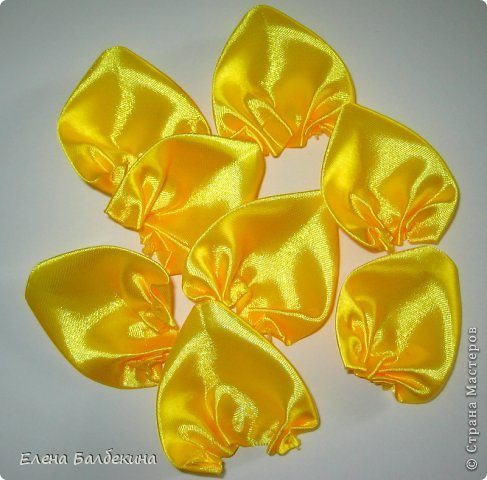
We select outfits in color. At each rosette I need 12 petals. You can do a little more or less. When I cut the ribbon advance’m rough count to 12. While the glue is heated counted out the petals …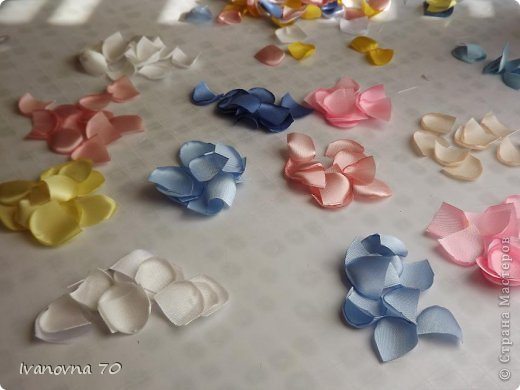 The first petal curl up into a tube underside.
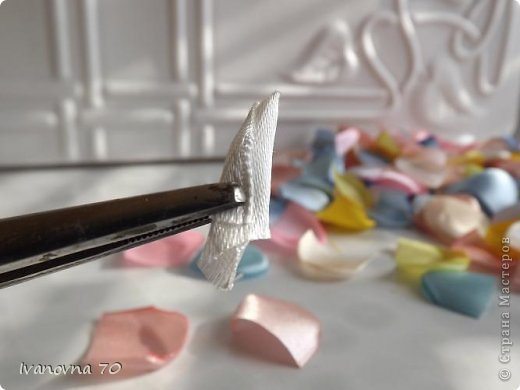 On the second and all following petals drip two tittle glue … on the front side.
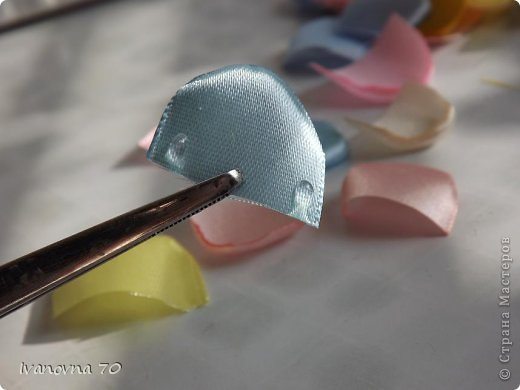 … And wrap our “straw.” Follow to 1lepestok not appeared above 2. Otherwise, your roses will be long-nosed.
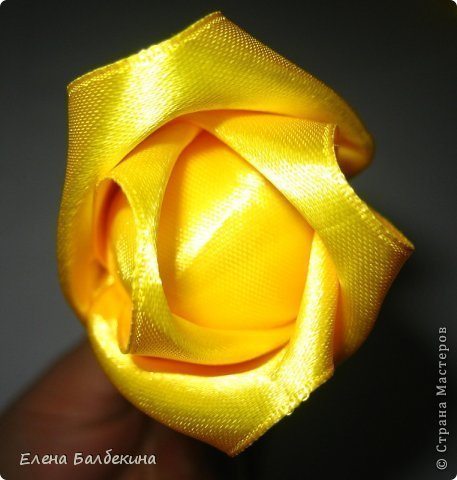
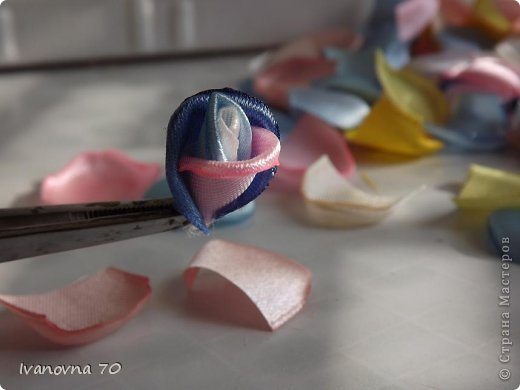
I collect the sample onto a different color.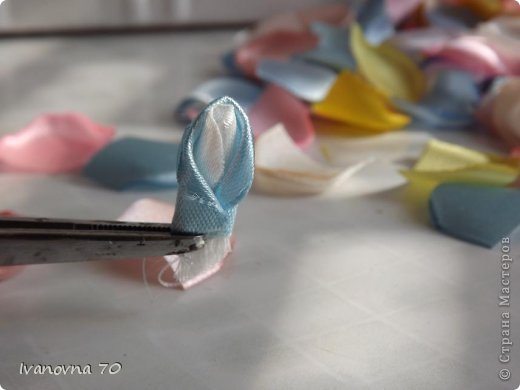 Again – glue and third petal embrace the first two.
At the bottom of pussies do not pay attention.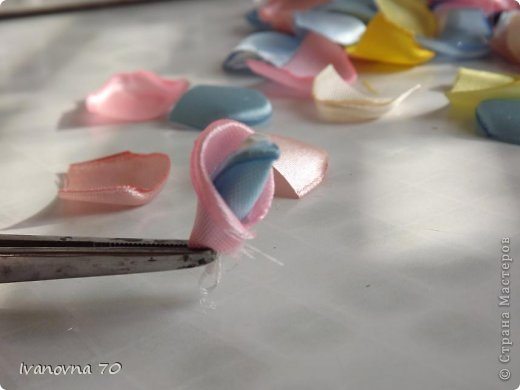
 … More …
So, until all 12 are not embrace.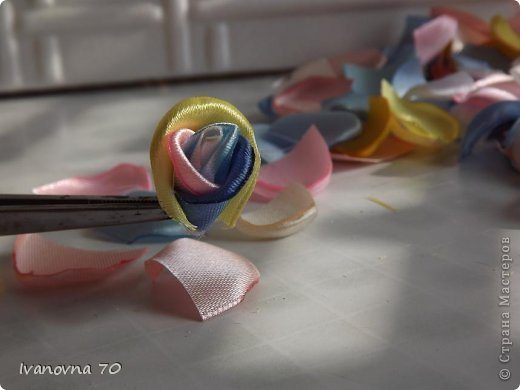 Here they are already ready to waltz whirl.
Look what little nose peeking out seredinok.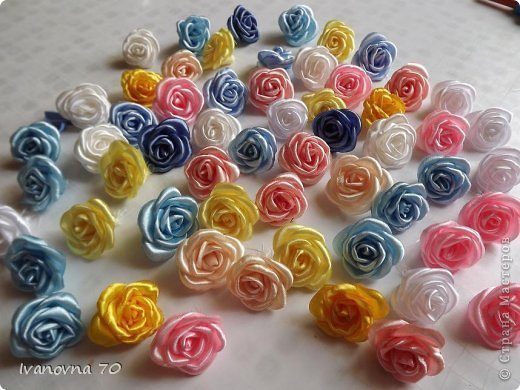 This “tail”. Right Shaggy and they stick out length of the cone, and I left them shortened. So stick to the ball easier.
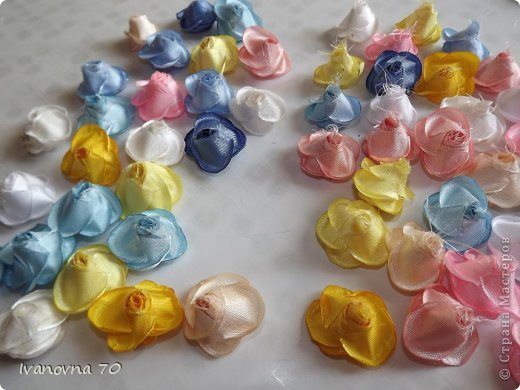 Now prepare the basis for the trees. Can Christmas ball, and you can collapse Bun paper and wrap the thread. Threads are no sizing, because hot glue when gluing roses and leaves all fasten tightly. The length of the wire is determined by taking into account whether we Stalks bent or straight.
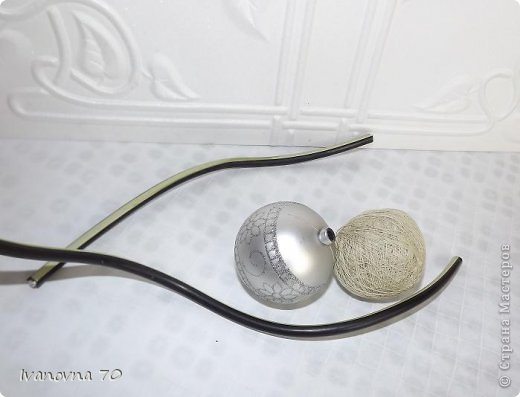 Before gluing flowers foot -cool, sticking to the bowl and wrapped with a tape 1 cm. Wide, securing with glue.
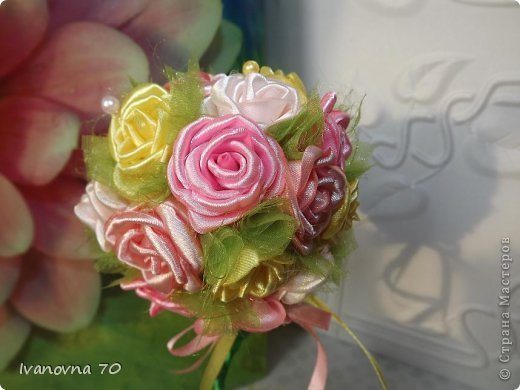
 Here they have already gathered all together!
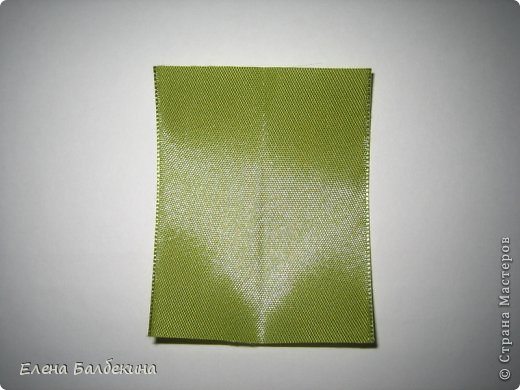
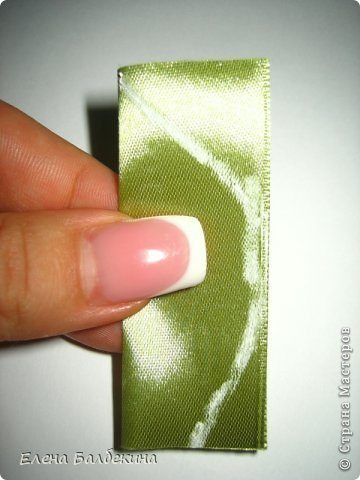
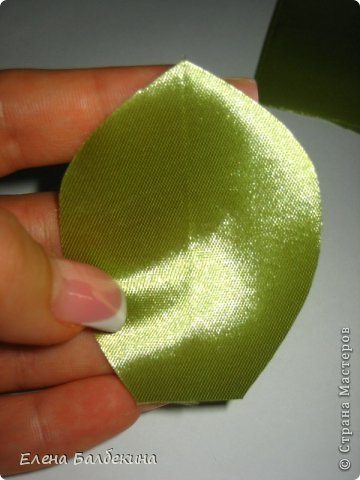
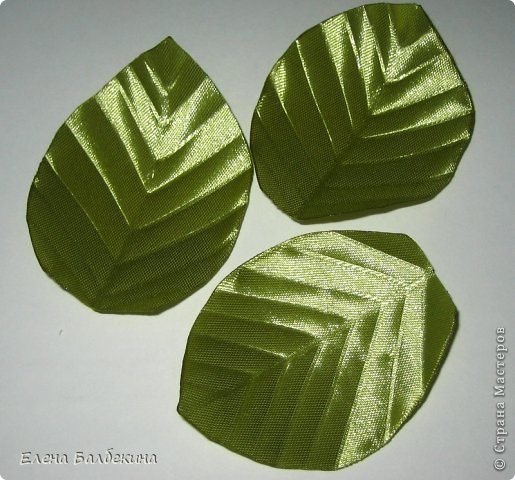
But so far no green leaves. For leaflets and samples. This trimming of the floral organza. As I like it! Mohnatenkaya such … With glitter silk interesting combination is obtained.
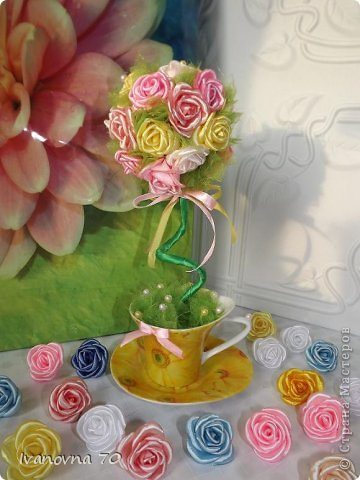
Now they need to find suitable pots.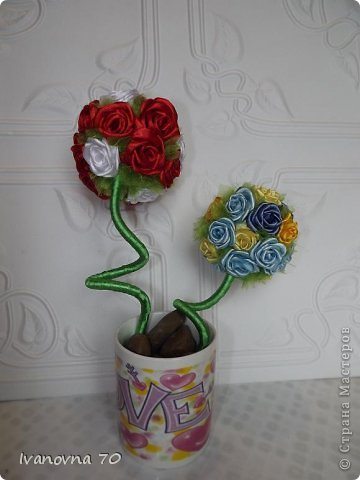 Well, my Crank your house warming already right.
 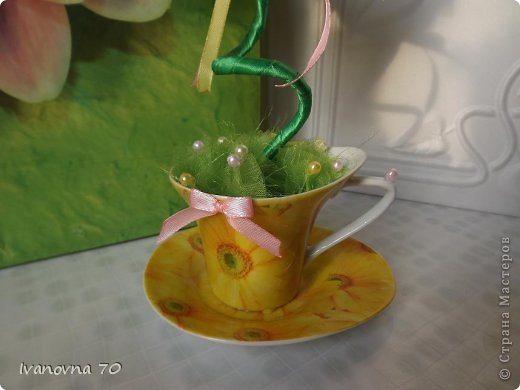 Here it is in all its glory. … Soon they will scatter your sapling.
 Feed 5 cm to 10 cm. Cut the right amount of soldering. I took on this rose petal 21.