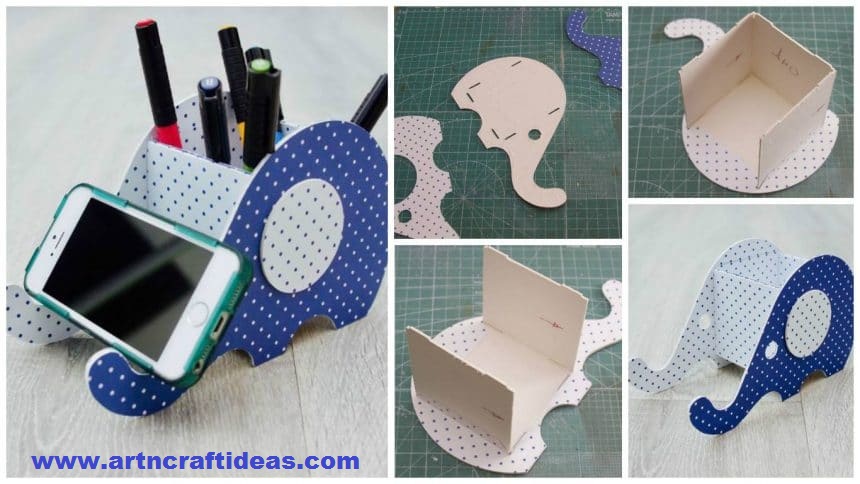
paper and cardboard stand-organizer “Elephant” for the tablet:
On our desktop, where the whole family is engaged in creativity, are always accessories. One of them – the tablet, usually show some series, a regular review of interesting gizmos, workshop or just playing music. In this master class you will learn how to create a stand for such a satellite creativity with his own hands.
So, let’s begin!

Required Material:
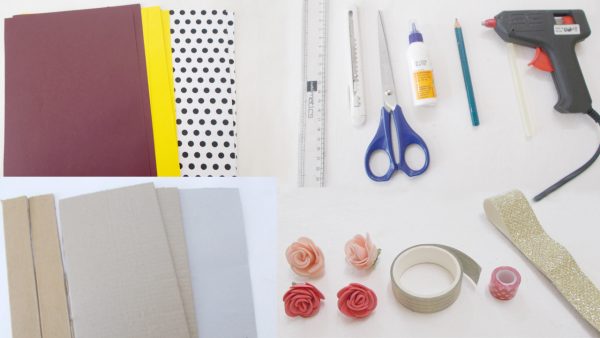
beer board thickness of 1.5 mm, a sheet of 250 × 300 mm (I had two sheets of 250 × 200 mm at hand);
beautiful sheets of paper, one of at least 9 “x9” (229 × 229 mm) and 2 A4 paper (I used 3 sheets of paper for scrapbooking 305 × 305 mm);
adhesive (for example, “Moment of Crystal”);
scissors;
line;
stick to scoring.
Additionally, to facilitate the manufacturing process, can be used:
board Creasing (preferably inch as customized sizes just under a);
model knife;
mat for cutting;
metal ruler;
plotter.
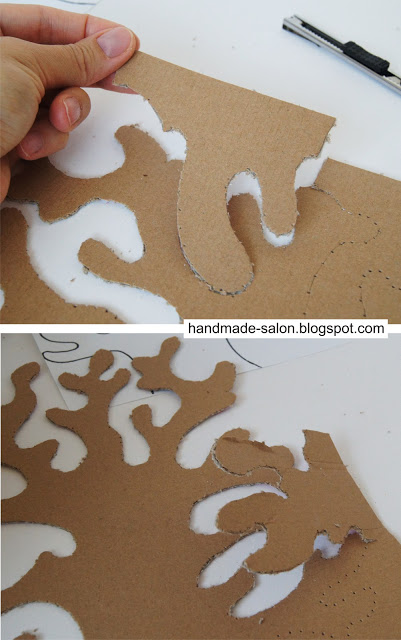
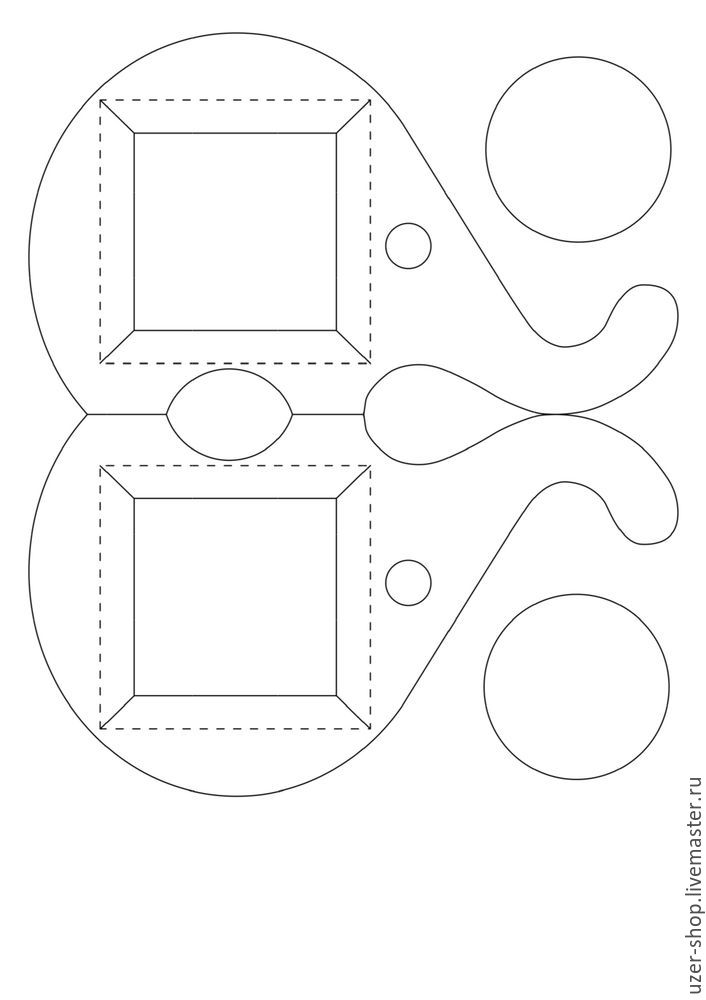
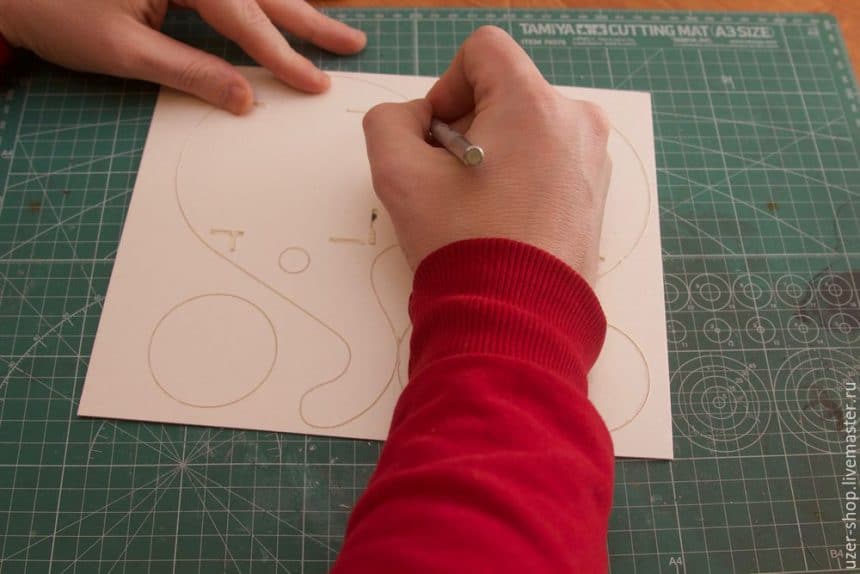
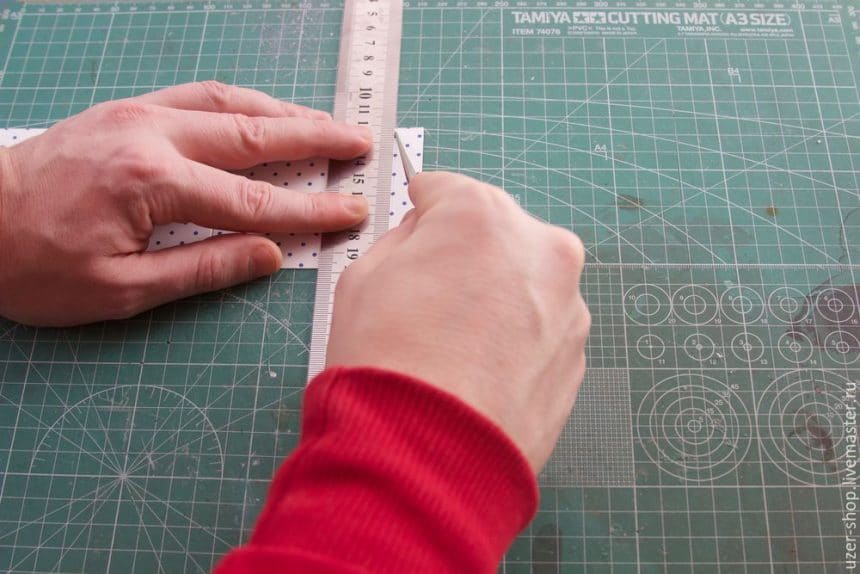
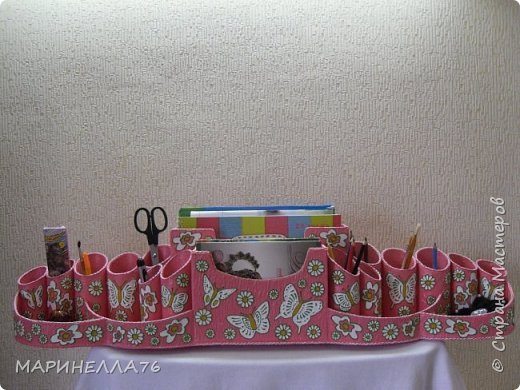
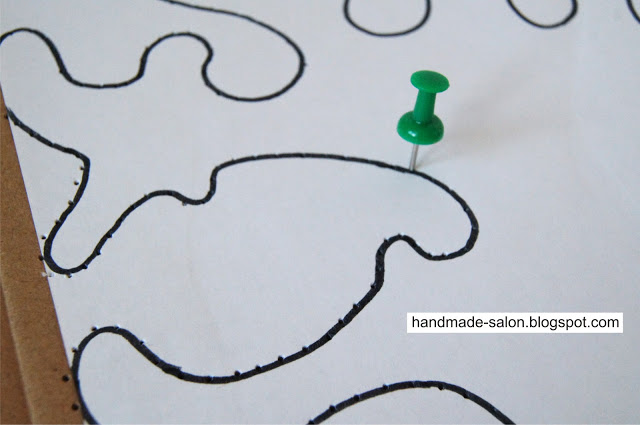
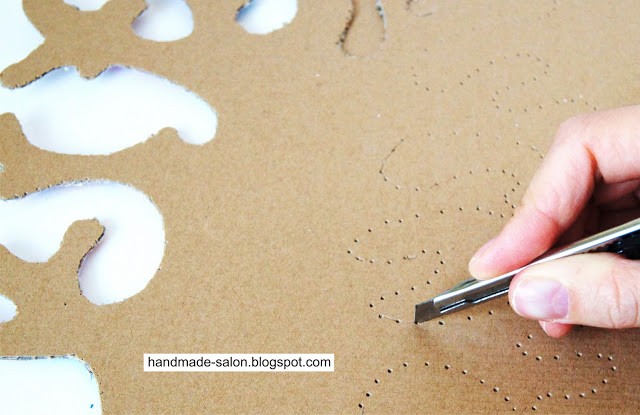
Now we need the sketches “Elephant.” To maintain the correct dimensions, the image should be printed on A4.
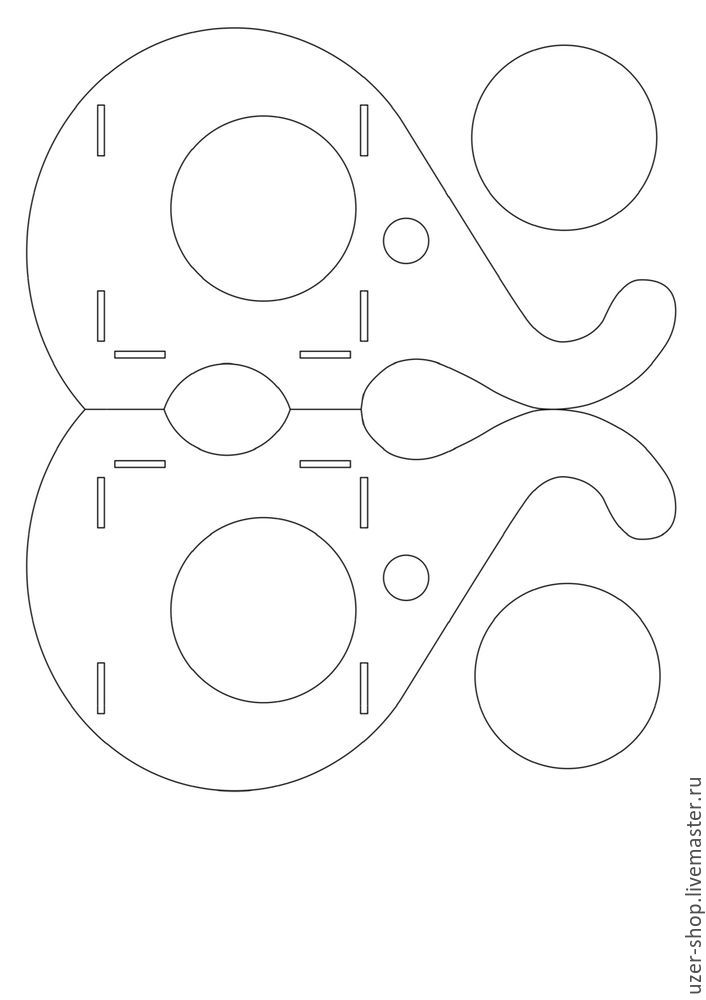
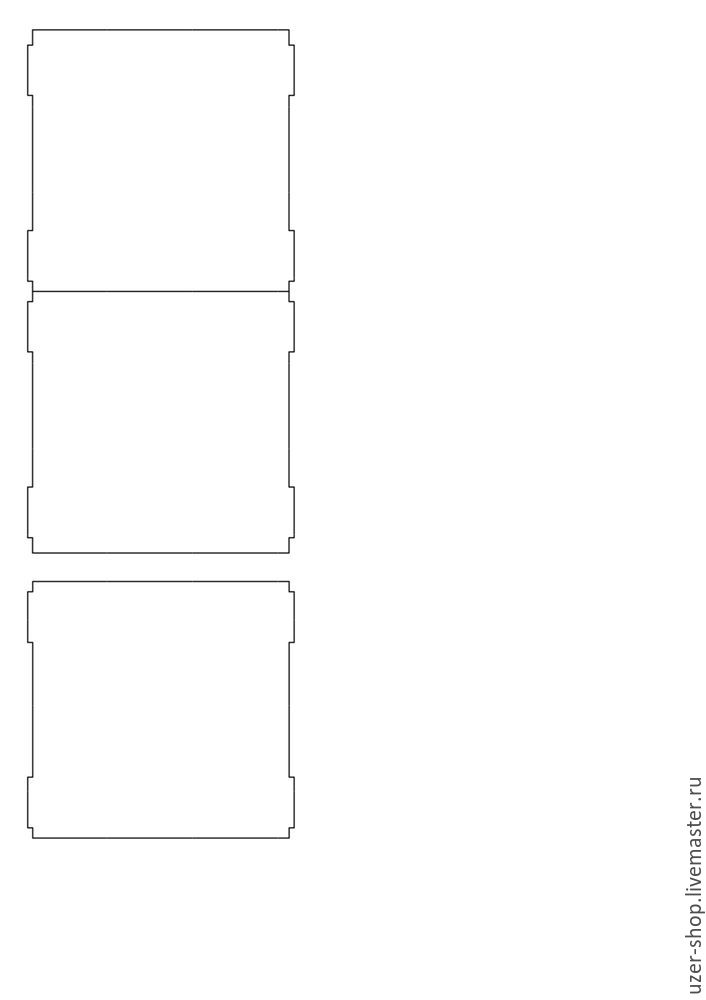

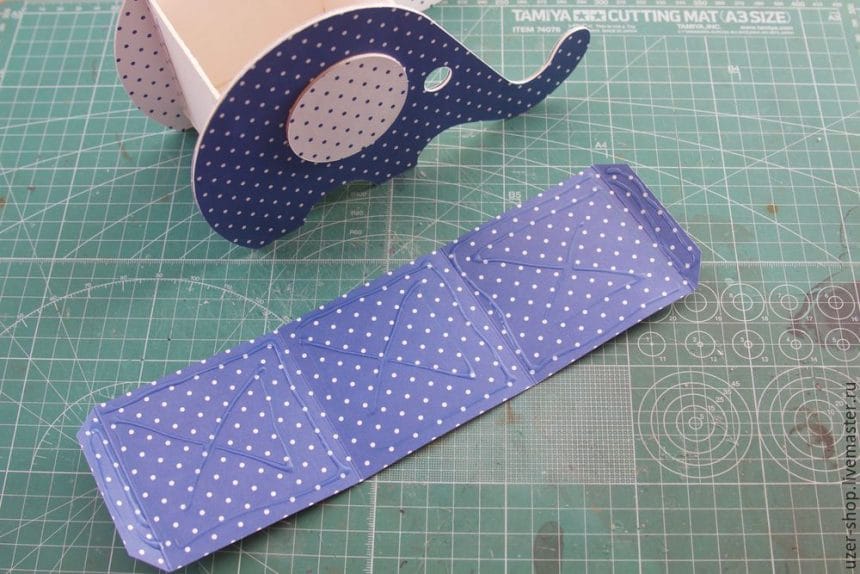
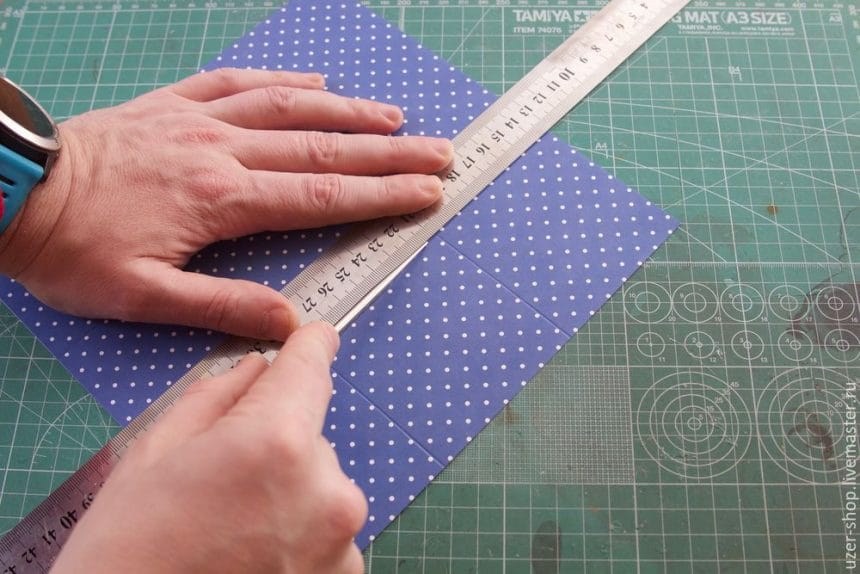
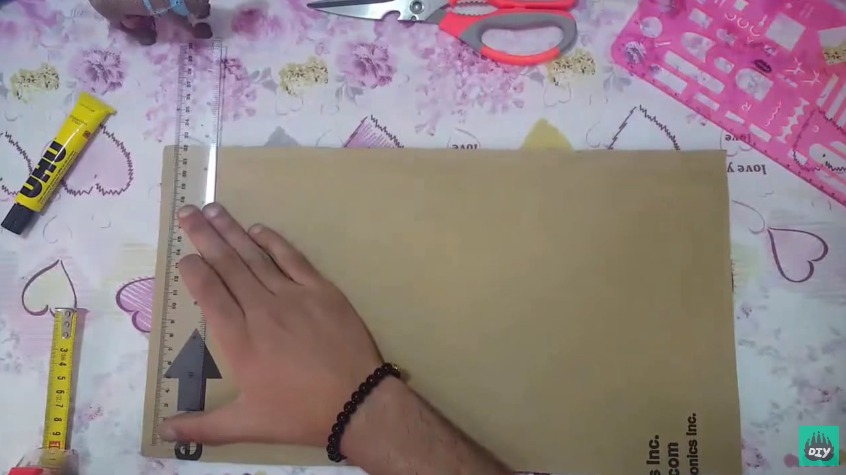
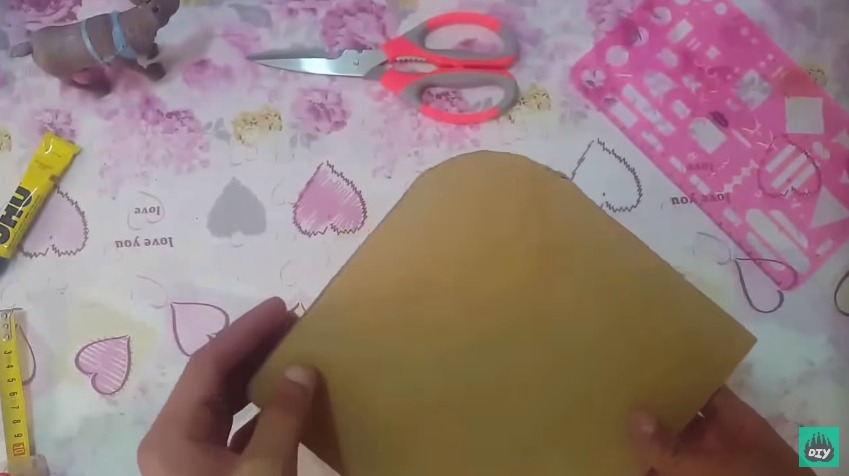
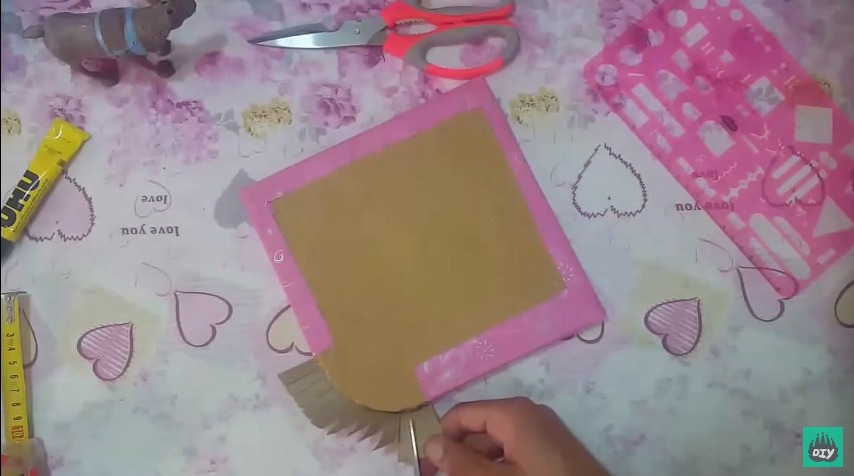
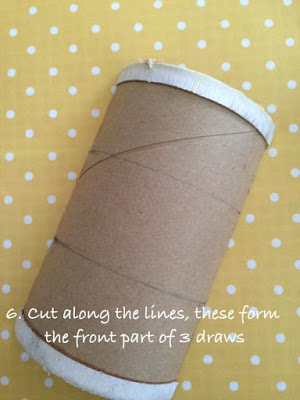
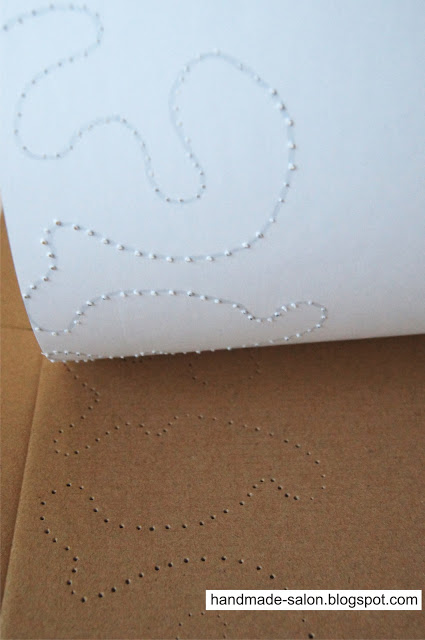
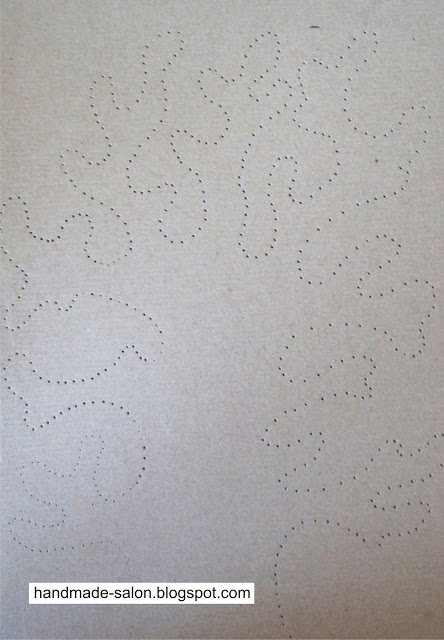
The first two designs for the board – this is the framework of our stand. Printed, pasted on a sheet of cardboard prepared and cut. it is not necessary to cut out on the first page of the ear at the elephant, it is there to guide. We cut out the details of the plotter. But there is a nuance, plotter companies Silhouette can cut through the cardboard beer 1.5 mm, even a knife for cutting deep. I cut the usual knife to the maximum depth, then dorezayu modeling knife.
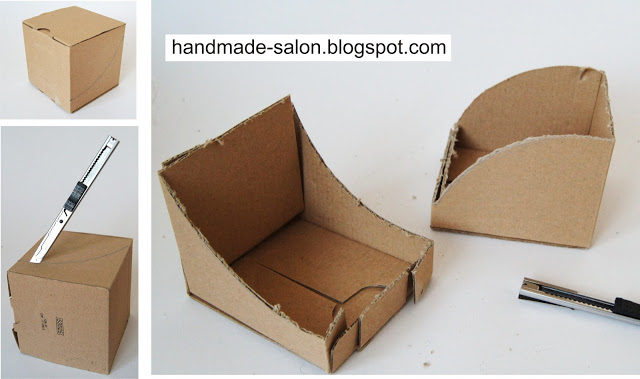
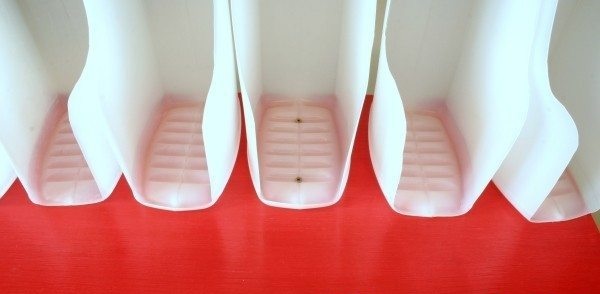
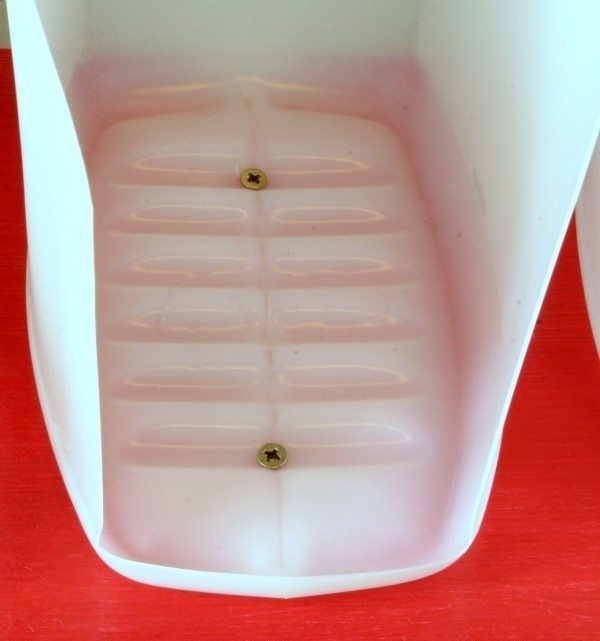
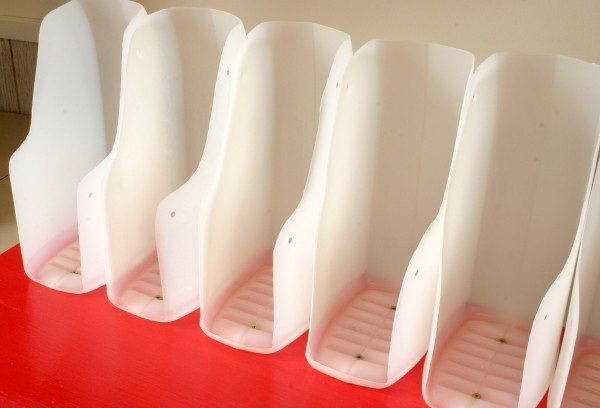
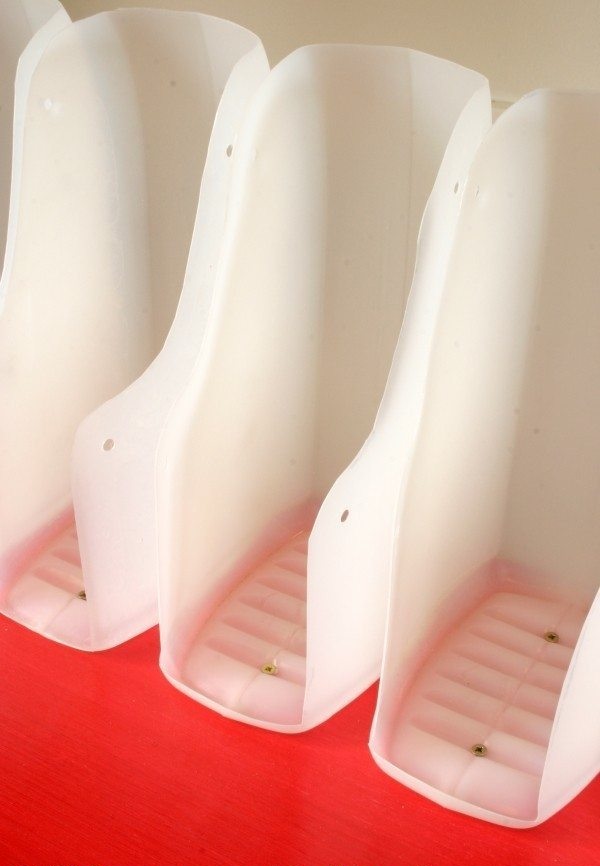
On the second sheet of the boxes are arranged to the last detail. In the sidewalls have top and bottom. When cutting, it is desirable to label them, then to avoid confusion (see. Photo). The arrow indicates where the top.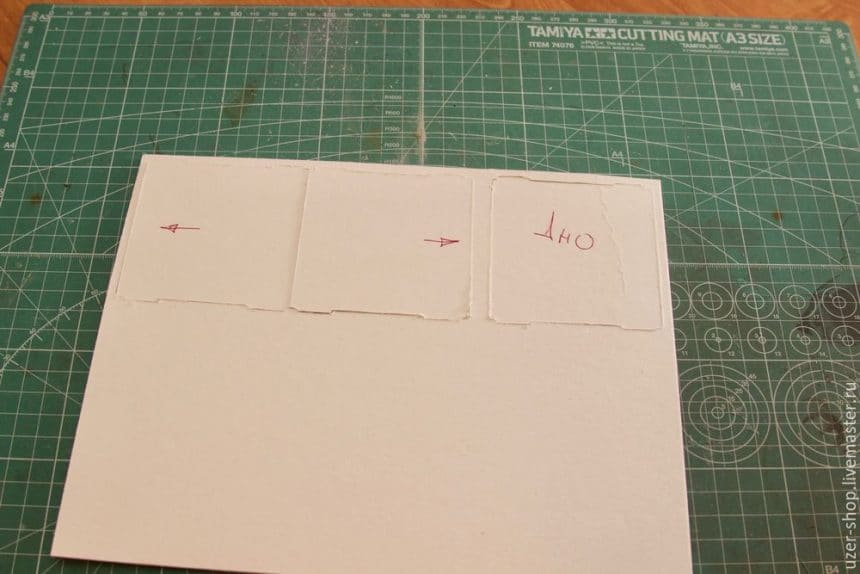
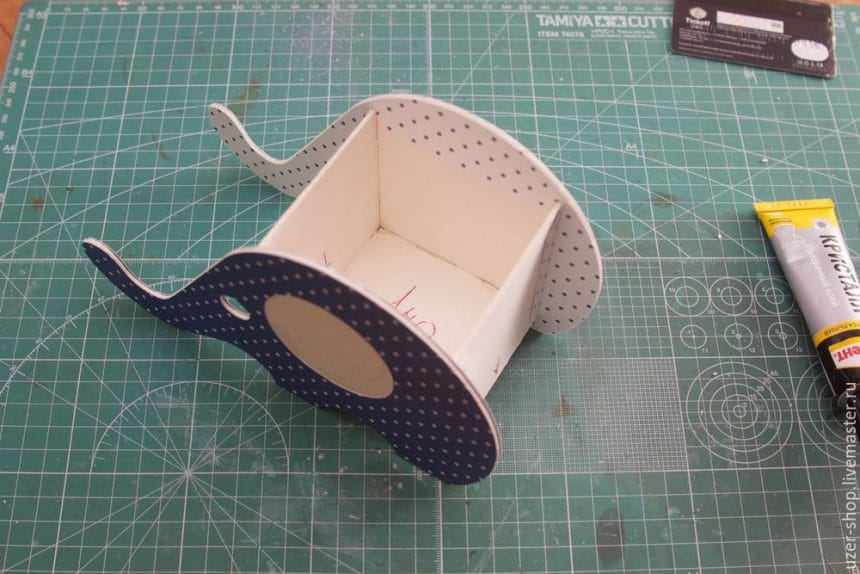
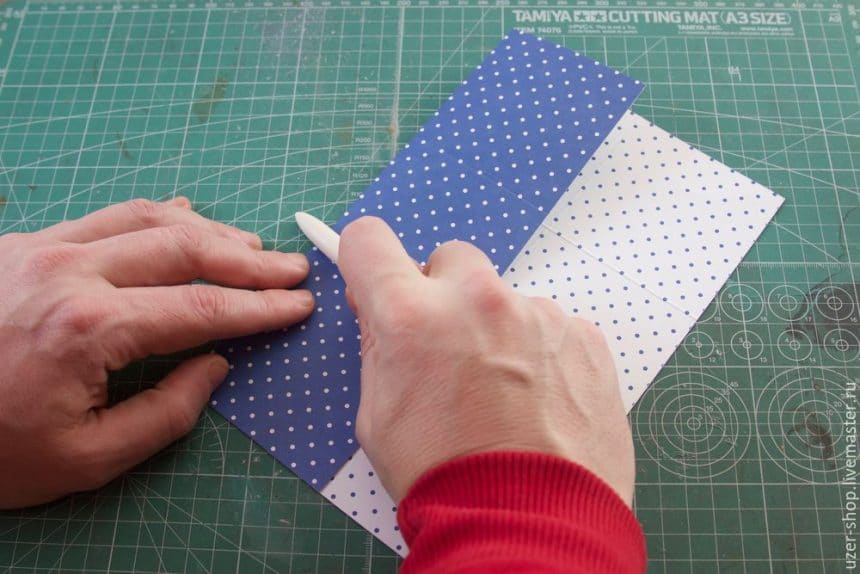
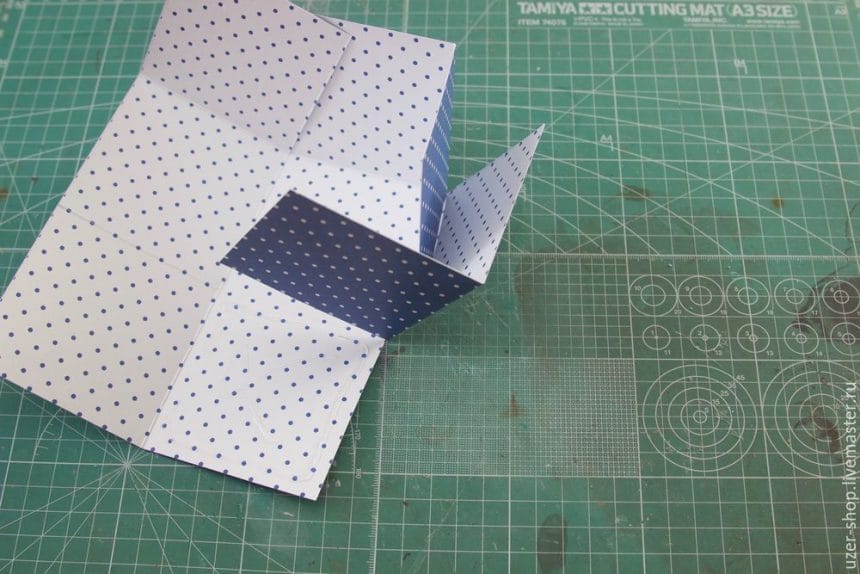
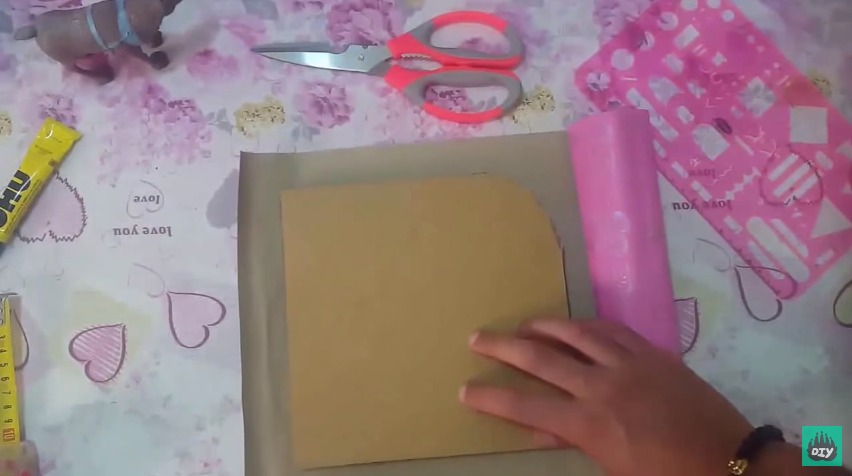
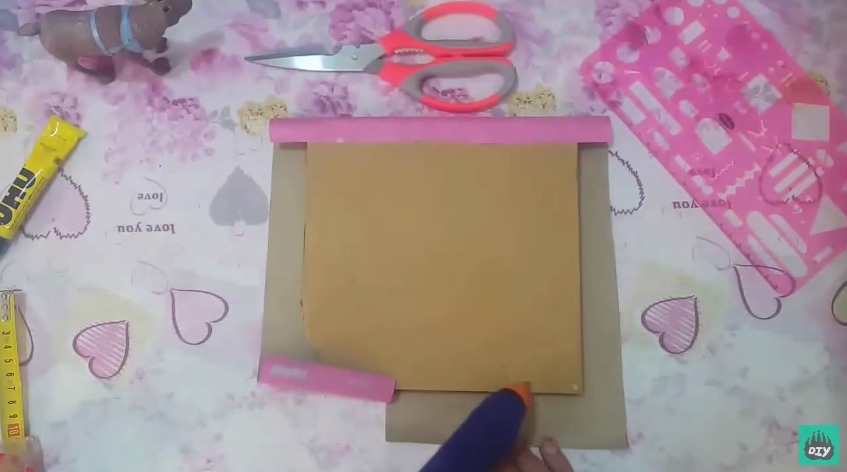
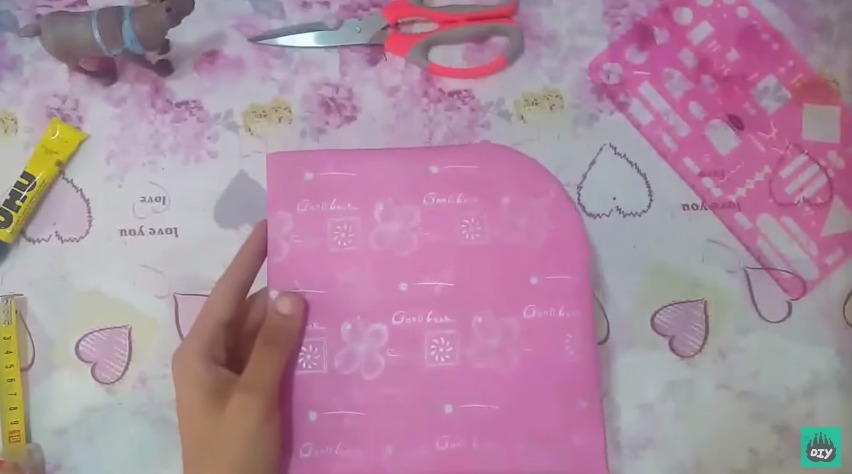
The remaining two files can be printed directly on a beautiful piece of paper, which will hide the frame of cardboard. It is necessary to bear in mind that you need to print on the back side of the paper. And also cut out. The dashed line, in the diagram designated fold line.
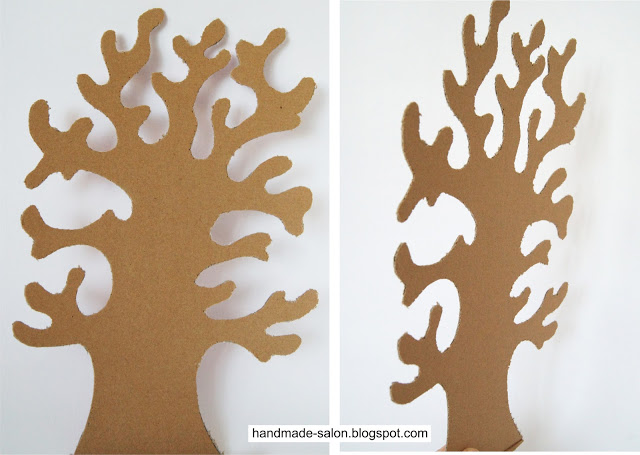
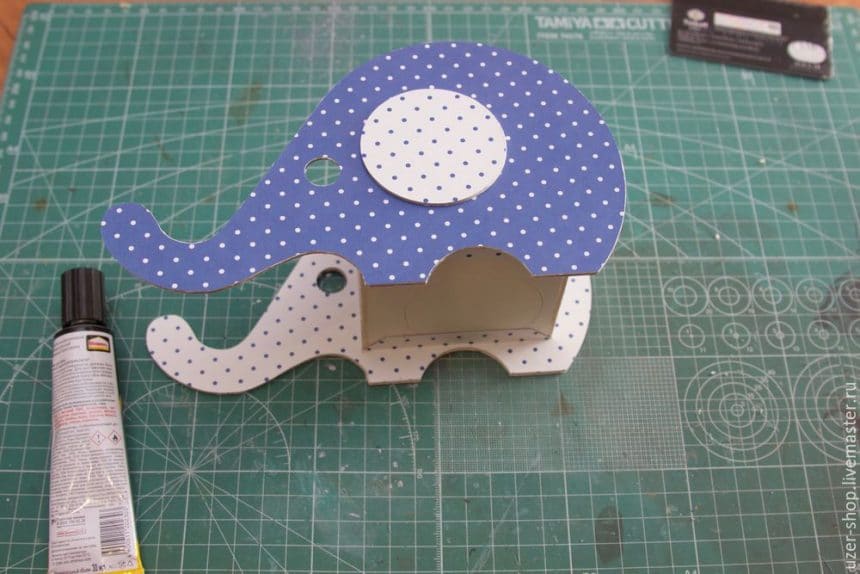
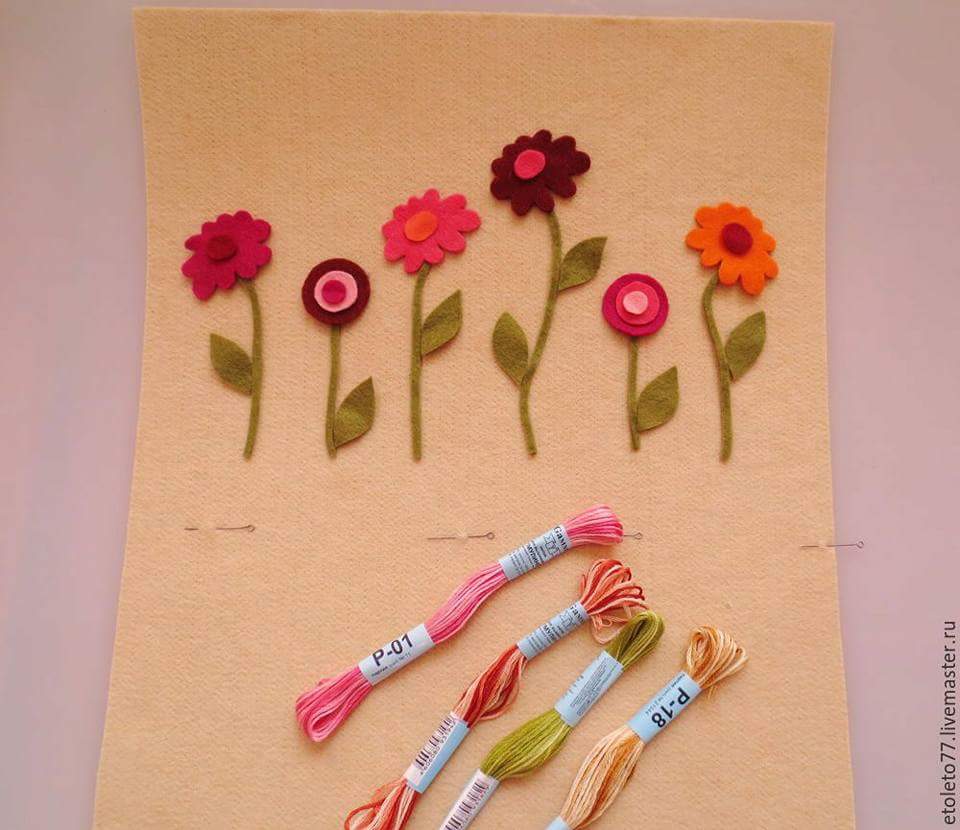
The first step will collect elephant ears. I prefer them to do different in color from the base color stand to emphasize their presence.
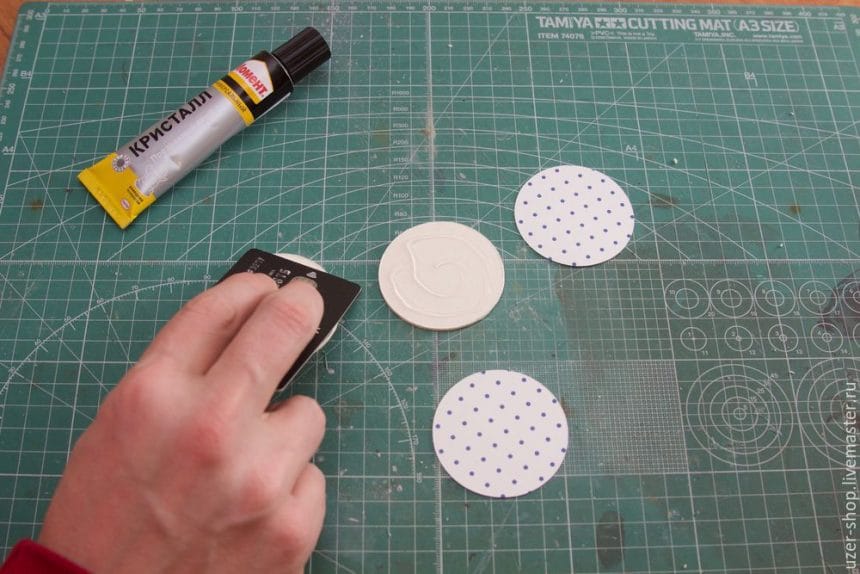
Apply glue and you can use an old credit card to evenly distribute 🙂 Ready ears are set aside, they give us is no longer needed. And go to the sidewalls of an elephant. First glue outer sides, those with the ear hole. By the way, about this hole … You can not cut, but I cut, because then it is easier to glue themselves exactly ears.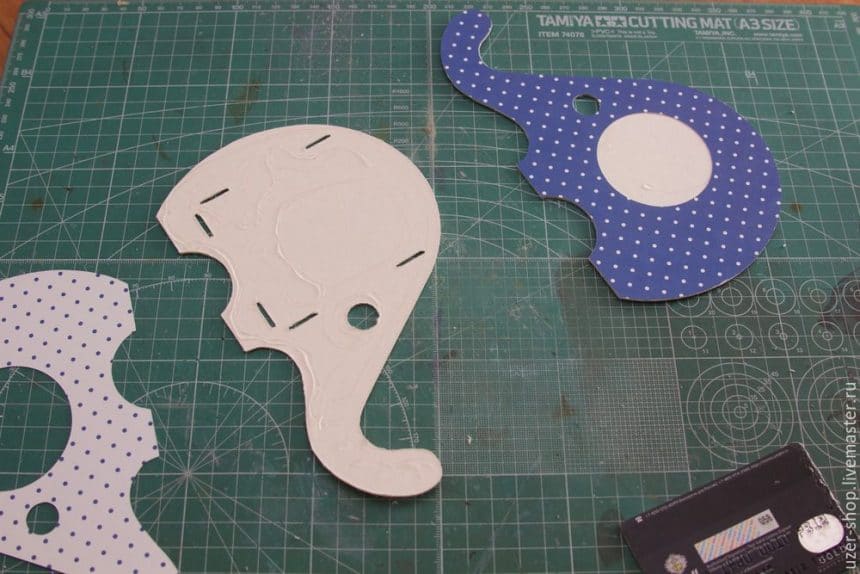
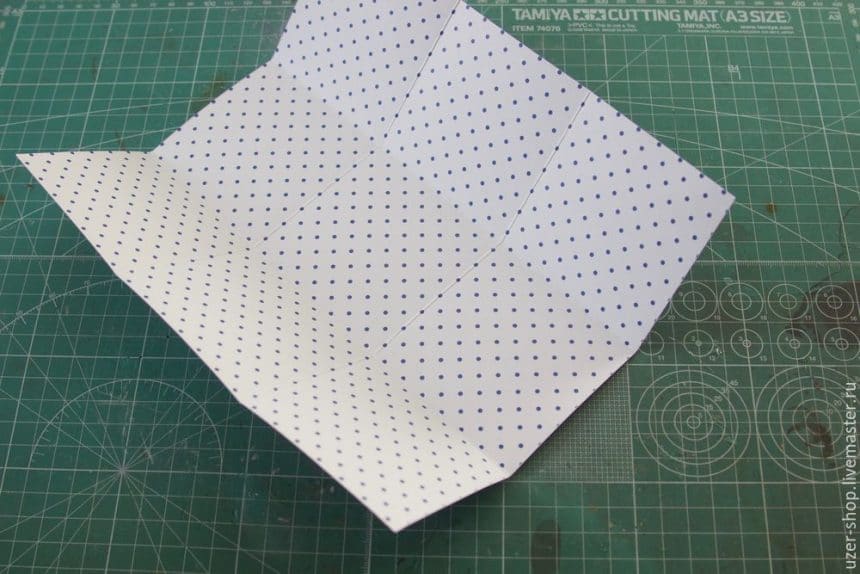
We give a little dry, and can be glued inside. Bends by first fold lines on each of the paper components. Do not forget that should have two mirrored parts, but not the same (see. Photo).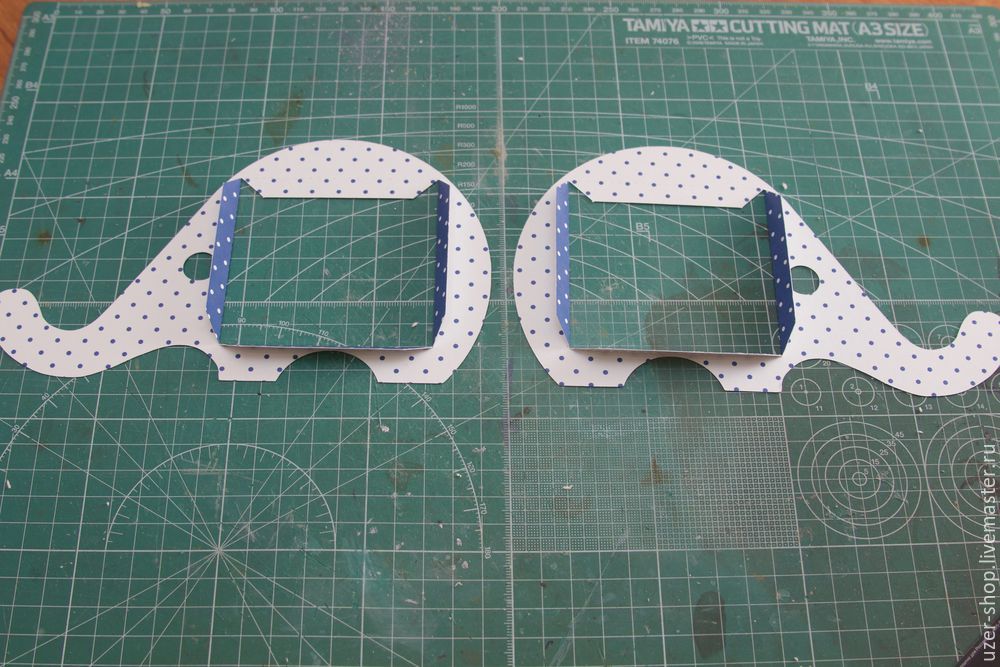
Now you can paste them. The adhesive can be applied to cardboard, guided by the slots for the side walls.
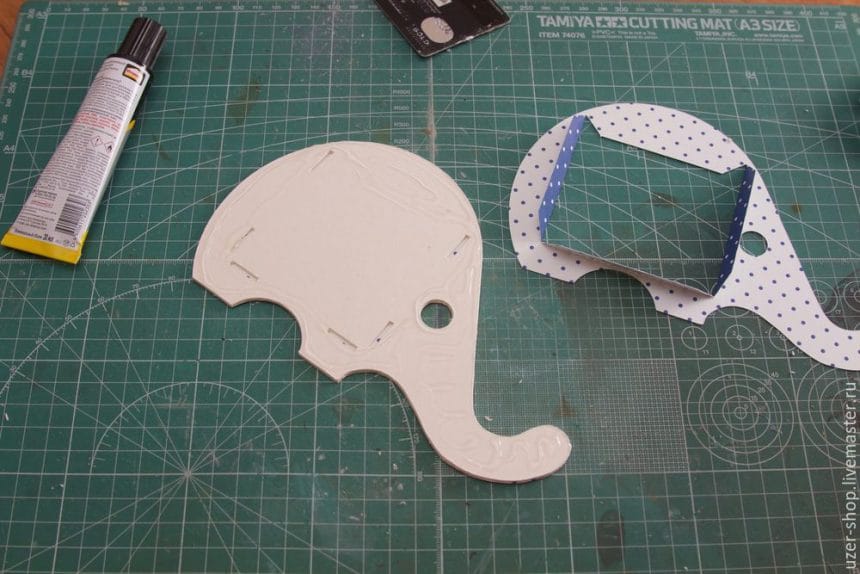
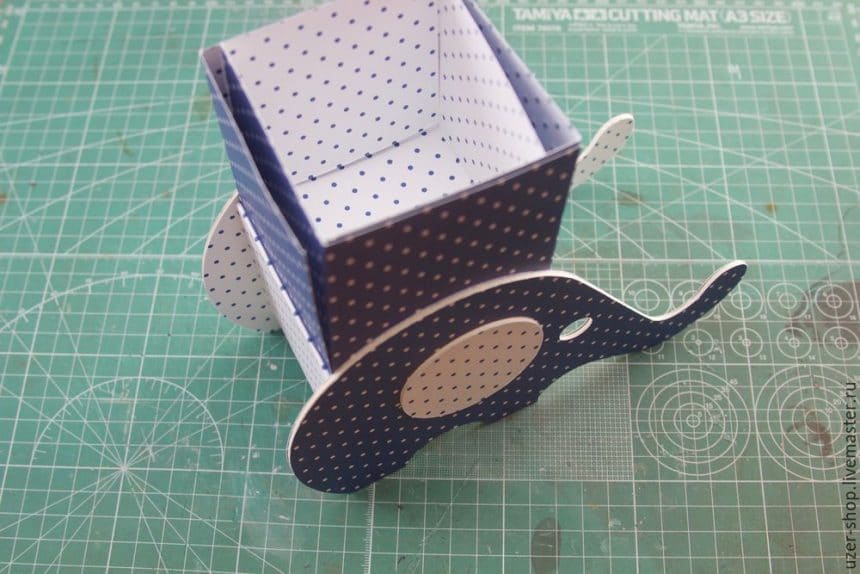
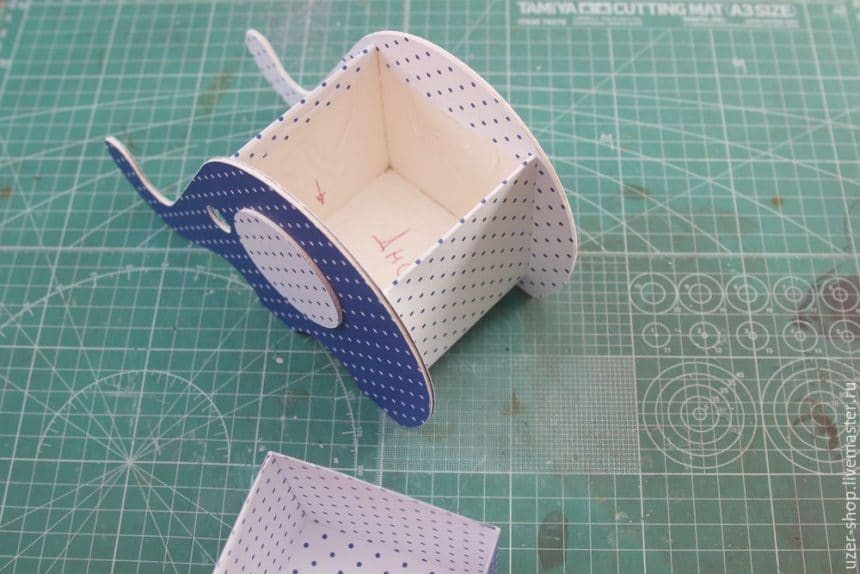
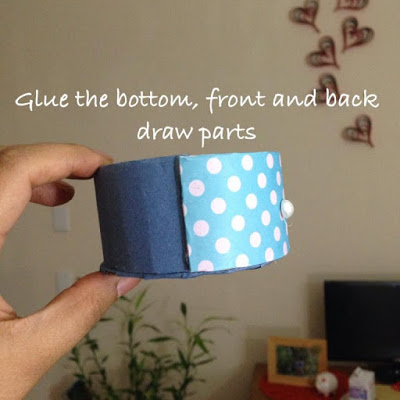
Then start collecting box. Glue all the pieces to one of the elephant’s side. First the sides and then the bottom. All parts have to enter the end of the slots.
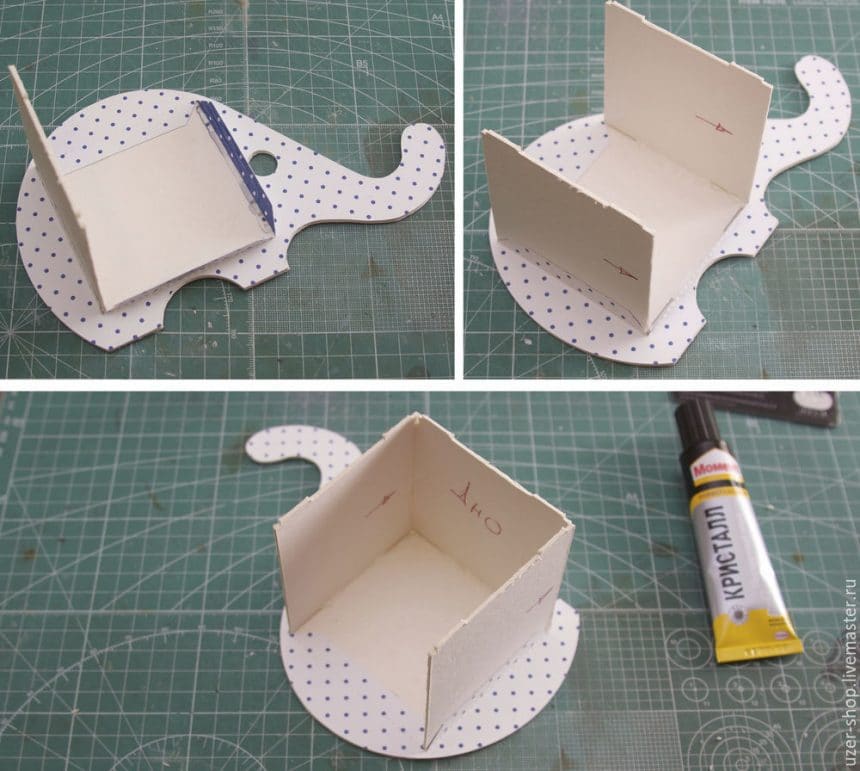
The attentive reader must have noticed the mistake. I became interested in photographing process and mixed direction sides. Later I will tell you what it will turn back to me. After we have collected this part of the box, it is desirable to quickly paste the second side of the elephant. The fact is that when the adhesive dries thoroughly, we will not be able to correct the symmetry of the sides. And this, in turn, will affect the stability of the finished stand. The slots for the connection, I specifically made with a small gap, this will allow us to align with the need of an elephant at this stage of assembly.
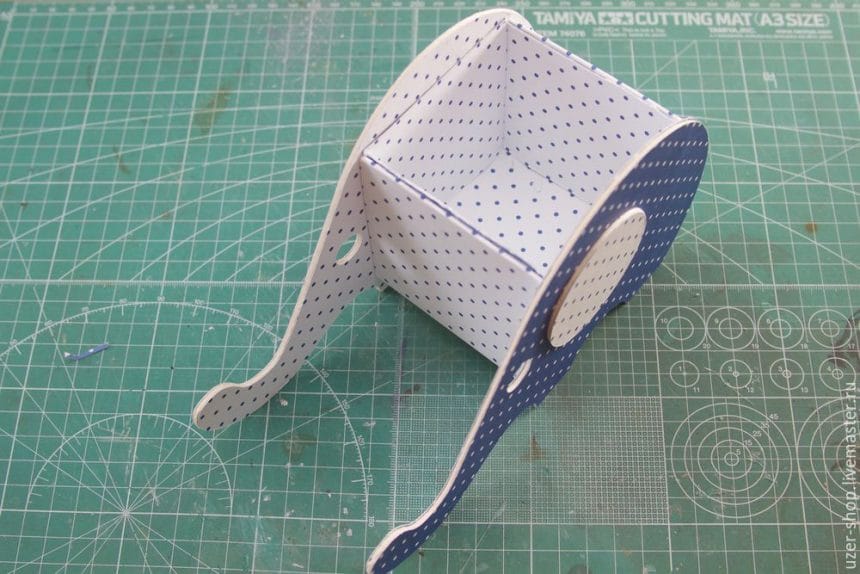
After a complete frame assembly elephant set on a flat surface. And make sure that all the legs and trunk rest on this surface.
If all is well, let it dry. So that will not shift anything in the further work.
Dried up? Now you can paste the elephant ears.
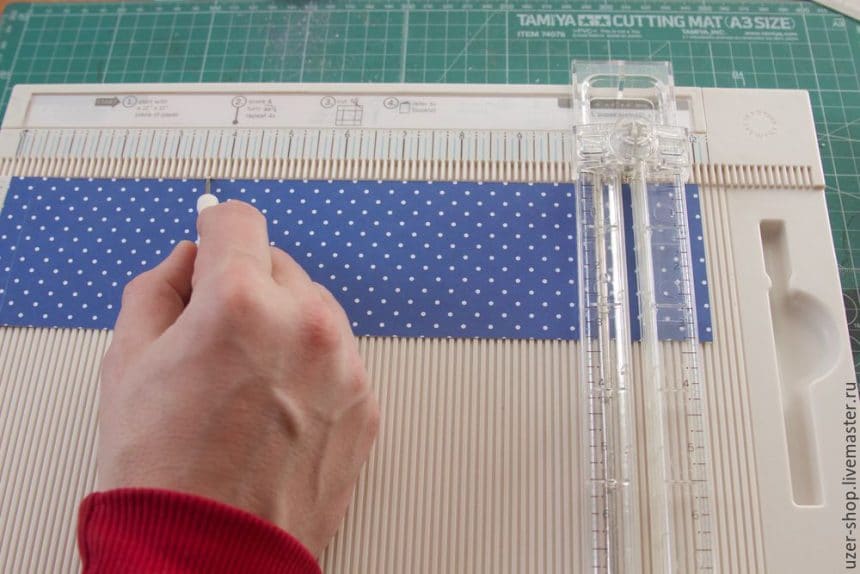
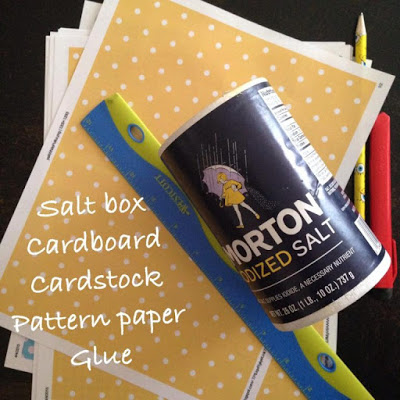
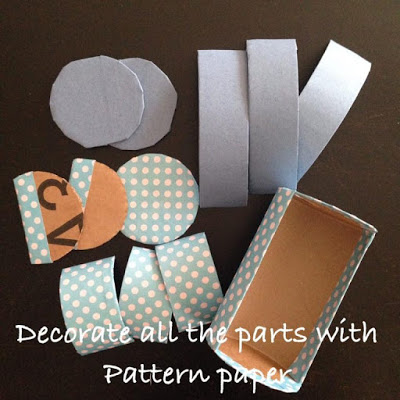
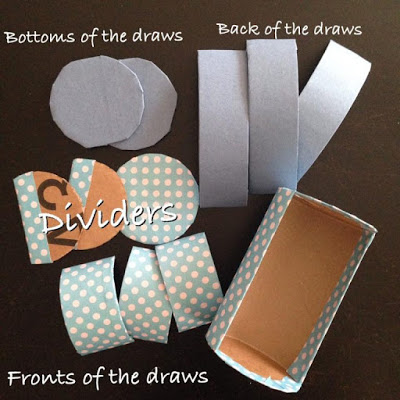
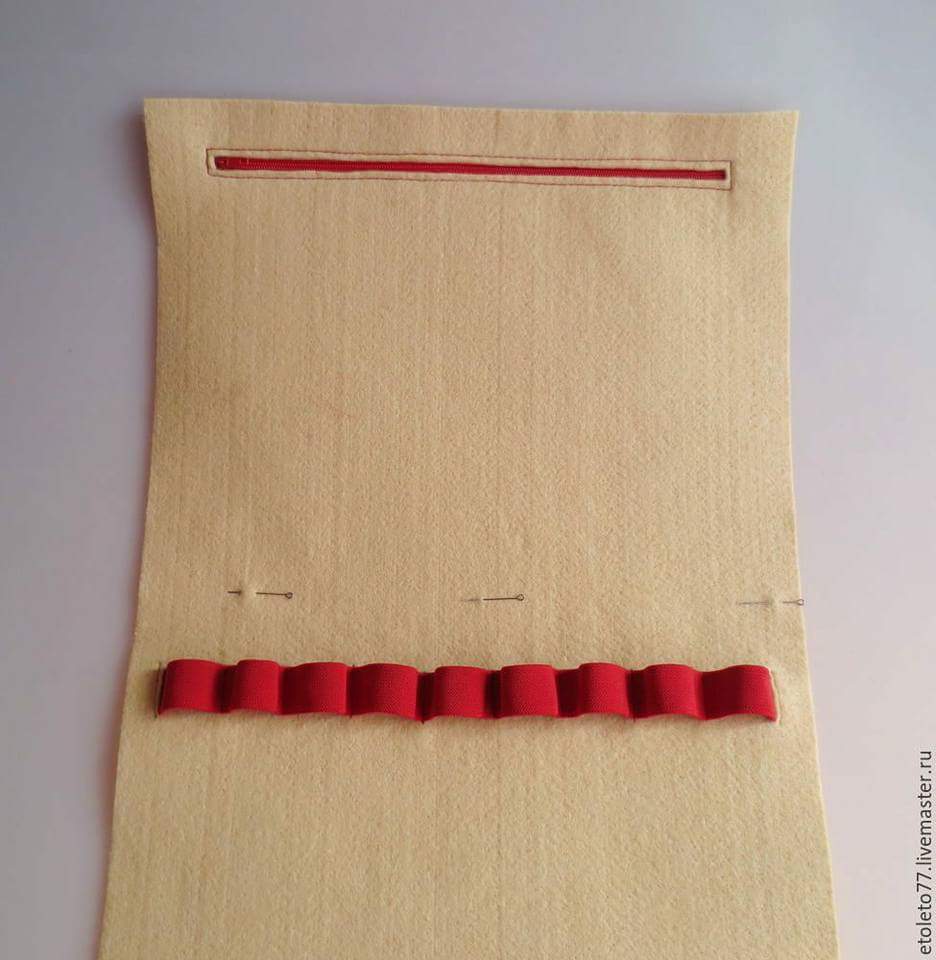
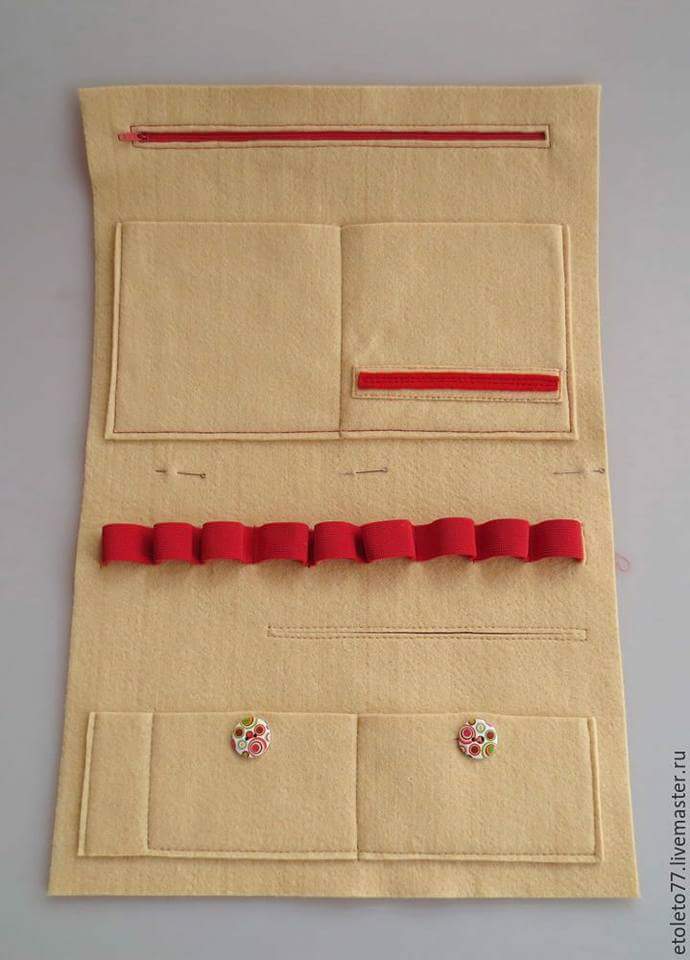
Next we will refine a box for small items. I used paper for scrapbooking 305h305 mm, left of it are two trim width of just over 3 “(about 8 cm).
I have already said before, the size of a box fitted with an inch, as we have in the presence of plaque for scoring from Martha Stewart.Dimensions in millimeters will be put in brackets, they can be rounded up to integers.
We need a long strip of exactly 3 “(76.2 mm) and long 10⅜” (263,5 mm). This will be the outer part of the box. Folds will be from any edge on ½ “(12,7 mm), 3⅝” (76,8 mm), 6¾ “(153,1 mm) and 9⅞” (229,5 mm).
Scoring can be done without the board on the mat for cutting
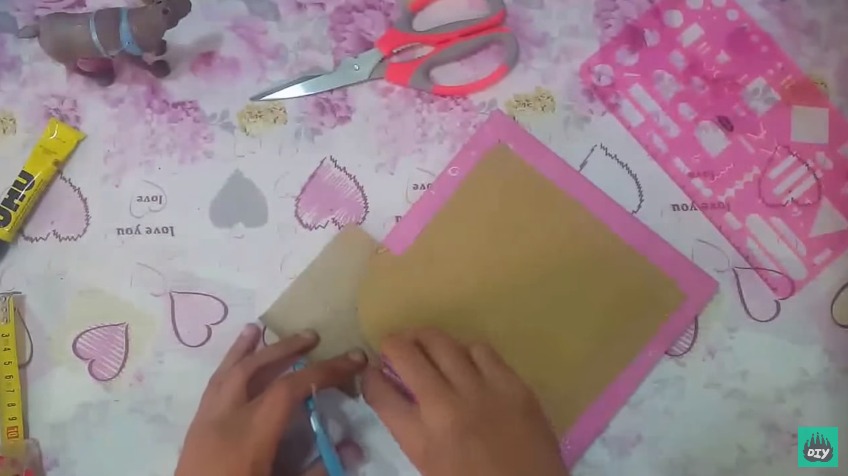
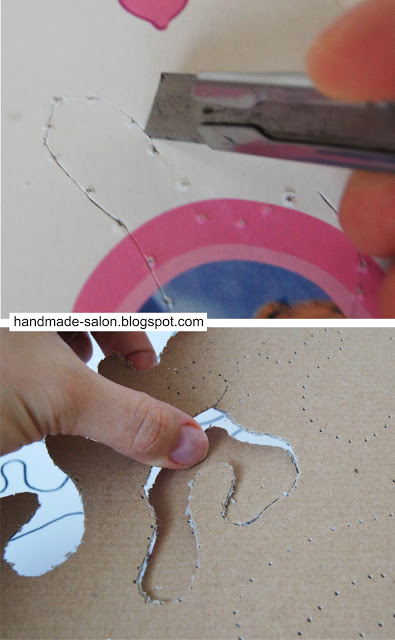
Corners need to slightly undercut, at about a 45 ° (cf.. Photo).
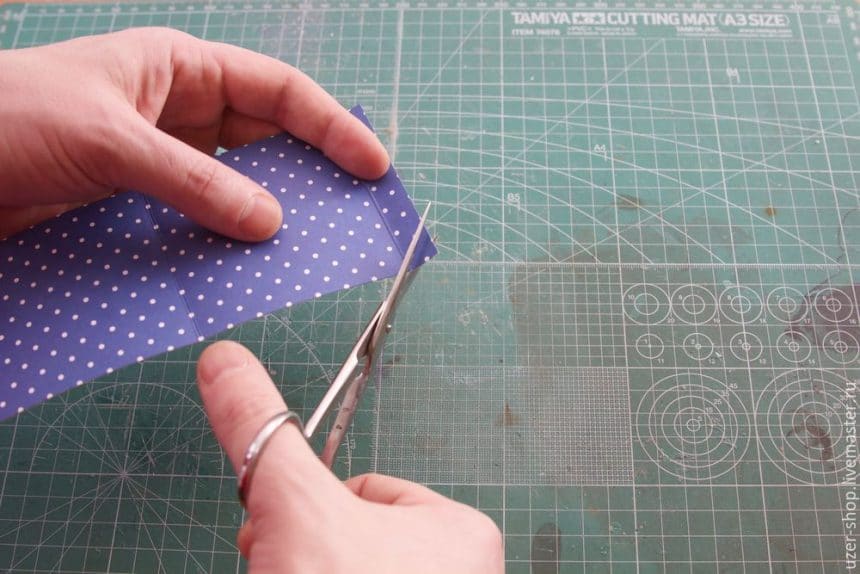
As a result, should get a band, wrap the entire outside of the box and curled inside edges … I recommend to try it before gluing. If everything is exactly the size, the band will go tight enough to not work nor any gaps. After that you can be glued.
At the edges, the corners glued strips is recommended to take a stick to creasing, or something similar, to press tightly against the edge to the frame.
In any case, you can check the structure for alignment. If everything is in order, then put off to the side of an elephant and begin to make the inside, a decorative box. Here we need a sheet of 9 “x9” (228.6 x 228.6 mm), I will use the same sheet skrapbumagi, as well as for the whole elephant. Cut the desired size and outline the fold line at a distance of 3 “(76.2 mm).
Then we put on them and well ironed
As a result of these steps, the next work piece should get:
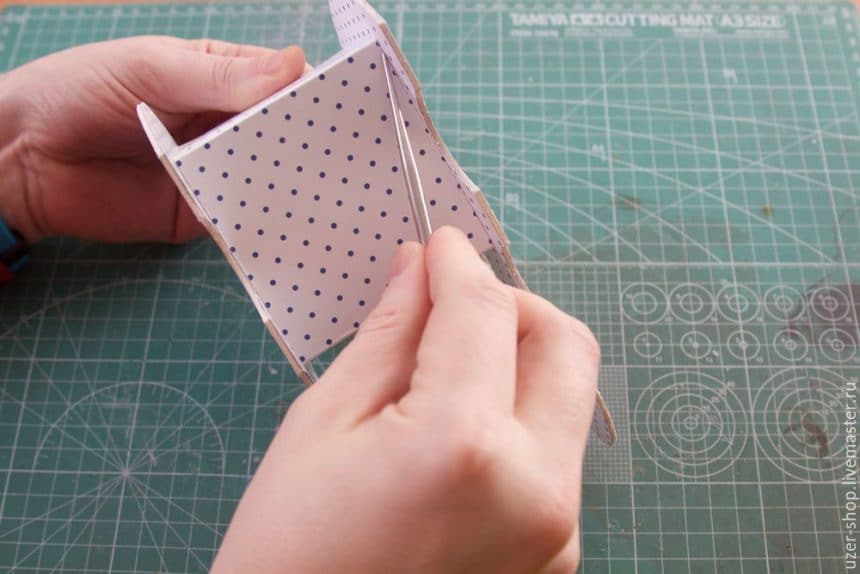
Now we make four incisions, like the following picture, so you can collect the box.
Assembled without glue box you need to try.
It also should include tight, but still go. After a successful fitting can be glued. As it is not extremely important, but I prefer to do all four sides equally (see. Photo).
Well and still collected a box to paste in our elephant. Glue is applied to the inside of the carcass. Otherwise, if you put glue on just glued box when installing it in place all of the adhesive remains on the outside and the risk to stain the whole elephant.
Now that’s what caused my inattention. Remember, I mixed up the direction of the sidewalls of the box? So, these walls have turned lower decorative portion and protruding edge. I had to trim it in place, and it is not very convenient and turned koryavenko. In the photo seen below, by how much.
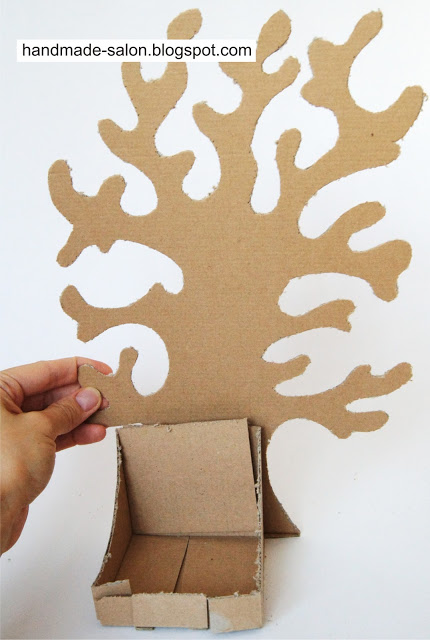
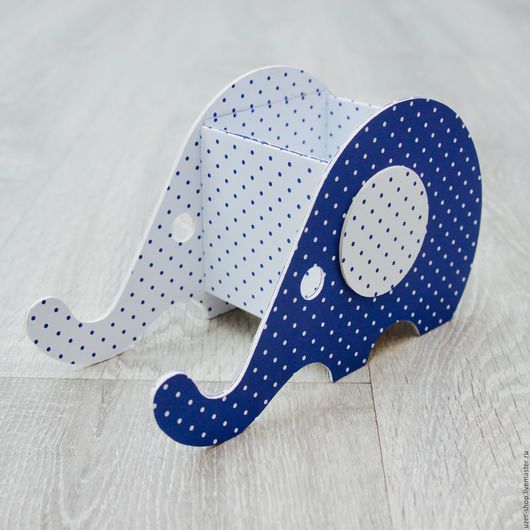
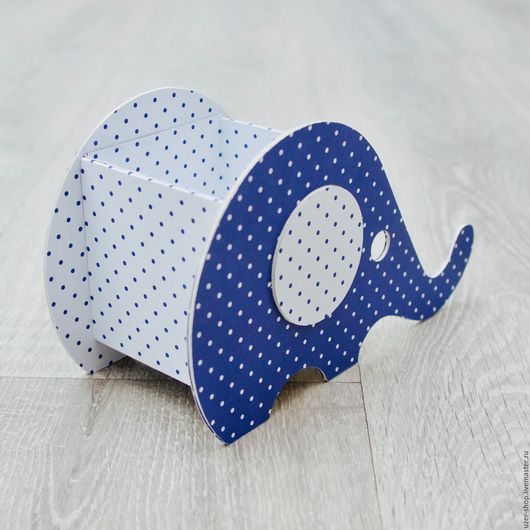
Sam elephant is ready, you can exploit
Phew .. It seems to have coped. I hope that someone will come in handy. And if you like it, put the Huskies and subscribe. For this single respect, and a ray of goodness in your face
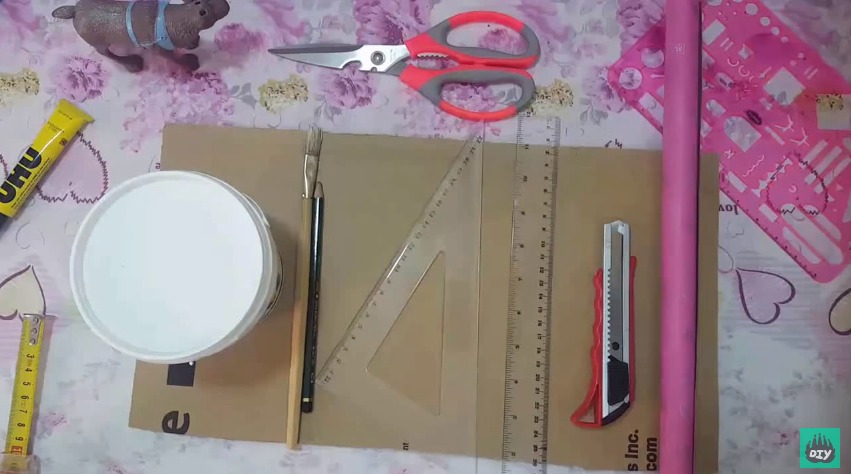
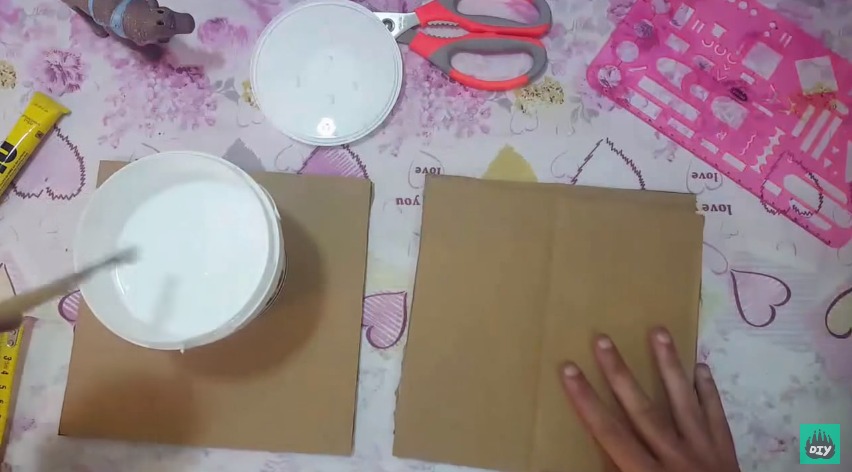
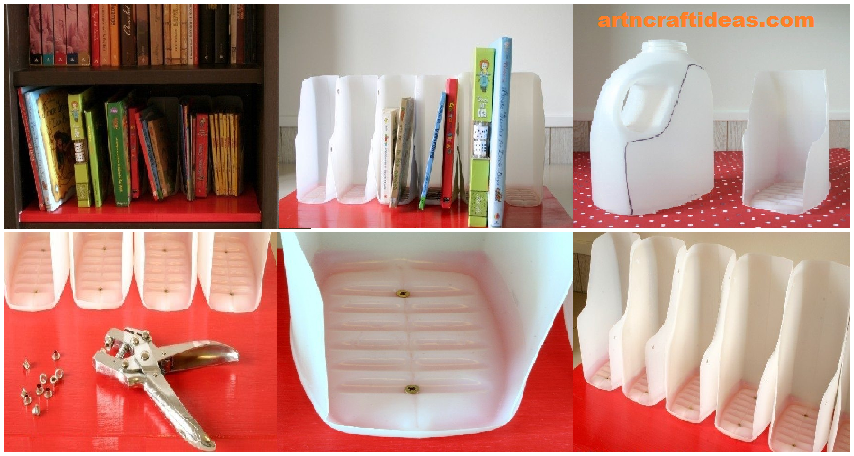
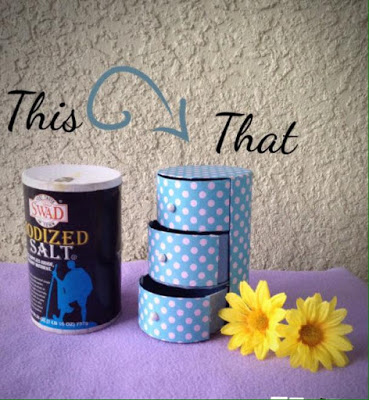
 Take a piece of cardboard, a little more than A4.
 I took this size. A little longer and a little below … do these 2 items.
 Then, on the one part indent 4 cm below the upper edge.
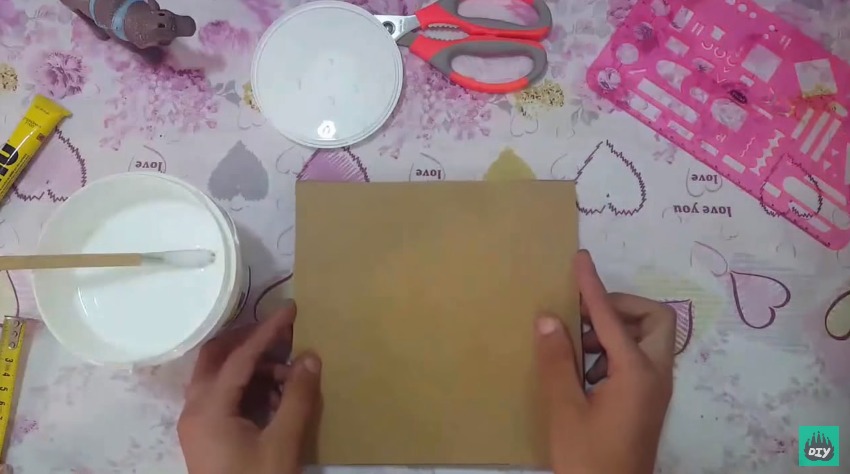
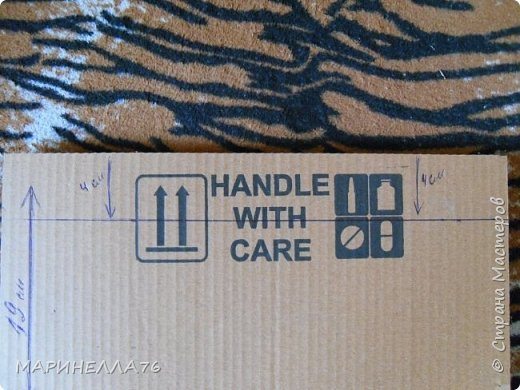 Was handy plastic container cap. I placed it exactly in the center, through which we measured out)
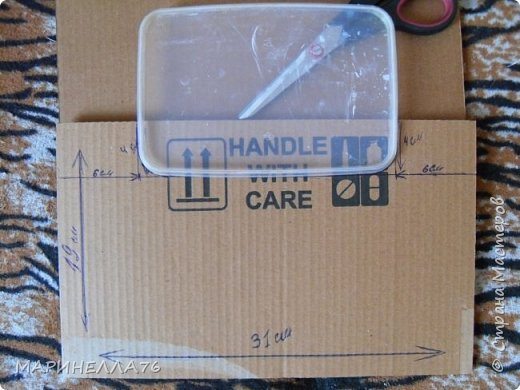 Cut … Here is the neckline we’ve got) This two together.
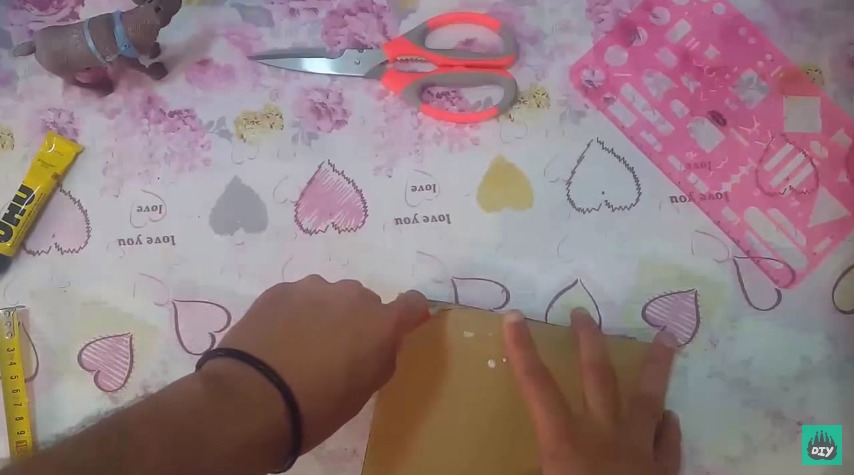
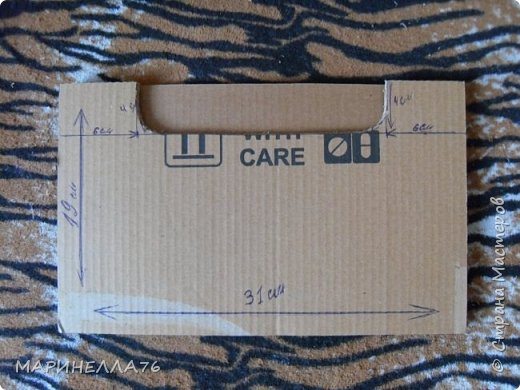 Do marginalia …
 Result.
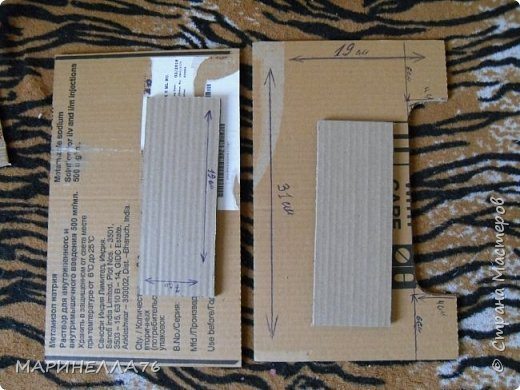 Glued it all together, and got a crate). Without a bottom … Top view.
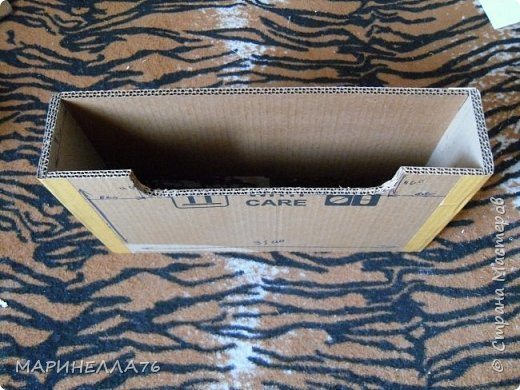 Exactly like …
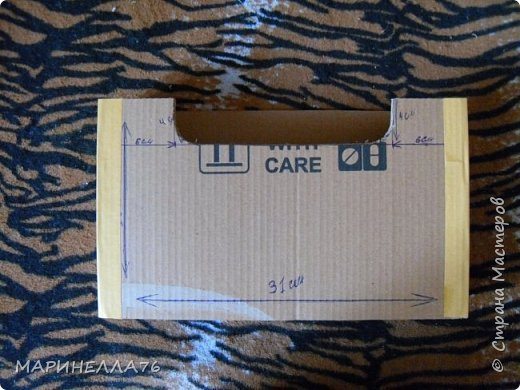 Makes the second work piece.
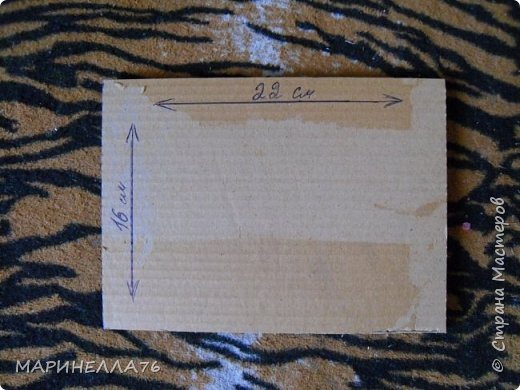 The process is the same.
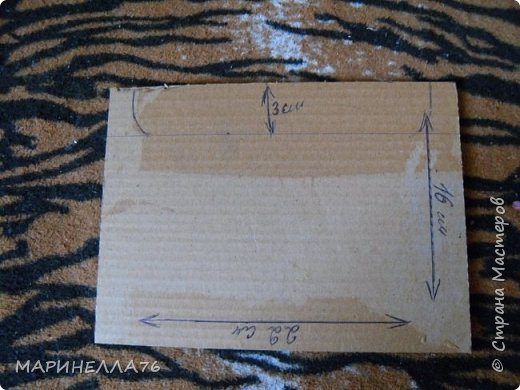 The same cap)
 Do these two parts.
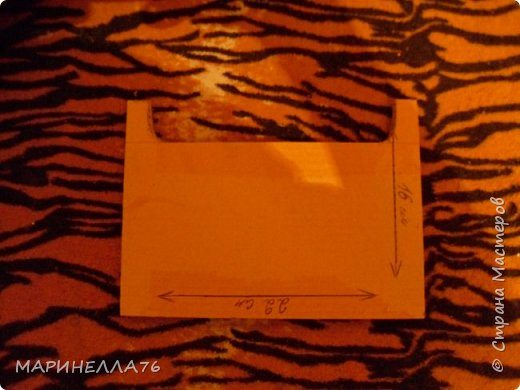 Try on …
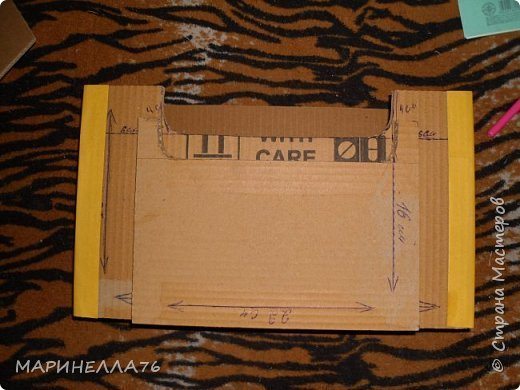 This marginalia.
 Glued.
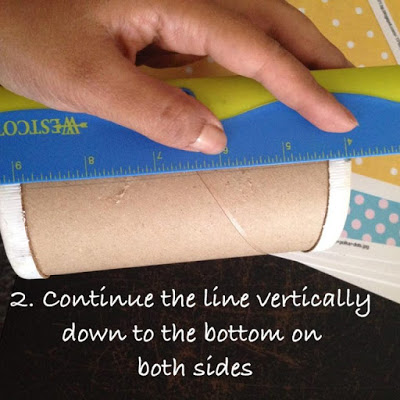
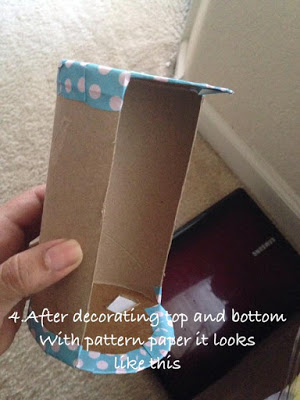
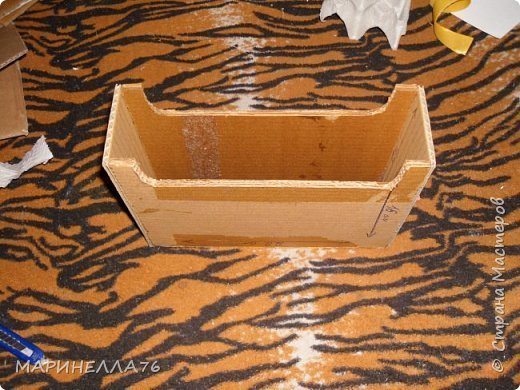 Delicious … everything sticks together Moment “Crystal”. You can make between compartments stenochku one … But I liked it so much anymore.
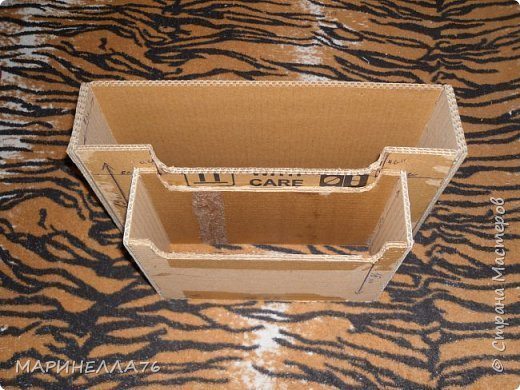 Plastered napkins or paper towels, as in my case.
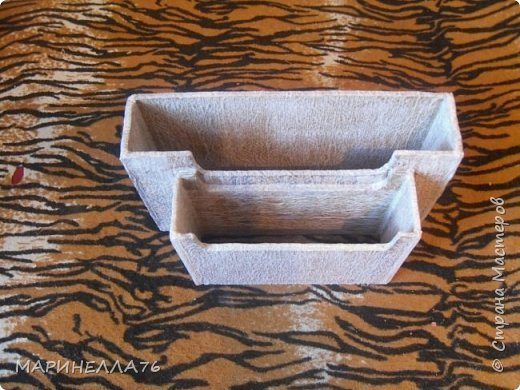 I stayed pasted paper towels tube (I always do for the future).
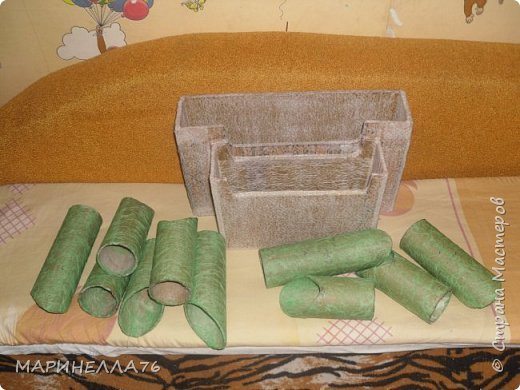 I stayed pasted paper towels tube (I always do for the future).
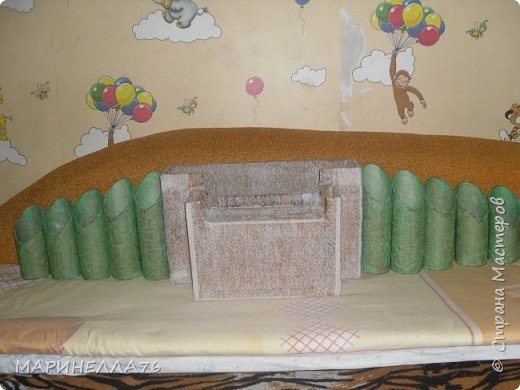 Looking ahead a bit … do such departments-pockets made of cardboard. Again, try on …
 Now themselves pockets. Cut 2 strips of …
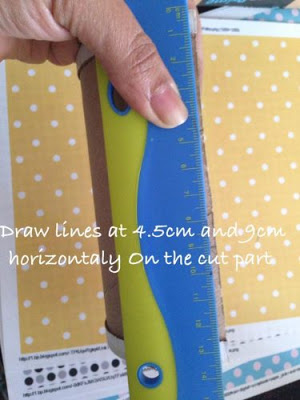
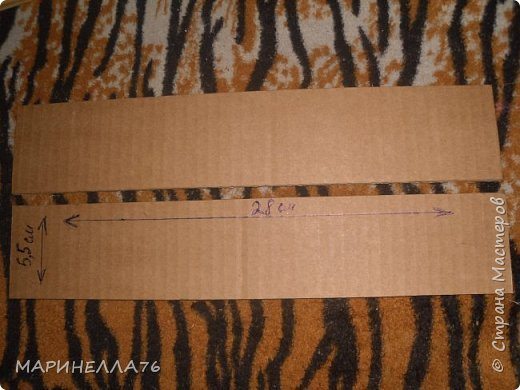 By hand, I draw an arc on which cut too much. Forgot to mention that divided the strip into two parts. Bottom 3cm, 2.5cm top.
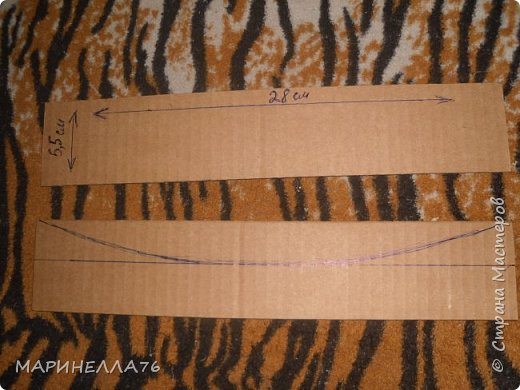 Like this ….
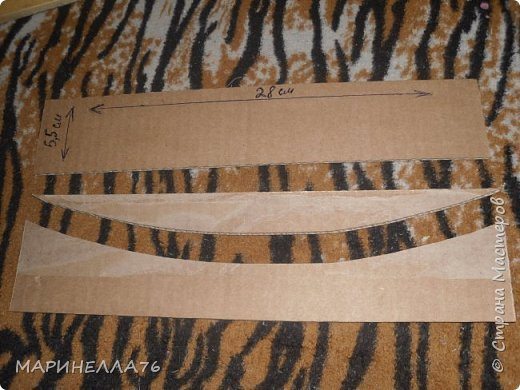 Burst …
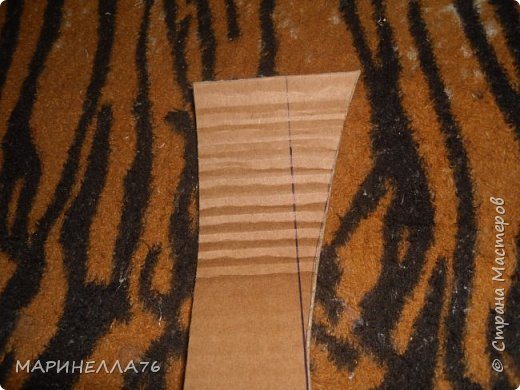 These are the arcs we get …
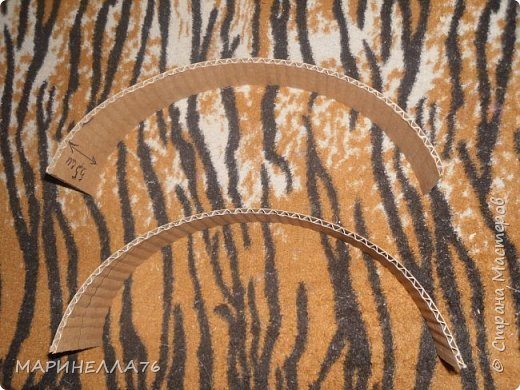 Try on …
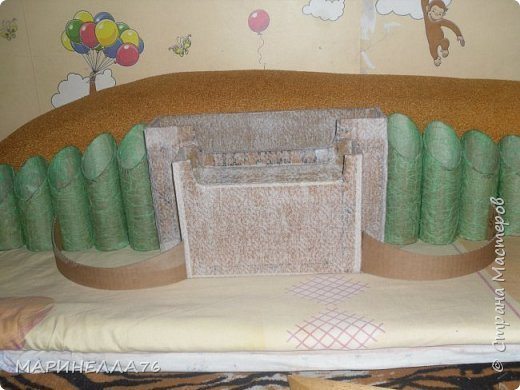 Making a second pair of pockets …
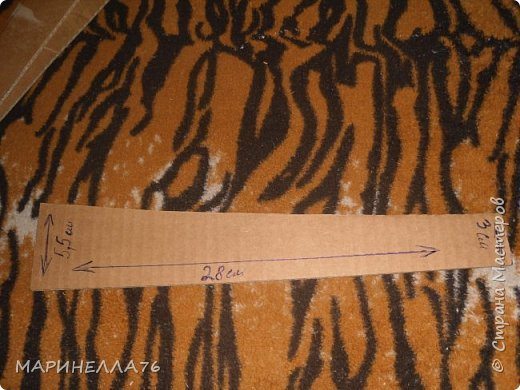 The process is the same …
 Try on …
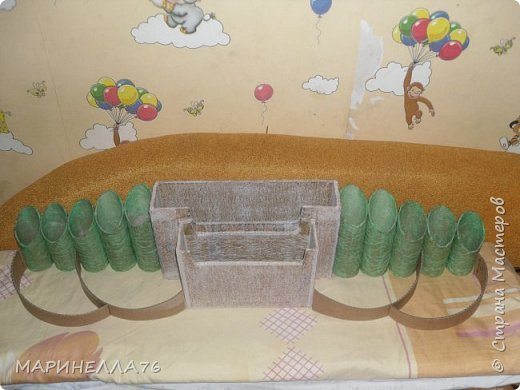 Pockets remove. I missed the photo as papered them. They are dried))) I did not have a large piece of cardboard, and I decided to make it out of pieces. Who has a large sheet, it will be easier. Many things can be missed.
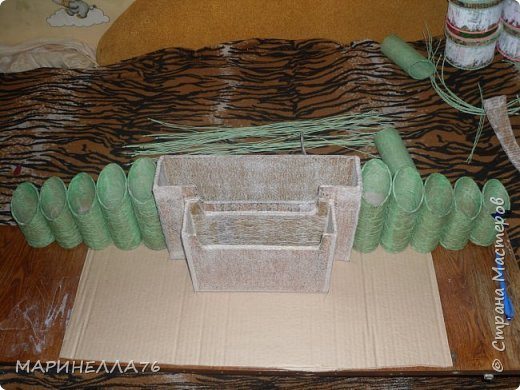 Puts the already dried pockets to our subject) I like it) Since I have a small piece of cardboard, obvozhu only with the first pockets.
 Hard to see, but I think it is clear.
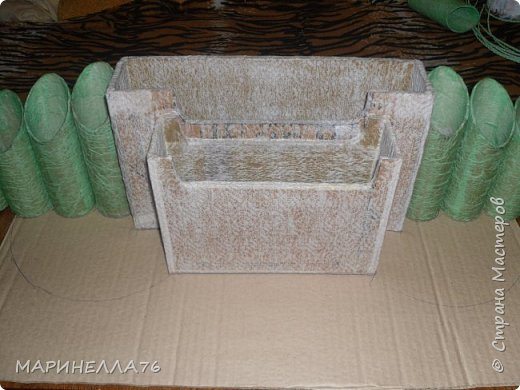 Like this …
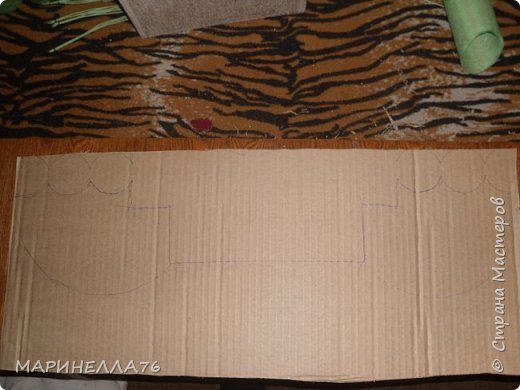 Cut and paste at the time of “Crystal”.
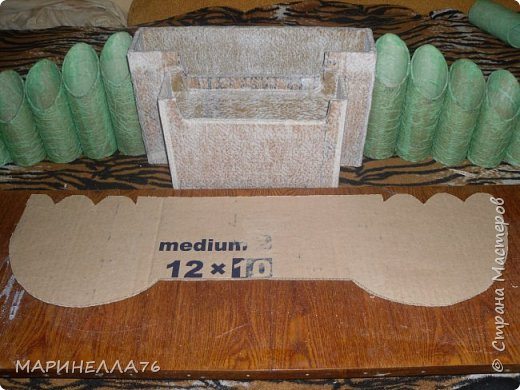 Since the whole structure is placed on a bad photo, will be showing one side. Try on the pocket …
 Take a piece of cardboard More … placed under the structure, and try on the second pocket … encircles the second pocket, and cut. Do not forget to do likewise second side)
 Remove pockets … As you may have noticed, there is no photo with a sketch … But I think everything is clear)
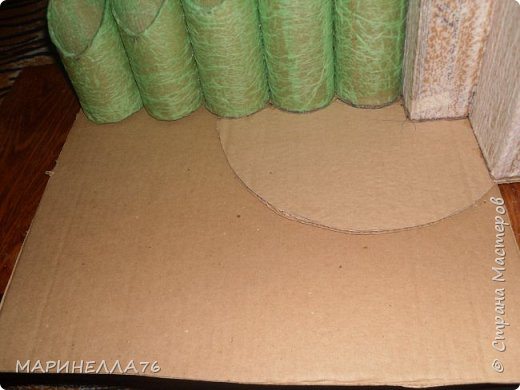 Here is a detail should get. Smear glue under the tube and cut, which we will stick to the first part.
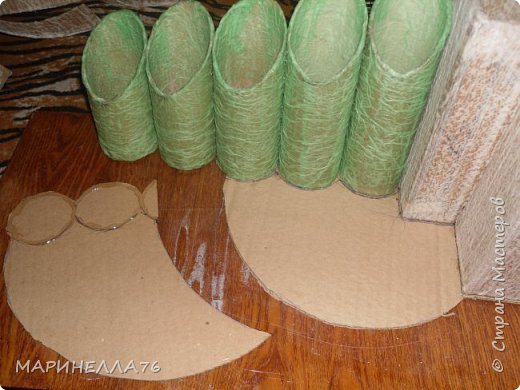 Glue and fix for reliability masking tape …
 Now it’s pockets) We glue them …
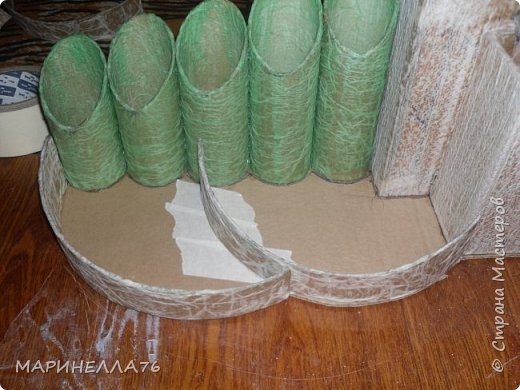 That’s what we’ve got.
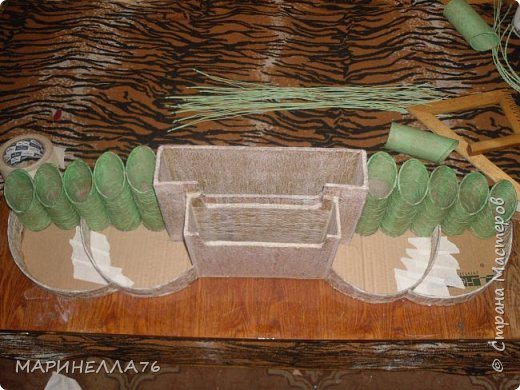 Now paste napkins bottom, inside and out. The rest is in the process … to finish, lay out photo description … While decorating a matter of taste. You can just paint. And you can issue to the technology, which is the soul. Who, in that much
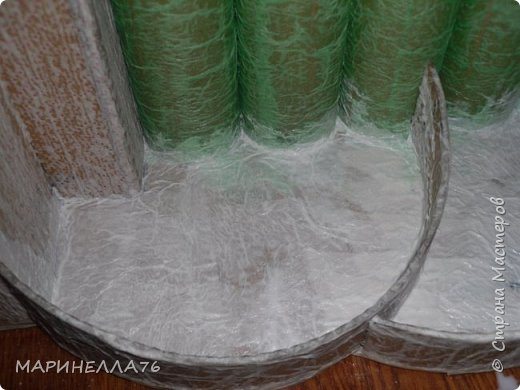
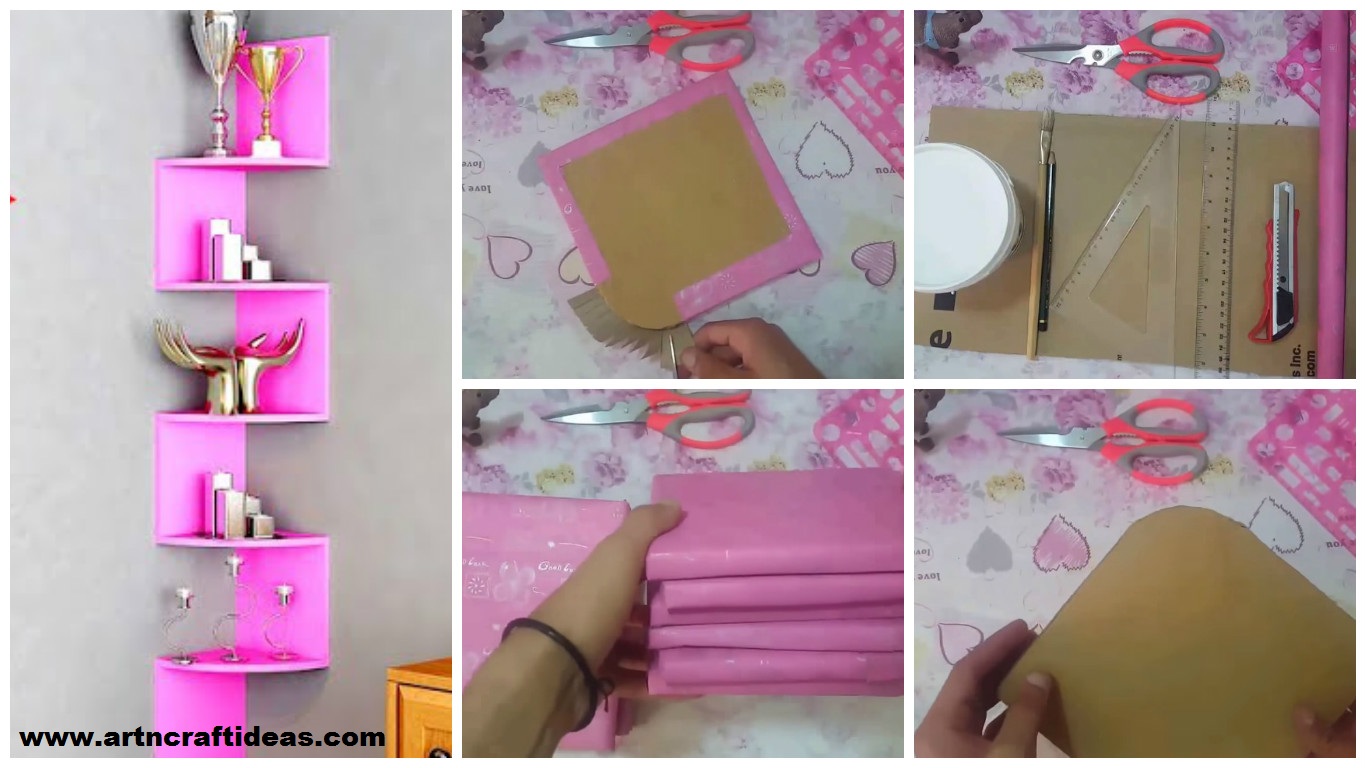

 Ready! We have a beautiful book organizer, magazines and I would bet on bags!
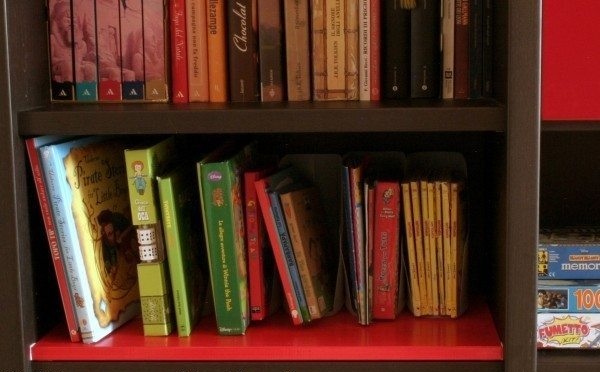
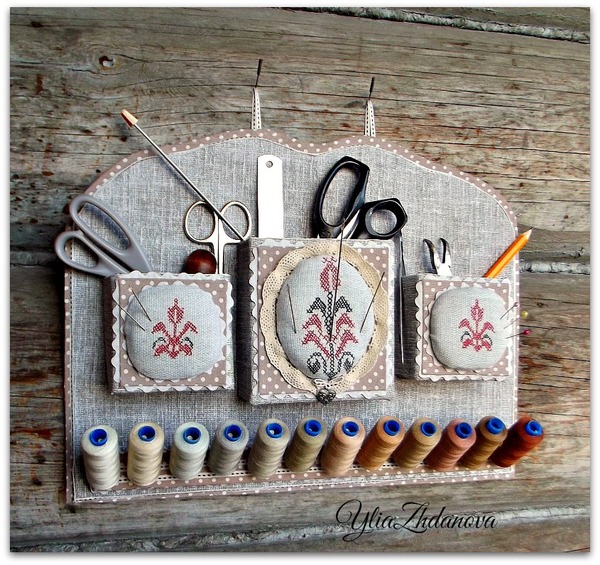

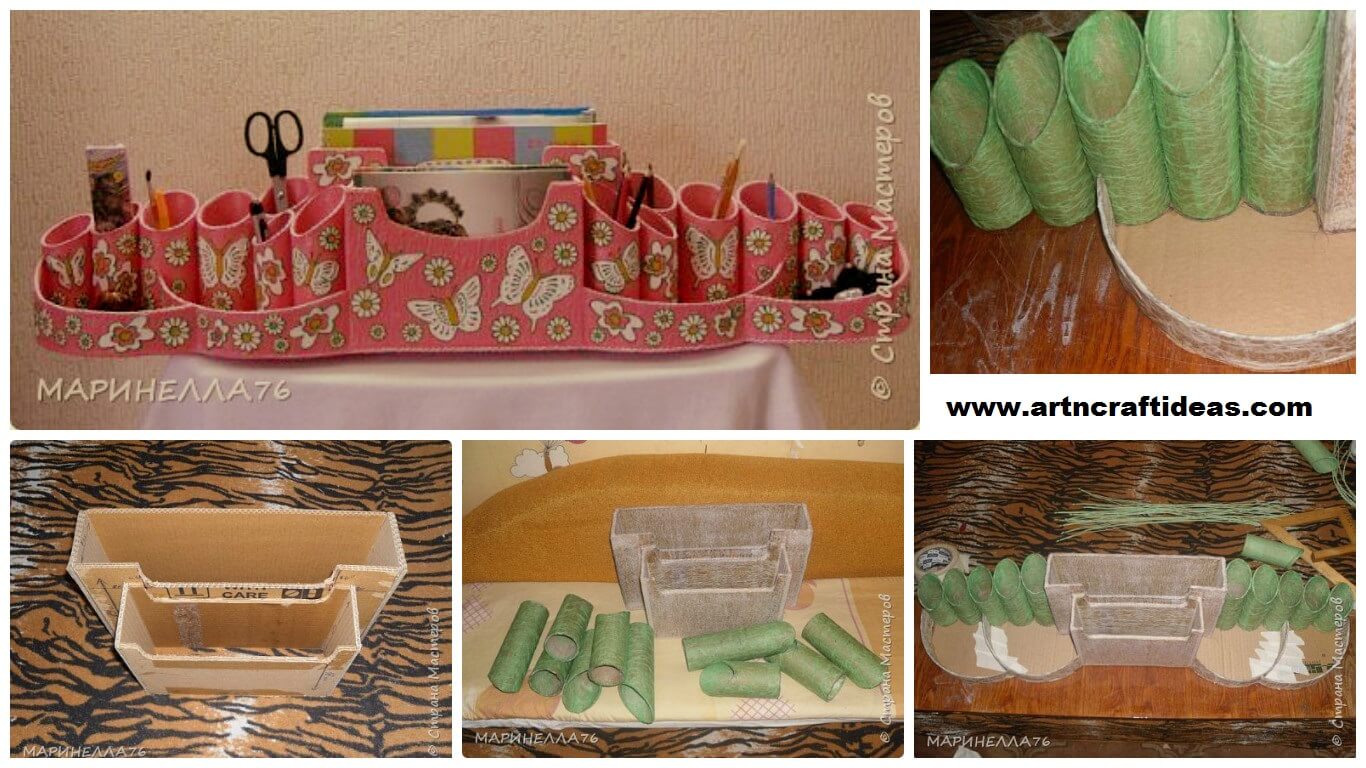
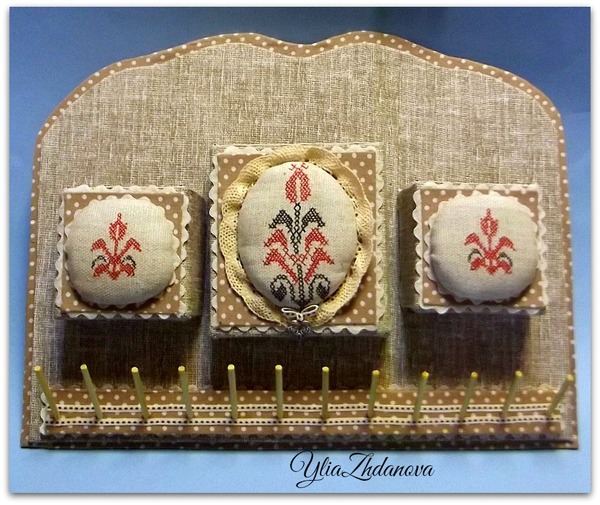
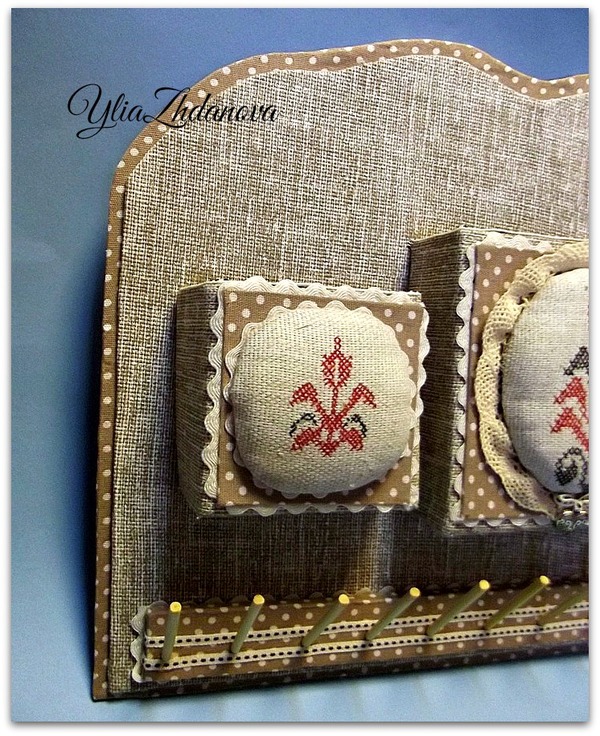
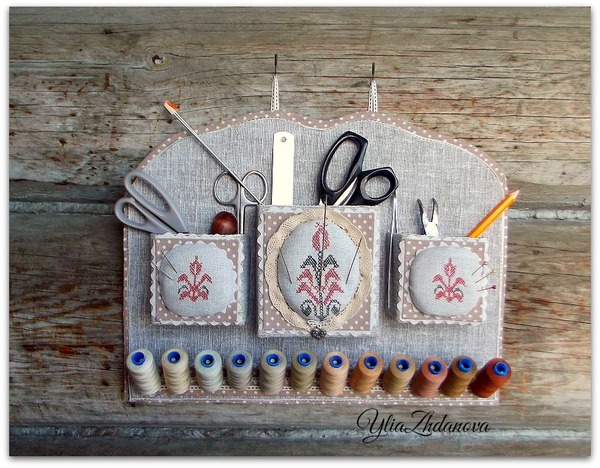
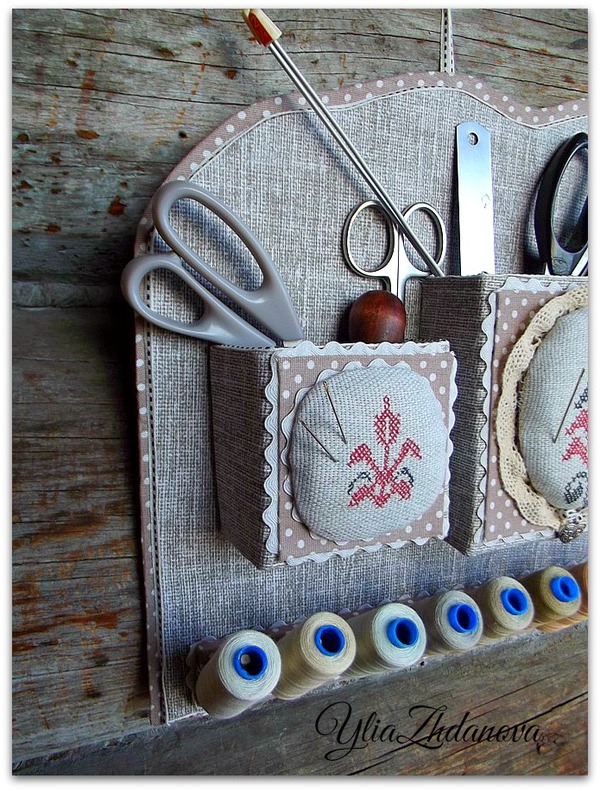
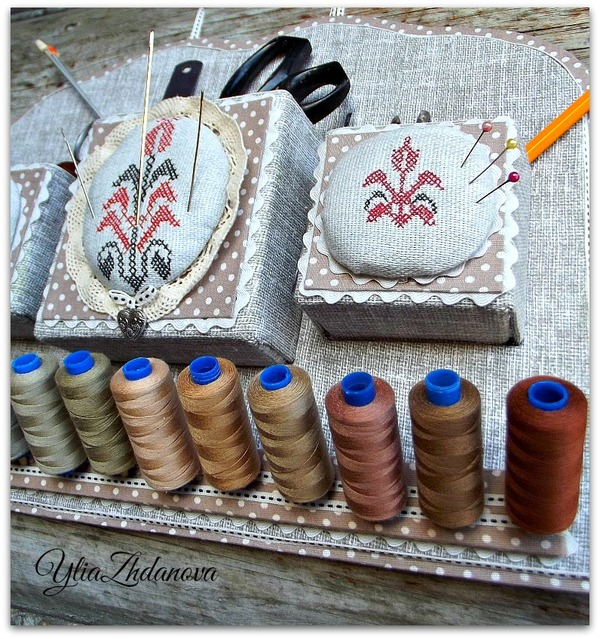
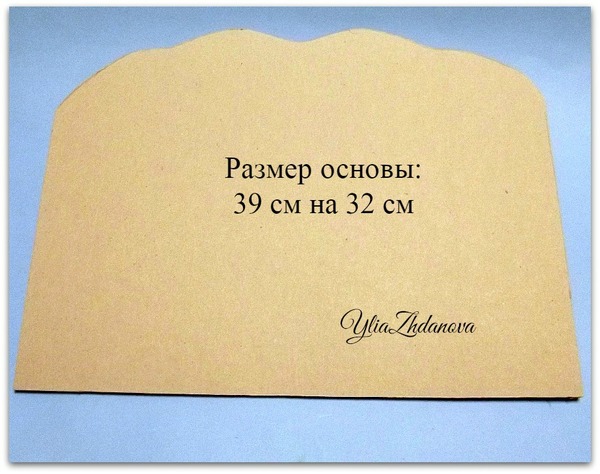 Then, from the same cardboard carved pocket 3.
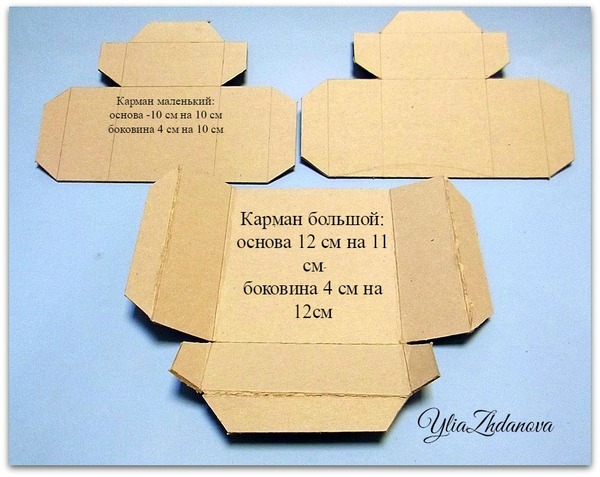 Has made scoring folds, then a linen cloth, plastered all three pockets, used for this purpose glue Moment Joiner.
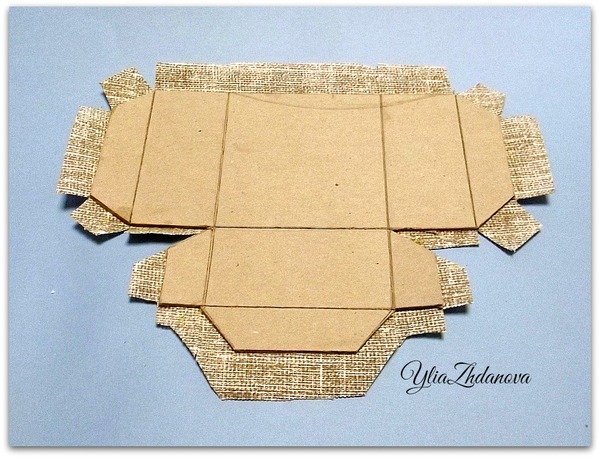 Gum helped fix sidewall pockets, until the glue dried up.
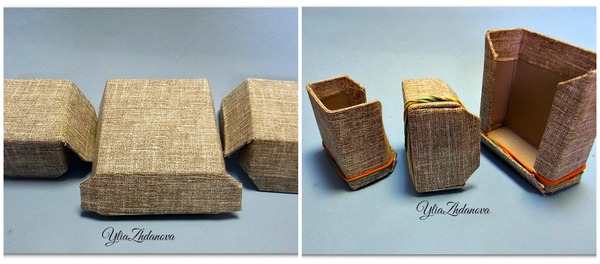 For home decor used thin cardboard, covered with a contrasting fabric.
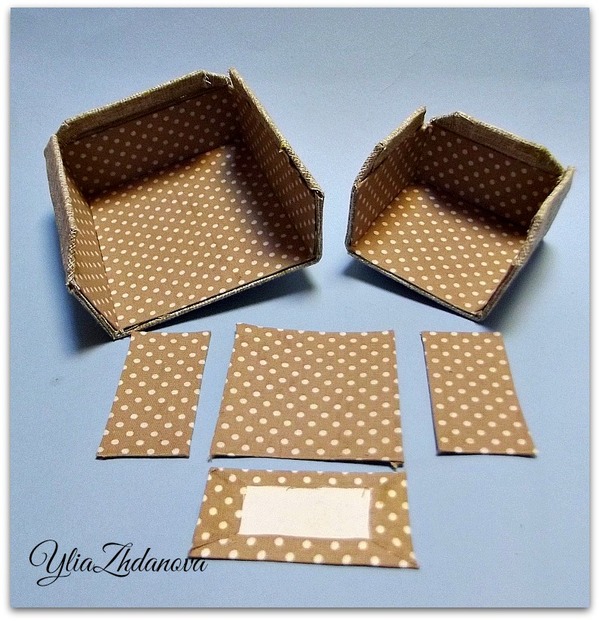 Then, in front of the foundation construction knife made slit width of the slit – the thickness of cardboard. Example – all came up))))
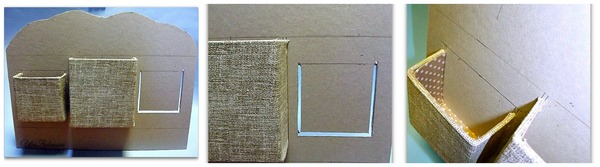 View from the inside out.
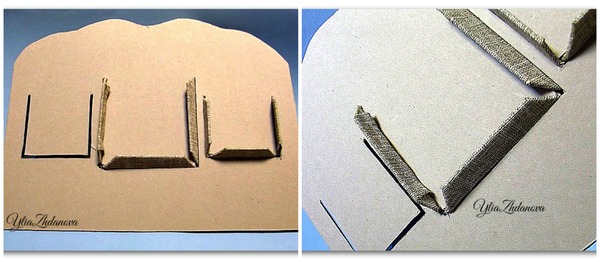 I removed pockets and pasted the same linen cloth, the front of the base. The edges of the cloth, so as not to crumble, fixed with adhesive gel Moment.
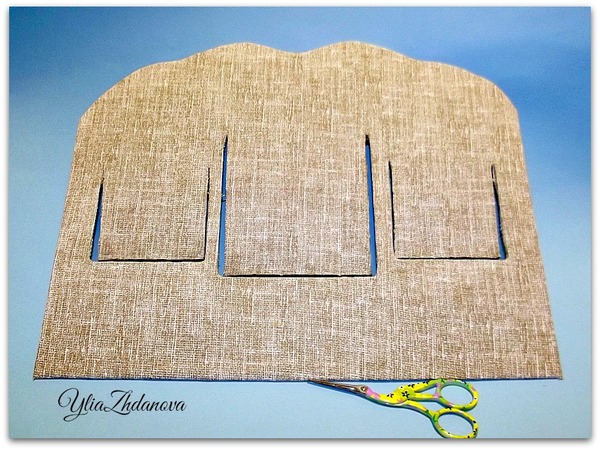 Pockets into place.
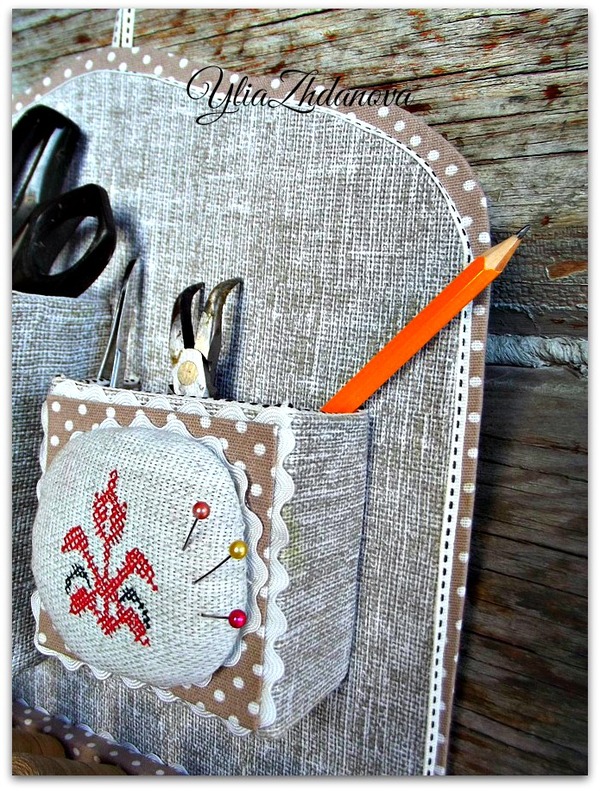
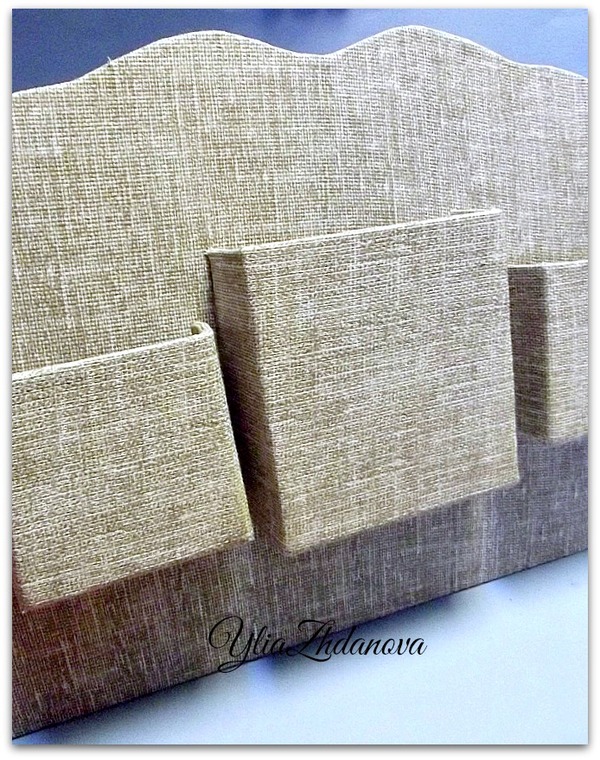 Now the most interesting – the decoration of the organizer, side pockets on the front, decided to make the needle bar inside – foam.
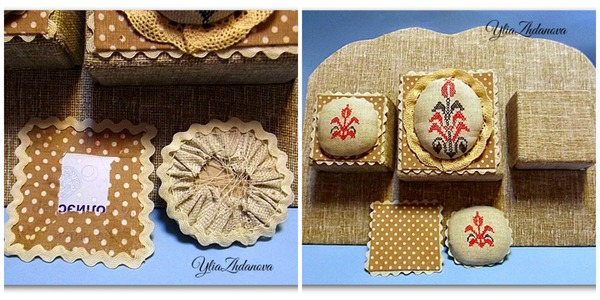 Then you have to take care of the thread – where to put them. For this I took – the piece of wood and bamboo sticks.
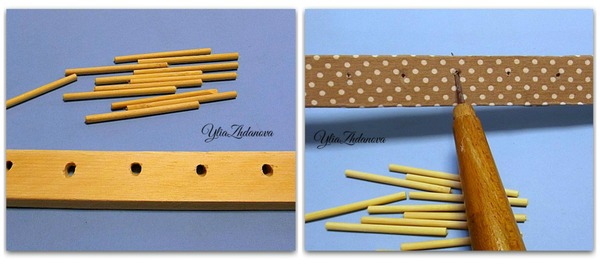 Drill a 45 degree angle holes and plastered cloth strip, then he has done with an awl holes, under the pins.
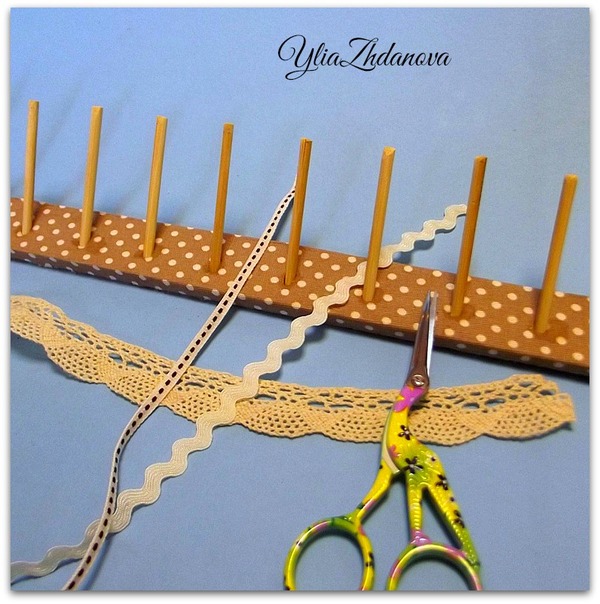 Glued pins – super glue.
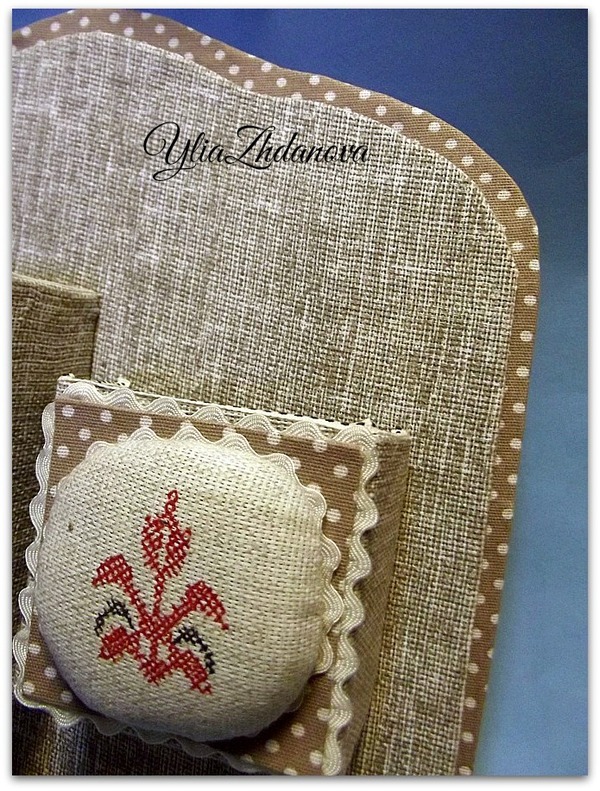
 Trim that I have left over from cutting pockets, all went to work. For Kant, I cut cardboard, 0.7 cm wider than the edge of the base and the first taped contrasting fabric, then a cardboard edge and closed his protruding cloth. It remained for the small – to close the second portion of the base, the back side of the organizer.
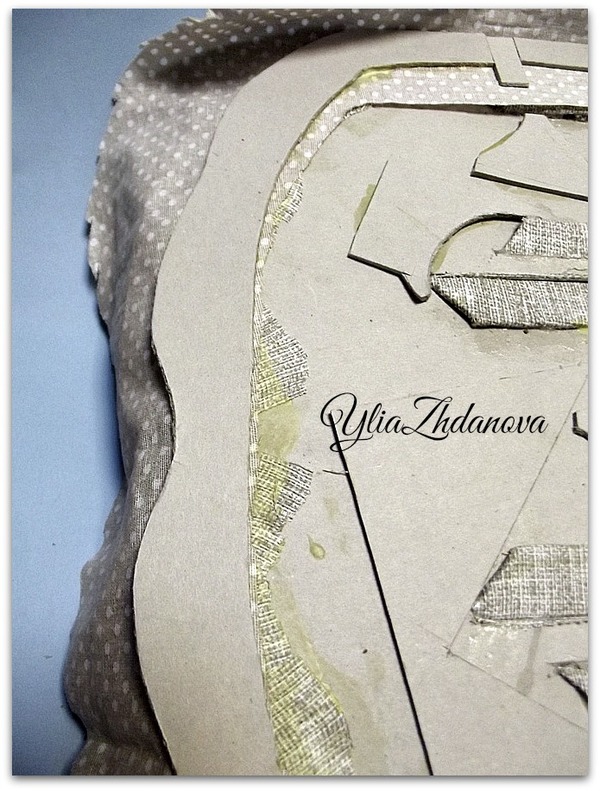
 Thank you that made it to the end.
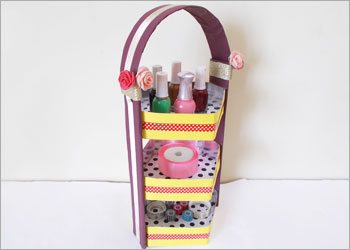
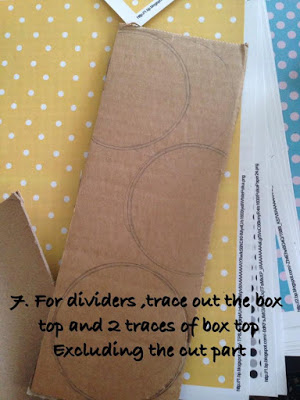
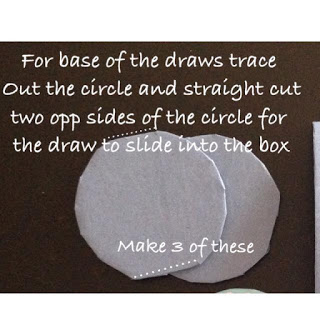
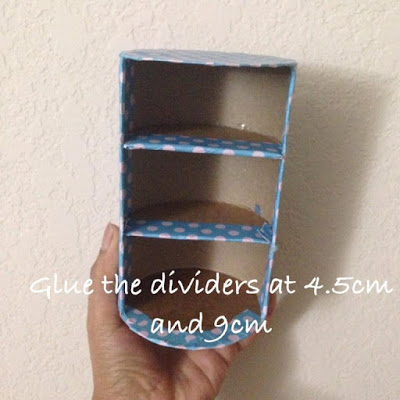
 Cut diamonds on the cardboard, to the size of your preference, to be the dividers of your organizer. Cut two opposing spikes from your diamonds.
 Cut into one of the chosen papers the same amount of diamonds cut into the cardboard. Glue the paper lozenges to the cardboard lozenges.
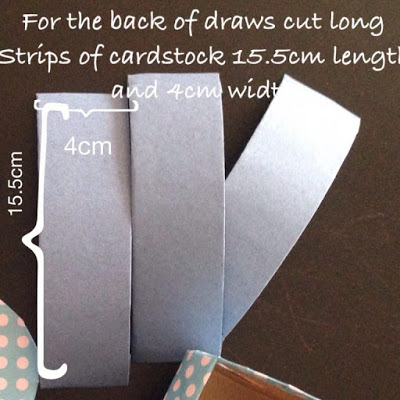
 Continuing with the preparation of your vertical organizer step by step , cut strips into another structured paper.
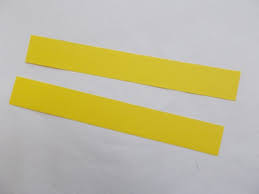 Glue the paper strips to the bottom of the dividers.
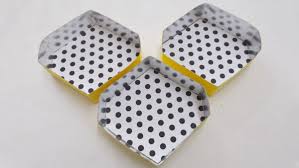 On cardboard, cut strips with the width of the cut nozzle of the dividers and glue these strips on the sides of the pieces, creating the structured one of your organizer. Coat the paper strips with a paper of your choice.
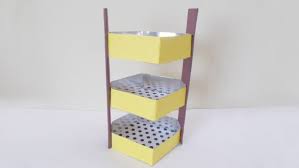 Cut another strip onto the cardboard, cover it – and glue it to the top of your organizer.
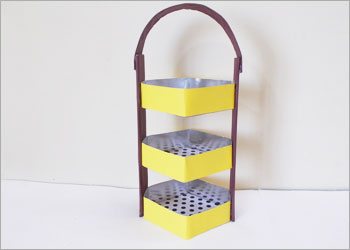 Pass pieces of adhesive tapes through the dividers and the handle of your organizer. To finalize your piece, decorate your organizer with the materials you want. And it’s ready!
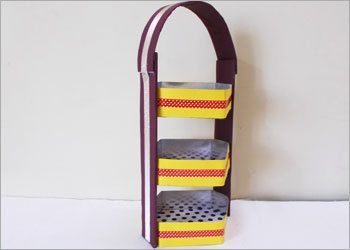 (Photo: recyclart.org)
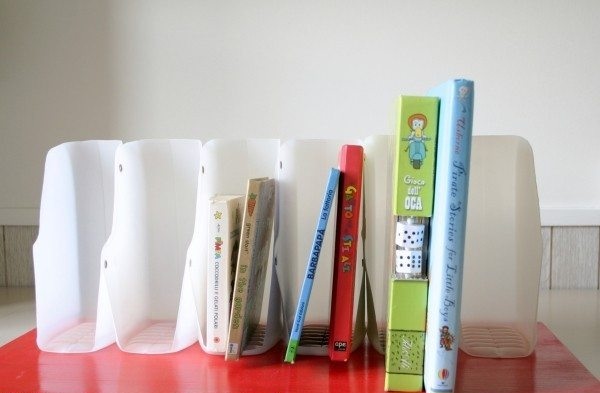
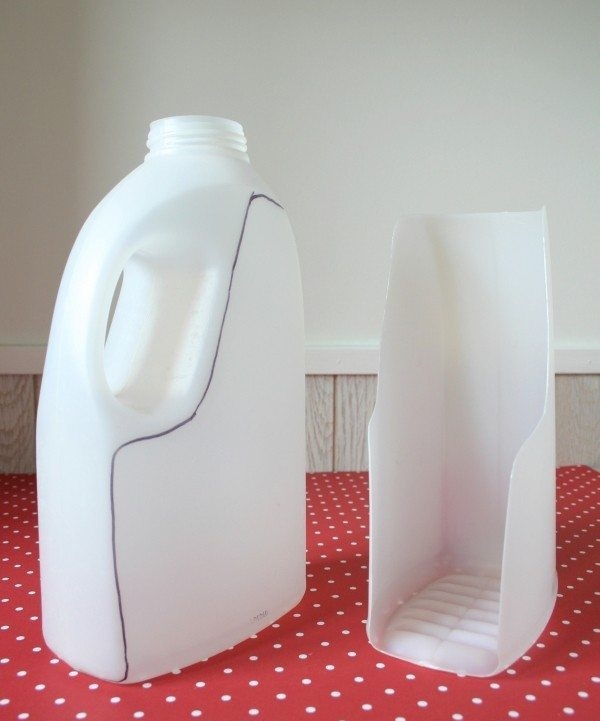
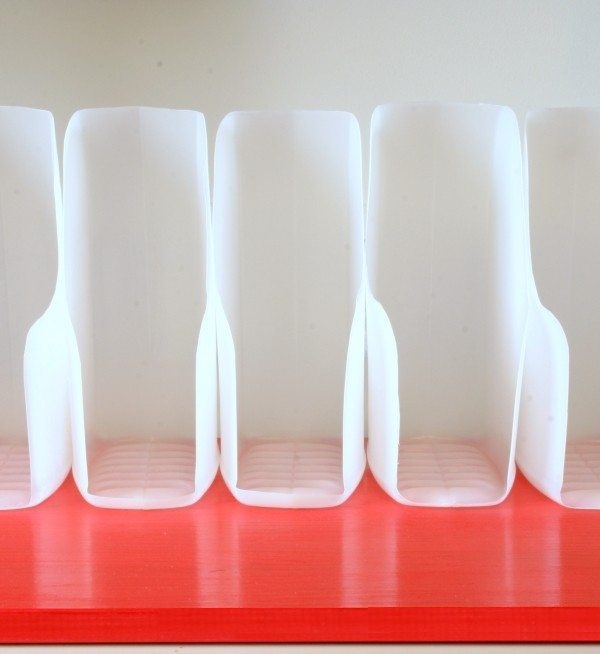
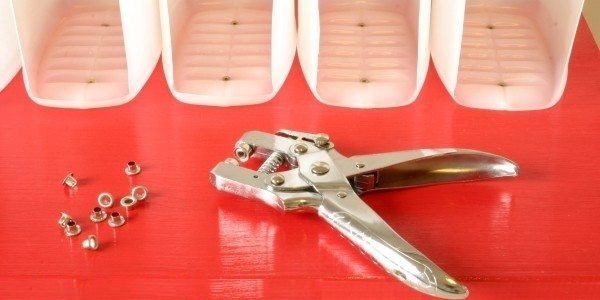
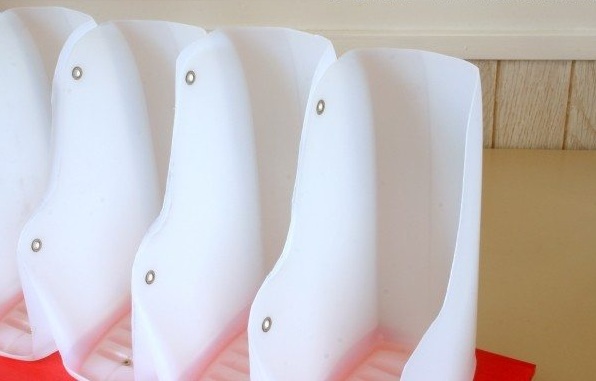
 Getting Started. Plastic bottle washes and remove them from the labels and adhesive residue that can be done with nail polish remover
 Stationary knife cut the bottle as shown in the photo below
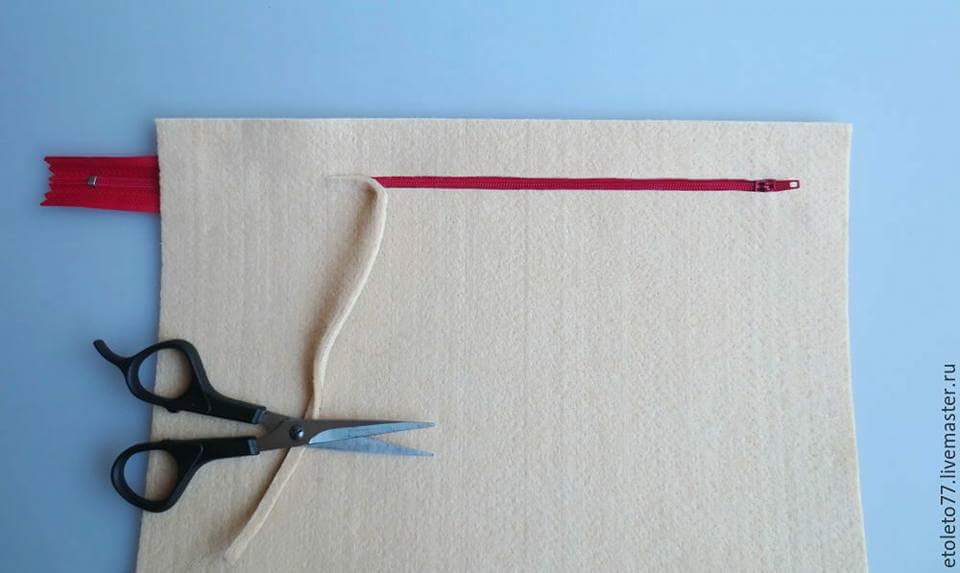
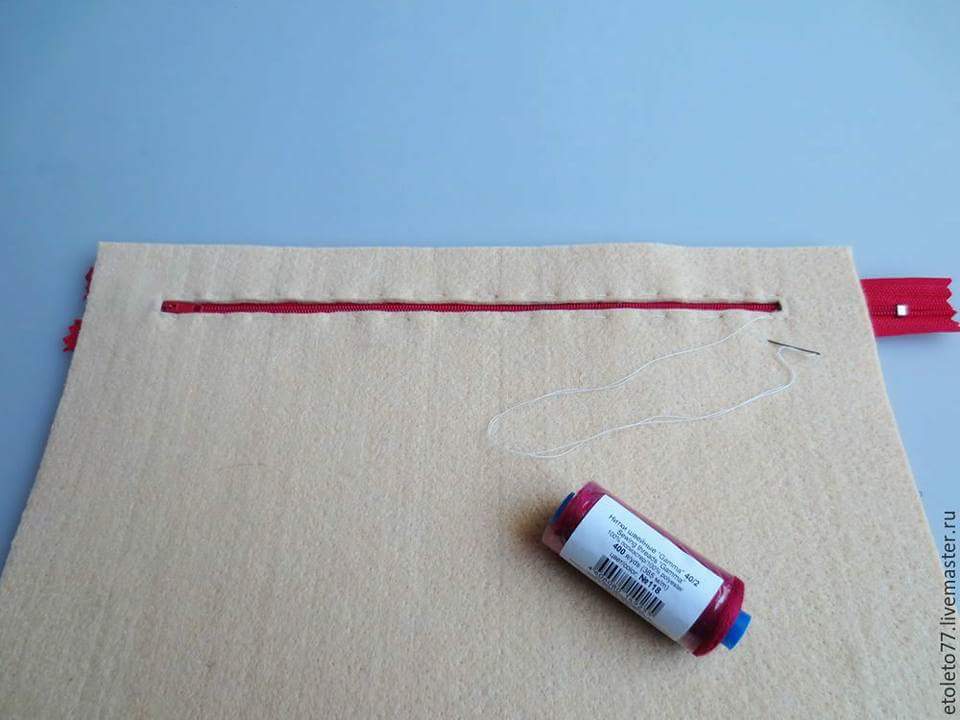
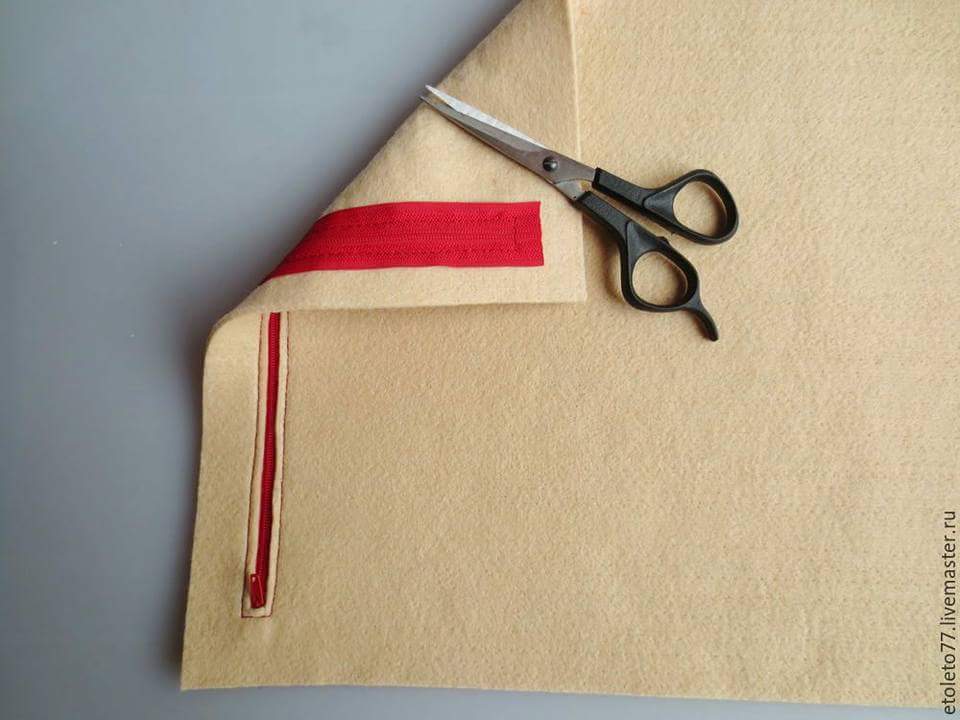
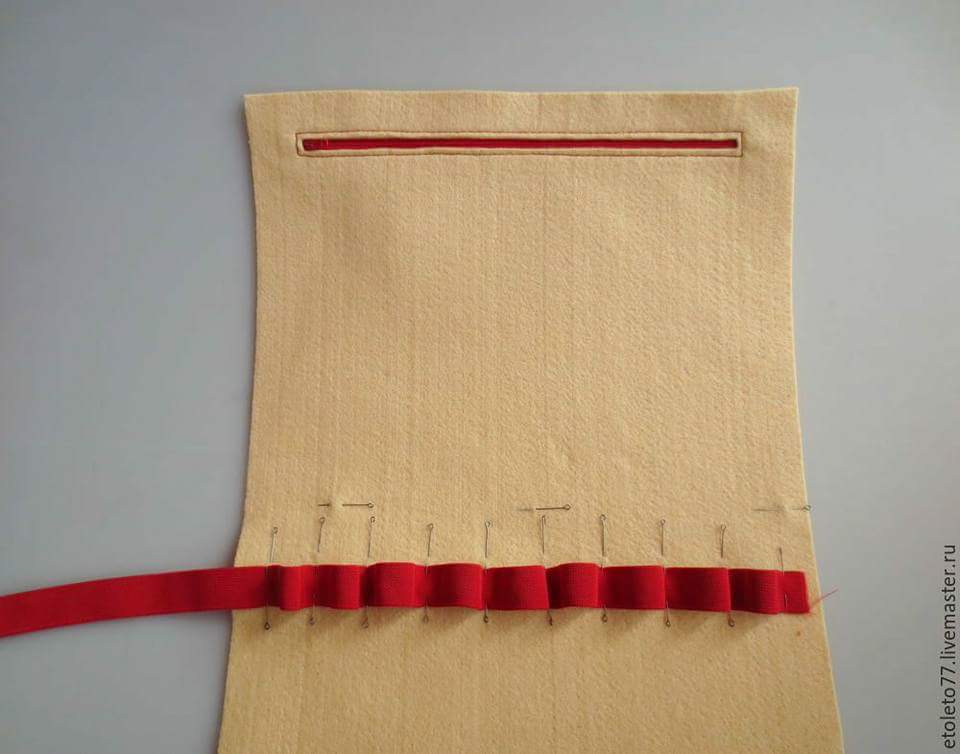
 Take colored zipper, open it
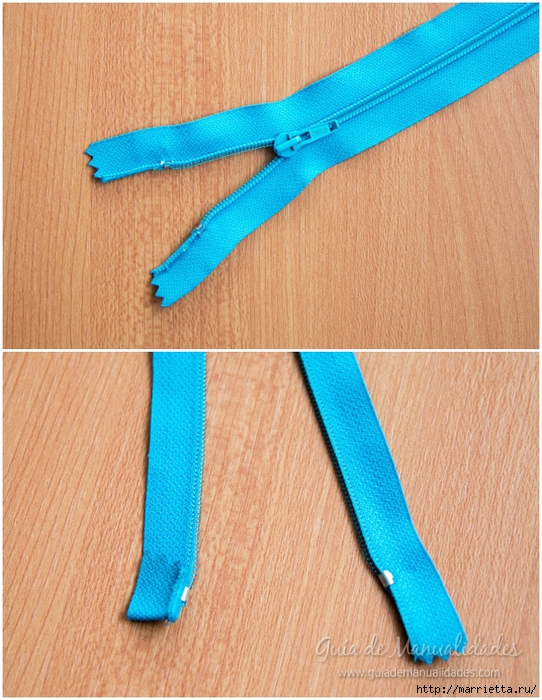 Glue the bottle with hot glue
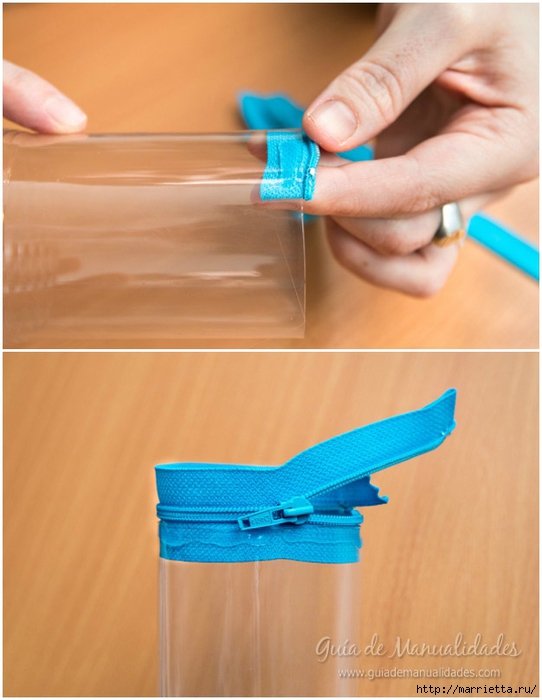
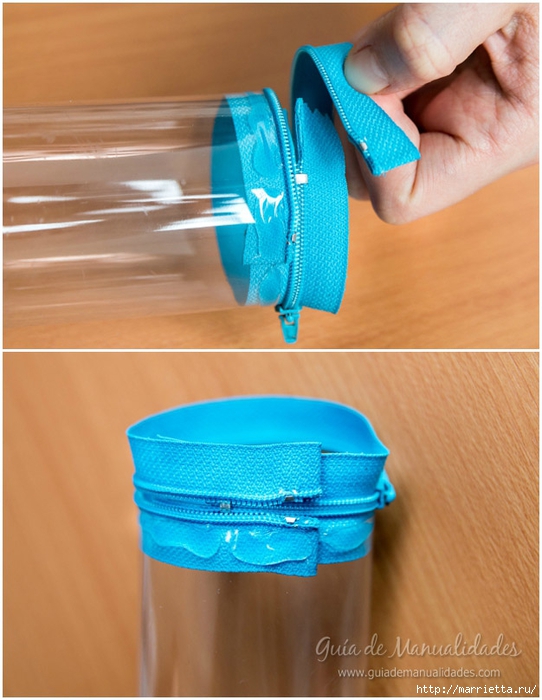 Glue zipper and another cropped plastic bottle
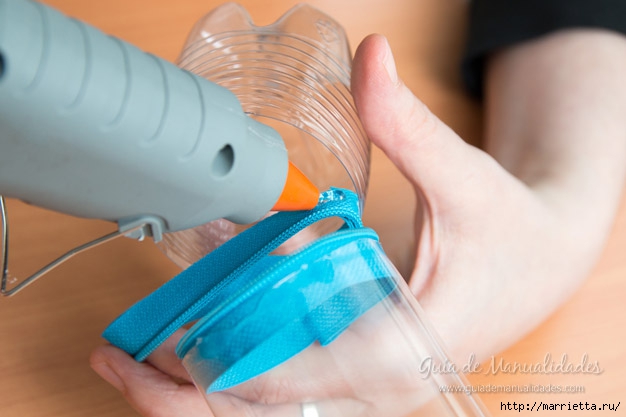
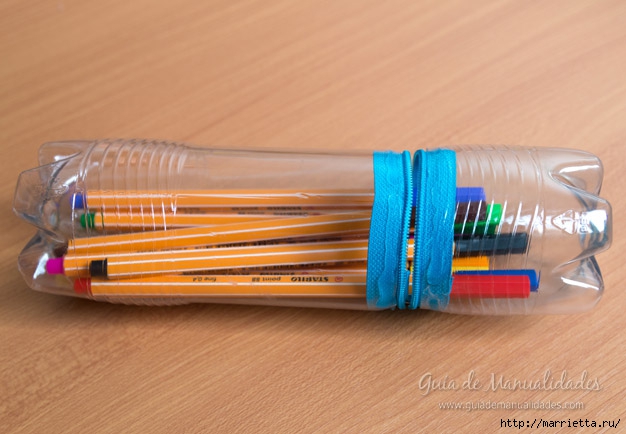 That’s all, or pencil box organizer is ready to use in the household)
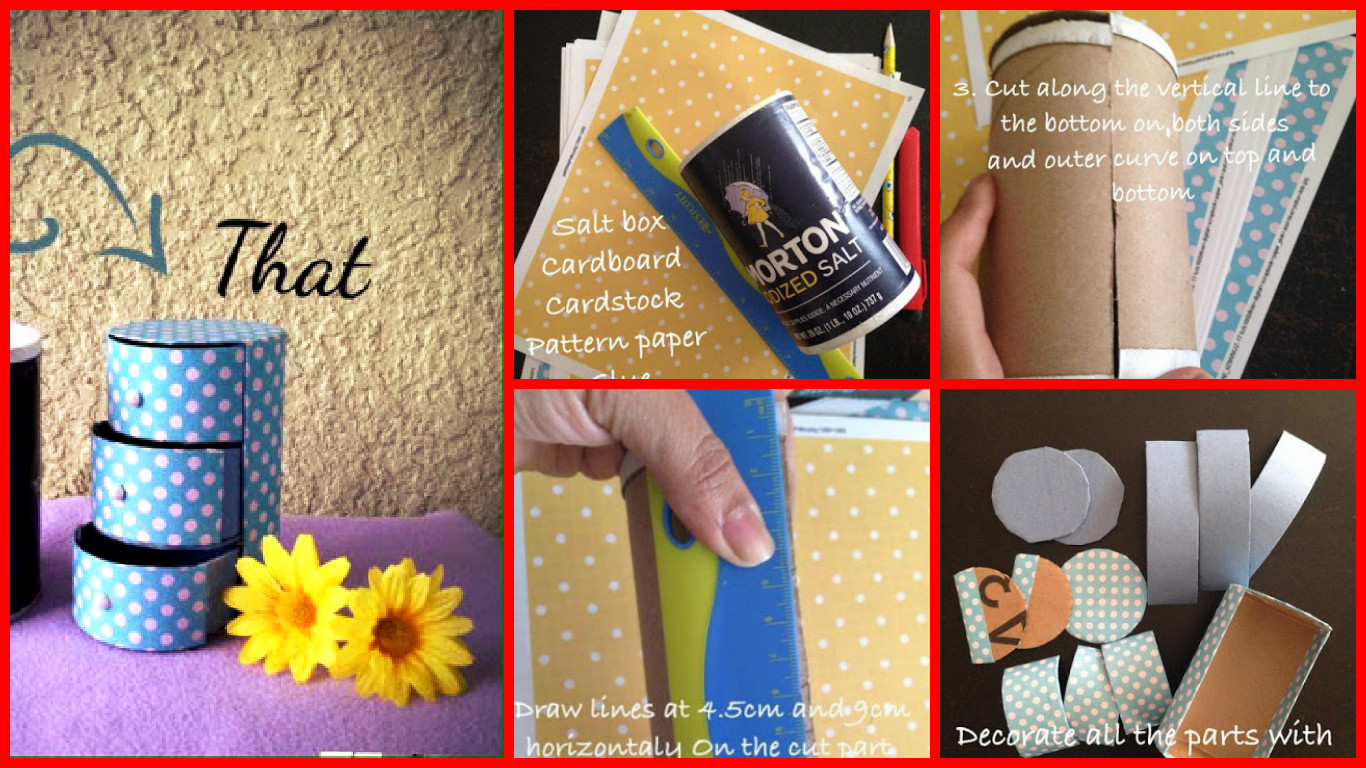


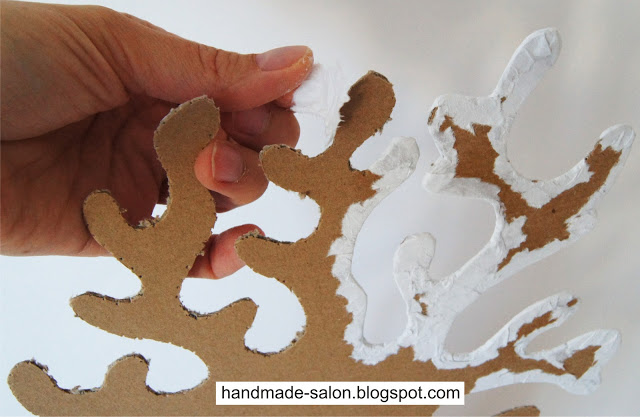
 and gently remove unwanted parts …