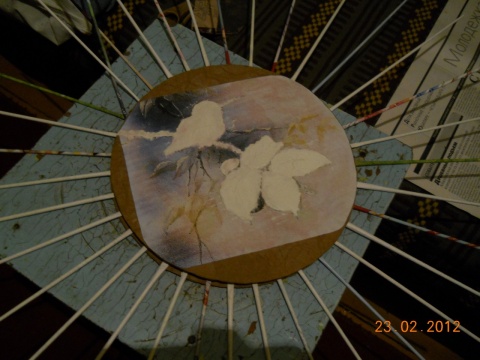
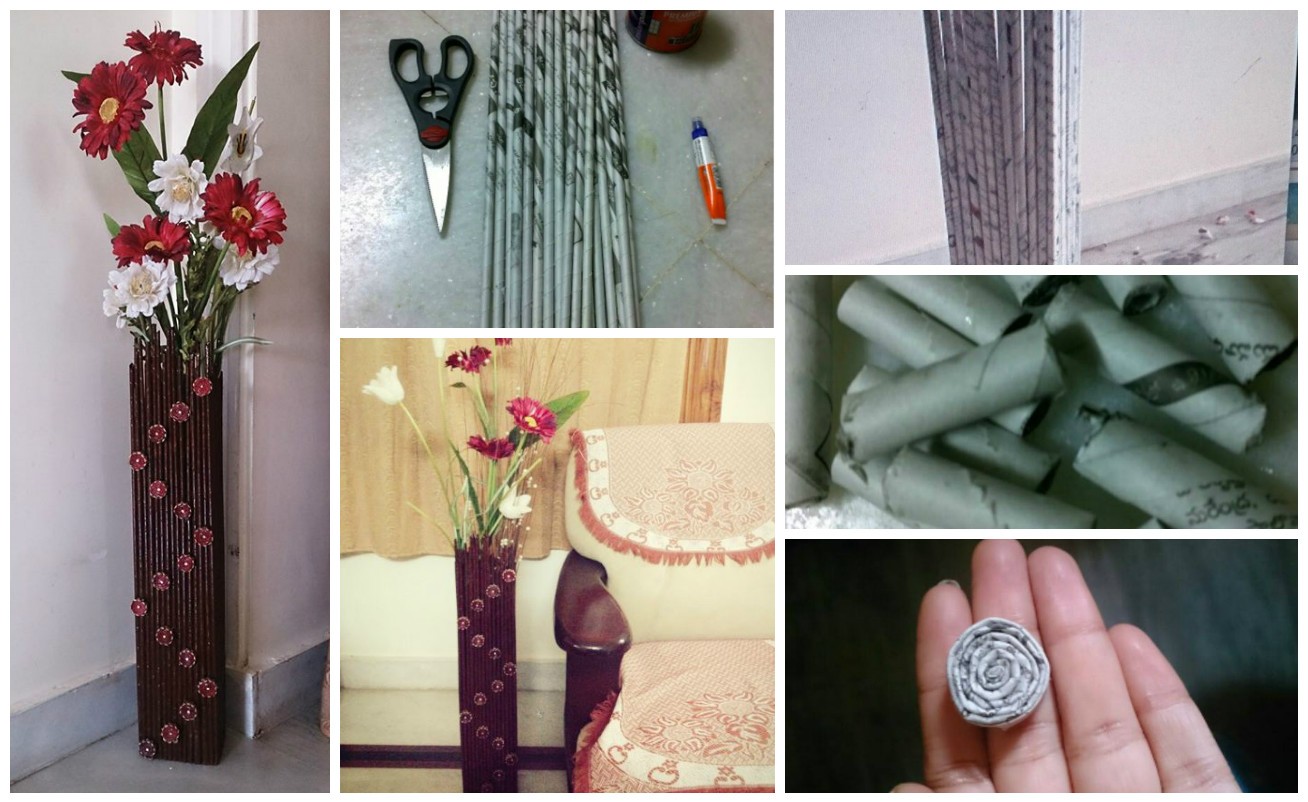
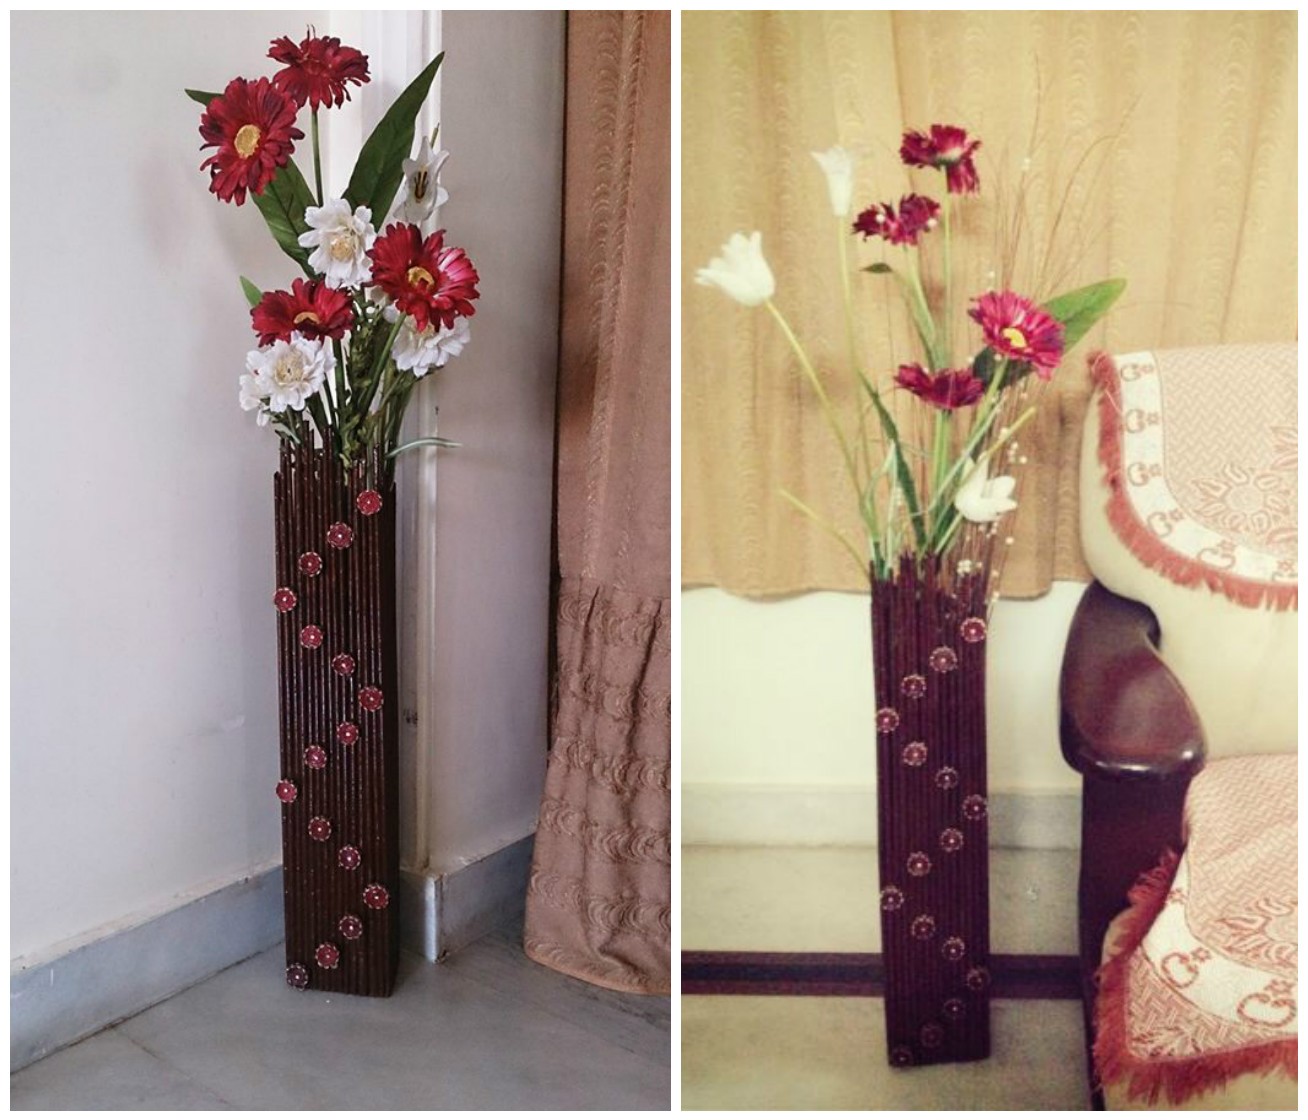
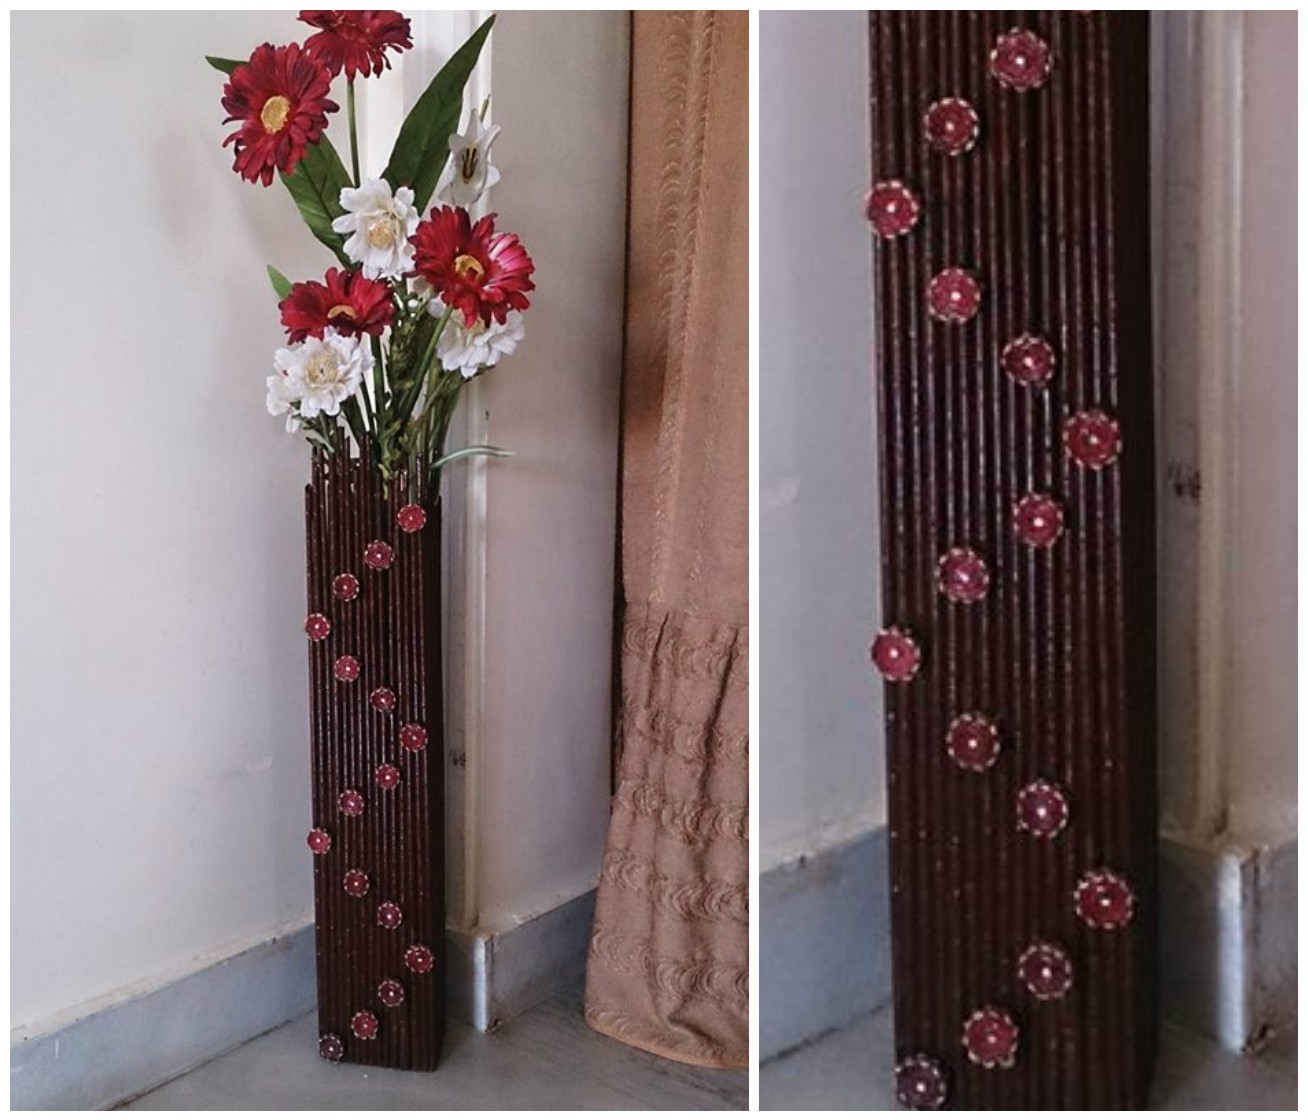
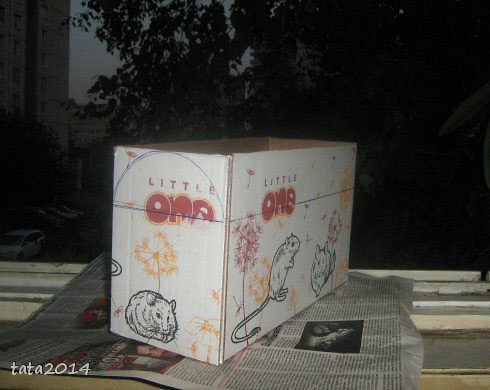
For storage of various household items, valuables, and other items used chest. From ancient times, people have become accustomed to such a container for storage. Produced most of the trunks of wood and decorated with various metallic elements. In the same master class, you will learn how to make a wonderful chest improvised with minimal cost.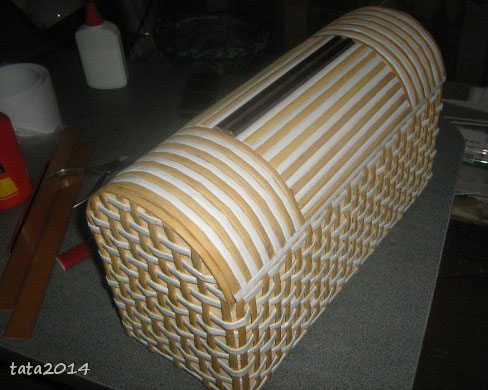
Required Materials:
• Cardboard.
• PVA glue.
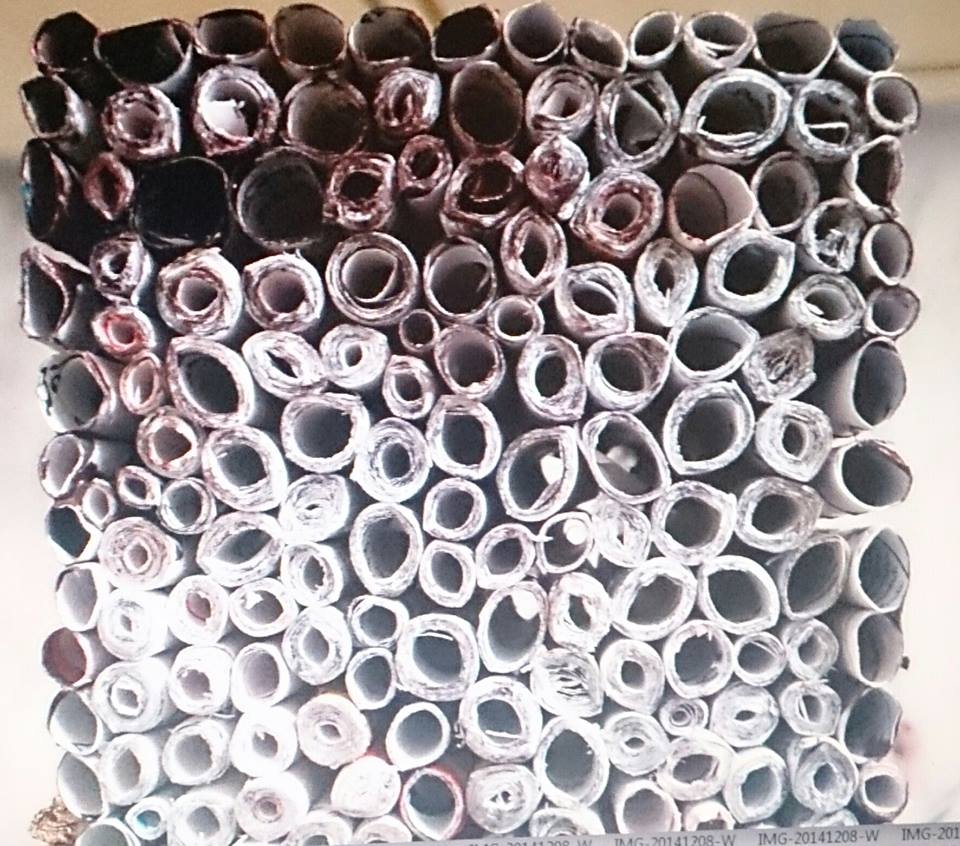
• Ducts of consumer paper.
• «Moment” glue.
• dressmaker pins.
• Decor.
• pliers.
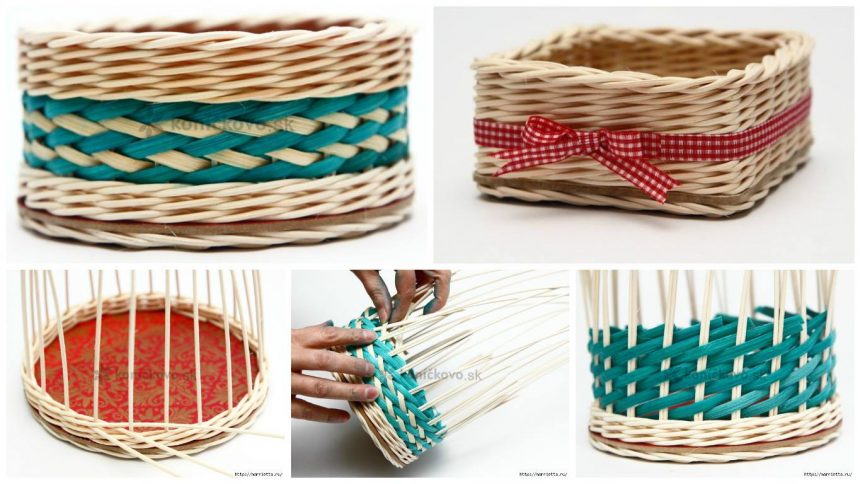
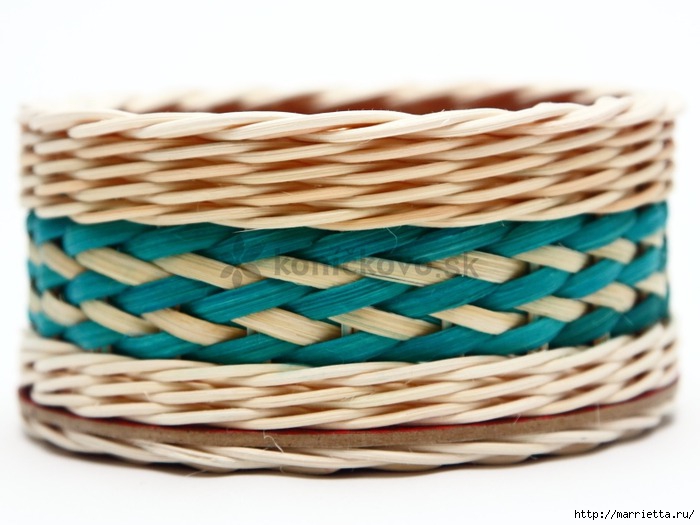
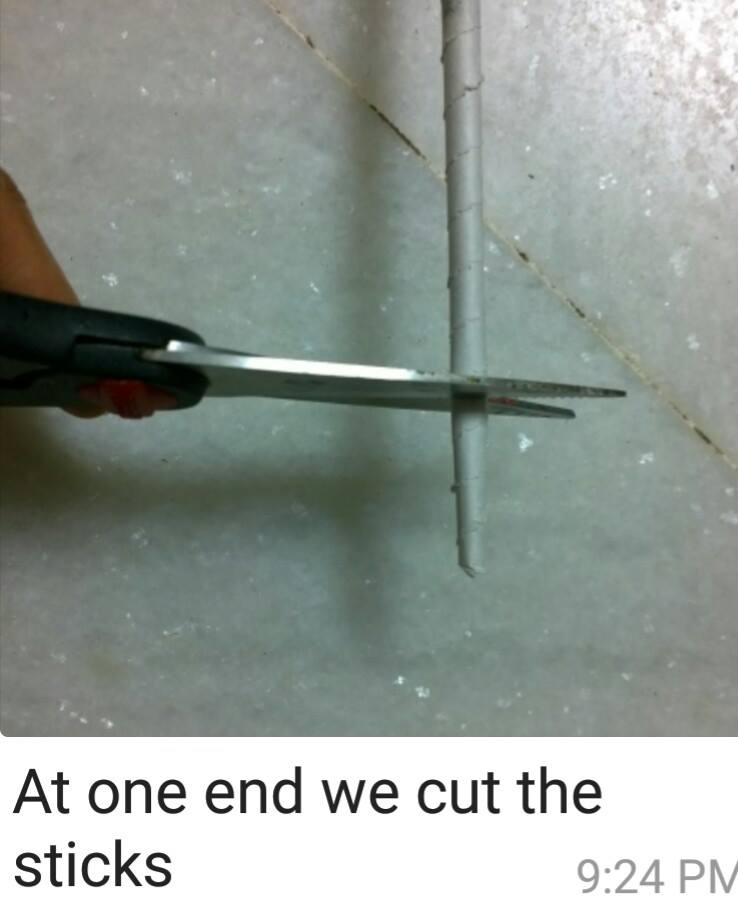
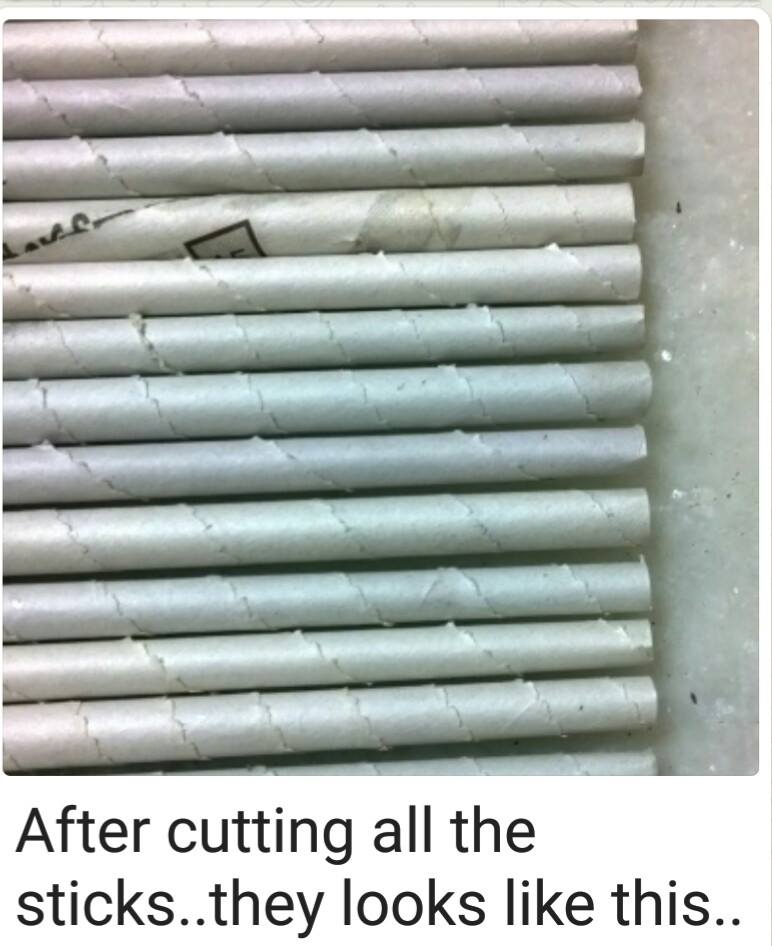
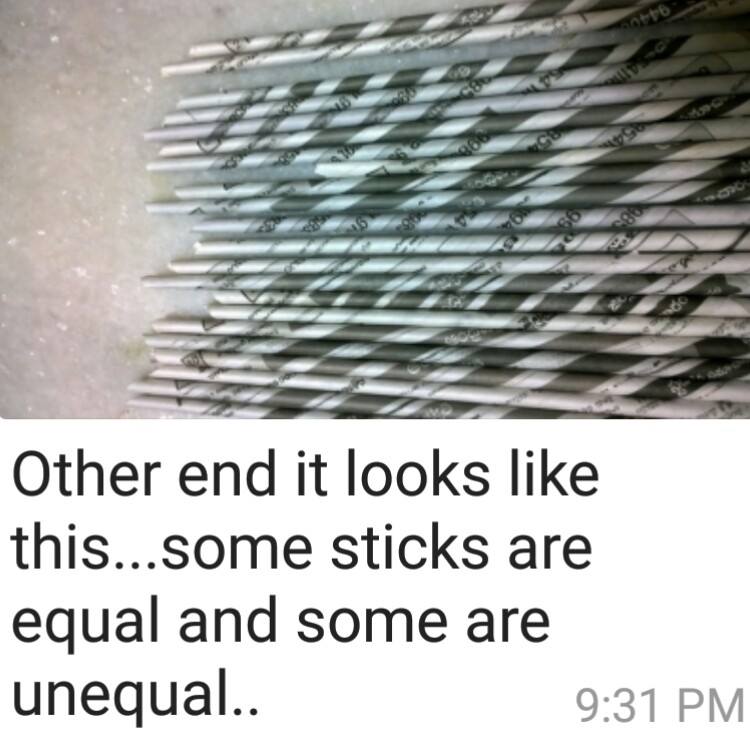
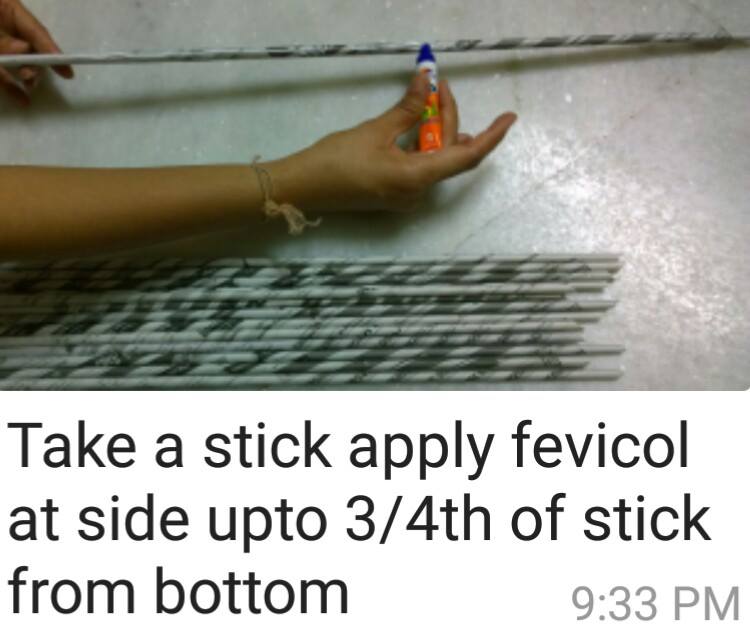
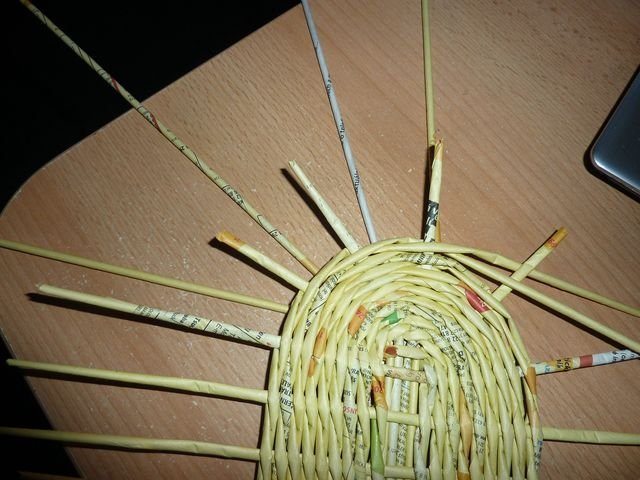
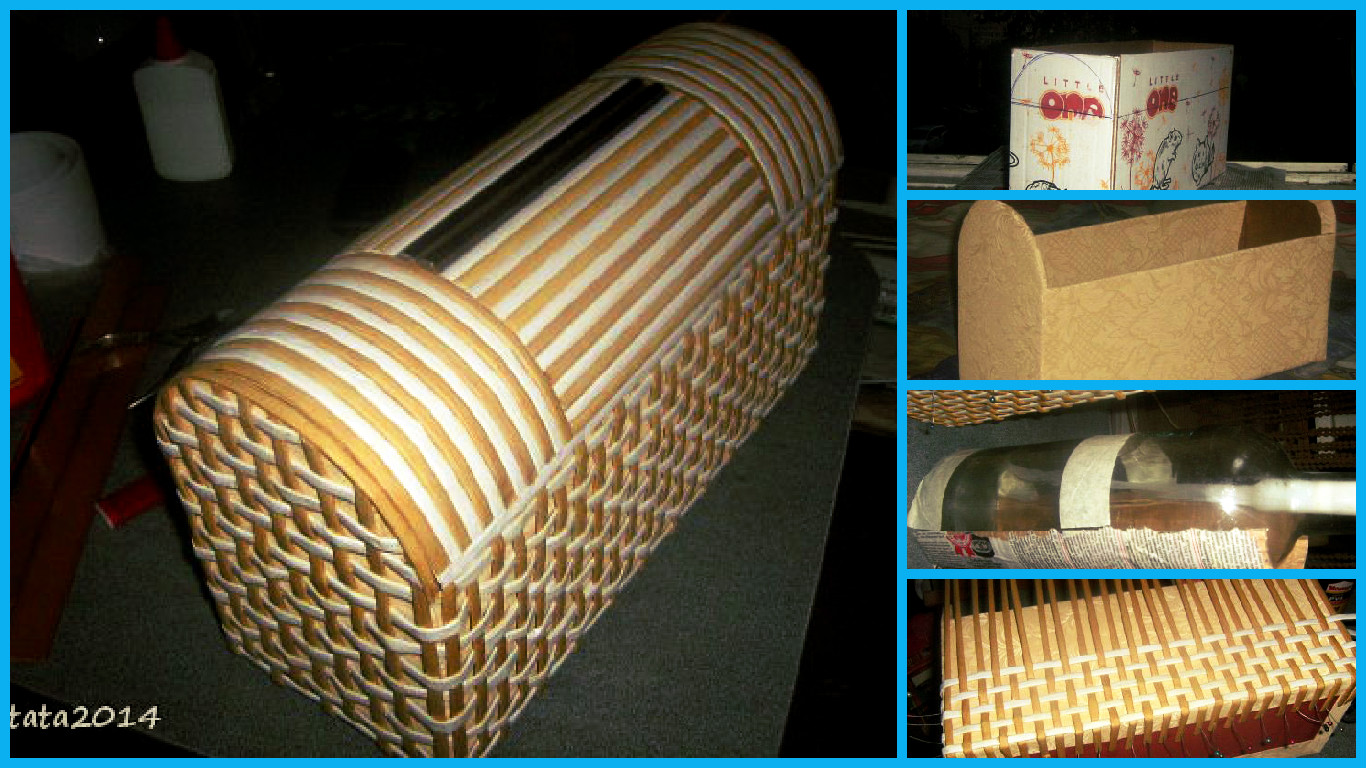
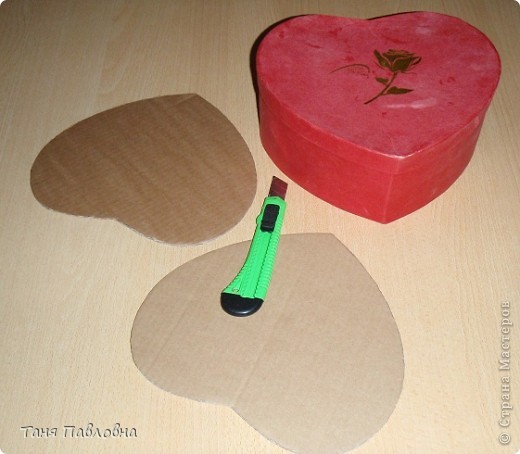
Stages of manufactureOn any trunk box make markup. Cut.
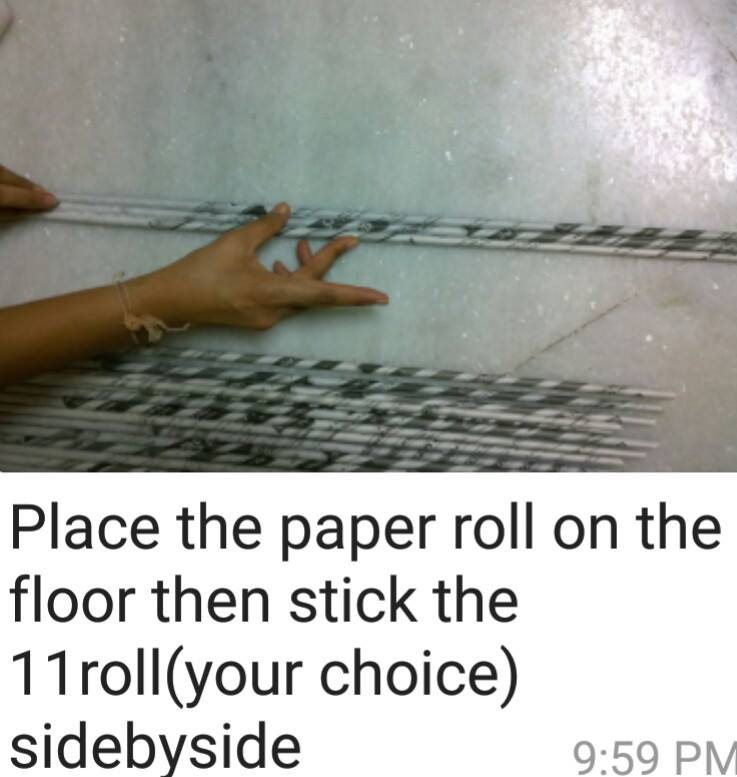
• paste over the outside of the box main background, the space into about 6 cm.
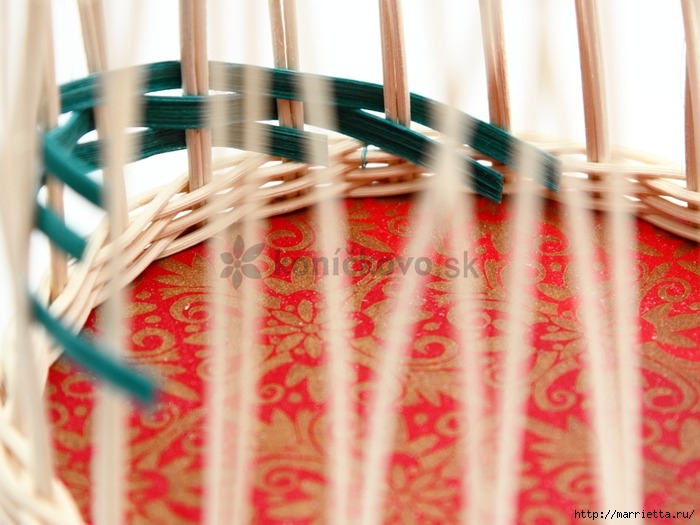
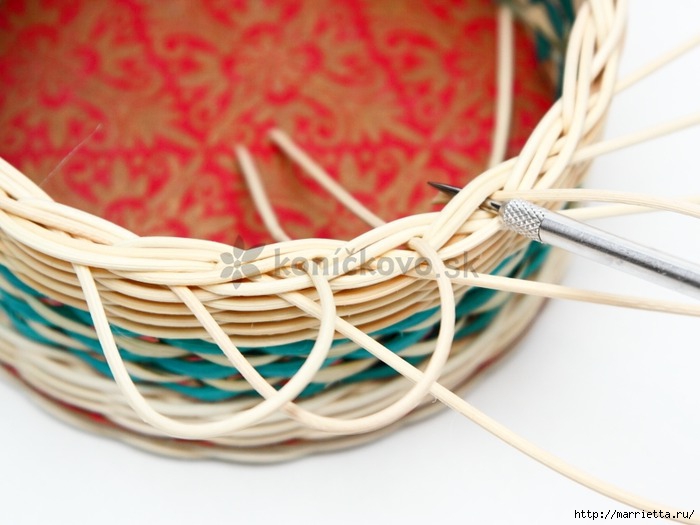
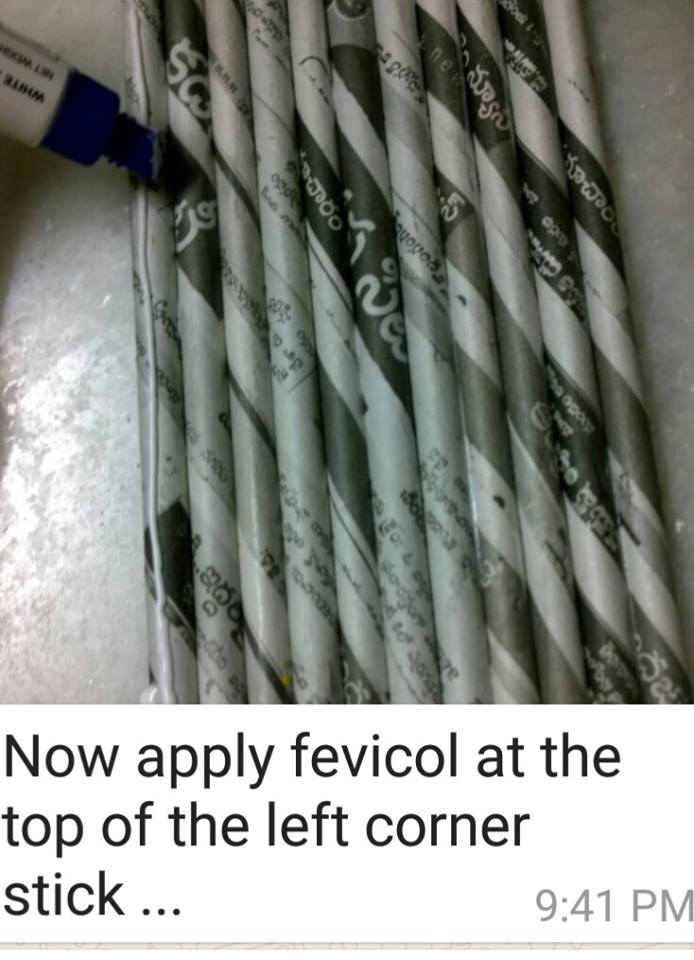
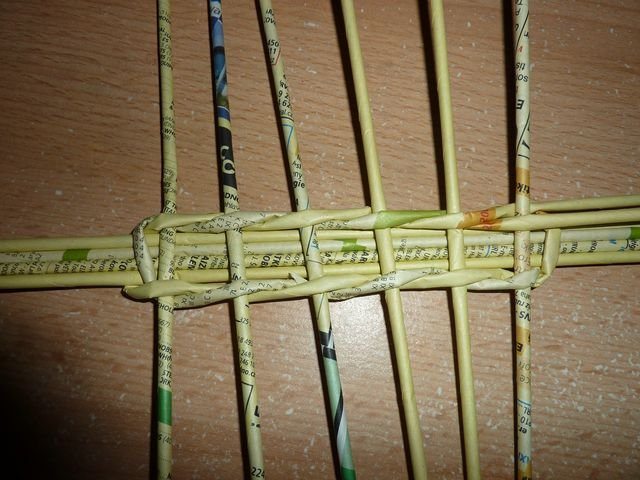
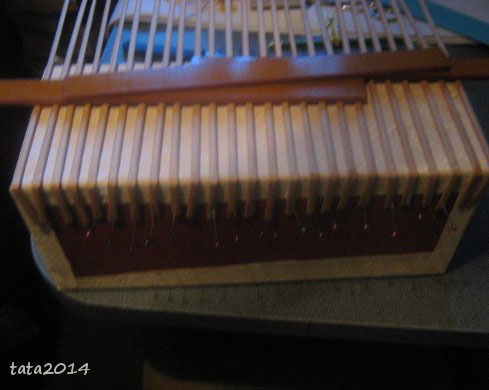
On the long side of the trunk, layout attaches dressmaker pins flattened tubes as in the photo.
Now take a long strip of a different color. Secure the ends of the pins on the left side. Now do the weave, the distance can be taken equal to the width of the tube.
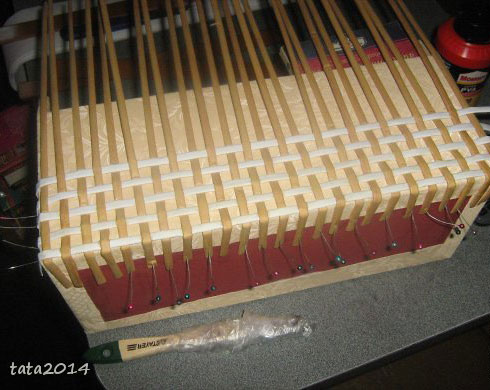 When depleting to the top, fold the ends of the strips and glue them inside.
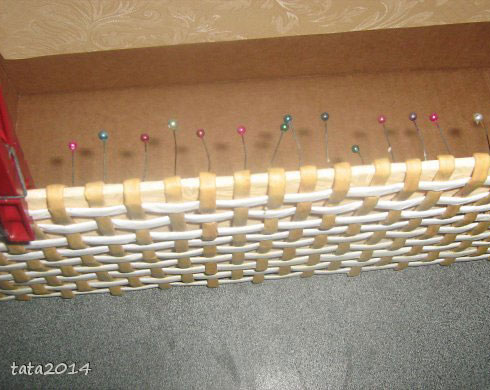 Here is the inside
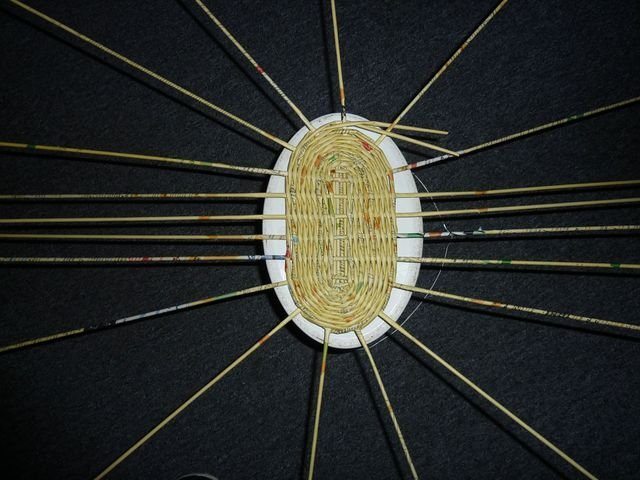
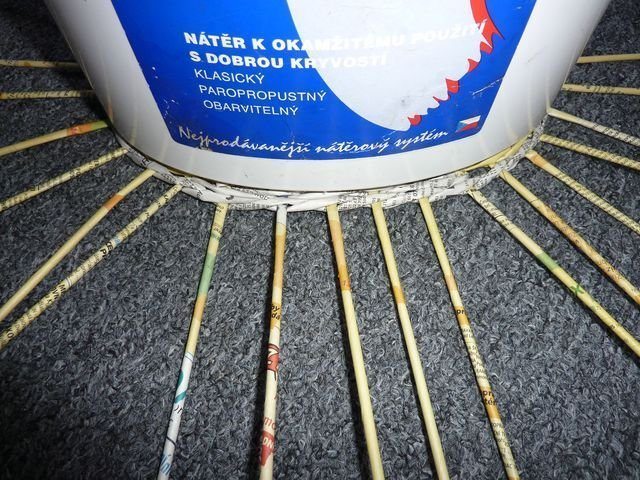
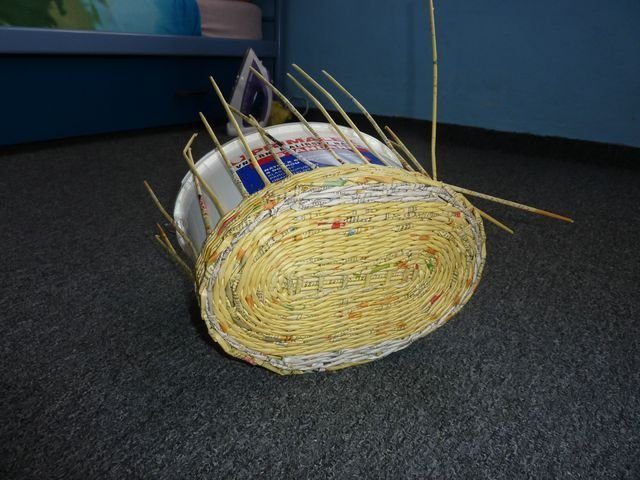
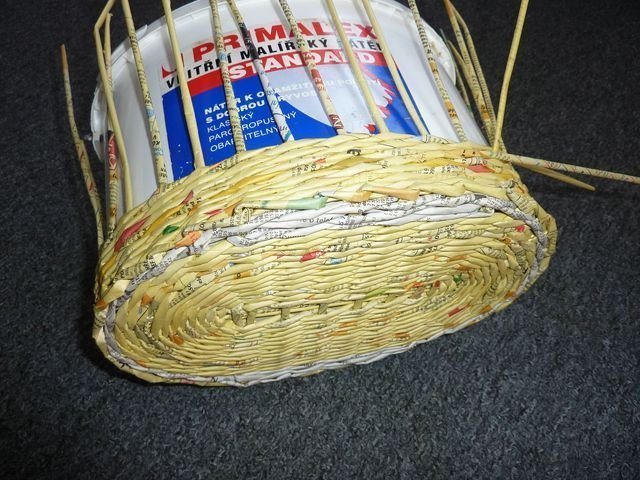
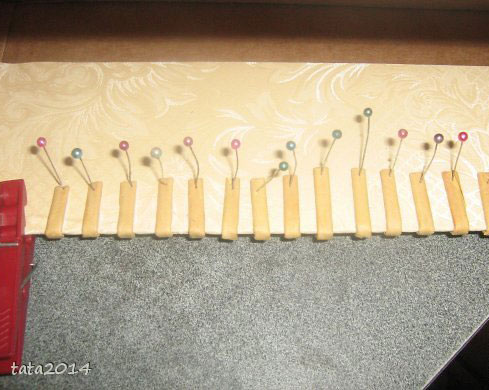 • While the glue dries, get the trunk lid. This MK bottle width equal to the width of the chest, so there is nothing to adjust the size is not necessary. Wet the cardboard and attach it to the bottle using adhesive tape. When the board is dry, it should be several times Procrit PVA glue.
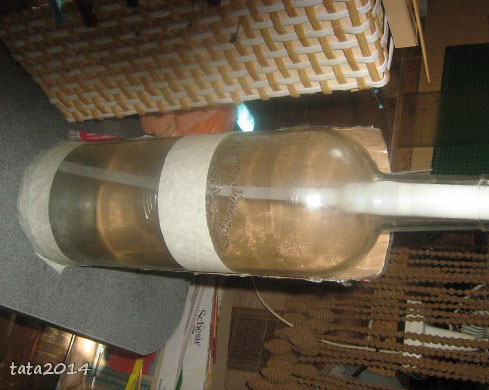 For greater reliability, you can glue the paper.
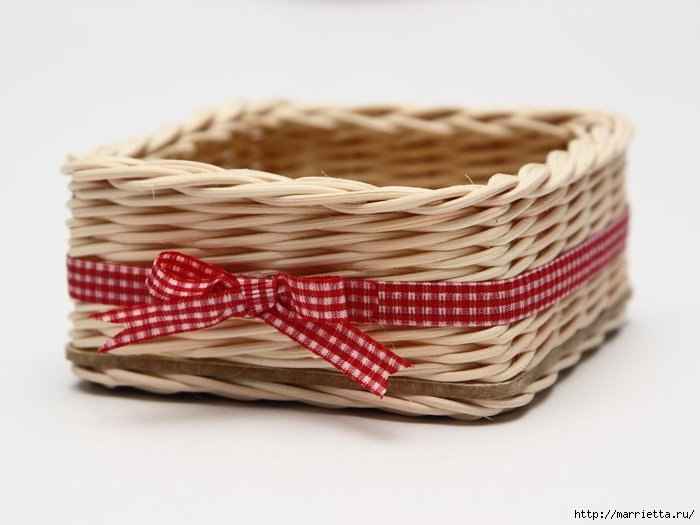
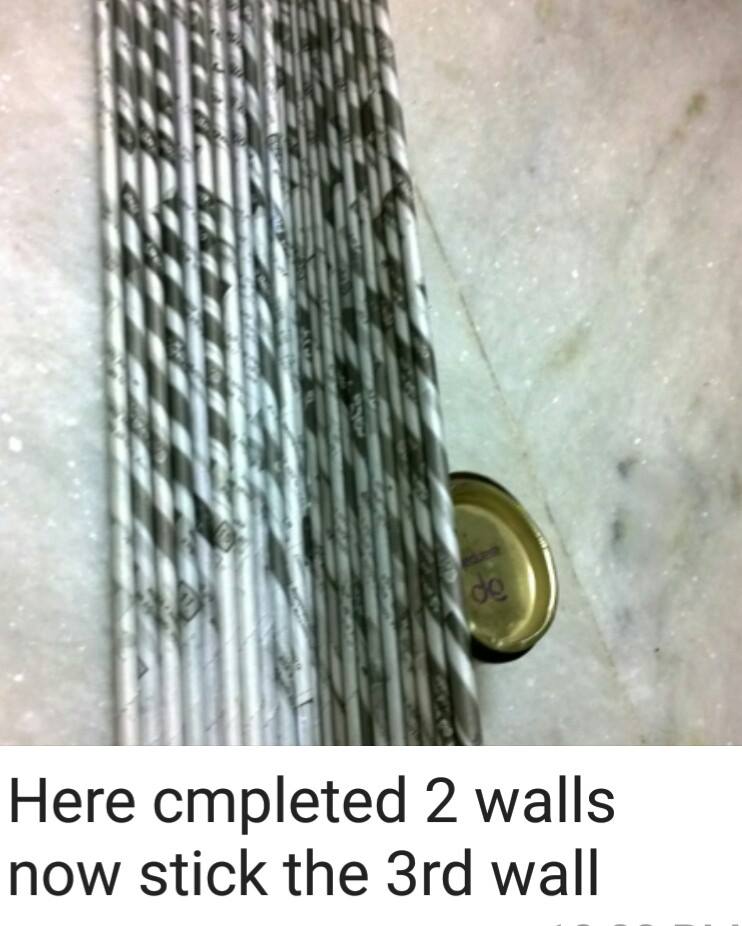
 • As long as dry cover, continue to braid the side of the trunk. Where should you need to build a strip?
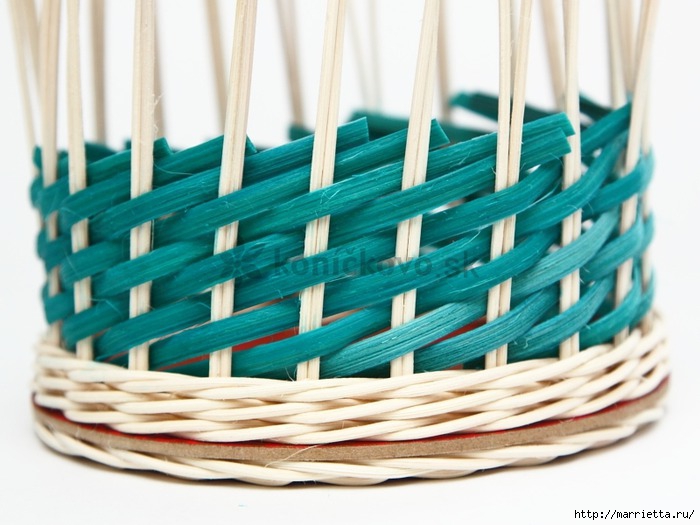
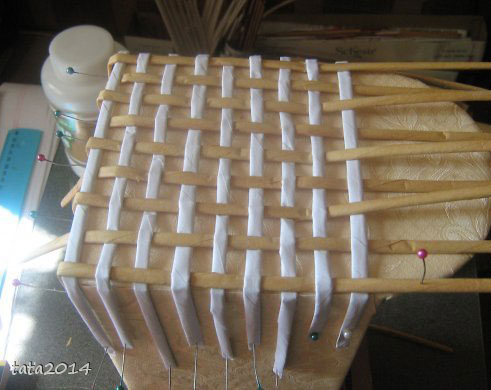 High lateral part is ready. Trim the excess from the strips and glue well.
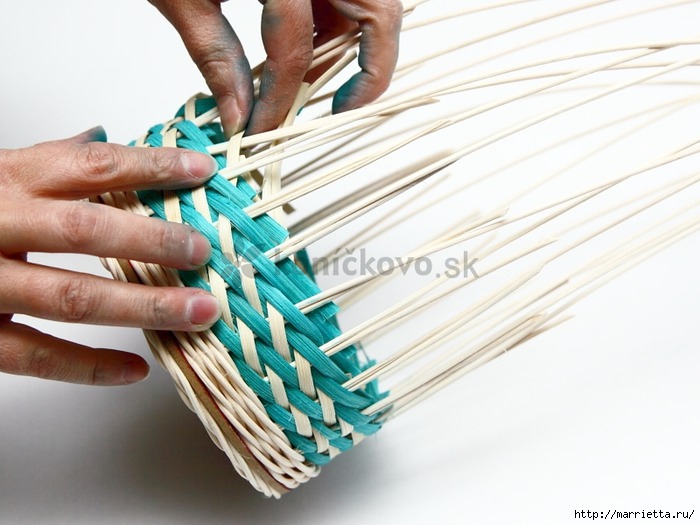
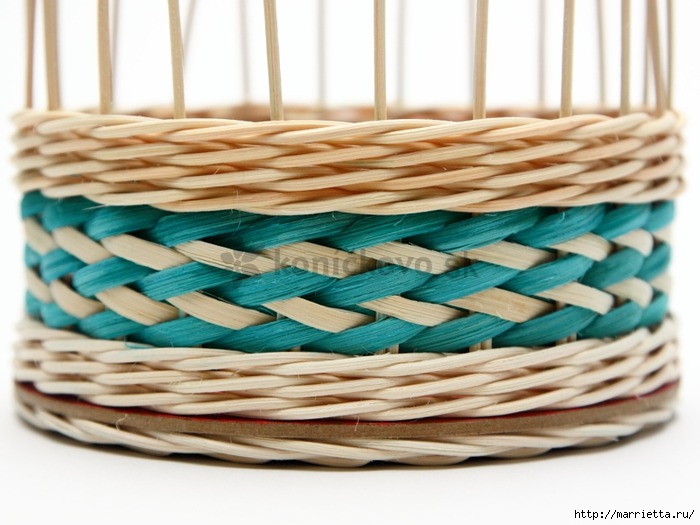
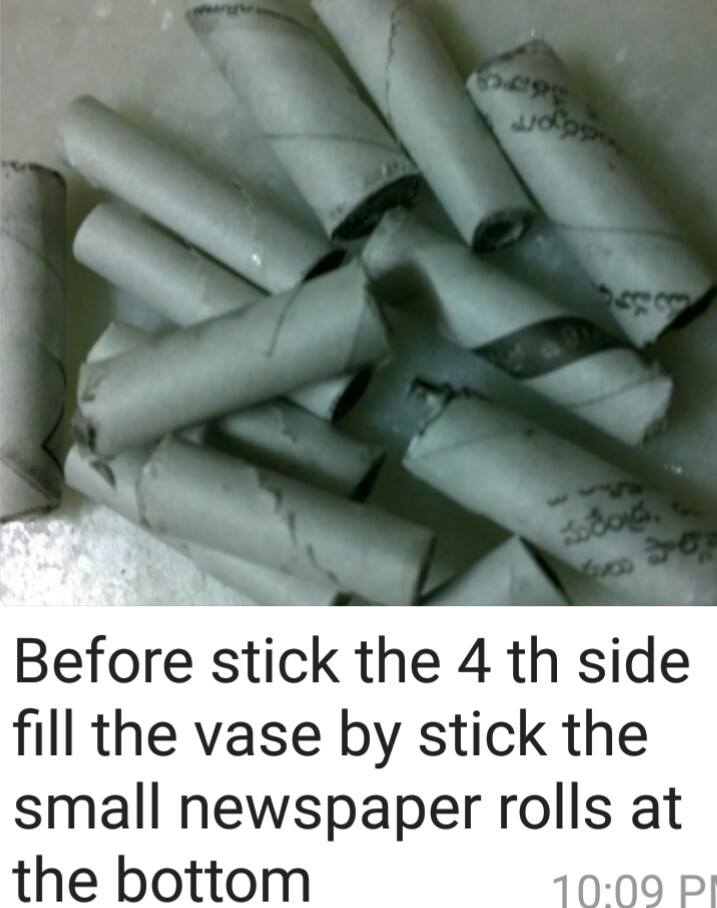
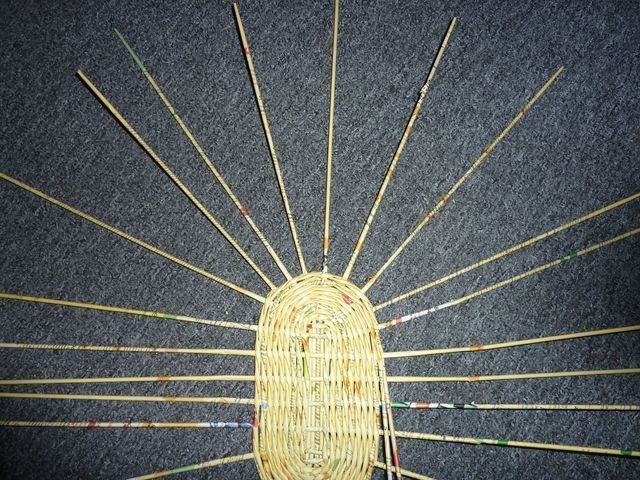
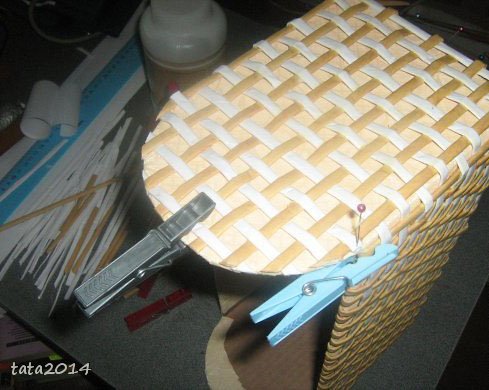 Continue to braid the trunk. Remember to stick to the bottom of the strip, the strip MK yellow.
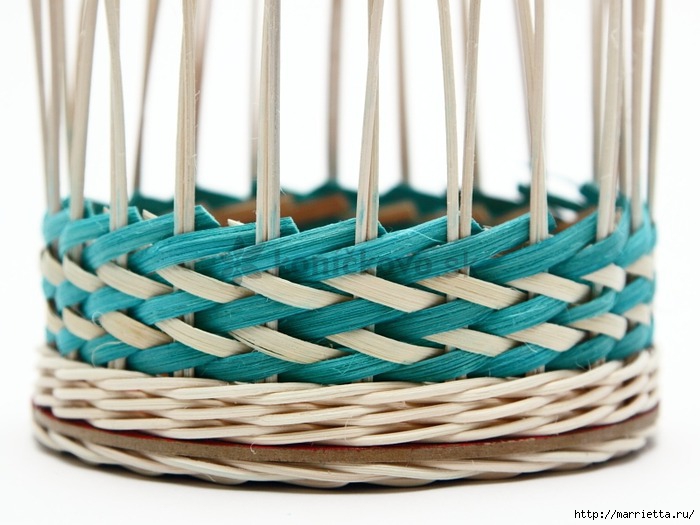
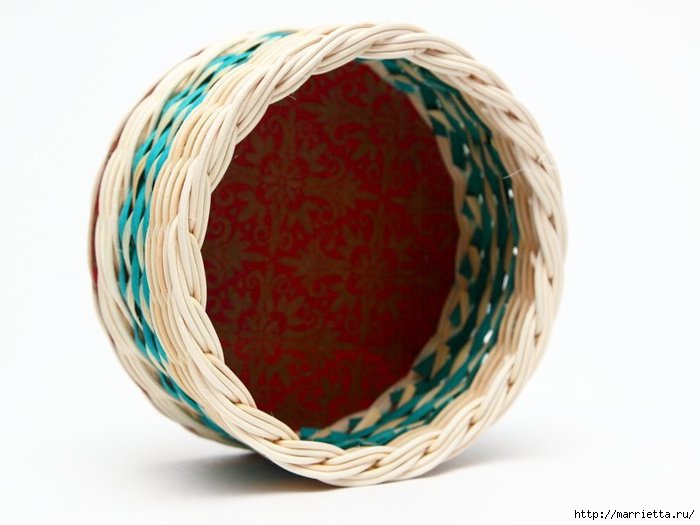
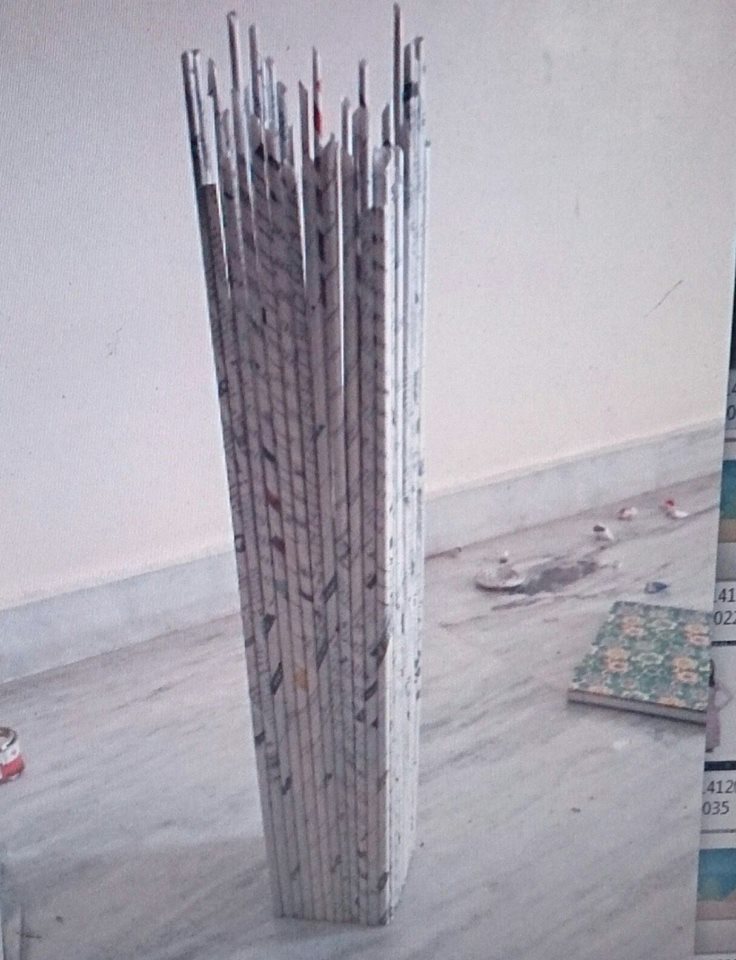
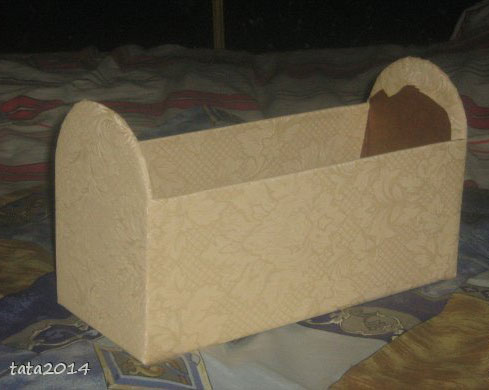
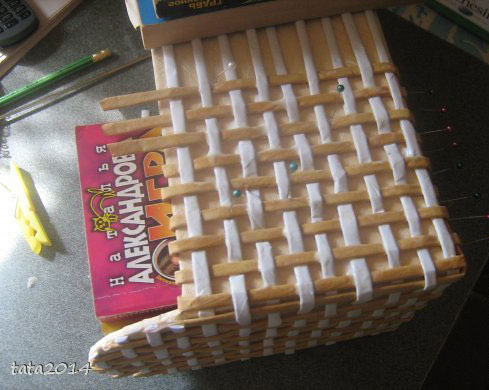 As a result of your labors get here is a neat and beautiful chest.
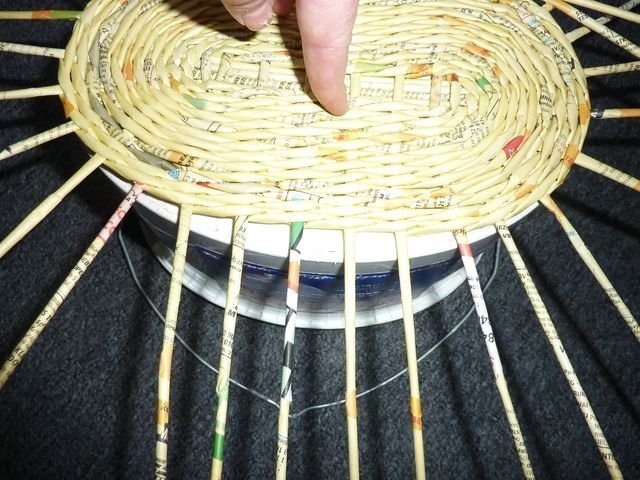
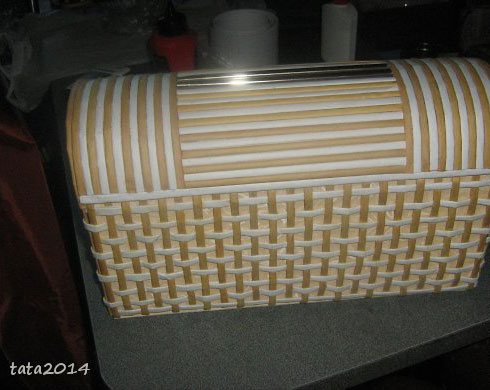 We admire? Now continue to work.
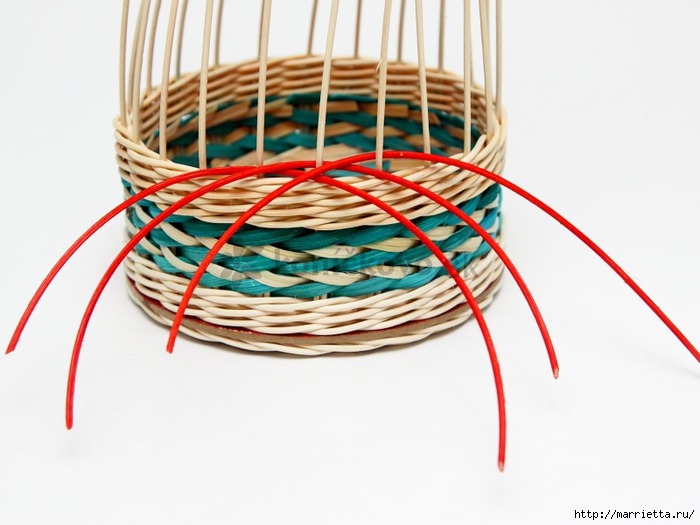
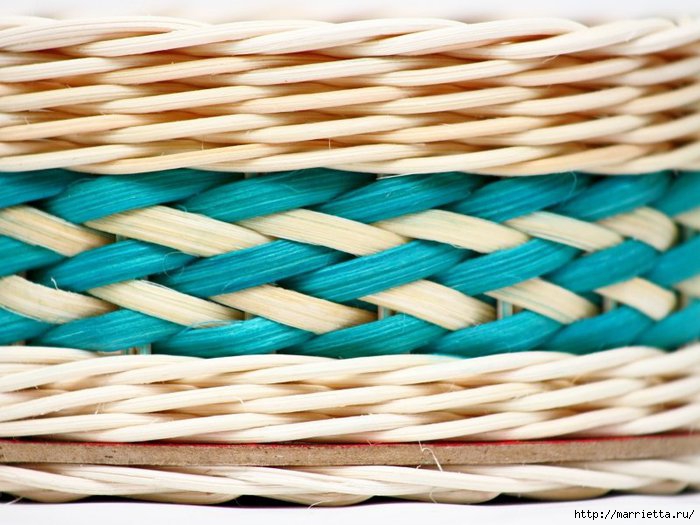
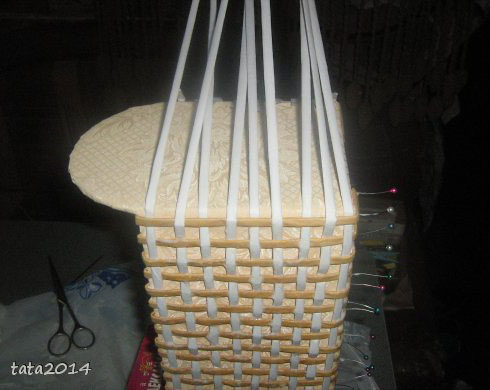 Edges to look neat and beautiful.
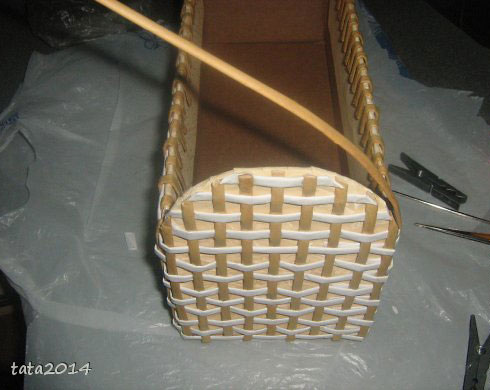 The lid of the chest the same color as the trunk itself, going upstairs to 6 cm.
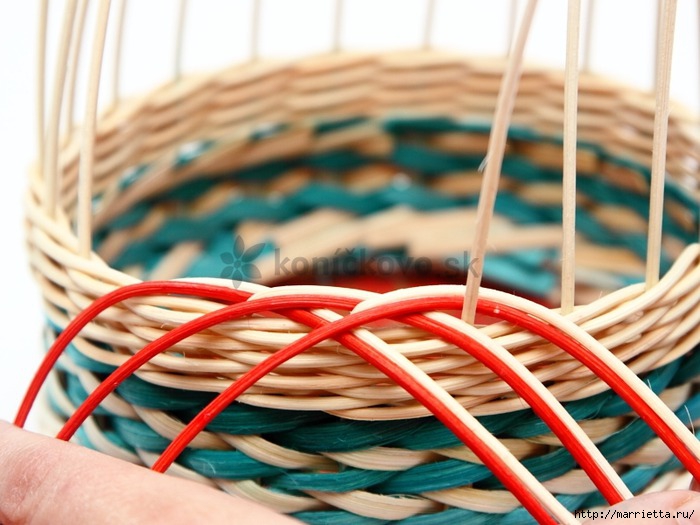
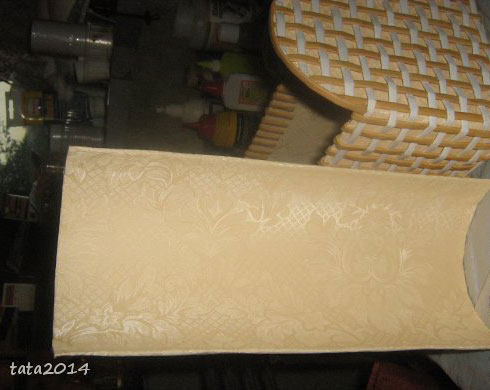 Try to design converged smoothly.
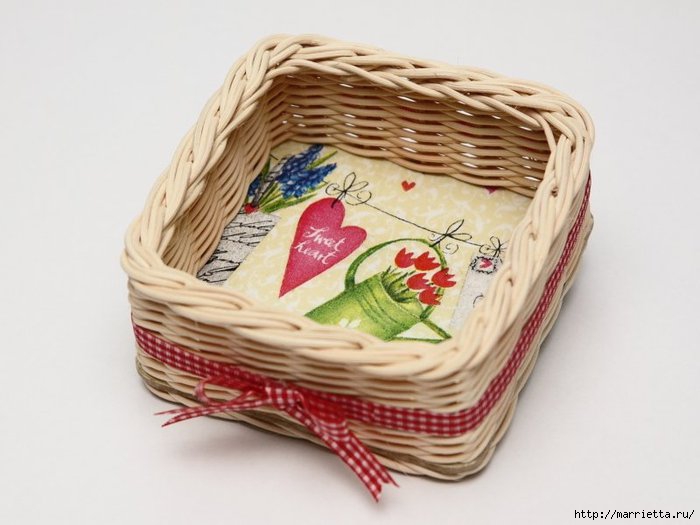
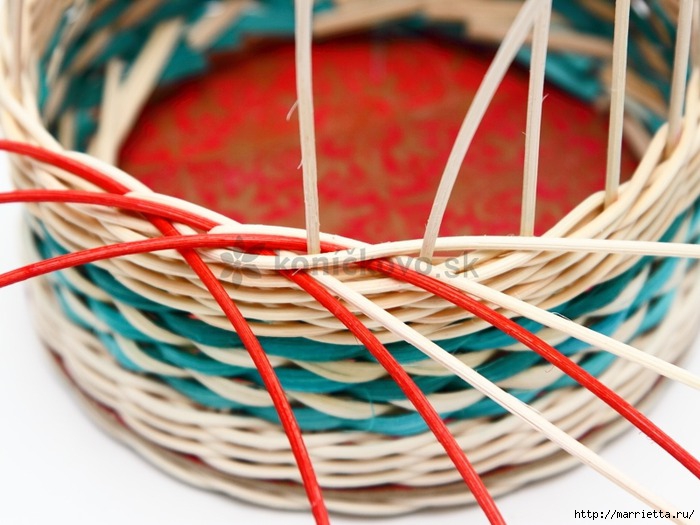
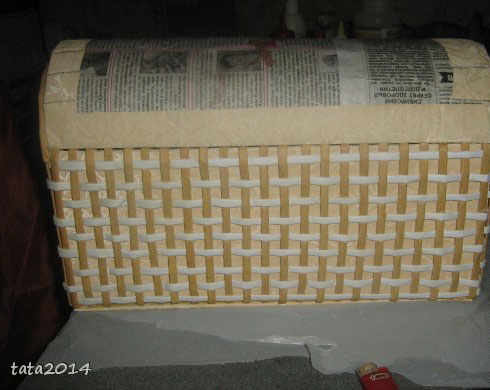 Arrange the cover as desired. Connect your imagination and forth.
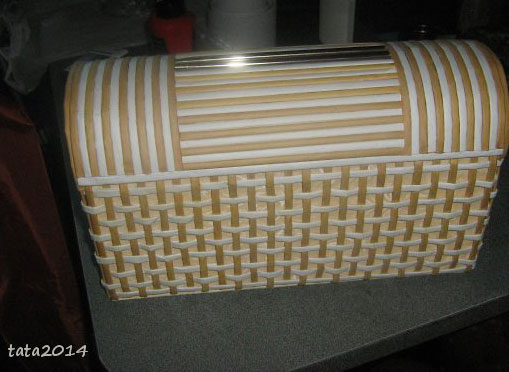 As a result of this work should be the following.
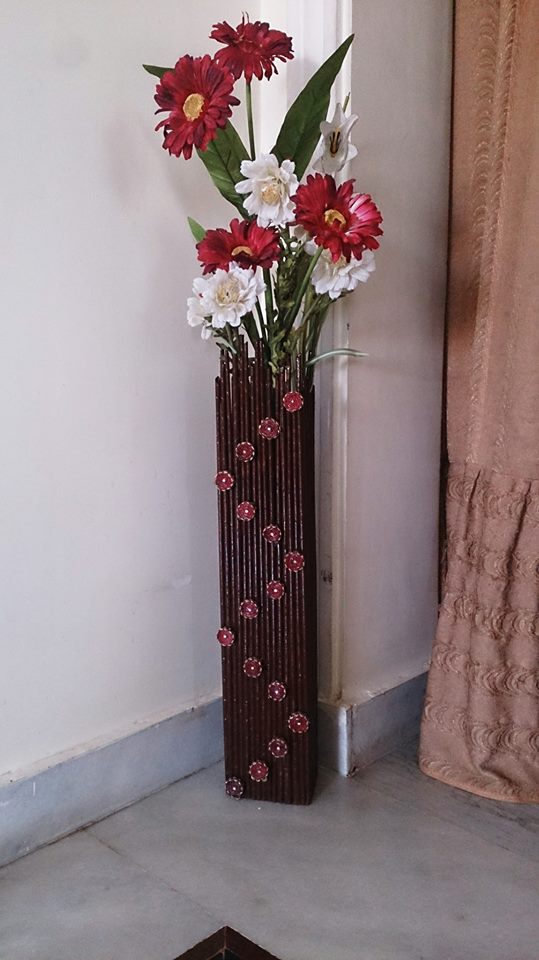
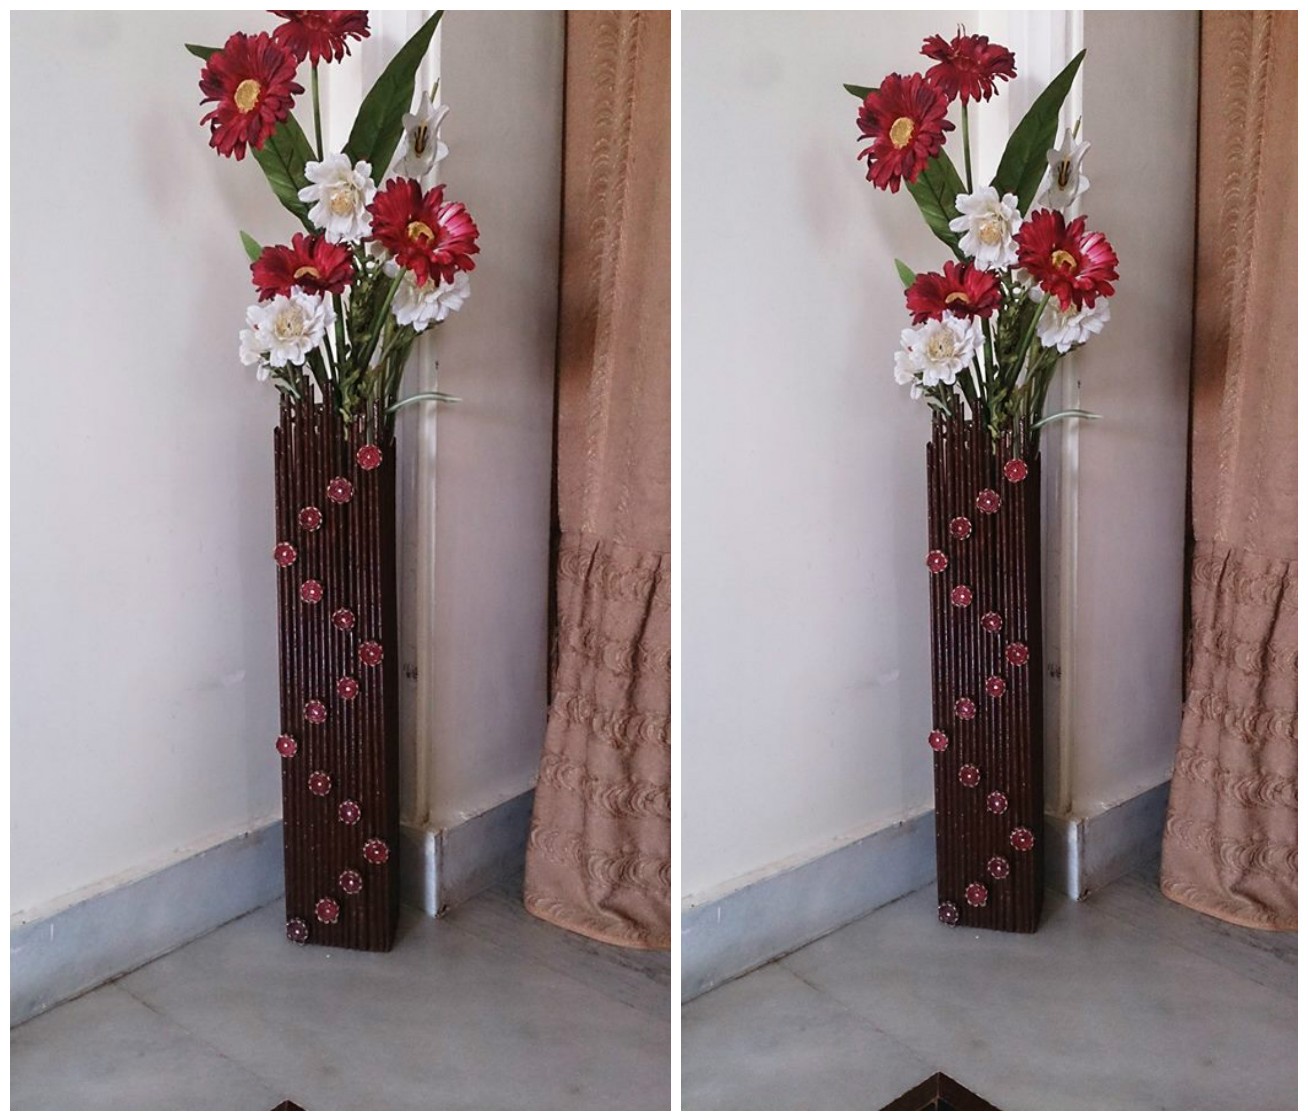
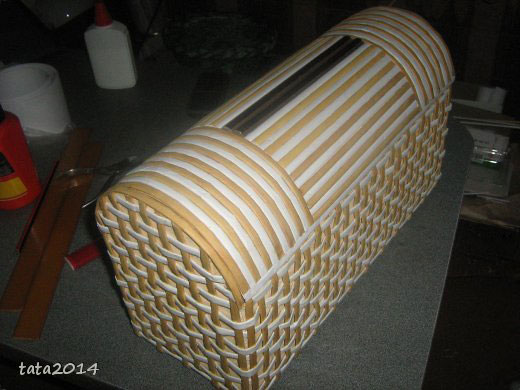 But, of course, calls for a chest decoration. Be creative and create. Let things made with their own hands, endows you with kindness, beauty, and warmth.
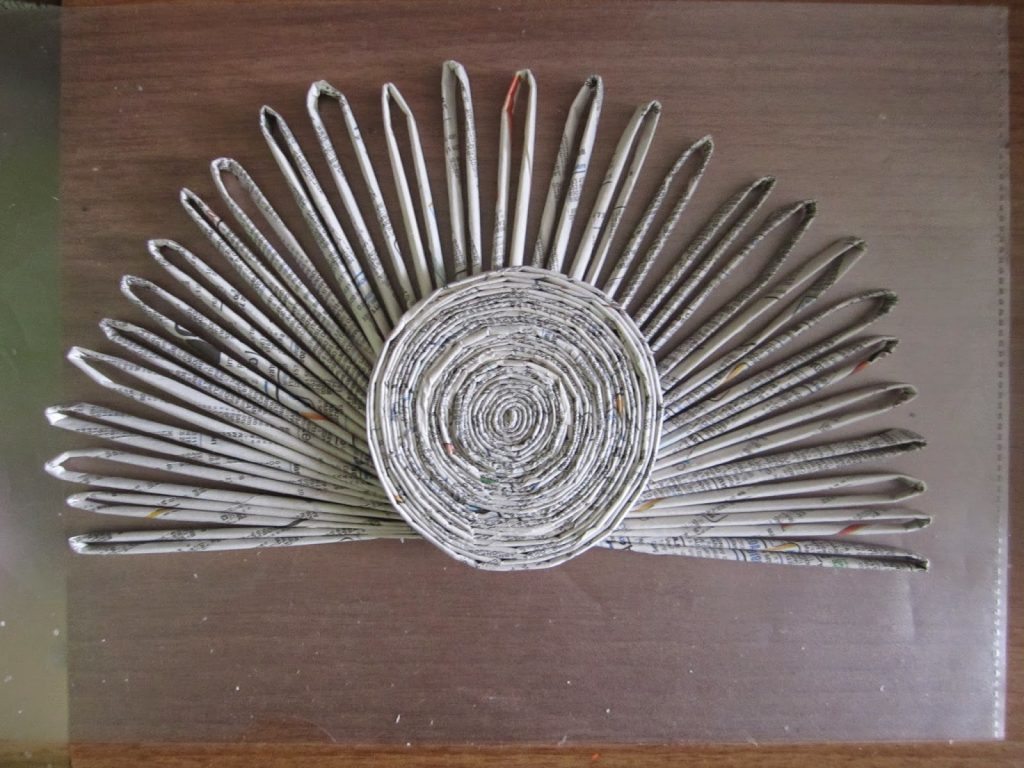


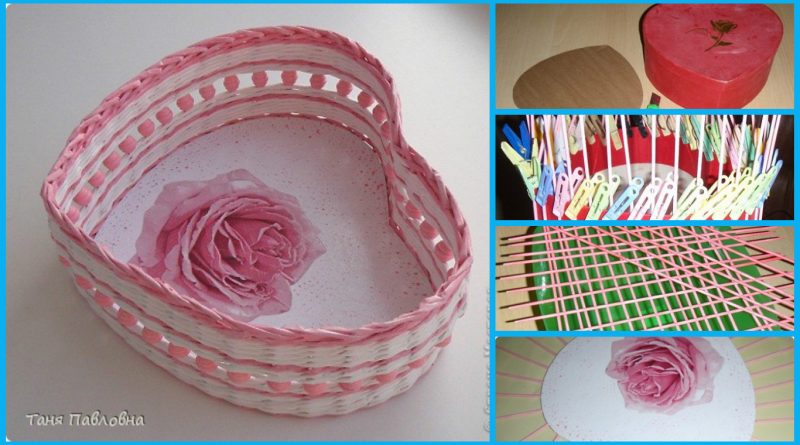
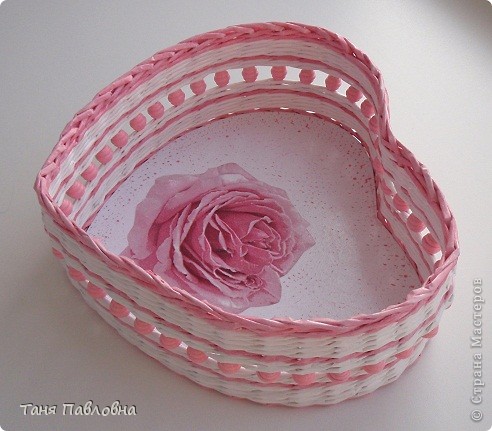
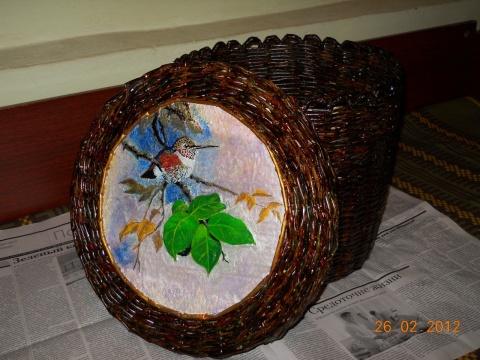
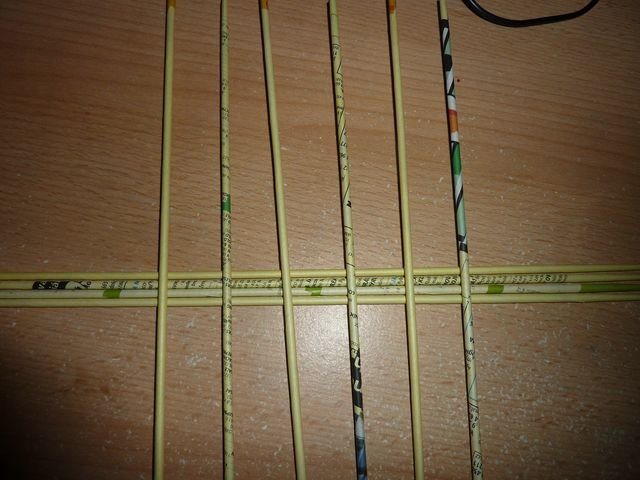
 Measured basis, divide the desired distance between the stanchions. If you can not without a trace, corrects the distance. I got 1,8sm. Normally, less is better.
 Postpones 1.8, starting from the center of the “heart”
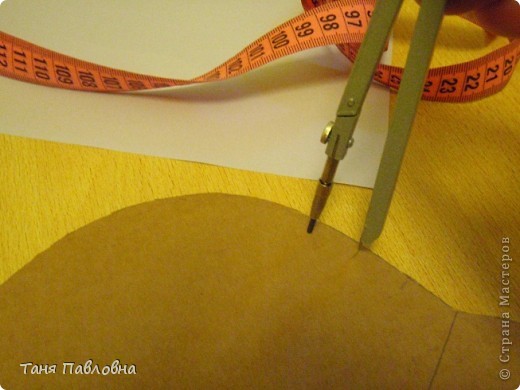 It turned out this way …
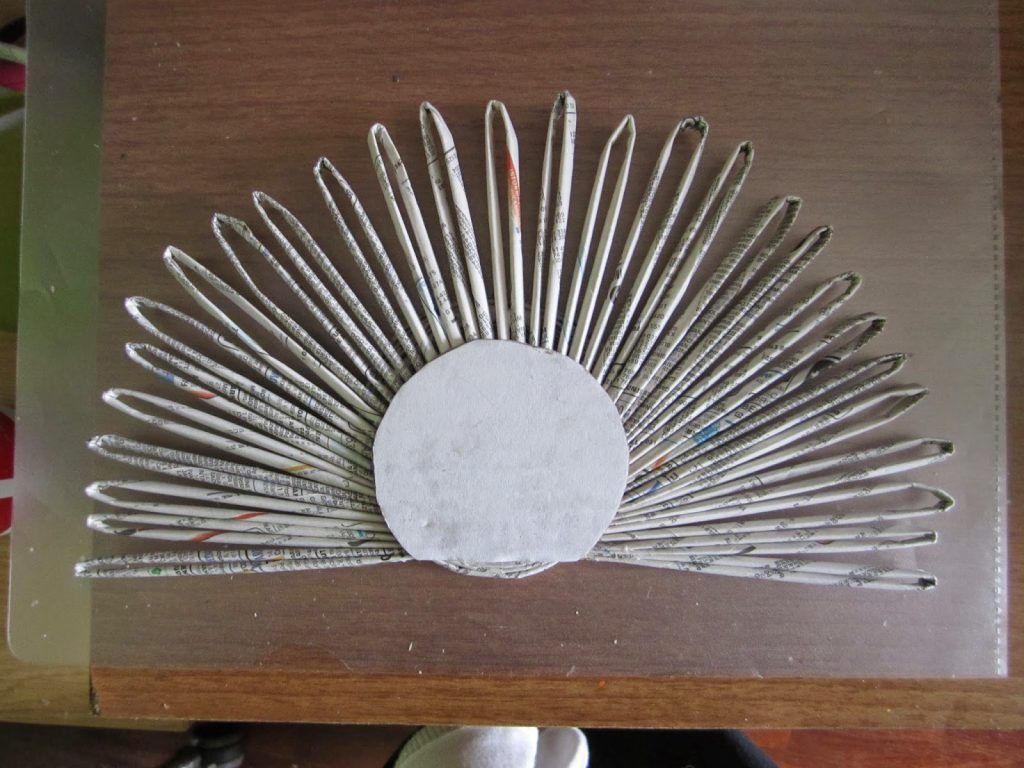
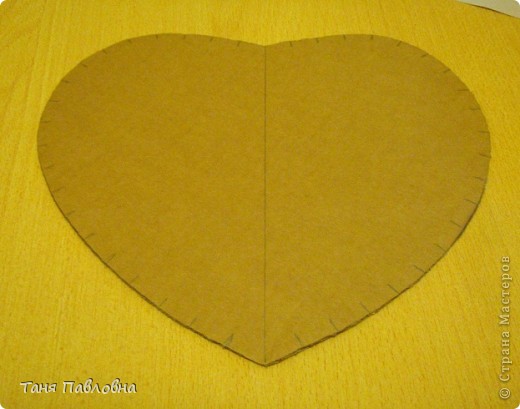 I prepare the paper
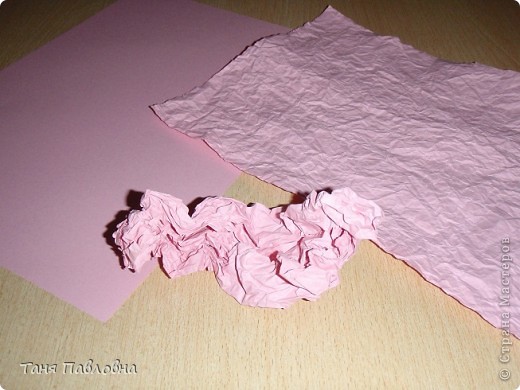 and more … The paper pasted on cardboard with white glue and left to dry. A bit dry and put under load, so as not curled hours on 12. The process of bonding is not removed, fascinated.
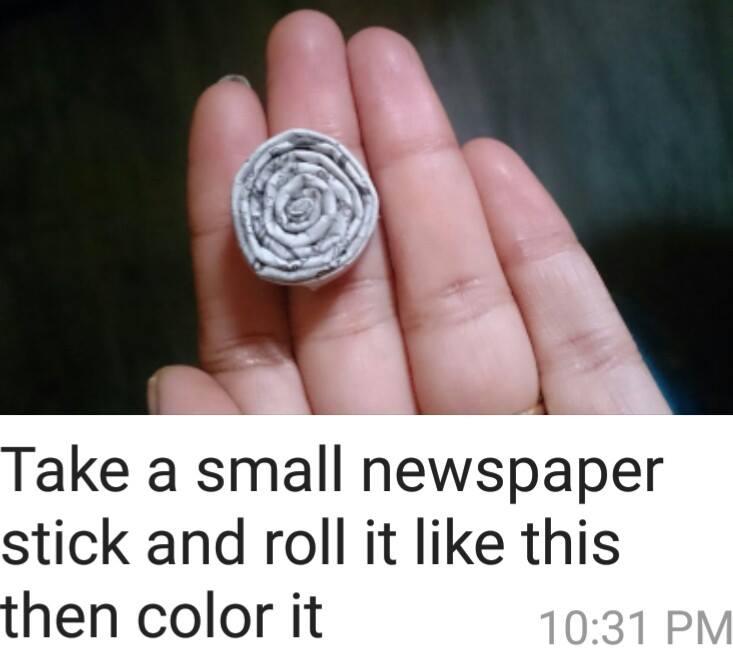
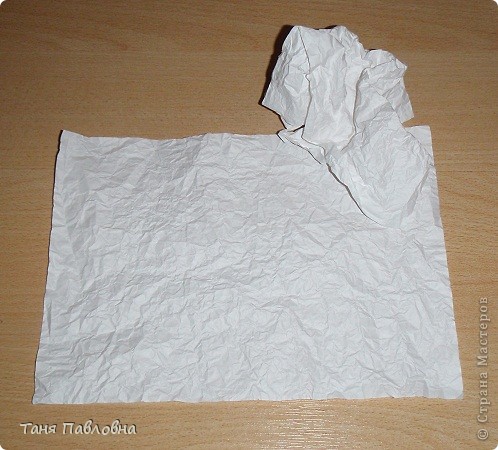 While the bottom of a dry, paint tubes.
 Expanding to dry and leave everything until the morning.
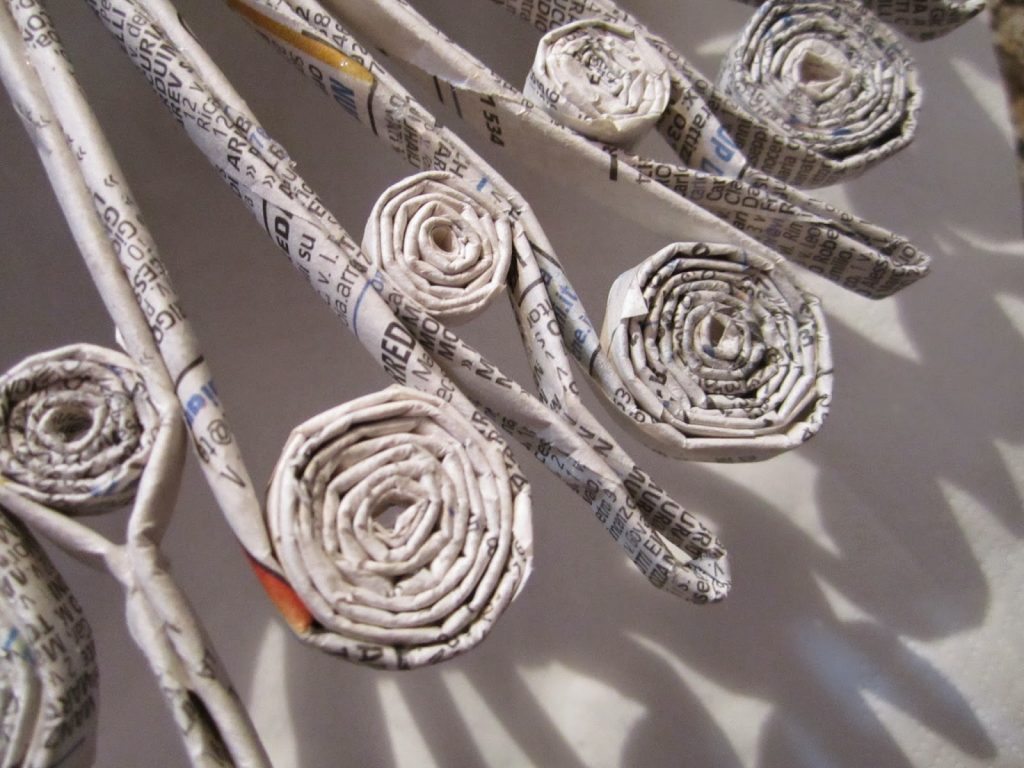
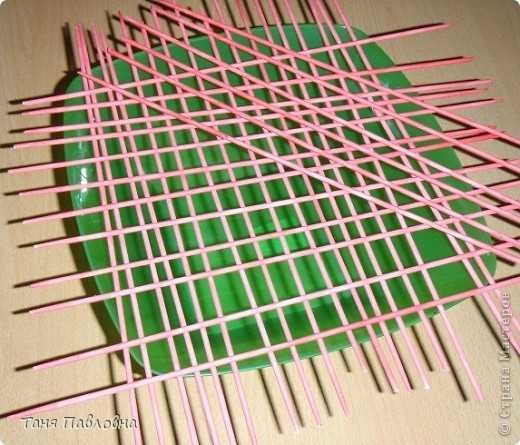 And in the morning for a surprise. That such a result is obtained. Apparently, the tubes were caught from different parties. I hope that will be enough of a color.
 Clay “Titan” pasting tube
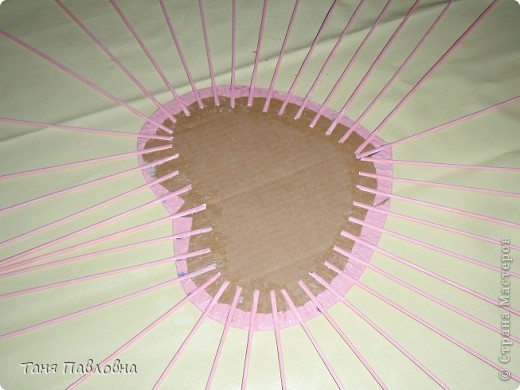 Top pasting the front of the bottoms. The process of gluing napkins too missed. Well, not all at once. Decoupage do with the file. I put the napkin “face” down at the file, pour some water into the center of a little and start to lift the edges to Vodicka gradually distributed on a napkin and no wrinkles. I add a little brush continue to keep raise for all parties. Try to keep the water before the time has not got to the edge (tear). When there is only the edge unglued, helping brush. When the napkin is flat, without wrinkles on the file, carefully poured the water and turn on the bedplate, smoothes. I remove the file from top to drip screed and PVA brush. Land.
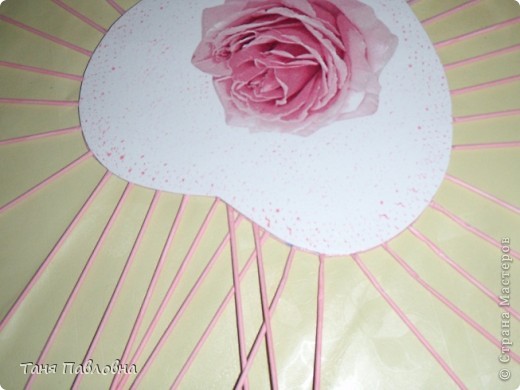 Yes! Two hearts are glued together, too, putting under pressure until it sets. It is better to wait a little longer. Clay grabbed. I begin to braid rope bottom of a single row.
 I lift the rack and begin to weave a rope in the two tubes.
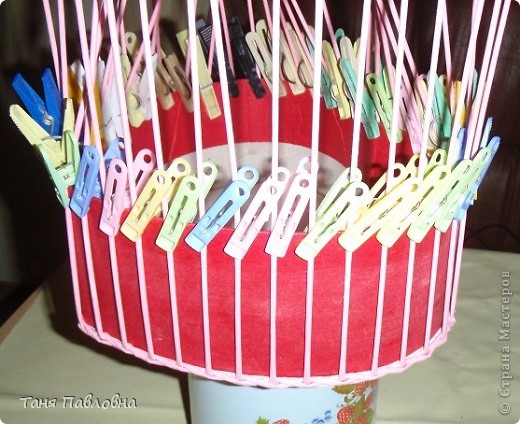 Get out of shape, that’s what happened. The result is not pleased with what’s nose turned out. It was necessary to equate the braid after varnishing.
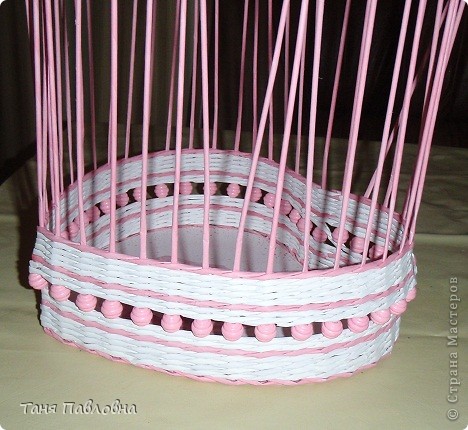 close: in front of the two, in the third
 It remains the last three tubes. The first of them is bent before the two and slips under the first rack start crisscrossing.
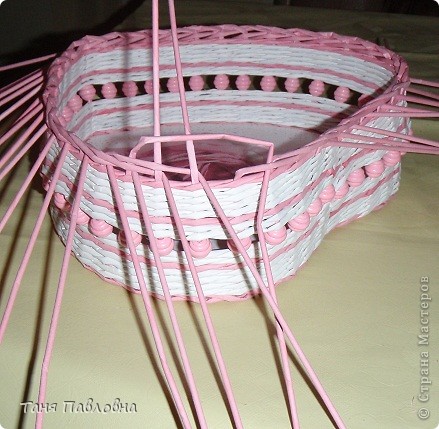 Second-on rising: before the third and the inside of the first braided basket
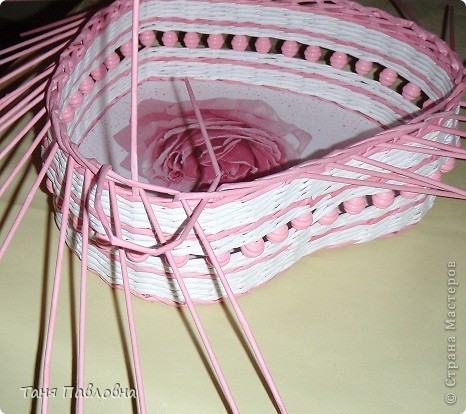 for the second braided out
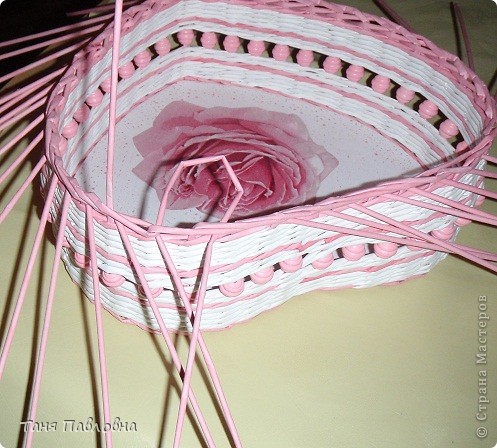 by drawing
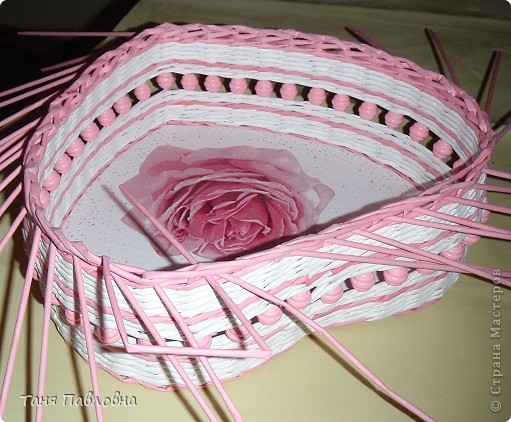 Fotik agreed to work only to that frame. I had to finish without him.
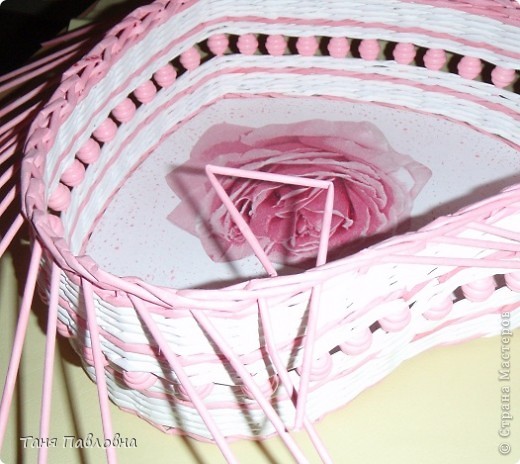 And it is you! This beauty blossomed in my yard, and I am very pleased.
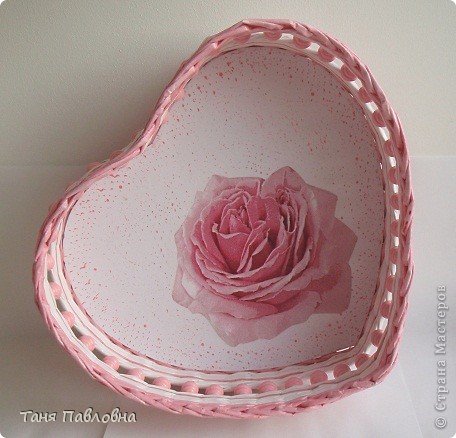
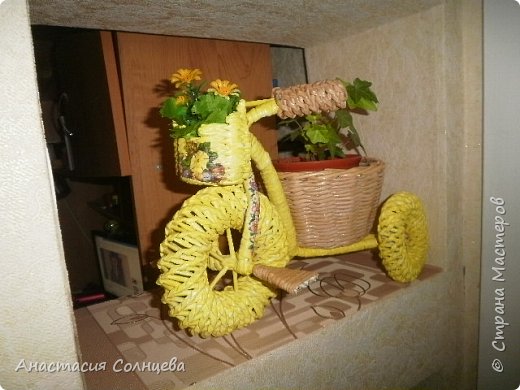 here is a great turned out to me !! She did the first time, but it seems like now and you. we trailed)
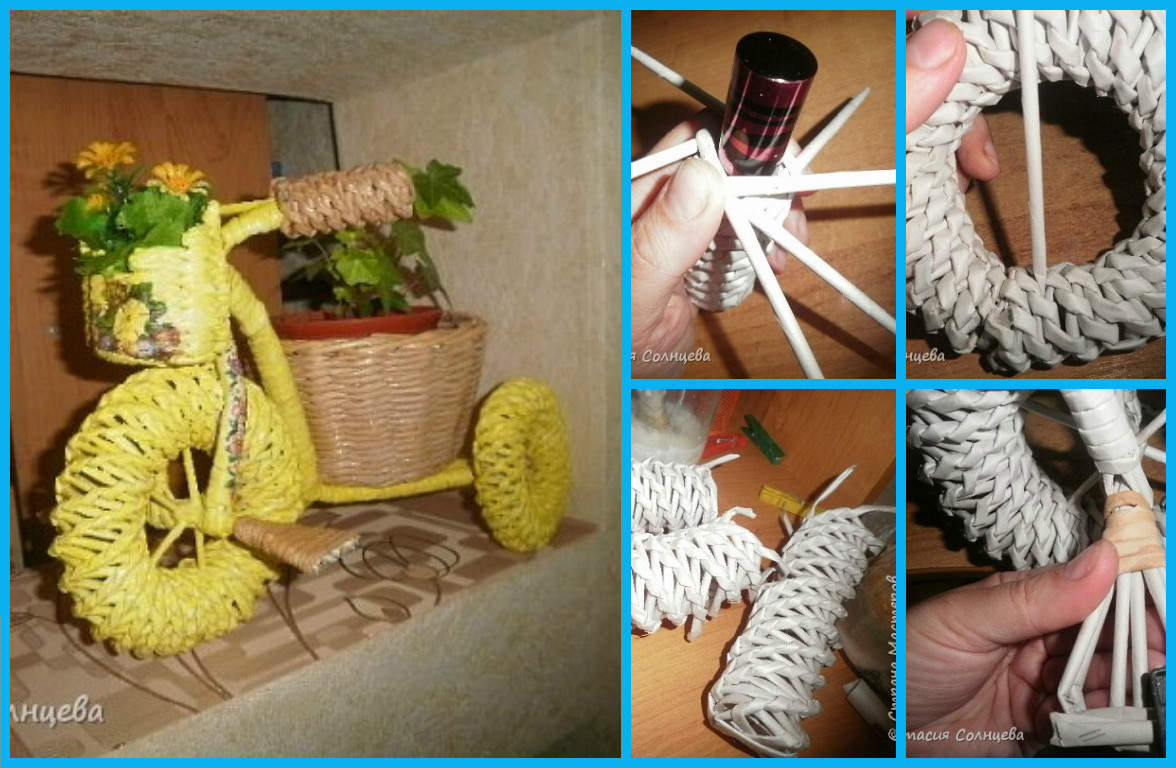
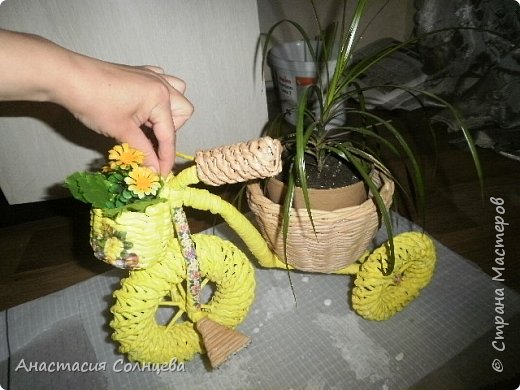 and so weave three spiral tubes, the diameter of the small wheel on twisted 1.5cm labial .a large wheel diameter of 3 cm (in a jar of acrylic paint TIP: each tube to take the glue otherwise imparting wheel will form like this …
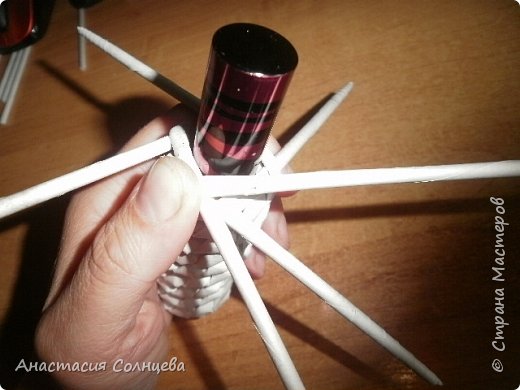 Here is my first wheel, everything fell apart (((and so weave a length of 29cm all three lanes, turn a wheel, we coat with glue the edges and that’s how I did (you can sew thread), but I took the ribbon and strongly bound, like this
 leave overnight
 We threaded tubes so as to get the “spokes”
 in small 4spitsy, a large wheel 6
 do first rear axle, three tube bend (tubes) and sticks to the inside
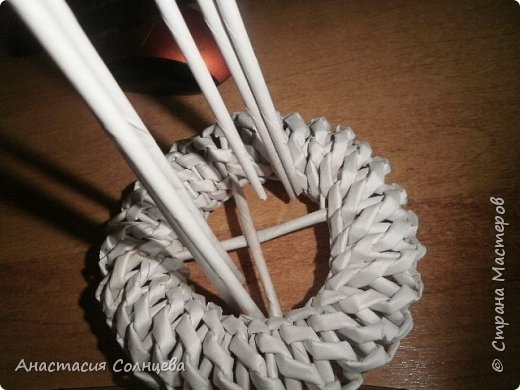 anchoring thread
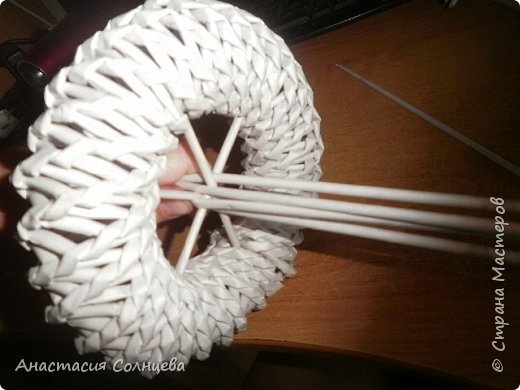
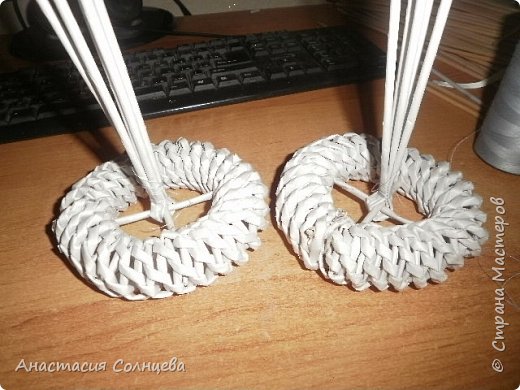 tails and connect the wheel thread
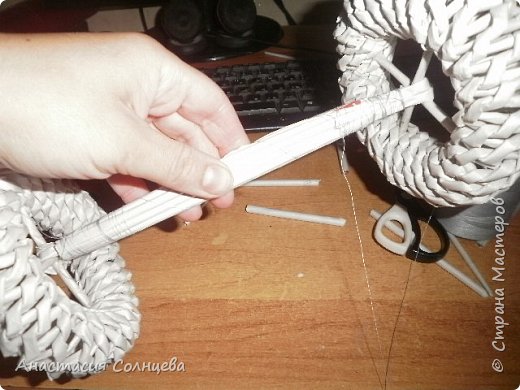 again take 3 tube
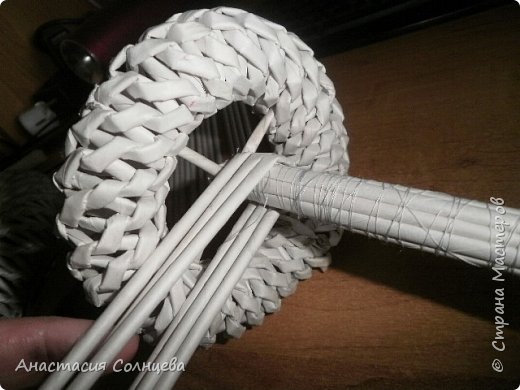 connect crisscross and connect
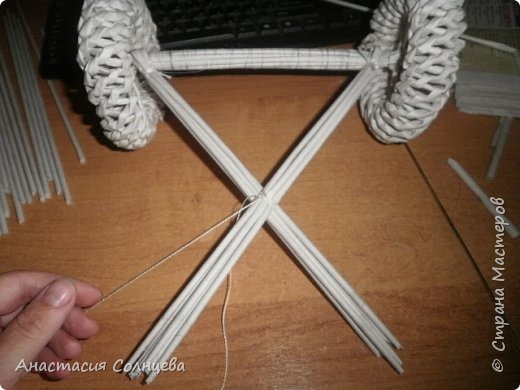 front wheel: 6 tubes take conventional threaded to Sredinka and connect on both sides
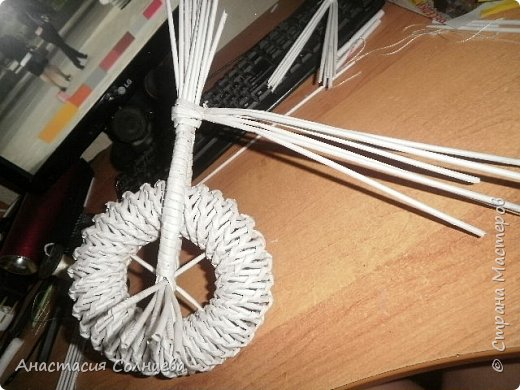
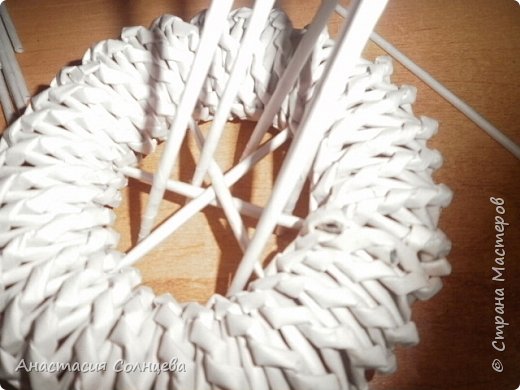
 ie, left and right
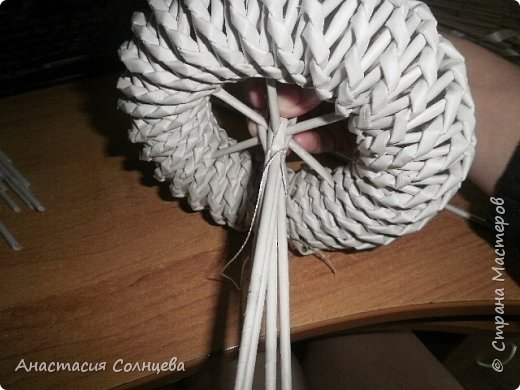 they put on another 3 tubes connect and entwine thread tube
 we do plug
 second and anchoring, and the tails are driving
 We put on another 3 tube in place of the plug connections, anchoring thread
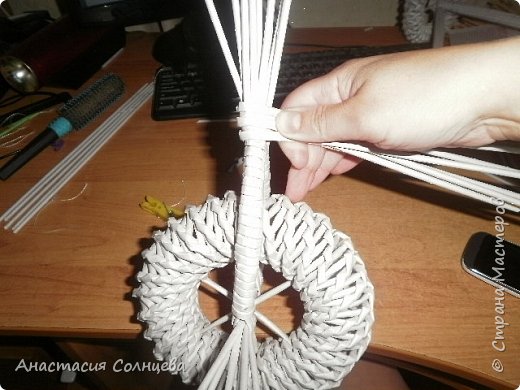
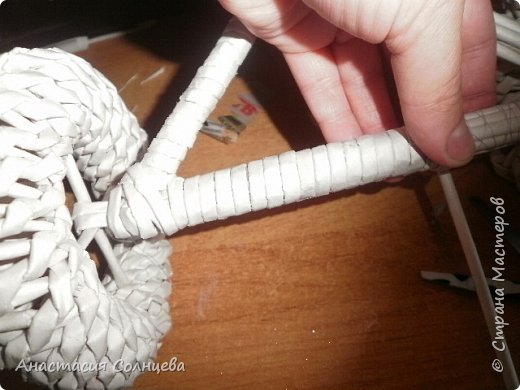
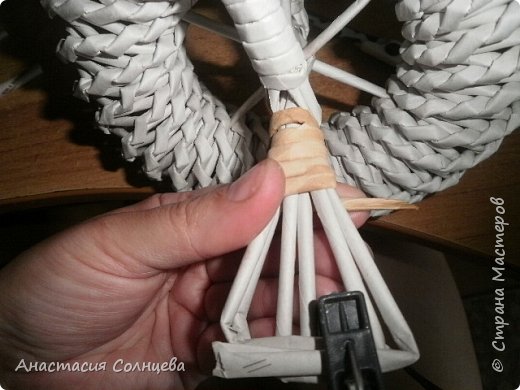
 weave knob on the steering wheel 9cm
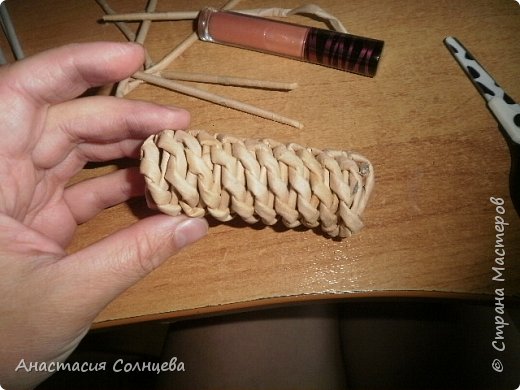 share
share entwine and put on glue
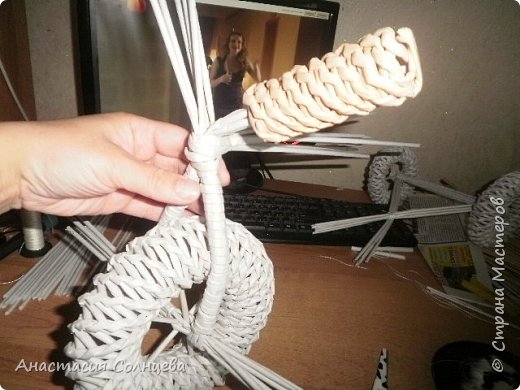 Here frame plus.soedinyaem
 and begin to wrap the entire frame
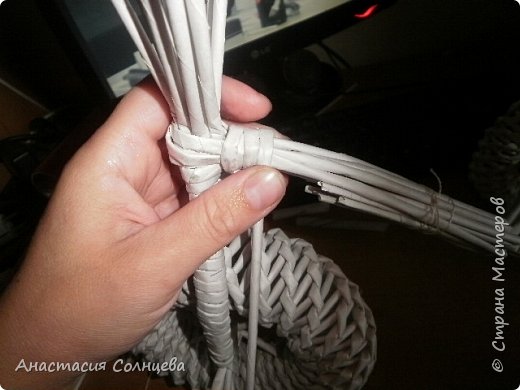
 as my daughter says FIDALIKI)))) take the tube on the front wheel, divide by 2 pieces
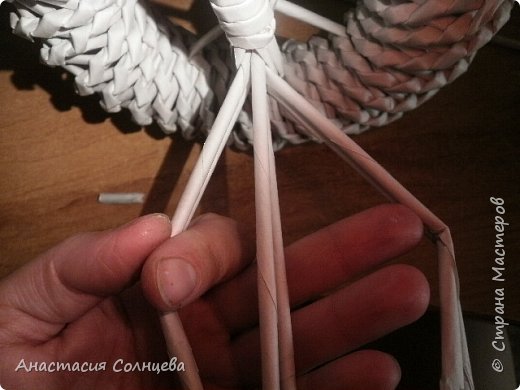 form a triangle and entwine, tails I cut off
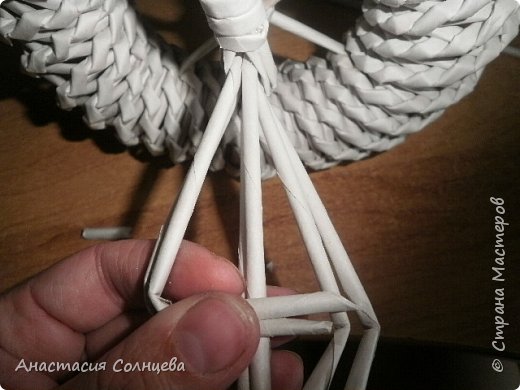
 white paint, dry them
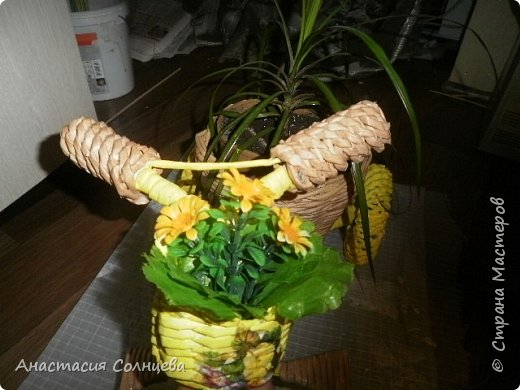
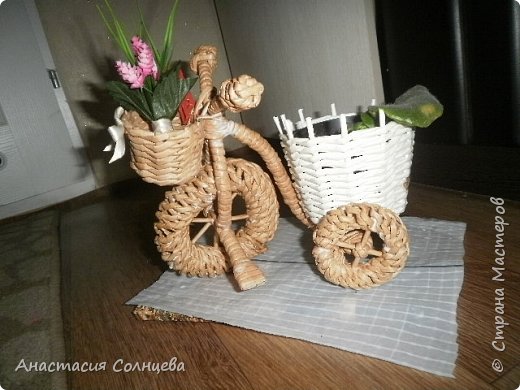
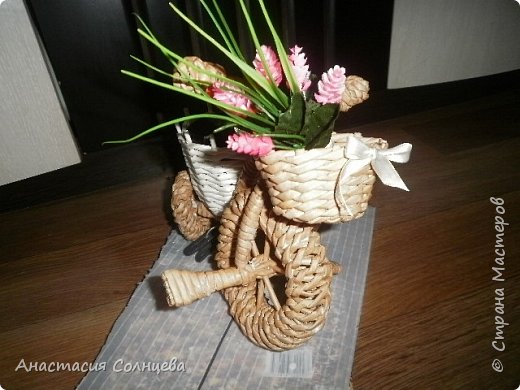
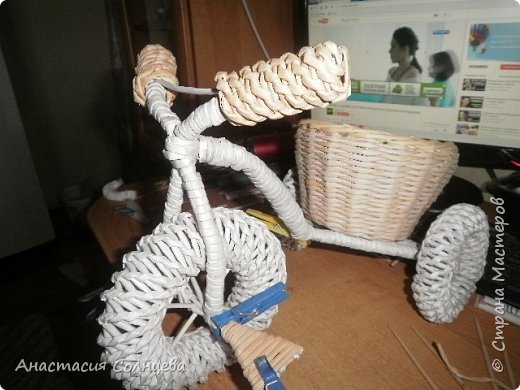 He wove this basket’s front will hang on the handlebars
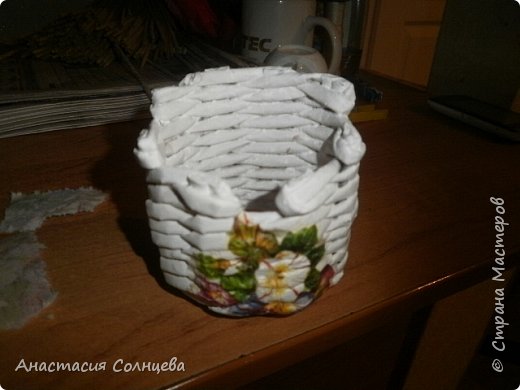 something like that
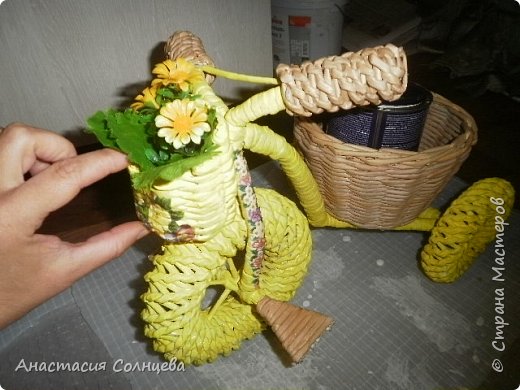
 and here is another
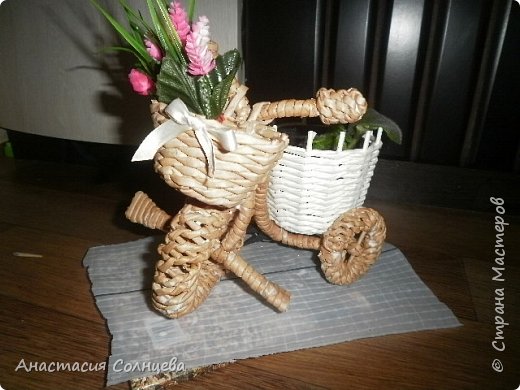
 I wish you success in the work, I hope has been useful for you!
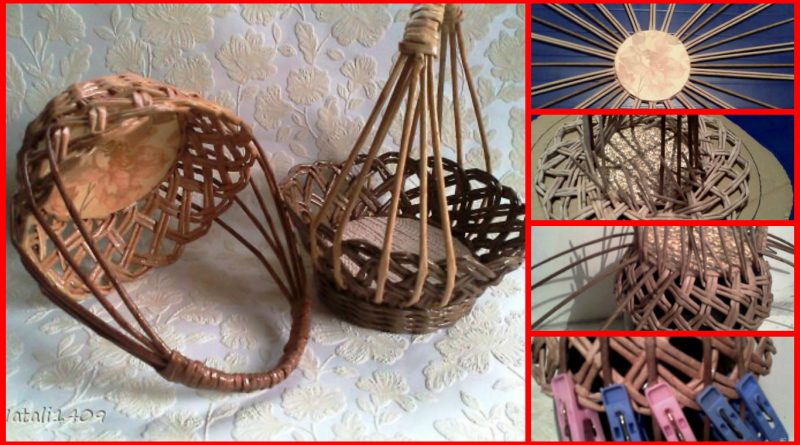
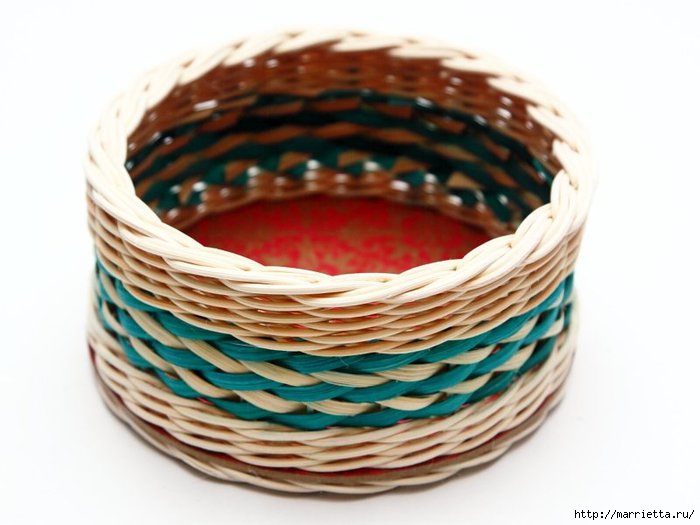
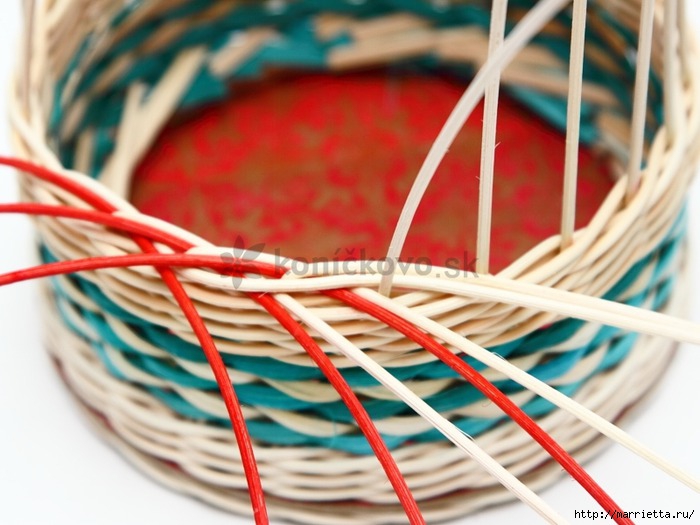
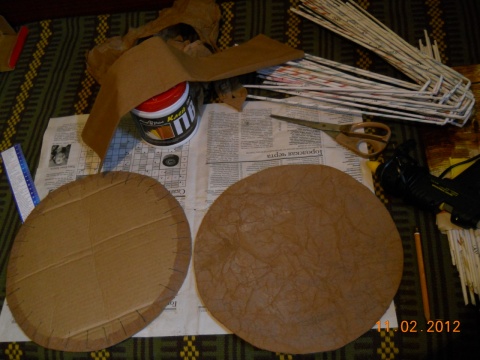
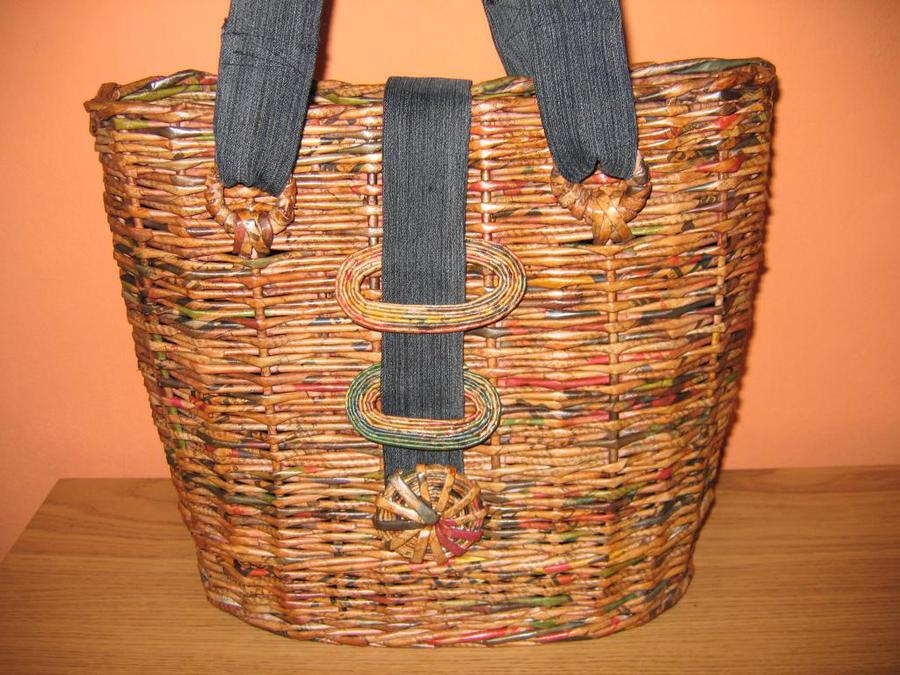
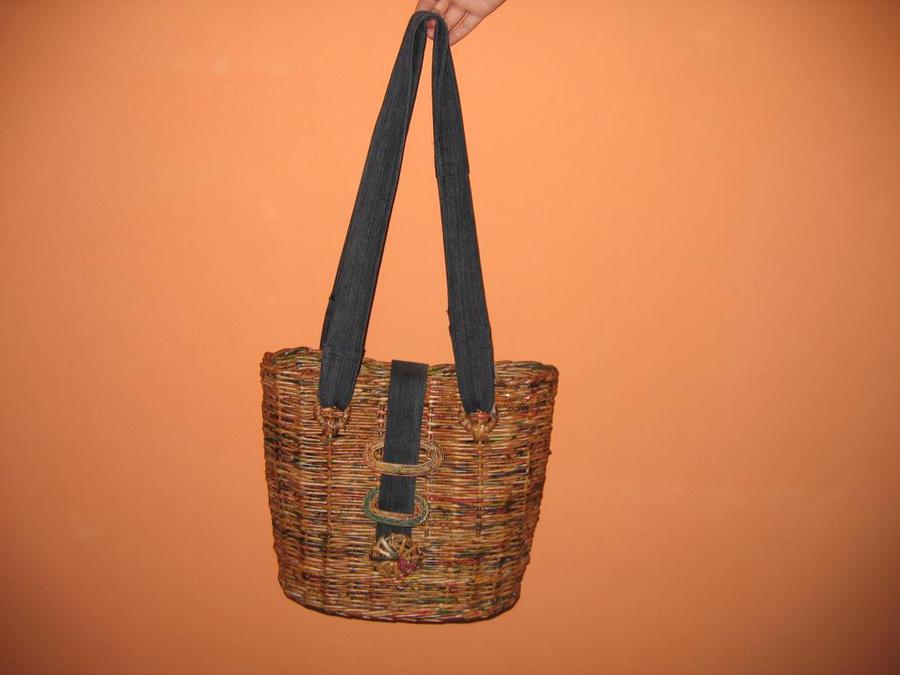
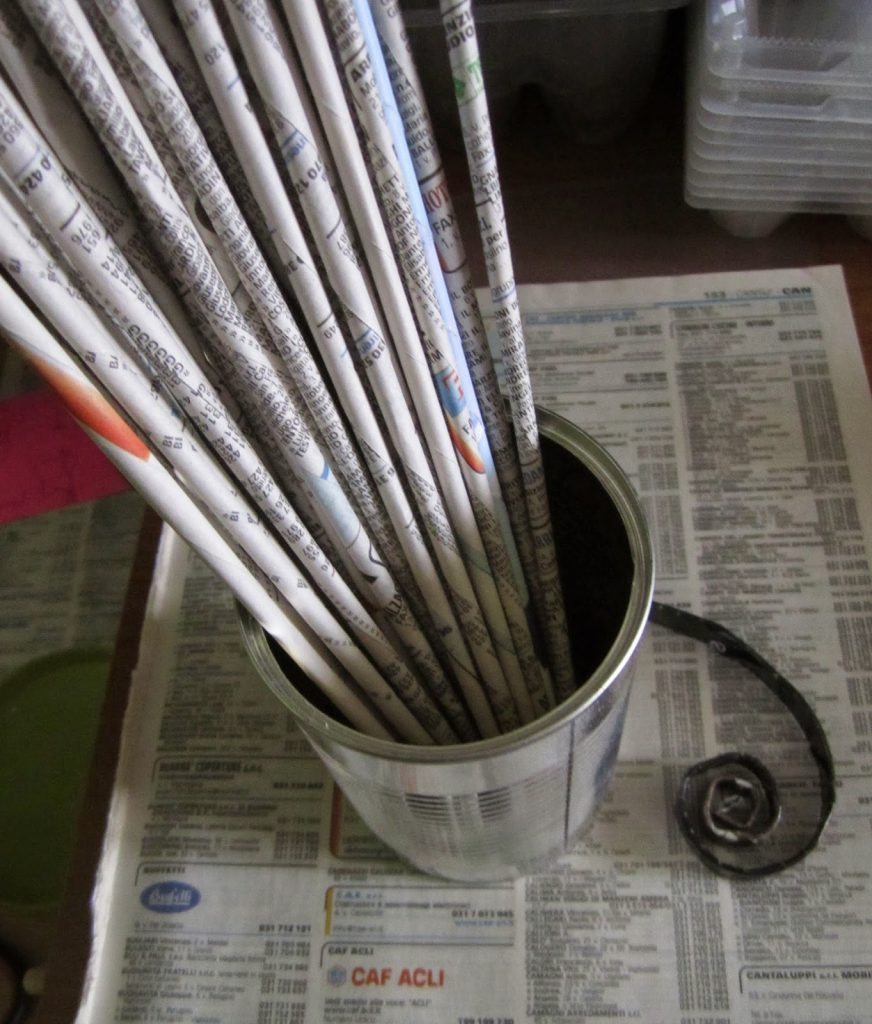
 we need:
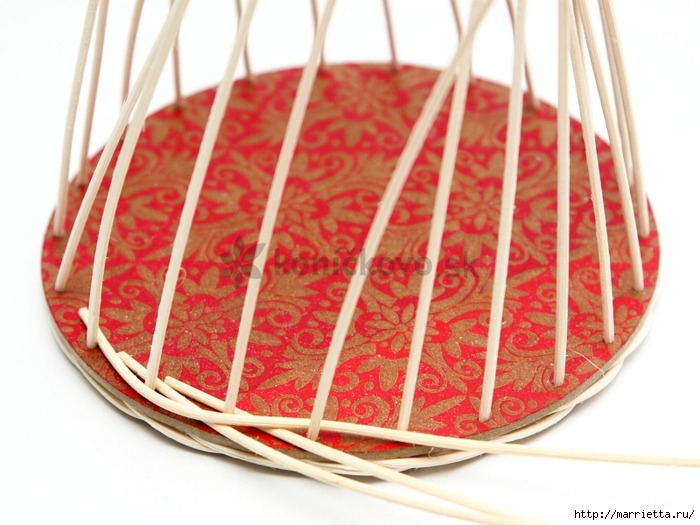
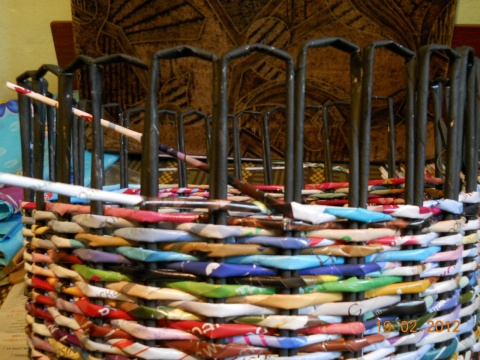
 Between cartons, wallpapered (I) insert 18 pairs of tubes (photo light) and 5 tubes for pins, placing them between pairs at a time. (5 tubes between the pairs, 4 pairs missing and another 5 tubes). I have them slightly darker.
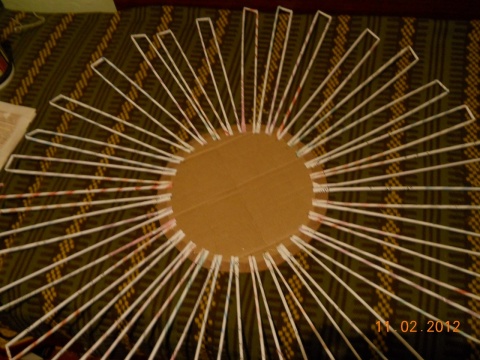
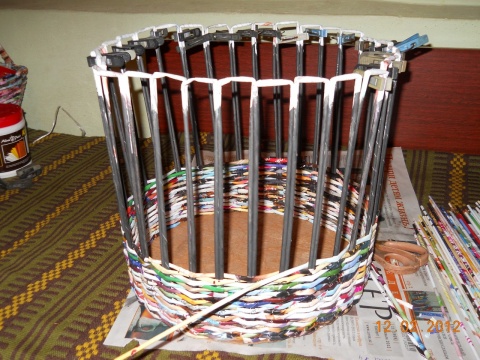
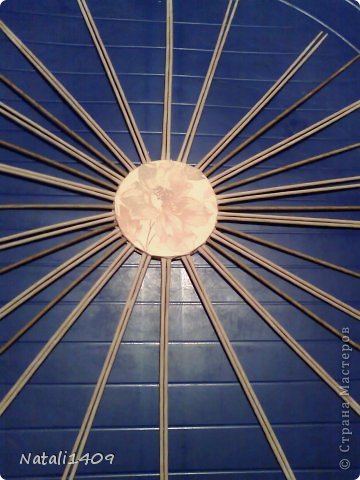 We raise our tubes for pens up and fastening a pin. The product is face down.
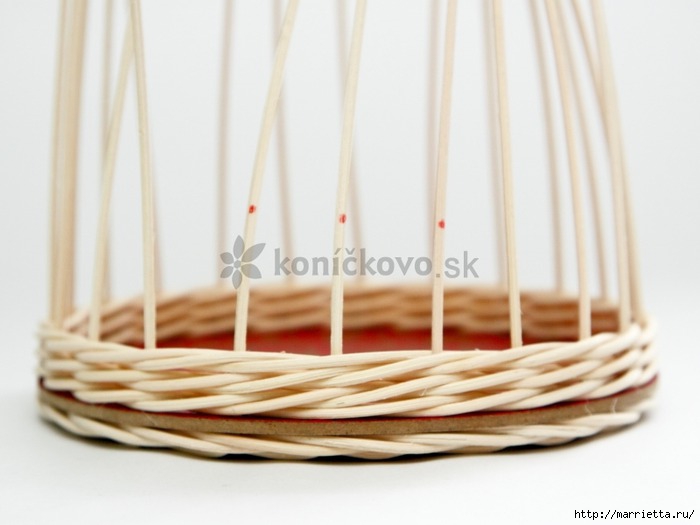
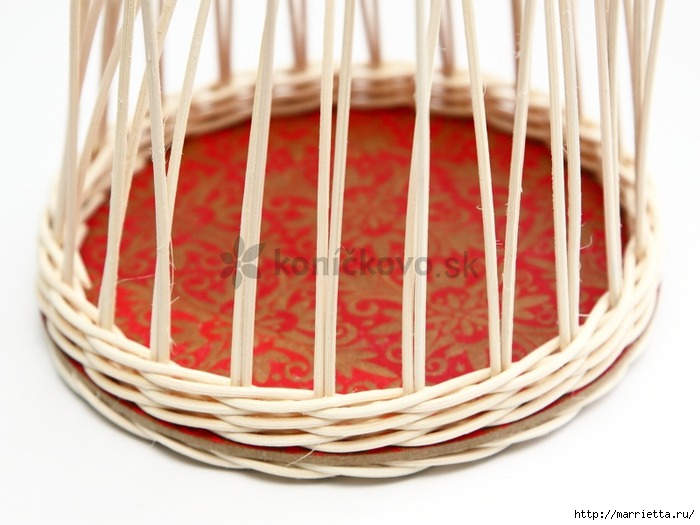
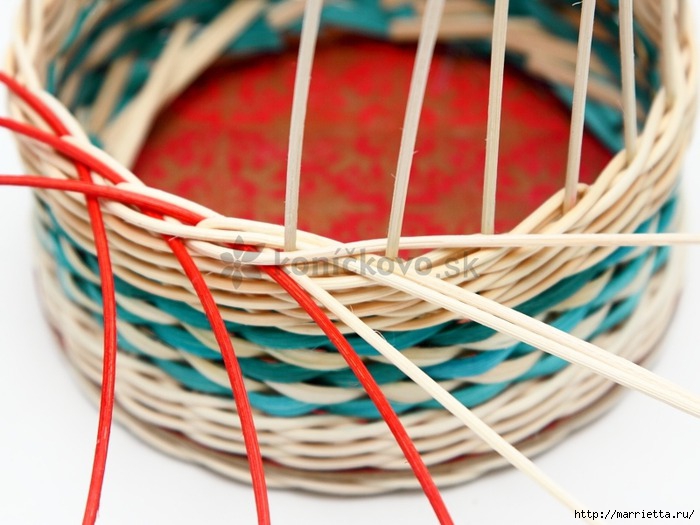
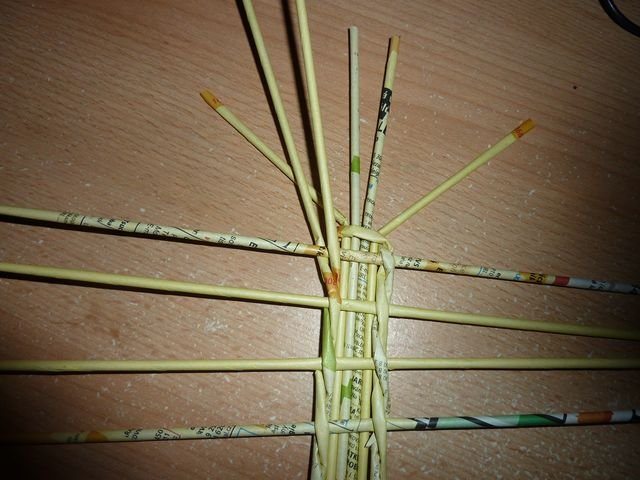
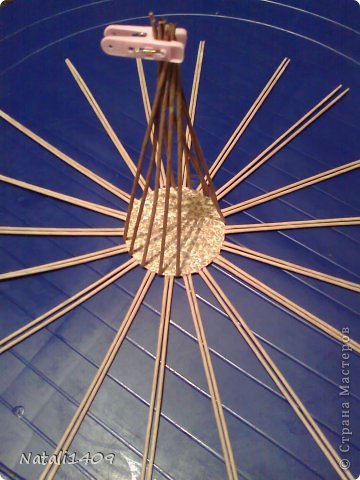 In our working pairs propel pigtails, ponytails from workers remove the tubes in the middle.
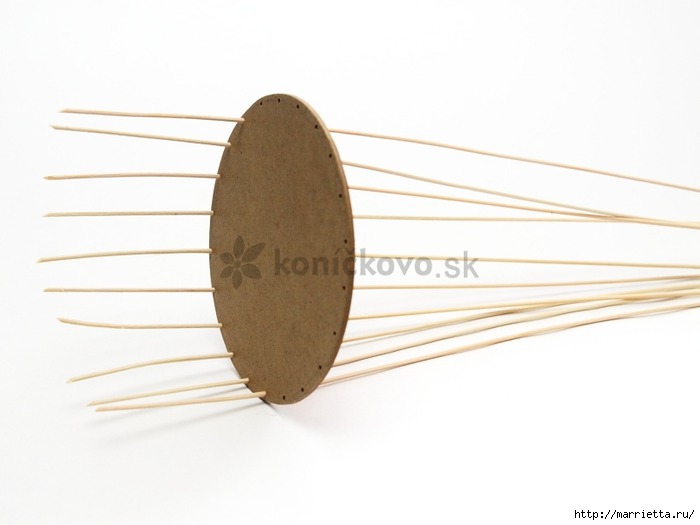
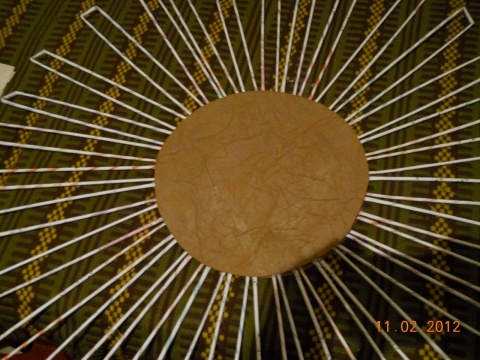
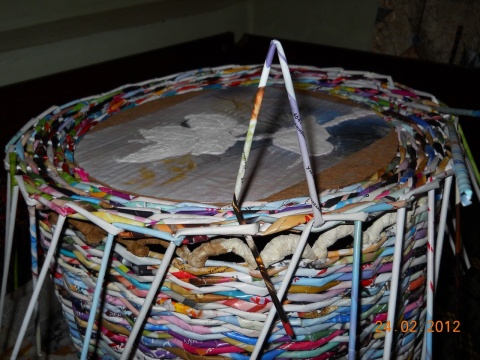
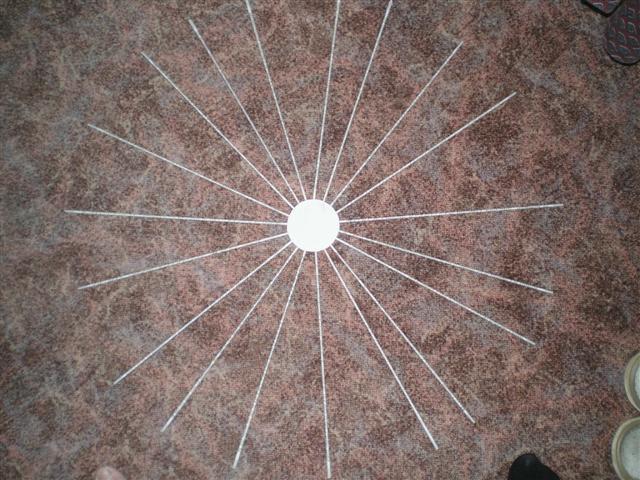
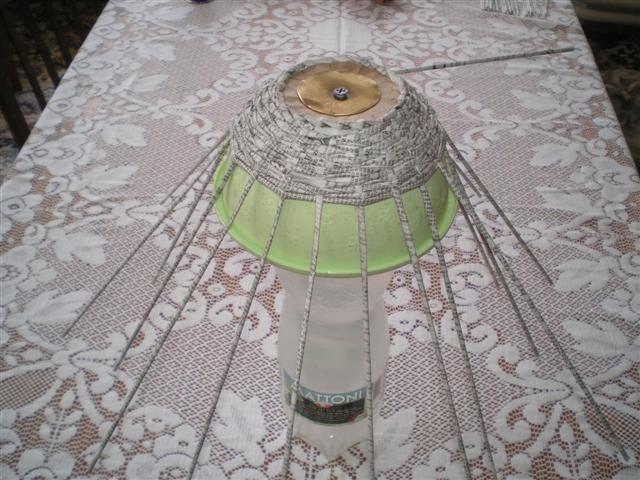
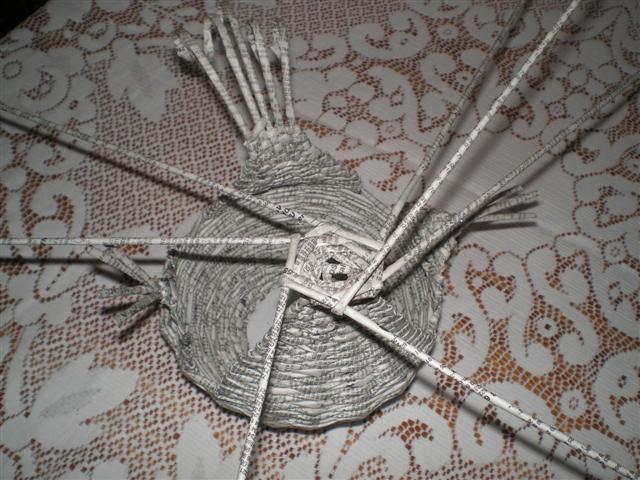
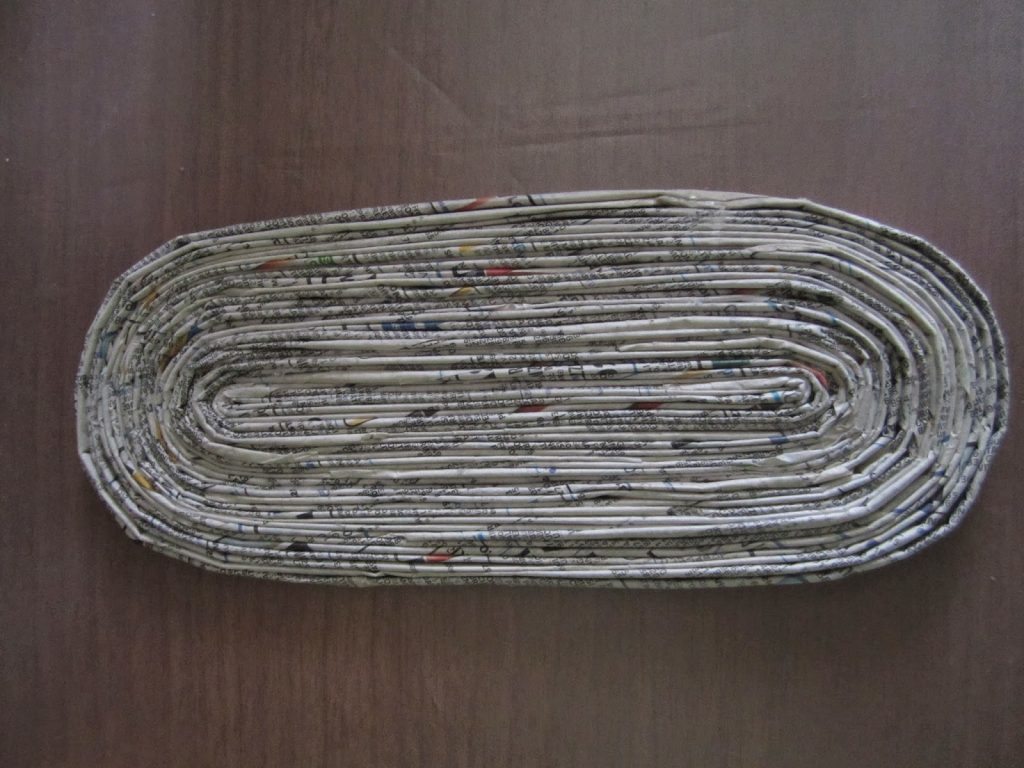
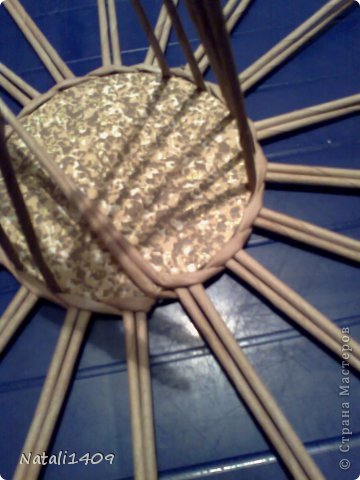 For simplicity and convenience, I drew on the defective cardboard concentric circles. Small in diameter as our bedplate, and two others of your choice. 6-8cm on their radius greater than the radius of the smaller circle. It depends on how high you want to get candy.
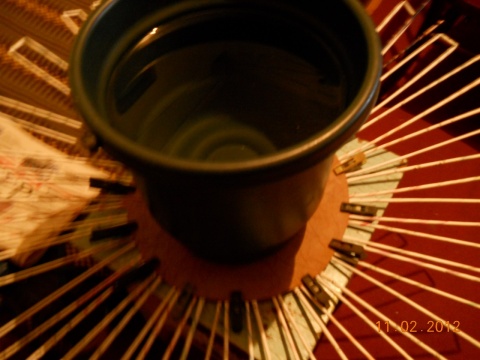
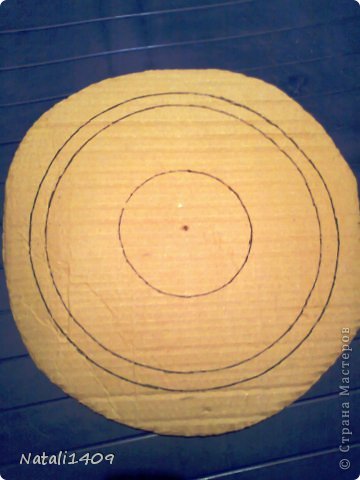 Set in the center at the bottom of a small circle, and our anchoring its masking tape.
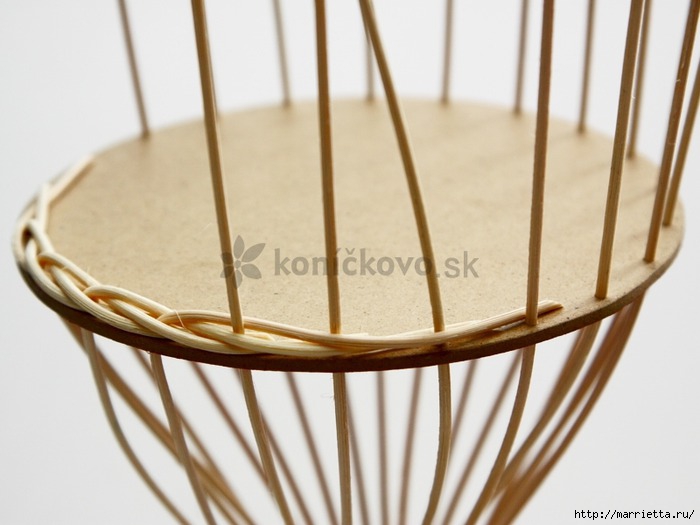
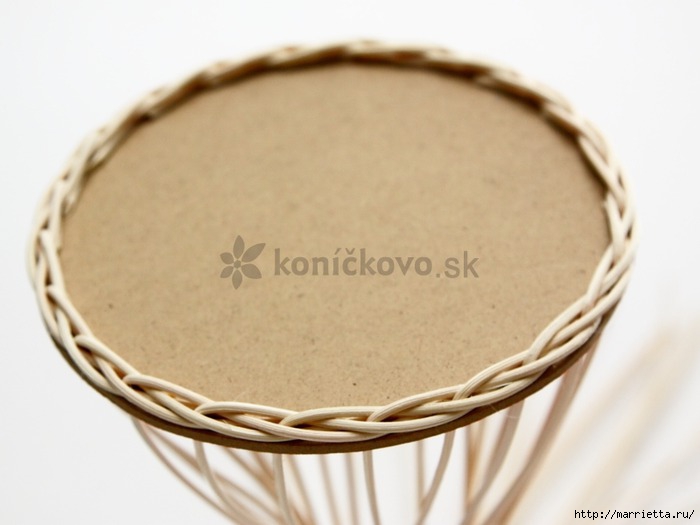
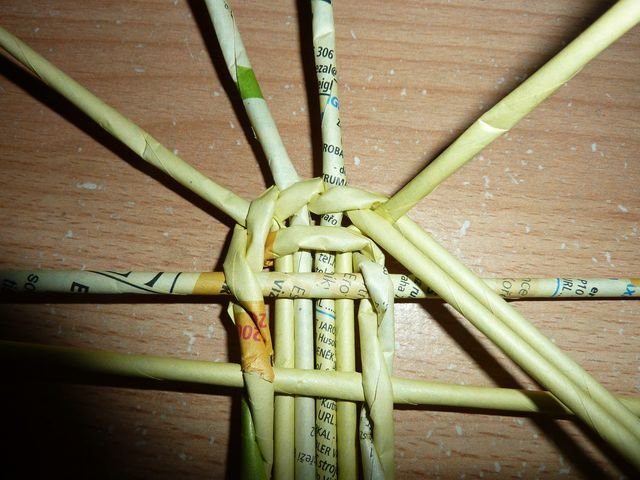
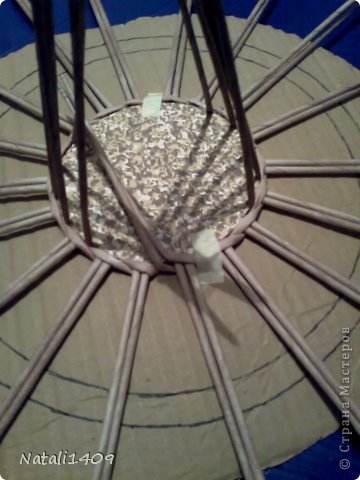 Now we carry out any trouble. I have a couple of tubes over the first, under the second, over the third, a fourth, and displayed on the top. The main requirement is that the tubes were wetted and after the last binding went up.
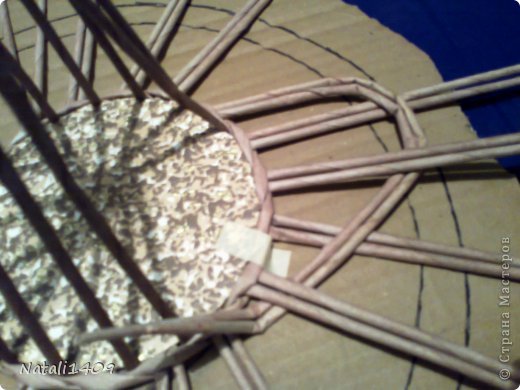 I moved counterclockwise. To do so with all the pairs. At the same time, we look to the fold height touched our circle. In this basket, I chose a smaller circle.
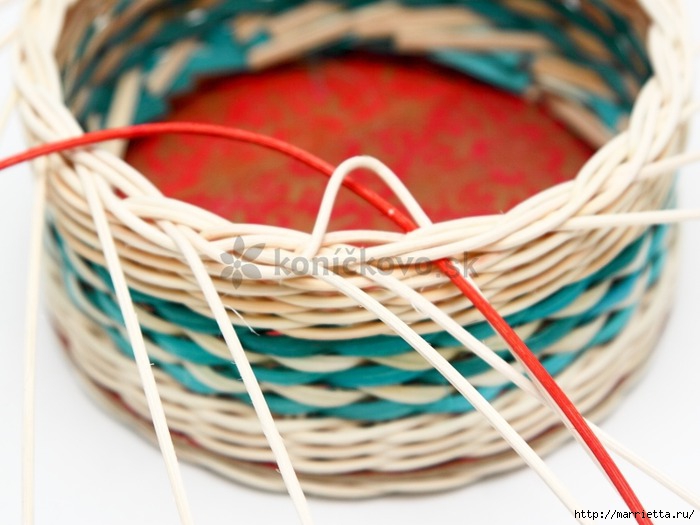
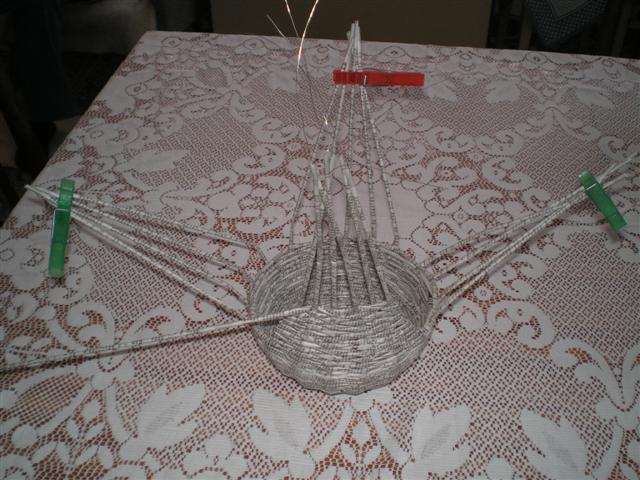
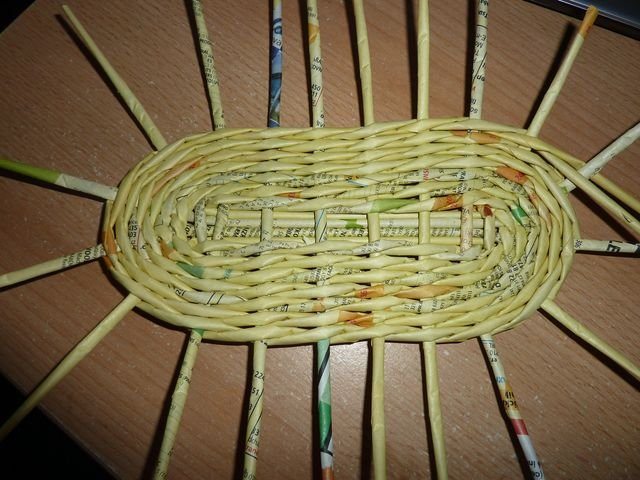
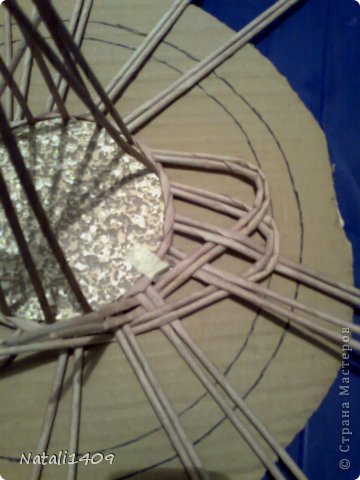 This is what happens when we have completely stranded all pairs of tubes. Now you are all good provisos, pull, etc.
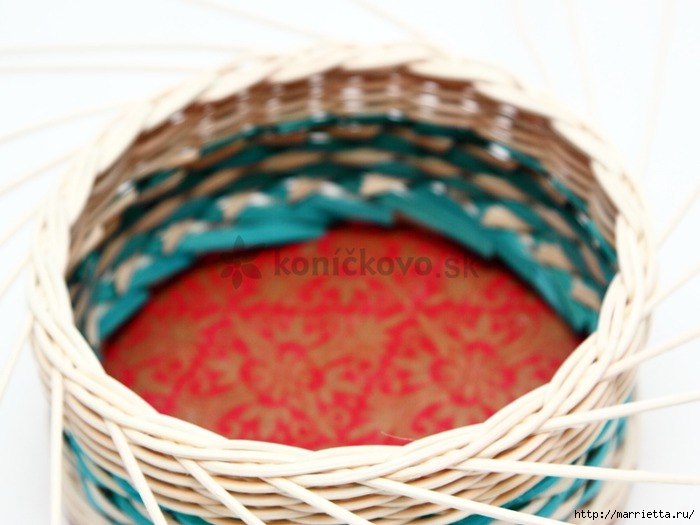
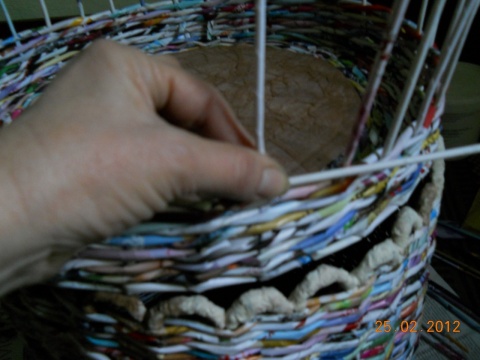
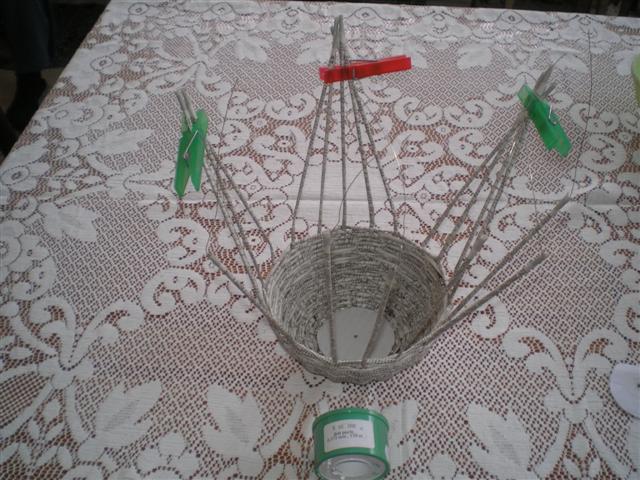
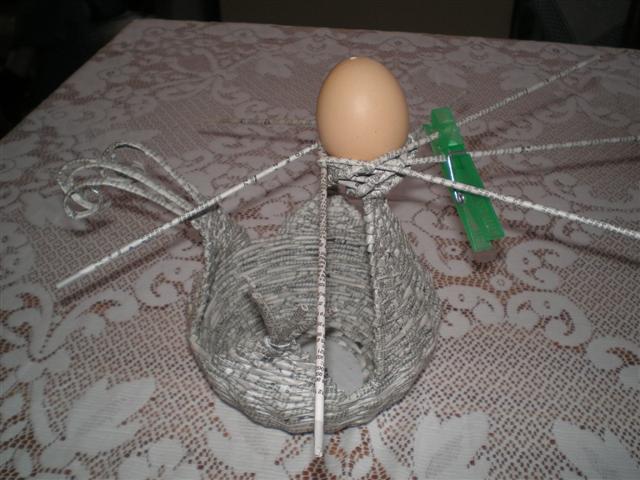
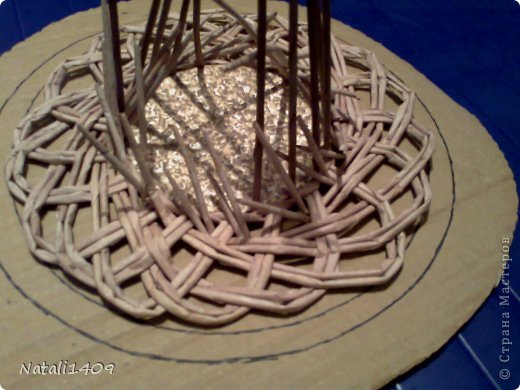 Next, remove the masking tape and our entire structure is placed upside down on a 3-liter. Carefully drop the cover down, clutching. Our tails raising up- and tubes to the handle go down.
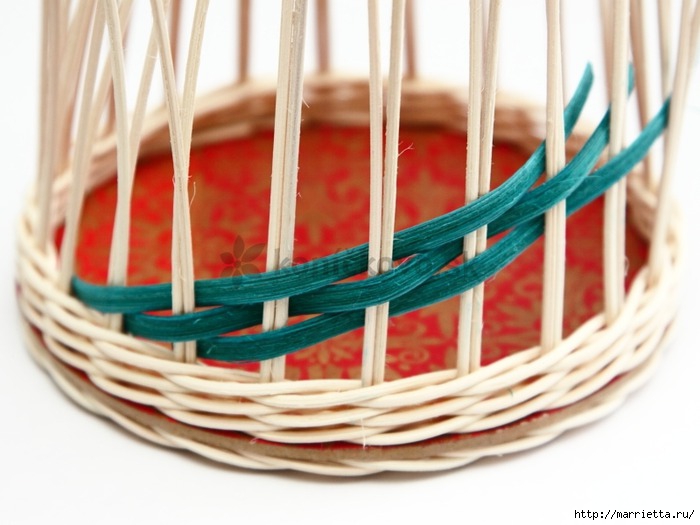
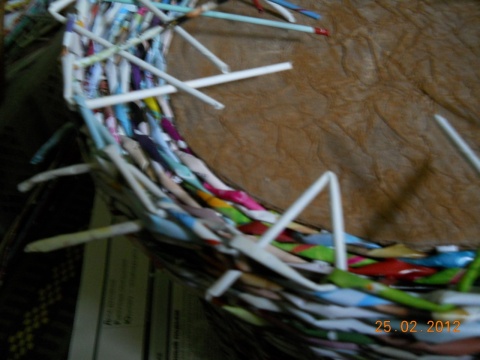
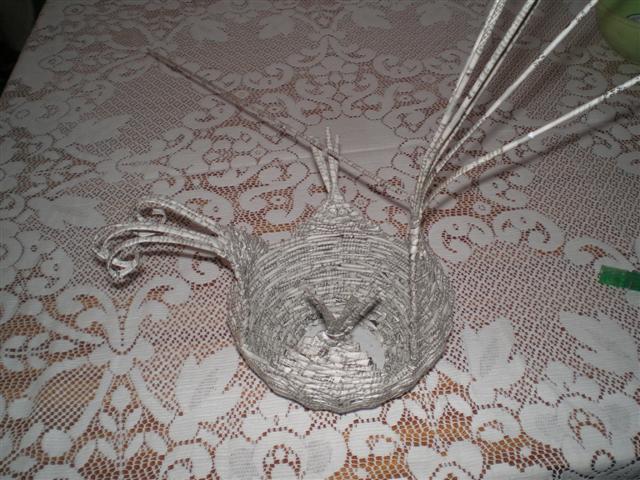
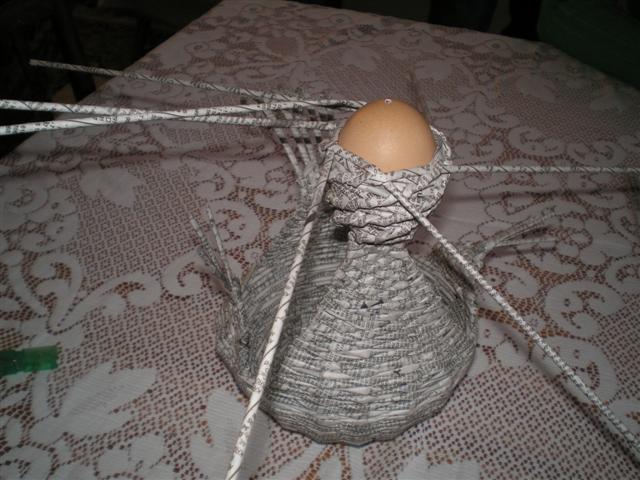
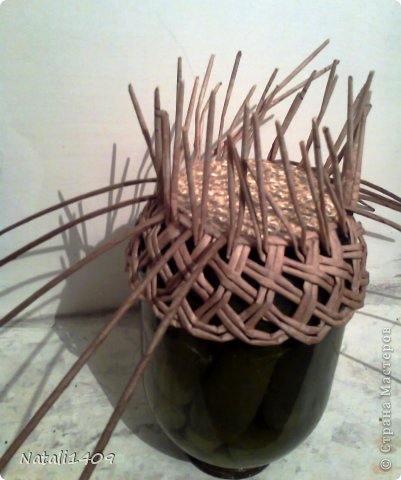 Ducts for the handles are glued to the binding and fixing pegs. And our 3-series ponytail weave rope. The tubes are cut off. Flips the product and make out the handle.
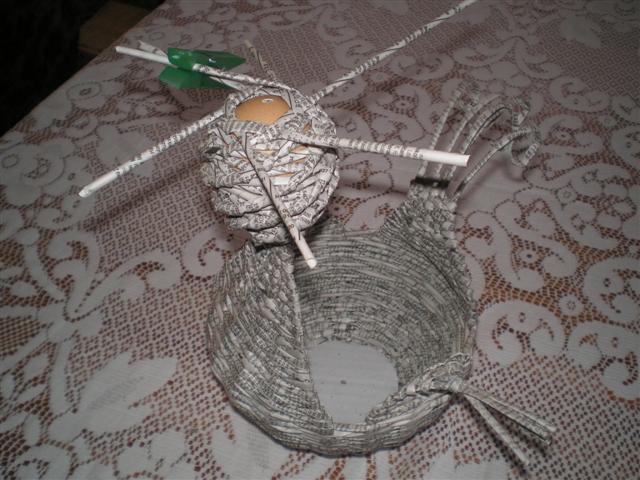
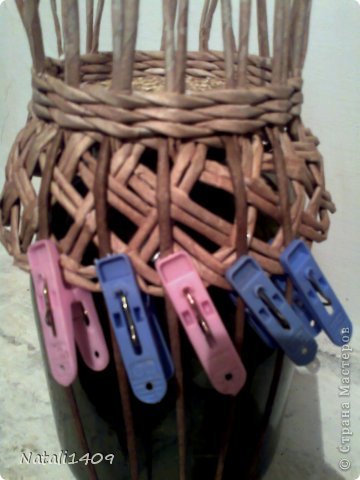 Handle simple. it does not bear the load. Because simply I gathered her tubes and wrapped them. Korzinulka ready.
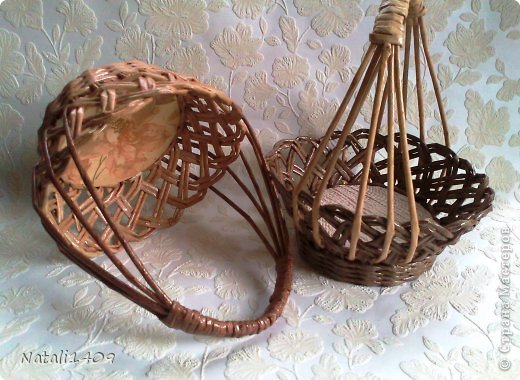
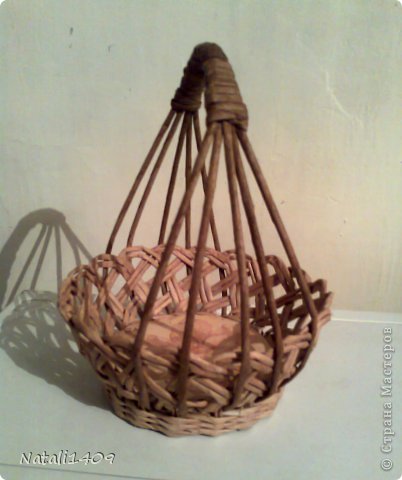 That’s about what happens.
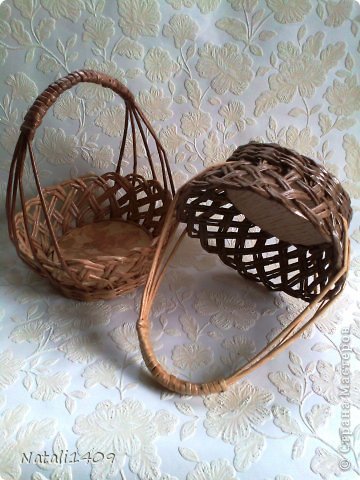 Since the candy in the country (for some reason) do not grow, you have to use them in other ways.