DIY Tutorial: Make Your Own Mini Boxy Makeup Bag

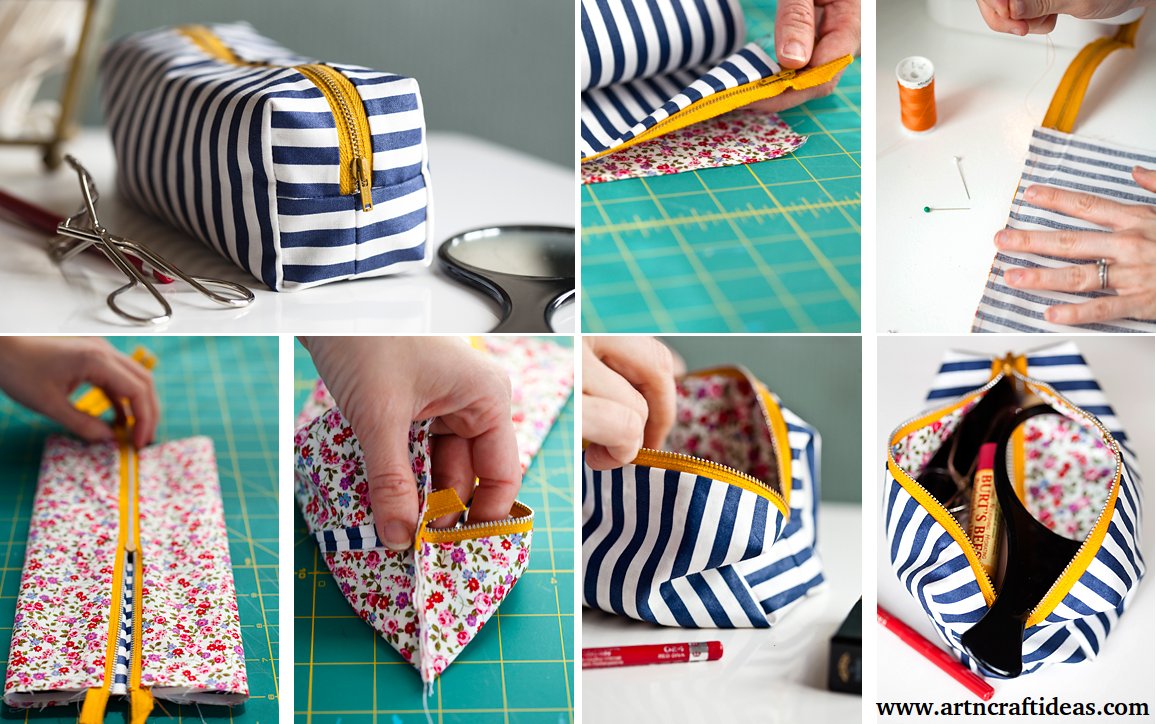
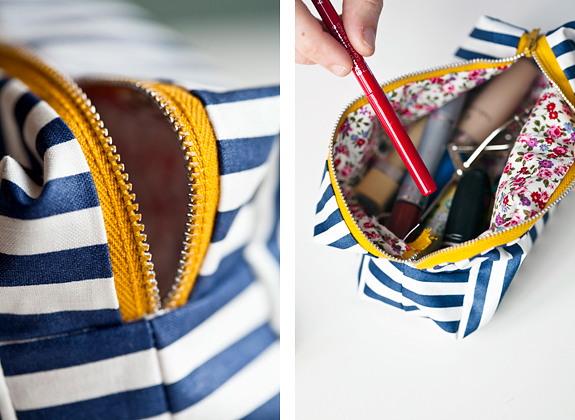
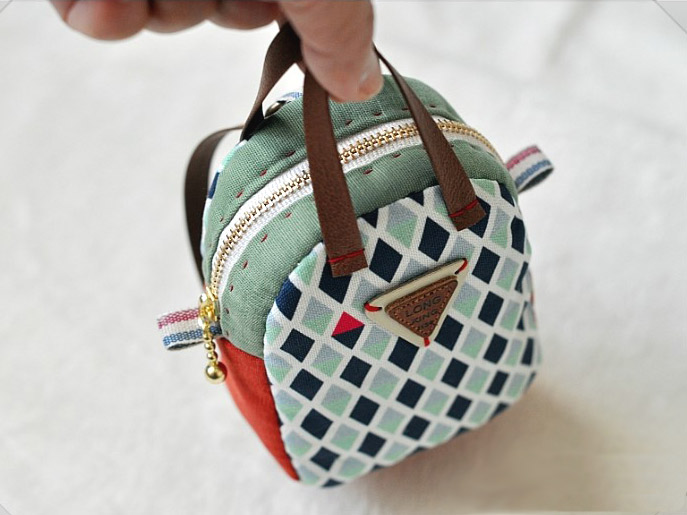
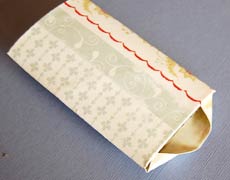
DIY today for creating this boxy mini makeup bag. Compact enough for your stylish purse but big enough to fit all your touch up supplies you may need for a party, evening out, or special event like a wedding.

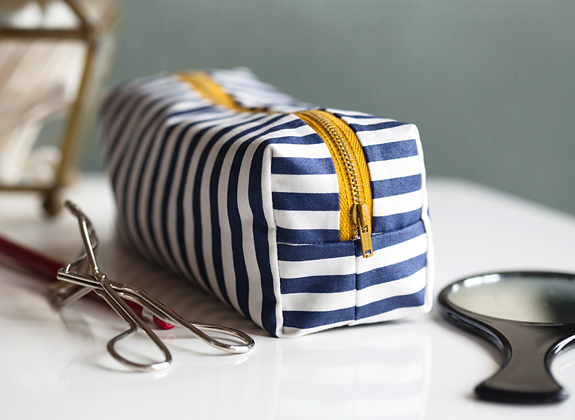
If you’ve never worked with a zipper before, this will be a great project to learn on. I promise, it’s really easy!
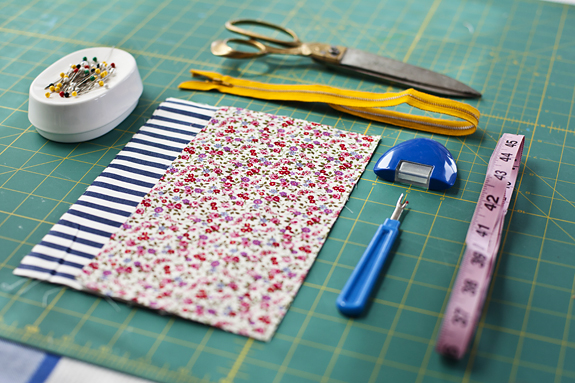
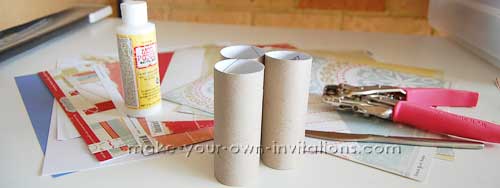
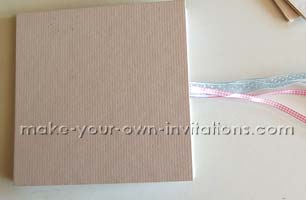
Required Material:

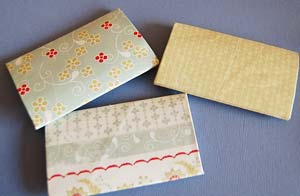
Two coordinating fabric (one is preferably upholstery weight), Zipper, Coordinating thread, Pins, Sewing Machine, Scissors, Ruler

Steps:

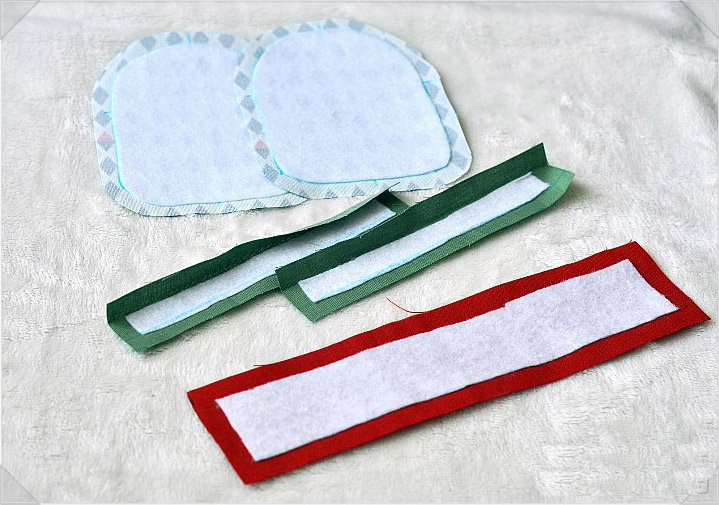
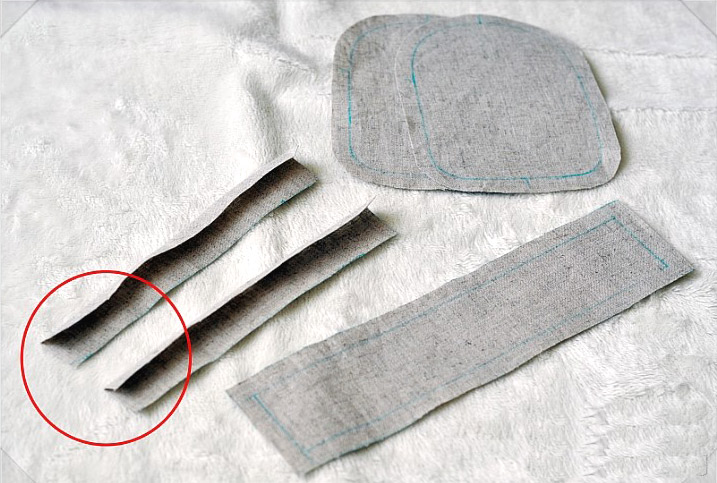
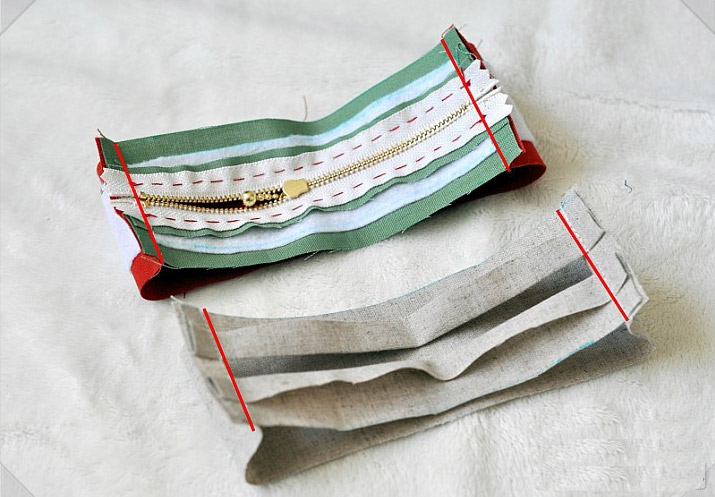
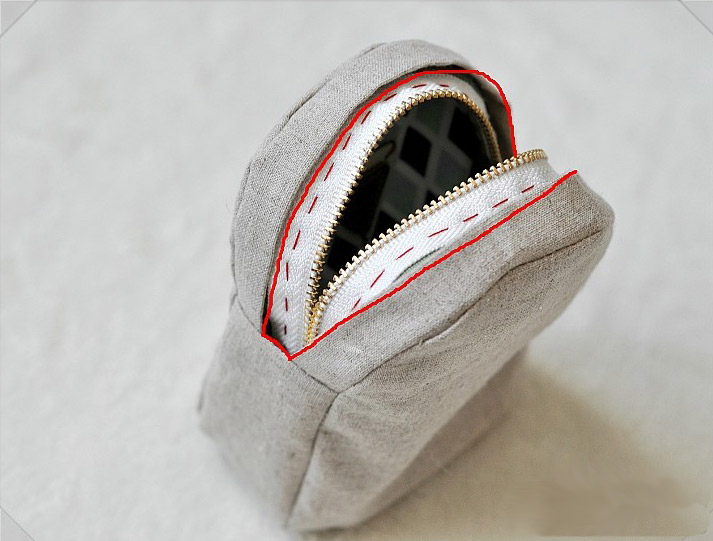
1. Cut two pieces of each fabric choice. Each piece should be 5 1/2 x 9 1/2

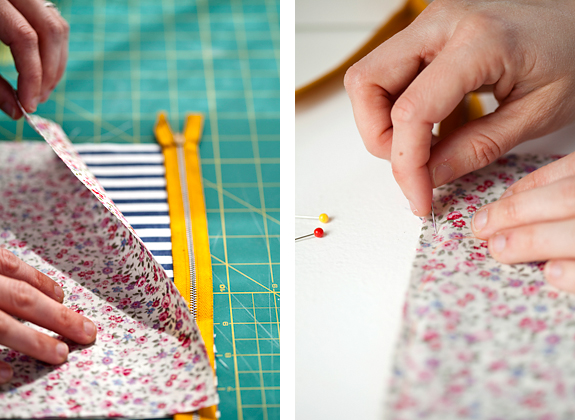
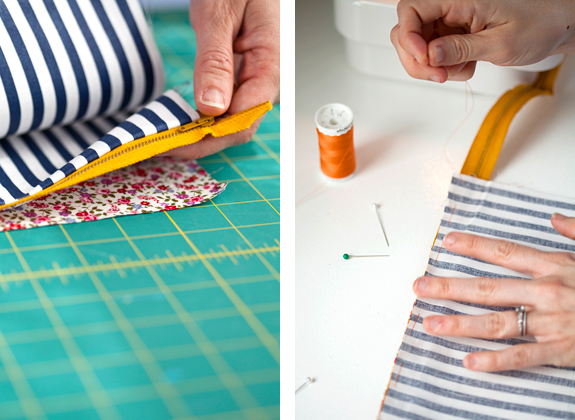
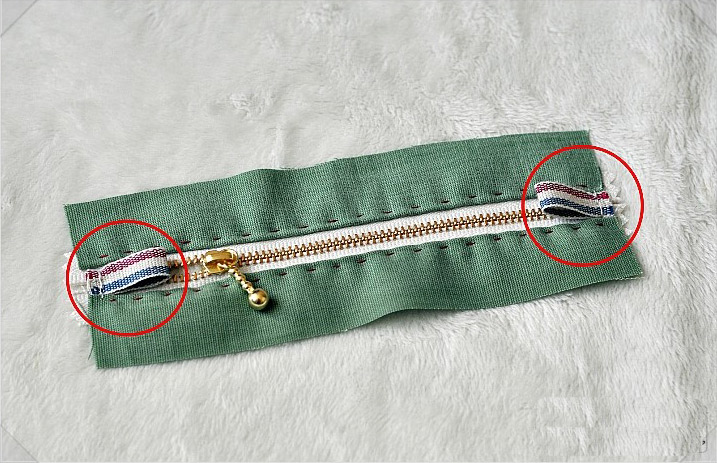
2. Lay one of the outer fabrics face up on your table, and set the zipper on top, face down so the top edge meets the top edge of the fabric. Then lay one of your lining pieces right side down to meet the top edge as well.

3. Pin along that top edge so all three pieces are attached.

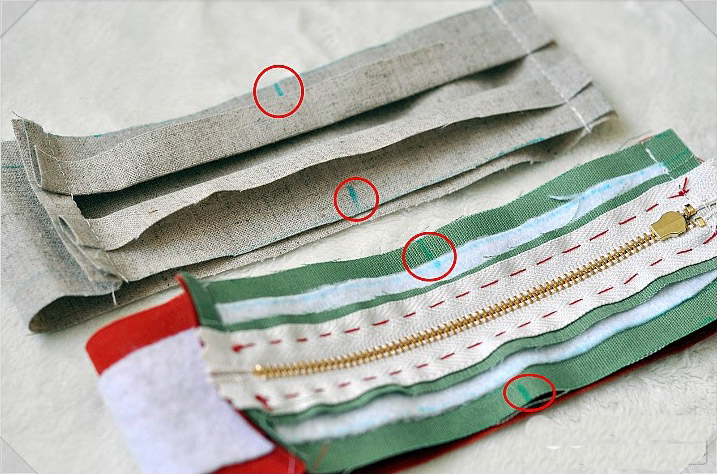
4. Baste with needle and thread and then sew with your zipper foot along that top edge. Move your outer fabric so it’s on the outside, right side up.

5. Now place the second lining fabric right side up on your table, then sandwich the pieces you just sewed in between, and finishing with the second outer piece right side down on top.

6. Pin, baste and sew with the zipper foot on the top edge like you did for the other side.

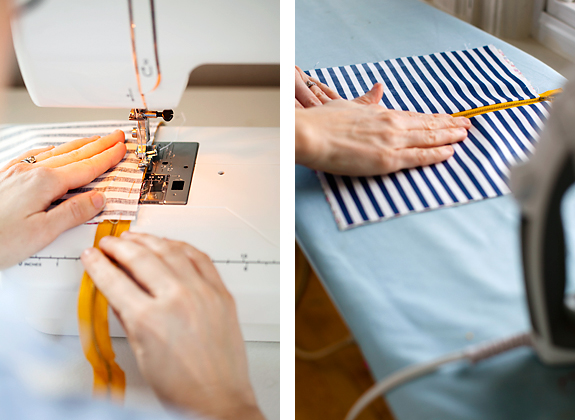
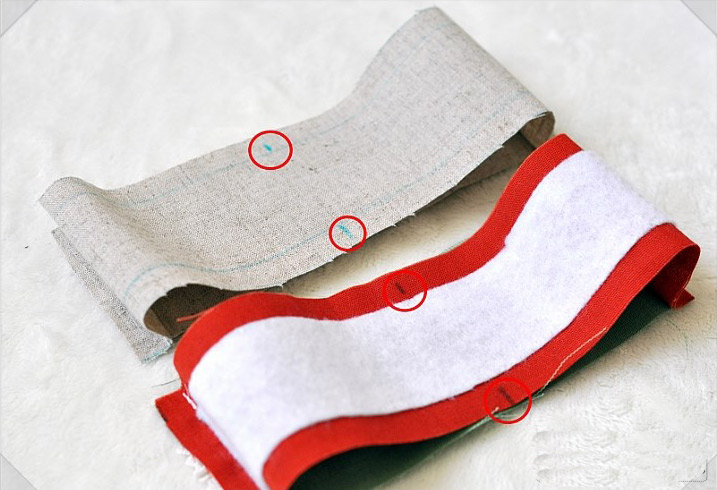
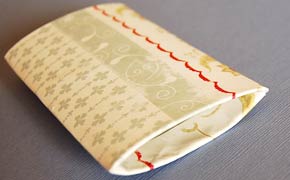
7. After sewing, iron the outer pieces flat, and then fold them together so the outer pieces are right side together and lining pieces sandwiching them.

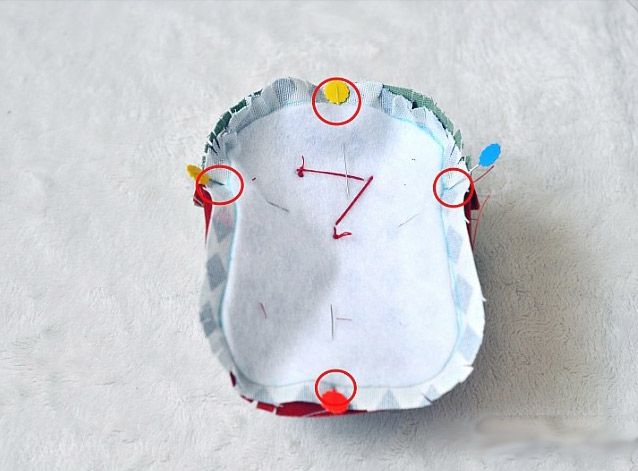
8. Pin at the opposite side of the zipper and sew along that bottom edge.

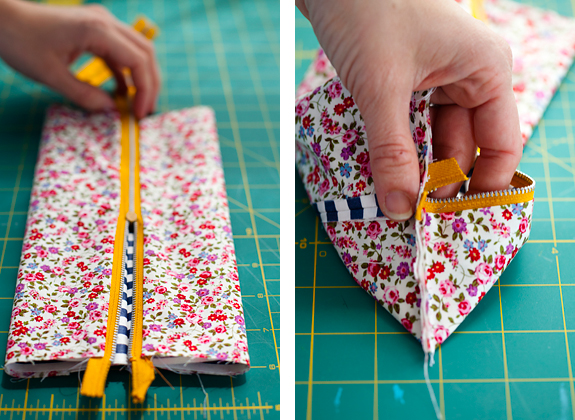
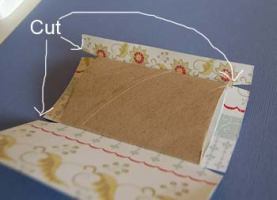
9. Move the zipper to the middle, unzip it halfway and sew along those two sides, through the zipper (pinch the zipper together when you’re sewing through it).

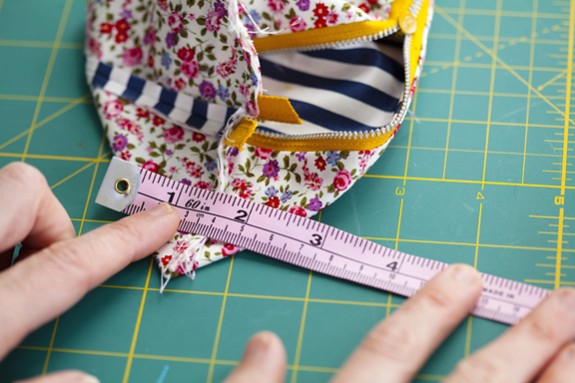
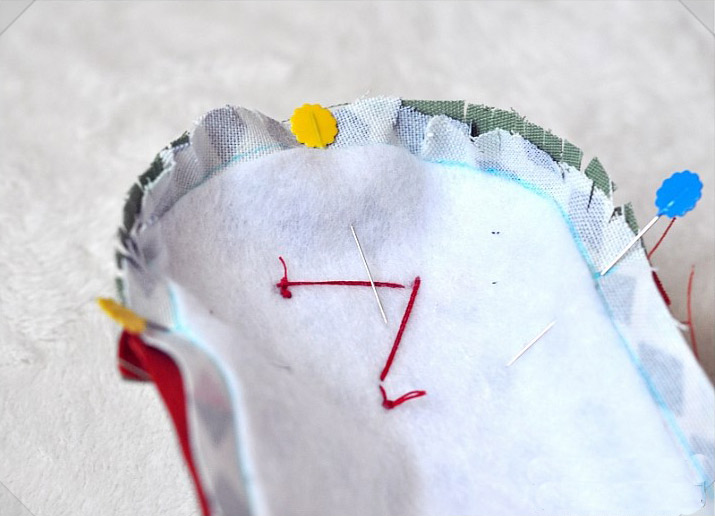
10. Pinch each edge in and measure with your ruler 2 1/2 inches across.

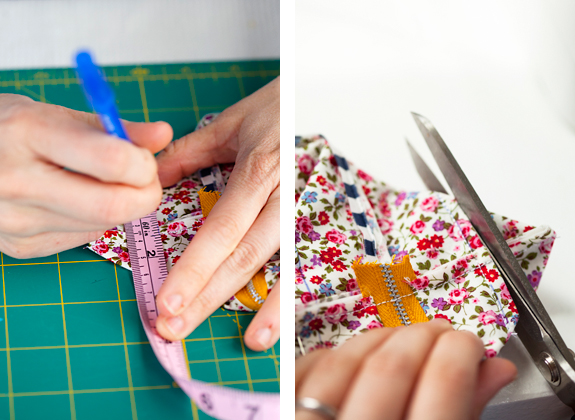
11. Mark with a pen that line and then pin next to the it. Sew along the line you drew and then snip off the triangle end. Do the same for all four sides.

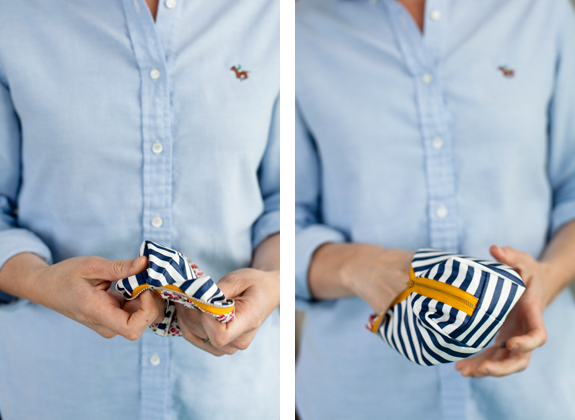
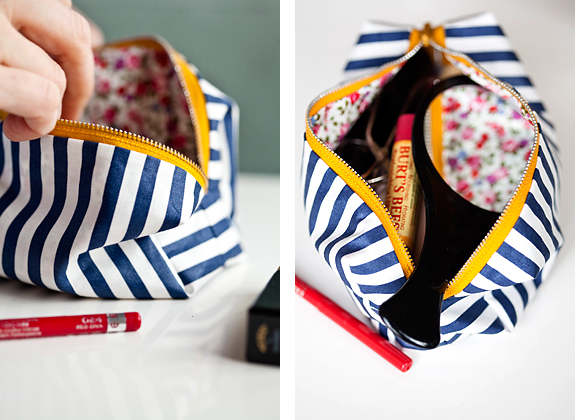
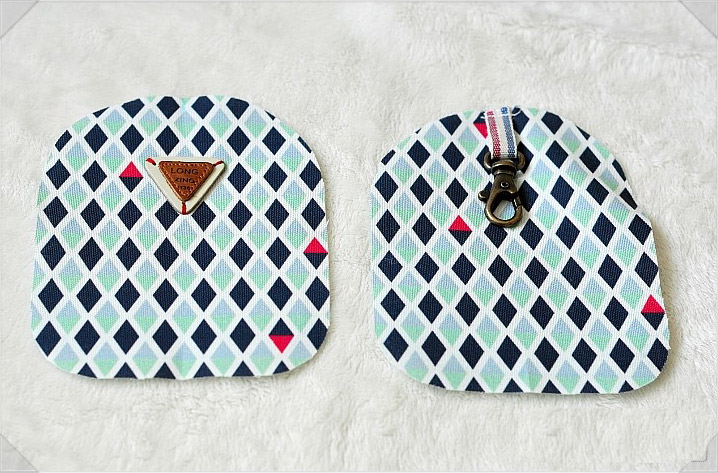
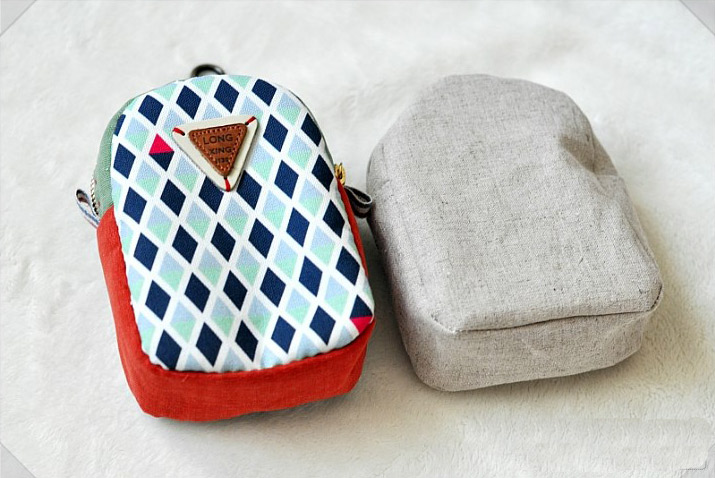
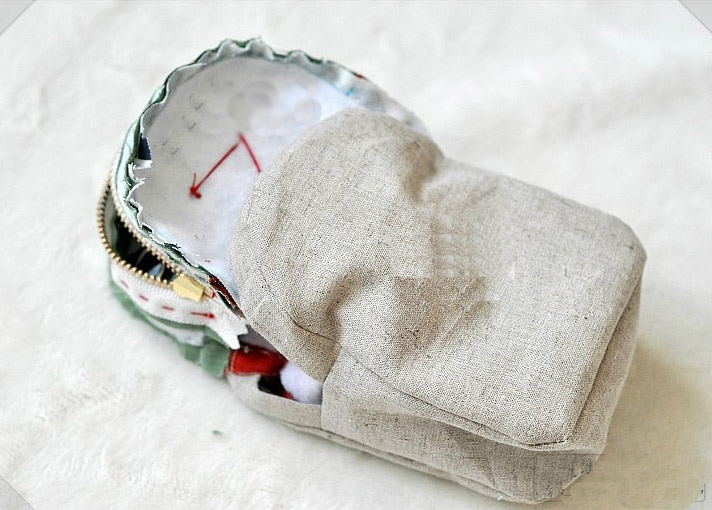
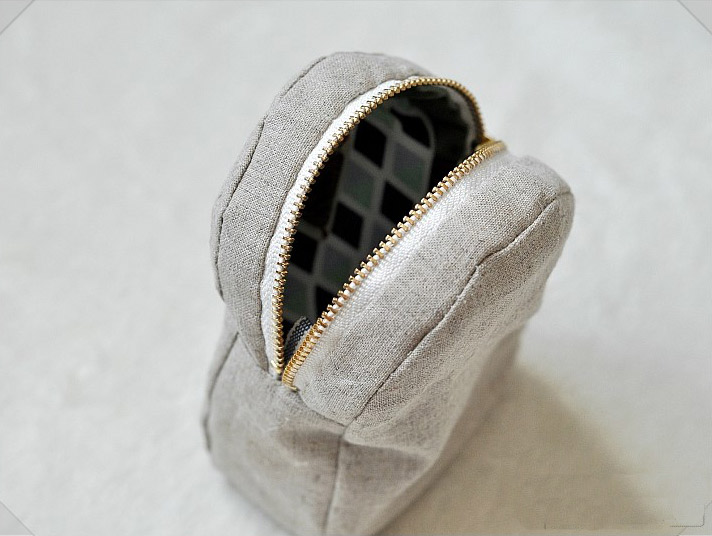
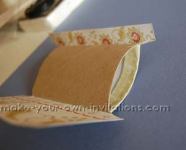
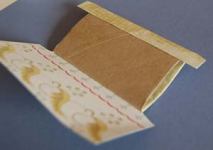
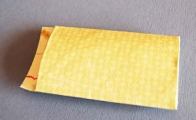
12. Fold it inside out, so the outer pieces are on top and you’re done!

Hope you like this tutorial.

Image by Liz Daly

We would love to hear your thoughts in the comment section below. And be sure to like us Facebook for more ideas!

Thank you for visiting our website. Keep Creating with Art & Craft!

How to make mini yarn purse

I wanted to make something out of left over yarn from my Yarn Monogram Wall Decor project. The yarn was in baby pink, hot pink and purple color. These colors were beautiful for some girl’s accessories. So I decided to make a purse. Few days back I had made a hand bag using bath tissue paper and people really loved the idea. In that project I came up with an easy way to make paper yarn out of toilet tissue paper and used braiding technique to make a hand bag. Lot of people asked me if the same bag can be made using a more durable material. Yes! This time I have used the same technique to make a hand bag using yarn which is robust and pretty at the same time!

Required Material:

    • Yarn in 3 different colors
    • Beads
    • Needle and thread
    • Cloth for lining
    • Scissors

Procedure:

      • You can watch complete video of the procedure at the bottom of this post
        • Cut 10 strands of yarn about 1.5 feet long in each of the three different colors
        • Tie 10 strands together at one end. Three groups of strands should be formed in three different colors.
        • Start braiding (interlacing) three groups of strands to form a tight plait.
        • make six such plaits.
        • Next step is to connect all these plaits to each other forming a sheet of plaits.
        • Place two plaits next to each other and add around 10 stitches from top to bottom at equal distance. Every time you add a stitch, add a pearl bead in the stitch.
        • Connect all the braids to each other.
        • Next, keep the sheet of braids over a lining cloth
        • Fold the sheet of braids in half by lifting the bottom side and putting it over the top side.
        • Fold the lining cloth as well
        • Attach lining cloth to the sheet of braids by hand stitching it on left right and top side.
        • Once the lining is attached to the braids, stitch open sides on lining cloth on left and right.
        • Turn the purse inside out and it is ready

Source

Toilet Roll Mini Album Tutorial

No need to  buy any fancy supplies to make this toilet roll mini album apart from pretty papers. This is one of the thriftiest and coolest upcycled mini albums that you can make. As an added bonus, this is a project for anyone including seasoned scrapbookers, beginners and children.

Required Materials:

  • 3 or more toilet rolls
  • folder binder rings
  • Scrapbook patterned papers to decorate
  • Ribbon or fibers
  • A Bone folder – a ruler or dull dinner knife works just as good
  • A hole punching tool – crop-a-dile or a regular hole punch will do
  • Adhesive – I used regular PVA glue (white glue) and an old credit card or piece of firm card to spread the glue evenly
  • Paper trimmer or scissors

Directions

Step 1

Take your cleaned up toilet rolls and flatten them. Use the bone folder to firmly crease the folds so that they are as flat as you can make them.

Step 2

Now measure your flattened roll to get the ‘roll length’ and the ‘roll width’

Cut a piece of Patterned cardstock to be:
roll length + 1″   by   2 x rollwidth  then add on an extra 1″

Step 3

align one side of the roll with the edge of the paper and fold it over. Fold over again the remaining small piece.  You will now have three panels – the top flap, the middle and bottom panels.

Step 4

Now spread some glue evenly over one side of the flattened toilet roll. stick the roll to the middle panel. Be sure to center it.

Now take a pair of scissors and cut four small wedges in the card as shown below. This will enable us to tuck in the overhanging edges easily.

Step 5

spread a small amount of glue onto the overhanging edges and tuck them inside the roll and press firmly for a good 20 seconds to ensure they stick.

Step 6

Glue down the shorter top flap and tuck in the edges.

Step 7

Then glue down the last panel and overhanging edges.

Step 8

Repeat for the remaining toilet rolls. Cover them in the same or coordinating patterned papers.

Step 9

Take your hole punch tool and punch two holes a quarter inch in from the side of the flattened rolls for binding. My holes are also 3/4″ from the top and bottom of the rolls.
You don’t have to use rings for binding – you can thread through some ribbon and fibers if you wish.

Step 10

Measure and cut three cardstock tags that will fit into the pockets that will be created by the bound pages. I measured my tags to be a little longer so that they will protrude from the pockets.
Punch a hole approx 1/2″ in from the top of each tag in the center.  Use a corner rounder punch to round of the corners if you wish.

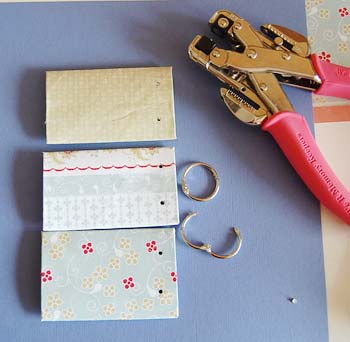
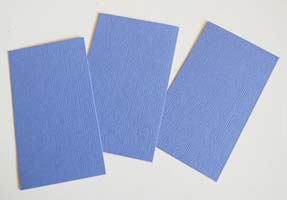
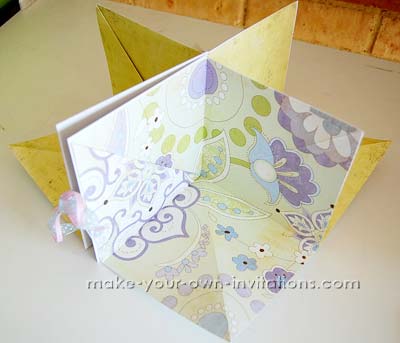
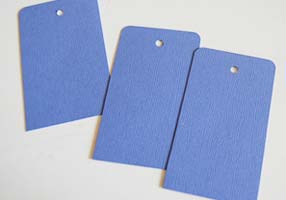
Thread the pages onto binder rings and tie on some pretty, coordination lengths of ribbon to embellish the album. Embellish the tags with ribbon as well.  
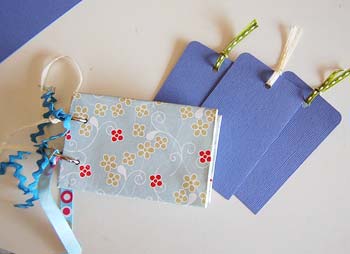
And you’re done! Decorate each of the pages and tags with embellishments and photos and you have completed your toilet tissue holder mini book!
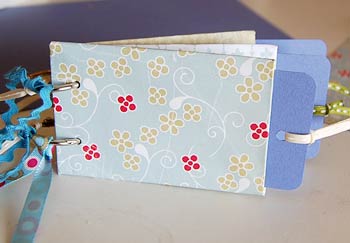
Finished Toilet Roll Mini Album.

A Square around mini scrapbook step by step

A Square around mini scrapbook


This square mini scrapbook also goes by the name of a carousel mini album or you may have seen it around as a  room mini album.

It is a cute little mini book that you can display on around your home.

Materials:

Four 12″x12″ Scrapbook card papers


Two 6 1/8″ chipboard or cardboard for the covers


Scrapbooking embellishments


Scissors or craft knife, pencil, adhesive – glue or double sided tape


two lengths of ribbon approx 12″ long

Instructions:

Step 1.

Take a sheet of the 12″x12″ card and fold it in half horizontally. Now fold it in half again, this time vertically.

Step 2.

Now take the sheet and flip it over. It should now be face down. Create two diagonal folds. Flip it back over and open the sheet out.

Stick a thin line of double sided tape along the top left side from the top corner down to the horizontal fold.

Step 3.

Fold up the bottom left corner while bringing together points A and B and stick it down on to the tape. This will form a pocket that you can stick tags into.

Step 4.

To keep the album firm, stick together the backs as shown in the picture. Run a line of double sided tape along the edges and press firmly together.

Now you have formed one signature or group of pages for your album.

Step 5

Repeat steps 1-4 for the remaining three sheets of 12×12 card..

Step 6.

Fold each set of pages flat adhere them together on top of each other with glue or  double sided tape.

Step 7.

Once all the pages are stuck together lay it down on your work surface with and mark a point down the center outer side of the assembled album. Adhere the ribbon with double sided tape. Repeat for the other side.

Step 8.

Create your covers from chipboard, embellish however you like.

Stick your covers to the album pages over the top of the ribbon ties with double sided tape or glue.

How To Make Mini Photo Album

Make a mini photo album to give someone you love with the best moments of yours. Choose colors that intensify your bond as your preferred colors.

To make this cute craft you will need:

  • Photos of your preference (but all with the same size);
  • Thread, yarn or cord of your choice;
  • Glue stick;
  • Common scissors;
  • Very thick and firm cardboard;
  • Tough adhesive tape;
  • Ornaments of your choice to decorate your piece;
  • Papers of your choice and with colors or prints also of your preference.

-Start by separating all the materials that you will use in your crafts. 
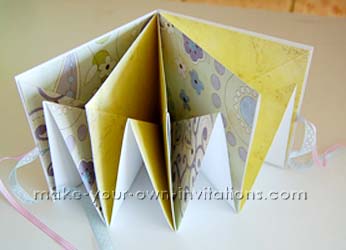
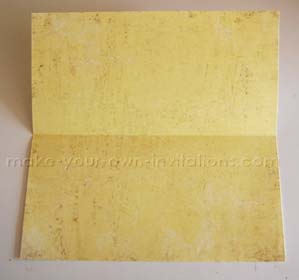
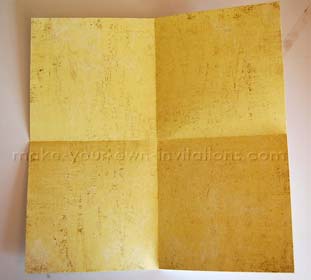
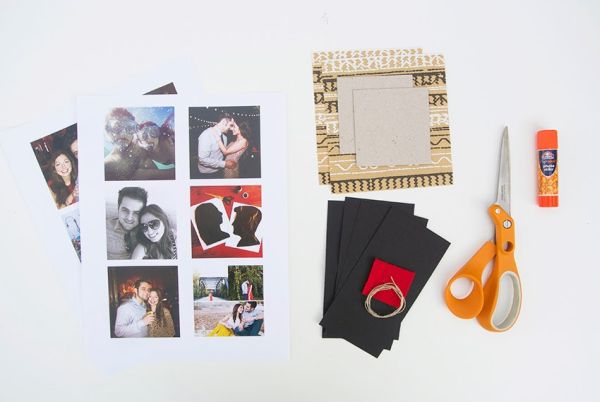
Then, separate all the photos that you will use in your handicraft and cut strips with the size of these photos on paper that will stay in the inner part of the album. Fold the strips in half and paste as many strips as necessary to accommodate all the photos you choose. Afterwards, paste the photos on the inside sheets, with the help of glue stick. Coat two squares of cardboard, which should be a size a little larger than the size of the album sheets. 
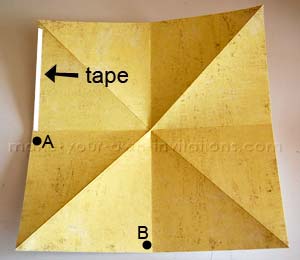
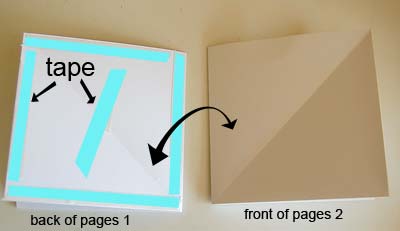
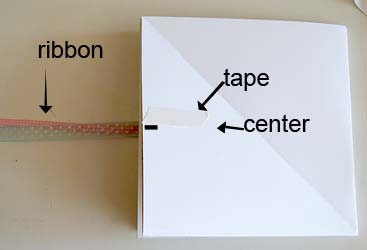
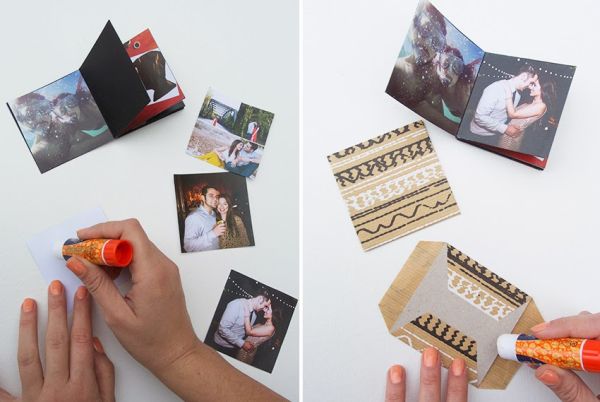
Now attach a piece of string, yarn, or string of your choice with pieces of tape on both the front and back covers of your mini album.
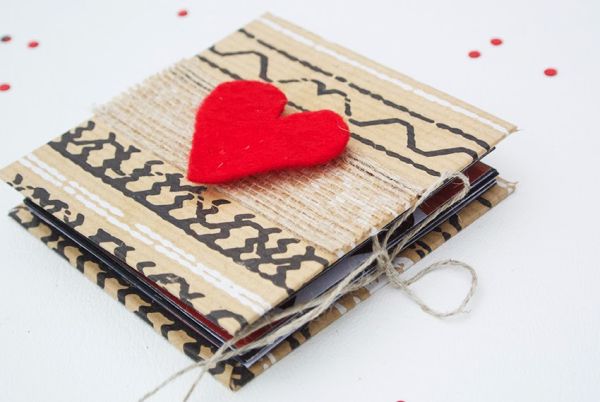
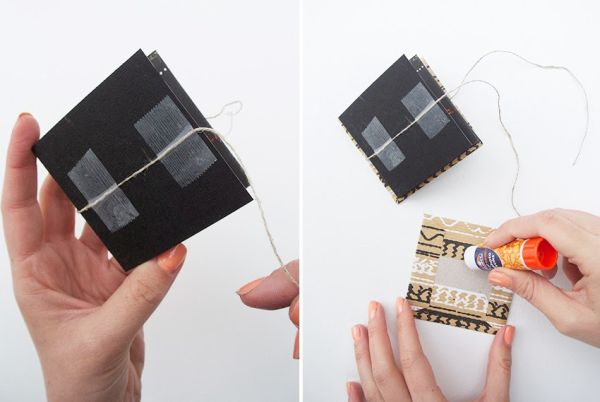
Then, to finish off your piece, paste the cover and back cover that you just created and decorate the cover of your mini album with the materials you want to use. And it’s ready!
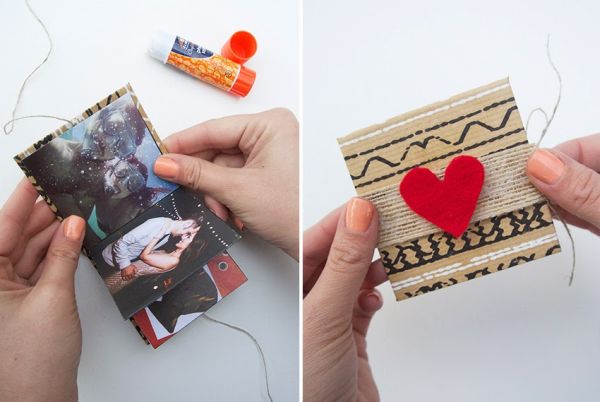
(Photo: cremedelacraft.com)

How to make mini vase bamboo

MINI VASE BAMBOO 1

The creative idea to create a small vase imitating bamboo. Very original look in the interior, with virtually no material costs for manufacturing. Sea pluses and no minuses. Do you want to try to make their own hands?

Materials and tools:

• Melt.
• Pipe-tube from the film.
• napkins, preferably white.
• Toilet paper (rough).
• The paint is suitable gouache or watercolor.
• A piece of laminate. This flooring pre-cut in the shape of a triangle. Laminate is the basis of the composition.
• PVA glue. 6 steps and the original vase ready

1 step. The pipe must be cut into three unequal parts.

Step 2. On the prepared piece of triangular-shaped laminate, glue all the pieces of the pipe by means of Melt.

Step 3. Rough toilet paper basis pastes vases using PVA glue.

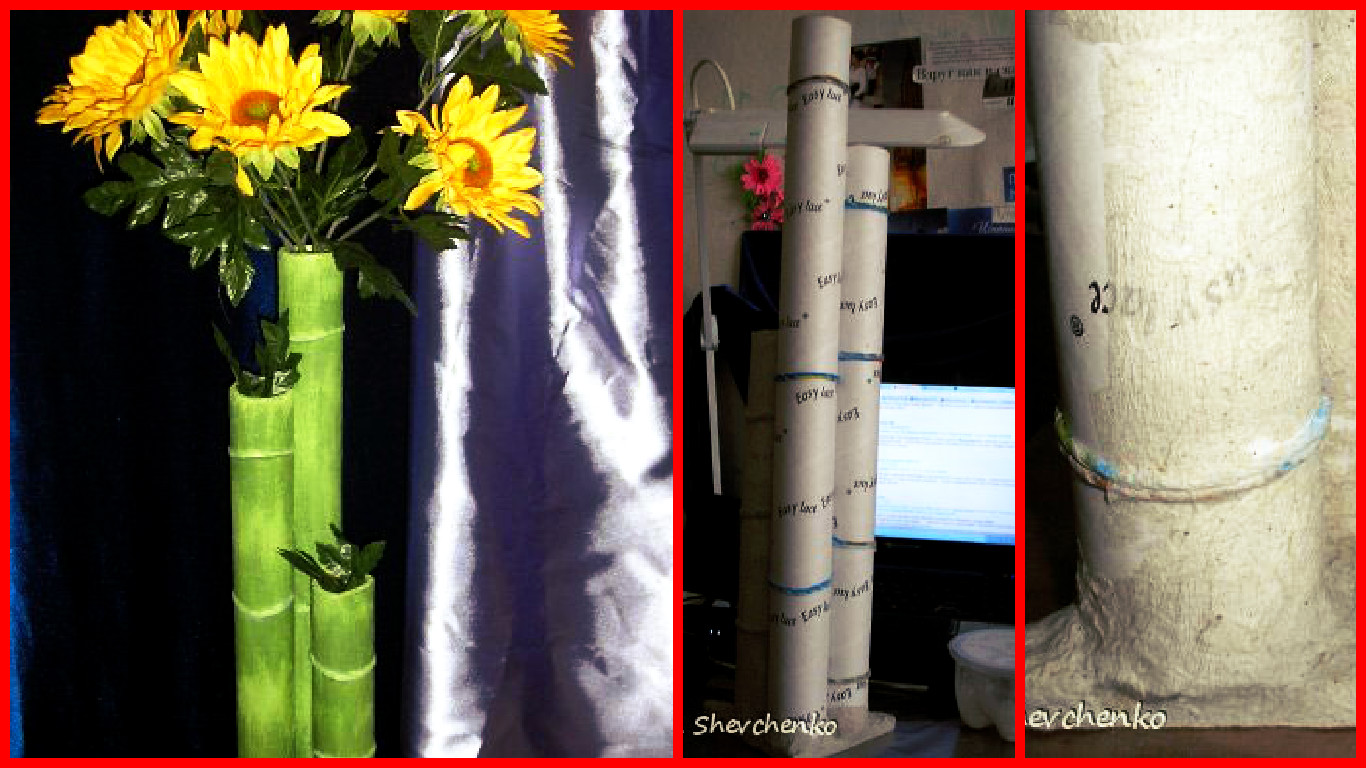
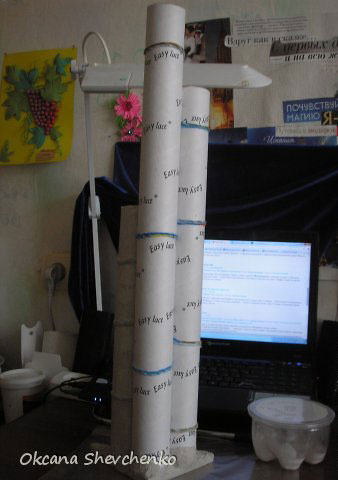
Step 4. Twist the cloth, using techniques Pape art, thereby we attach our image of a vase of bamboo. 
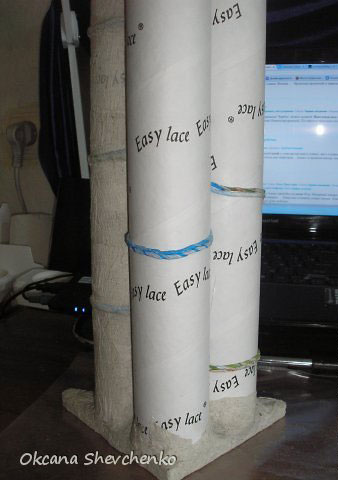
Step 5. Imitating the bark of the bamboo stem. To do this, toilet paper glue, a little squeezing, giving texture vase vertical stripes. 
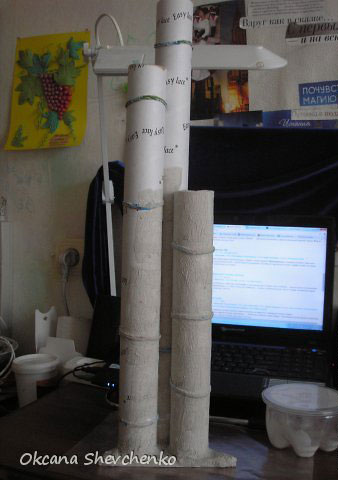
The result should look like this. 
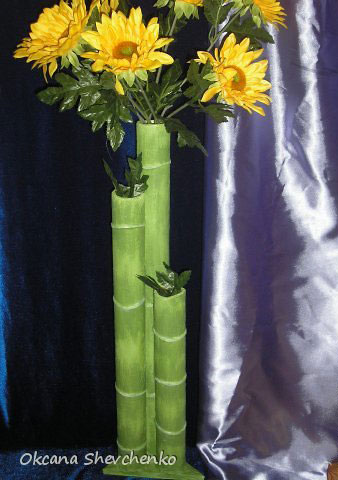
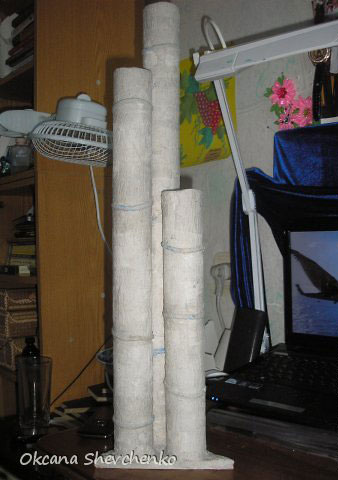
That’s a mini-vase made of bamboo looks close. 
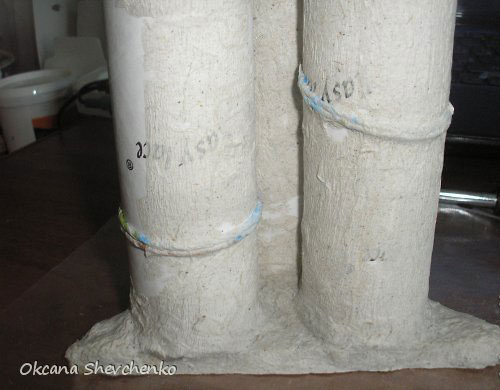
6 step. Paint the vase in color similar to natural bamboo. You can use shades of green and beige colors. This MK twisted flagellum napkins dyed white mother of pearl. 
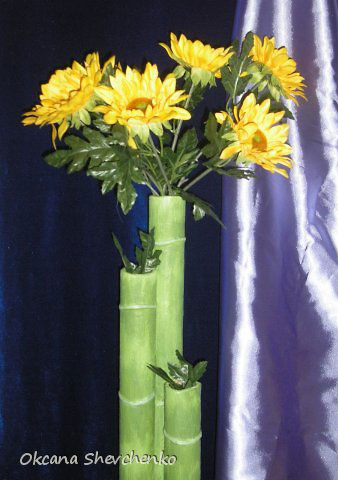
So ended a mini-vases manufacturing process.
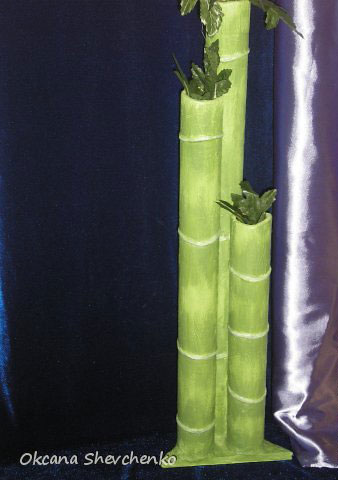
The concept is simple! Be creative masterpieces their beauty and originality of the people around them!

How to make beautiful mini yurt

Mini yurt 1

I miss the big white yurt it? DIY a bar, mini cute, little deformation, but also as a paper towel tube. Tools and materials required: ready required fabric material, good iron stick lining, and cotton shop. Production steps: prepare two table cloth and consistent Round and Baguette cardboard. Sewed up the table cloth, white plastic cast. The cardboard glued to the inside, then the tablecloth sewn together. Prepare four windows and doors with a cloth, and sewn. The doors and windows were sewn on the right position in the cylinder. Remove the roof made of seven sectors cloth, rope through the red cloth to do the roof. The pieces of cloth are stitched together to form a headpiece. Finally sewn flower ball fixed on the roof, on the cylinder cover, cute and practical mini yurt is complete.