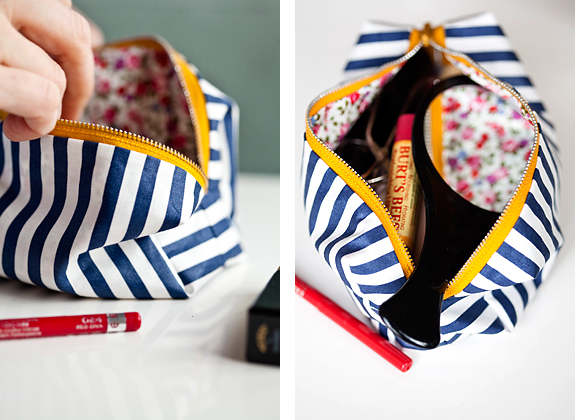
DIY today for creating this boxy mini makeup bag. Compact enough for your stylish purse but big enough to fit all your touch up supplies you may need for a party, evening out, or special event like a wedding.
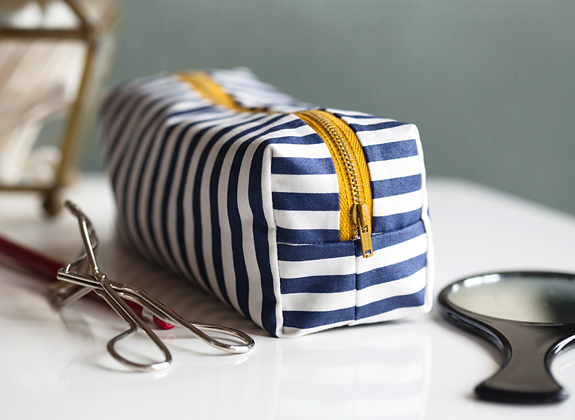
If you’ve never worked with a zipper before, this will be a great project to learn on. I promise, it’s really easy!
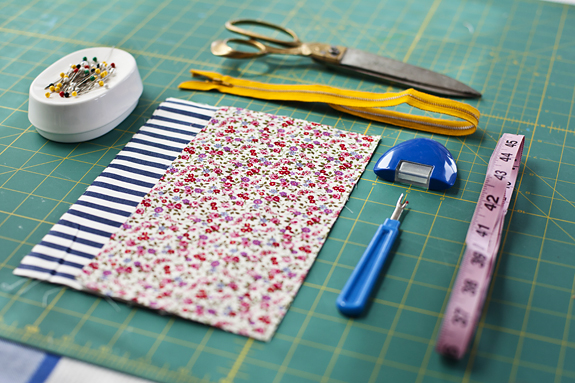
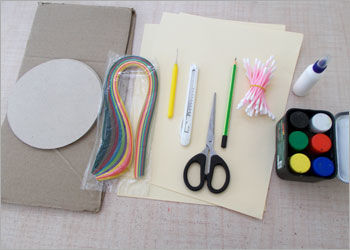
Required Material:
Two coordinating fabric (one is preferably upholstery weight), Zipper, Coordinating thread, Pins, Sewing Machine, Scissors, Ruler
Steps:
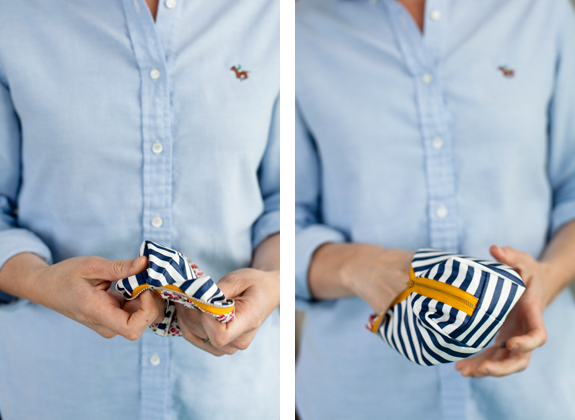
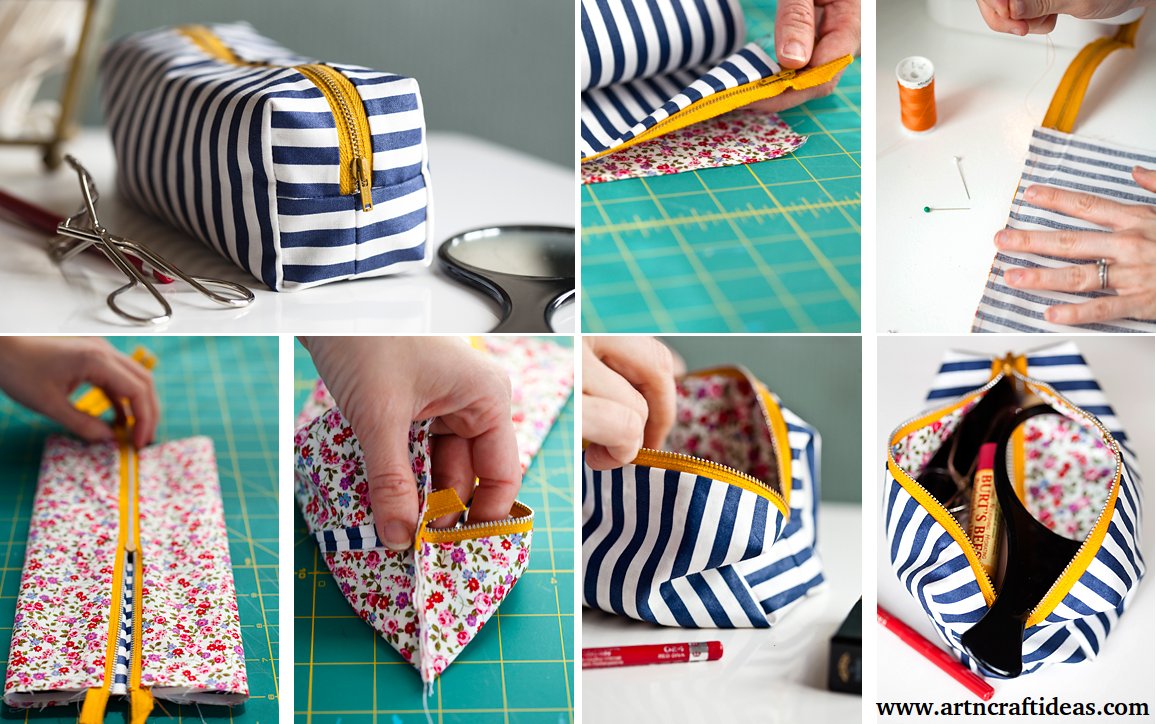
1. Cut two pieces of each fabric choice. Each piece should be 5 1/2 x 9 1/2
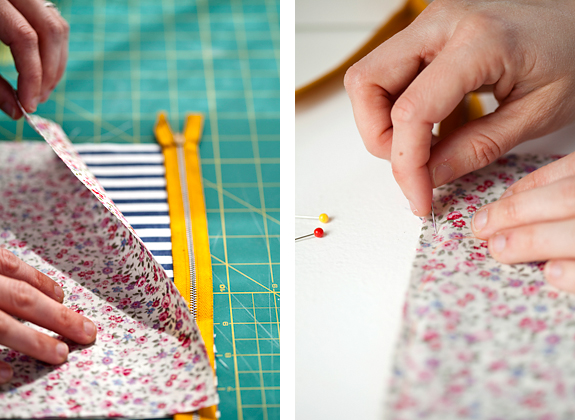
2. Lay one of the outer fabrics face up on your table, and set the zipper on top, face down so the top edge meets the top edge of the fabric. Then lay one of your lining pieces right side down to meet the top edge as well.
3. Pin along that top edge so all three pieces are attached.

4. Baste with needle and thread and then sew with your zipper foot along that top edge. Move your outer fabric so it’s on the outside, right side up.
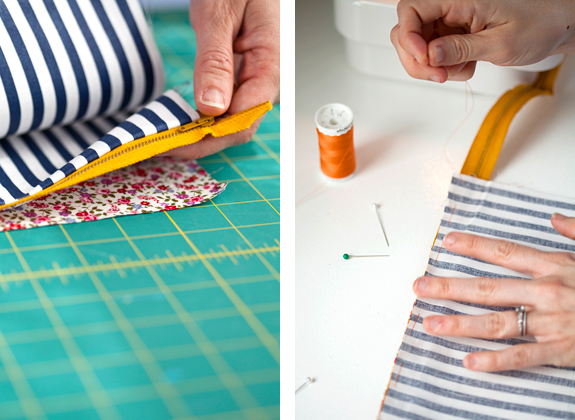
5. Now place the second lining fabric right side up on your table, then sandwich the pieces you just sewed in between, and finishing with the second outer piece right side down on top.
6. Pin, baste and sew with the zipper foot on the top edge like you did for the other side.
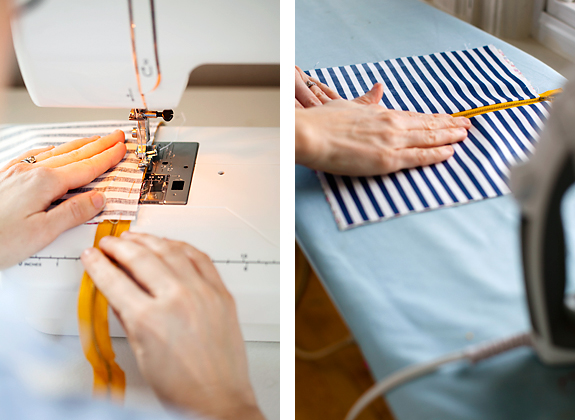
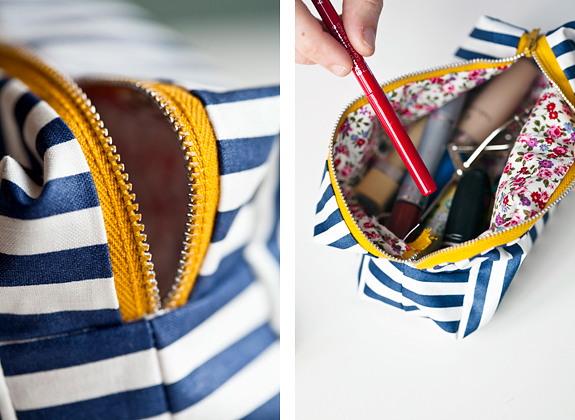
7. After sewing, iron the outer pieces flat, and then fold them together so the outer pieces are right side together and lining pieces sandwiching them.

8. Pin at the opposite side of the zipper and sew along that bottom edge.
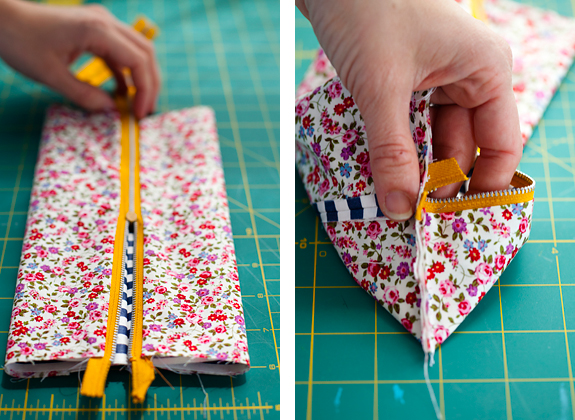
9. Move the zipper to the middle, unzip it halfway and sew along those two sides, through the zipper (pinch the zipper together when you’re sewing through it).
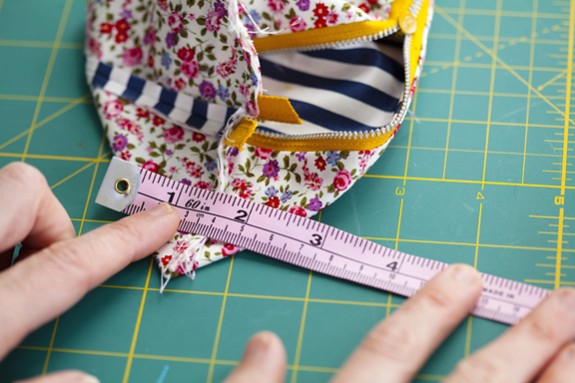
10. Pinch each edge in and measure with your ruler 2 1/2 inches across.
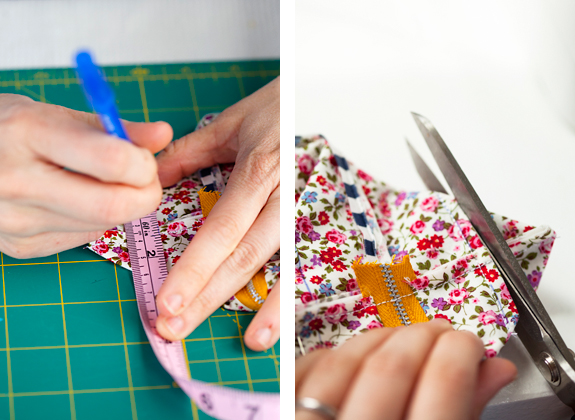
11. Mark with a pen that line and then pin next to the it. Sew along the line you drew and then snip off the triangle end. Do the same for all four sides.
12. Fold it inside out, so the outer pieces are on top and you’re done!
Hope you like this tutorial.
Image by Liz Daly
We would love to hear your thoughts in the comment section below. And be sure to like us Facebook for more ideas!
Thank you for visiting our website. Keep Creating with Art & Craft!


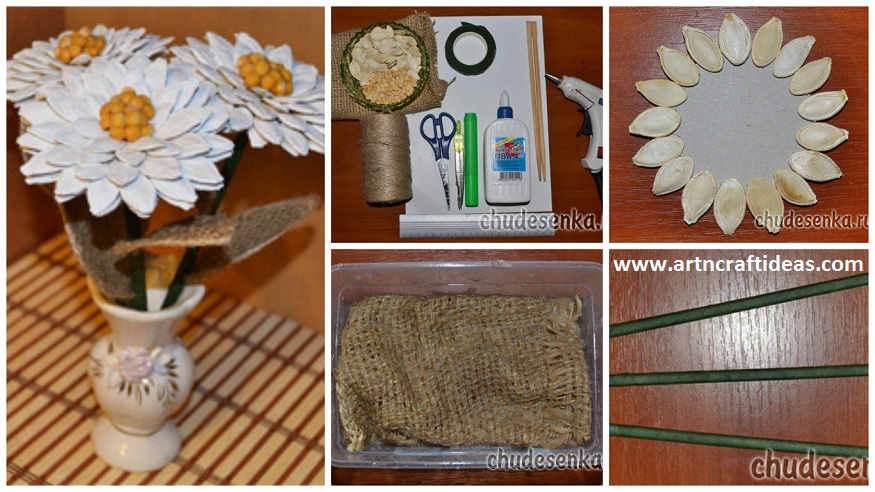
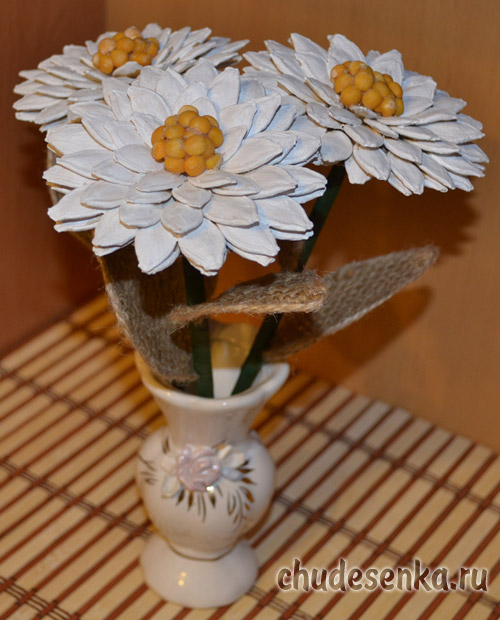
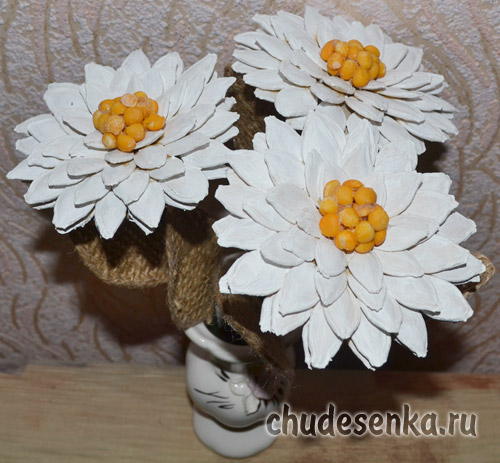
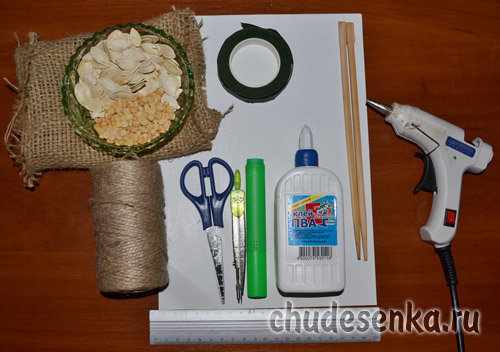 Before you begin, you must treat the burlap so that it becomes rigid and does not crumble. To this mix of PVA glue and water in a proportion of 50 to 50 and fully put in the sack solution. After that, the fabric should be dried and ironed.
 While dried burlap, let us direct manufacturer flowers. The basis for the colors to be a circle of cardboard. Using a compass draw a circle on the cardboard with a diameter of 6 cm., And cut it.
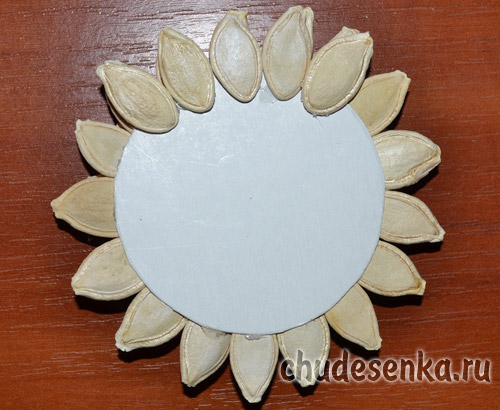
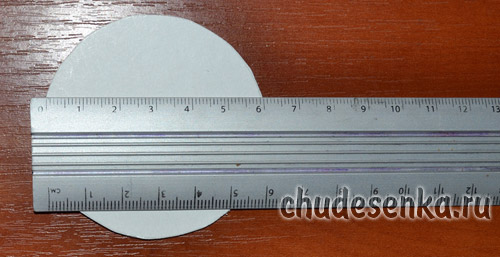 Now take the pumpkin seeds and using a silicone adhesive or glue “Moment”, pasted them in a circle. Paste the seeds so that their sharp edge was on top.
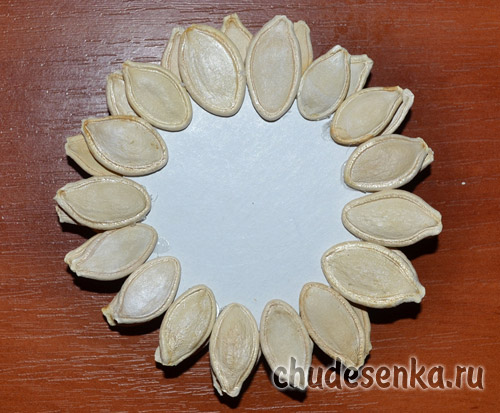
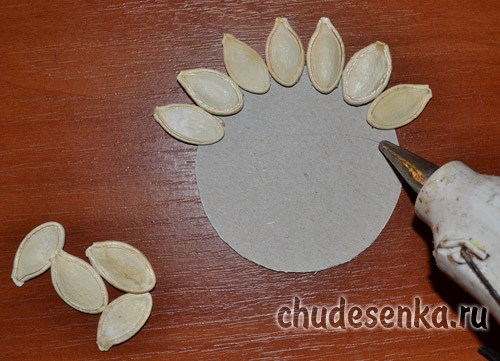 The first row of seeds prepared.
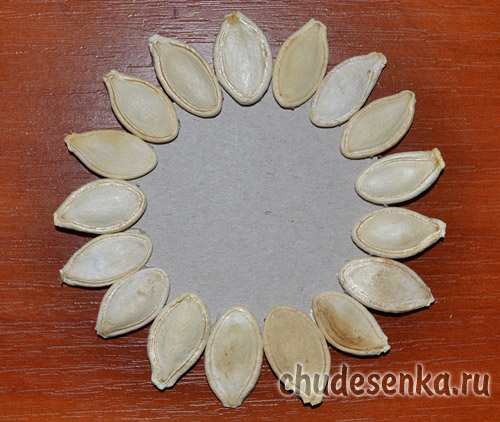 Now just glue the seeds of the second row.
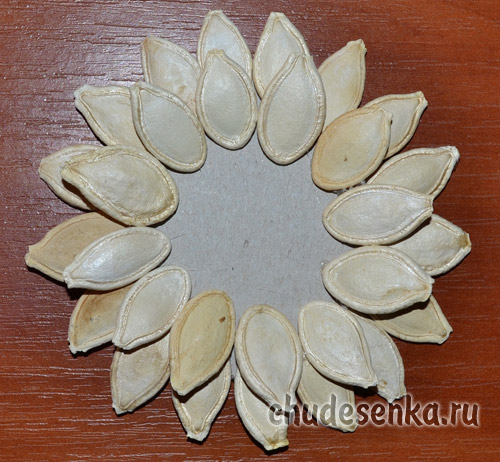 Sunflower seeds in the second row should be staggered and overlapping with respect to the first row. Also, do the third and fourth rows of seeds.
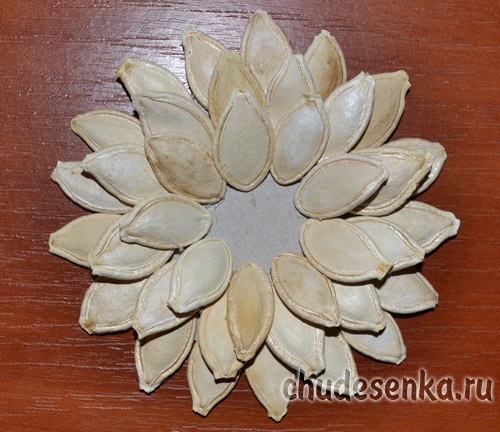
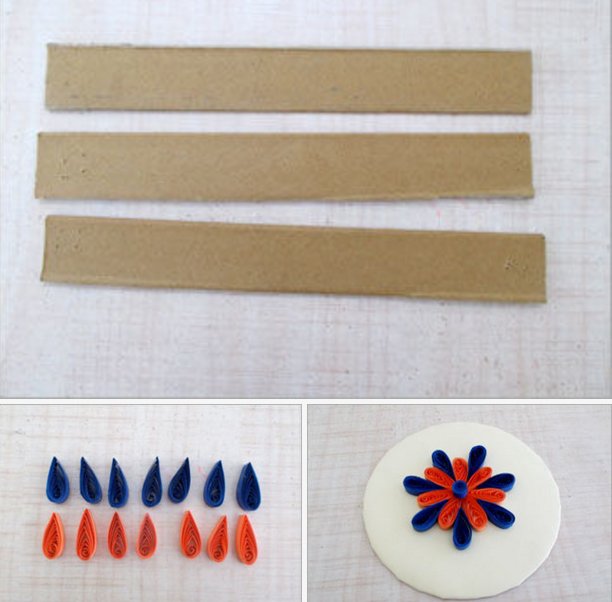
 Since our bouquet will consist of three colors, then make three for flowers.
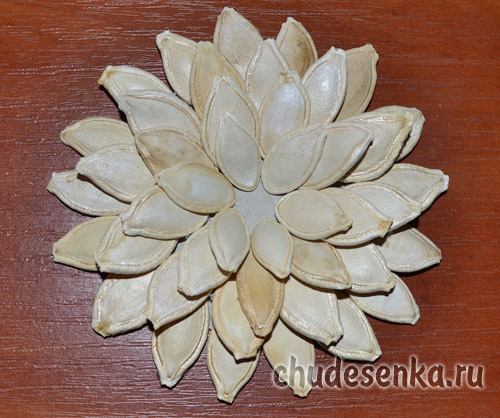
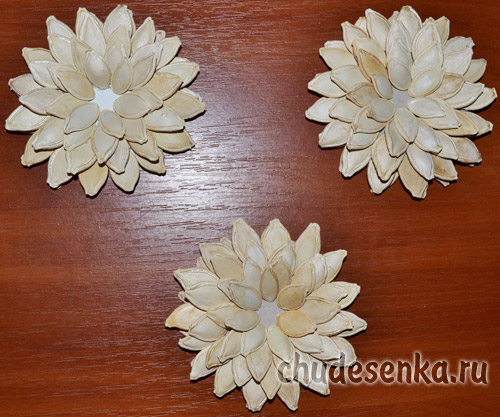 Pumpkin seeds, which we used for the flower petals are not very beautiful yellowish tint, so we using white acrylic paint, paint them white.
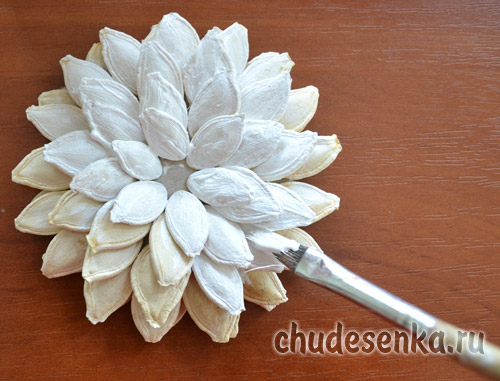 We leave flowers alone until they are completely dry.
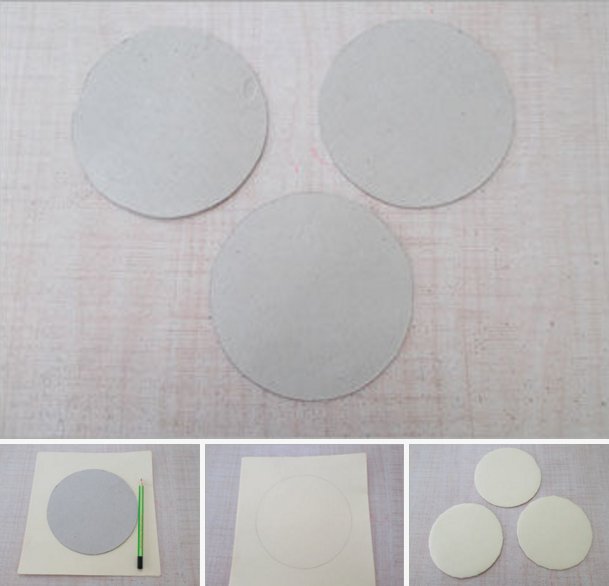
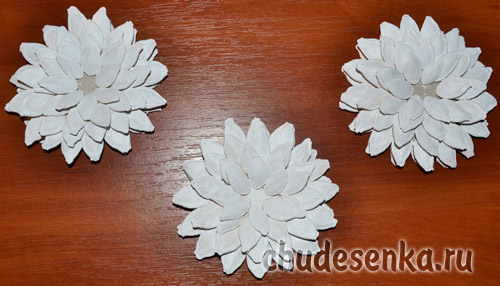 Until the paint is dry, we do not lose time in vain and will prepare two cardboard parts: a circle with a diameter of 6 cm, and lepestochek, the height of 7 cm, and width – 4 cm…
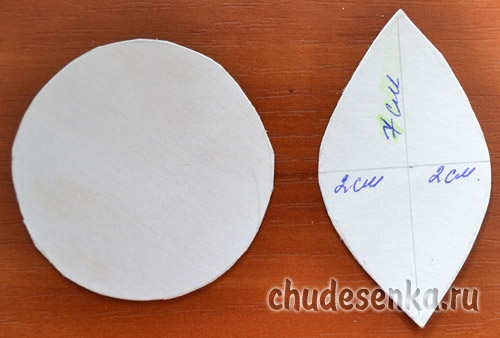 The carton blanks are put on the pressed and dried burlap and encircle their contours.
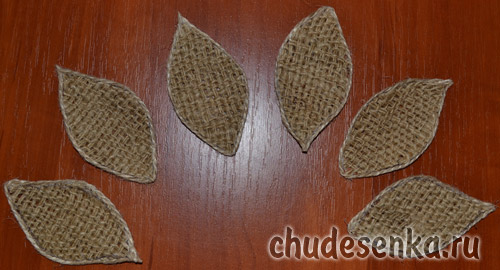
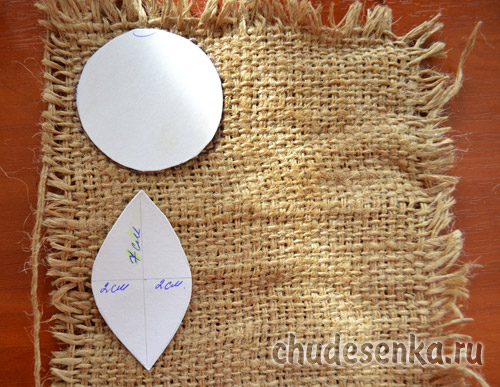 Circles will need to cut 3 pieces,
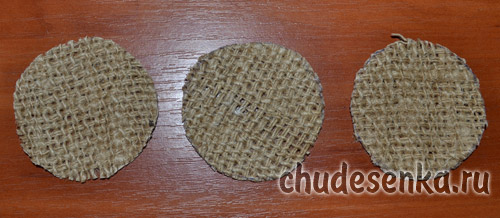 and petals – 6 pieces.
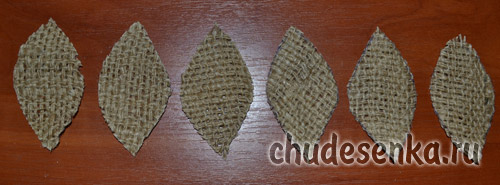 Next a burlap circle glue on the reverse side of a flower preform.
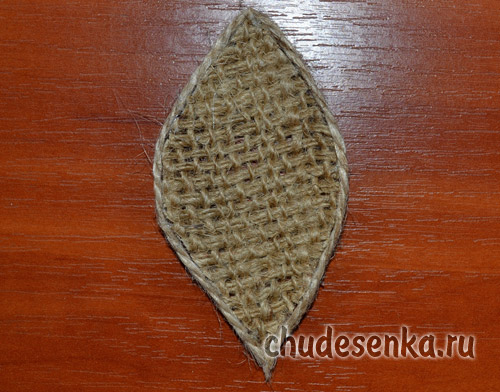
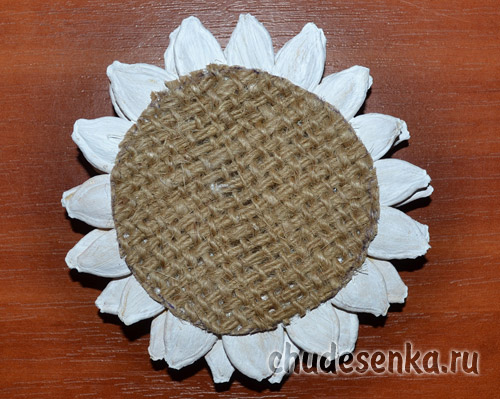 And along the contour cut petals from burlap, we stuck jute thread.
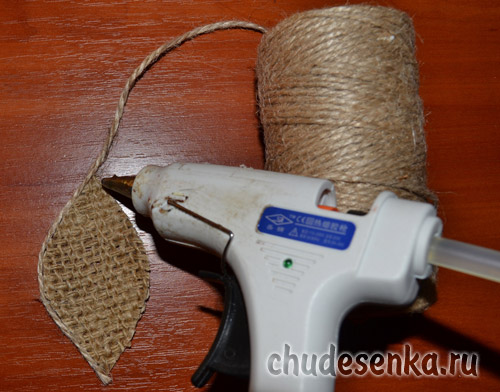
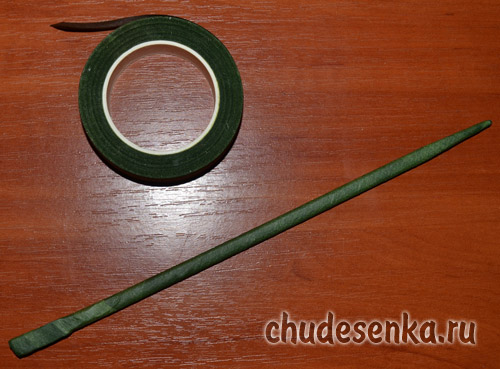
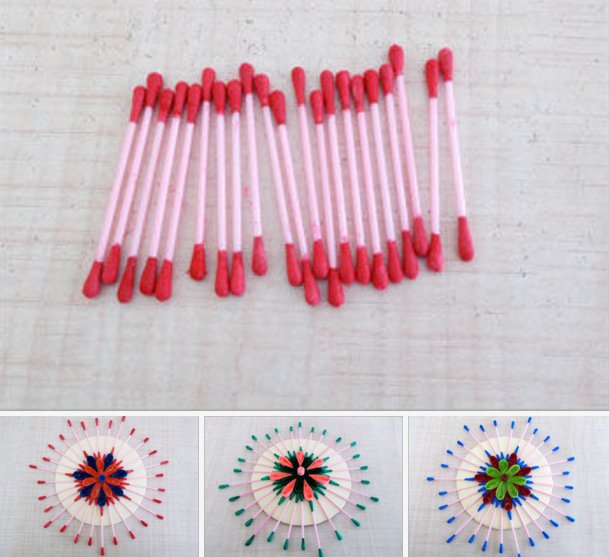
 And now it’s time to prepare for the stems of flowers. To stem can be used straight branches of the tree, we took advantage of chopsticks for sushi. Take floristic tape green and completely wrapped with it every wand.
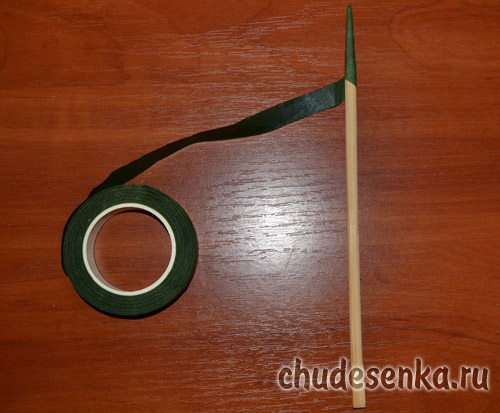
 If you do not have floral tape, you can use the corrugated paper. We make three identical stems.
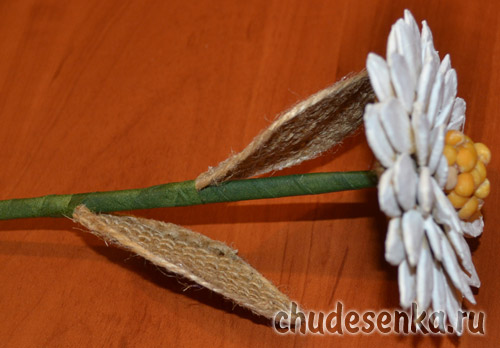
 Now we collect our flowers. In the middle of the flower Do the workpiece hole
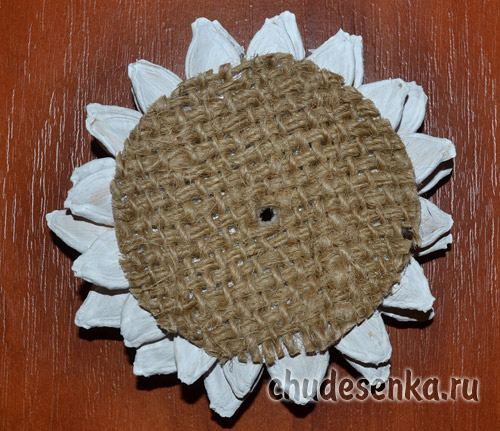 and insert the stem into it ready.
 In the middle of the flower glue yellow peas, which for strength from above abundantly watered with white glue.
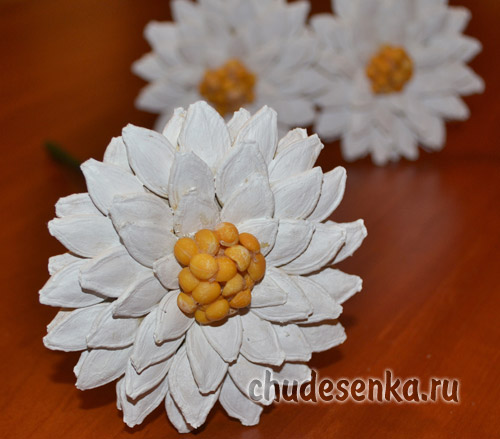
 That’s all – flowers ready! It remains to put our bouquet in a vase. This original bouquet decorates any space, especially natural corner in the school or in kindergarten. Good luck and success!
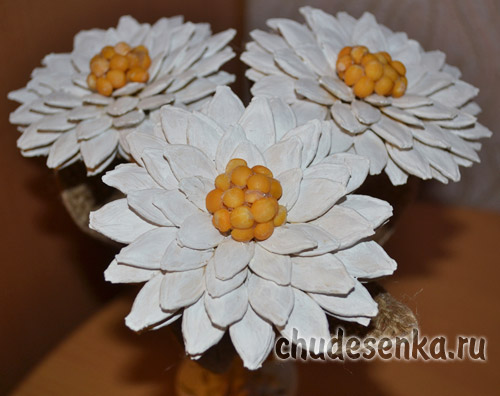
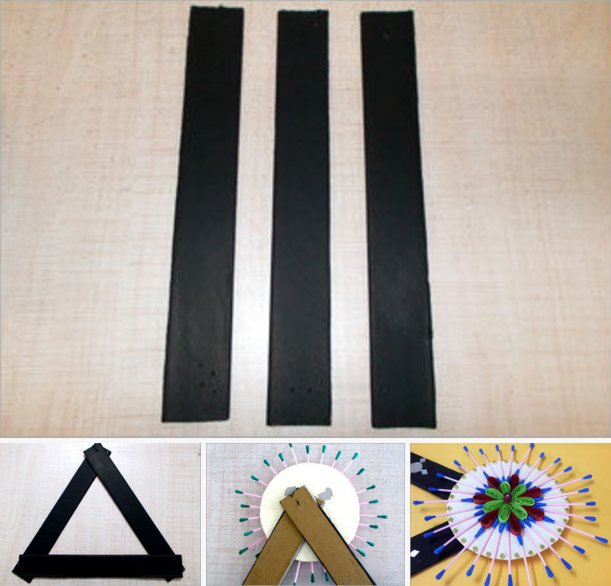


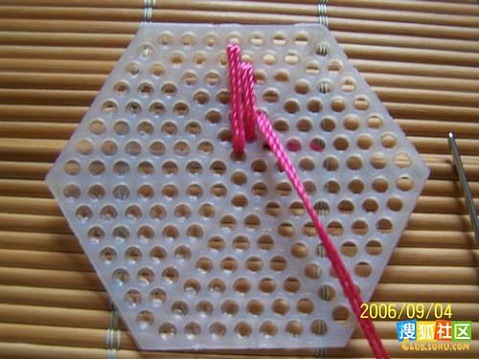


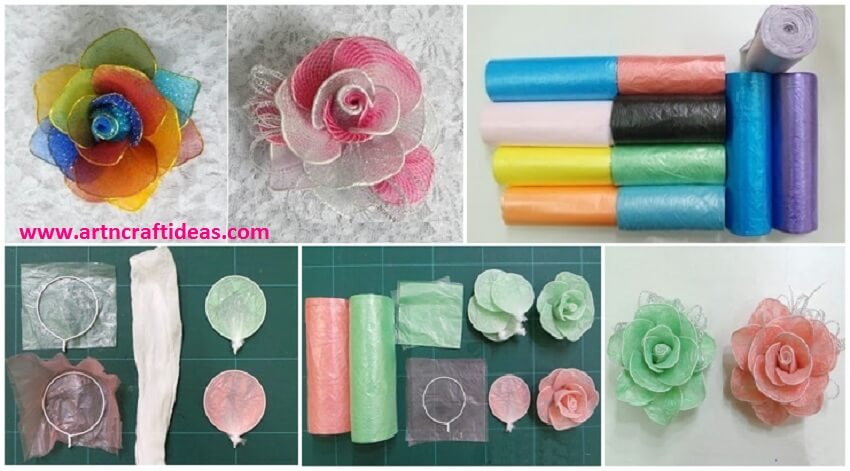
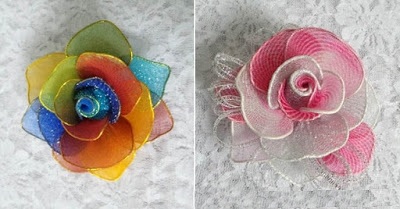
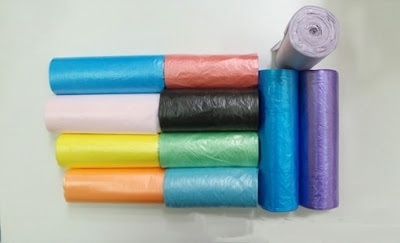
 Packaging in the circular start racing wire
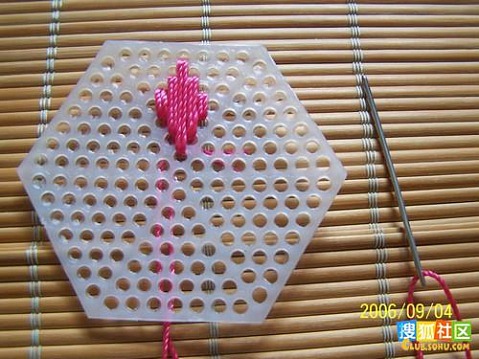
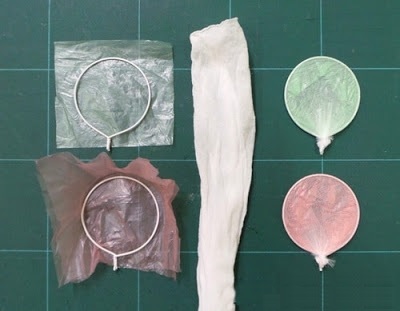 Giving those coated wire forms and a variety of well-connected strings at the bottom.
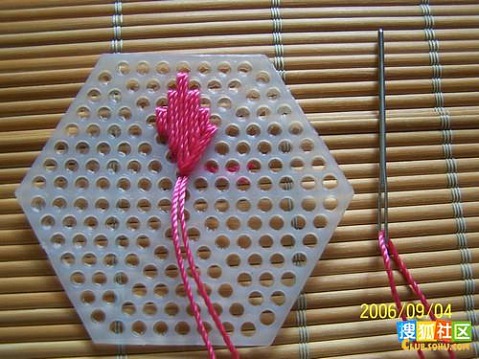
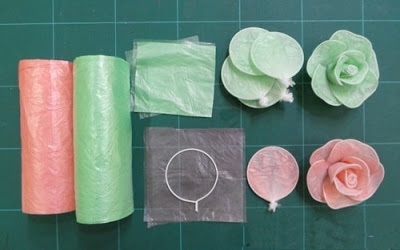 Continue to prepare all kinds of formats
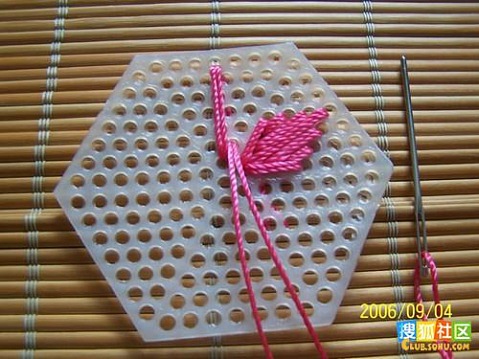
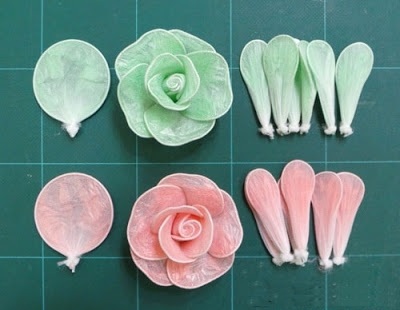 After you finish you get the following figure
 These are some suggested formats