20+ Easy DIY Toilet Paper Roll Craft Ideas

I have an unhealthy obsession with toilet paper roll crafts. Friends and family even collect toilet paper rolls for me so I can make more crafts with them! I like them because, well, pretty much everyone has access to toilet paper rolls. With that said, you’ll want to start collecting (or hoarding) toilet paper rolls after you see these incredible DIY toilet paper rolls crafts.

How to make designer back neck blouse

Indian bride looks stunning with very beautiful designer blouse made by our well known fashion designers. If you don’t find the unique and different design of blouse by your own, there are ways through which you can create beautiful blouse without breaking your brain.

Blouse designs accentuate the looks of the wearer. For a classy and sophisticated look, try these amazing blouse designs which can win you many appreciations. Just keep in mind if you are planning on a wearing a transparent saree, it’s best to avoid front hooks or pins, since it will make your overall look very clumsy. The current trend for blouse designs is net blouses with sweetheart necklines. Any simple looking saree can look wonderful with designer blouse designs which can make you look gorgeous. Every woman is different and it’s difficult to come up with a unique fitting, so tailor made blouses is the ultimate choice. A blouse should be like your second skin, it shouldn’t be too tight nor too loose and the right fitting makes a woman very confident.

From this videos, you can learn how to make this designer blouse in simple and easy method

Bridal Designer Blouse Made Easy Cutting And Stitching:

Designer Bridal Back Neck Blouse Pattern:

Designer Back Neck Blouse Pattern:

Designer Bridal Blouse Back Neck Pattern:

Blouse Back Neck Designs:

Spring Crafts: How to make a ladybug with their hands

Spring crafts. Articles made of paper ladybug. How to make a ladybug. Spring crafts kindergarten. Spring crafts from clay. Spring crafts from salted dough.

Ladybug poem:

“Ladybug, fly to the sky
Bring us bread,
black, white,
only not burnt.”

She listened attentively, and we threw it to the sky.
A continuation of the poem is:

“Ladybug,
Fly to the sky –
I’ll give you bread!
Ladybird,
Fly to the sky,
They are your kids
Kushan candy –
All for one,
And you no!”

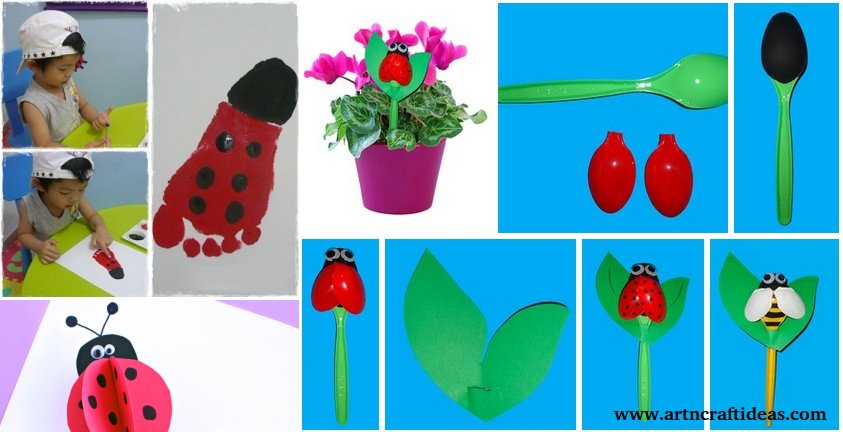
In this article, we gathered the spring crafts on “Ladybirds with their own hands.” We invite you to make these cute insects from paper to sculpt out of clay or salt dough and even mini sandwiches prepared in the form of ladybirds. We hope that our crafts will give you the spring, sunny mood!

1. Spring crafts out of paper

We offer you a spring crafts origami – ladybird paper. You will need a square sheet of red paper. Fold it as shown in the picture below, cut with scissors sharp corners black pencil or marker Doris ladybug missing parts. Articles made of paper ladybug ladybug is ready!

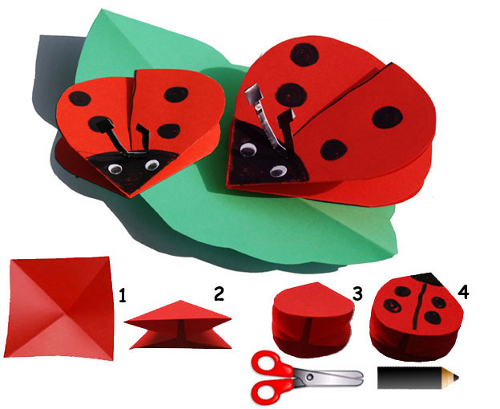
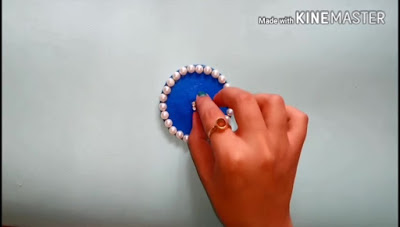
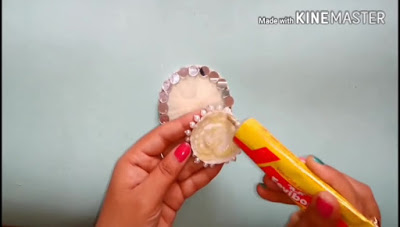
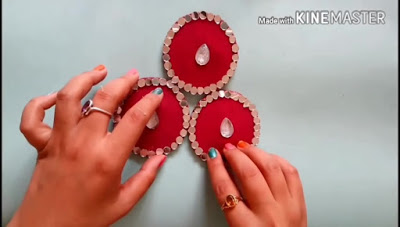
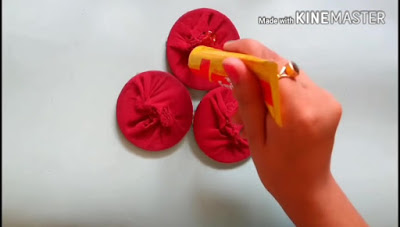
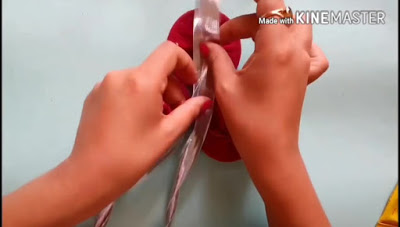
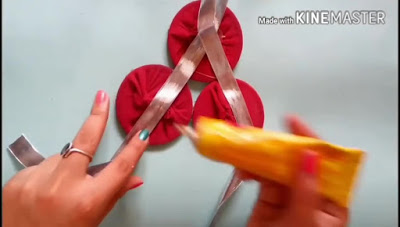
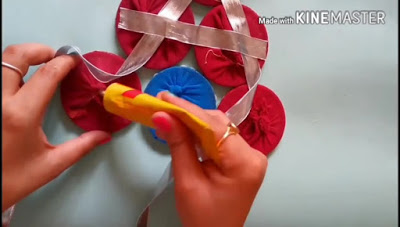
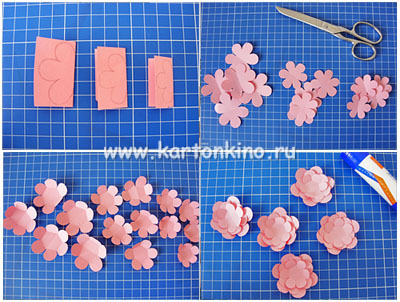
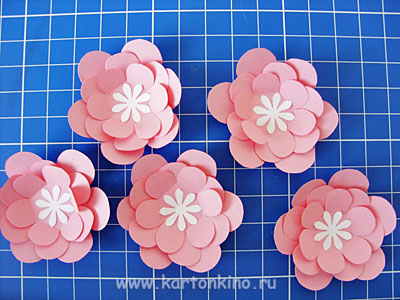
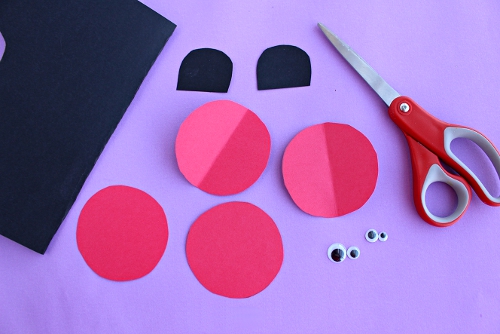
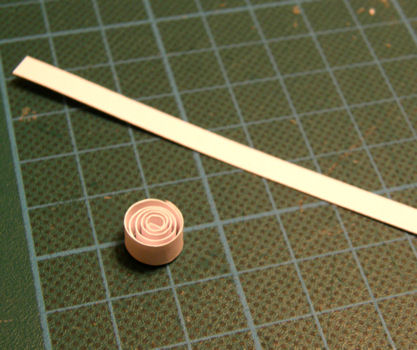
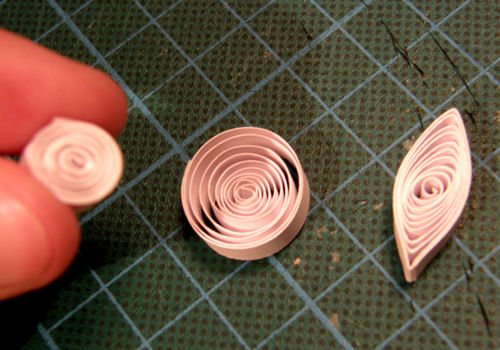
You can make three-dimensional applique with ladybirds in the photo below from the paper circles.

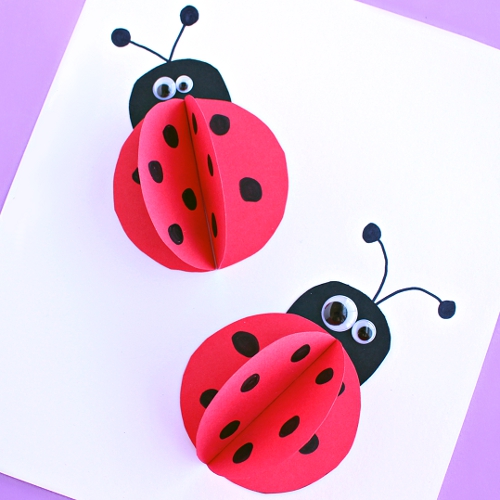
For the manufacture of a ladybug, you will need three circles. Each circle should be folded in half, and then glue them together flanks.

2. Crafts on spring – Kids crafts spring

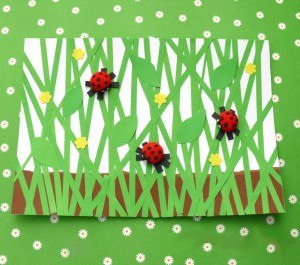
See what kind of an interesting application on the topic spring can be made with the children of colored paper. It is very simple to manufacture spring hack for children.

3. Crafts spring has come. How to make a ladybug:

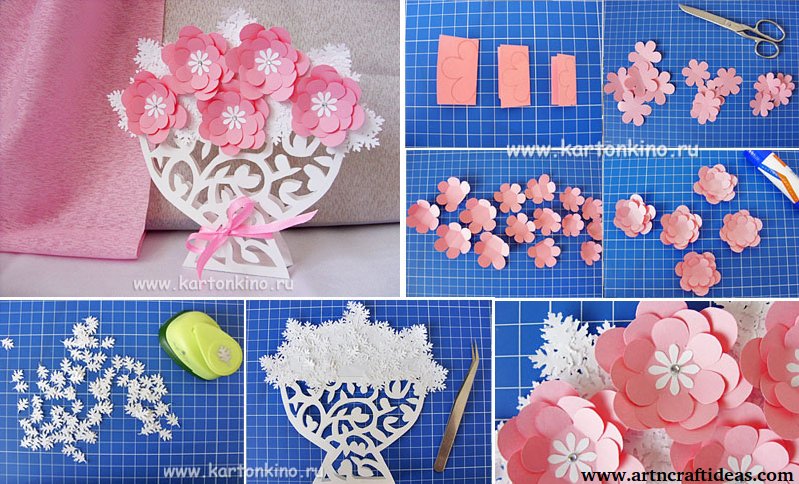
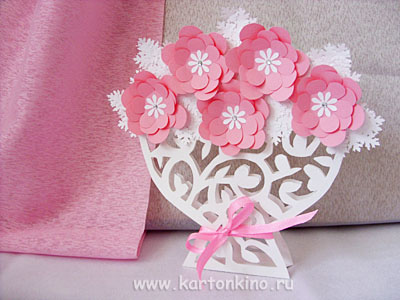
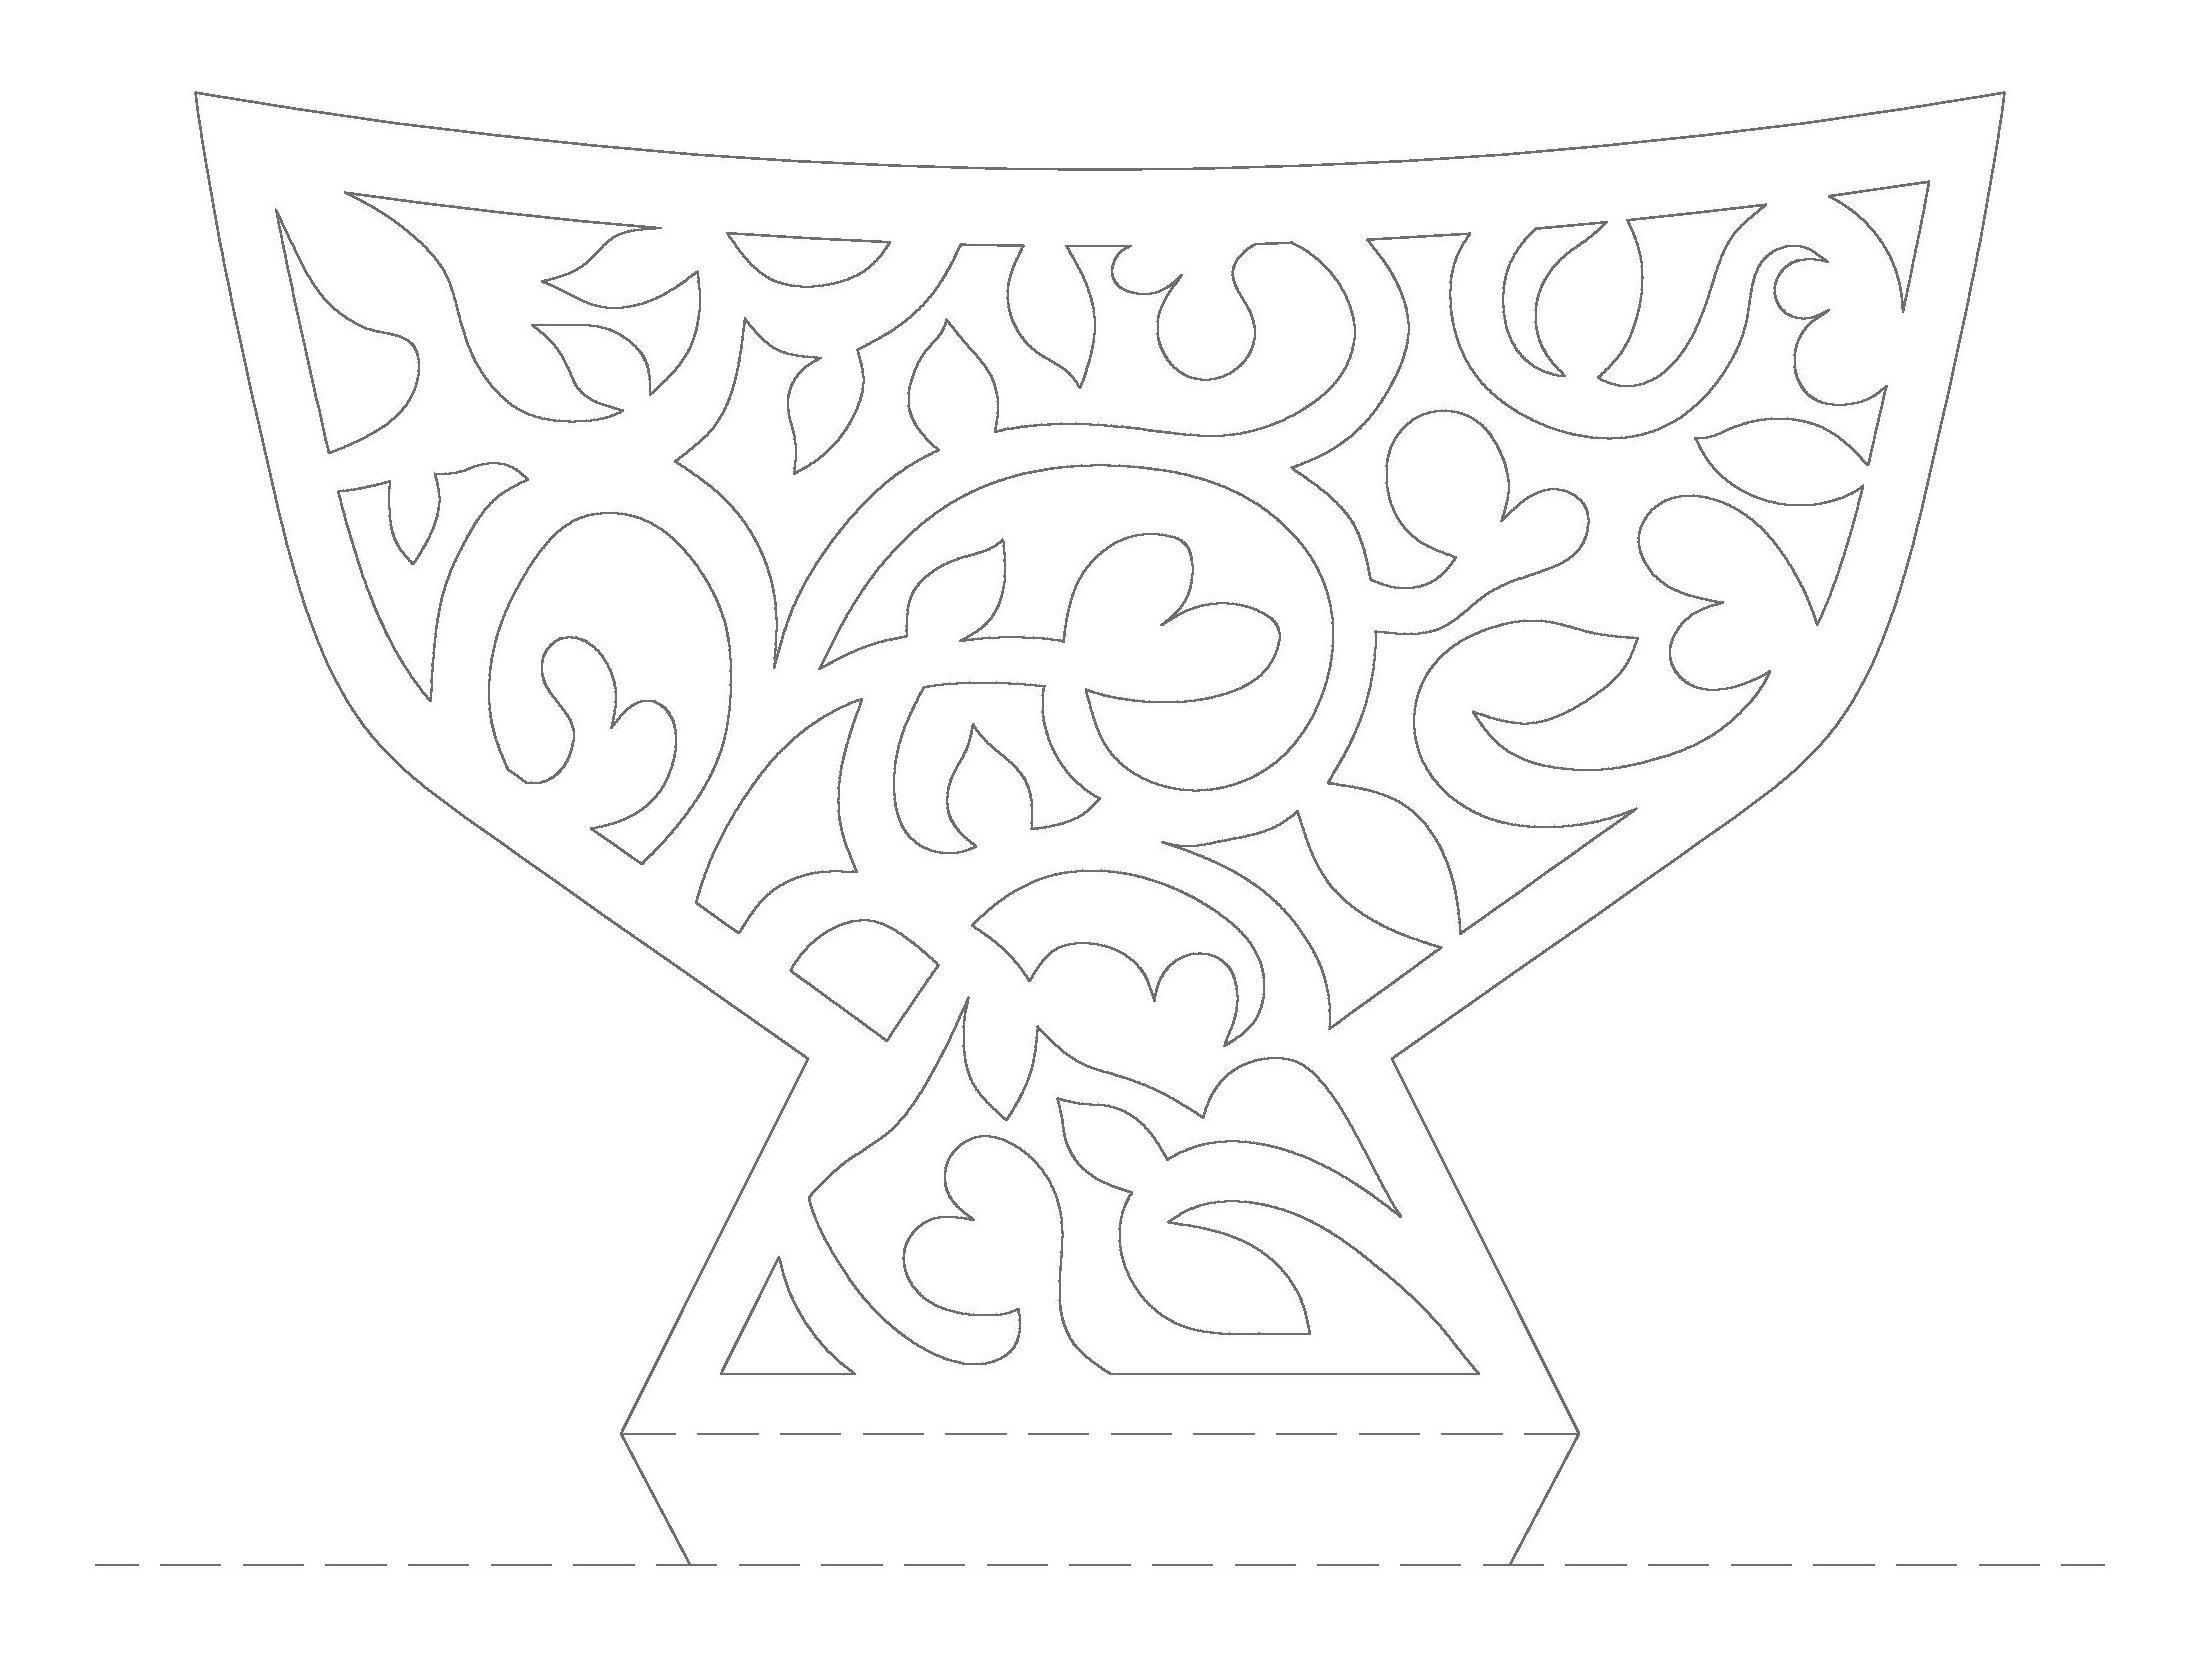
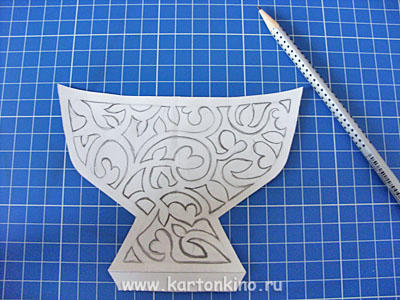
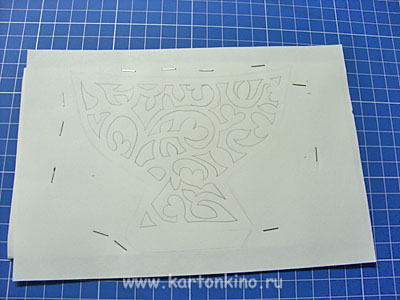
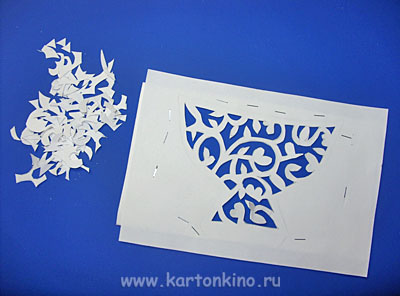
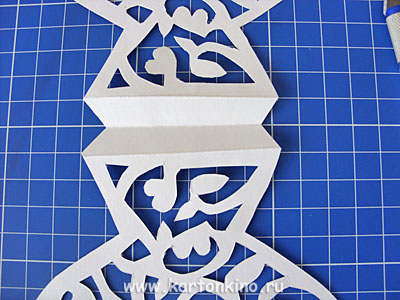
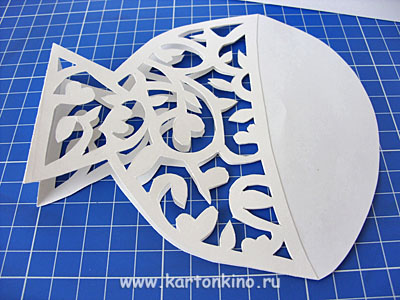
Another spring crafts out of paper-

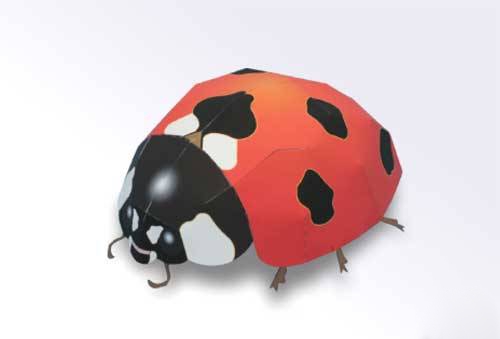
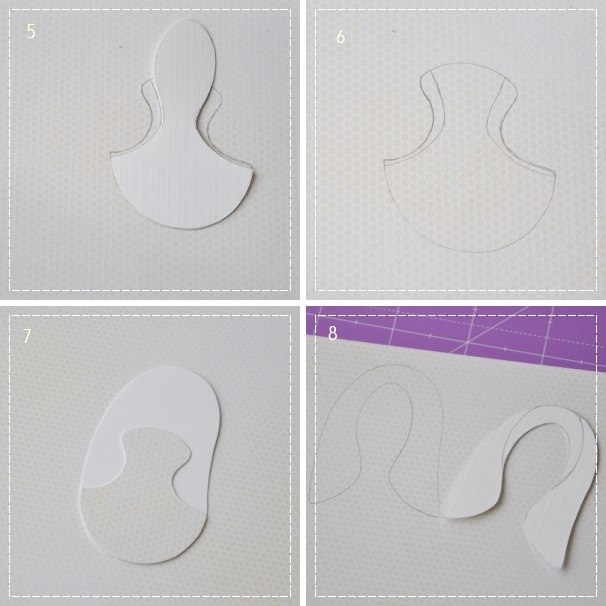
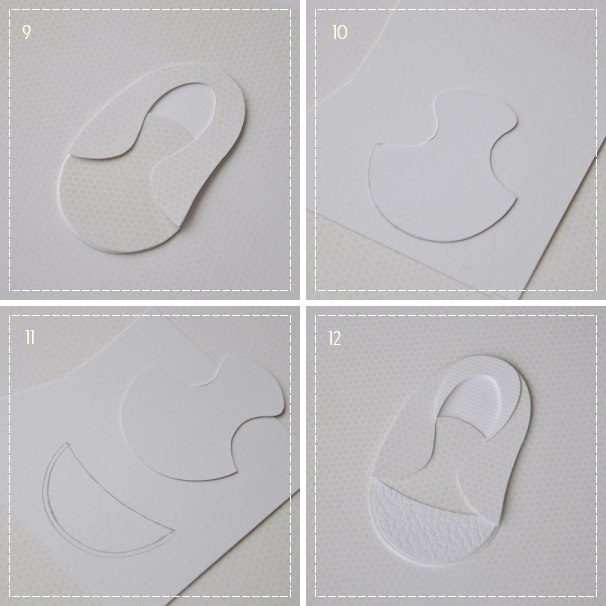
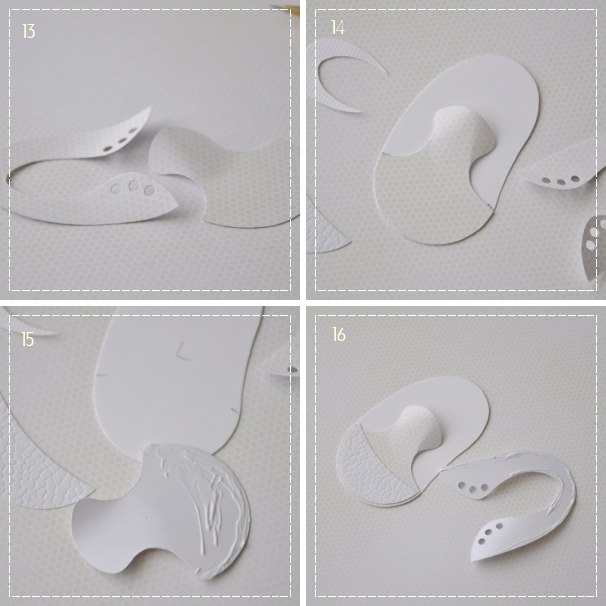
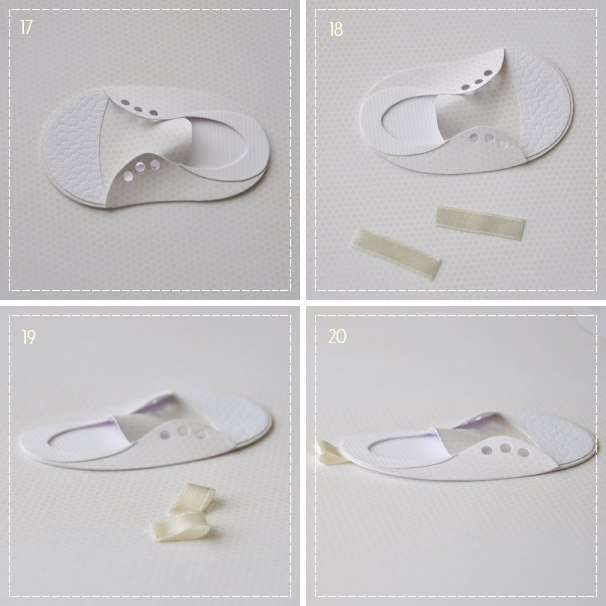
Download and print the scheme crafts out of paper on the link >>>> Cut and glue according to the instructions. This spring crafts out of paper just seems complicated. In fact, it makes it easy and fast.

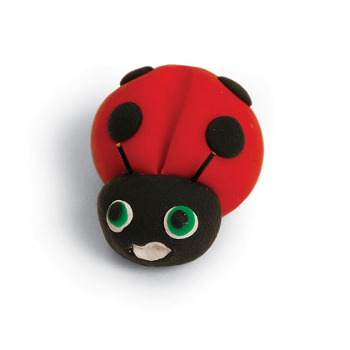
4. Spring crafts from clay – Spring crafts from salted dough

Moving from spring craft paper for the spring Crafts from clay and salt dough. Even a very small child under the supervision of an adult mentor can dazzle ladybird from plasticine or salt dough. The link you will find detailed instructions on making this spring crafts with their hands >>>>

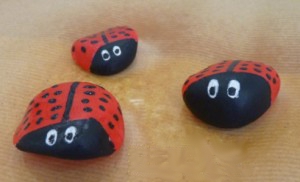
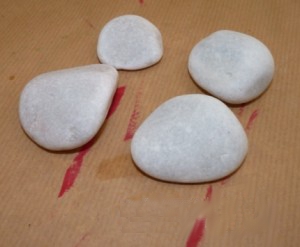
5. Spring crafts kindergarten – Spring crafts for kindergarten

If you have a home remained flat stones since last summer, it is possible to paint them with paint, and you will turn out cute crafts ladybugs.

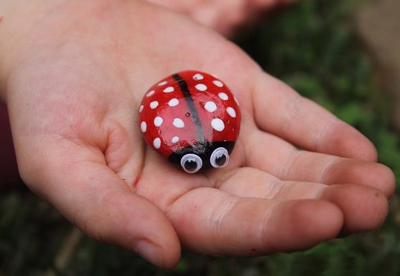
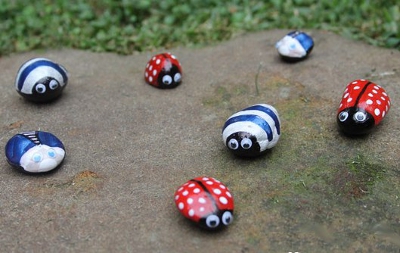
On the other interesting artefacts from the stones can be found in the article “Living Stones” >>>>

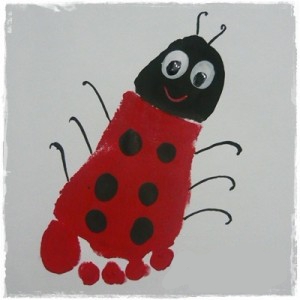
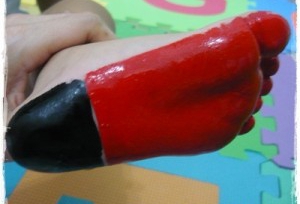
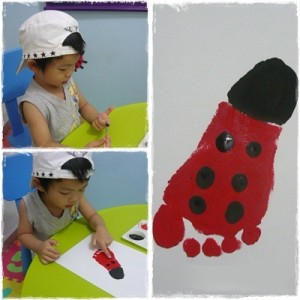
6. Crafts Spring. How to make a ladybug

spring hack – the ladybug imprint of children’s feet.

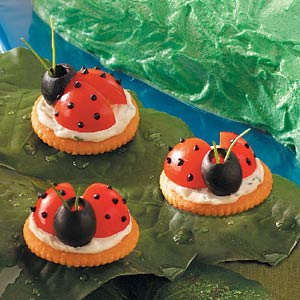
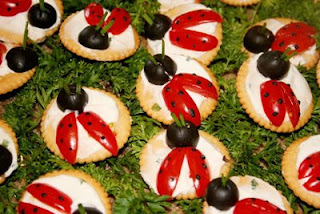
7. Spring crafts for kids. How to make a ladybug from tomatoes

Cook with your child edible crafts – mini sandwiches “Ladybugs”. To do this, first spread a soft cheese on crackers.Now take the cherry tomatoes, cut them in half and pomidorinku of these halves make wings ladybirds. Olives (pitted) make insect head and dots on the back. Decorate all the greens. It turned out tasty, useful, beautiful, spring dish.

8. Developing games for children. Education account

Cards in Mathematics for preschoolers with numbers from 1 to 20.

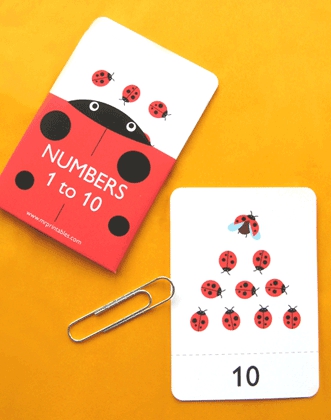
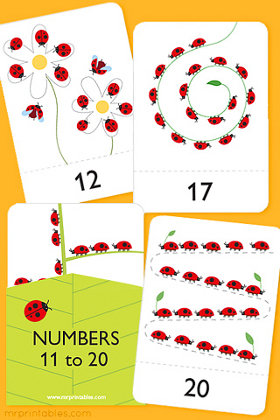
Download cards in mathematics can be on the links:
link 1 >>>>
link 2 >>>>

9. Spring crafts

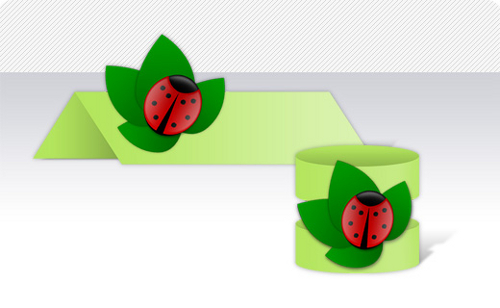
Original decoration for pots of potted flowers can be made from plastic spoons. For this spring crafts you will also need: acrylic paints, doll eyes, glue or glue gun on cardboard or heavy paper green.

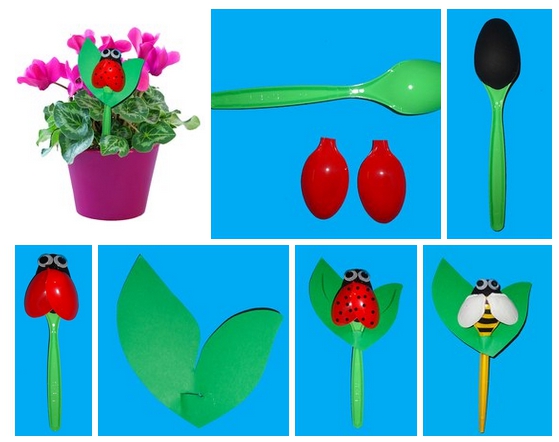
Hope you like these spring craft ideas and tutorials.

Love birds – Acrylics Painting on Canvas

Love birds – Acrylics Painting on Canvas:

Required Materials :

  • 3-4 different colours of paint – Red, Yellow, Black  & White
  • Canvas
  • Circular pouncers
  • Hanging supplies
  • Tray to hold the paint

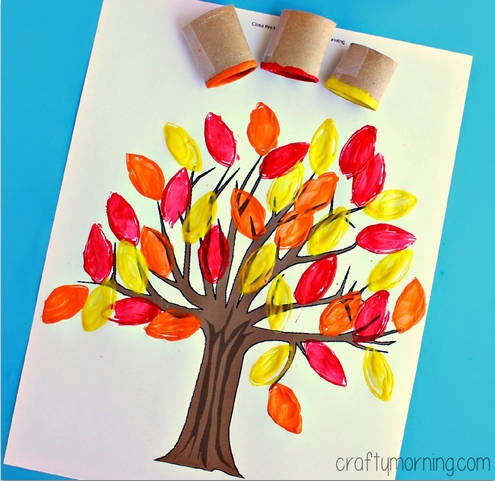
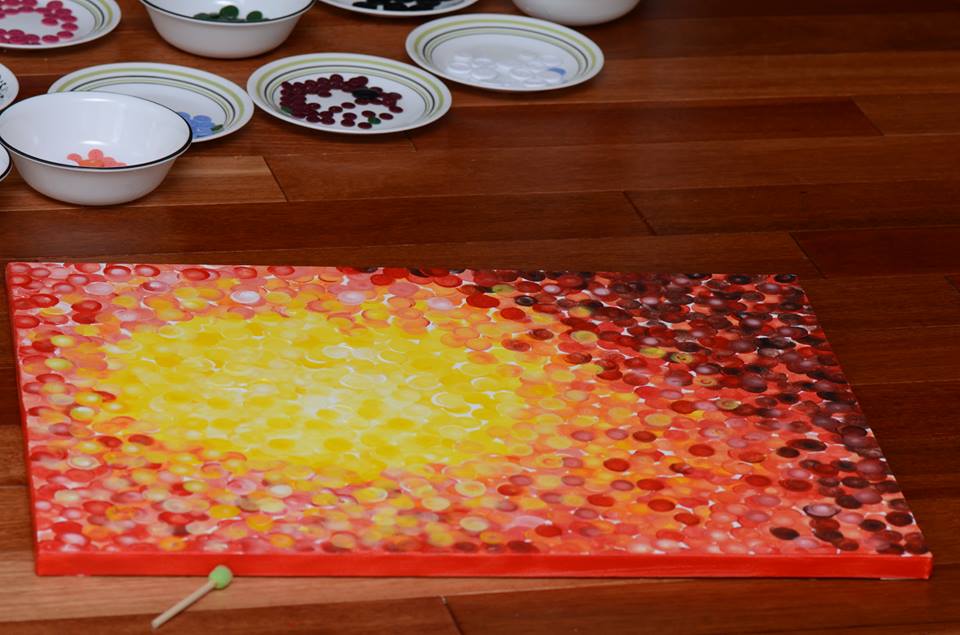
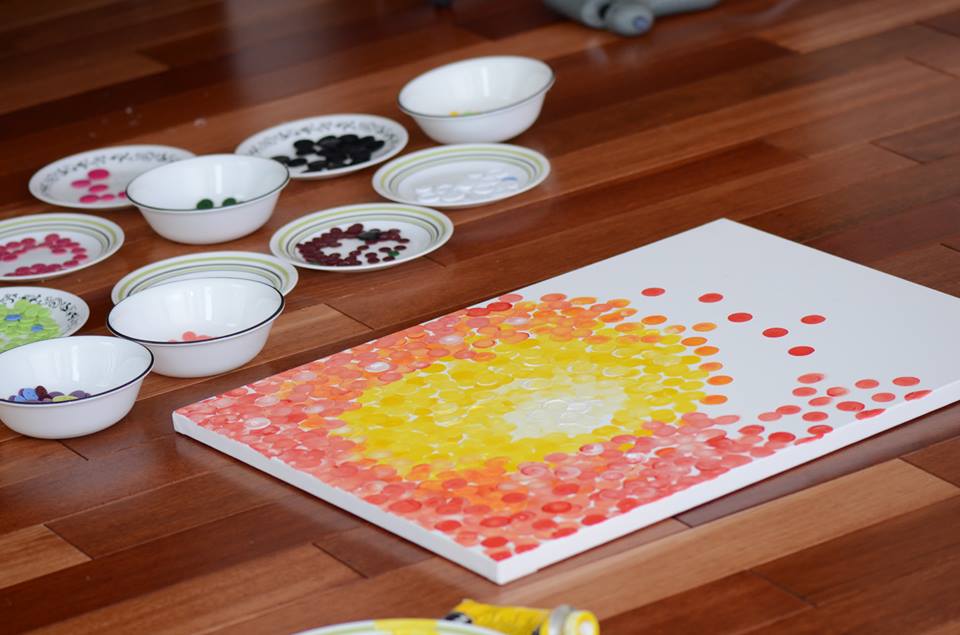
I used round flat tip sponge brushes(pouncers) for the background.. I was after bokeh affect of a sunset scene..
Start with white in the center of the sun and add yellow, and then eventually red.. try to blend the colors so that they wont appear like patches..

You can see the pouncer brush beside the painting, used different size brushes randomly..
The main colors used in this are yellow,red, white, and black.. Basically add black and white to your colors to make it dark and lighter..
For the stroke, you just dab the pouncer in the paint(Acrylics) and put it on the canvas, and rotate it so that you get a perfect round.. Keep repeating until you get the desired background…

…plan was to use the buttons you see in the bowl, on the painting. but changed at the end and settled with just a silhouette of a tree and birds..

This is how the background looked before adding the silhouette…

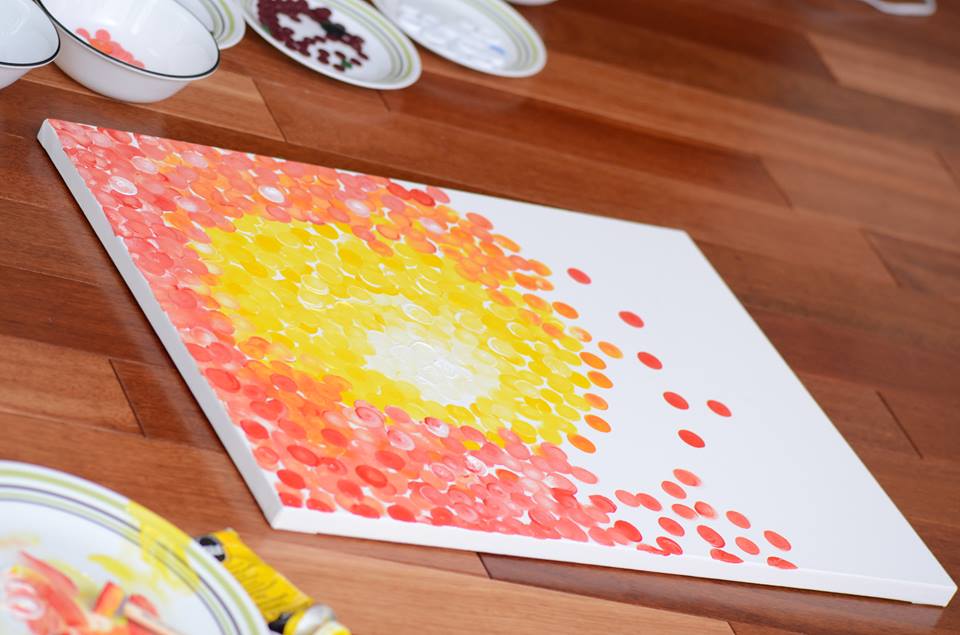
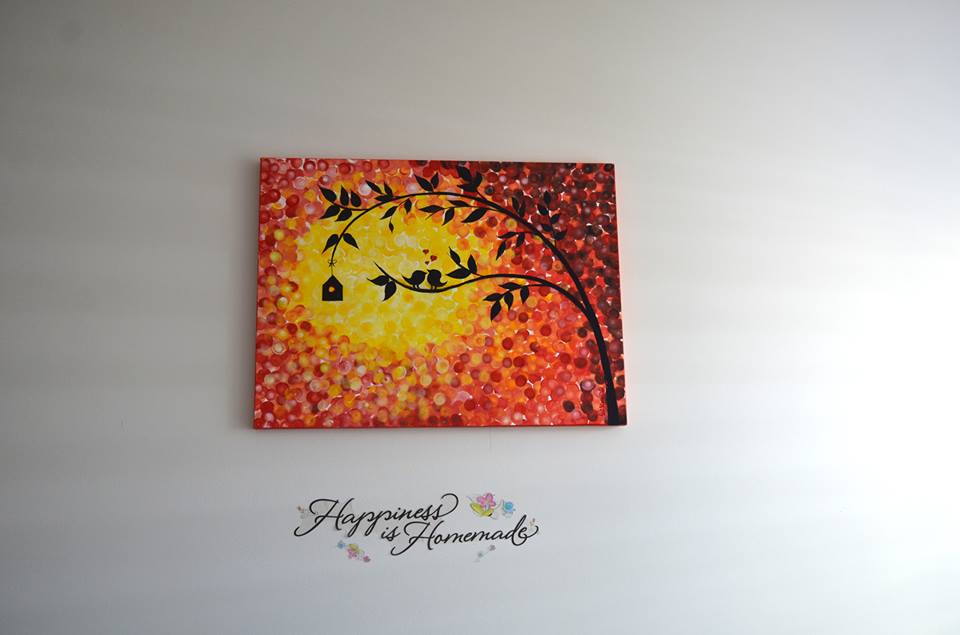
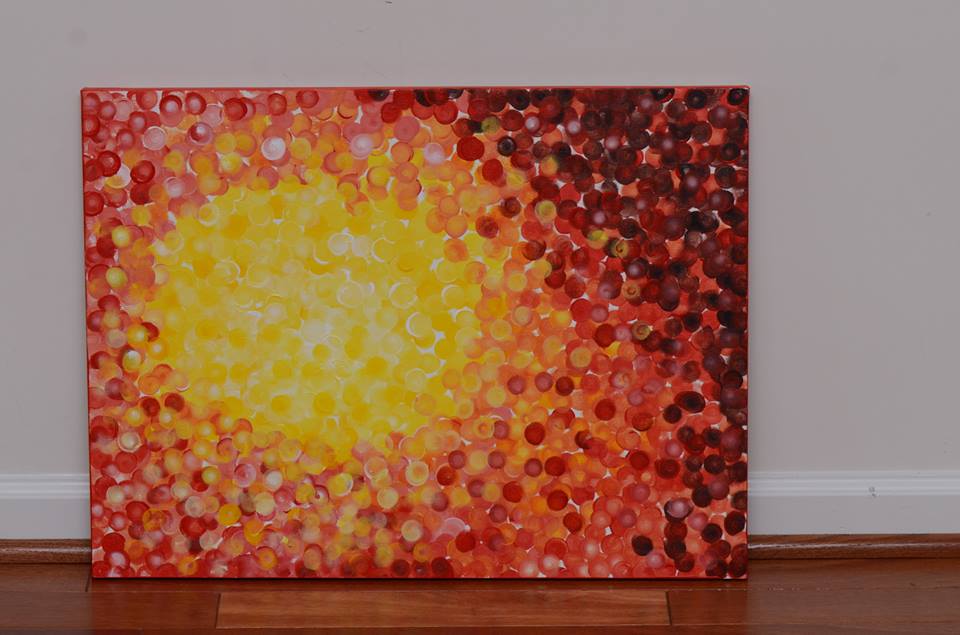
Finished version – After adding a simple silhouette of a tree with love birds.. it gave a real dimension to the background.. Just an illustration done in adobe to see how would the painting look on a wall…
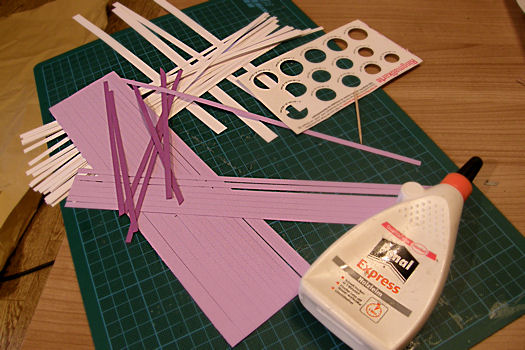
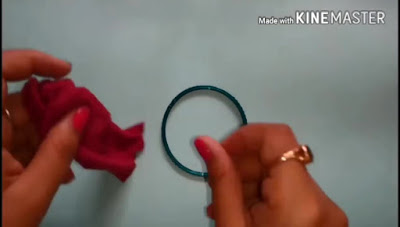
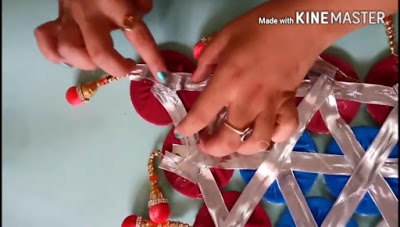
Courtesy: Sriks Creative Corner

DIY Jingle Pillow Tutorial

DIY Jingle Pillow Tutorial: Here’s another pillow from Scarlet’s Indian Elephant Party. The colors are a bit much attractive. I guess it wouldn’t be so comfortable to snuggle up to a pillow with metal bells on it, but it looks cute and that’s what really matters. Or you could replace the bells with buttons or ribbon flowers!

Get the full Jingle Pillow DIY after the jump…

DIY Jingle Pillow

1.  Wash, iron and cut your fabric. You’ll need one piece the size of your pillow plus 1/2″ for the front.  For the back you’ll need two pieces the same length by half the width of your pillow plus 2.5″.  Then you’ll need one long strip of any fabric in any width and length for your ruffle, and some jingle bells or buttons or what not.  My pillow is 12″ X 21″ so I cut a pieces 12.5″X21.5″ for the front and two pieces 12″X13″ for the back.

2.  Fold one short edge of each back piece in 1/4″ and iron, then another 1/4″ and iron, and sew in place.  On the side that will show, fold it in another 1/4″ and iron but don’t sew, so later on you won’t have a seam line showing on your pillow:

3. Take your long strip of fabric and fold it randomly across the front and pin in place.  Ignore the bells on the corner, I did it in the wrong order:

Sew the ruffle in place with one long line of stitches.  Then using embroidery thread hand sew your jingle bells or buttons to the front of the pillow:

There you go:

4. Now lay your pillow front right side up, your pillow back piece that will not be showing right side down, then the pillow back piece the will show right side down on top of that, making sure the outside edges of the front and back line up.  Pin in place:

Sew all the way around and finish the edges by serging, sewing with an overlock or zig zag stitch or just trimming with pinking shears:

5. Turn your pillow right side out and using your embroidery thread and hand sewing needle, sew some dangly jingle bells to the corners:

Stuff with pillow form, you’re done!

Add to growing pile of bright pillows:

Hope you like this tutorial.

Source: prettyprudent

DIY Handmade Newborn child’s birthday Card

DIY Handmade Newborn child’s birthday Card: Birth of a child in the family is very happy event . I would like to congratulate our dear friends or relatives. I would like to make it somehow special is not as all. As a beautiful and touching.

More cards pattern:

Hope you like these tutorial & ideas.

25+ Creative DIY Toilet Paper Roll Craft Ideas

These DIY crafts included in this roundup range from Home Decor, to Kids Crafts, to Educational Crafts, to Organizational Crafts, Gardening, to seasonal decor. It is all here. And, after you finish looking at all of these creative ideas I DARE YOU to ever throw away a toilet paper roll again (I know I will be saving mine!).

Easy Paper Quilling Photo Frame (Tutorial)

It requires the following ingredients:

  • A dense paper for background (at least 300g / m2)
  • Less dense paper for flowers (from 120 to 160 g / m2 – denser not desirable, tk strip of this size will not curl and smoothly obedient) two colors. In my case it is white, that will stand out, and a gentle shade of the background color, which will allow the flowers to our successfully combined with the main color and helps highlight the details.
  • Paper knife and steel ruler to cut strip. Use scissors to cut a tedious affair
  • PVA glue
  • A toothpick or other curler rolls

Cut into strips 30 cm long and 5 mm wide, the number pretends leaning on conceived plot. There are many clever ways to quickly cut, for example, cut a few layers of paper at a time, but this density (120 to 160), it is quite difficult. so long to not split hairs, I bonded with paper flowers tetrad piece of a cell and, Whack-Whack-Whack by moving the line of cells…

But first, make a frame, and best of all – for later.

We mark up our most dense leaf. It is recommended to prepare a detailed shemku on paper, not to cut too much, take into account all the dimensions. I look forward to photos 13×18, based on these dimensions, select the width of the box, my left and from the bottom a little bit wider. Zakrnchiv layout, cut out window for the picture, which should be slightly smaller than the photo

Now for the “pocket” into which the picture will be inserted. Photographic paper is very thick and has a substantial thickness, so that the frame is not deformed when it put them in the photo, we give the pocket a little bit width)) is glued to the back of the narrow strip of heavy paper, and now you can stick and “pocket” itself, which will not allow our shot to drop out of the frame.

Basis is ready.

We turn to the flowers. As you probably already know, the Demi demisoffice.com.ua/news/news_around_the_world/104 have a whole bunch of examples and lessons, which explores in detail and scale of the basic quilling techniques.
So, for the manufacture of the petal we need a paper strip, which by means of a split toothpick (or more noble instrument) is rolled into a tight roll of. A roll in turn unwound to a certain diameter, and then the end of the strip is fixed with white glue rolls and formed into the desired shape with the fingers. my hands to avoid dark spots then hurt at work. Particularly easy to get dirty cuts strips for the white paper is a disaster, it is easy to give very poor appearance.

For the manufacture of identical petals useful template to unwind rolls up to a diameter. Here is my first flower

Mnoe still really like the flowers of this form

and leaves, of course

In general, we turn your heart’s content, do not forget to create a variety of flora dimensions))
when the basic elements are ready, dispose of on the frame and prileivaem.
This is not the final version, but the meaning is, I think, is clear.

Now add the details and Circuits, until the composition does not seem quite complete

one last step – attach the back of the podstvku stability.

frame ready

Thank you for attention. I hope you will come in handy malenkty my lesson. I’d be happy reviews!

Vase with flowers – Mother’s Day Gift (Tutorial)

Mother’s Day gift – flower vases made in the art of paper cutting.

Long I stare at work Zulfiya Dadashov. Not so long ago bought a knife for cutting, tried to cut a Christmas tree for its MC. Cut I liked it, so I decided to do the work for the competition in this technique.

Author template:

Required Material:

  • paper white and pink,
  • knife for cutting,
  • a ruler and a tool for creasing,
  • scissors,
  • shaped punches,
  • glue,
  • pencil,
  • ribbon, rhinestones.

The finished scheme did not seek, I decided to draw itself. I admit, it did not work the first time.

He translated his drawing on thin paper and secure it with a stapler on white paper to cut, folded in half.

Cut parts with a knife. As the experience in the cutting I did not so much, it was hard to cut curved elements.

Then cut out the contour of the vase.

Based vases necessary to line 3 (probigovat) and folded on it, for the construction stability.

Top between the two halves of the vase paste leaf and cut it in a semicircle. This place is a decorative elements – flowers.

For the manufacture of each flower will need 3 different sizes of paper square. You need to add these squares in half and draw half of a flower.

I cut blanks for 5 flowers. Unbent their petals. And then glued blanks flowers with each other.

In addition the finished flower pasted dyrokolny little flower.

Next, the leaves made by a hole punch. And sticking them on top of the vase (pasted on a sheet).

After this has placed the flowers and glue them.

Midway flowers can be decorated with rhinestones.

At the bottom of the vase tied bow, covering only one half of the vase.

Hope you like this tutorial.