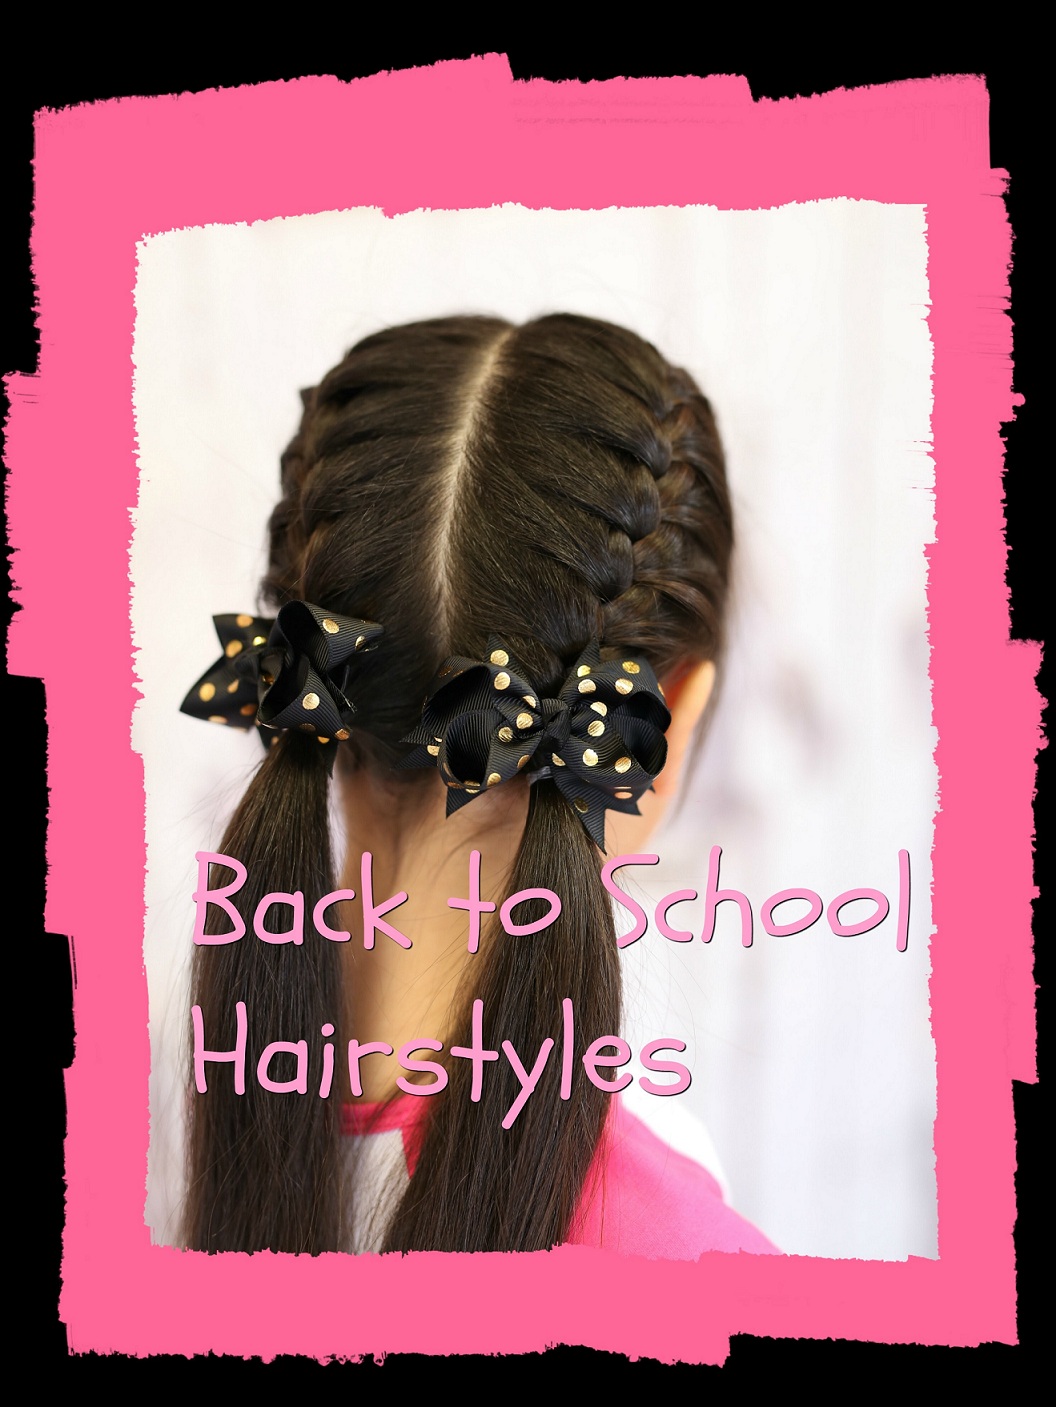
Braided Back To School hairstyle:
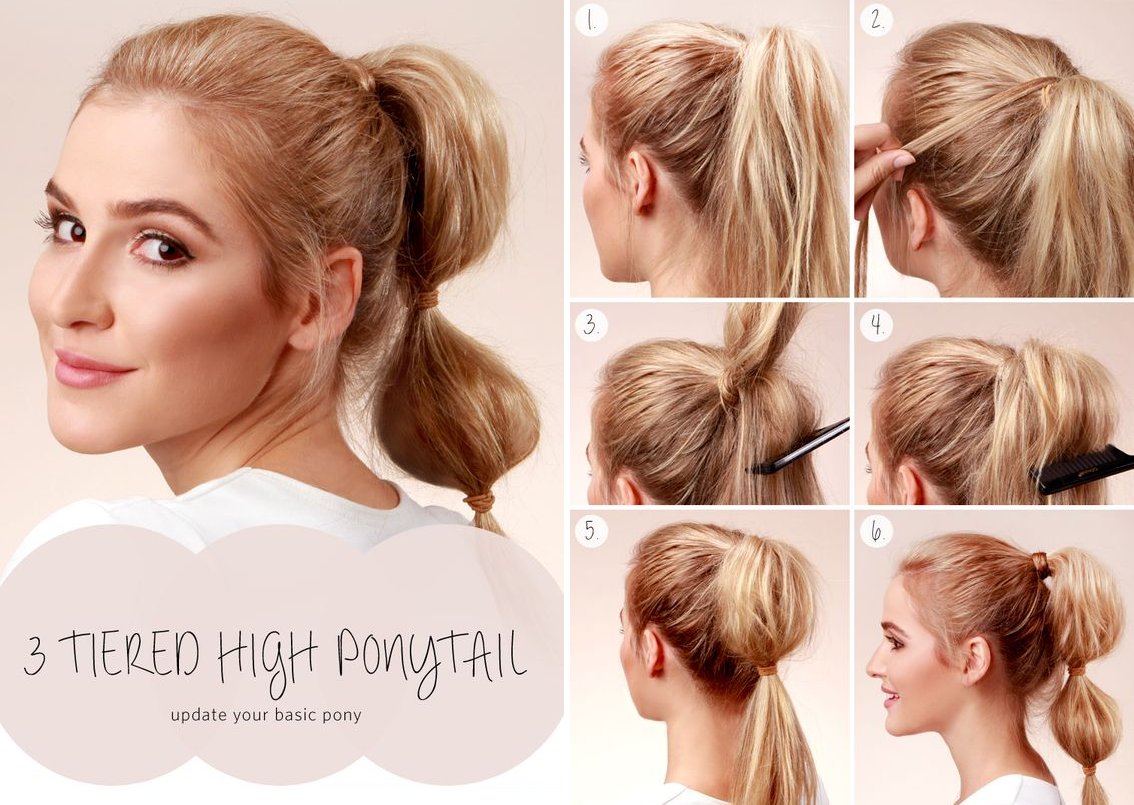
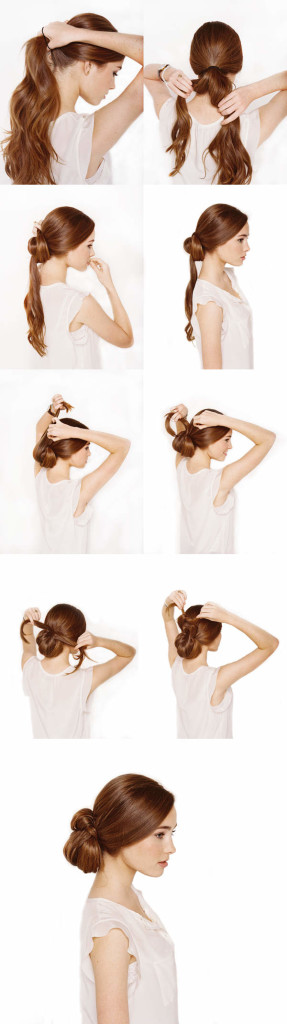
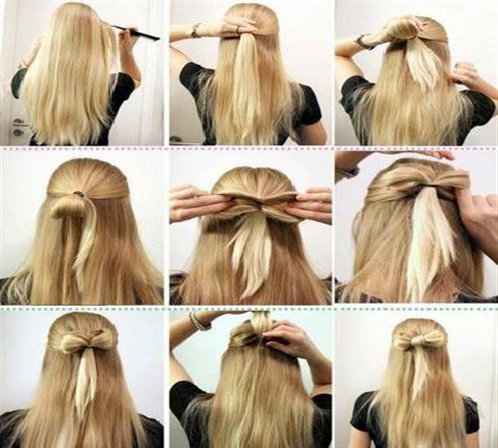
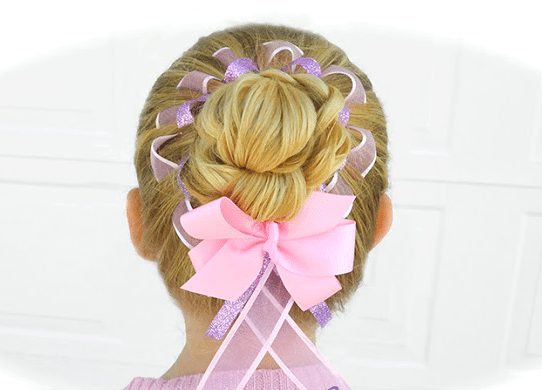
Messy Bun with Knot Headband or any Bow
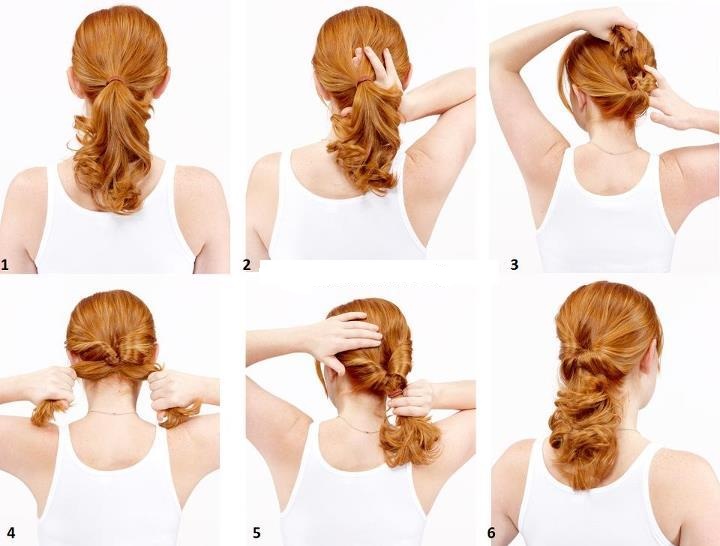
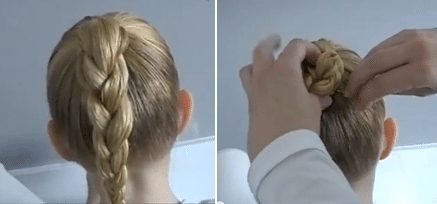
First pull hair up into a high ponytail.
When tying the ponytail around all the hair the last go round do not pull the hair all the way through. Leave at least a couple inches of “tail.” This will create a bun.
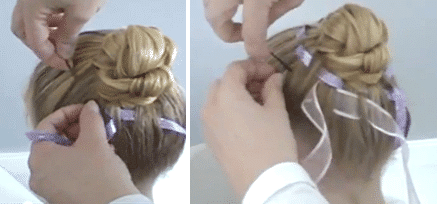
Pull the bun tight by the ponytail.
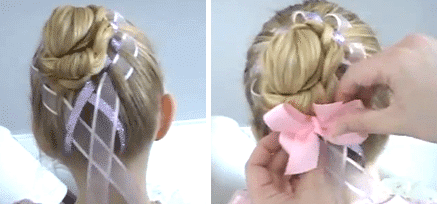
You can then add your knot headband or you can add your bow to the back of the bun to create a fun hairstyle!
Knot headbands (We also have these in stripes and other prints.)
Hair Bows
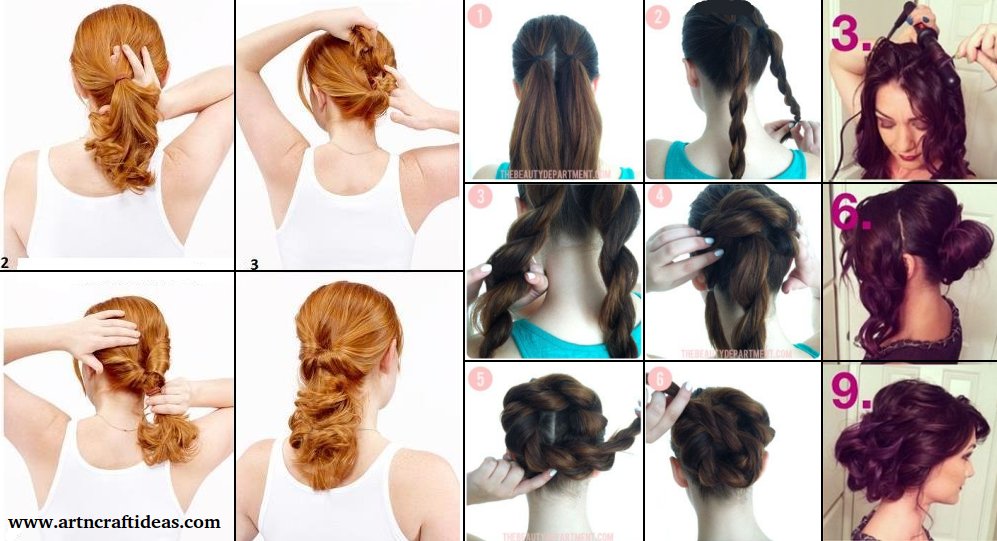
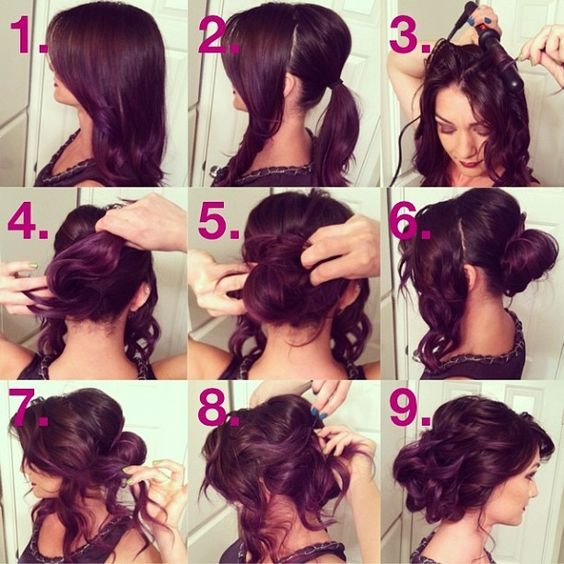
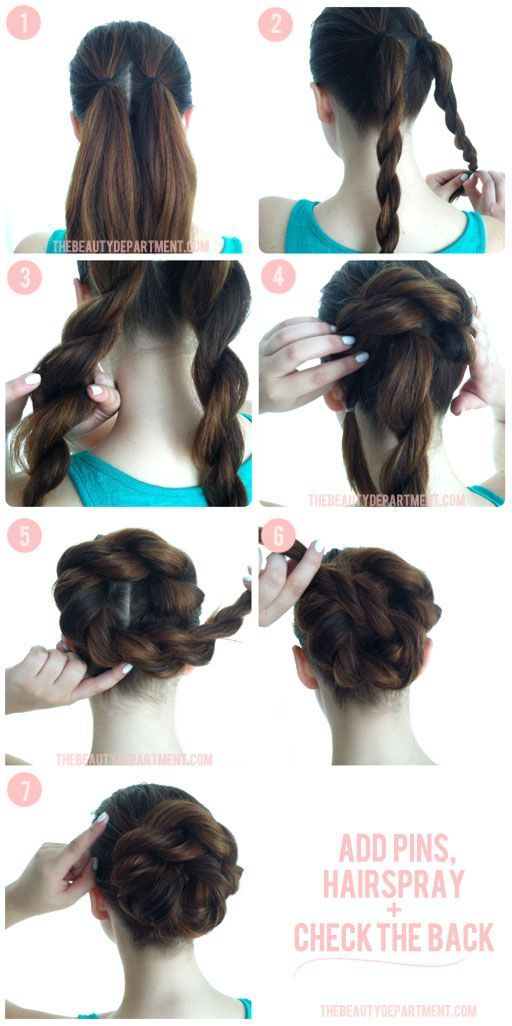
Here is one that is fun but takes a little more time.. 🙂
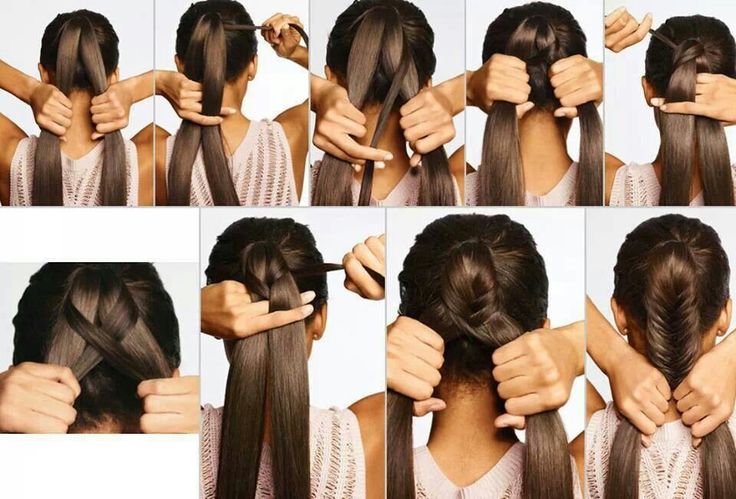
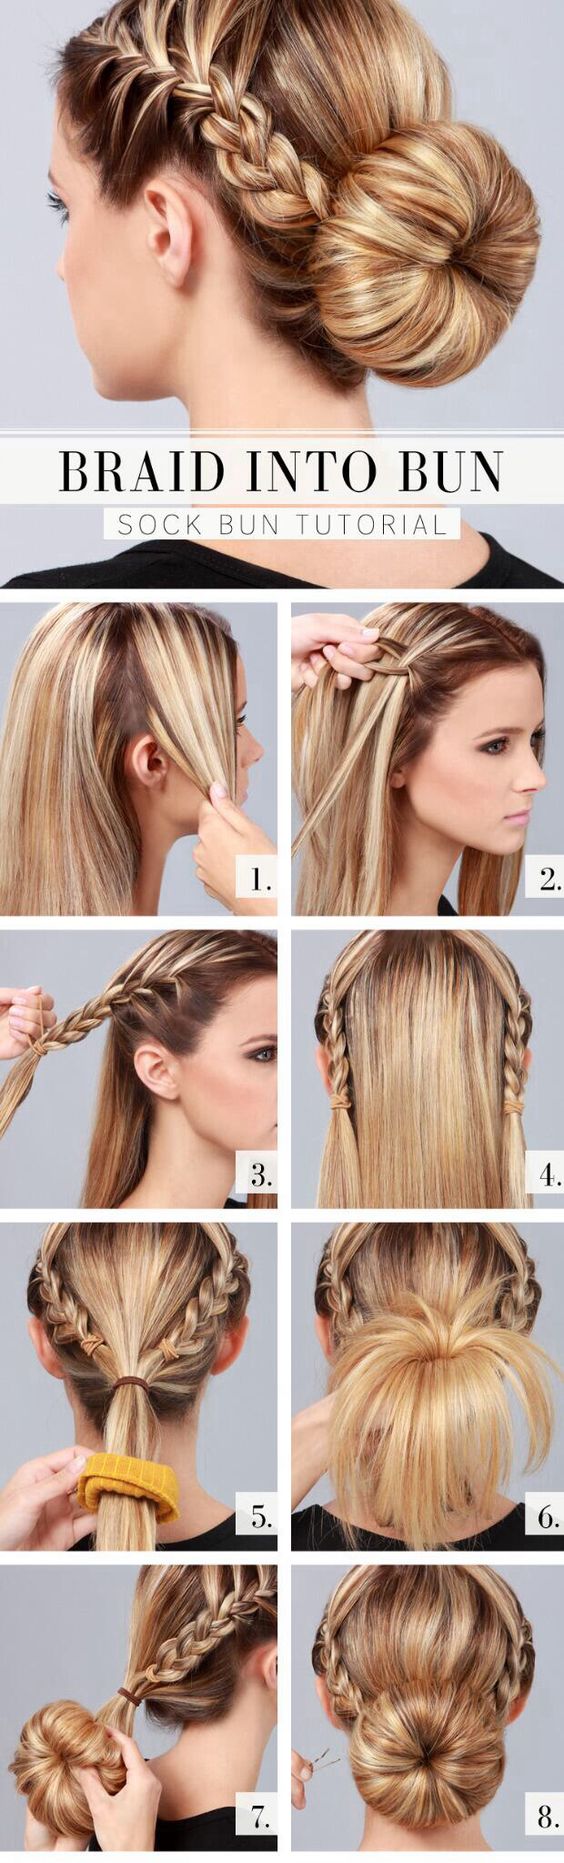
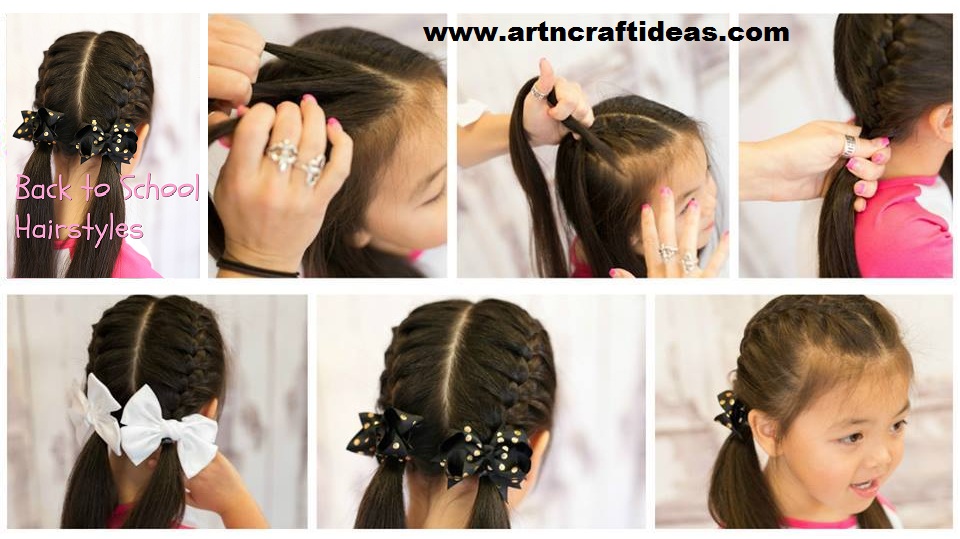
Braided Pigtails with Bows
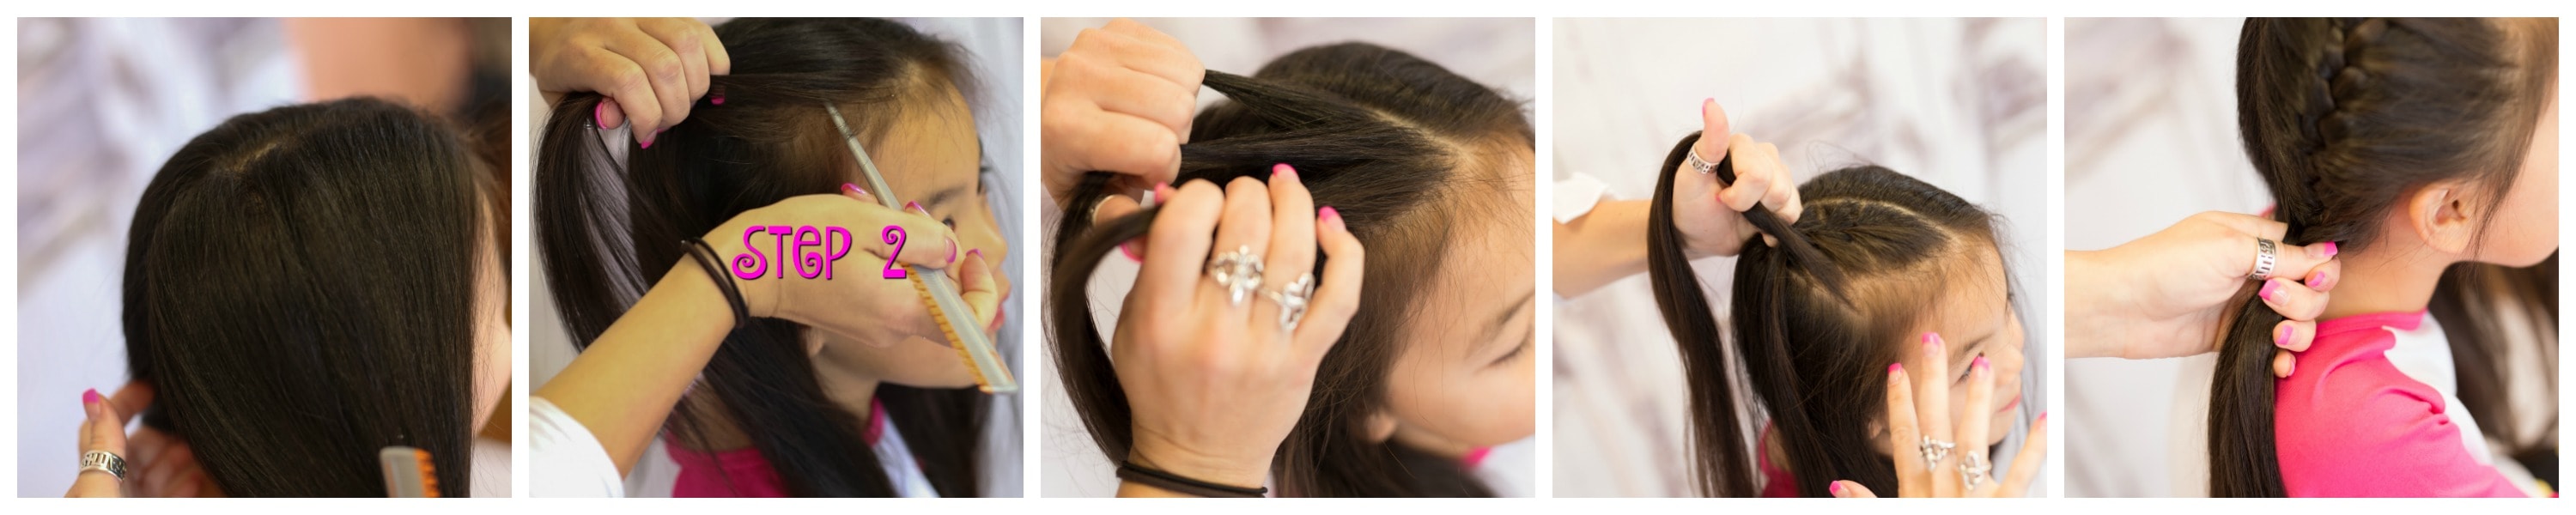
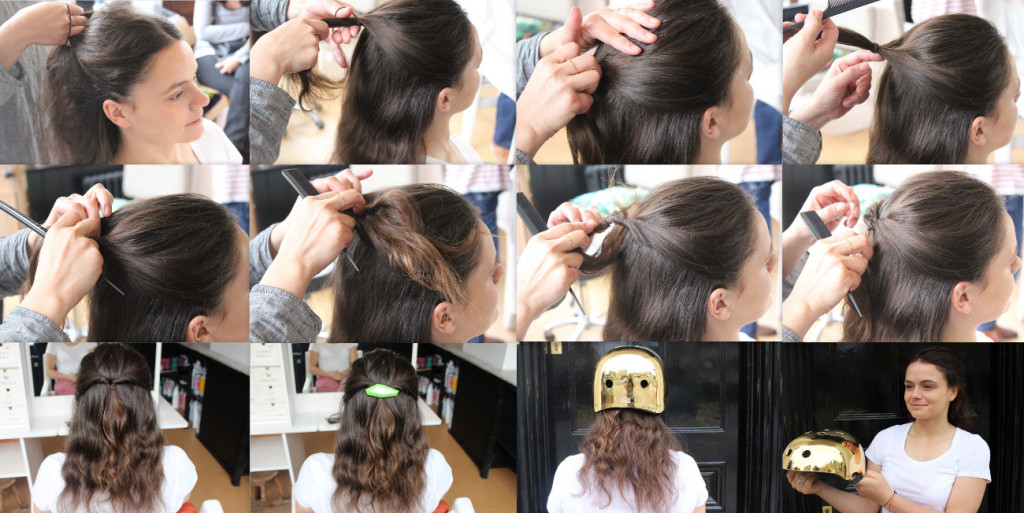
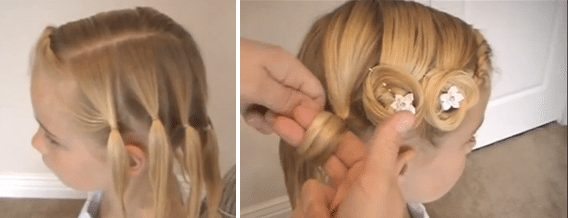
First, you will create two even sections for your pigtails. Once hair is parted all the way down the middle you will want to clip one side out of the way.
Step 2: Take the top half inch section of the first section of hair from the part to begin the braid. Now divide that section into three parts to start your braid. **Create fists with hair in each hand.Make sure your pinkies are touching her head. By keeping your hands close to her head makes for a tighter braid.
Drop the middle piece of hair and bring it toward the front. Grab a small section of loose hair to draw into the braid with the piece of dropped hair.
Pick up that hair with the hand closest to the forehead. You should have three pieces in your hands again.
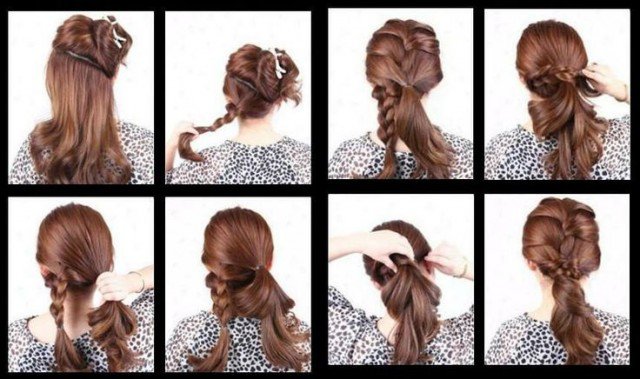
Now drop the current middle piece again and grab a small section of loose hair to draw in with the dropped piece. Pick up the hair using the fist toward the back of the head.
Repeat those steps until your braid reaches the bottom of her hairline on her neck.
Once you reach the bottom of her hairline, continue with a normal braid for an inch, and then band it. This will help keep the braid tight without creating tight pulls in the braid that will yank her scalp.
You can then leave the remainder of her hair loose in a ponytail (like pictured) or braid until the end of her hair.
Now follow these steps for her other braided pigtail.
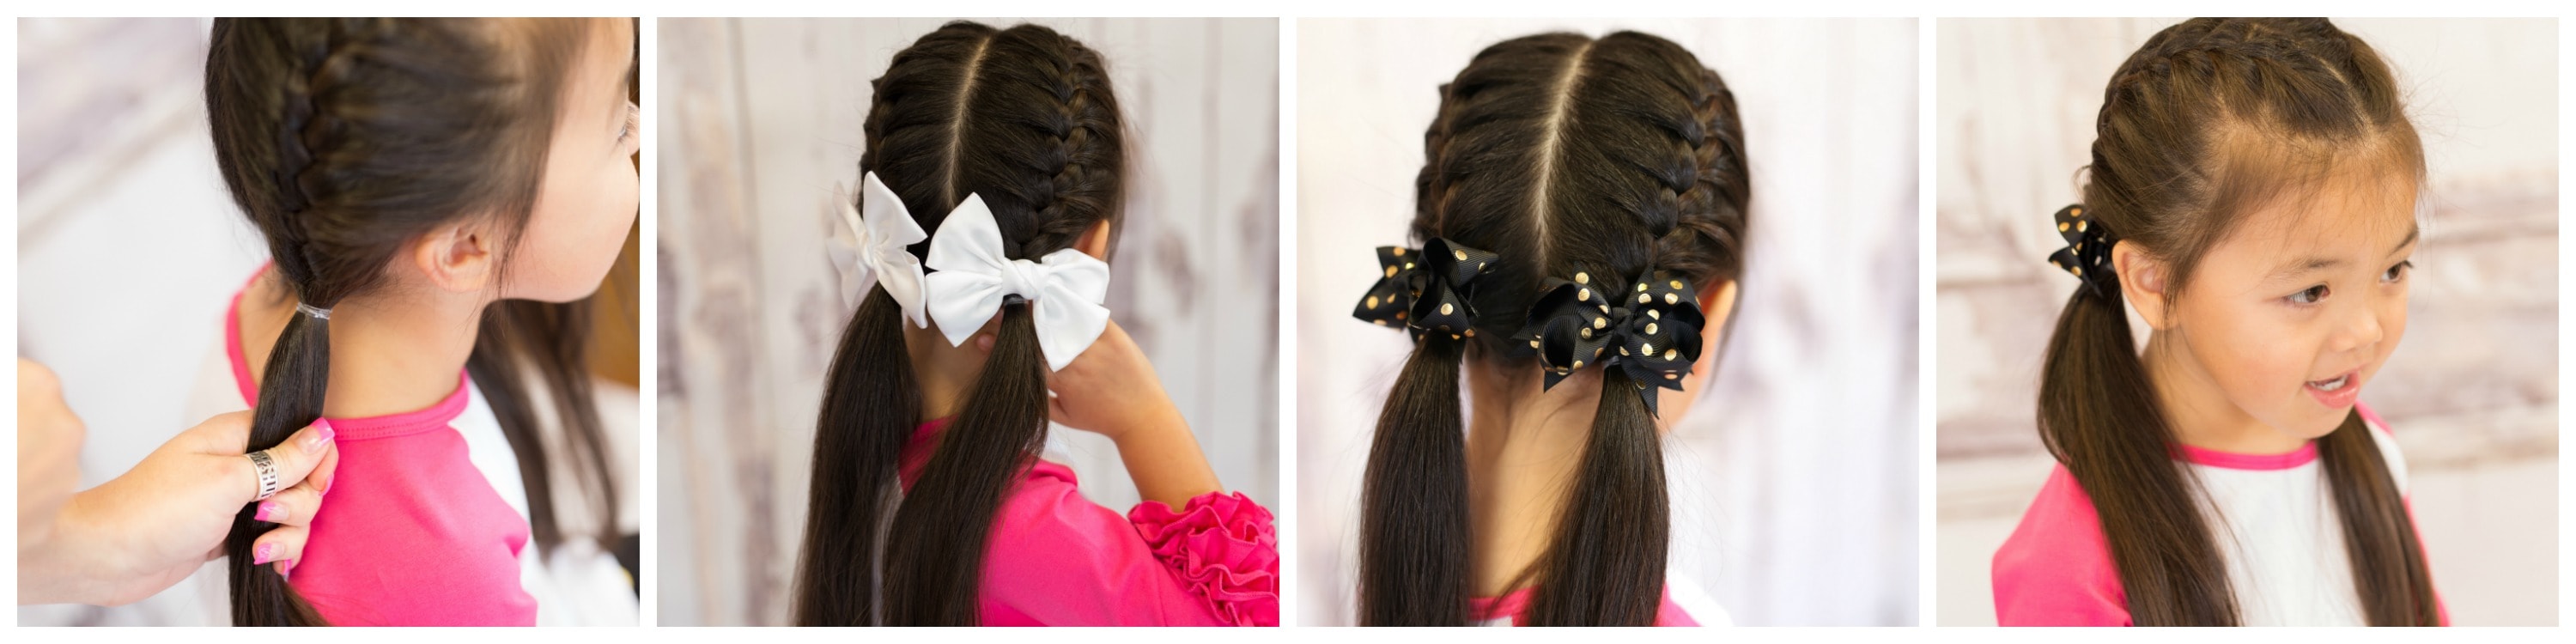
After finishing both pigtails you can easily slide a bow with an alligator clip in right above her elastic hair tie.
courtesy: The Hair Bow Company


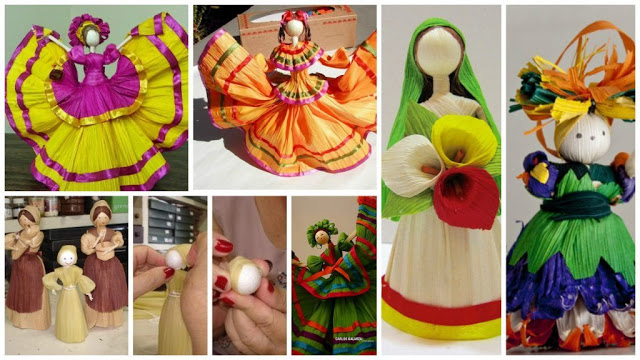
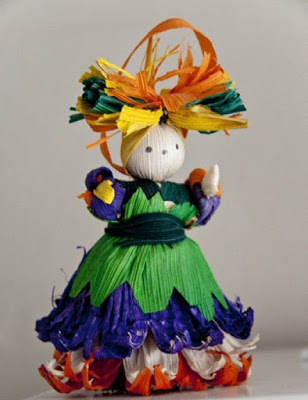
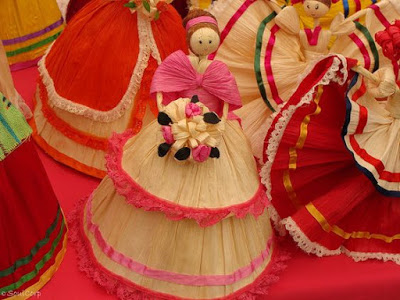
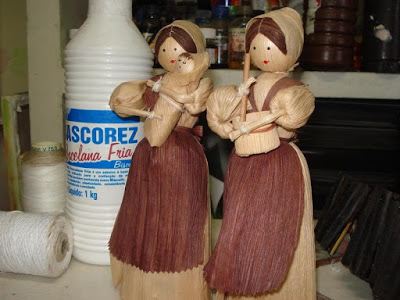
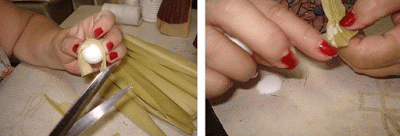
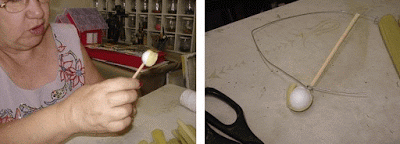
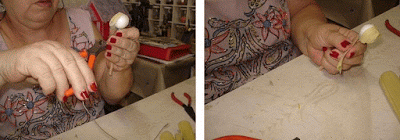
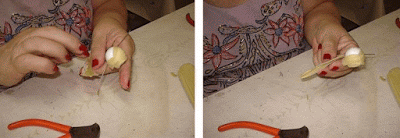
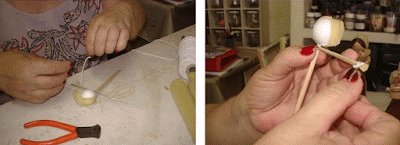
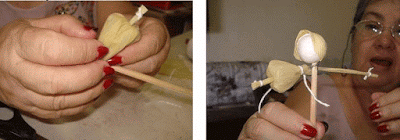
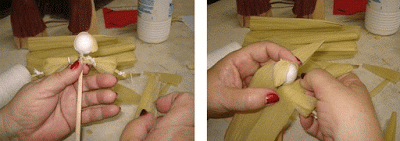
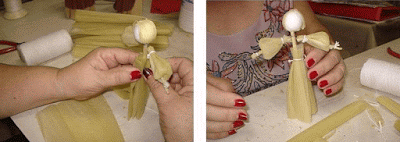
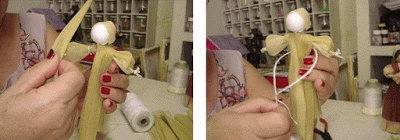
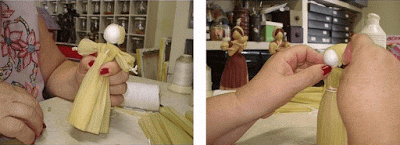
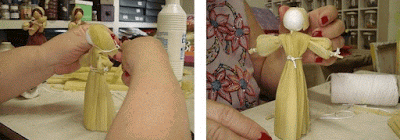
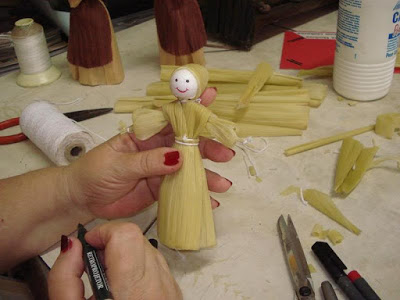
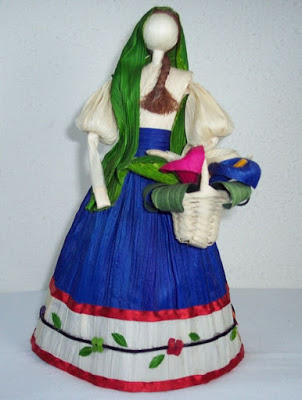
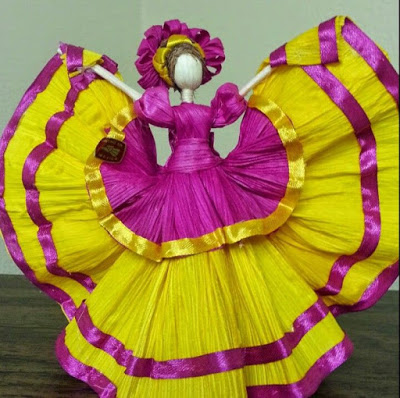
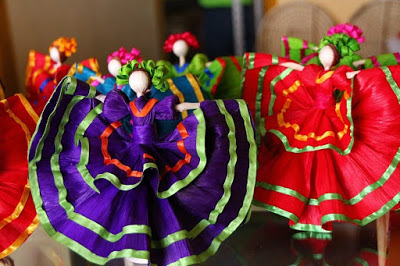 It is the Brazilian folk art. Released mess. First Ineys said that the leaves should be dry, but when we met, she used boiled leaves. Boil the leaves should be about 30 minutes. Inspiration were those two dolls that make Ineys in distant youth. Draw eyes and mouth. Wait for the complete drying of dolls and paint stain or potassium permanganate to her outfit. You can make the apron, you can handle in her something to give. Because the hand of the wire them hands, you can make some original position. This is a family of lines we have. I will say that we dry leaves and after drying, and many parts were bare steel hoses, flashlights are not as fancy, and at the hem bvysohlo so that the doll is no longer standing. I cropped hem, but the wound was not enough leaves.


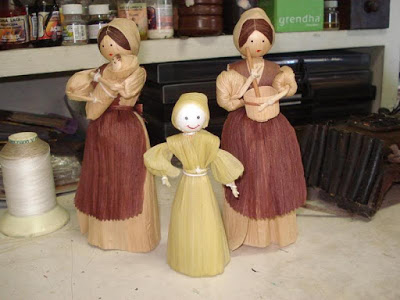
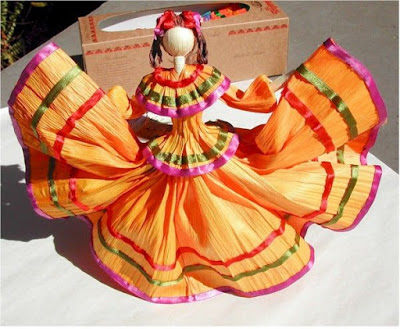
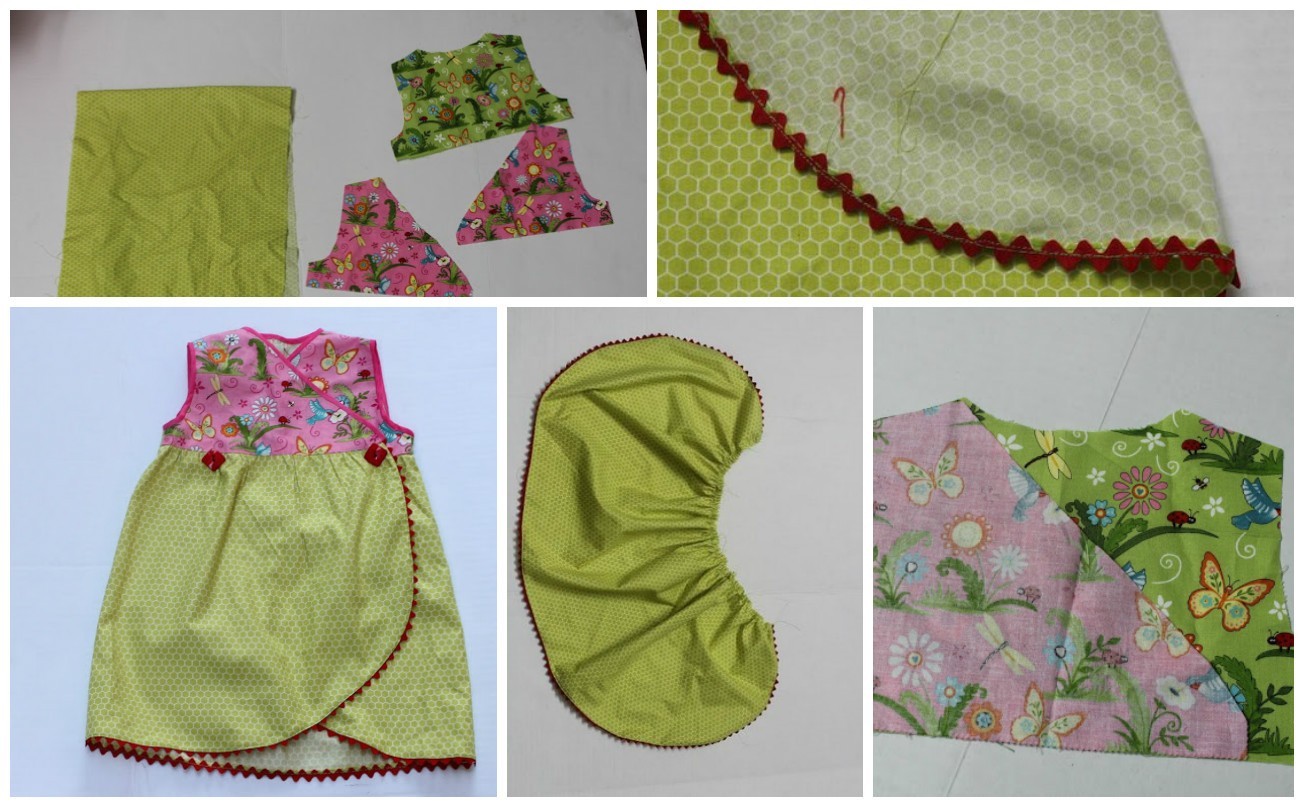
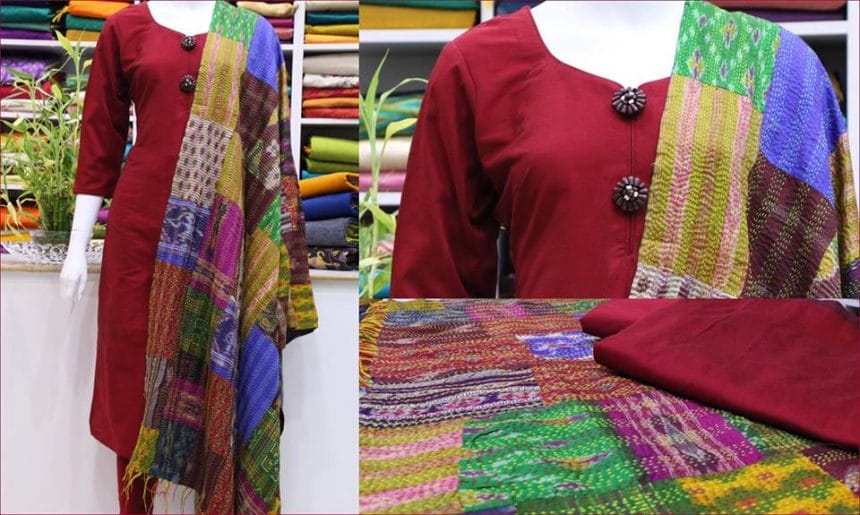
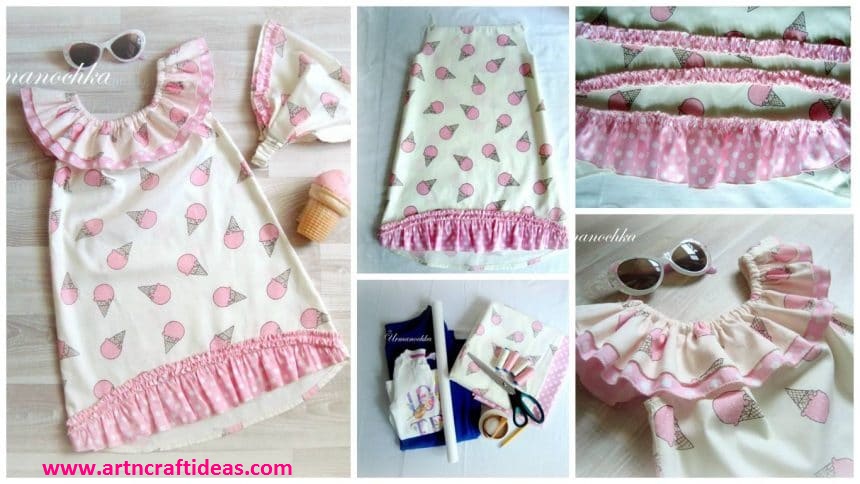
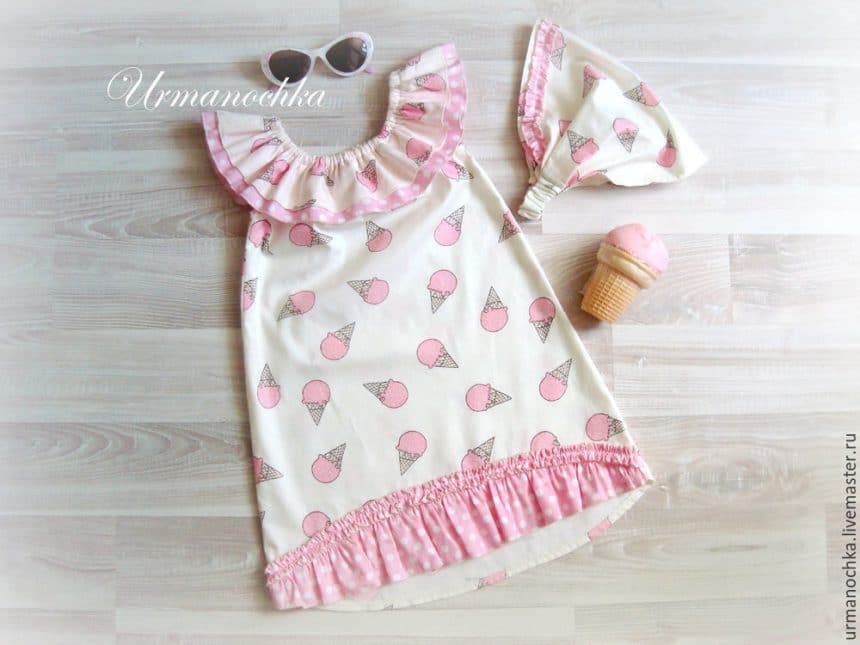
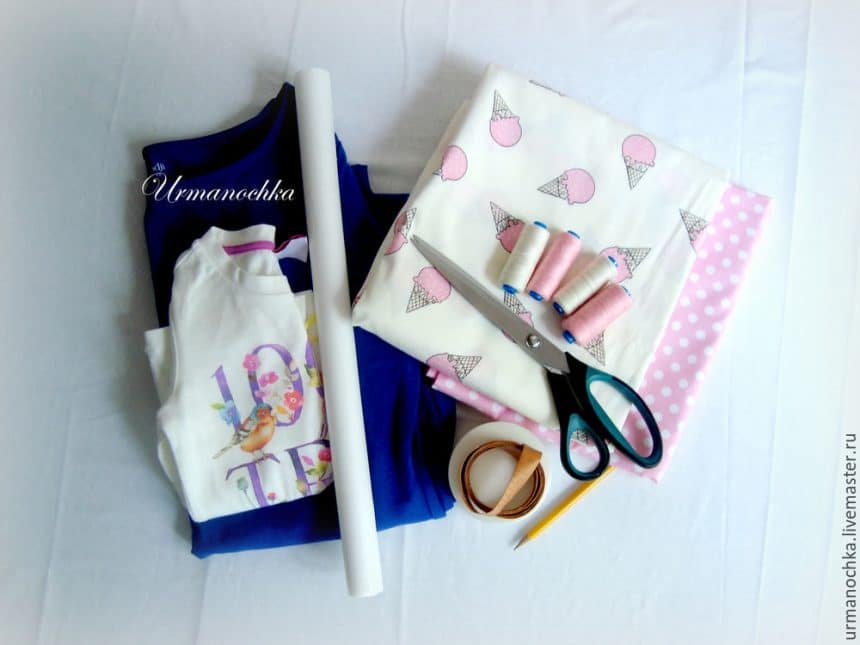
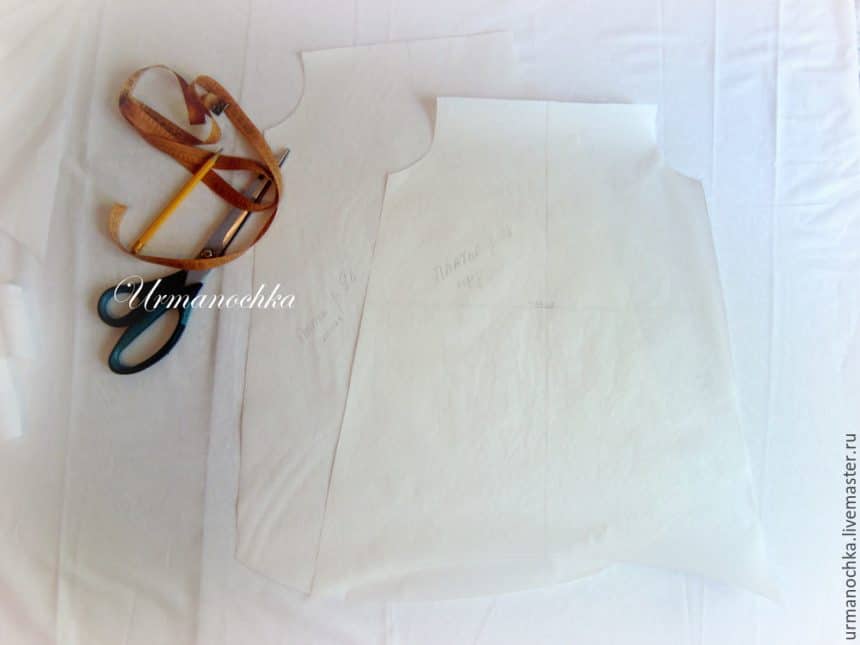
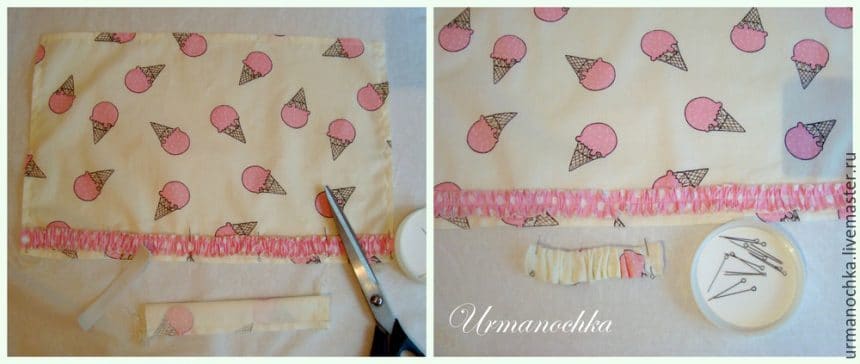
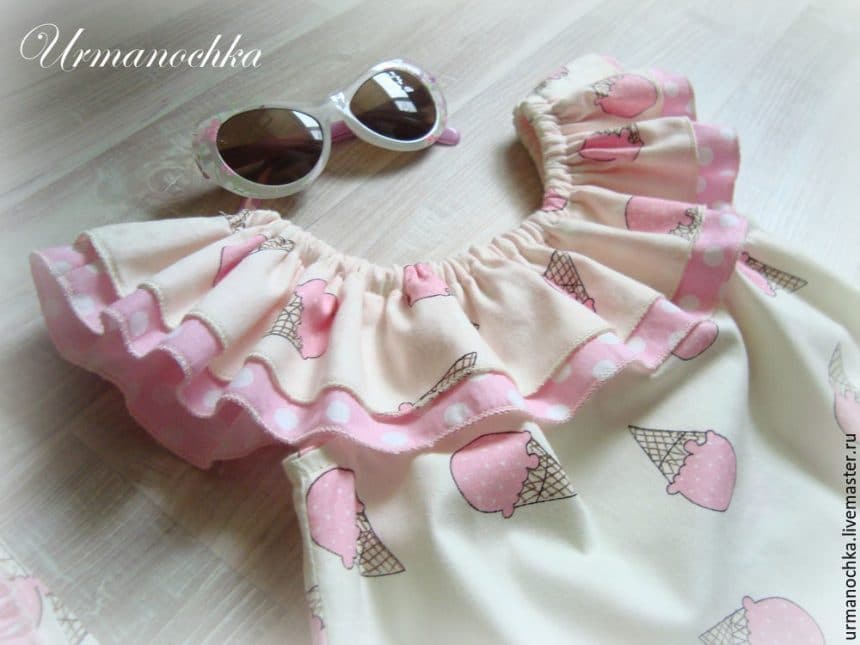
 For the manufacture of children’s dresses you need: two cutting cotton in different colors, red wavy rim, two decorative buttons (bigger and brighter than the standard), thread, scissors, pins and sewing machine.
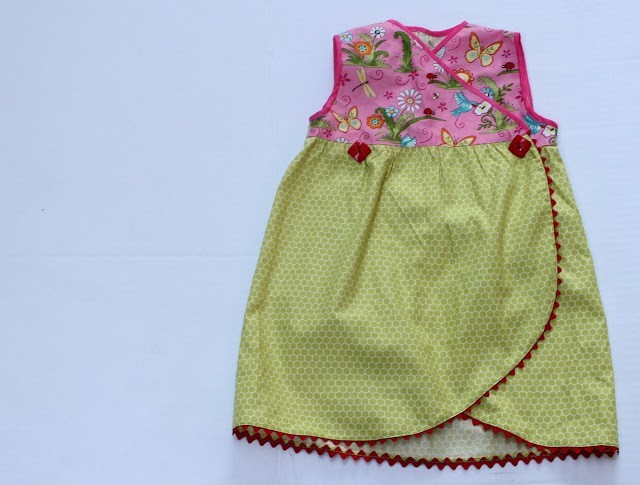 Everything starts with the bottom of the dress – the skirt. Carve out a rectangle of fabric long enough to skirt was not your babe in tight. In length, too, decide for yourself: ideally, the dress should be at the knee or slightly nizhe.Slozhite rectangle for the skirt half.
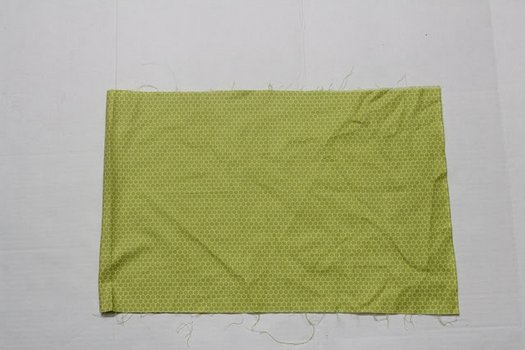 Cut angle in two layers of dress: make it rounded. Even here you can see the details of the future tulip: rounded corners and it will flower petals.
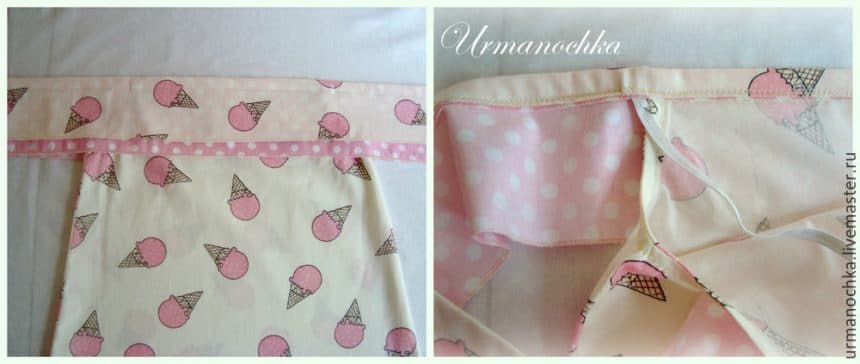
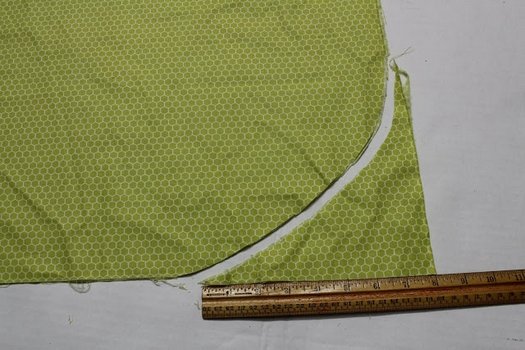 The bottom and side edges of the skirt next bend double to wrong side and Stitch.
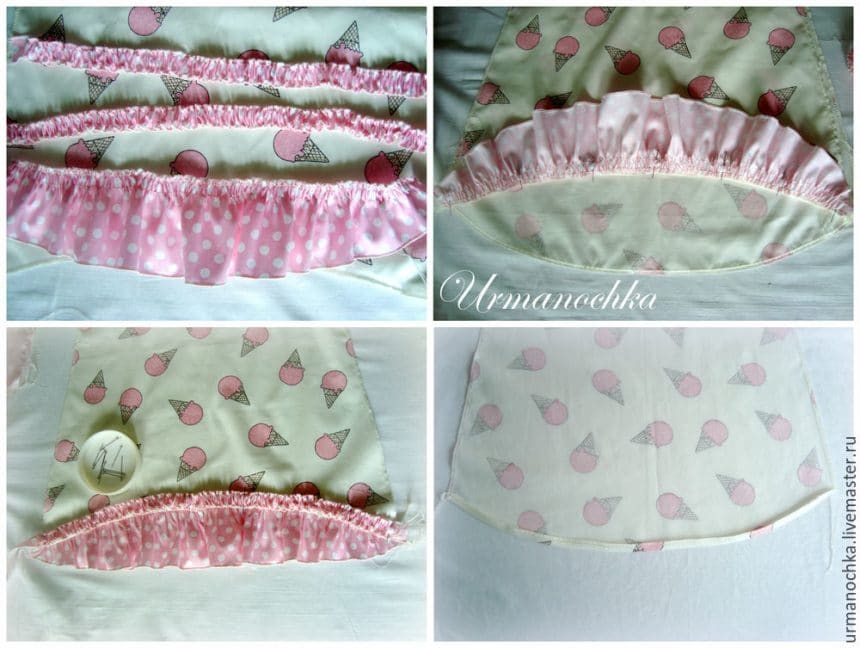
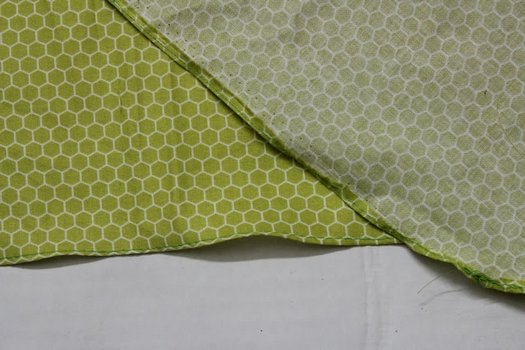 Also sew on all sides except the top-line skirts, wavy fringe. You can also use the lace or ruffles.
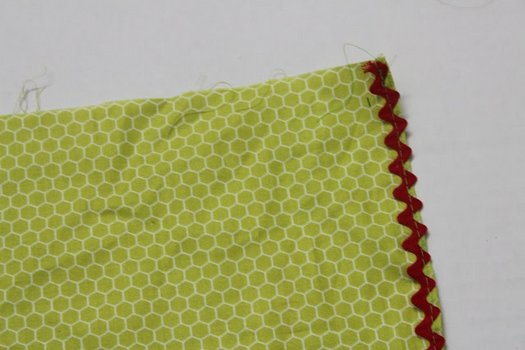 You can sew the hem so that on the front side only the side of the teeth.
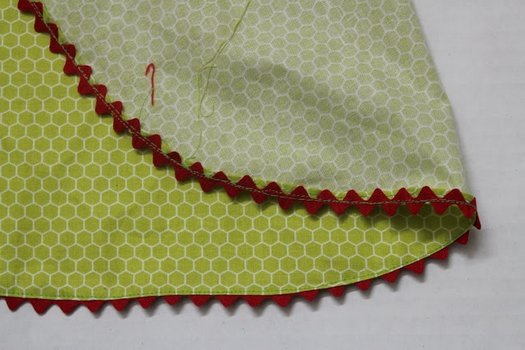 Now you need is gathered top line skirts or gum paste into it. How to insert a rubber band, you probably can guess, but is gathered – a little more complicated. Dvadly necessary to bend the upper edge and stitch it, and then strung on a thread and pull it. Try to pull off so that the skirt then covered another little princess!
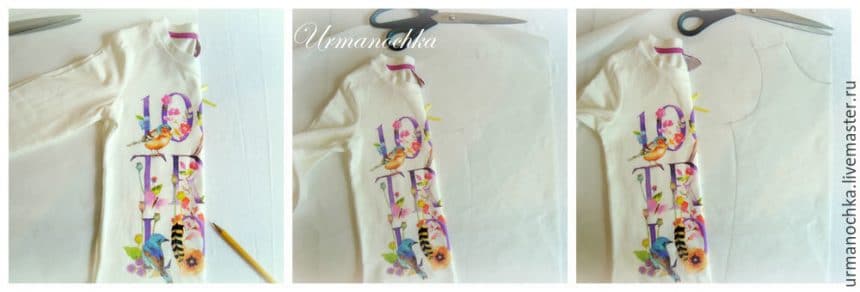
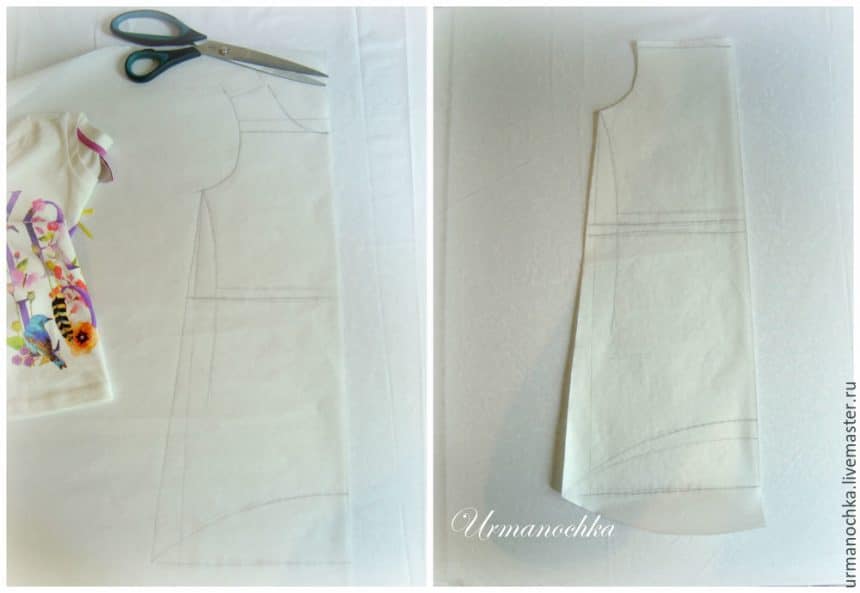
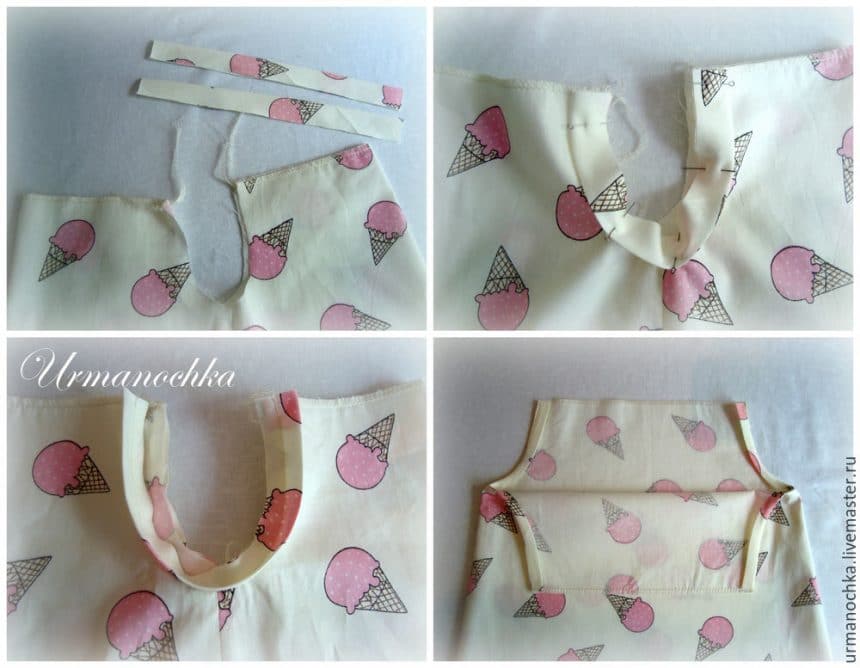
 Cutting parts for the upper part of the dress. Pattern is the easiest, because children’s clothes do not need recesses. To carve out a piece for the back and two (in mirror image, with an oblique smell) – for products forehand.
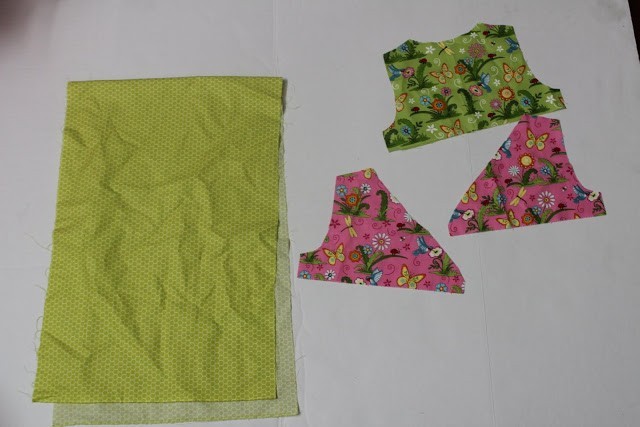 Fold the back and from the front halves face to face. Secure with pins in several places.
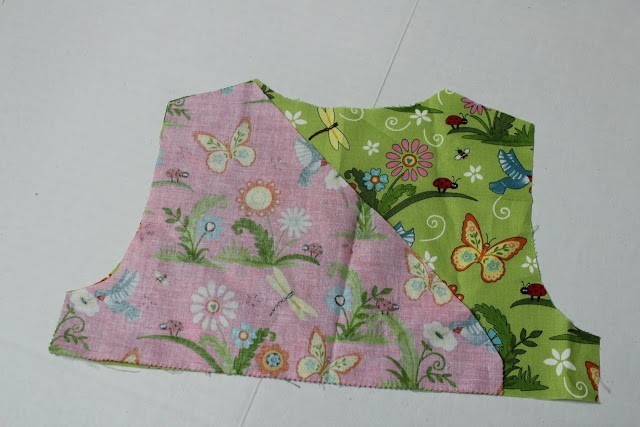 Stitch the side seam and the shoulder. Similarly, do the second and the front half. Remove the top of the front side and try to wrap halves Perda one after another.
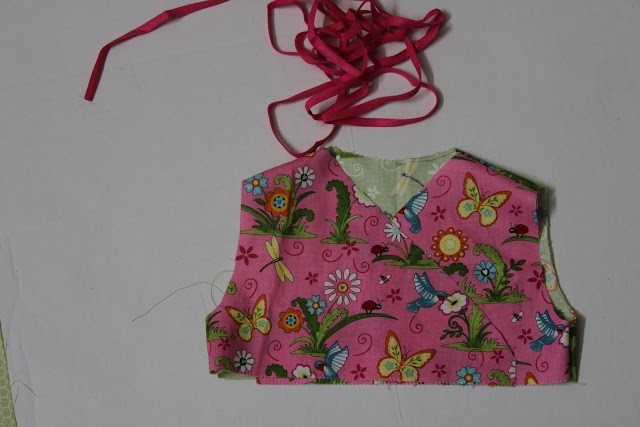 On the bottom line of the upper part (this also applies to the back, and the two halves of the forehand) stitched edging out of the ordinary or braid piping. It is more convenient to use a slash Bakey, as it is already perfectly folded in half and could well wrap the edge of the product.
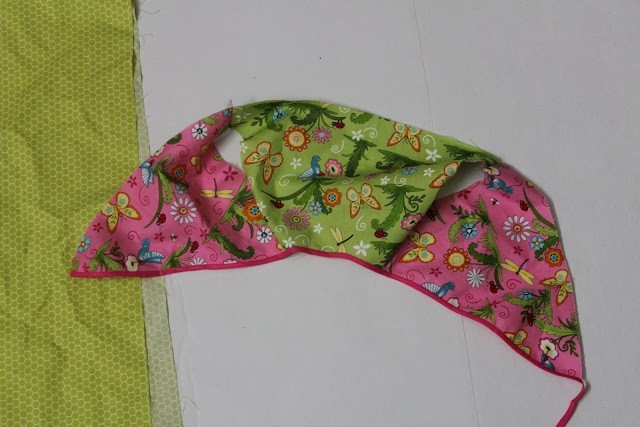 The same border or bias binding obsheyte neck, which passes the smell in both halves forehand.
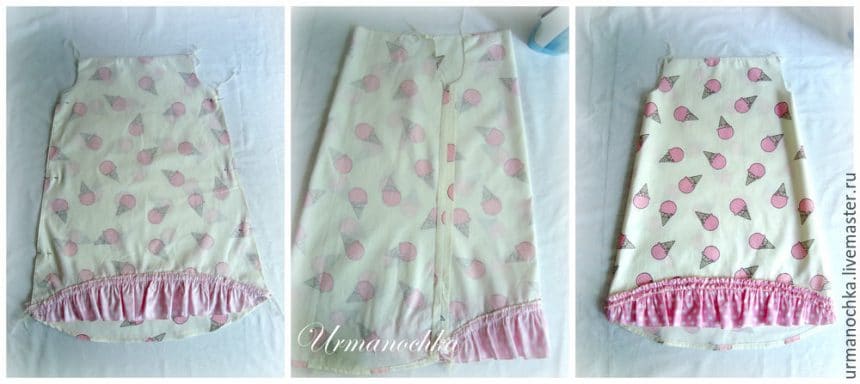
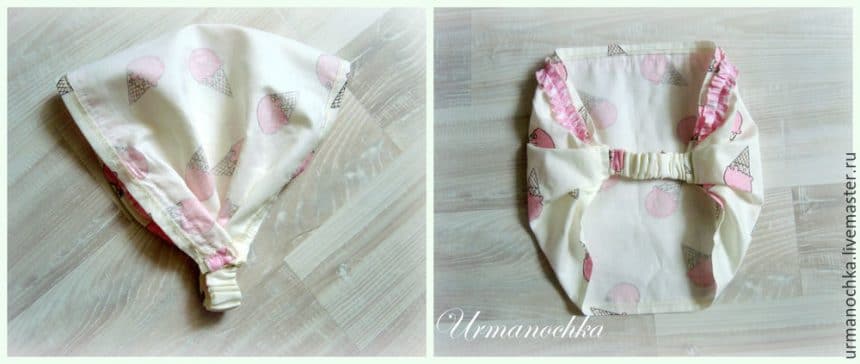
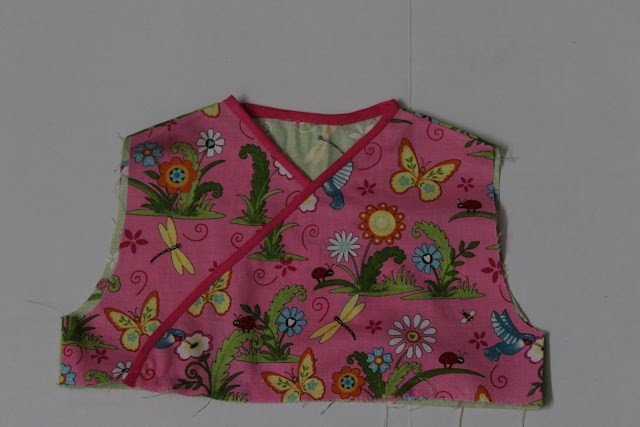 Now fold the top and bottom of the future tulip dresses together to faces were inside. Fix the joint tissues pins and then prostrochite dress. If we expand the product, it will look like an oval. However, little relief, because in places the
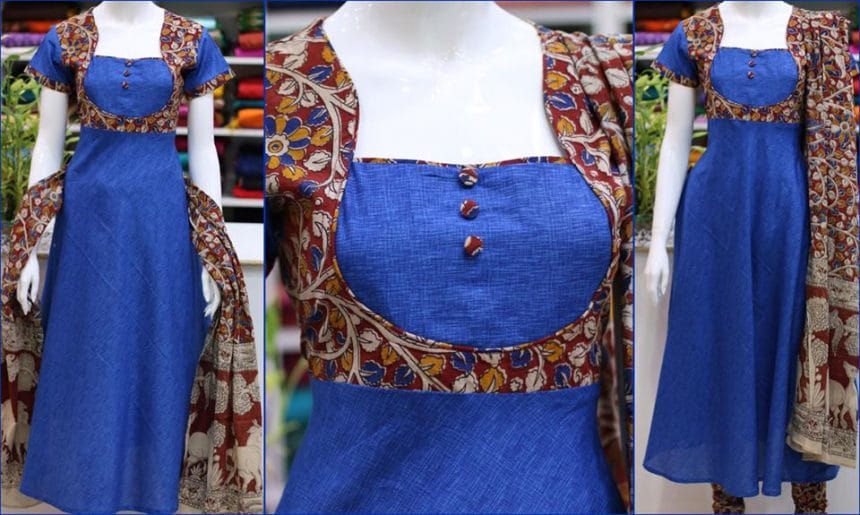
 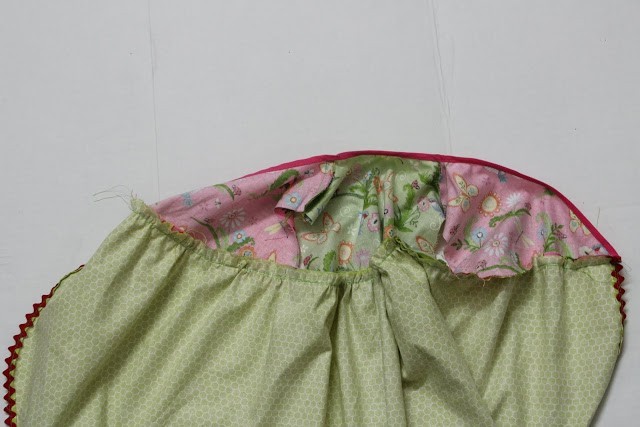 Bias binding obsheyte cuts hoses to the product looked neat. Decide which side will be closed smell, and the lower half of sew two beautiful buttons. In this place the top half, make two holes for the buttons. Obsheyte small stitches by hand, the fabric is not rastrepyvalas.
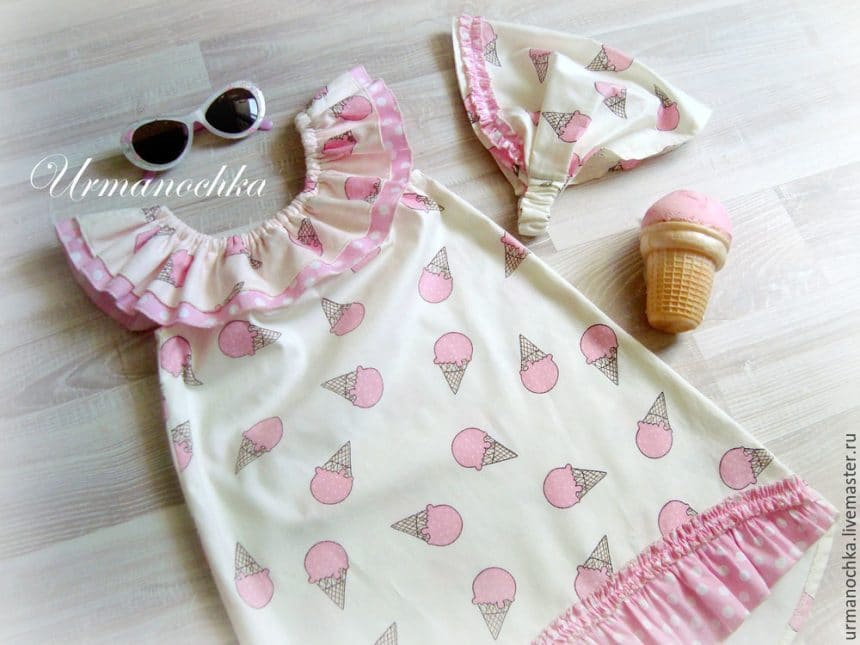
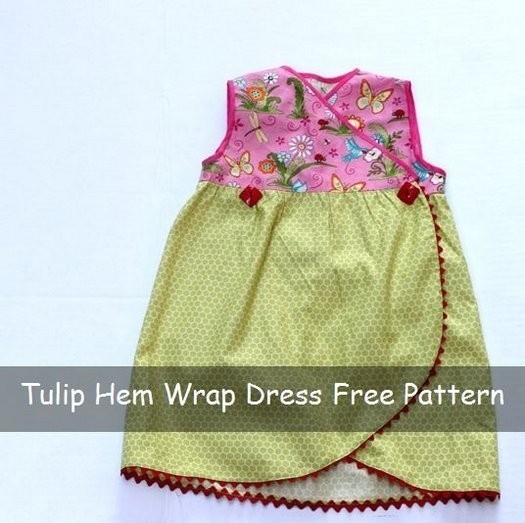
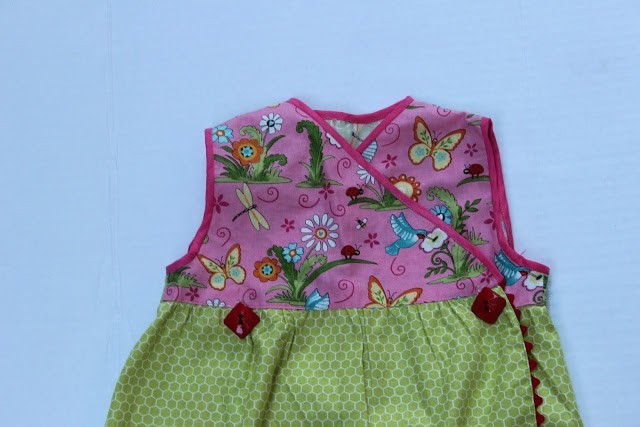 Get the original children’s summer dress! For more you can sew on a button, and the upper part of the product, mentally sketching the triangle between the buttons.