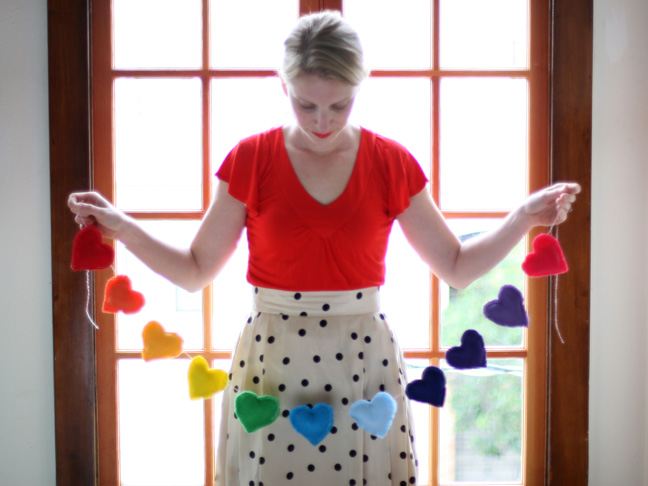
This is a fun little rainbow banner for Valentine’s Day make with felt and string. Keep reading to see how to make it!
Required Material:
- Squares of craft felt in rainbow colors
- Bakers twine
- Sewing machine or needle and thread
- Scissors
- Chalk
- Heart cookie cutter
- Batting
- Pins
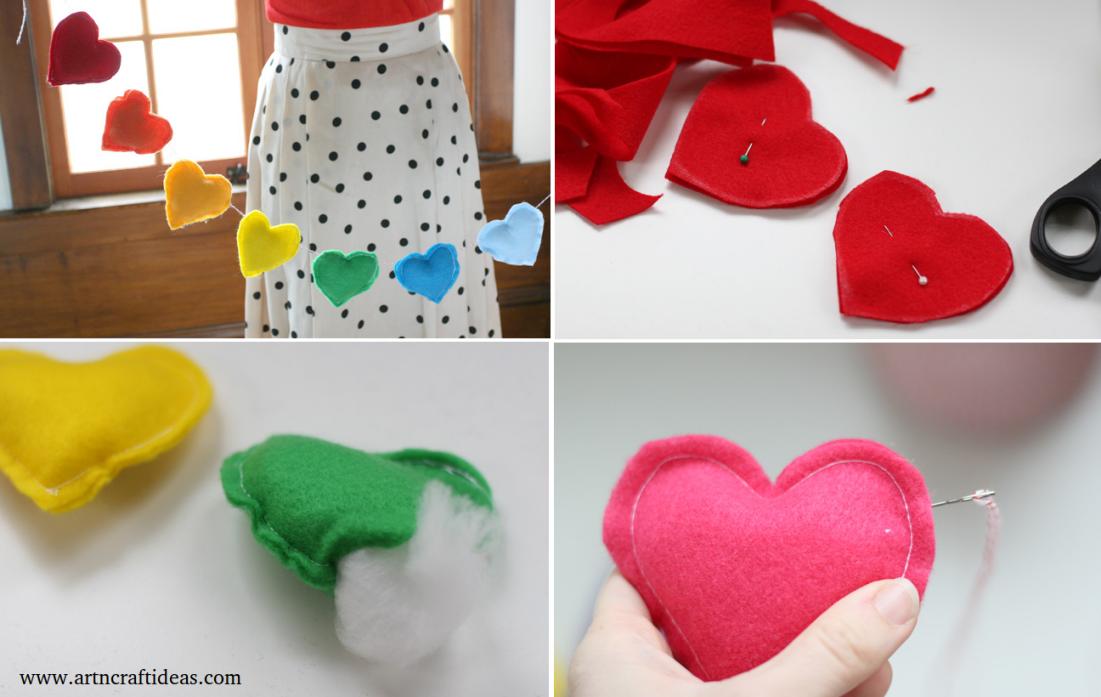
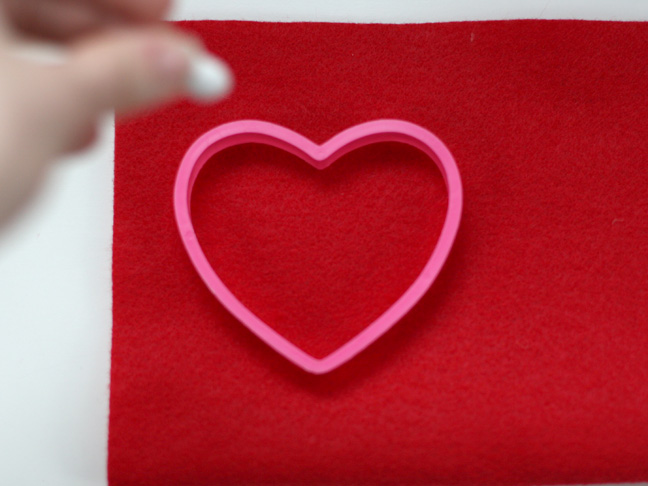
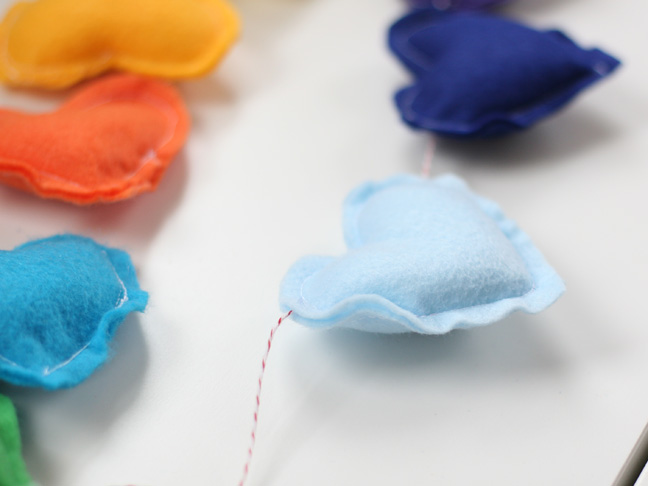
- Start by tracing the heart shape onto a piece of felt folded in half
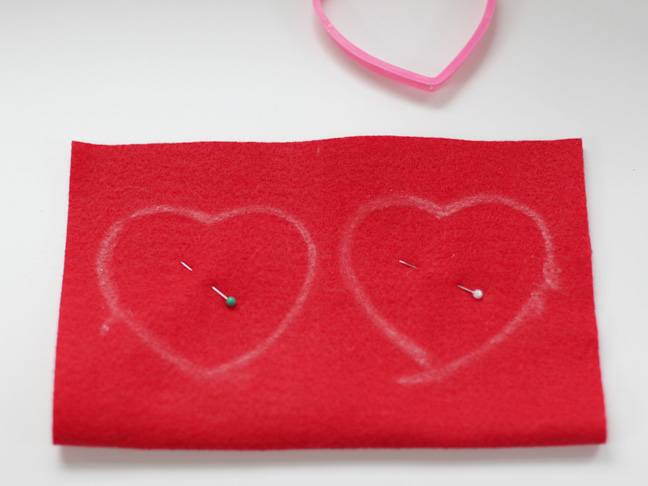
After it has been traced with chalk, pin the middle to keep both sides together.
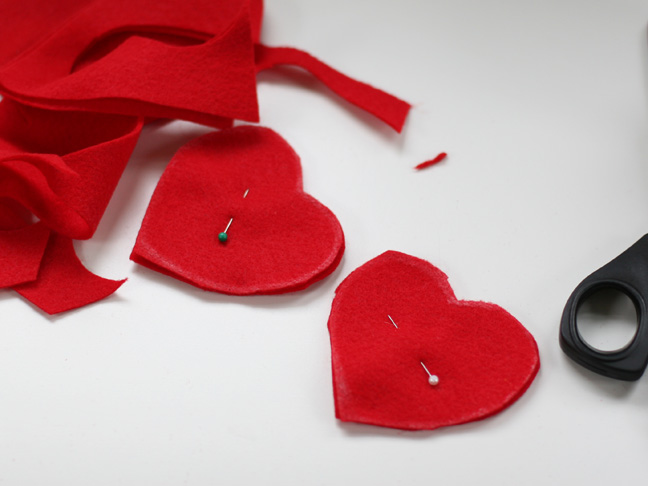 Cut out your hearts. Keep the pins in. Set pinned hearts aside.
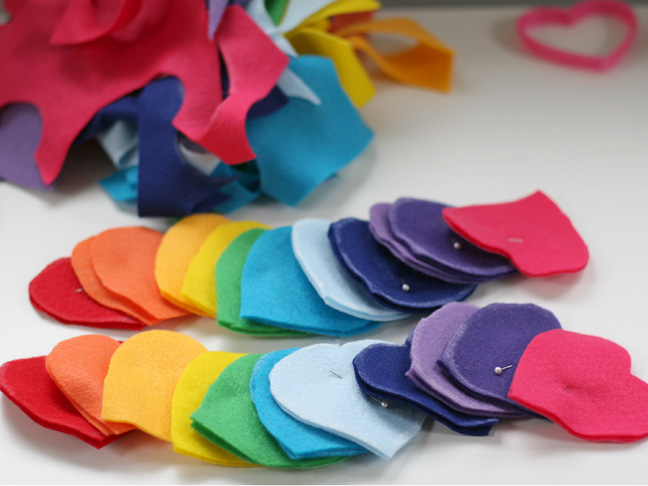
Do the same with the other rainbow colors.
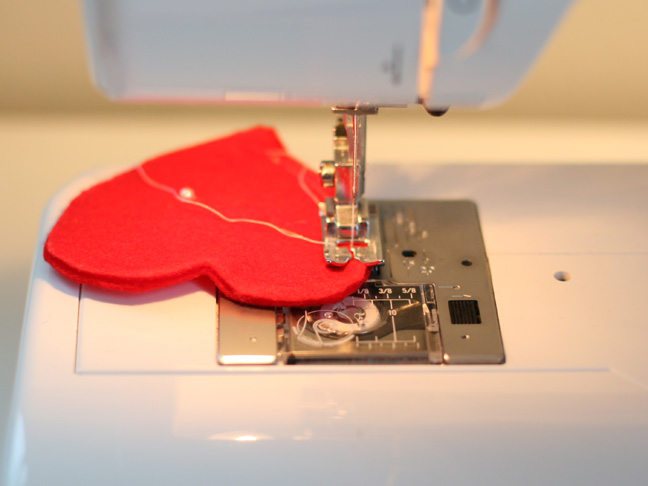
Now sew both pieces together along the edge in a extra wide stitch with contrasting thread. You could also handstitch these. Leave 2 inches open to add the batting.
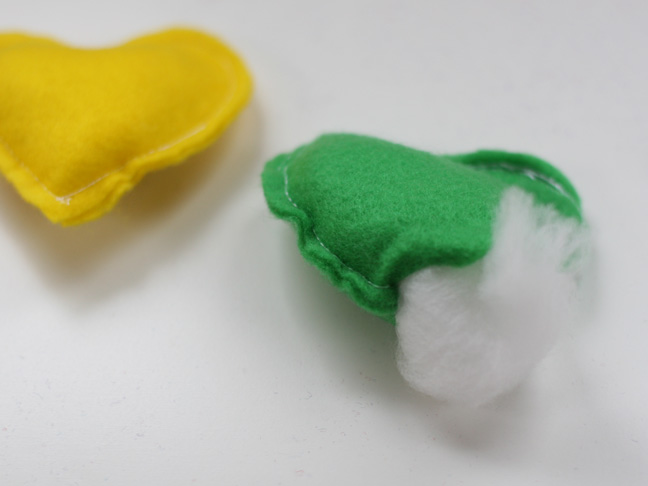
Stuff the batting into the heart and sew up the last inch.

Do the same with the other colors (I only ended up making one of each color as opposed to the two I had cut out).
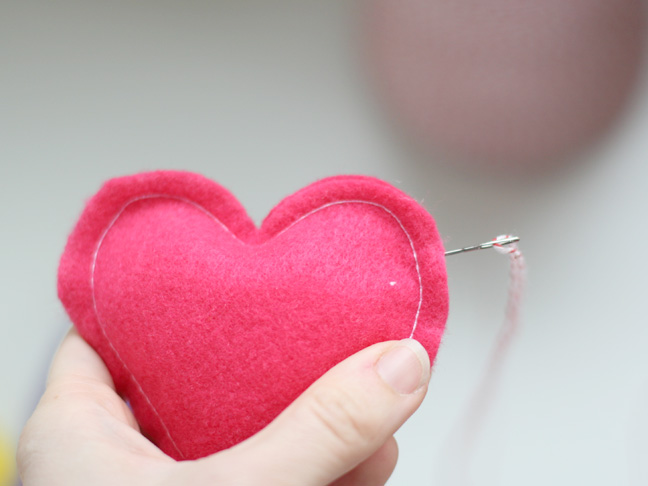
Thread some bakers twine into a embroidery needle and poke through the top end of one, threading it through to the other side. Make sure to put the hearts on in rainbow order.
Keep adding to the thread until they’re all on.
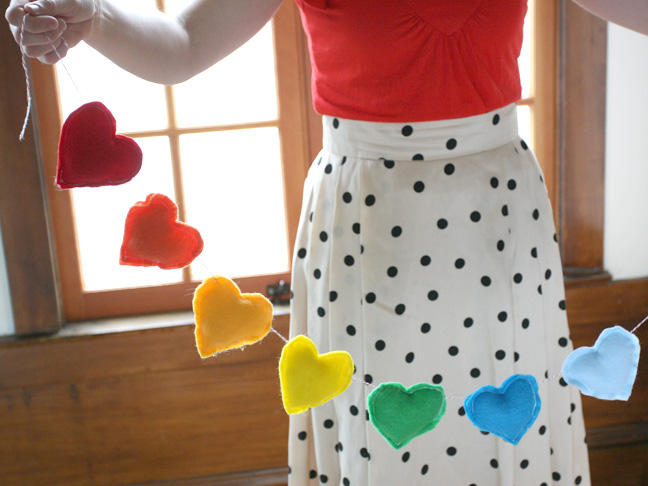
Hope you like this Rainbow Banner tutorial.
Image Source: momtastic
We would love to hear your thoughts in the comment section below. And be sure to like us Facebook for more ideas!
Thank you for visiting our website. Keep Creating with Art & Craft!
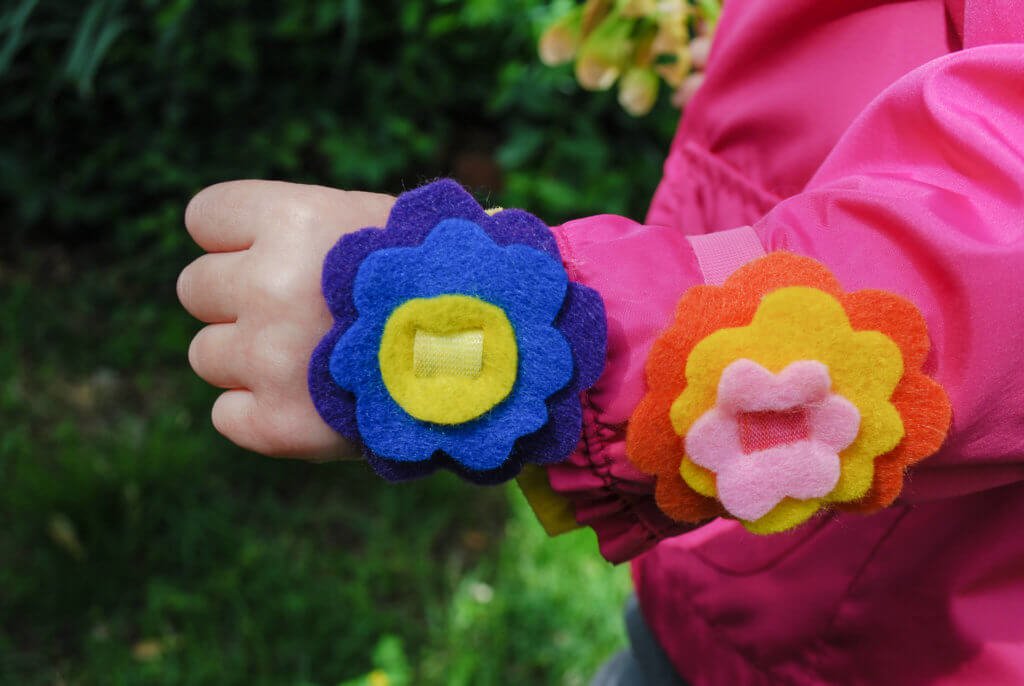
 I love how cheery these no-sew felt flower bracelets look. And it’s nice to be able to make a cute project without having to drag out my sewing machine.
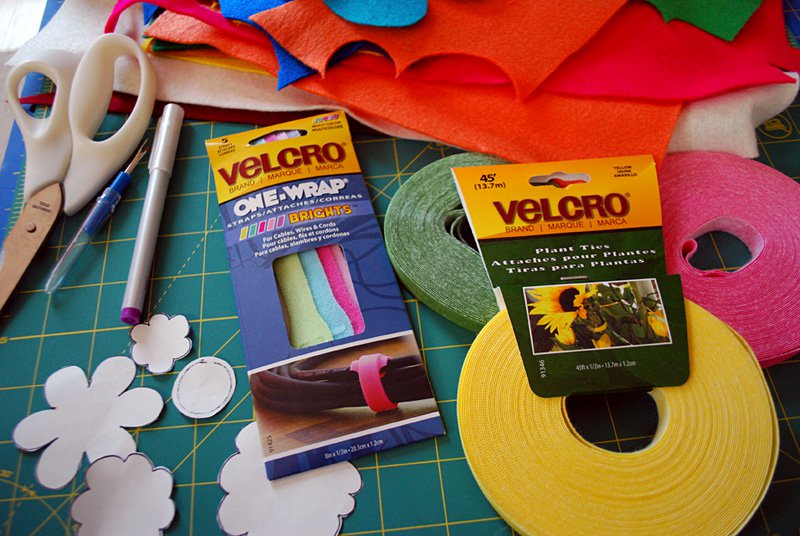
 The trick is VELCRO® Brand Plant Ties. So what are plant ties you ask? It’s basically a roll of colored thin VELCRO® Brand fasteners (I have these in yellow, pink, green and red and they also come in blue and black) that sticks to itself. Yep, IT STICKS TO ITSELF! So cool. You’re supposed to use to tie up your plants in the garden which I did last year to help my peas hang onto their trellis.
 I liked the
 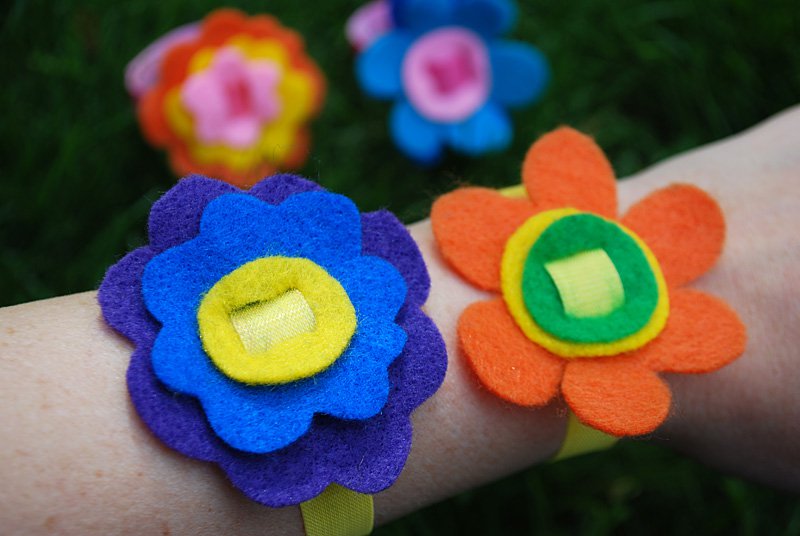 You could also make this project using VELCRO® One-Wrap Straps OR VELCRO® Get A Grip Straps in Multi-Colored, which are basically the same stick-to-itself concept that are used to keep cords and wires looking neater. Either way it’s a kid-friendly, no-sew craft to brighten your spring and summer days exploring outside.
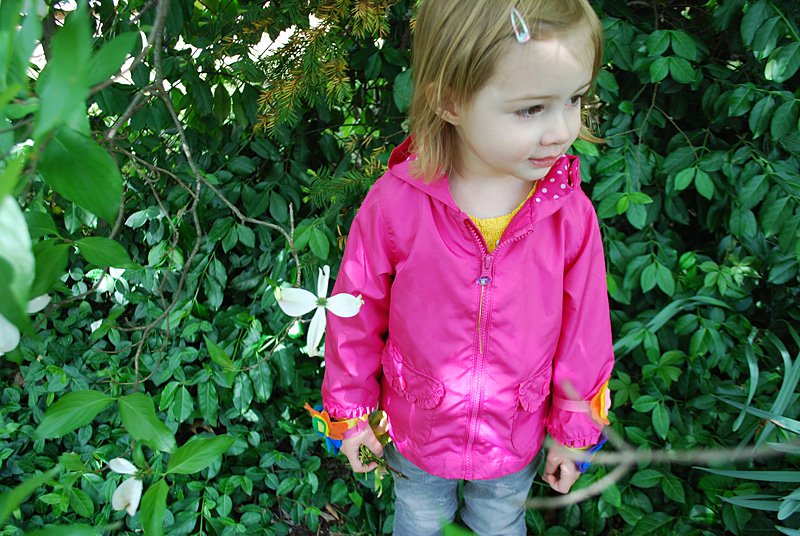
![How to make Easy DIY felt flower bracelets free no-sew pattern. Cute spring and summer craft activity to do with kids! [spring craft ideas| summer craft ideas | kids craft ideas | Easter craft for kids | no-sew crafts | felt crafts | DIY jewelry]](http://www.merrimentdesign.com/images/easy-diy-no-sew-felt-flower-bracelets-free-pattern-2-1024x686.jpg "How to make Easy DIY felt flower bracelets free no-sew pattern. Cute spring and summer craft activity to do with kids! [spring craft ideas| summer craft ideas | kids craft ideas | Easter craft for kids | no-sew crafts | felt crafts | DIY jewelry]")


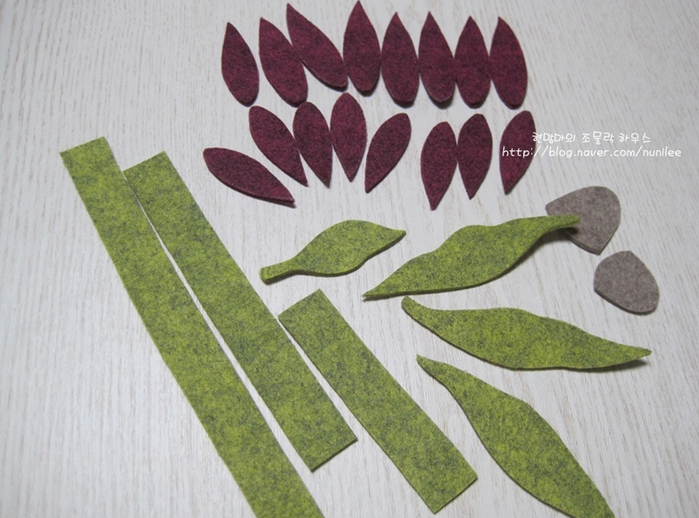
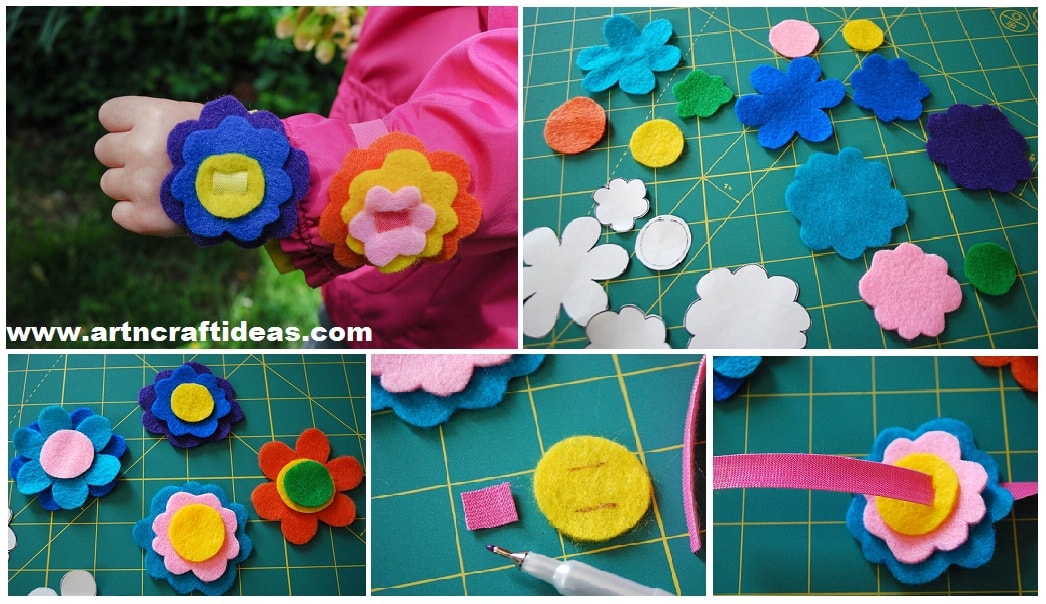
 Cut out flowers pieces in assorted felt colors. You can trace the pattern using disappearing ink pen onto the lighter colors, and for darker colors, just hold the pattern tightly to the felt and cut. No need to be perfect. You can even free-hand some pieces without using a pattern at all.
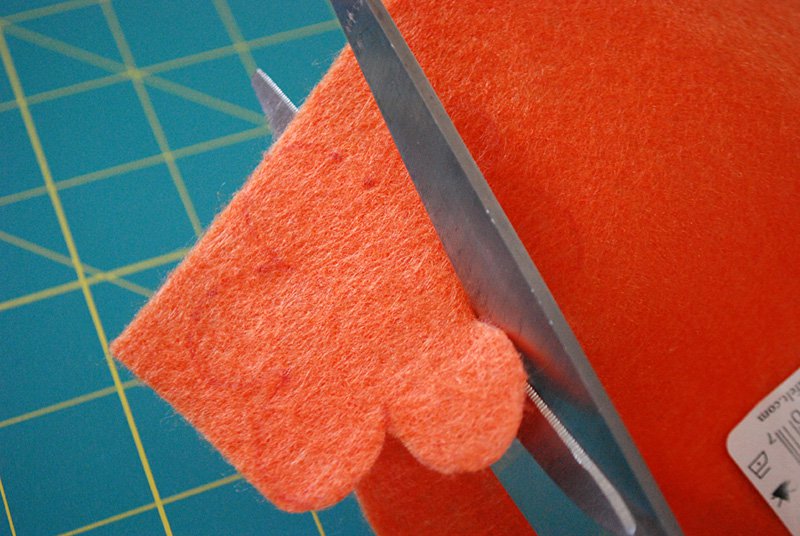 See all the cute felt flower pieces for the bracelets?
 Now just layer them up. Cut more as needed and play around to make the cute flower stacks for the bracelets.
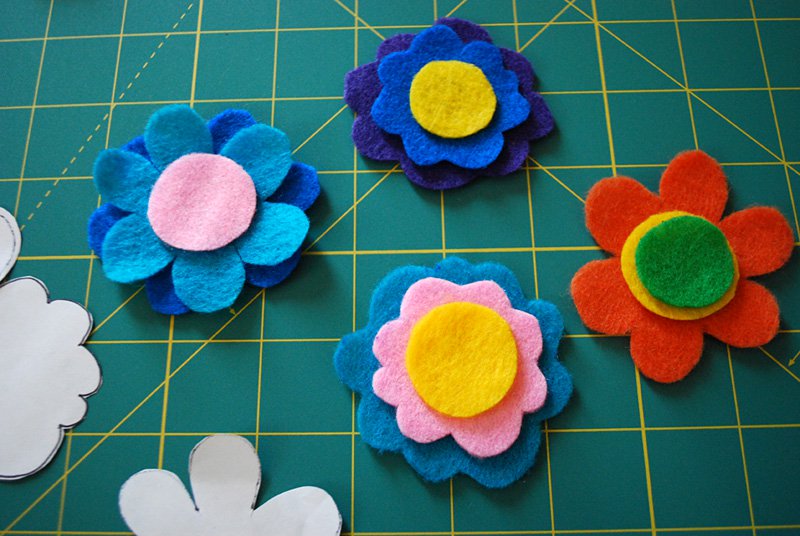 Cut a piece 3/8″ piece of VELCRO Plant Tie as a pattern for cutting slits in the felt flower pieces. Center it on your flower piece.
 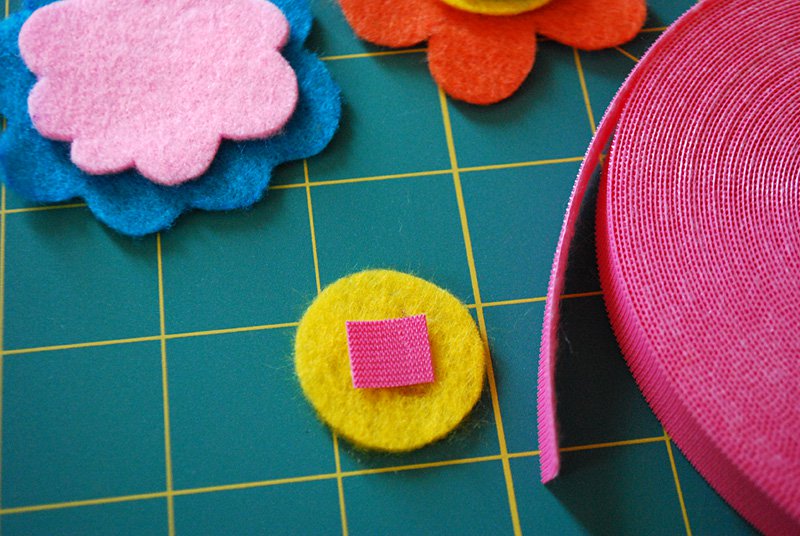 Mark slits above and below the pattern using a disappearing ink pen.
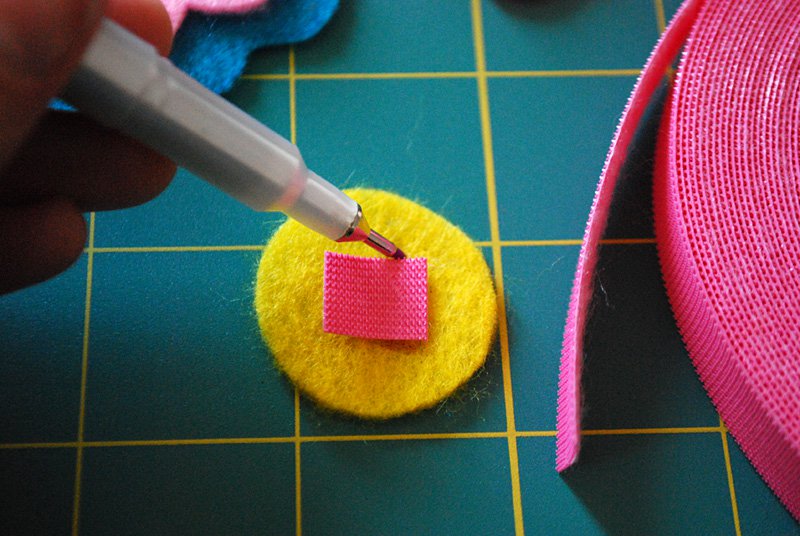 Now it’s time to cut the bracelet slits. First I tried using fabric scissors and I overshot big time – they’re just too big for me to handle on such a small cut.
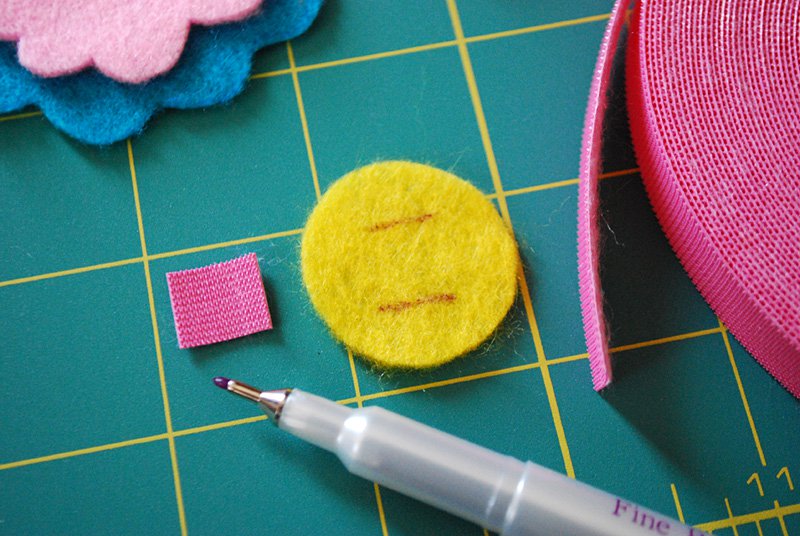 So then I used a seam ripper to get the bracelet slit started on each ends and followed up with tiny embroidery scissors to cut through the middle and it worked really well.
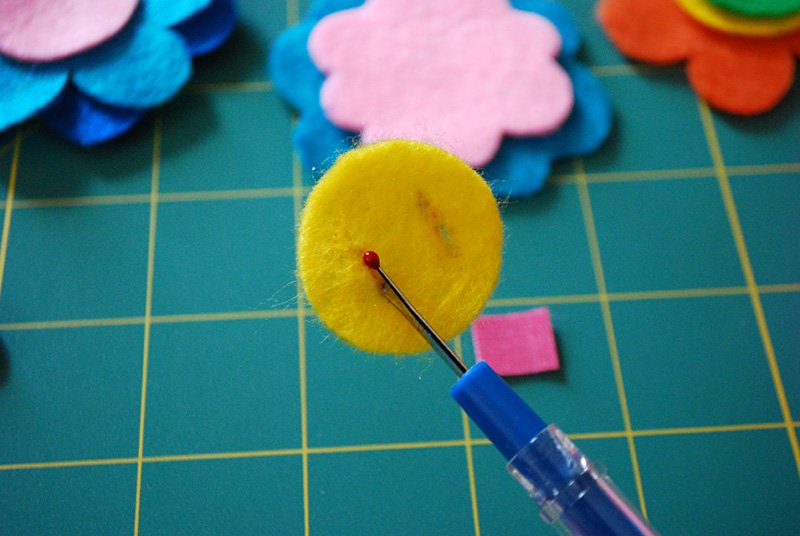 Repeat on your other flower pieces.
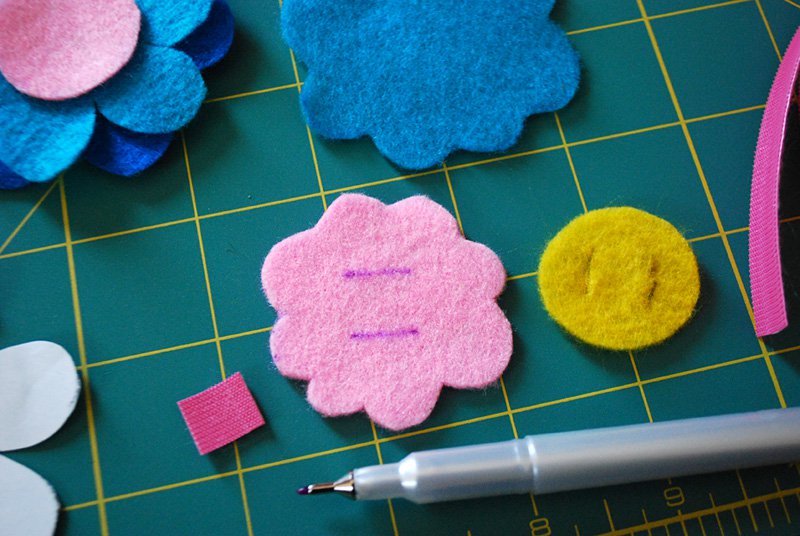 And here are three pieces ready to become a flower.
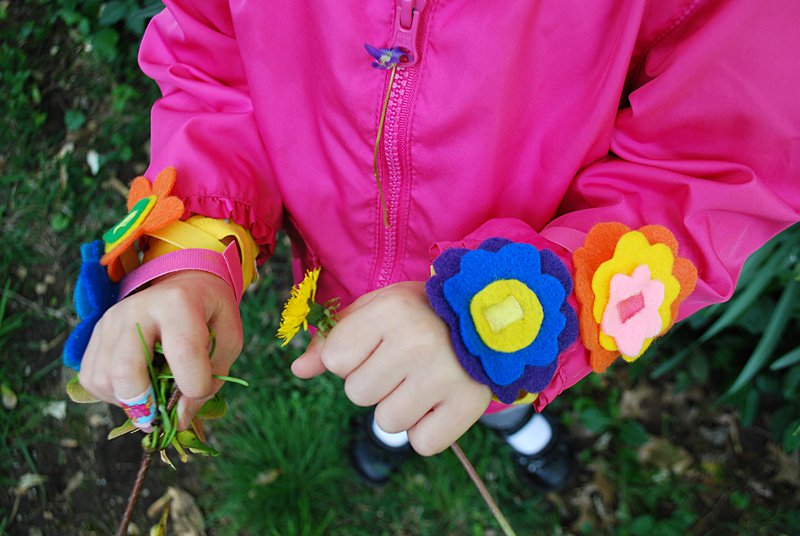
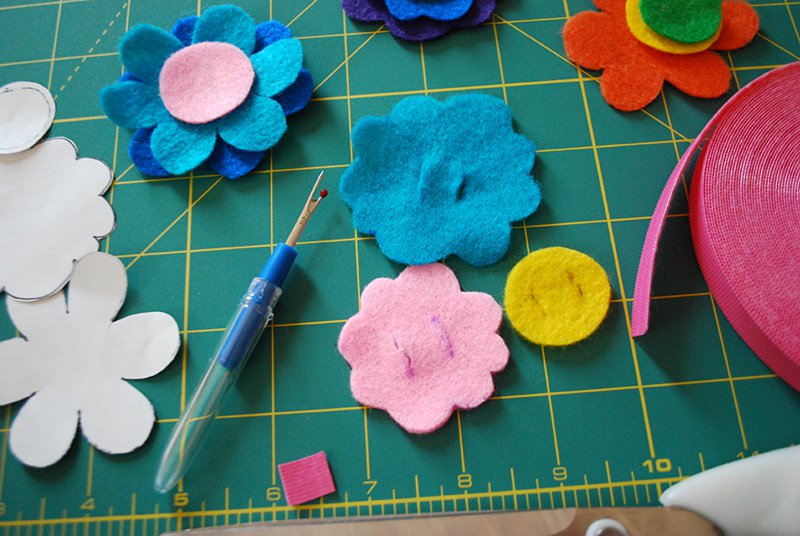 Measure your wrist and add about 1.5″-2″ to it for threading through the flower and overlap to close on your wrist. This batch of flower bracelets were for my 2-year-old Elise.
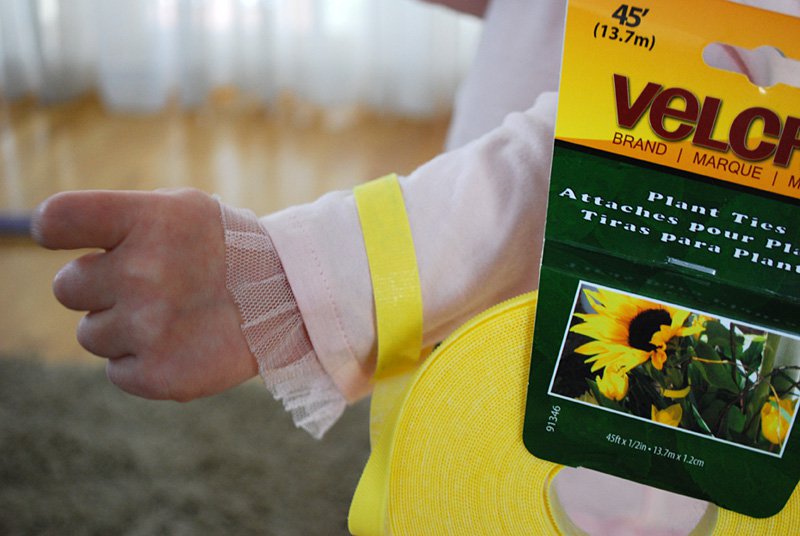 Cut a piece of VELCRO® plant tie to this length.
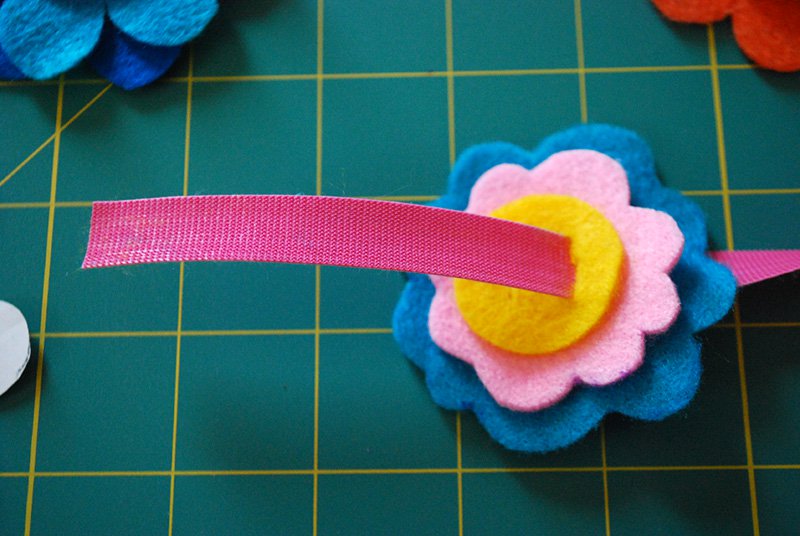 Now thread the end back through the other slit stack, which will make a cute little color in the middle of your flower. You can either try to match the color to your flower middle or choose a cute contrasting color. Now just wrap the felt flower bracelet around your wrist and overlap the VELCRO® Plant Tie to close. You can snip off any extra as needed.
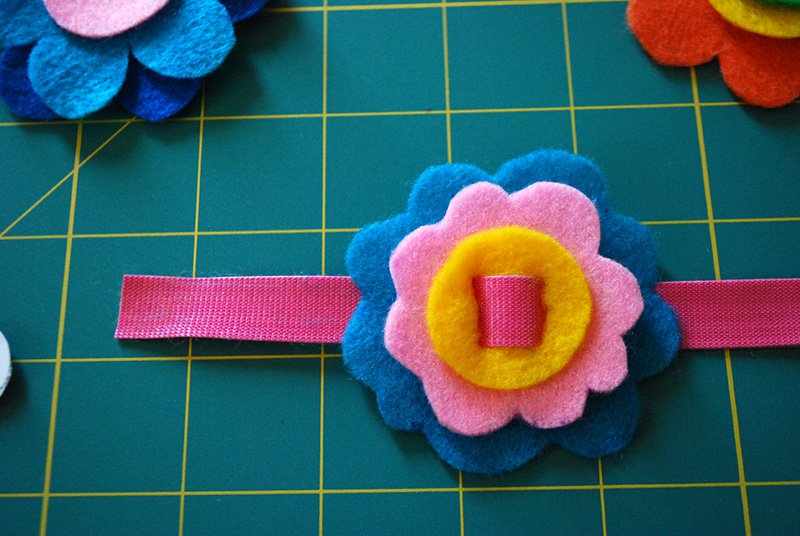

 Required Material:
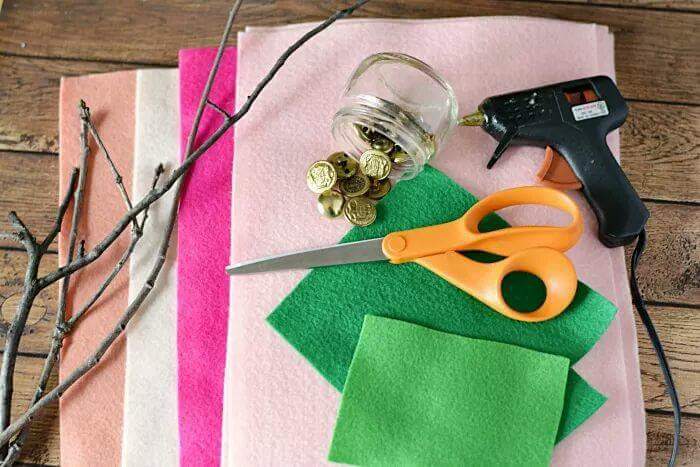
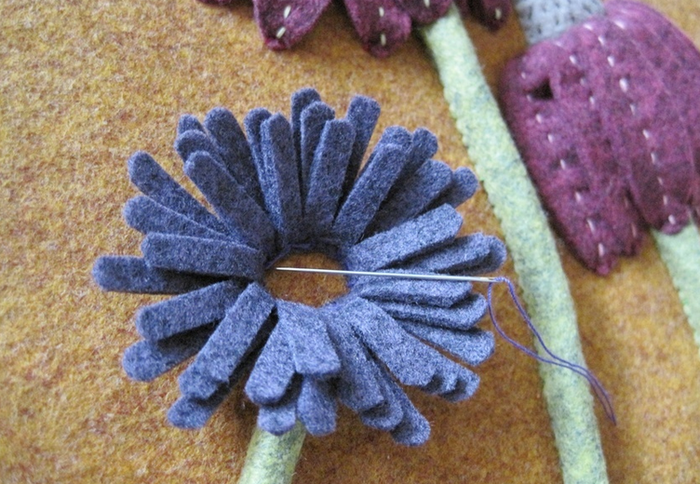
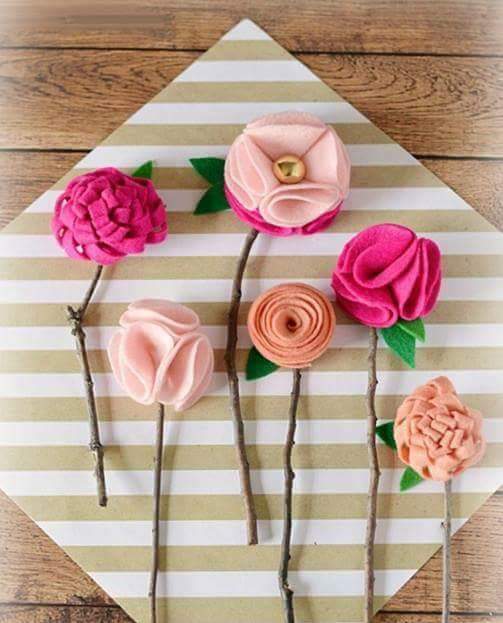
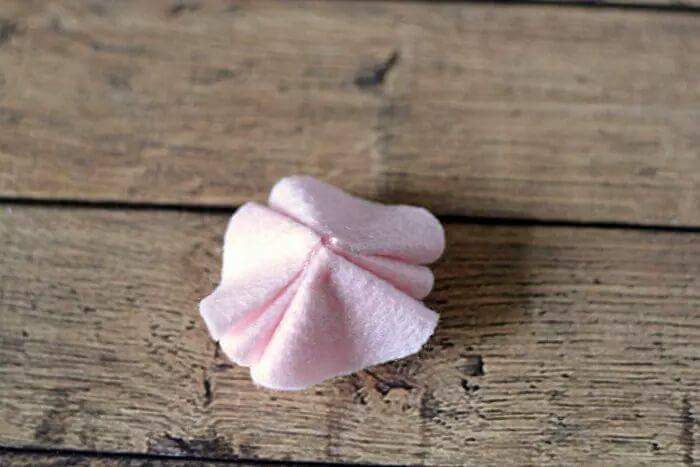
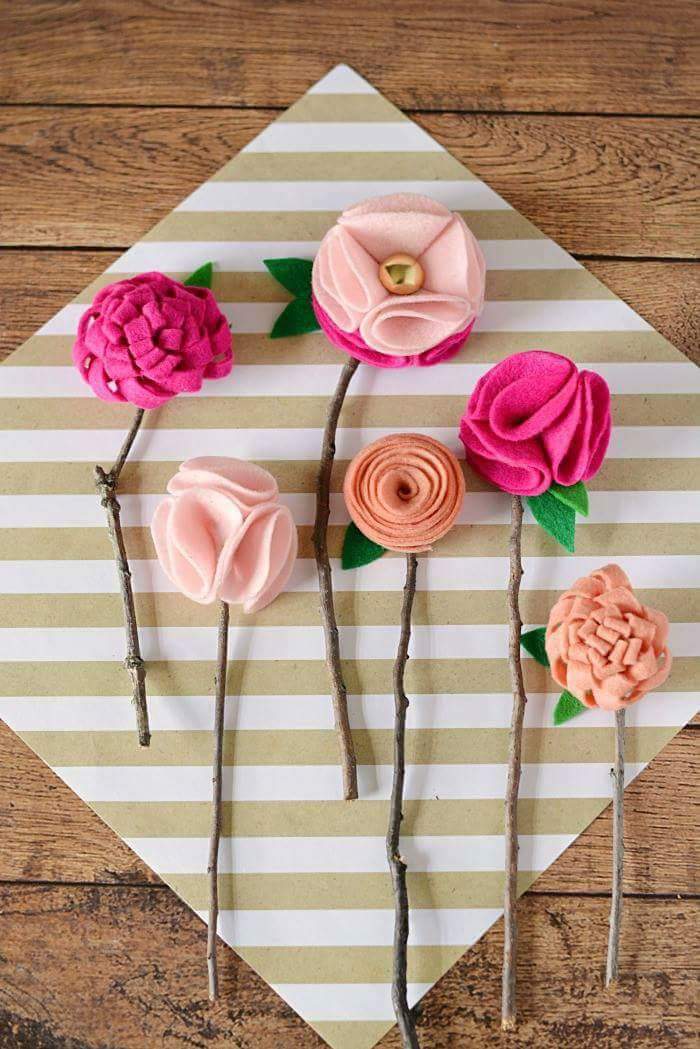
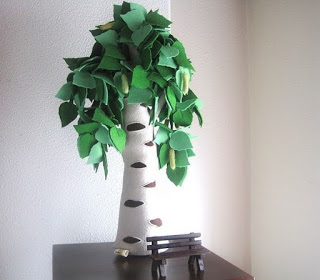
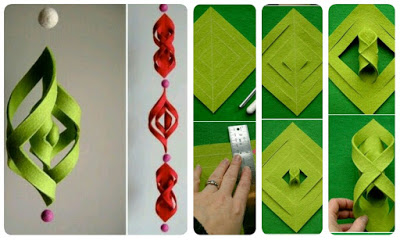
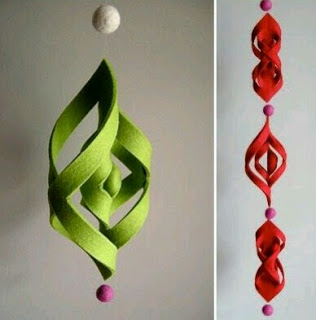
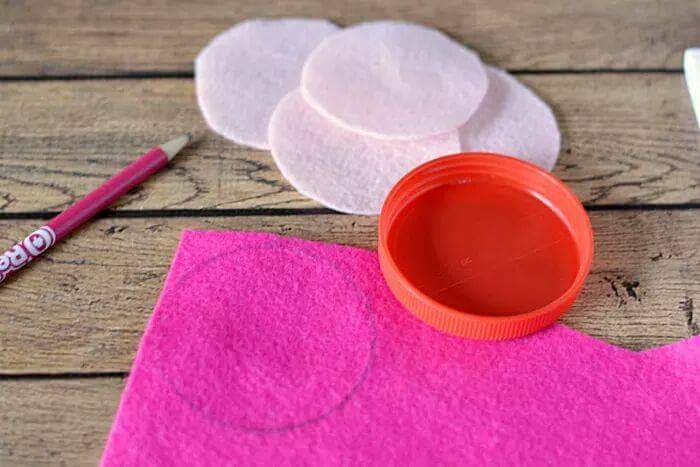 Fold the circle in half and in half again to create a quarter circle. Apply hot glue to the folded edges of one circle and attach it to the folded edge of another circle. Repeat until all four quarter circles are connected to create one circle.
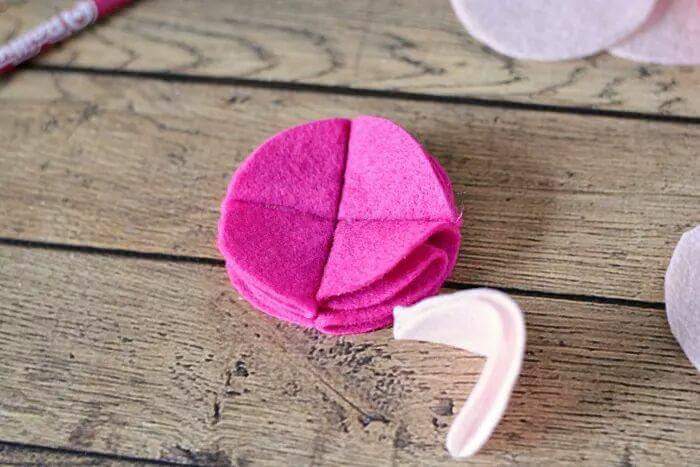
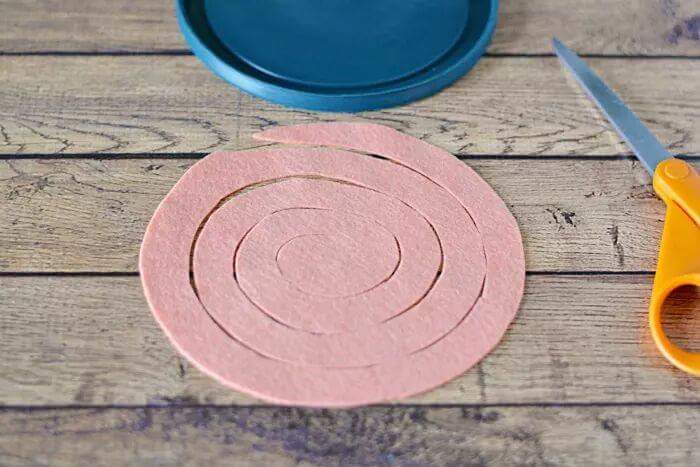
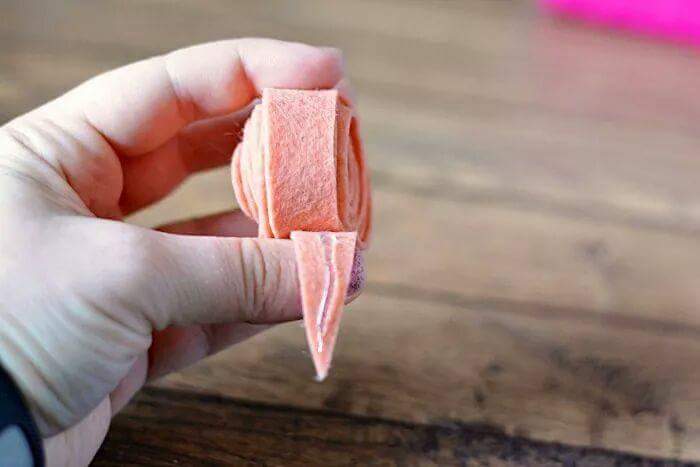
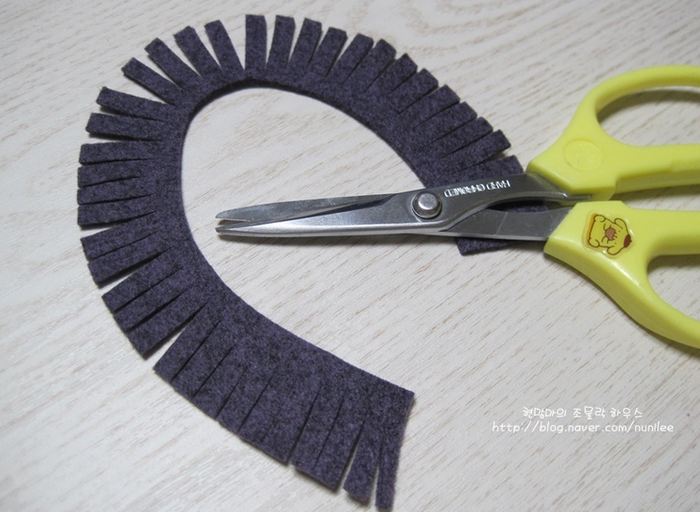
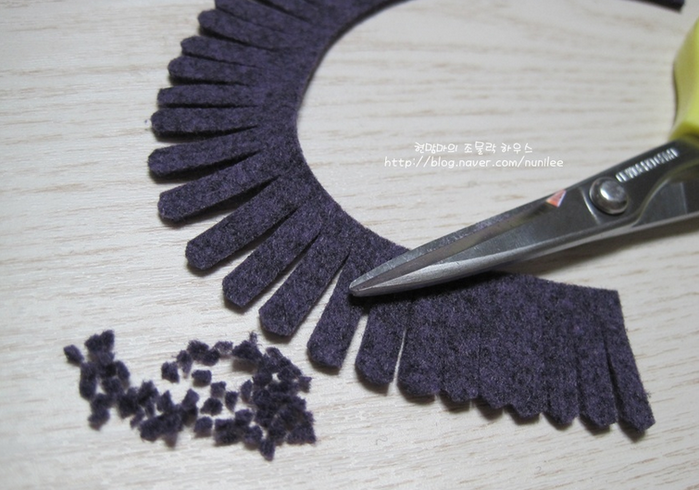
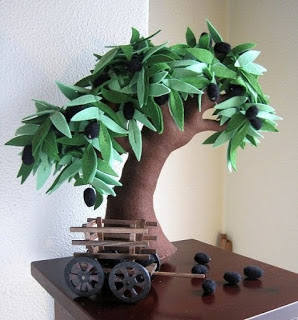
 Fold 9×2 or 12×2.5 rectangle in half lengthwise. Like a hot dog bun. Cut slits into the fold. About 3/8″ apart but not going all the way through the fold. Kind of like making fringe. But it’s on the fold.
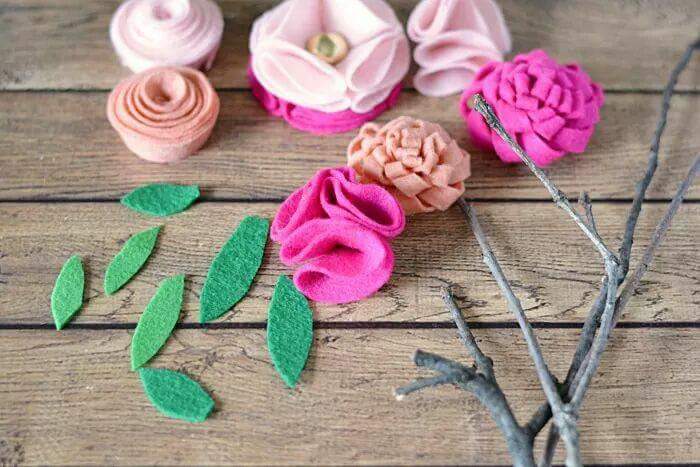
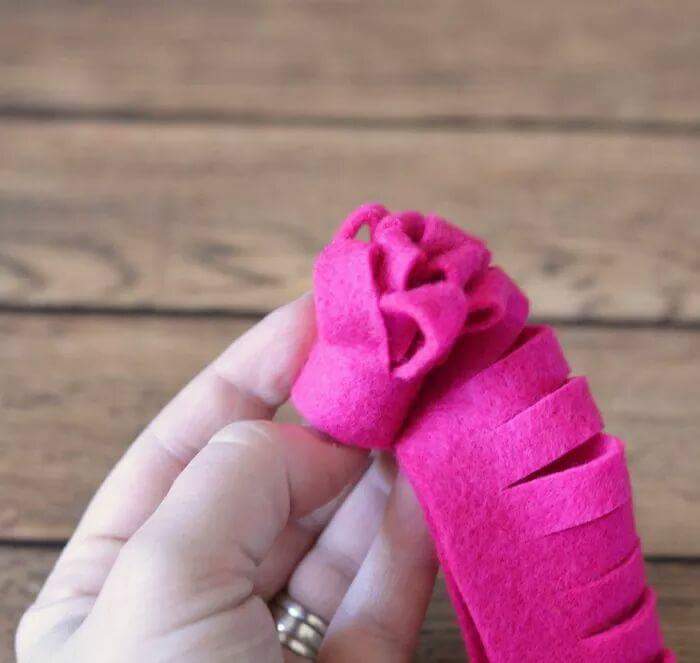 When finished making flowers, cut out leaf shapes. Affix to flowers with hot glue. Add stick stems.
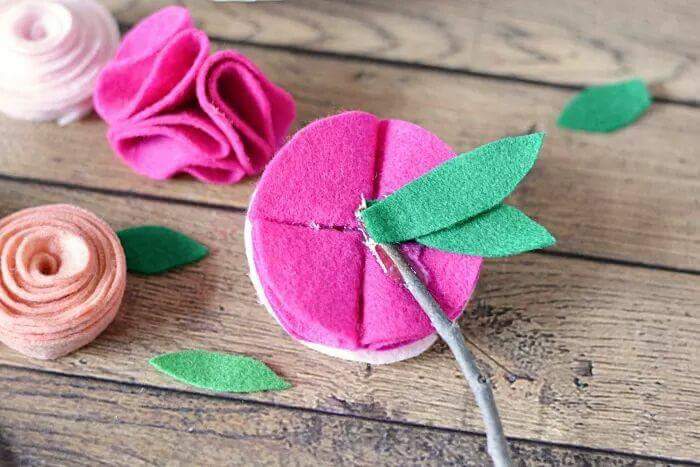
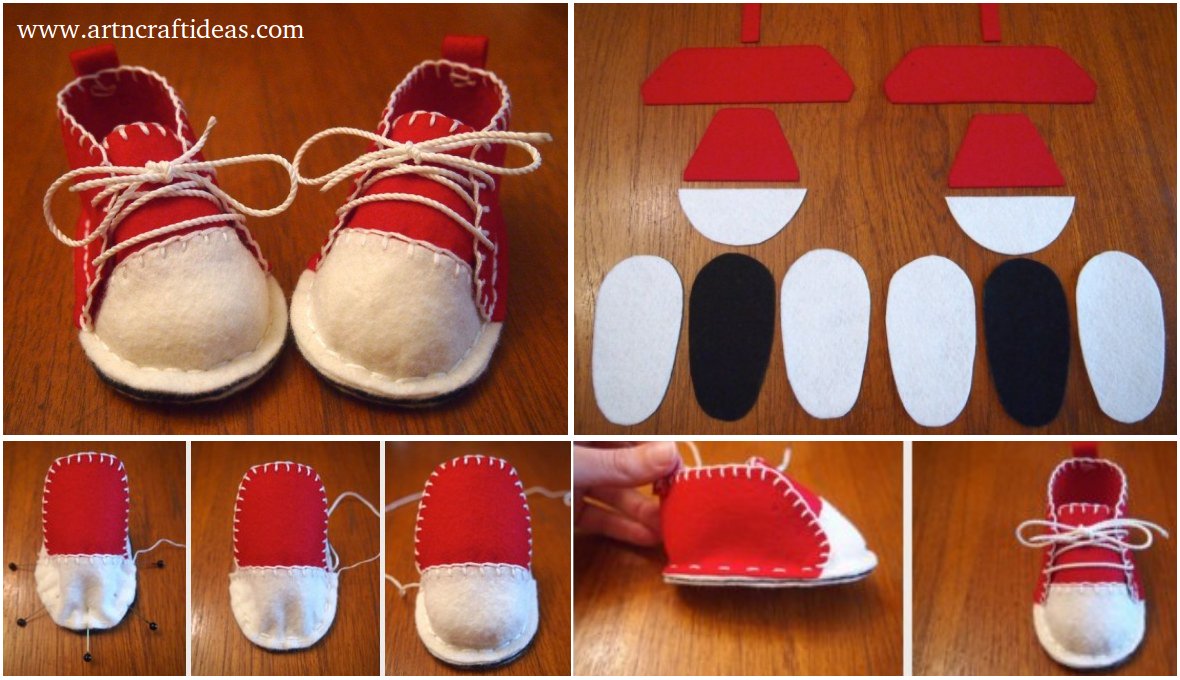
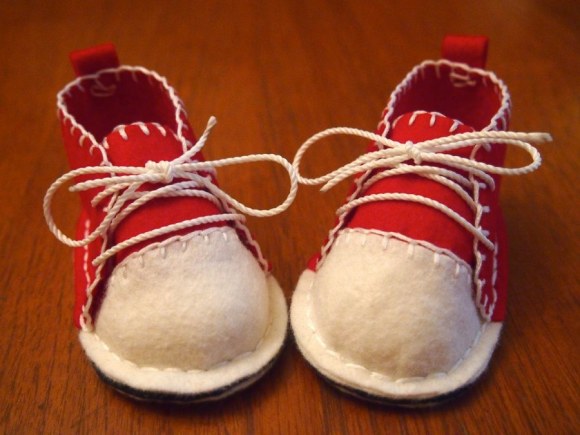

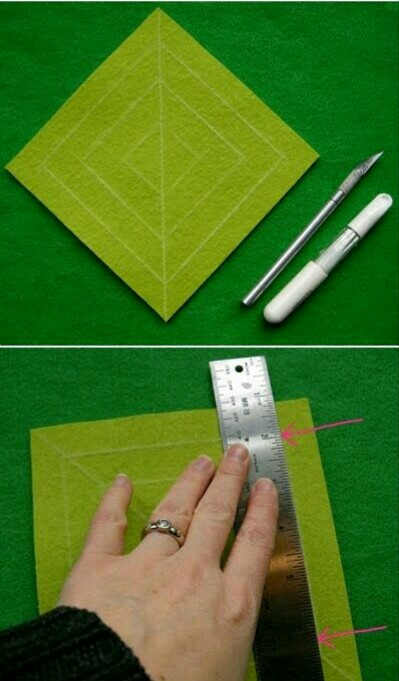
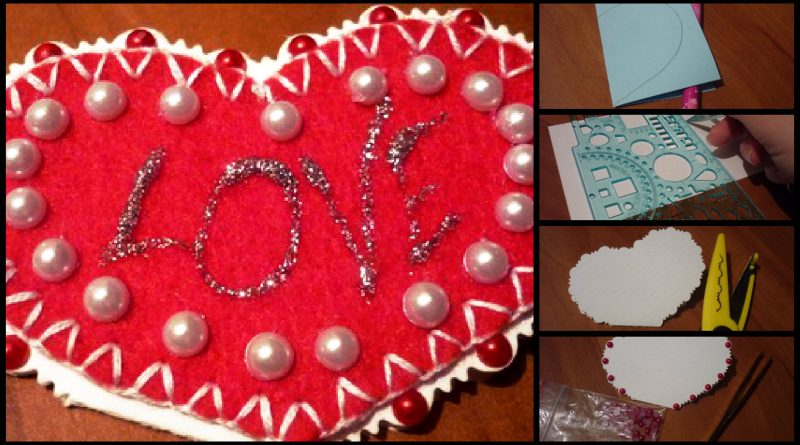
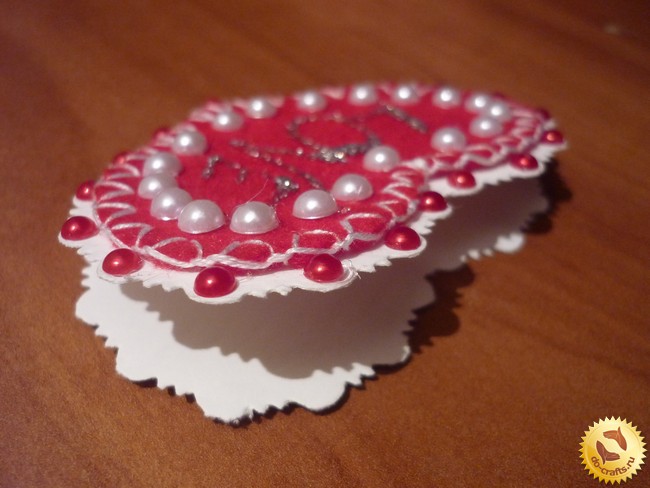
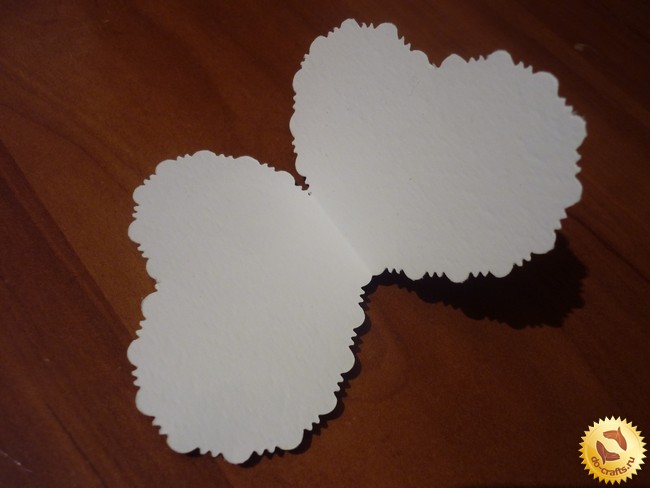
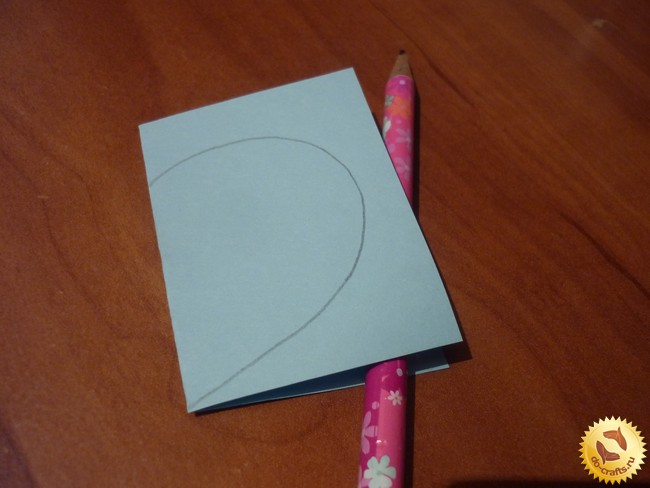 Take the white cardboard such size that in it together next two hearts already familiar size. Divide the cardboard pencil into two equal parts and then perform blunt scissors a ruler on the same line a little pushing. Eraser to erase the line from the pencil.
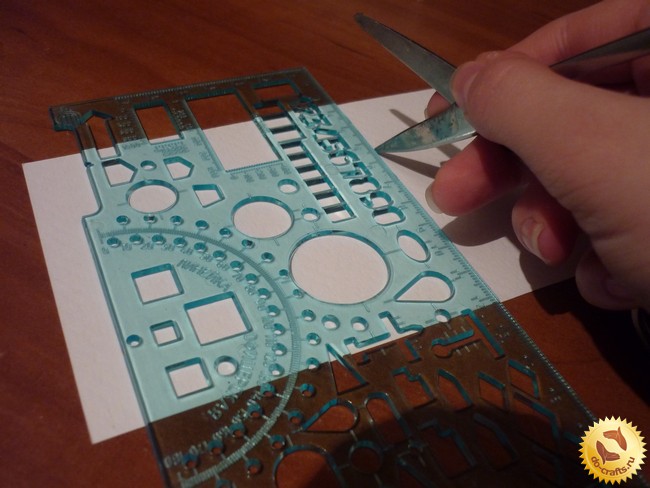 Bend the cardboard on the sunken line. To place, the fold is putting heart so that it touched the edge of the pointed end. Encircles the template.
 Cut along the contour curly scissors except for folding seats.
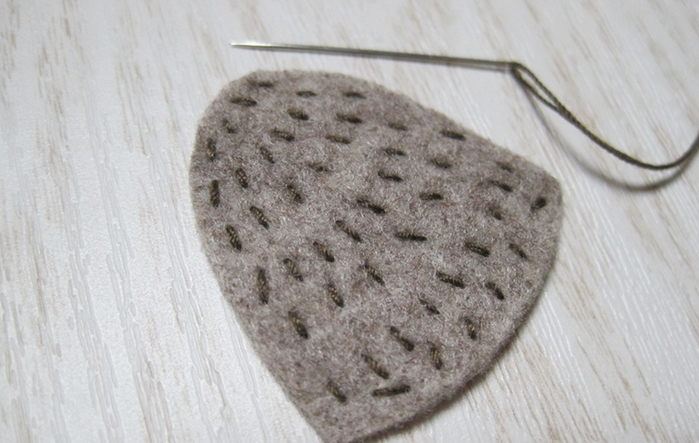
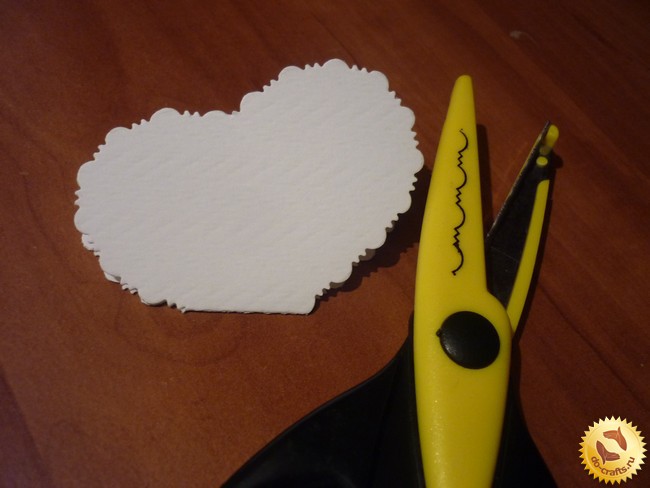 Trace the same pattern on a red chalk felt.
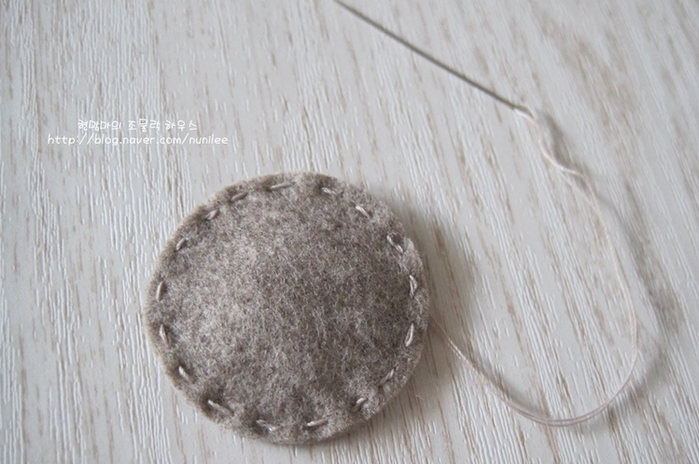
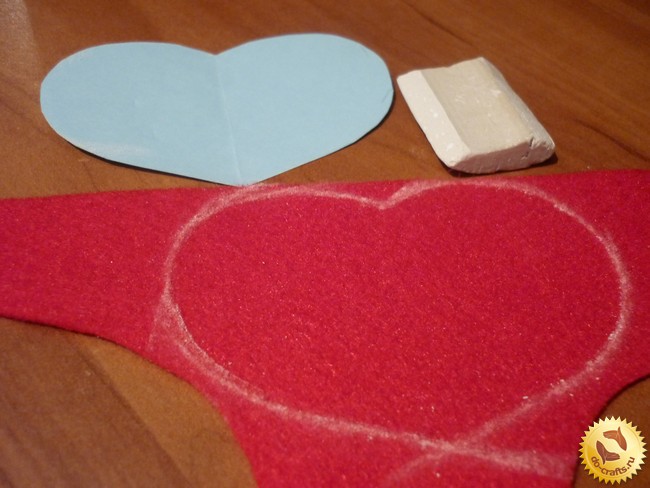 Cut Felt heart, making the indentation of 0.7 mm from the edge of the chalk. That is, felt heart must be smaller than that of the cardboard blank. Departing should be the same.
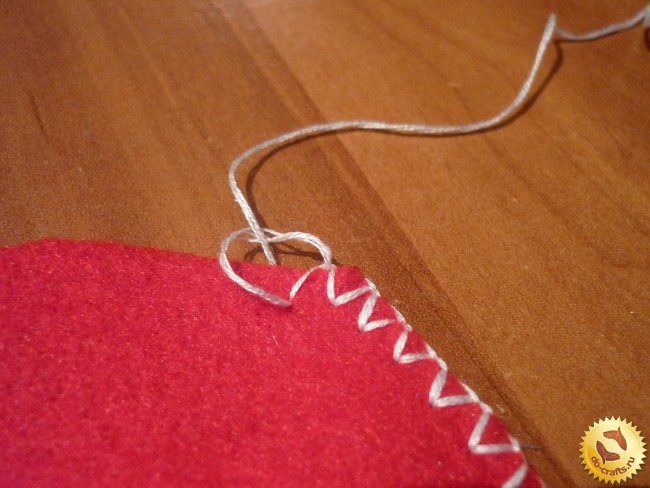
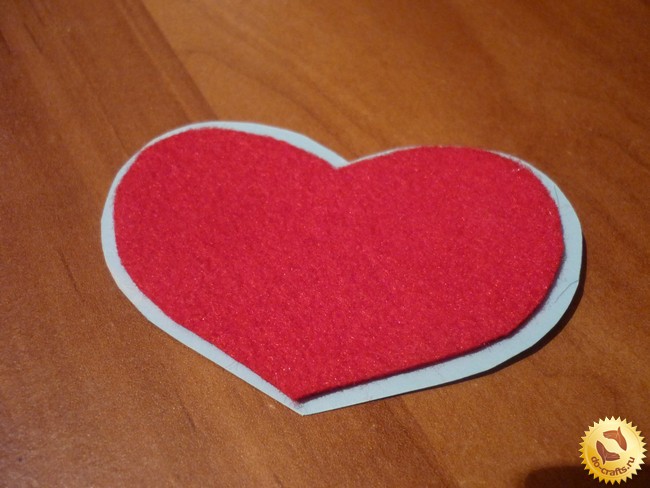 The edge of the felt heart processed loopy forked suture. First delaying loop in one direction and then in the opposite direction, thus penetrating the needle through the same hole.
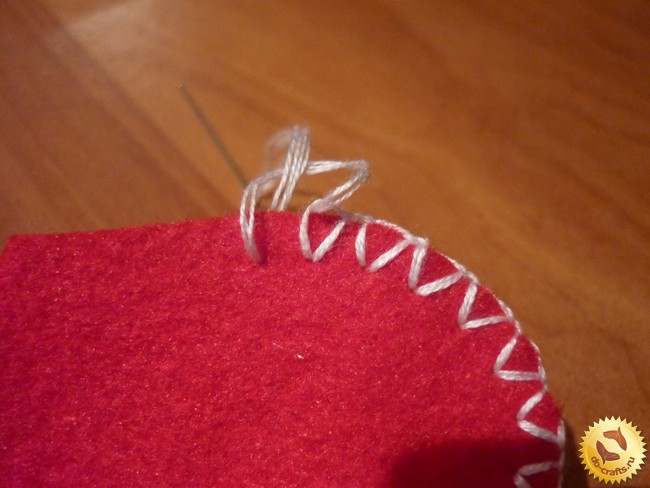
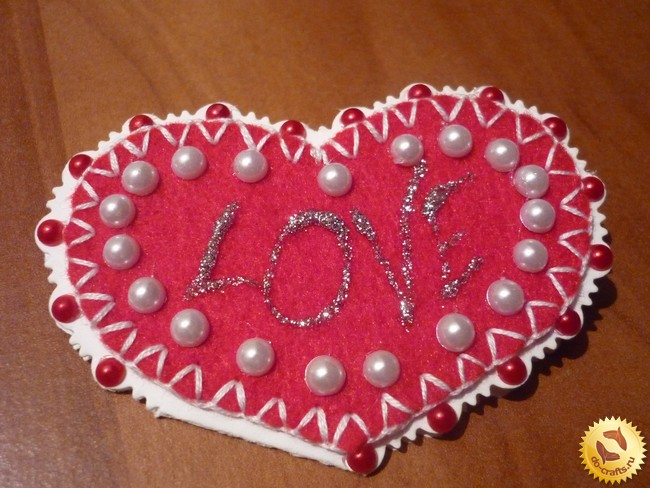
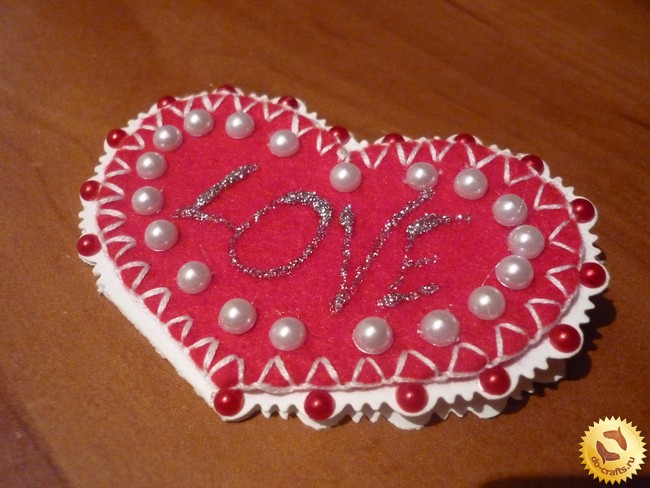
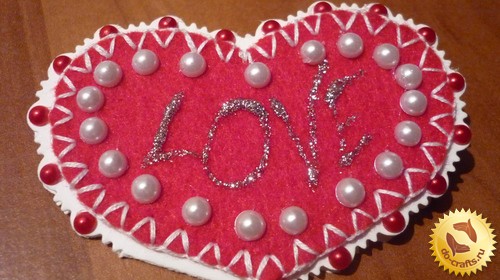
 The cut edge of scissors curly decorates red pol bus NAMI.
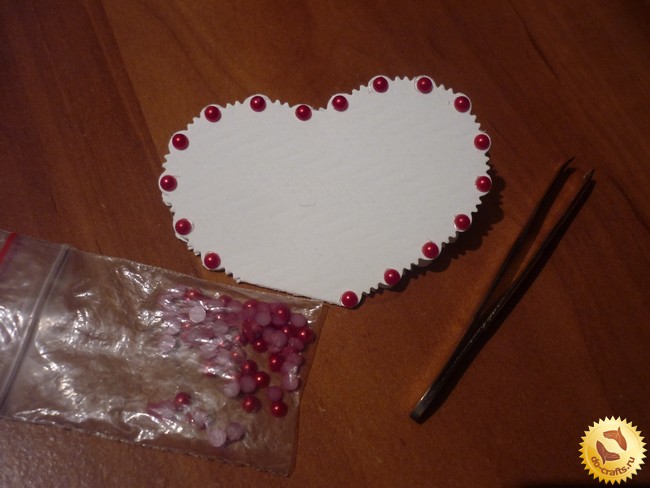 Then on top of sticking embroidered Felt heart and decorate the edge of the white pol bus NAMI. We place them one by one between the red.
 Silvery glue draws the word love. To this end, squeezing a bit of glue and stretch it in the right direction. After applying the adhesive must be dry.
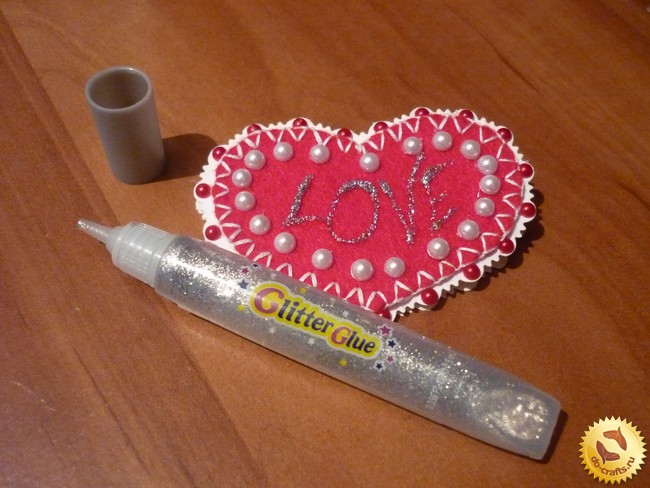 So we have made with their own hands Valentine, which remains the only sign and sends to the recipient.