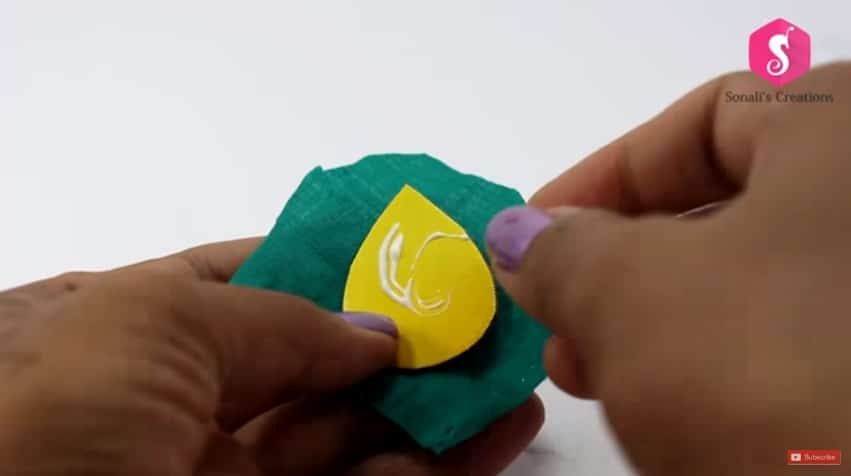
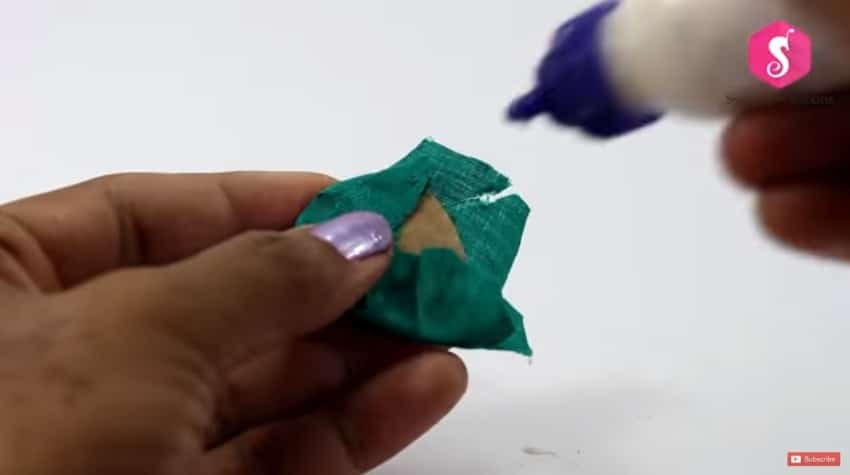
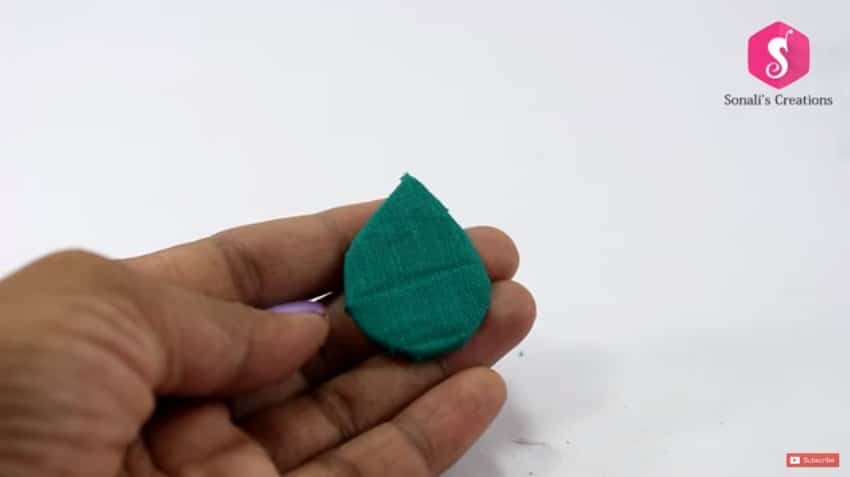
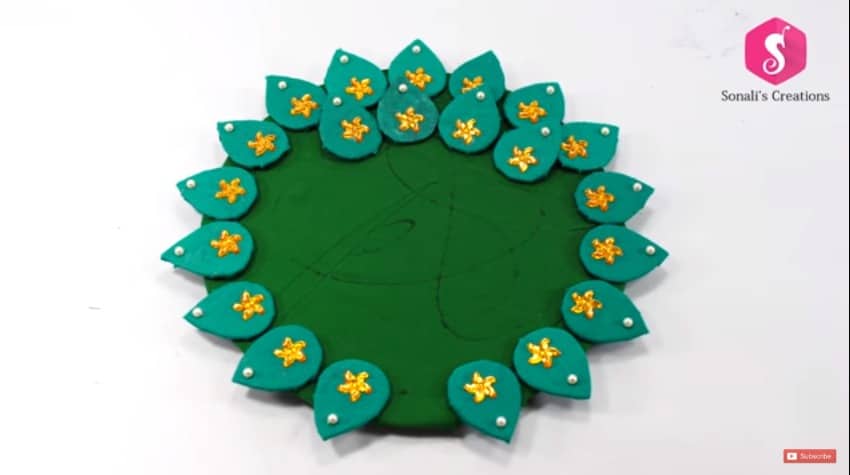
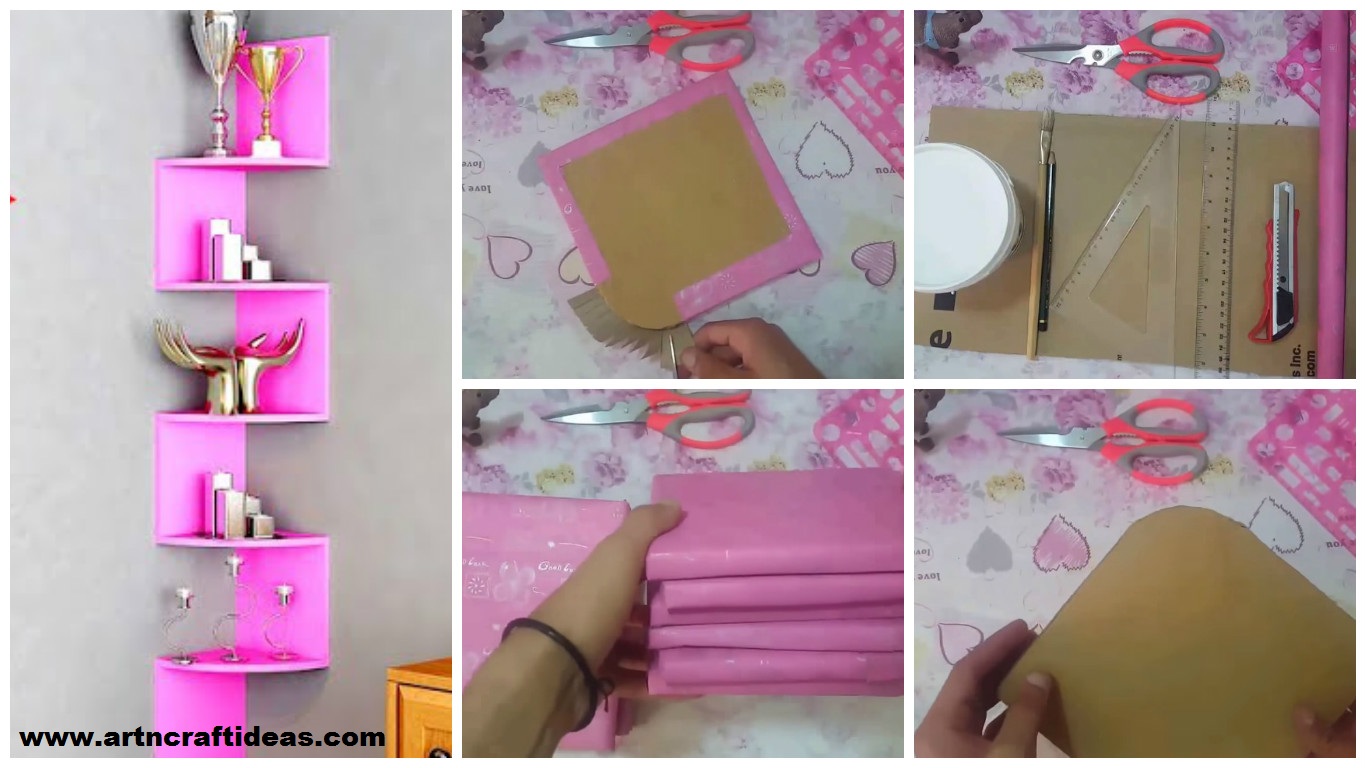
Procedure of an beautiful wall clock Take the desired clock base Prepare marble powder mixture Apply the mixture and give texture After it dries smoother the surface by a sand paper Make design with paper mache Apply primer on clay Add base colour Do the details by outliner Apply varnish Paste the clock on the board
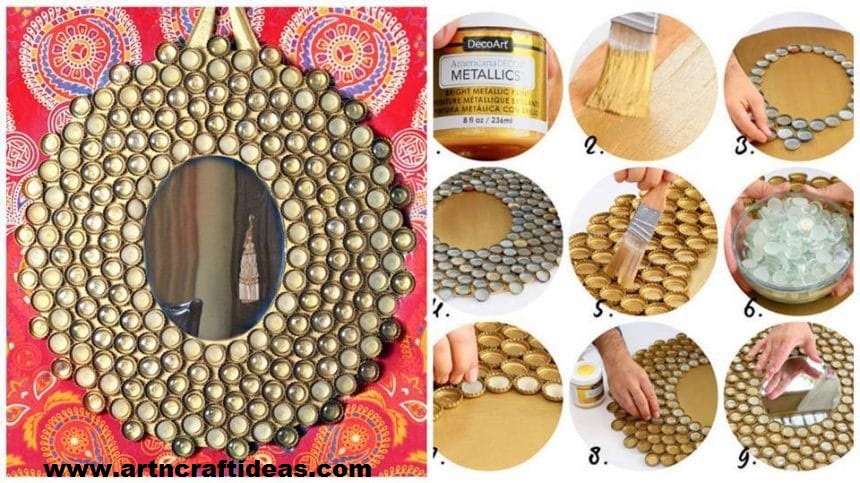
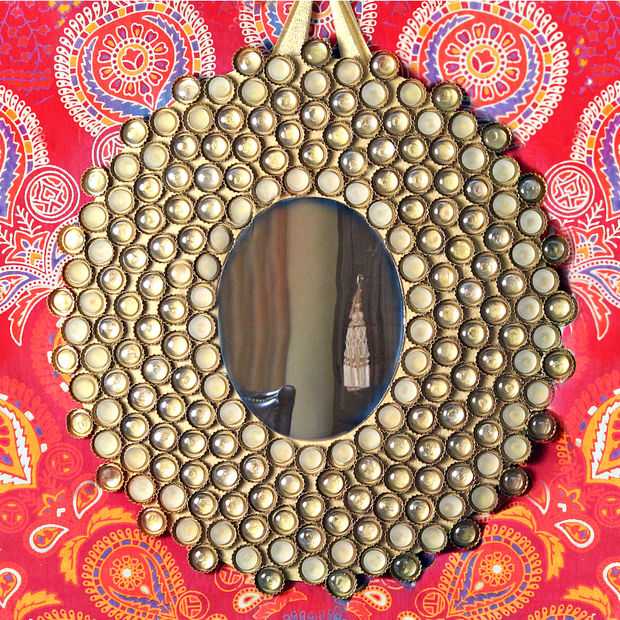
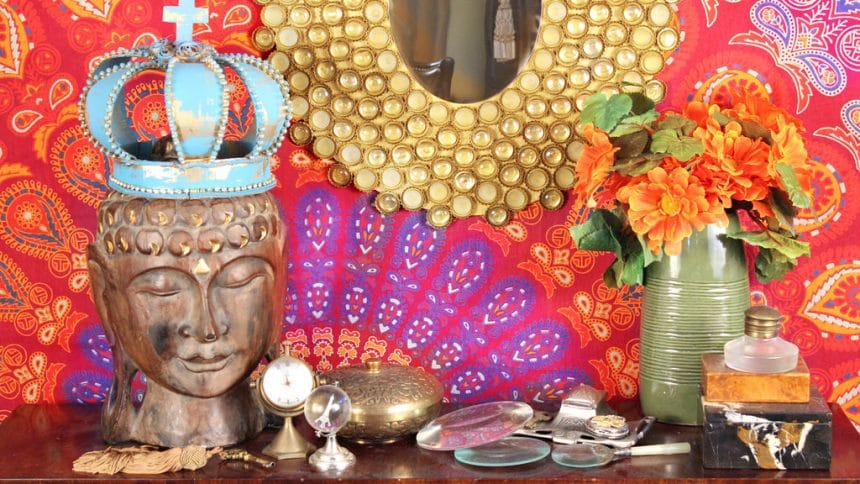
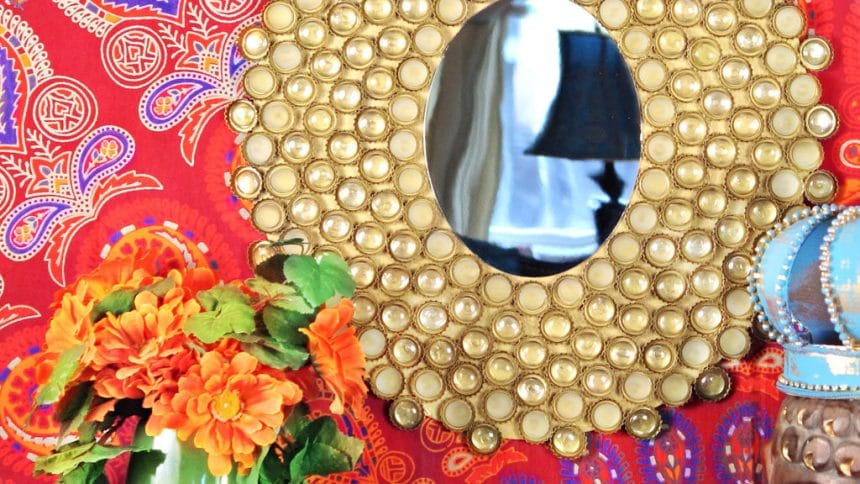
Use recycled bottle caps and floral marbles (from the 99c store) to make a funky boho mirror! I used clear glass marbles, but colors would be wonderful, too.Required Material:
Americana Decor Metallics in Antique Brass
Glass Floral Marbles
Round or oval wood base
E-6000 Glue
Bottle Caps
Mirror
Here’s How:
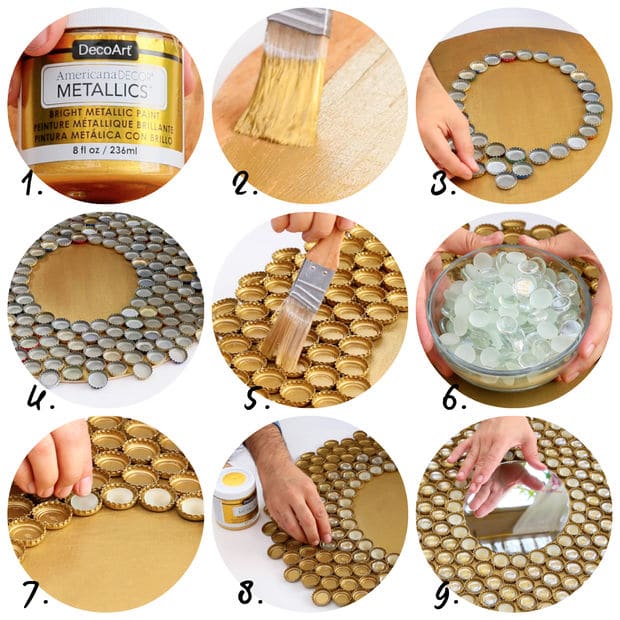
1. & 2. Paint the wood oval with the Americana Decor Metallics and let dry
3. Center the mirror and figure out your bottle cap design
4. Glue them on the wood base with E-6000 and let dry
5. Paint the bottle caps with more Americana Decor Metallics
6. & 7. Glue the glass chips inside of the bottle caps
8. Once the bottle caps are filled with glass chips, glue the mirror in the center
*Hot glue ribbon to the back for an easy way to hang your masterpiece
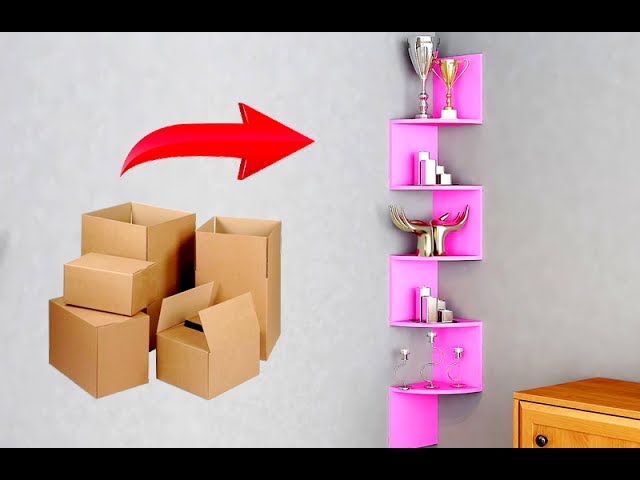
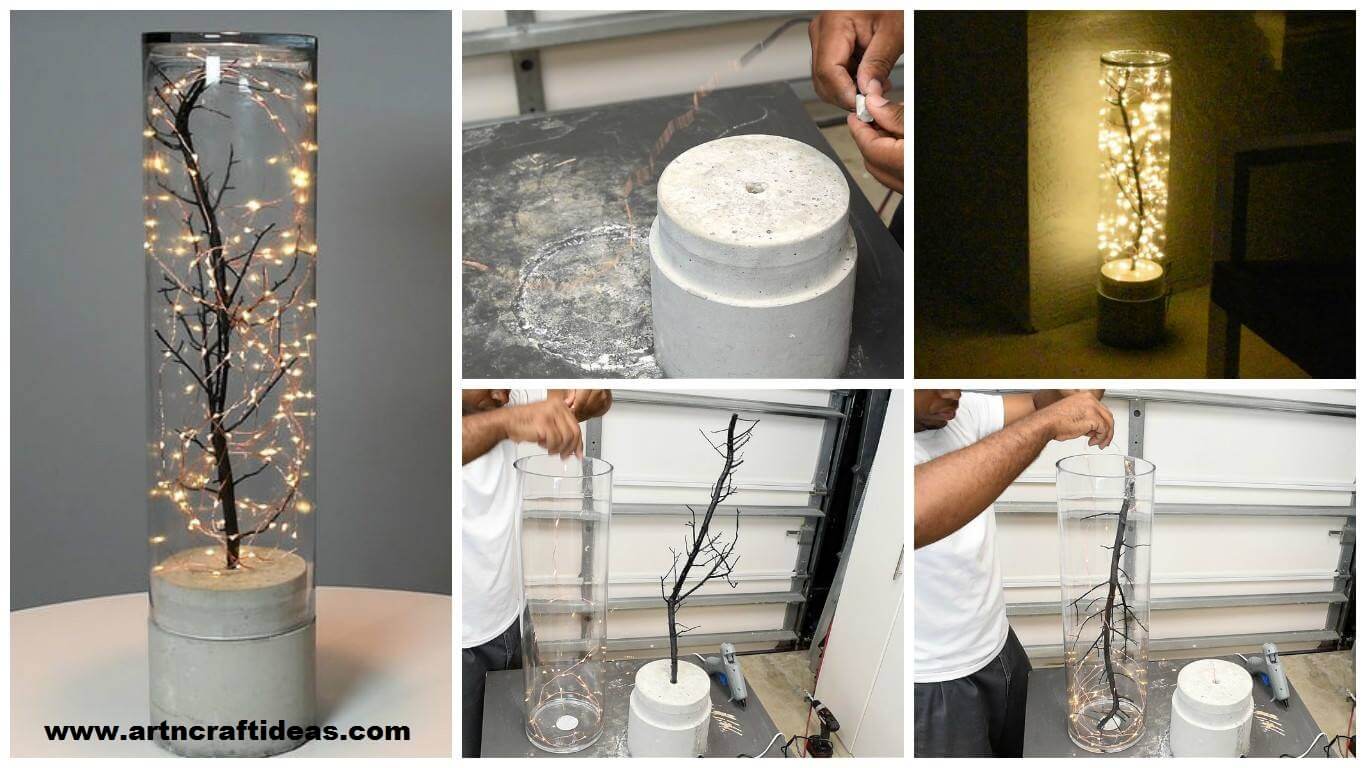
This time it had to be easier to make, had to be larger, and with the option of placing it outdoors. After brainstorming here is the attempt of improvement. Check out the video for more details.
Required Material:
1. Led String Light
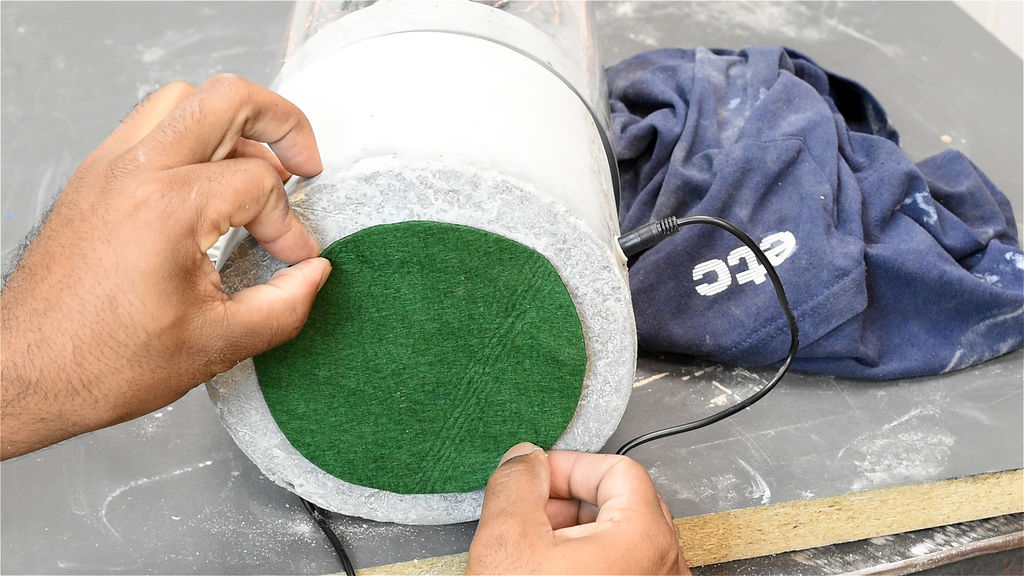
2. Felts Sheet
3. Cement
4. Large vase ( I used a 24in tall x 7in)
5. Drill bits
6. Random tree branch
7. Spray paint
8. Metal flashing
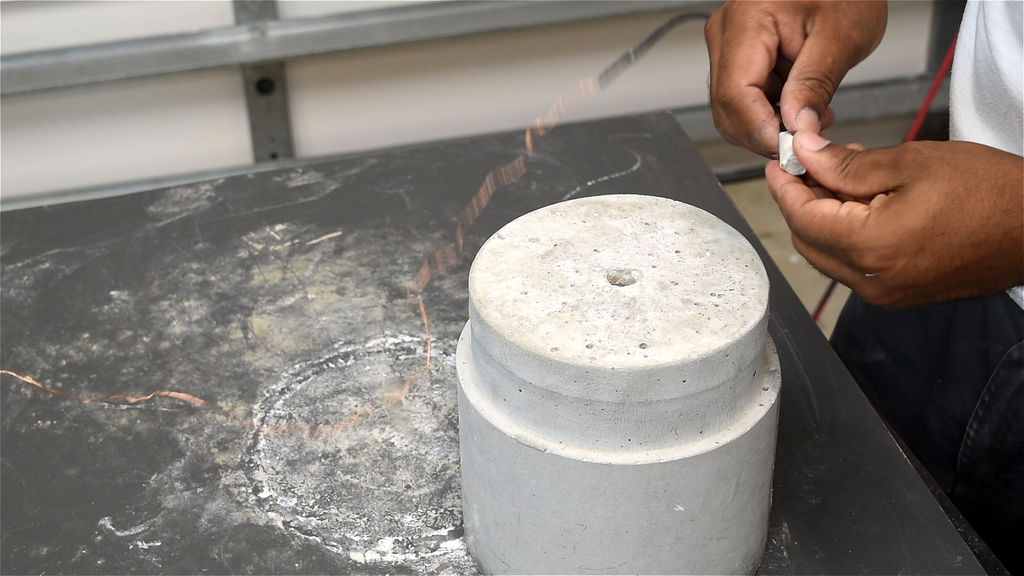
Making the Storage for Led Controller:
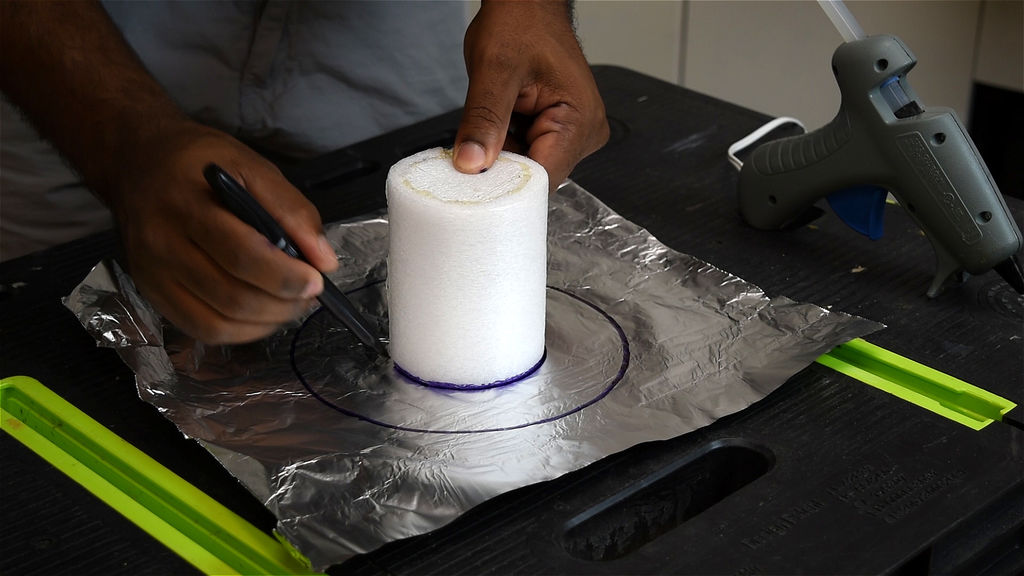
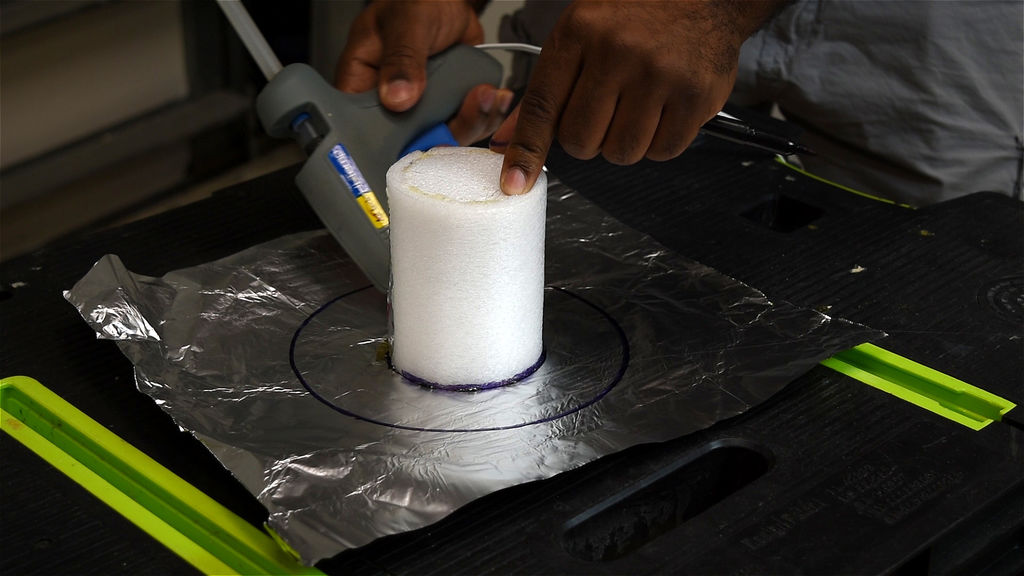
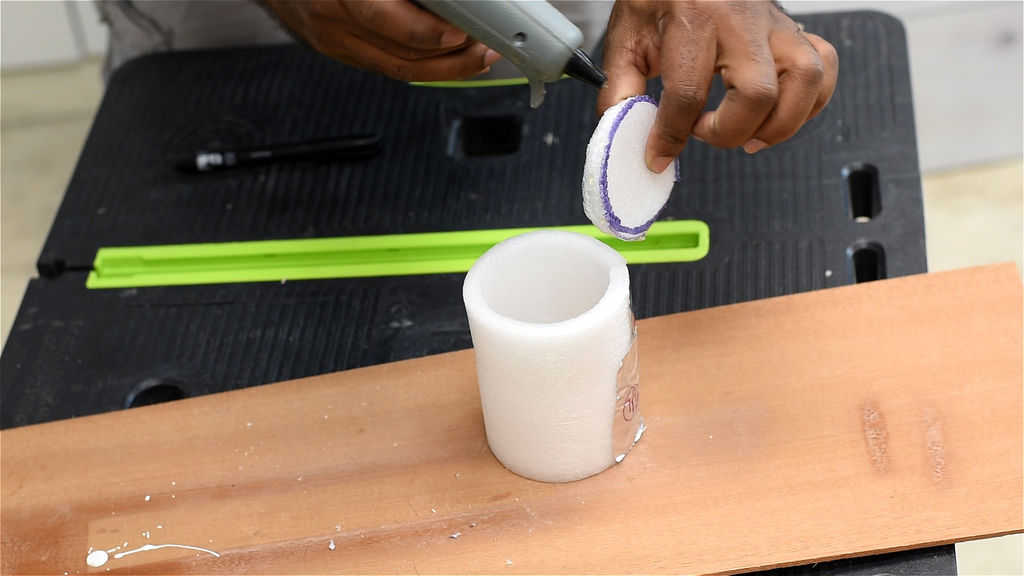
I took a piece of foam from a shipping package. Cut it to create a cylinder. I closed it by taping the side. then cut out a circle to close off one end. A paper cup would work as well.
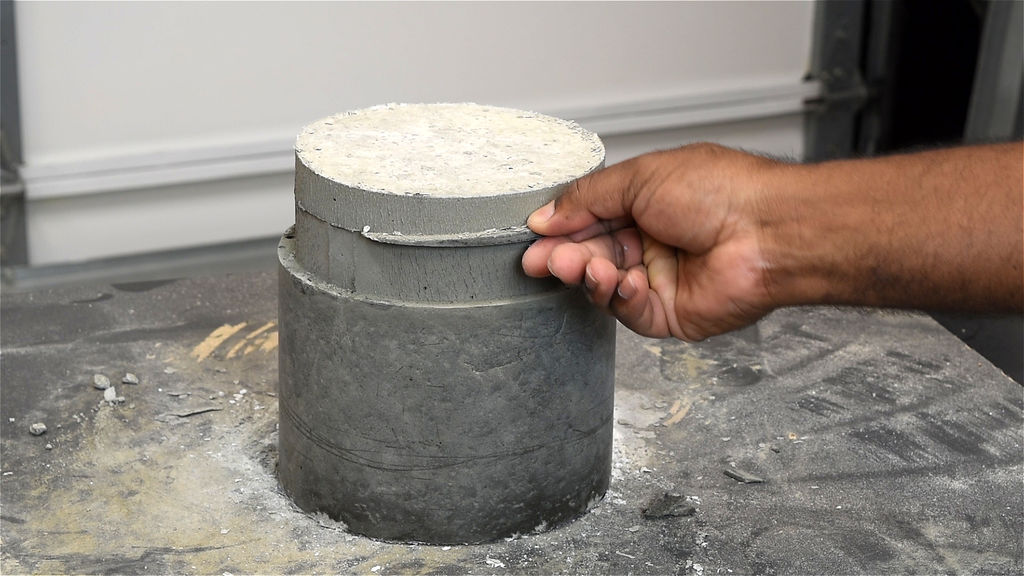
Creating the Concrete Form:
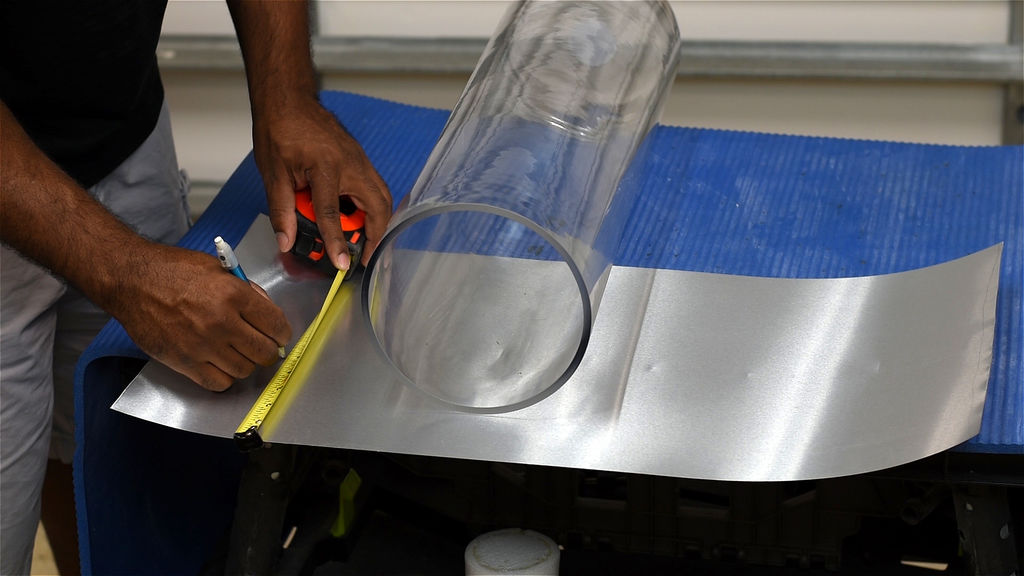
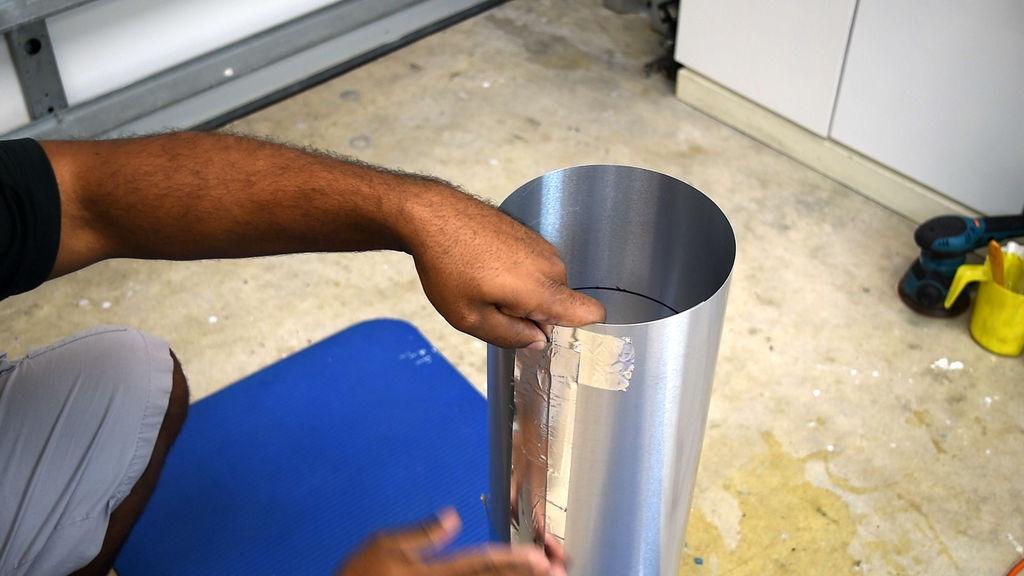
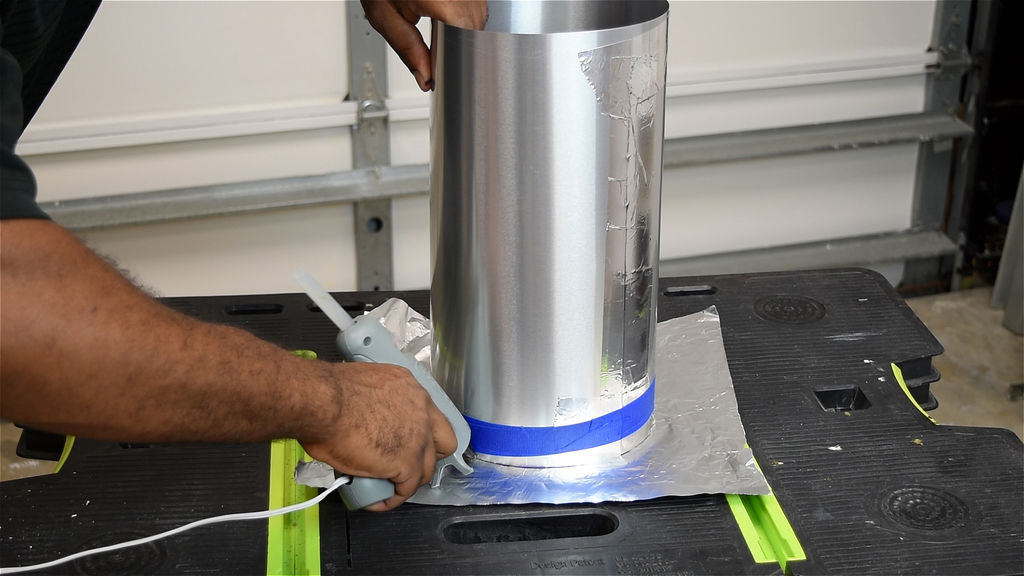
I used a piece metal flashing to create the concrete form.
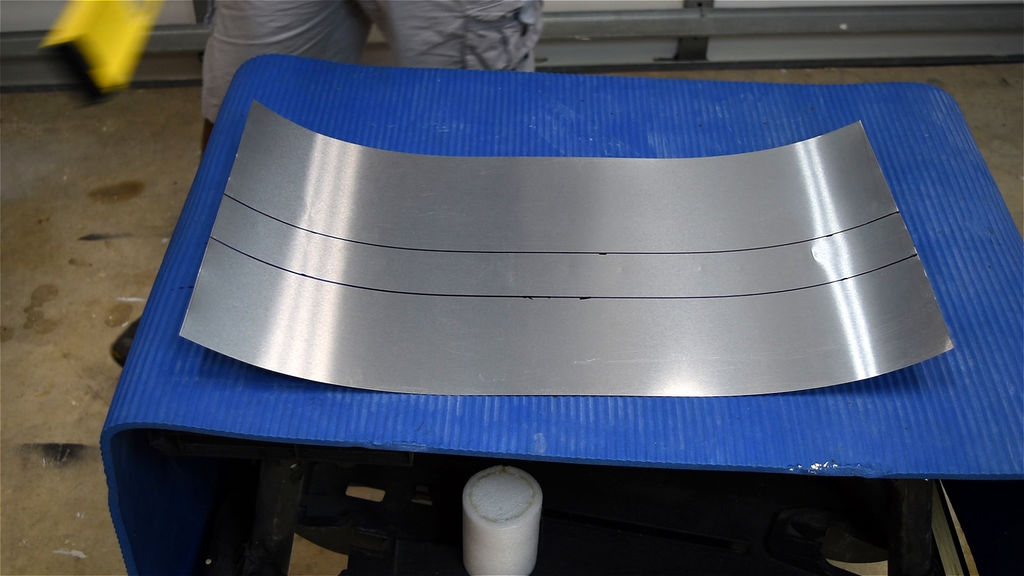
First I marked the metal flashing for the bottom of the form, I made this 5 inches tall. Next, I marked 2 inches above the first line. At this point, you will have two parallel line.
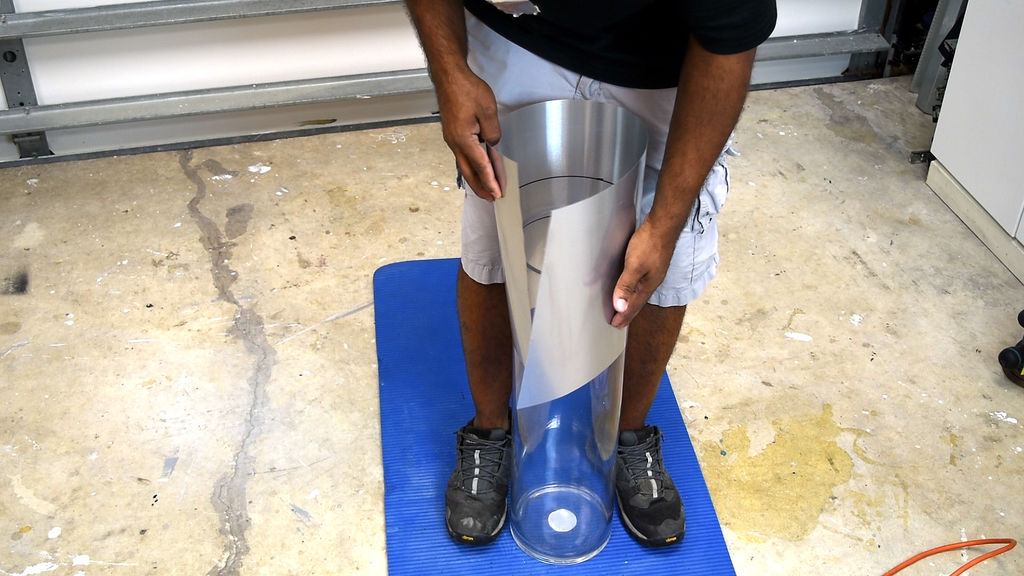
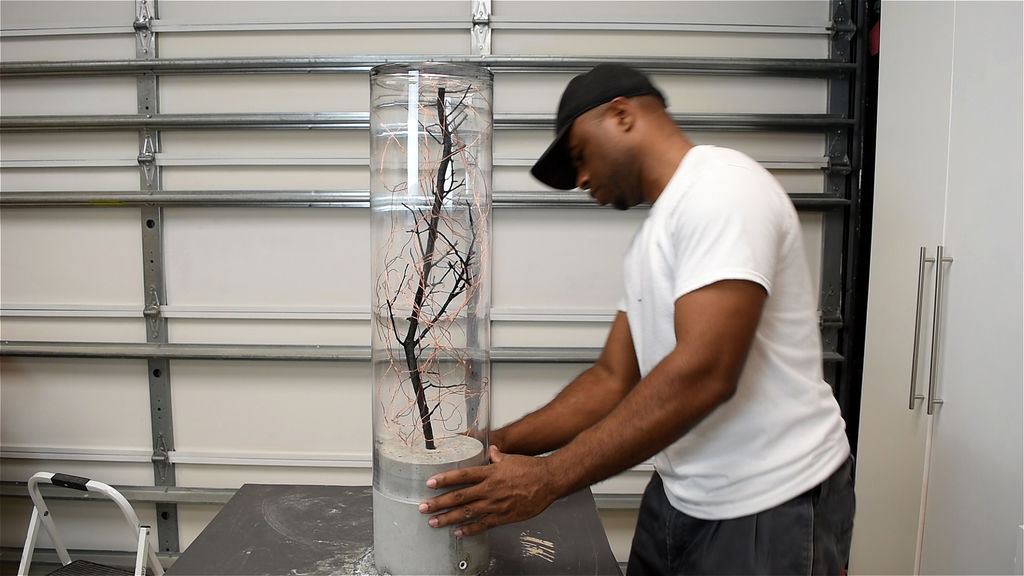
Now wrap the metal flashing around the vase. Close the flashing by taping the loose end. By the way, I’m using a large vase that’s 24 inches tall by 7 inches. You can find that at your local craft store.
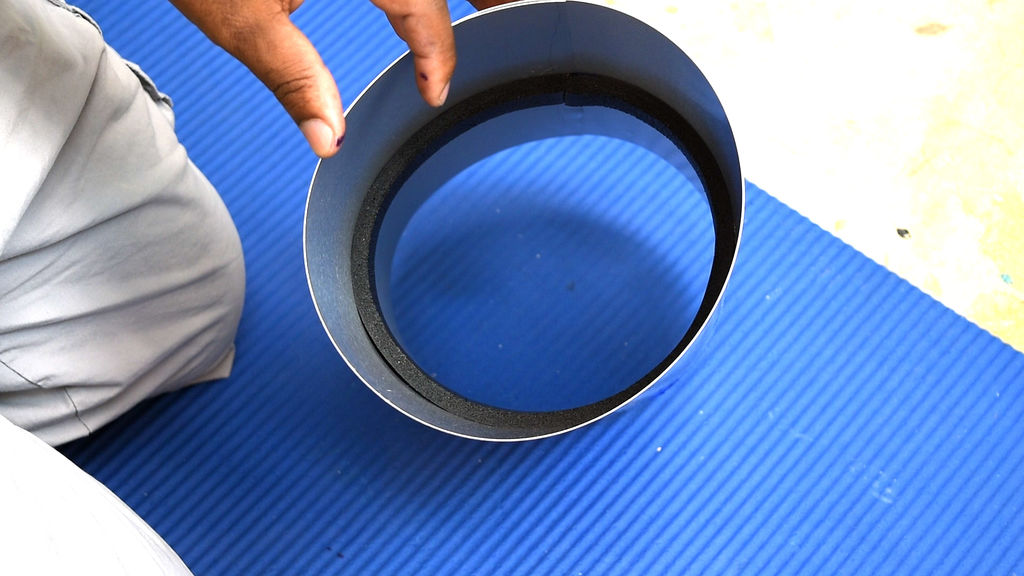
Next, I took two 1 inch rubber seal and follow the line going around the interior. Following the line I drew out. I did this twice which gave me a two-inch path around the interior of the flashing. This part will shrink the interior, which will make the concrete fit right over.
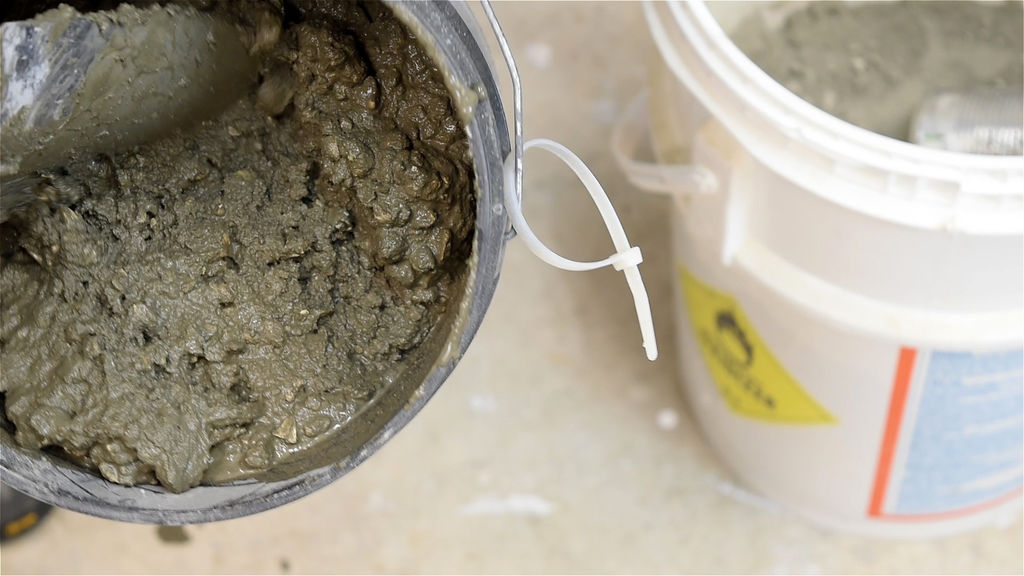
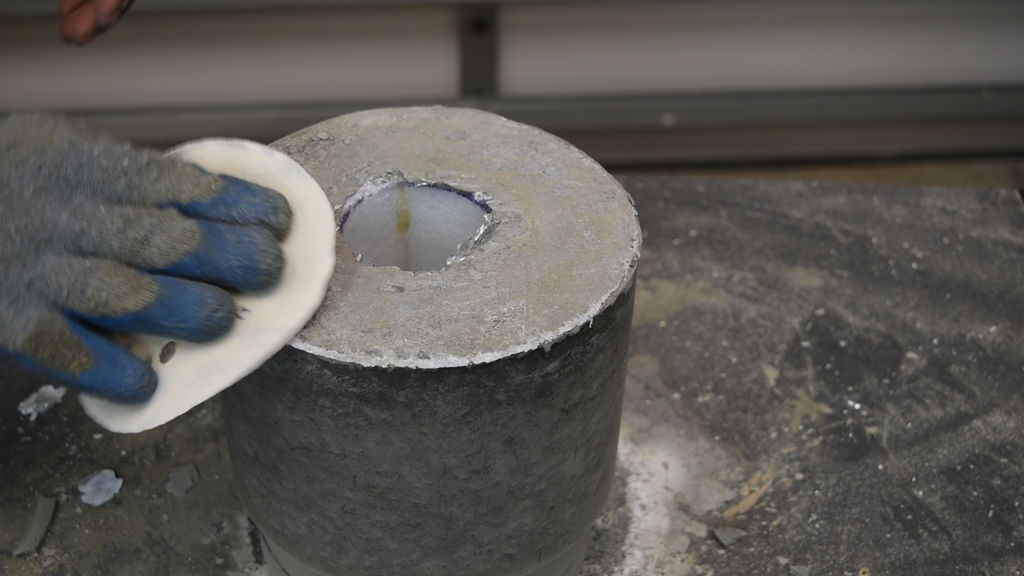
Mixing the Concrete:
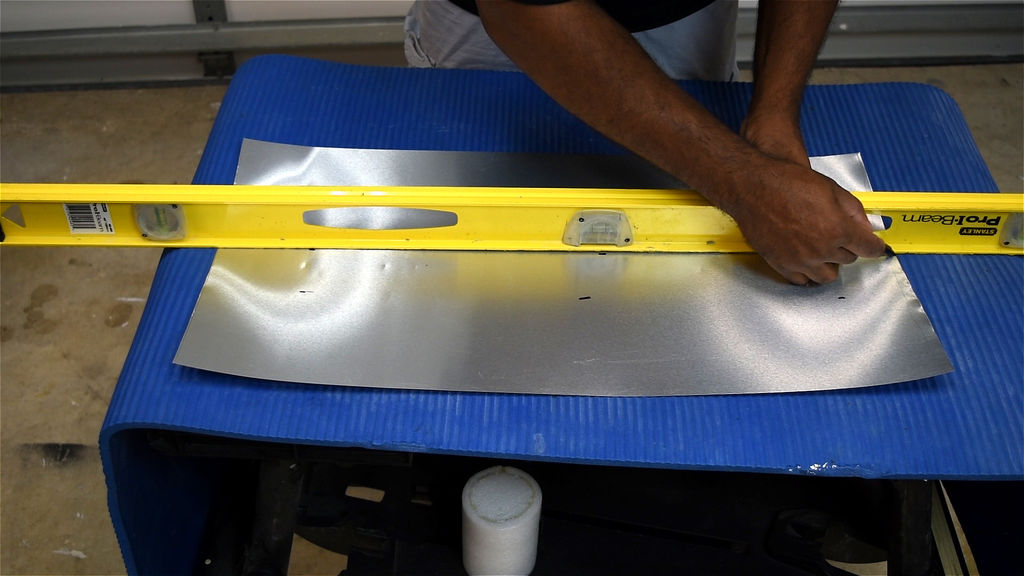
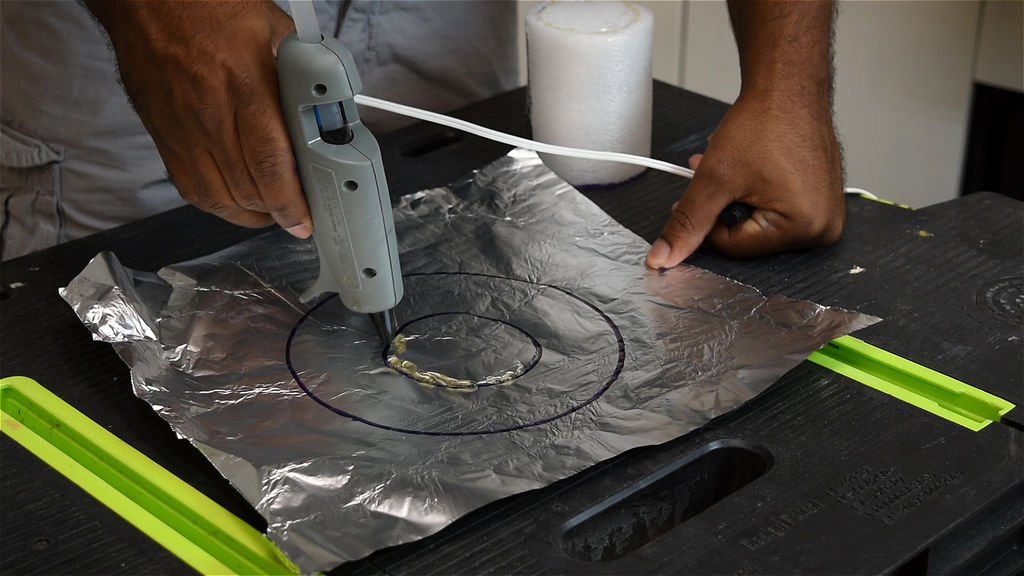
Take a piece of aluminum foil, place it down on a flat surface. Then I trace the vase and then the foam cup as shown. Use hot glue to secure the cup then the flashing to the marking.
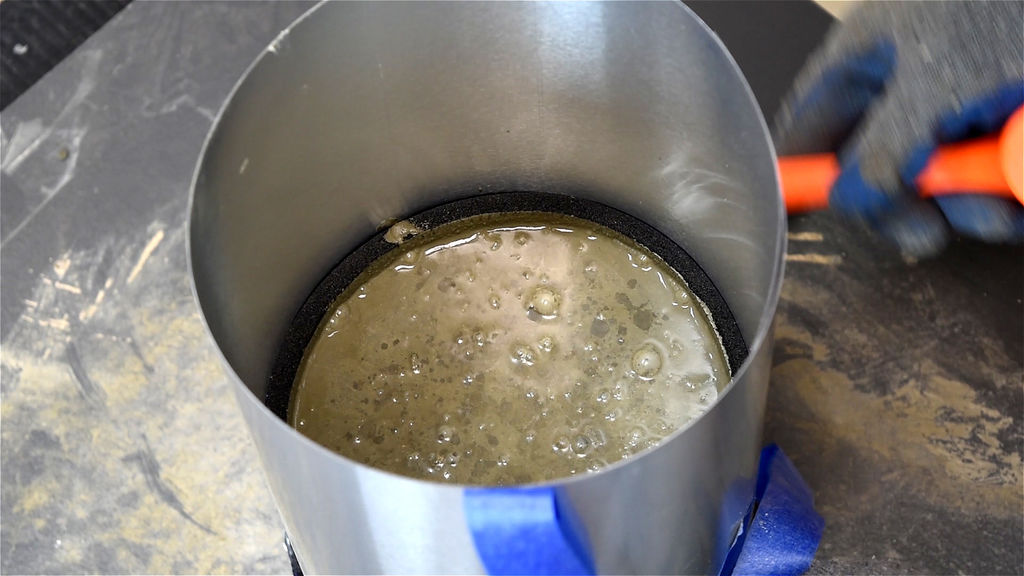
Mix concrete and pour it in the form.
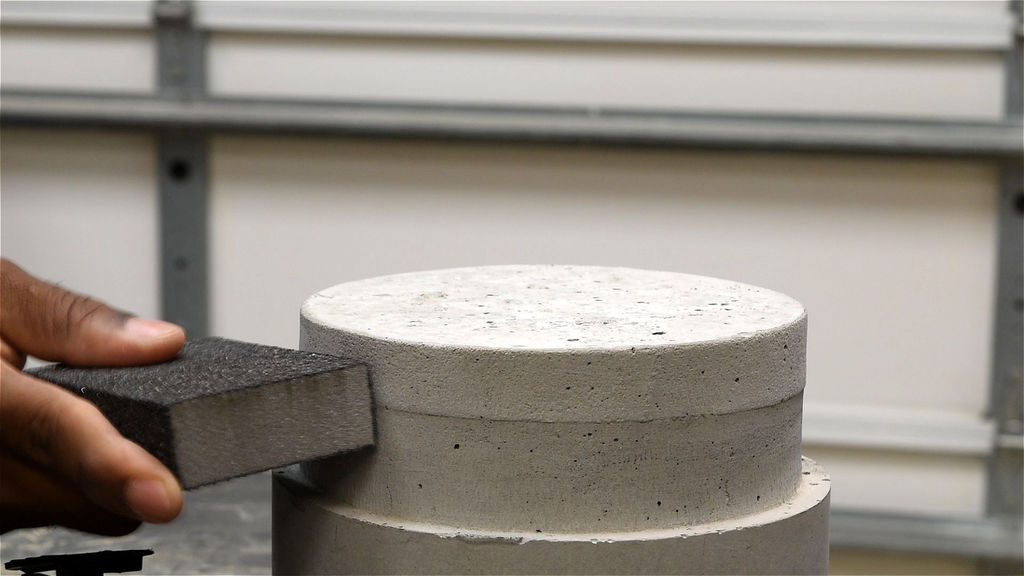
After a few days remove the flashing and rubber seal. The bottom was smooth so I only had to sand the top.
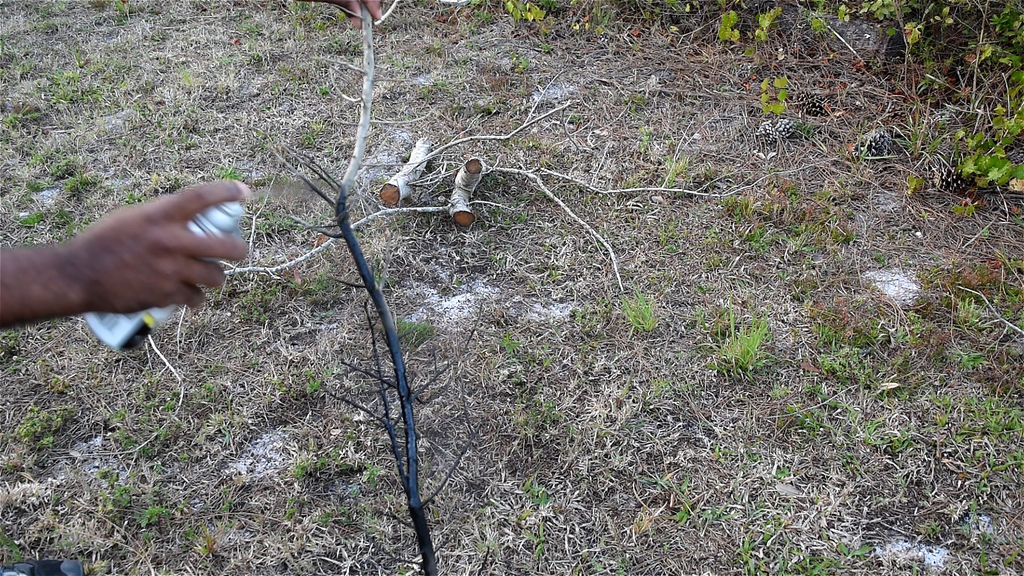
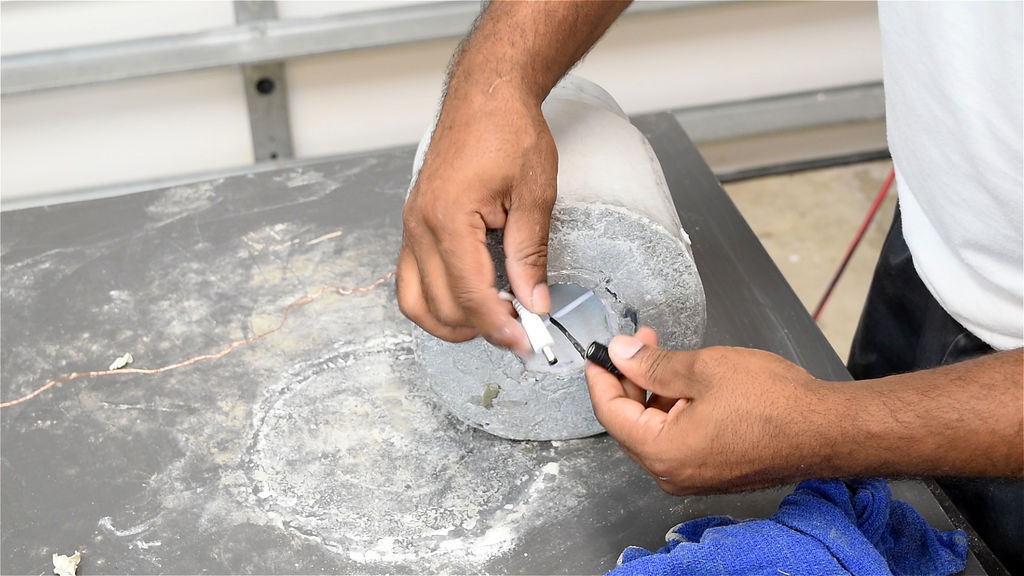
Using a Tree Branch:
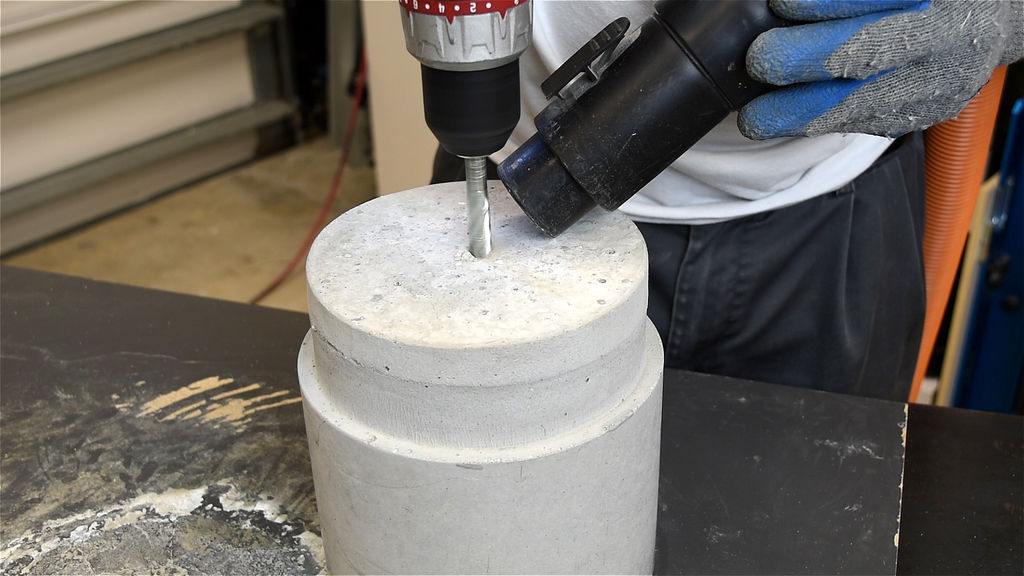
I took a tree branch and sprayed it with black paint. Allow enough time to dry. Depending on the size of tree branch you chose, use the appropriate size masonry bit. I use a 1/2 inch bit to drill down to the bottom into the foam cup. Test that everything fits nicely.
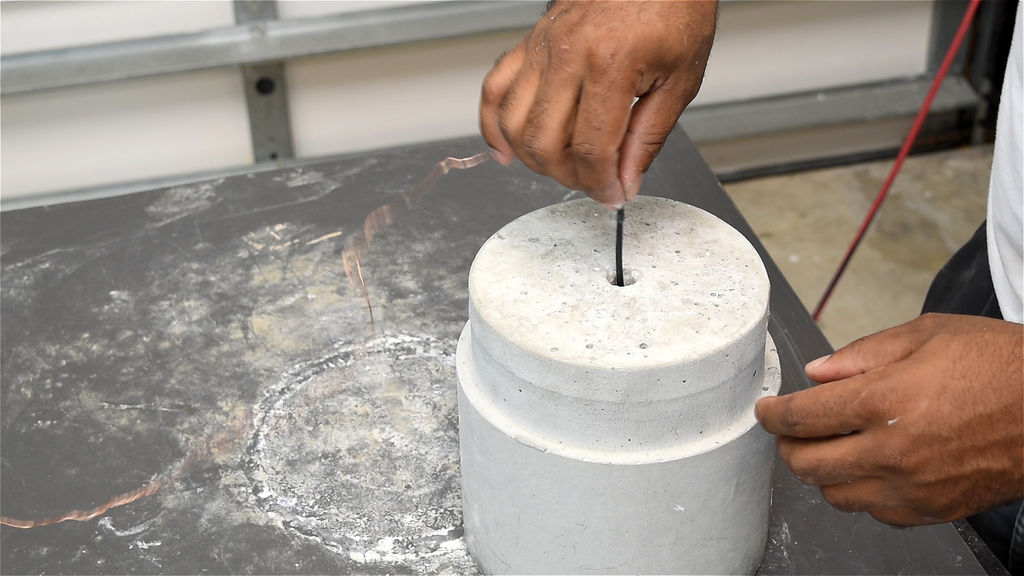
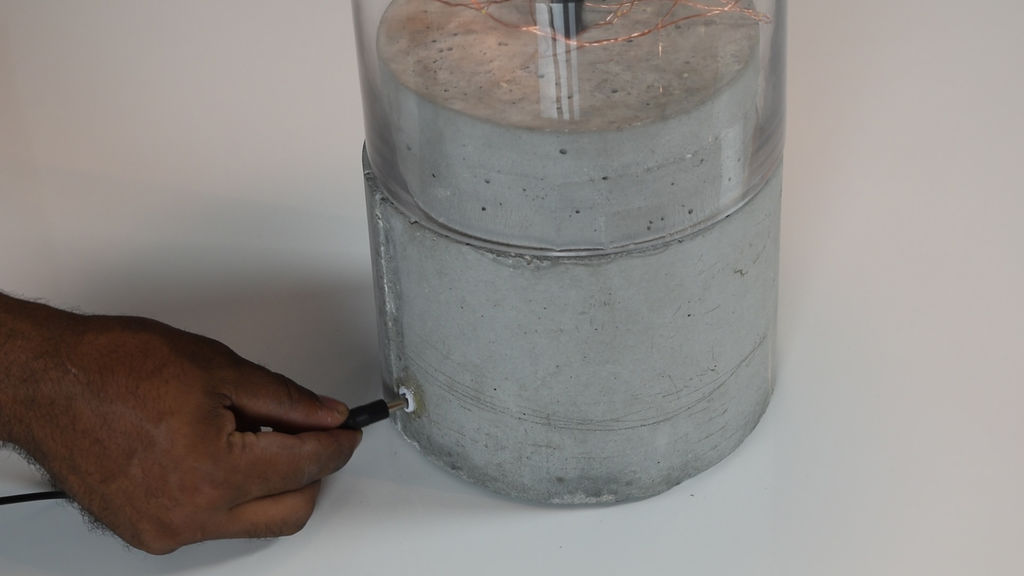
Install the Light:
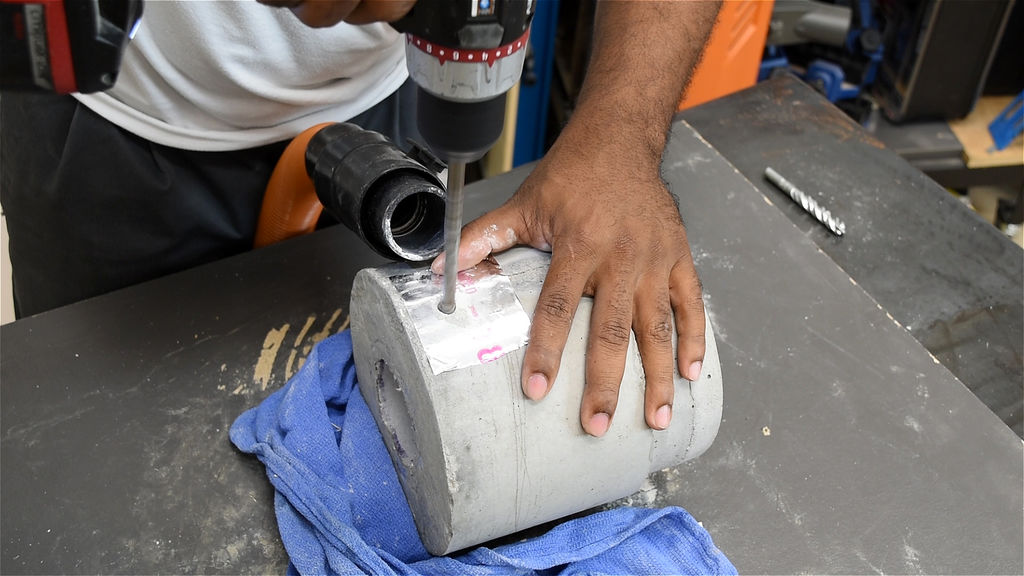
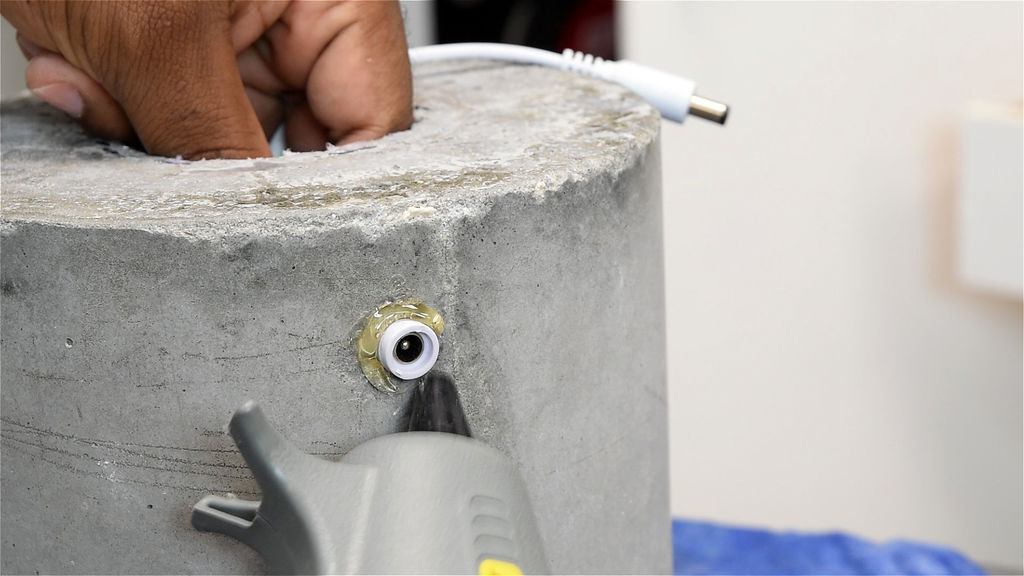
Drill a hole in the lower part of the concrete form for the power end to pass through. Next, use hot glue to hold the plug in place.
Pass the Led String light power end down through top then connect to the power cable.
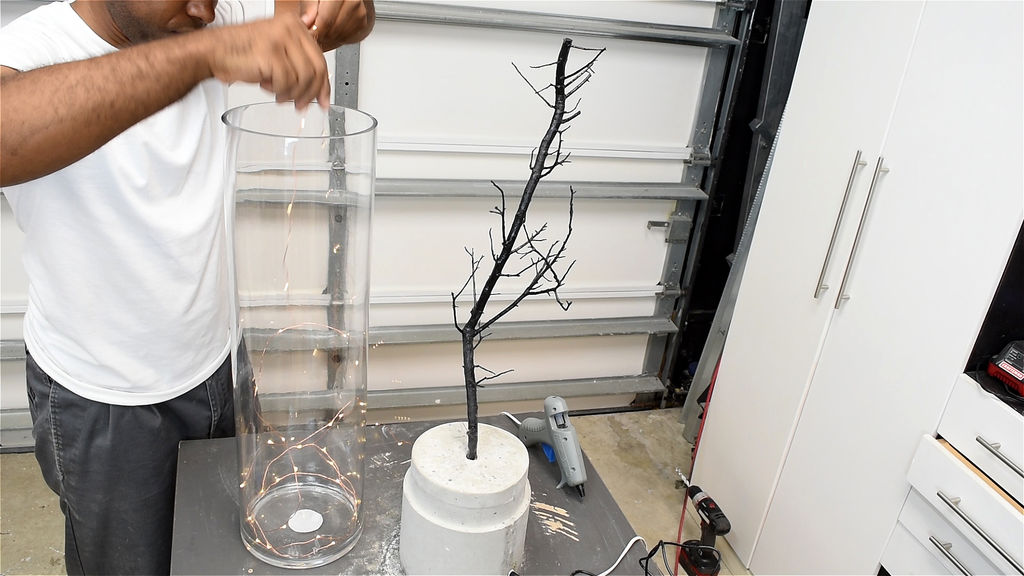
Adding the Lights:
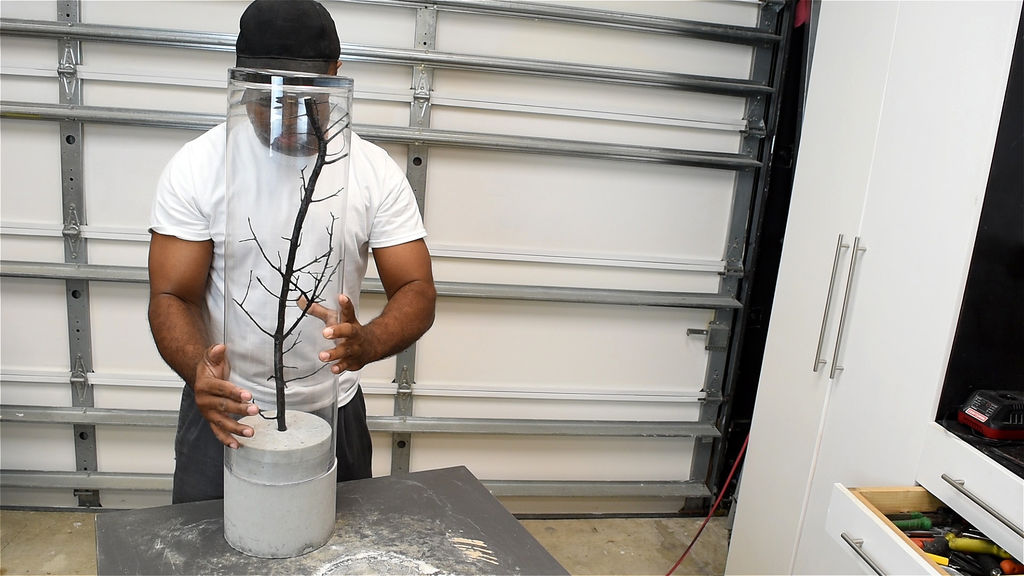
Feed a few feet of the led into the vase. Then place the branch in the vase and feed more led as you proceed.
Now sit the vase on top of the concrete. I placed a felts pad on the bottom to protect any surface.
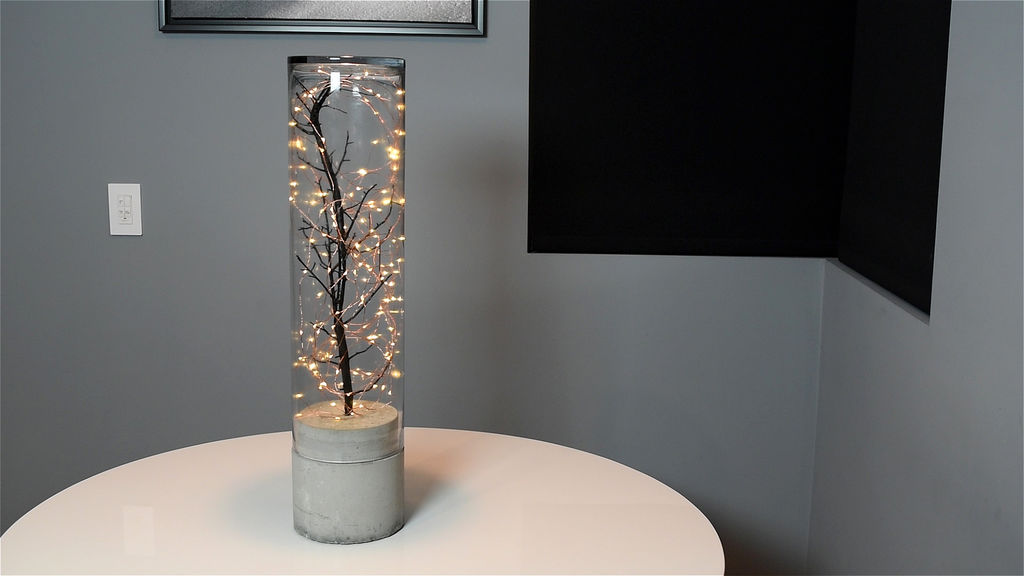
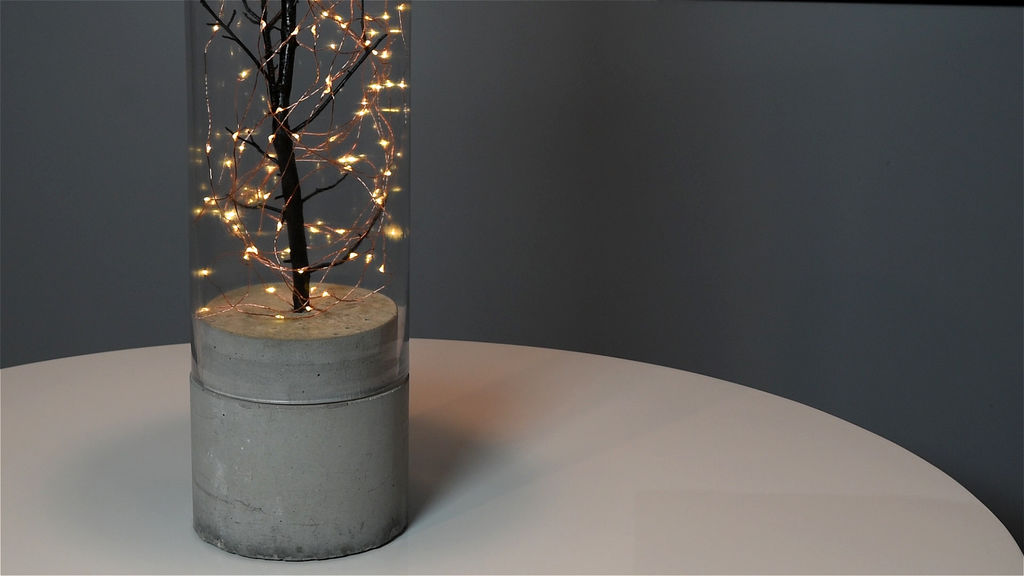
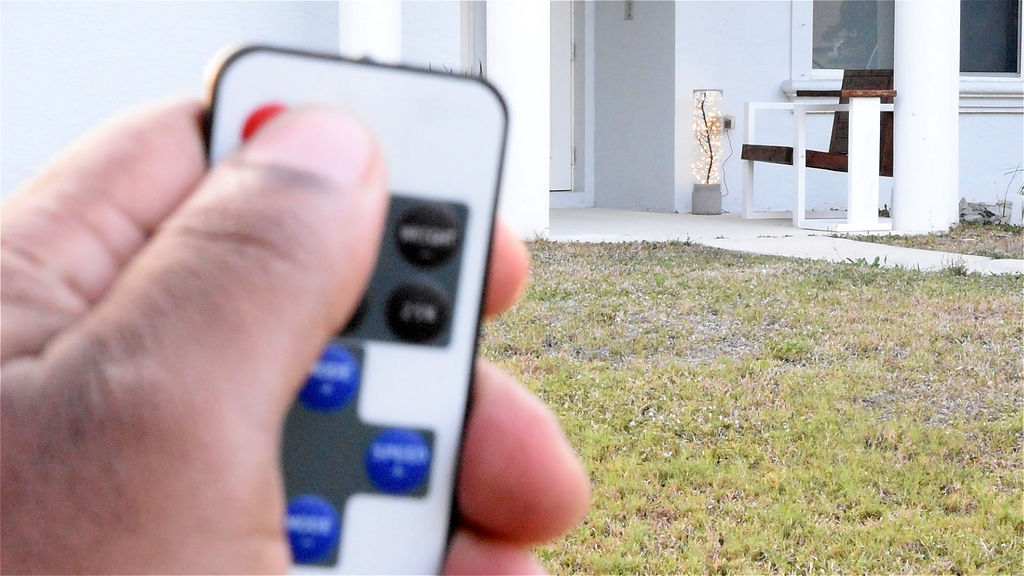
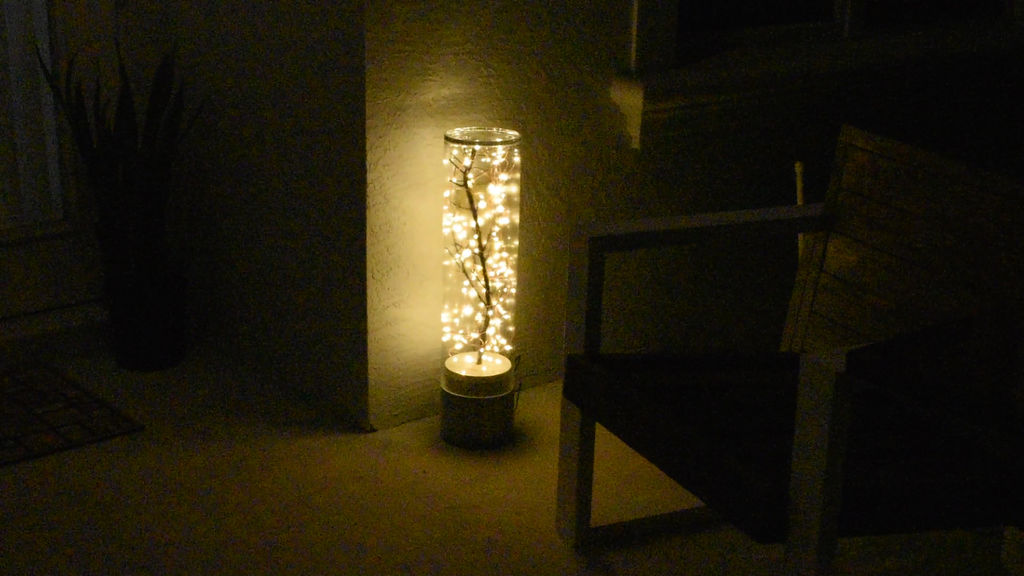
The Finish:
I love the way this lamp came out. The LED String Lights works extremely well. I was able to get this lamp to work approximately 50 feet away. Hope you have a blast when you make yours.
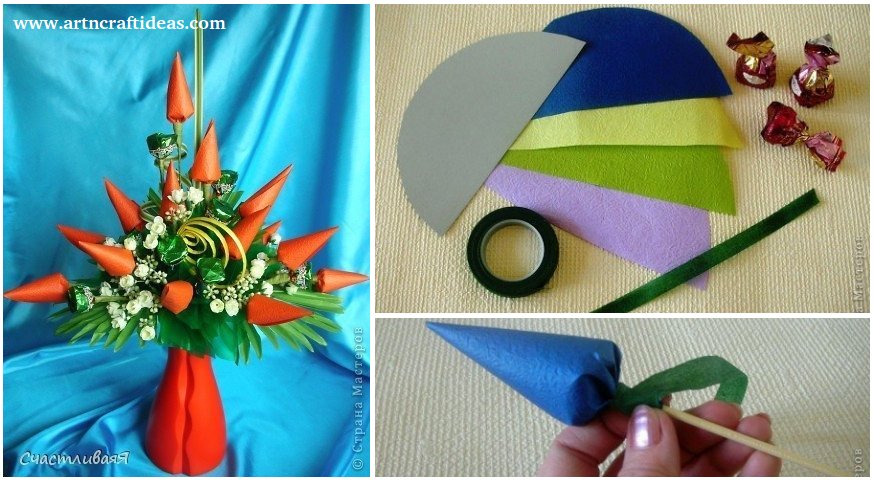
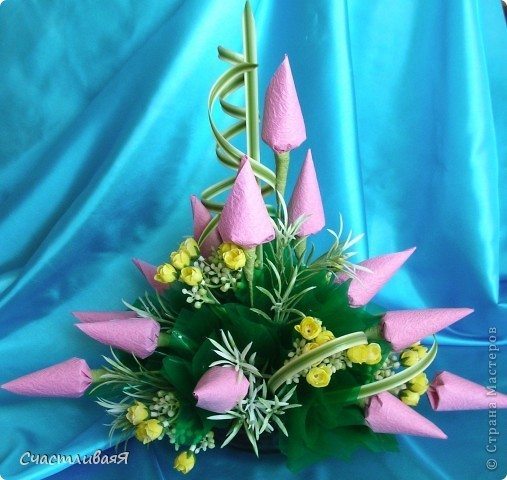
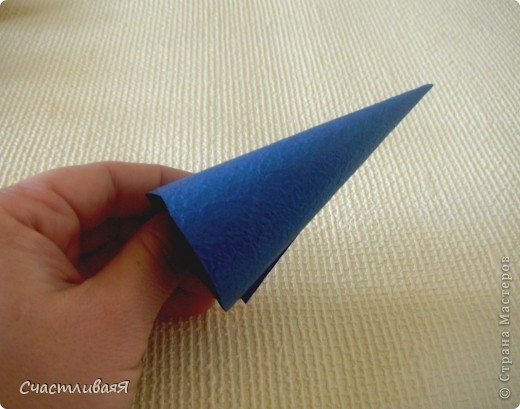
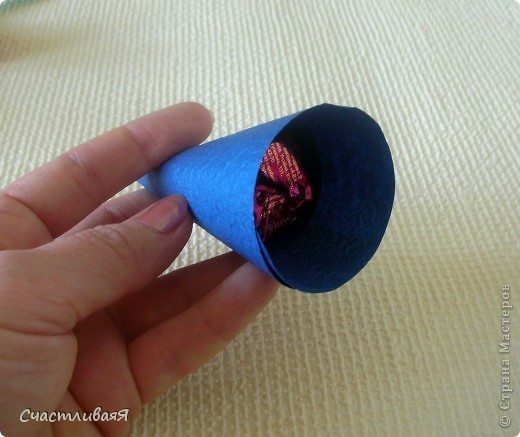
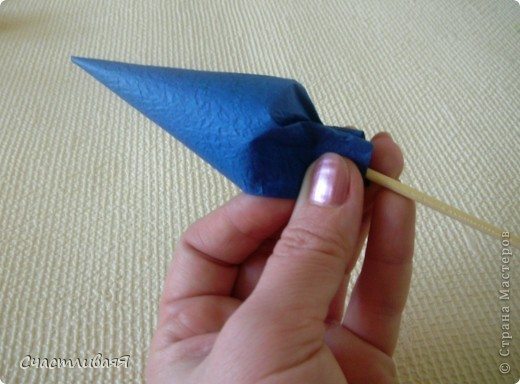
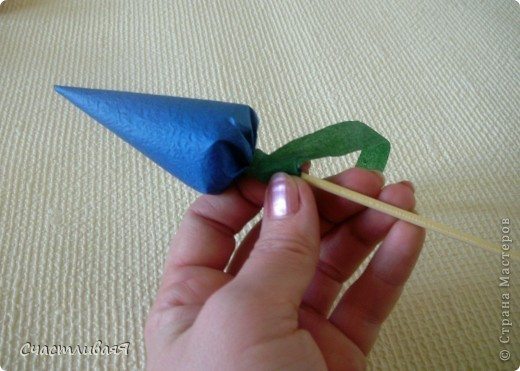
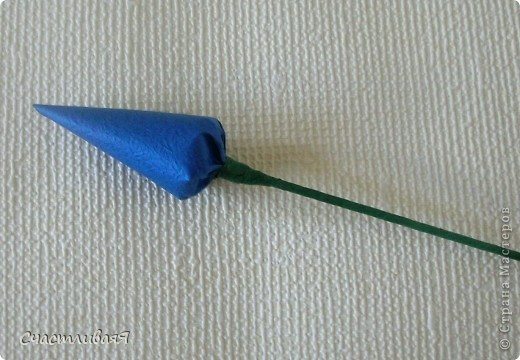
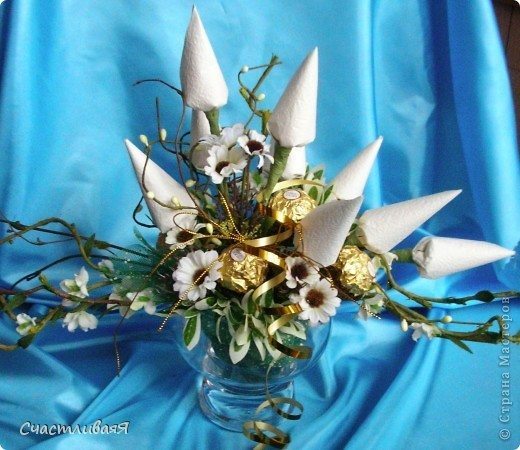
The beautiful arrangements for party and bouquets of sweets are now increasingly using different colors of crepe, and cones, in my view, unfairly bypassed. I want to share with the inhabitants of the countries of the Masters, it is easy to make the cones and spectacular bouquets with them.
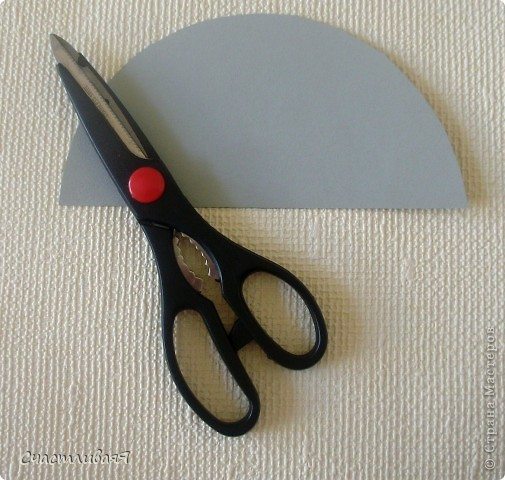
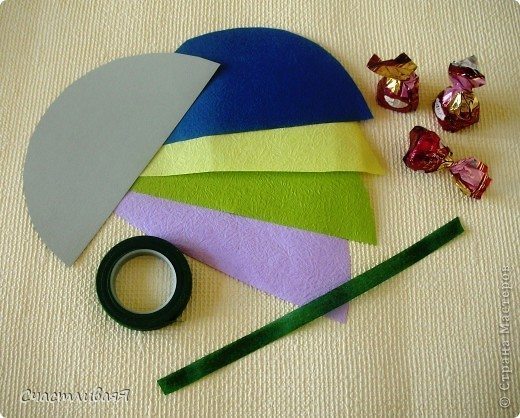
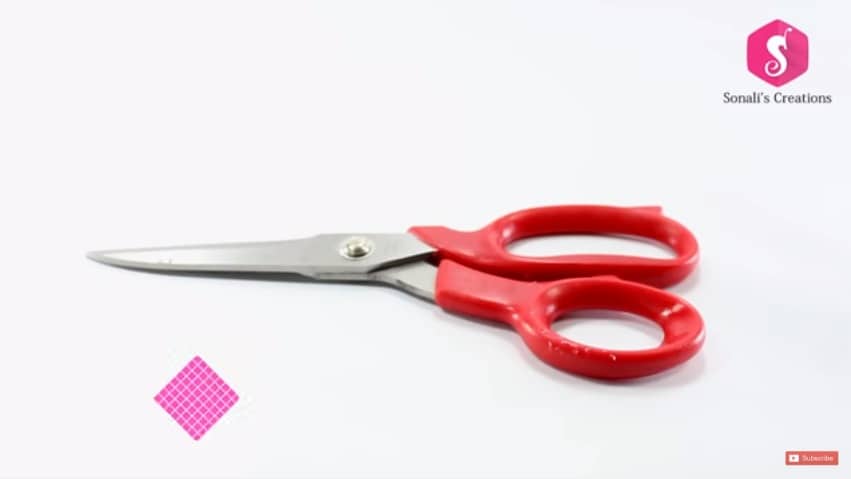
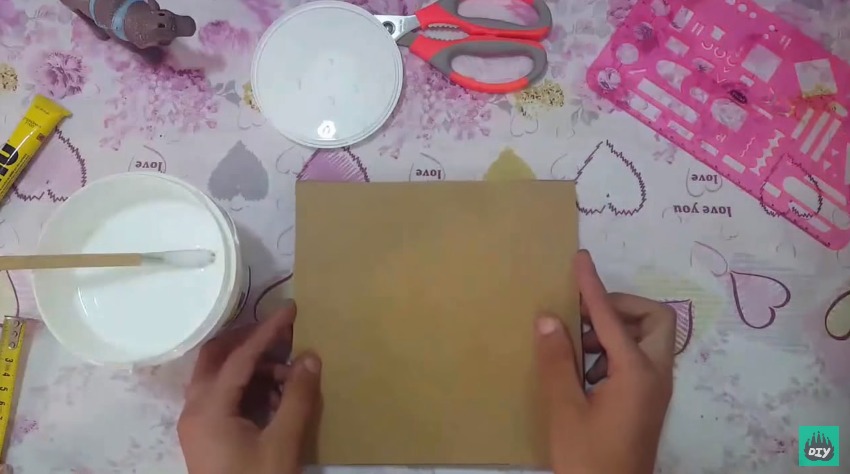
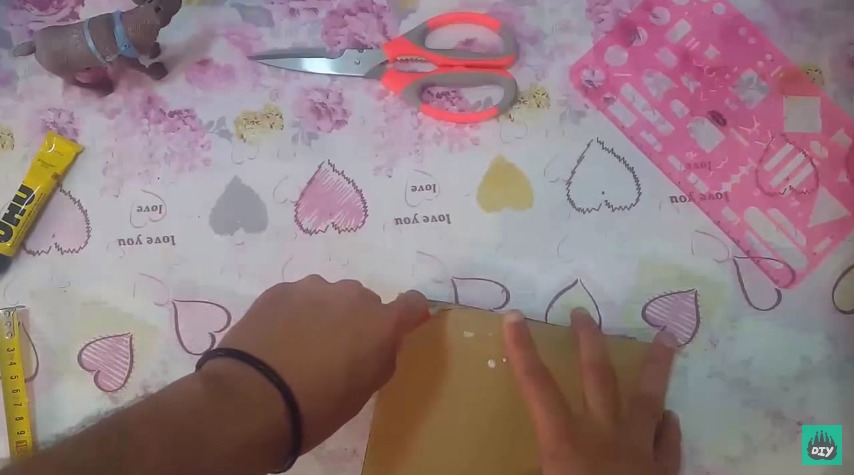
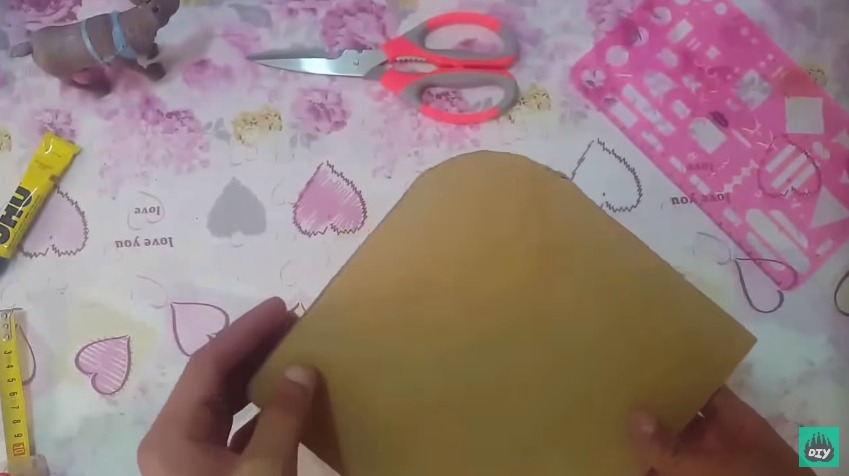
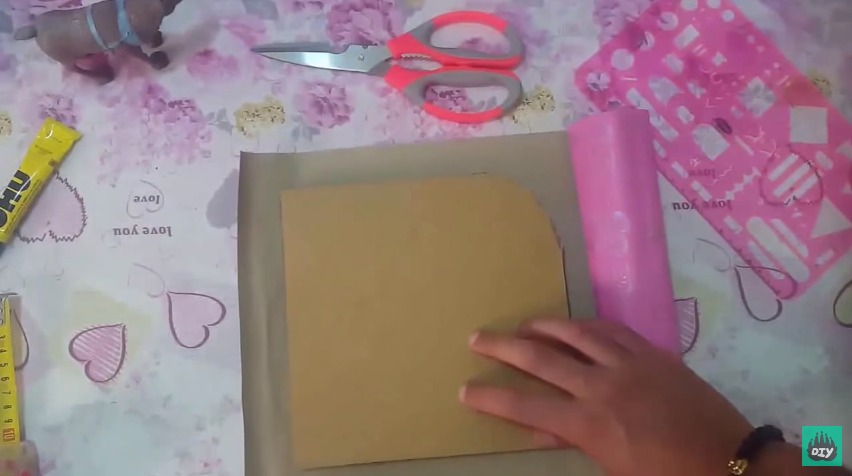
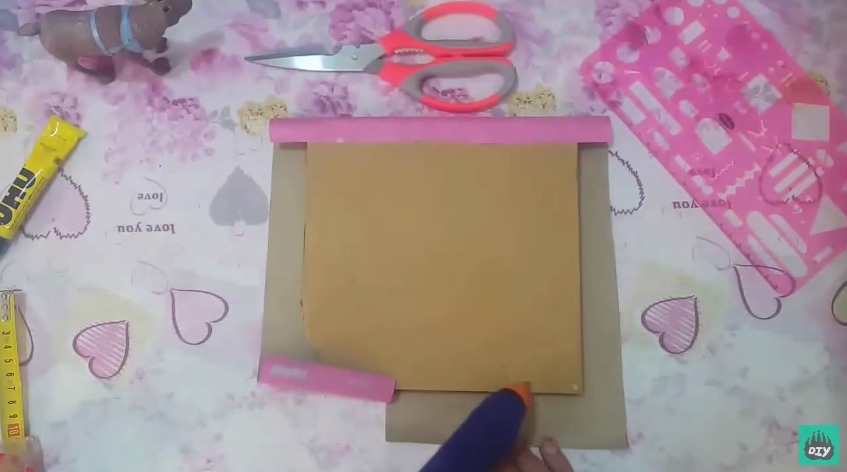
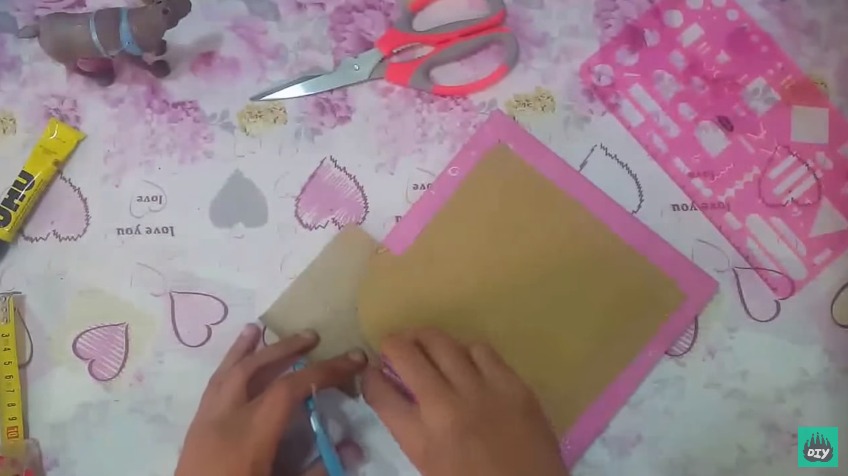
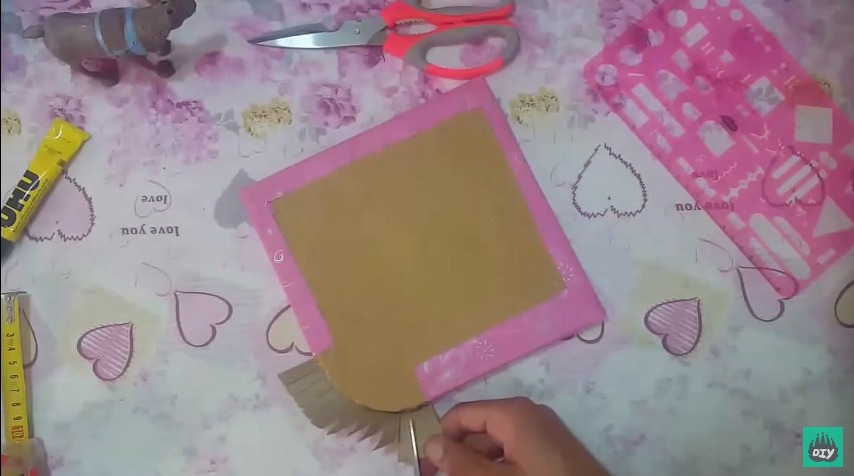
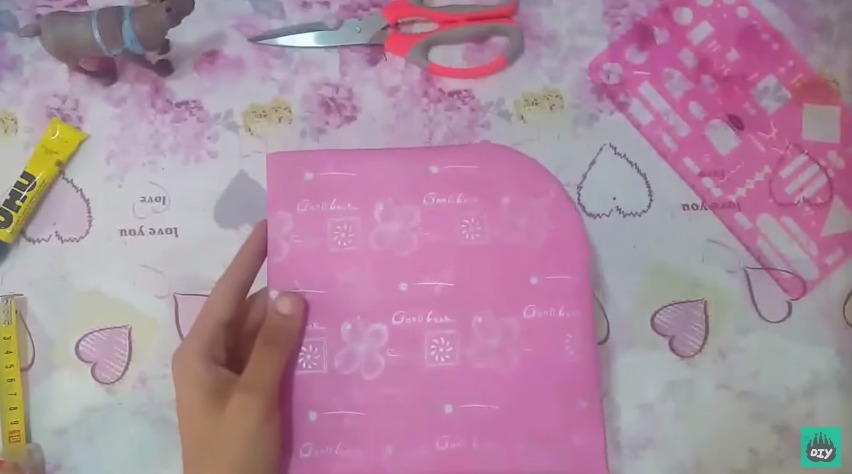
So, we need: scissors and a template from cardboard (less than half of the circle). Its size depends on the size of candy, which will pack.
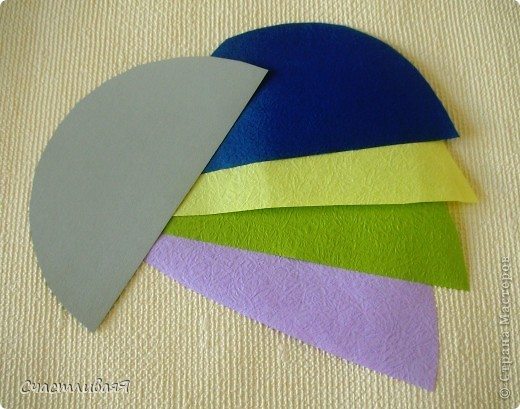
Using the template cut blank, I use any wrapping paper.
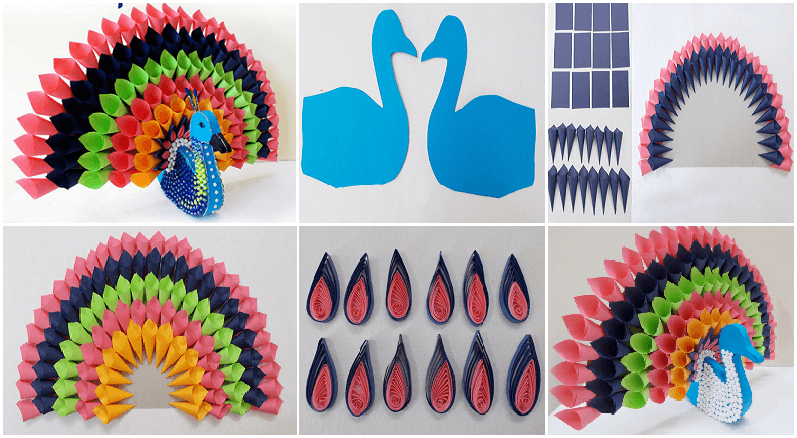
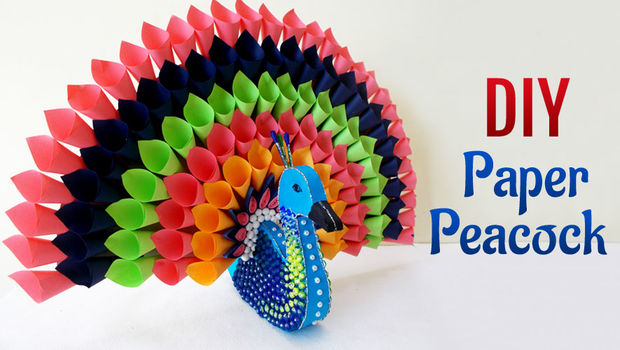
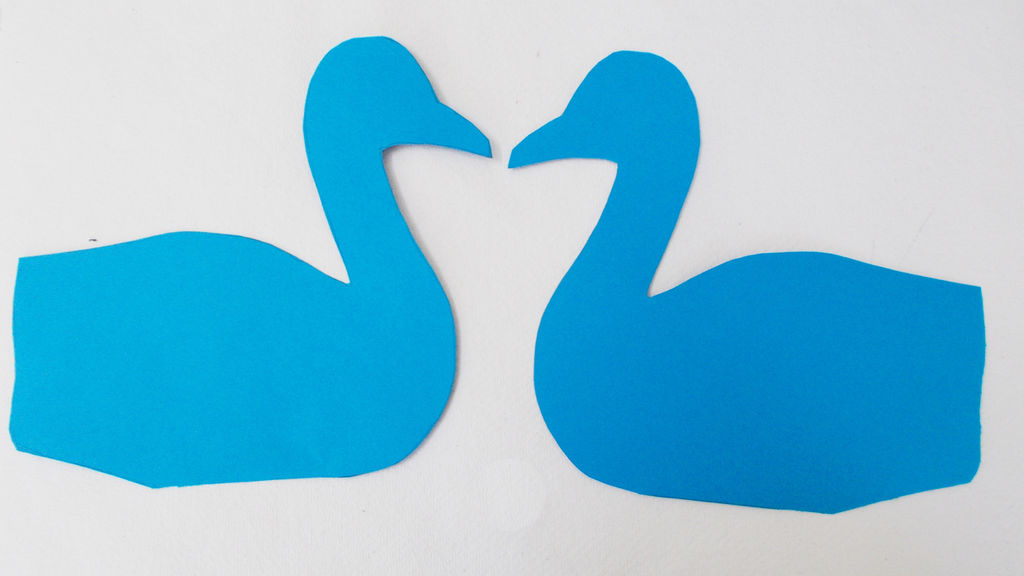
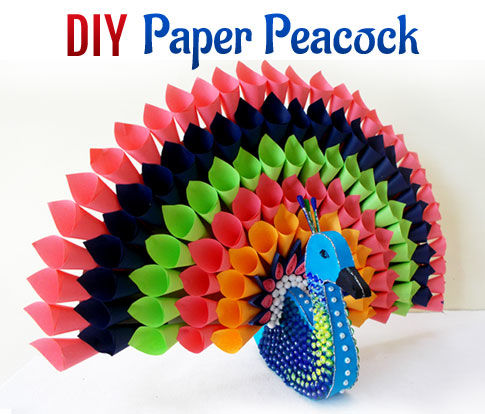
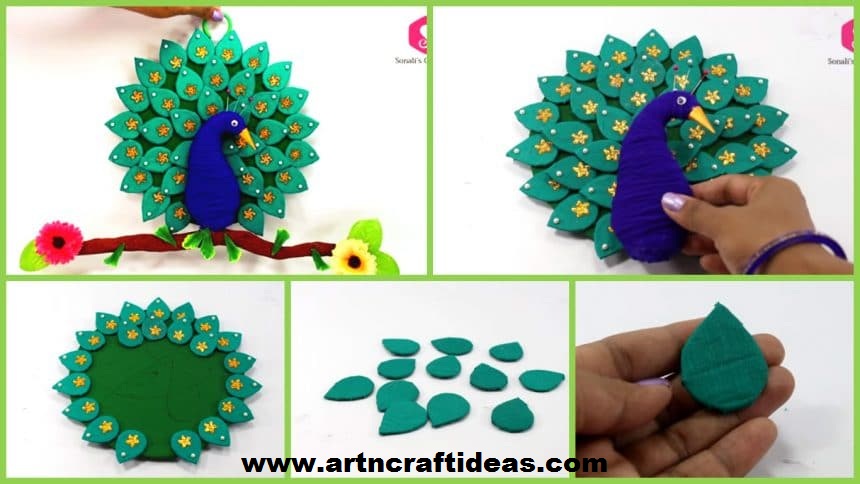
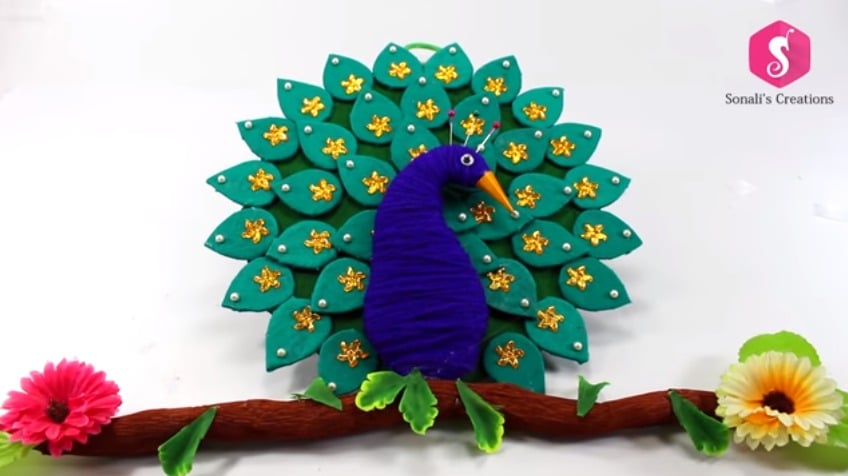
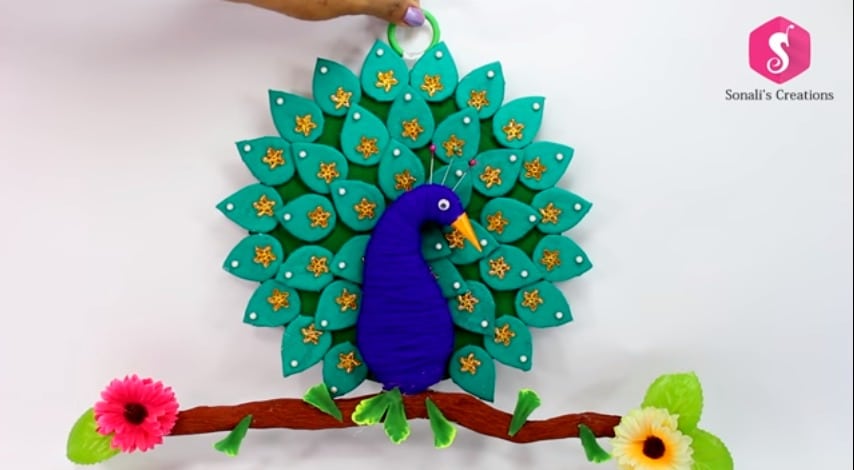
An interesting DIY Paper Craft Project can consist a wide variety of easy Do It Yourself Paper Craft Ideas for you to make at home. This Step by step tutorial with instructions on how to make Multicolored Paper Peacock for Home Decor project is something, that you must watch in order to ensure, you make this wonderful paper craft idea in an easy and systematic way. Peacock design paper craft ideas are always searched for by avid crafters.
Capture the sheer majestic presence of the beautiful peacock by making it as an awesome and easy paper craft idea.Being a fun art and craft activity for kids, you can also make this Multicolored paper peacock for kid’s school projects.Use this amazing Multicolored Paper Peacock as a creative handmade home decoration Idea for your home.
Come! let us learn how to make the pretty Multicolored Paper Peacock.
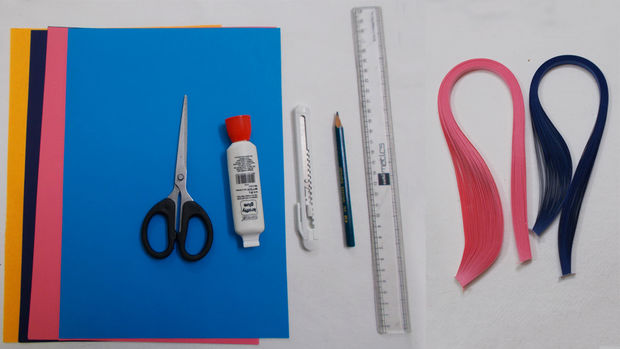
Step 1: Required Material
The basic craft supplies that you need to make the multicolored peacock are as follows:
Color papers
Scissors
Cutter
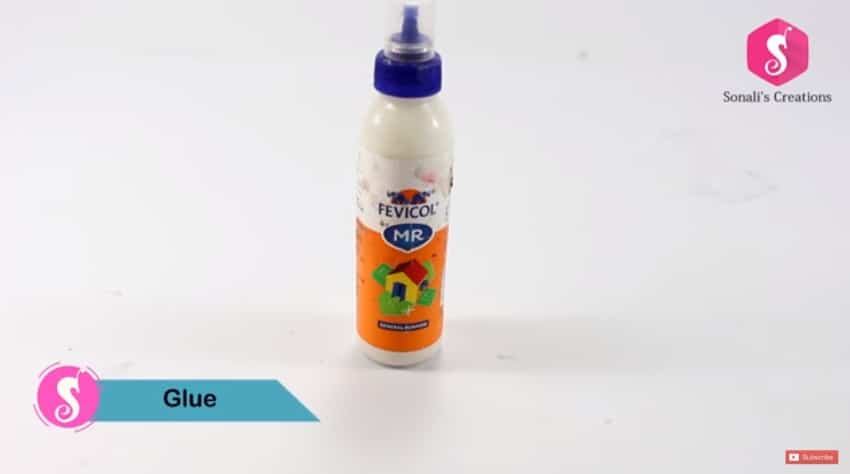
Craft glue
Scale
Quilling Strips
Quilling needle
Pencil
Thick Cardboard
Thin Cardboard
Colors
Black sketch pen
Styrofoam/Thermocol Balls
Earbud
Decorative Stones
Glitter
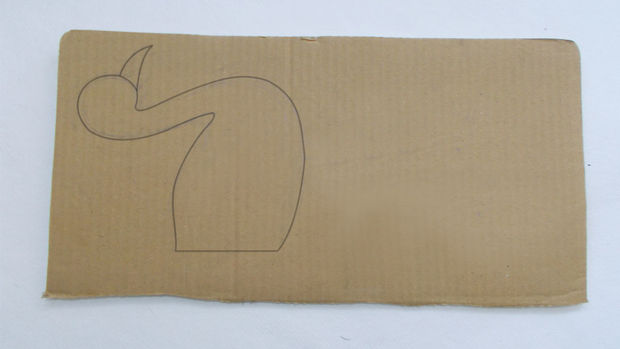
Step 2: Make the Base
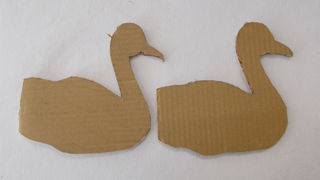
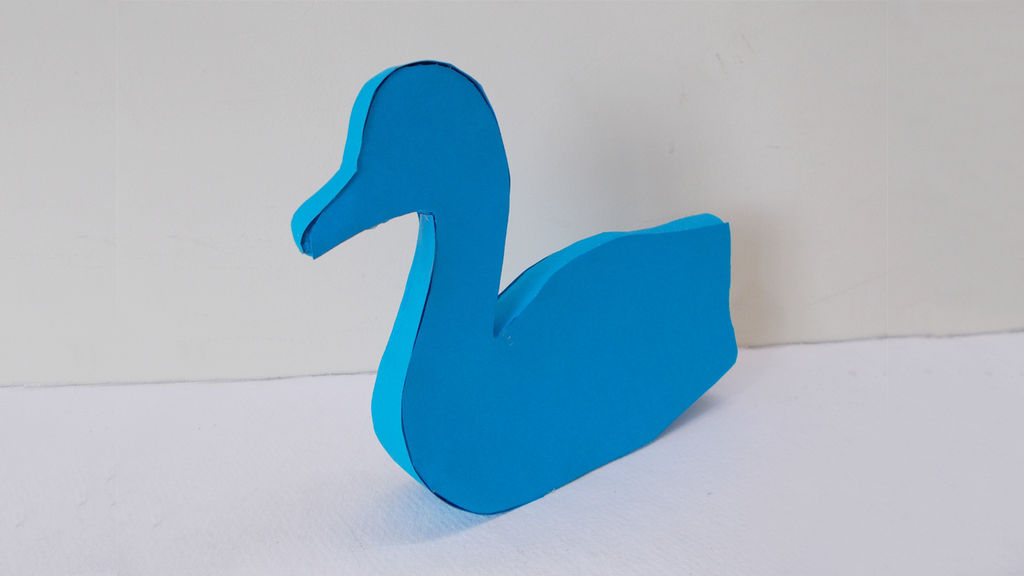
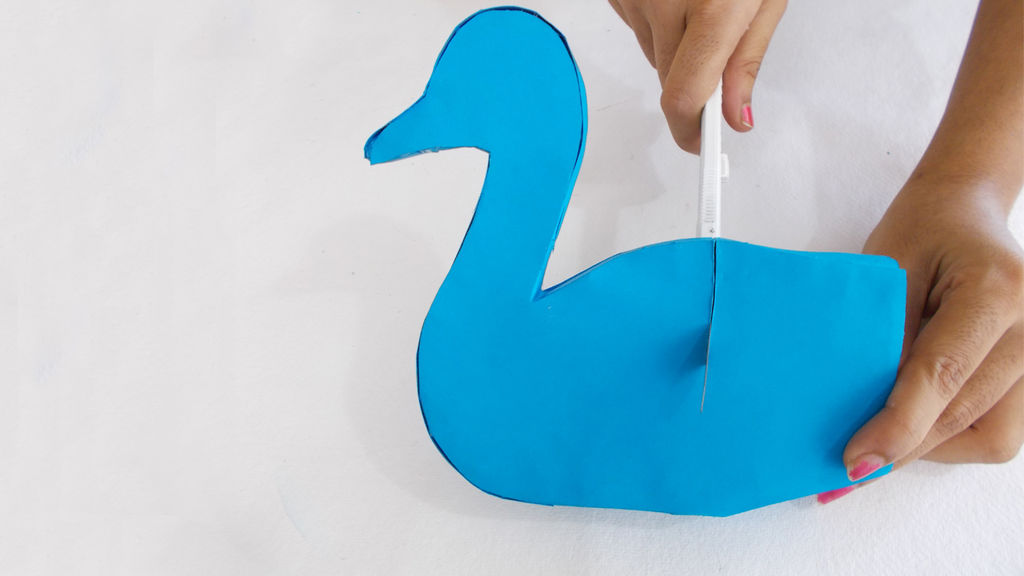
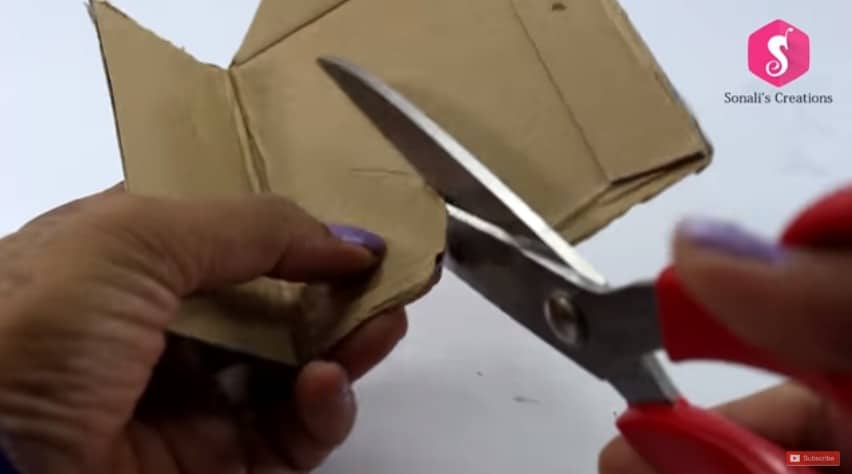
Make the base of the craft by drawing the shape of the body, neck and the beak of the peacock, on a thick cardboard and make two similar cut outs like this.
Paste and join the two cardboard cut out together with glue gun.
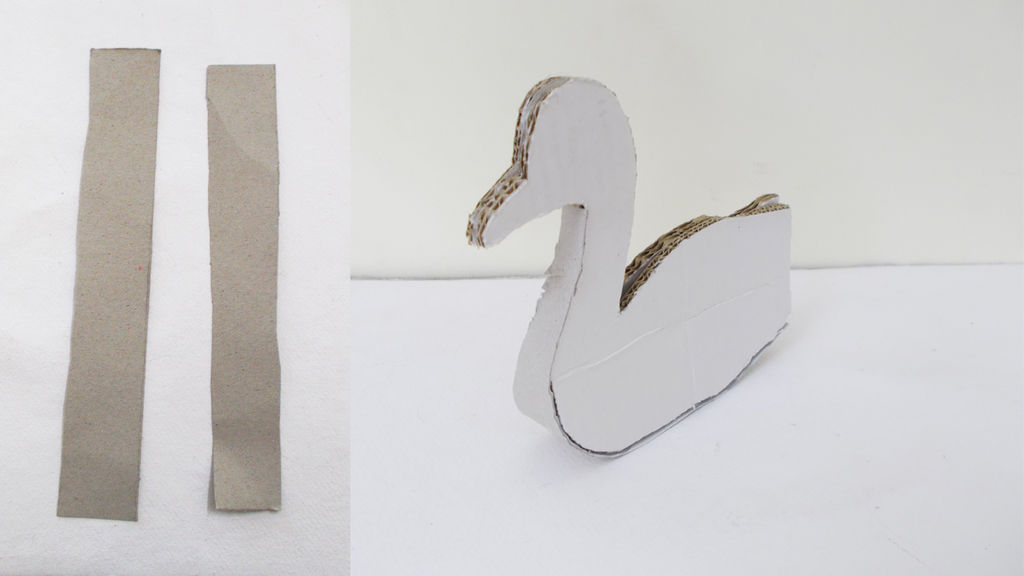
Cut thin cardboard strips and cover the gap remaining between the two bodies of the Peacock.
Make 2 blue paper cut outs of the same measurement as that of the cardboard.
Cover the bodies of the peacock with blue color paper.
Step 3: Build Your Craft
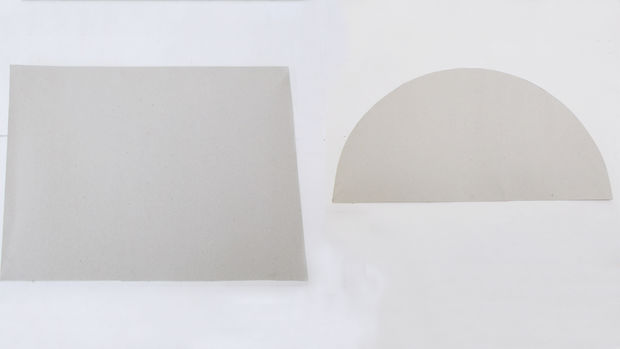
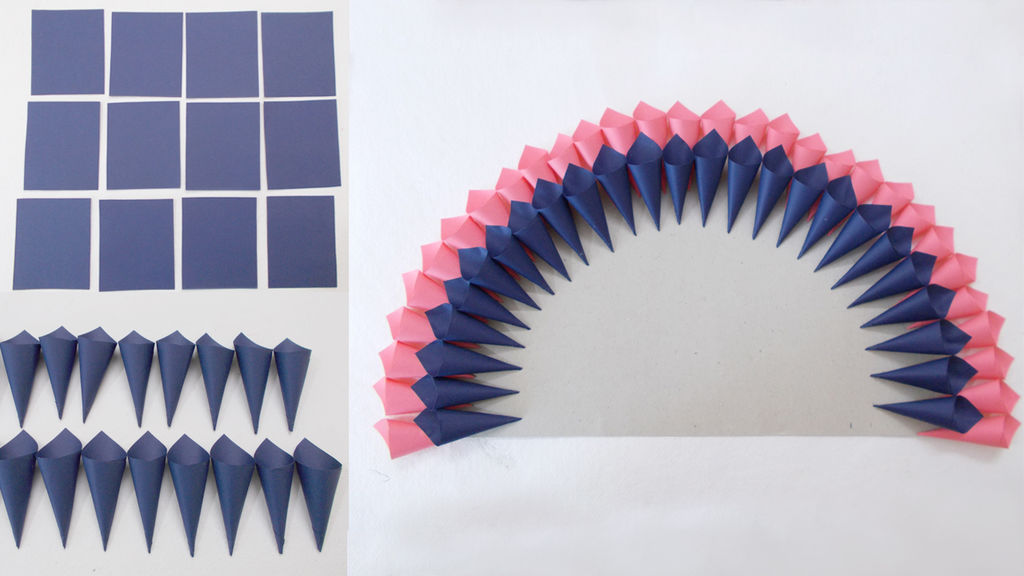
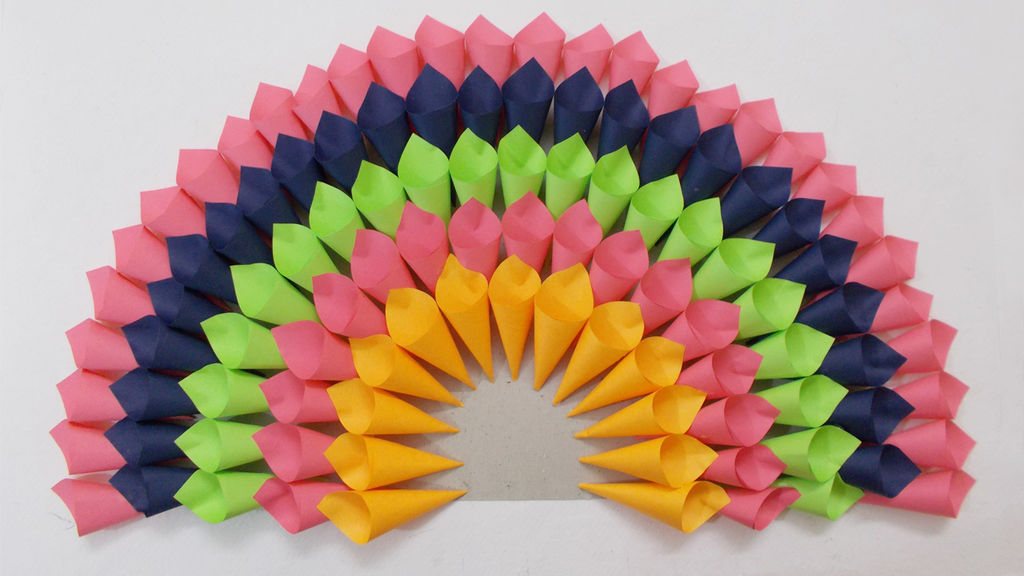
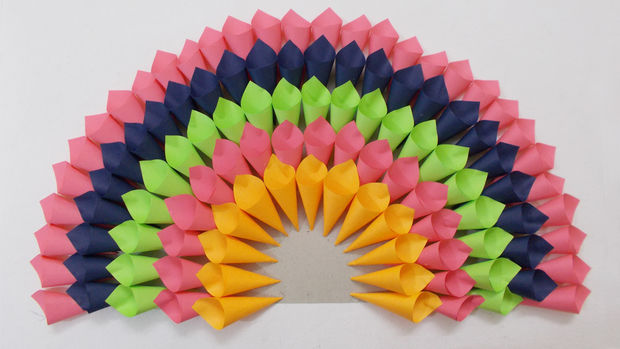
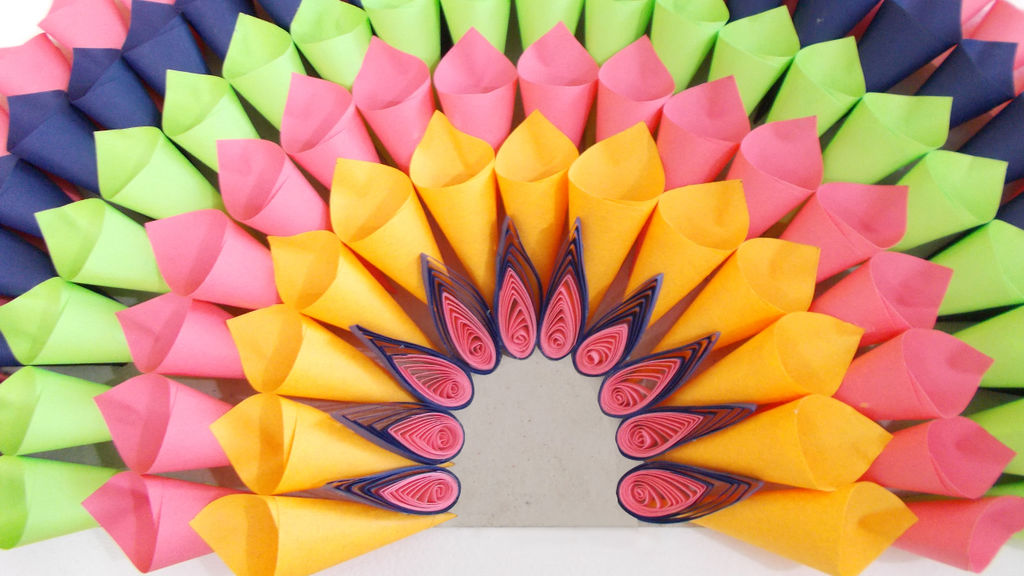
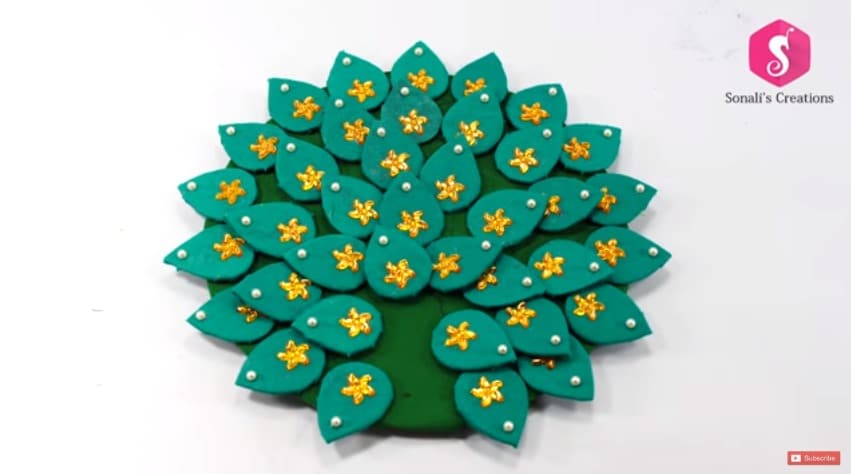
Cut out a semicircle measuring 28 cm in diameter, from the thin cardboard.
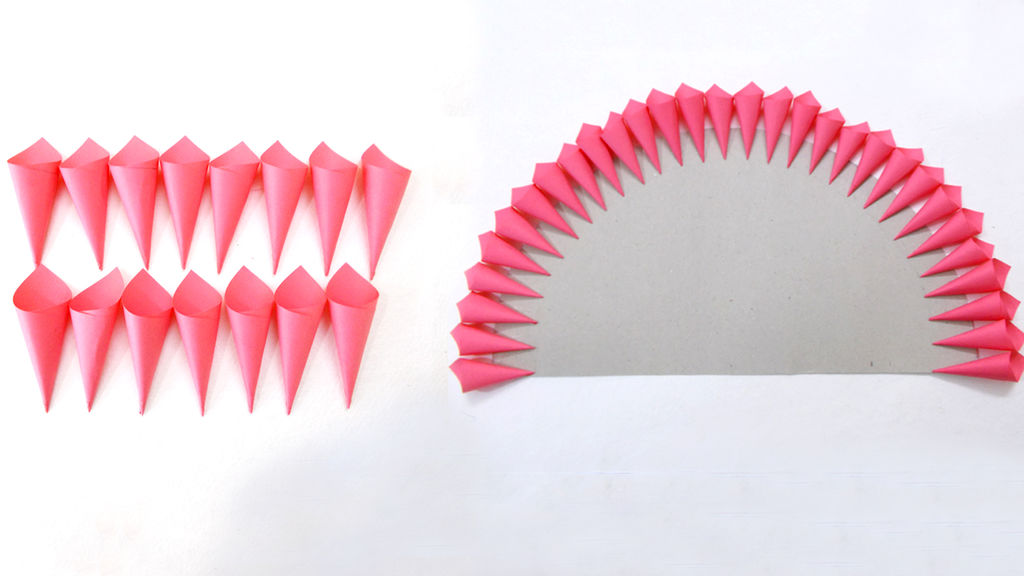
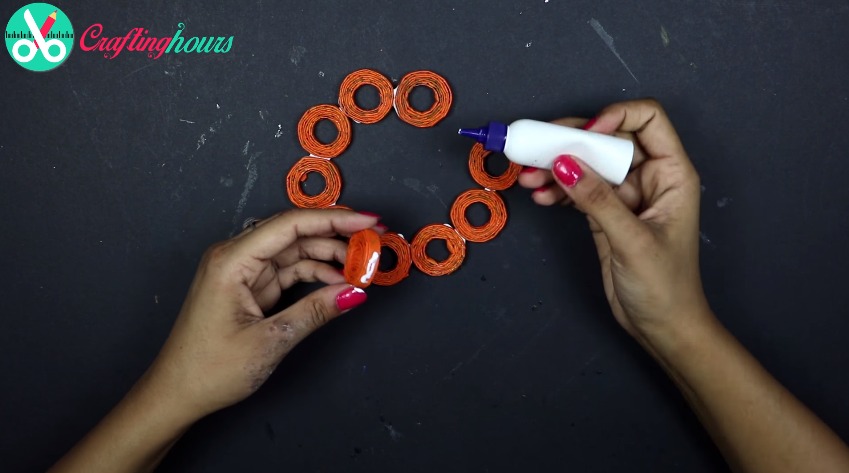
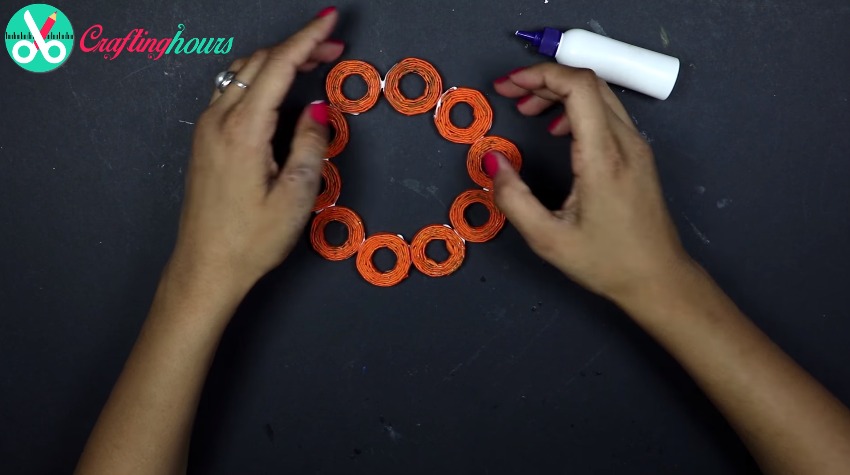
Cut out square shaped pink color papers measuring 5 cm x 5 cm and make multiple cones with them.
Paste them on the edge of the semicircle, with craft glue, to form the first layer of the peacock feathers.
Add a layer of blue paper cones after the pink one in the peacock feathers.
Keep adding different colors of paper cones to brighten up your peacock!
Keep a small space, blank, in the center.
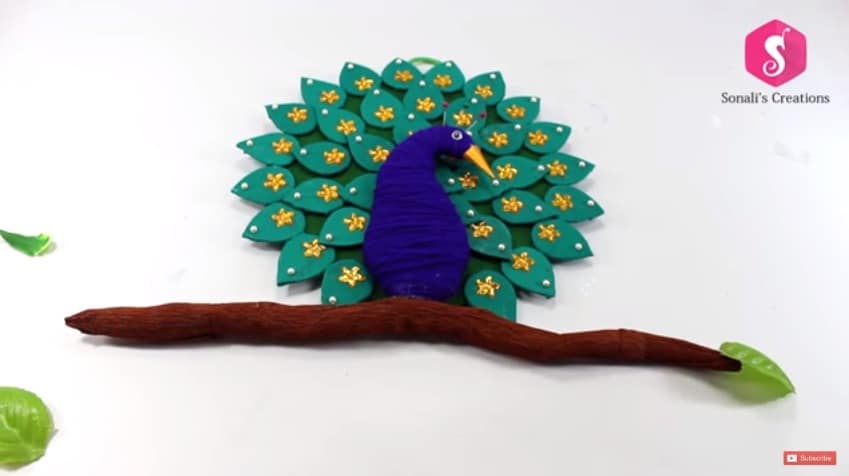
Step 4: Add Creativity to Your Craft
Make paper cones in 5 different colored layers.
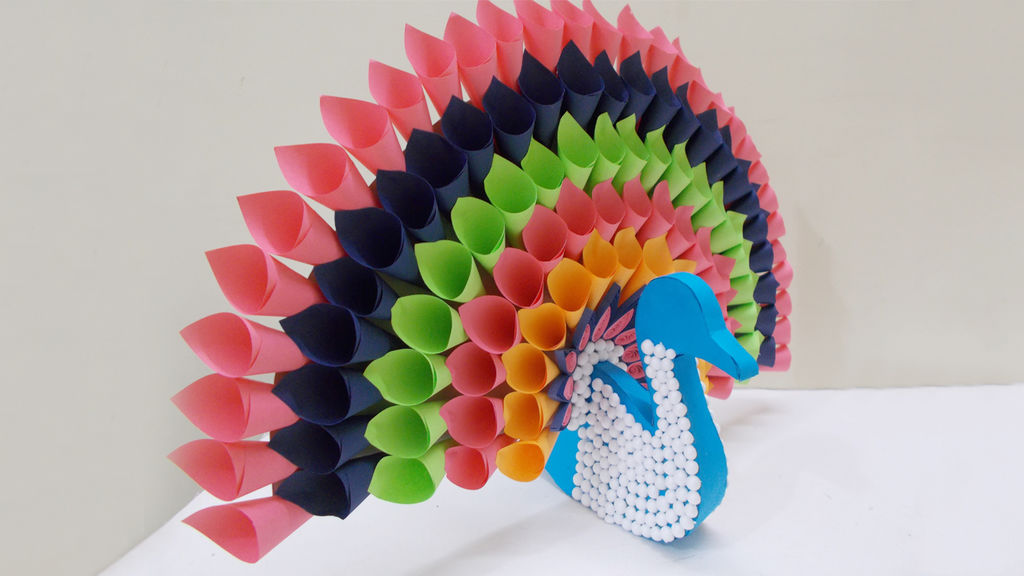
Now take the cardboard body of the peacock and make a slit using cutter.
Insert the paper cones semi circle in the slit and ensure it is firmly fixed.
Paste and join two different colored quillings trips and make tear drop shaped coils with them.
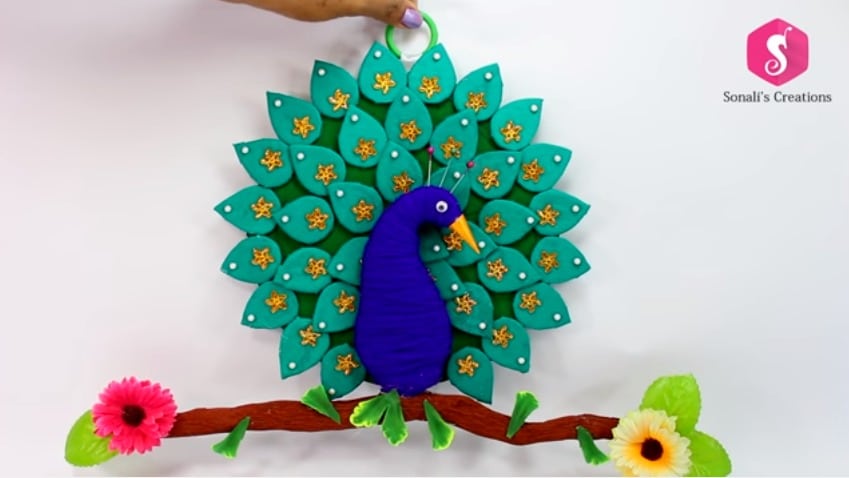
Step 5: Decorate Your Craft
Cut styrofoam balls in half and paste them on the peacock’s body and the remaining space in the semicircle.
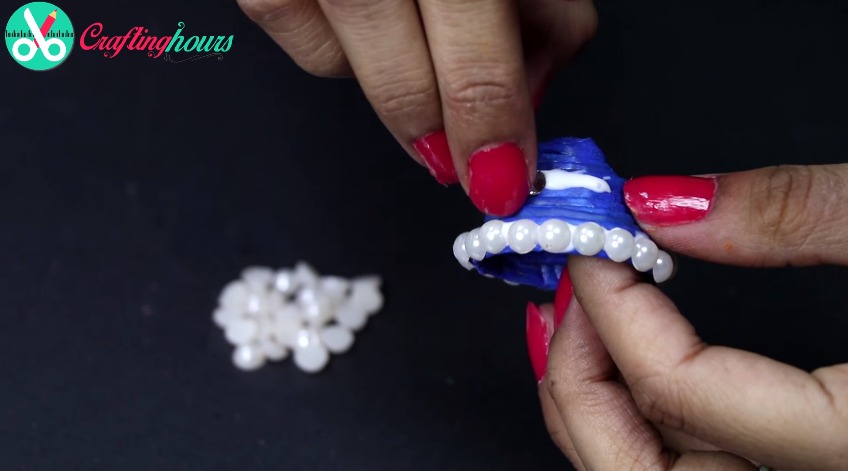
Color the beak and draw the eyes using black sketch pen and line the neck of the peacock using decorative pearls.
Paint both the ends of a few earbuds and cut the stick in the center.
Paste them on the peacock’s head to form the crest.
Add some glitter to the earbuds to be used as the crest.
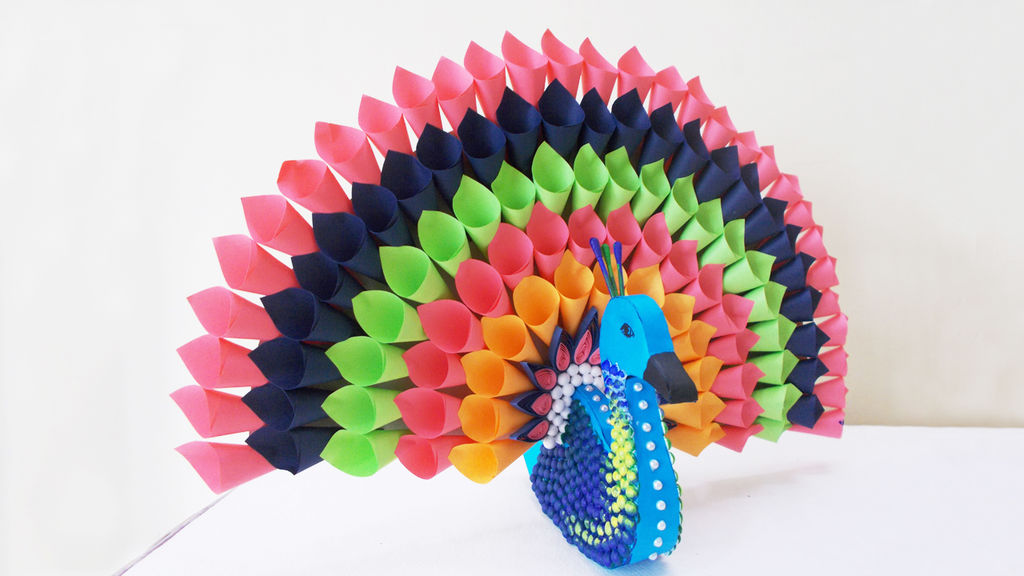
Step 6: Your Craft Is Ready
Within no time and a few basic steps of easy paper craft ideas, you have a beautiful DIY Multicolored Paper peacock ready to adorn the room decor of your living room. This pretty looking colorful Peacock design Craft idea for Home Decorations is one such cool craft that can bring an instant energy to your otherwise boring looking Home Decor.
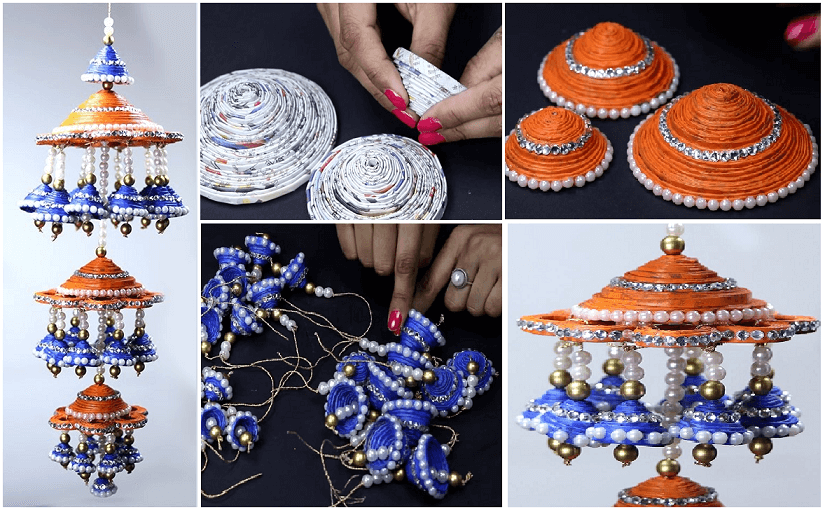
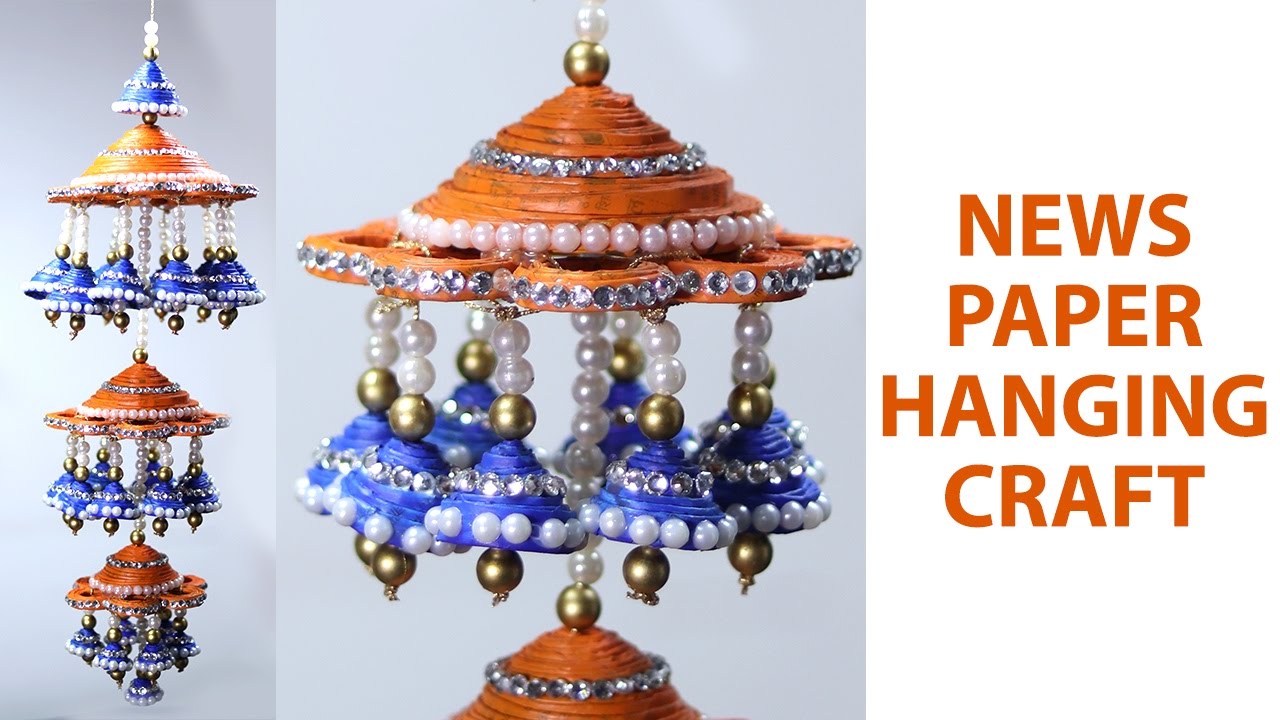
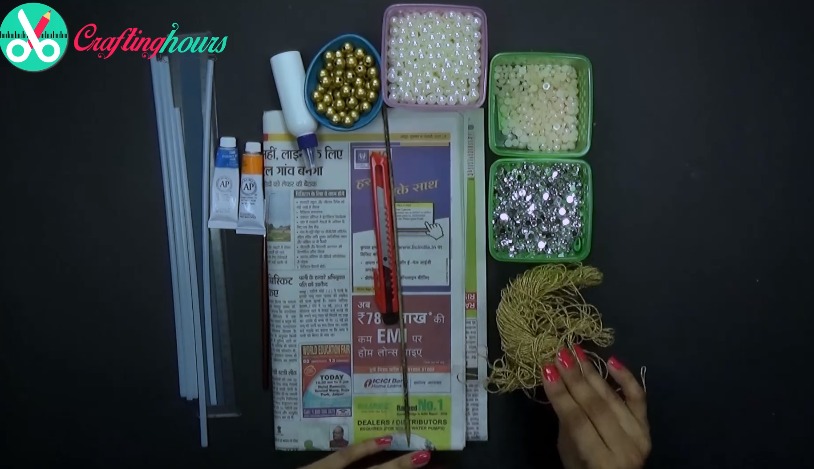
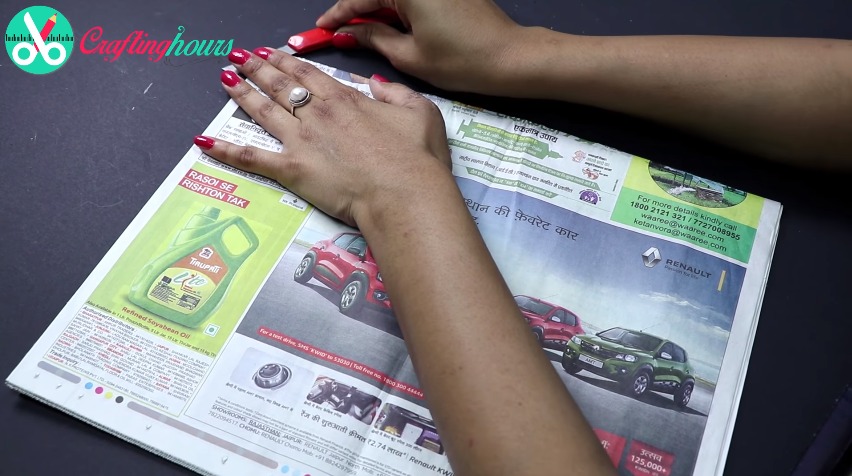
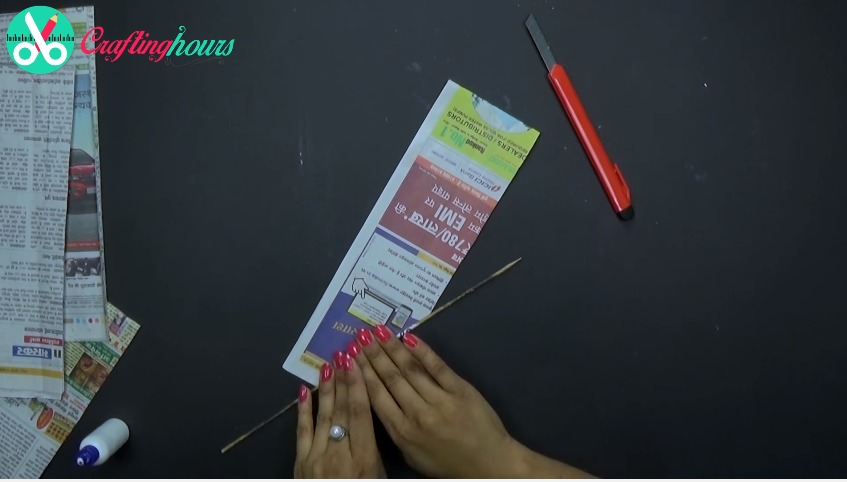
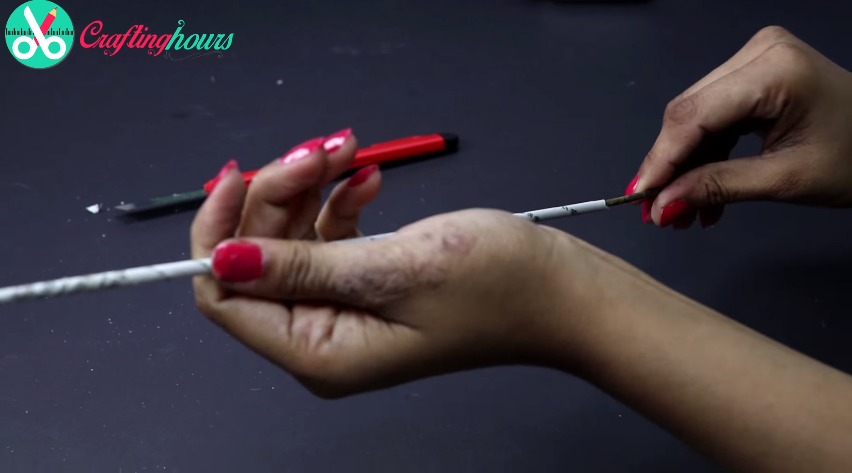
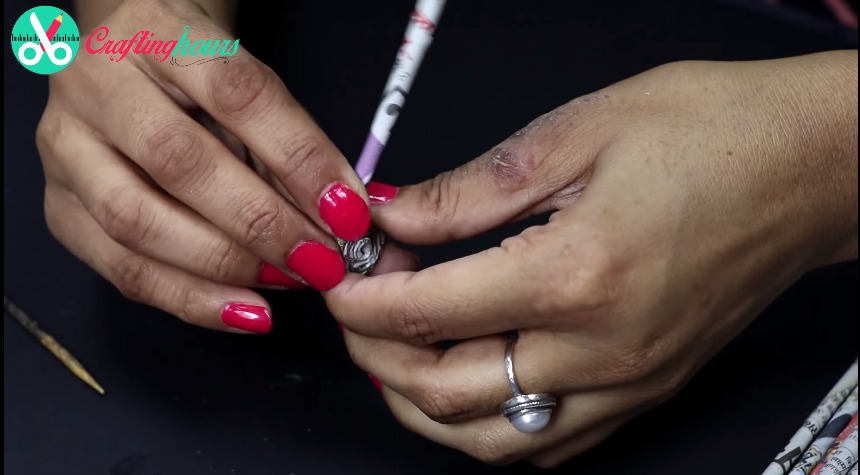
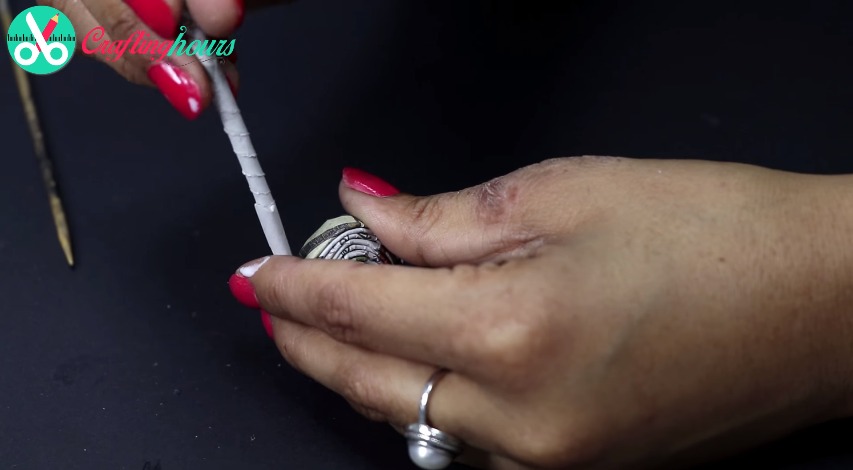
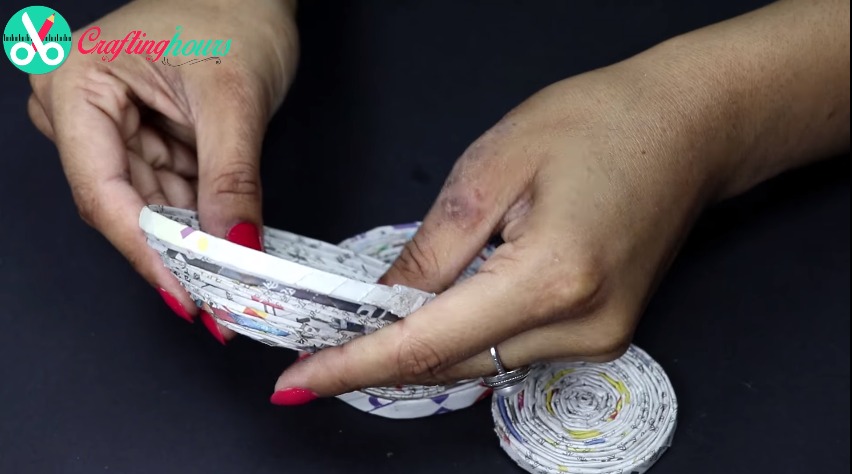
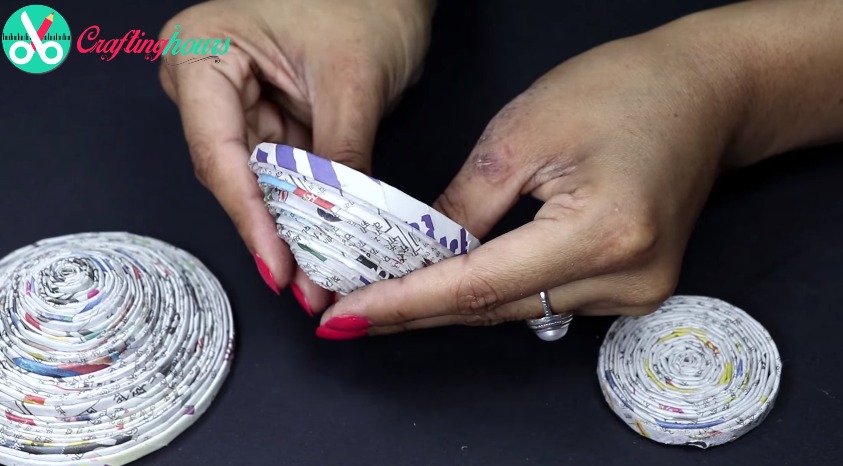
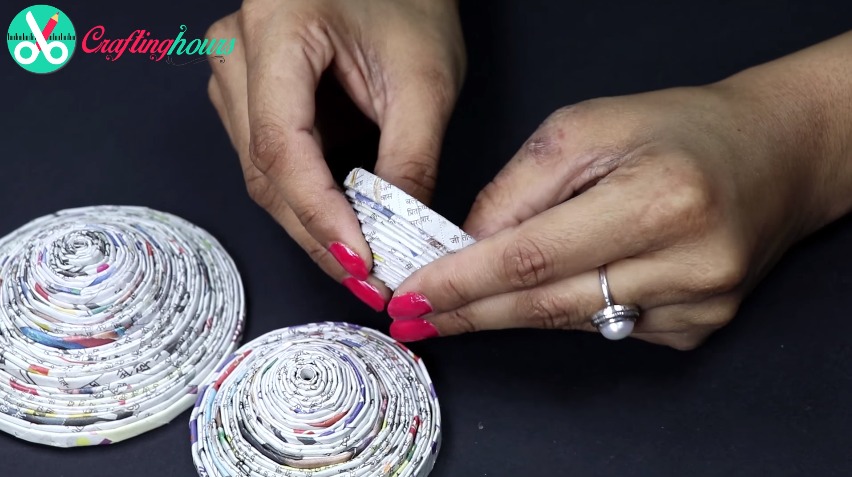
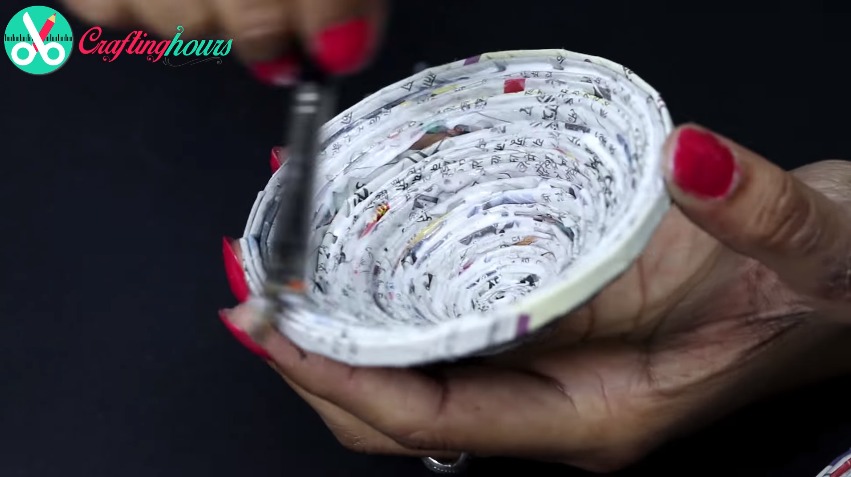
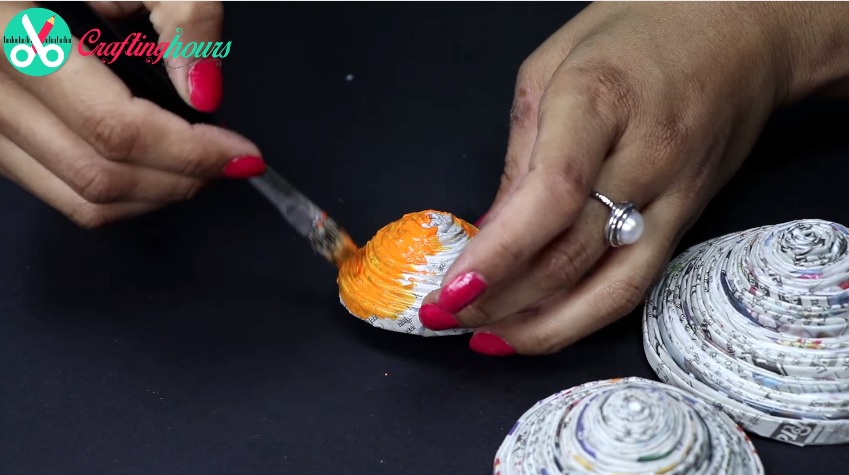
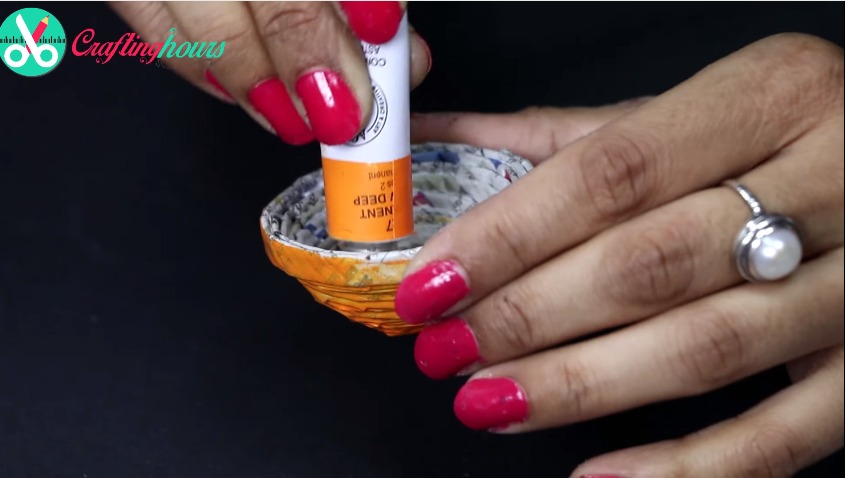
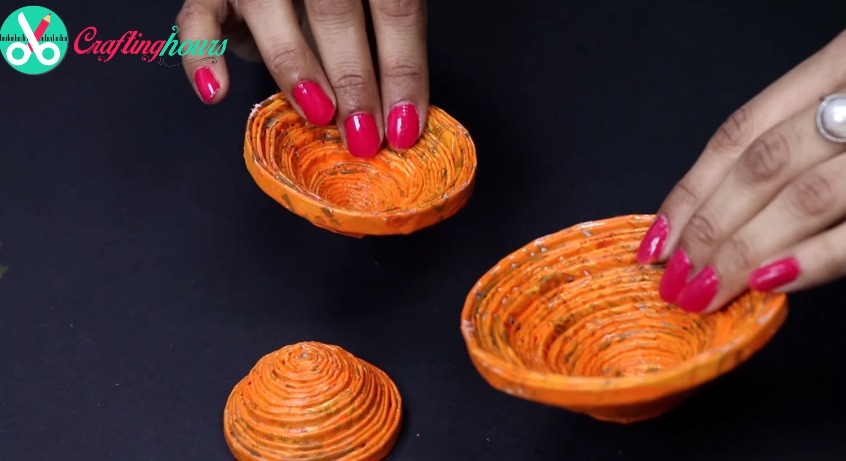
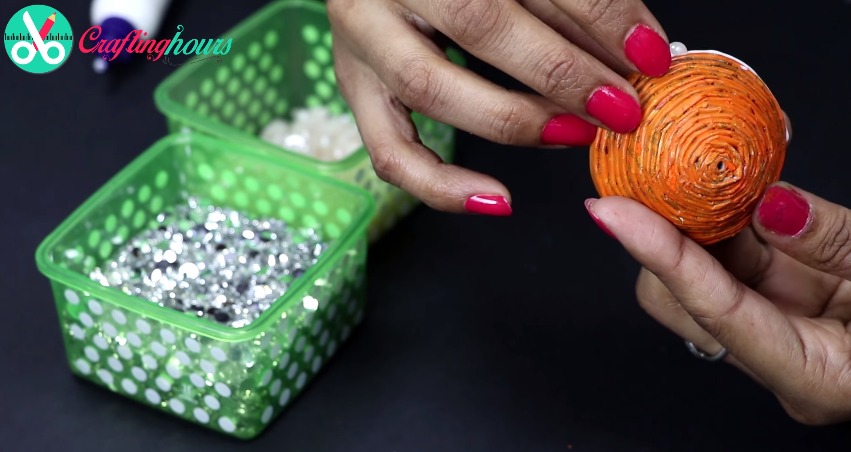
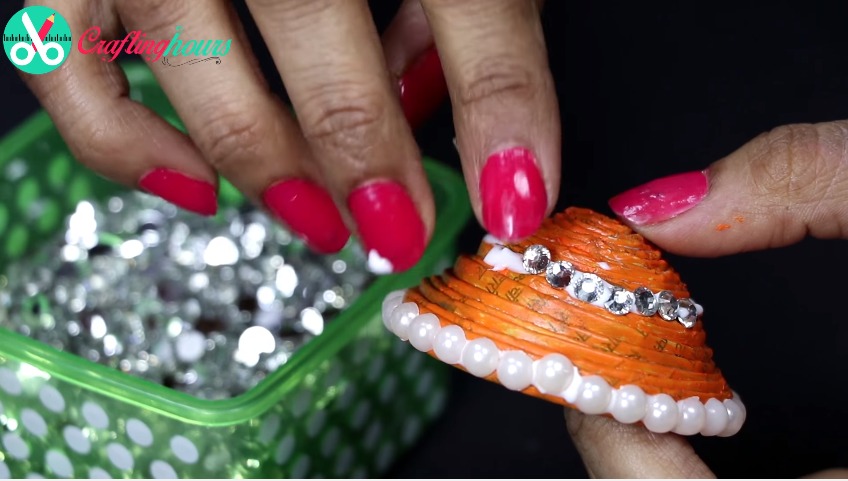
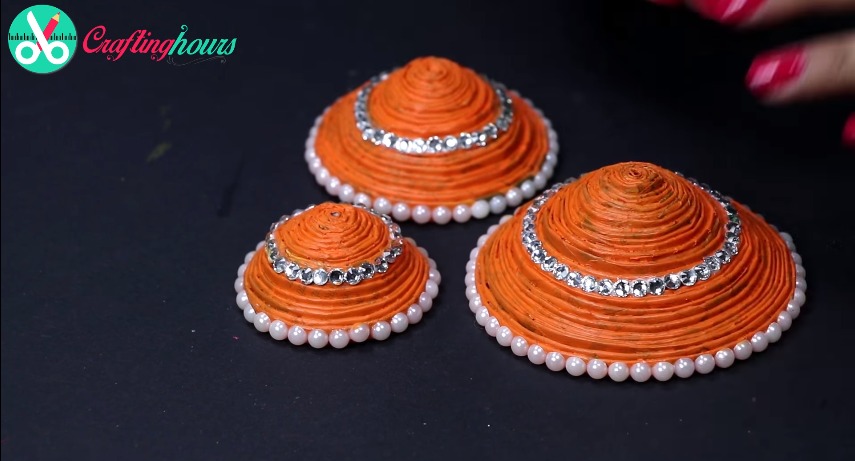
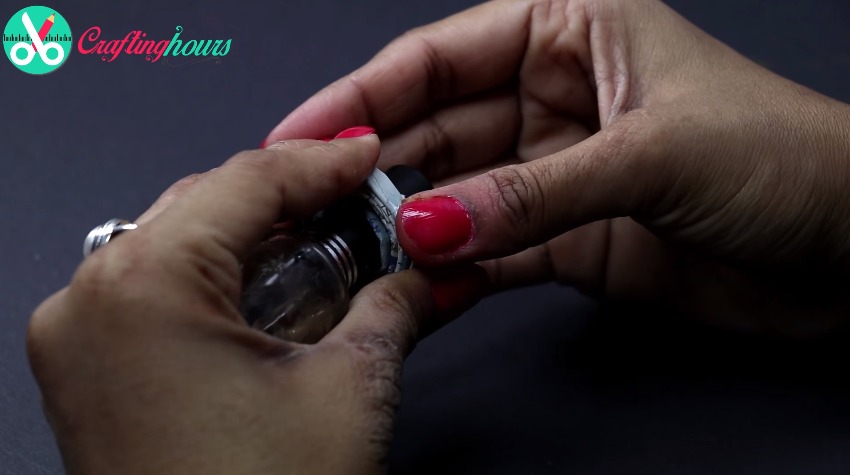
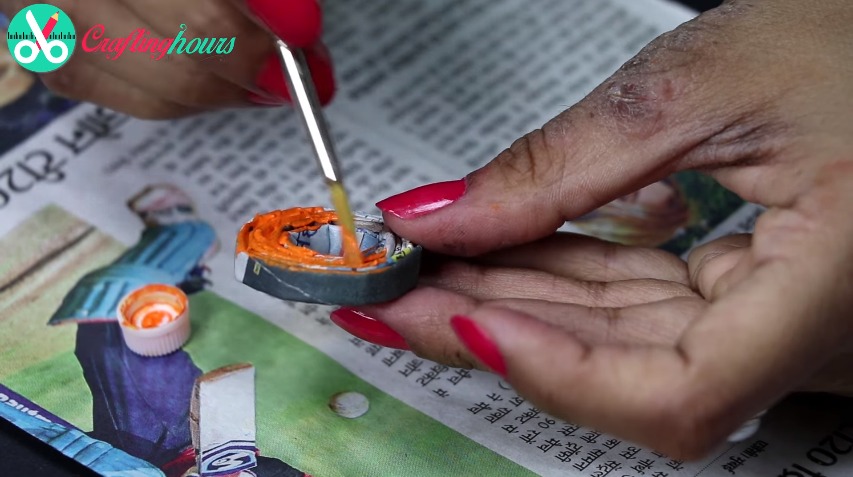
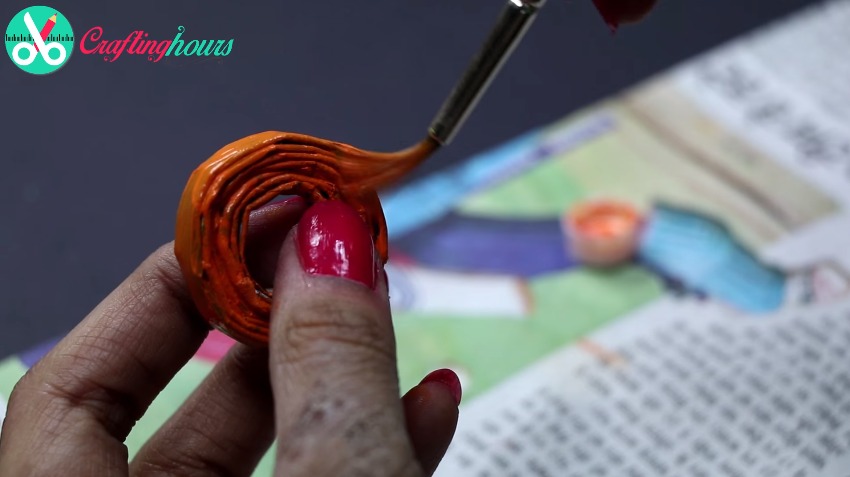
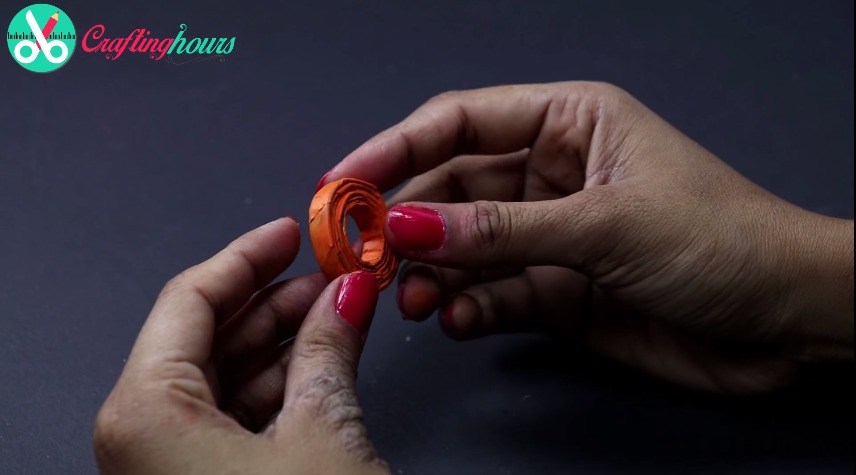
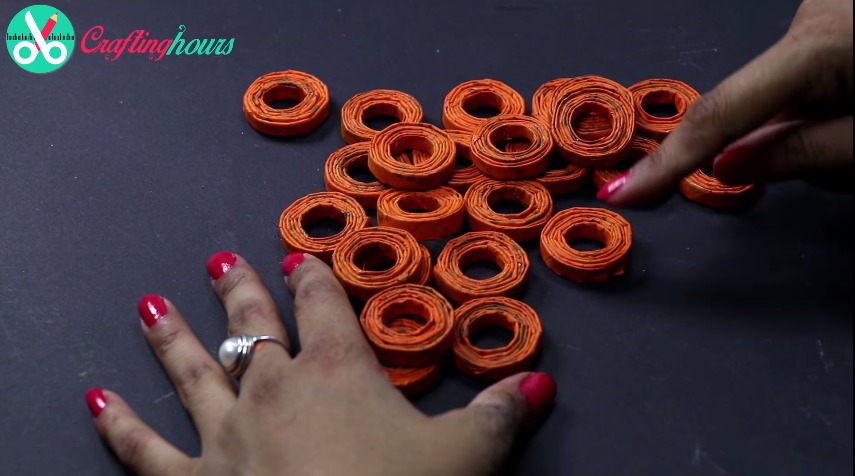
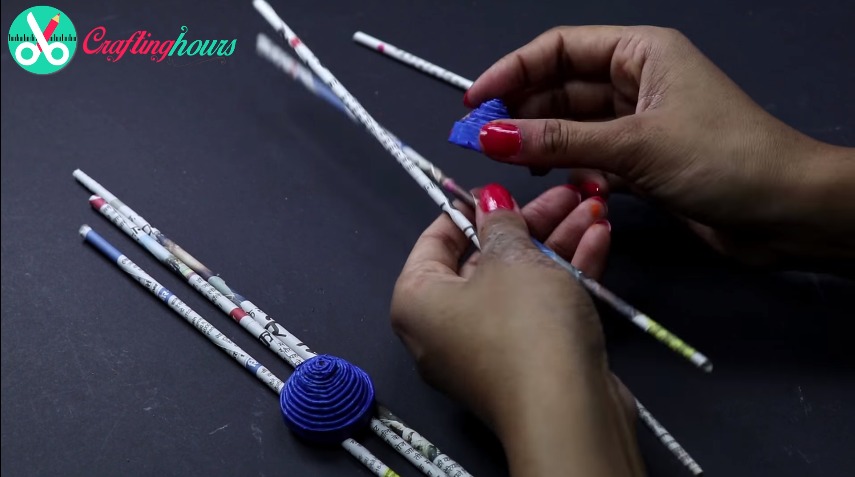
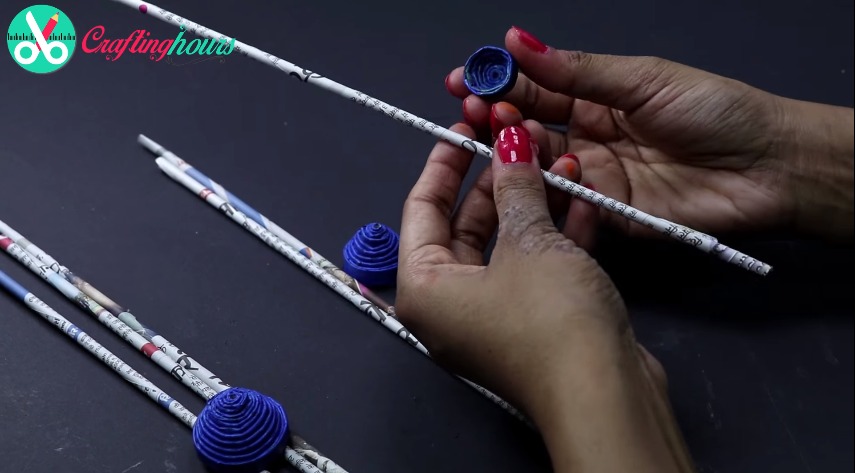
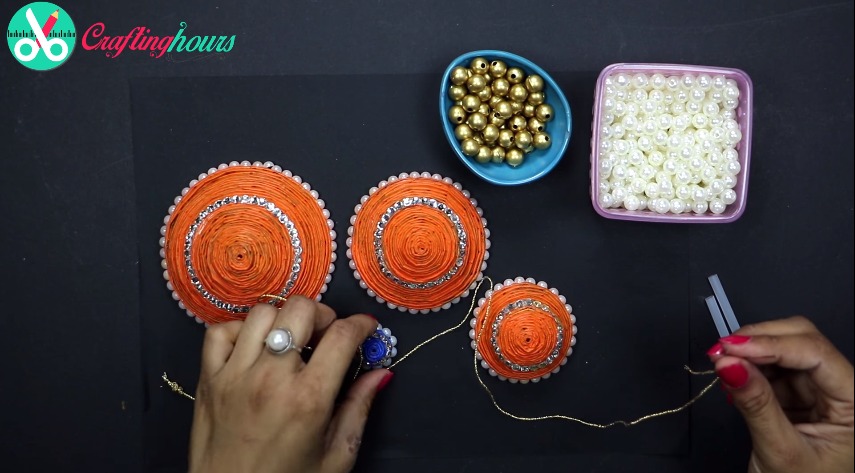
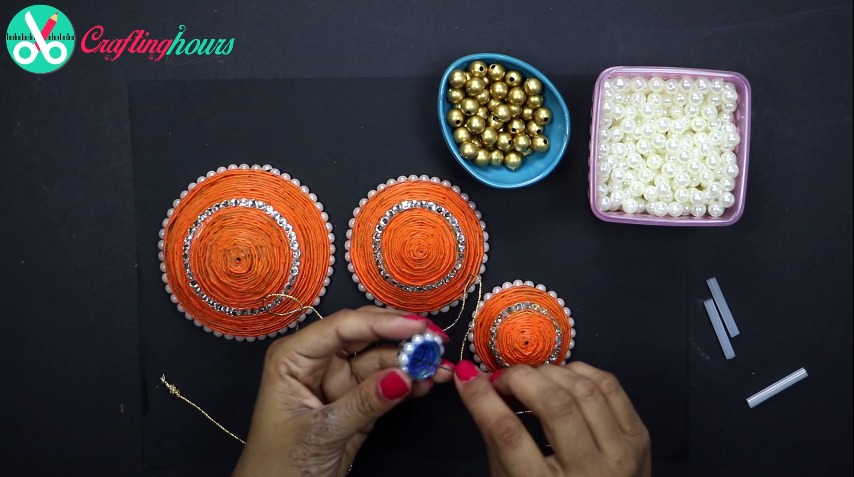
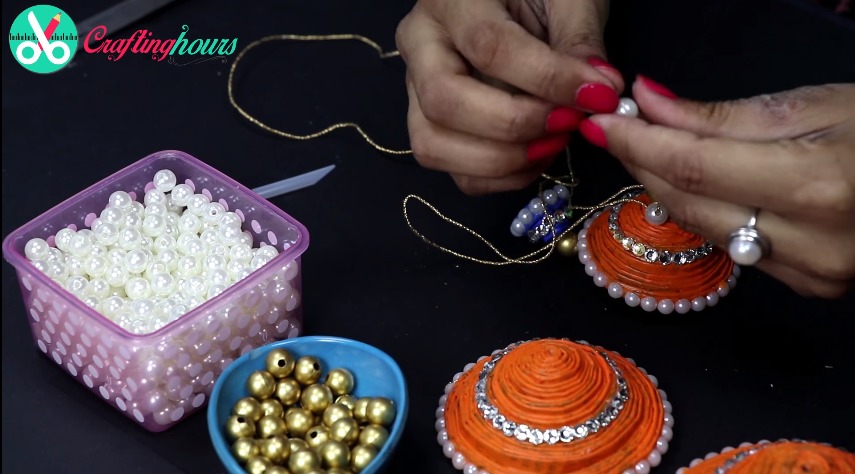
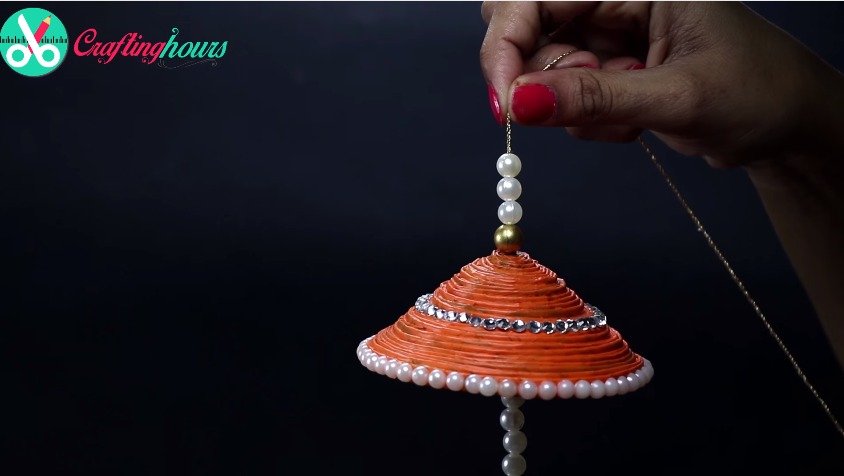
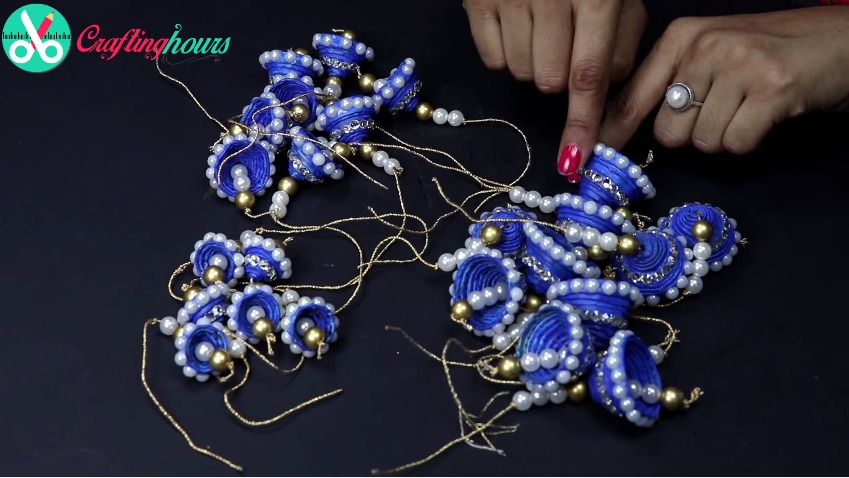
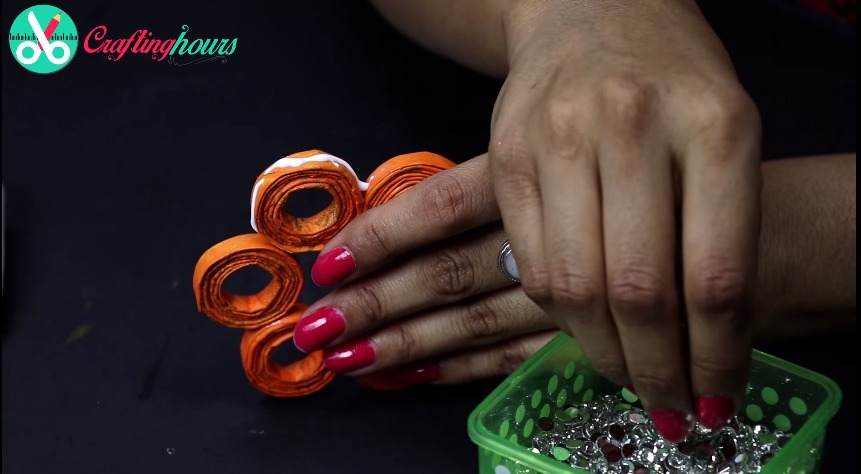
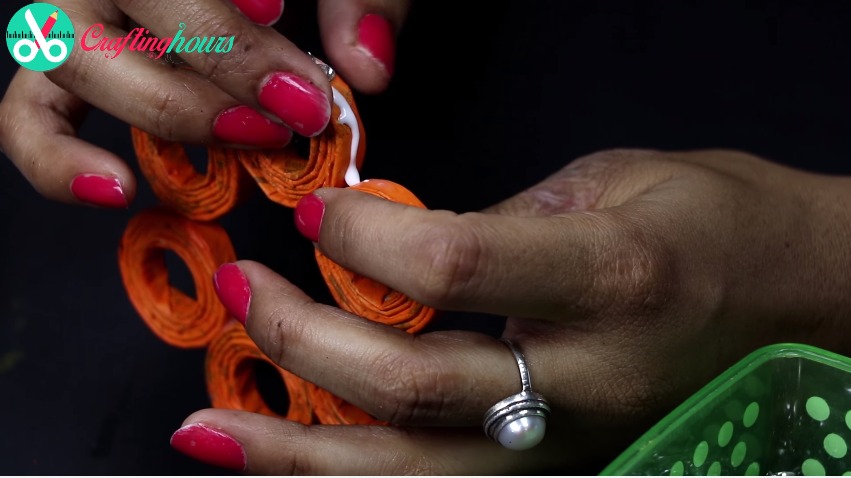
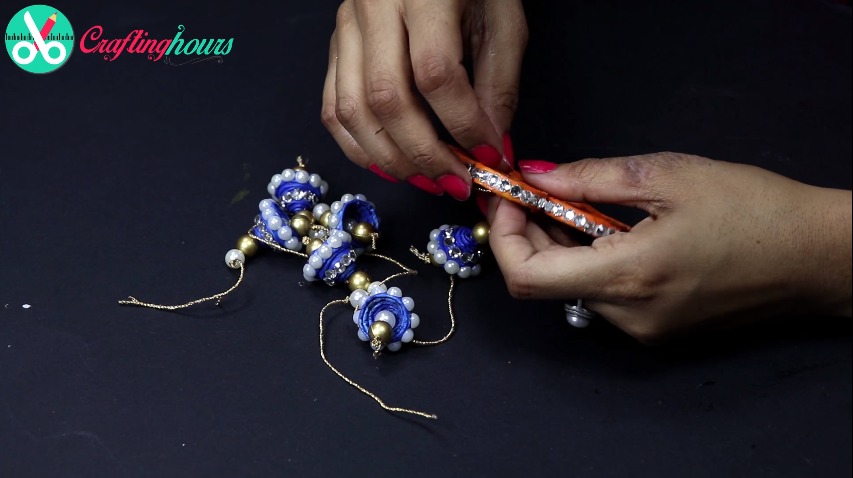
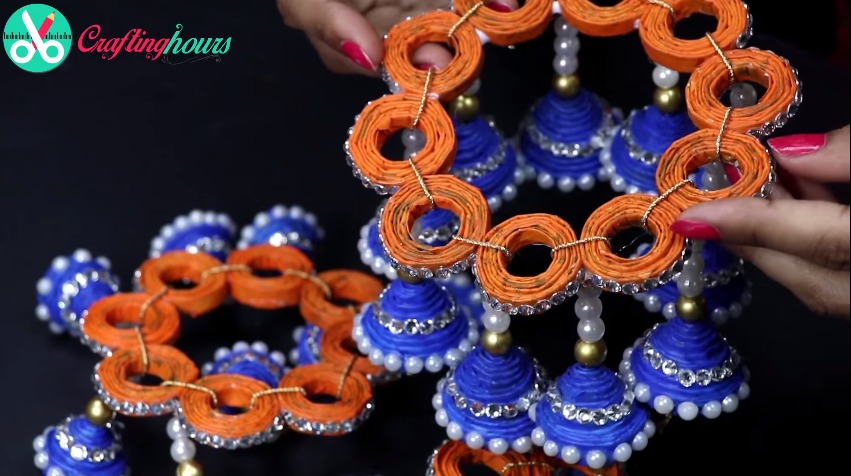
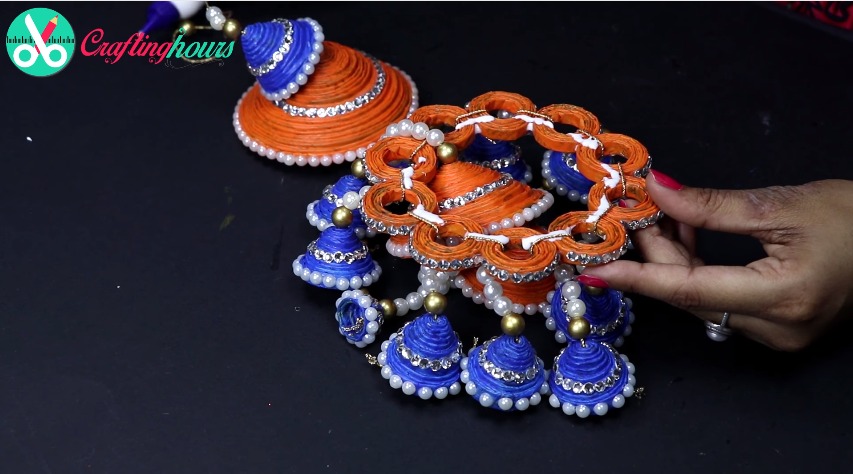
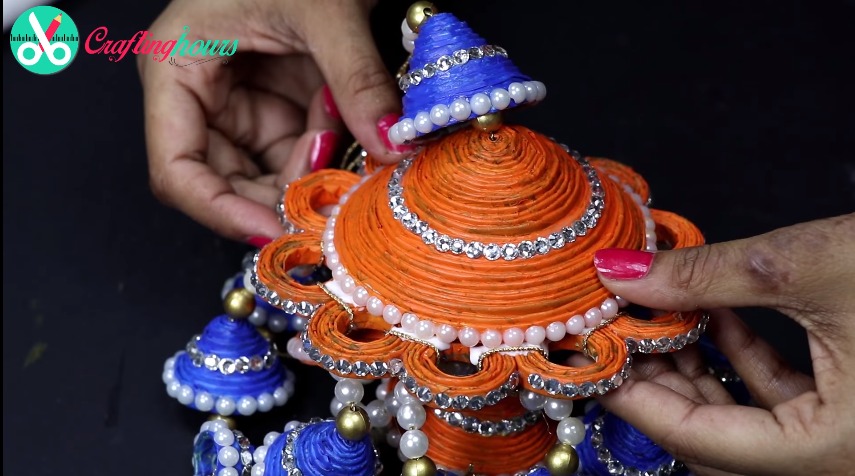
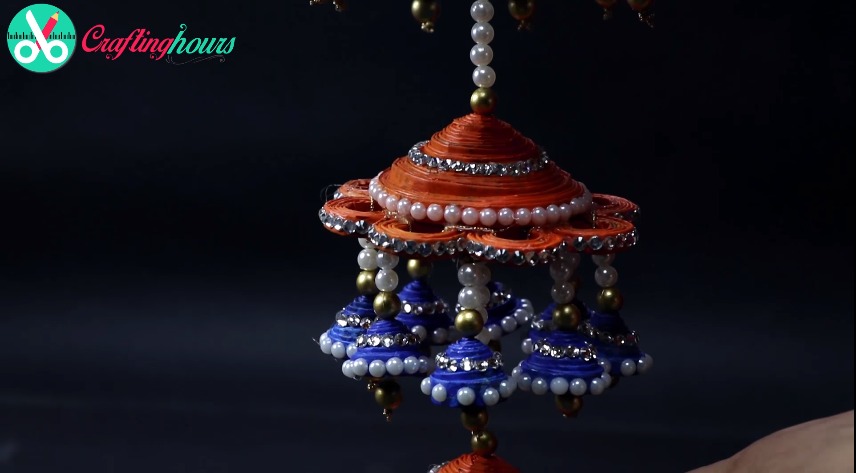
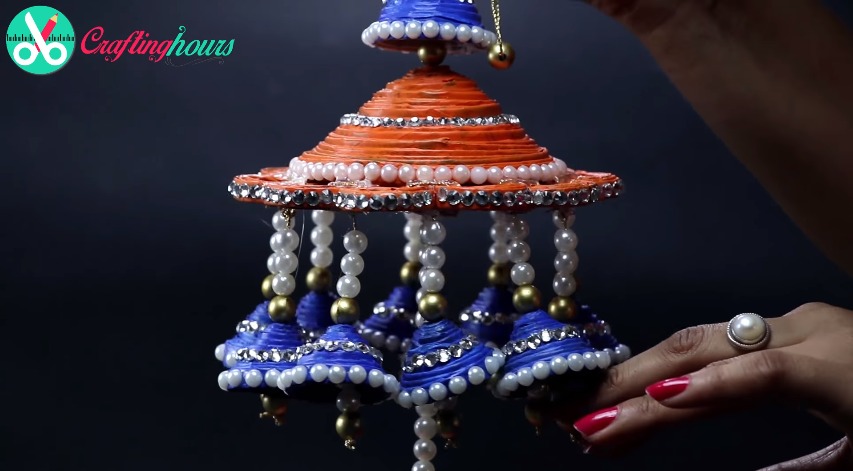
This is one of the most beautiful things made by waste material and among best hanging decor ideas. You can make your own party decorations in this manner with newspaper crafts. Just follow the step by step directions shown in this craft tutorial. Soon you’ll be able to make these hanging decorations from the ceiling and receiving compliments for your creativity in homemade party decorations. So, gather your old waste materials and get ready for some creative things to do with the newspaper. If you want more best out of waste projects or other old newspaper crafts, check out other tutorials as well on Crafting Hours!
Wall hanging using old newspapers from this best out of waste

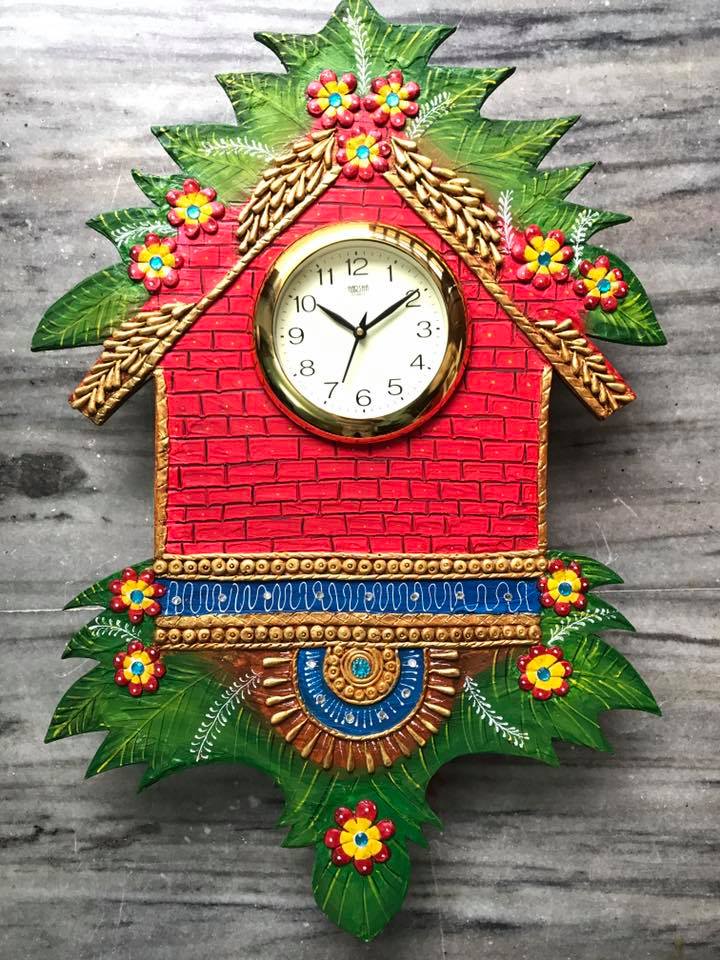 Take the desired clock base
 Prepare marble powder mixture
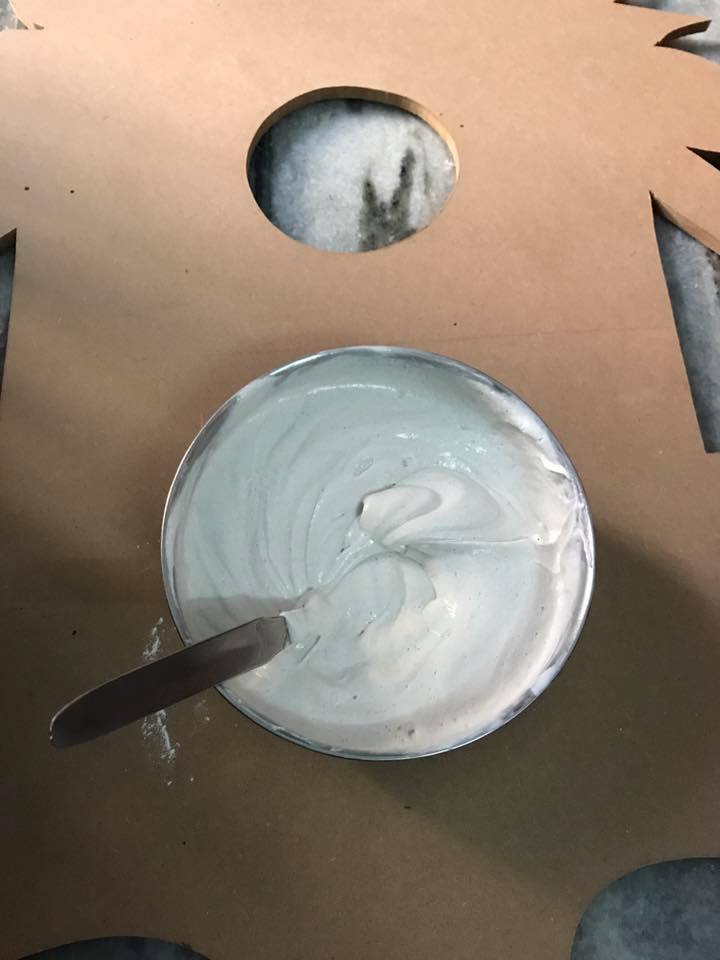 Apply the mixture and give texture
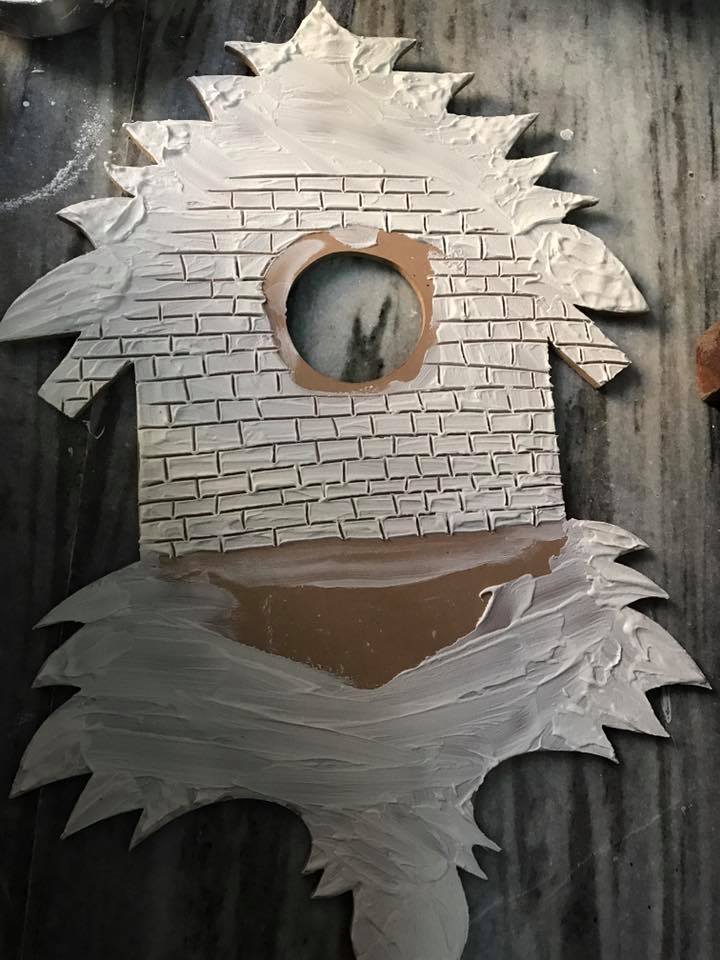 After it dries smoother the surface by a sand paper
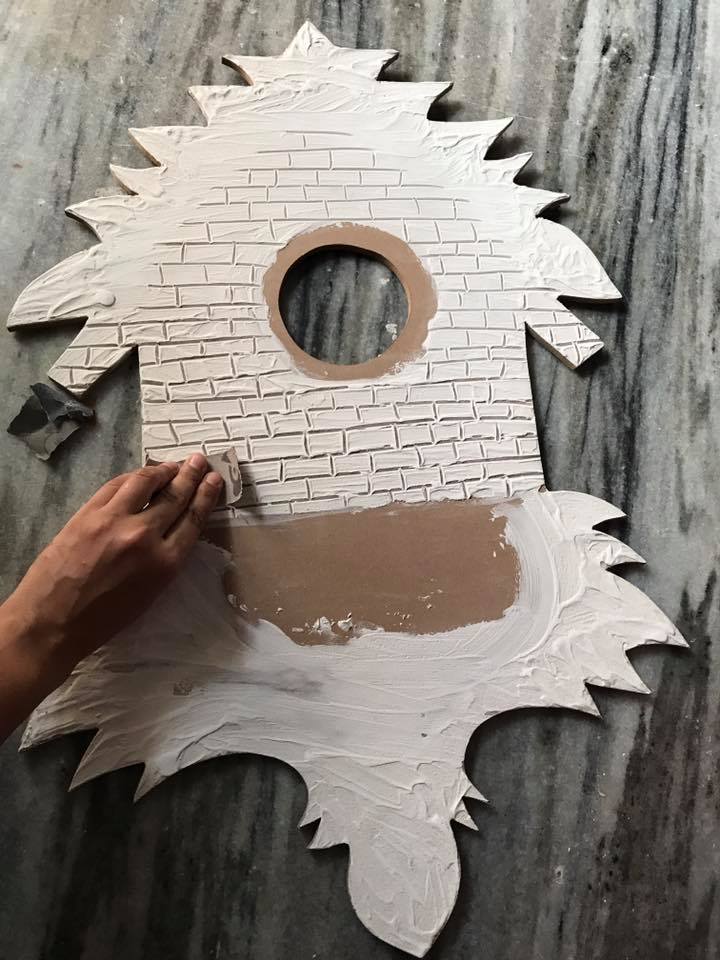 Make design with paper mache
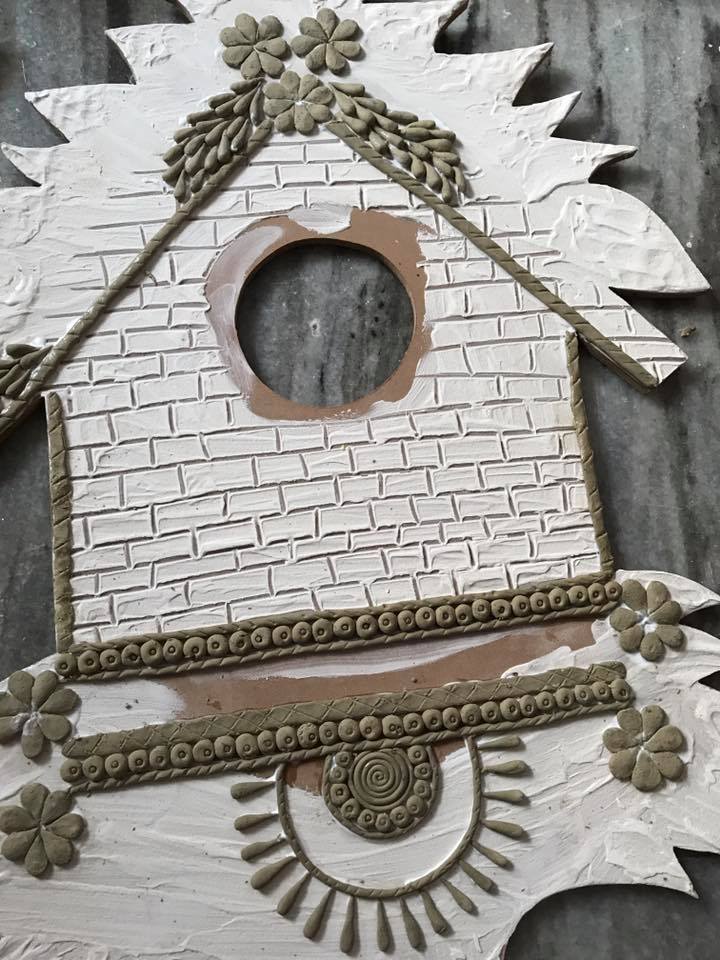 Apply primer on clay
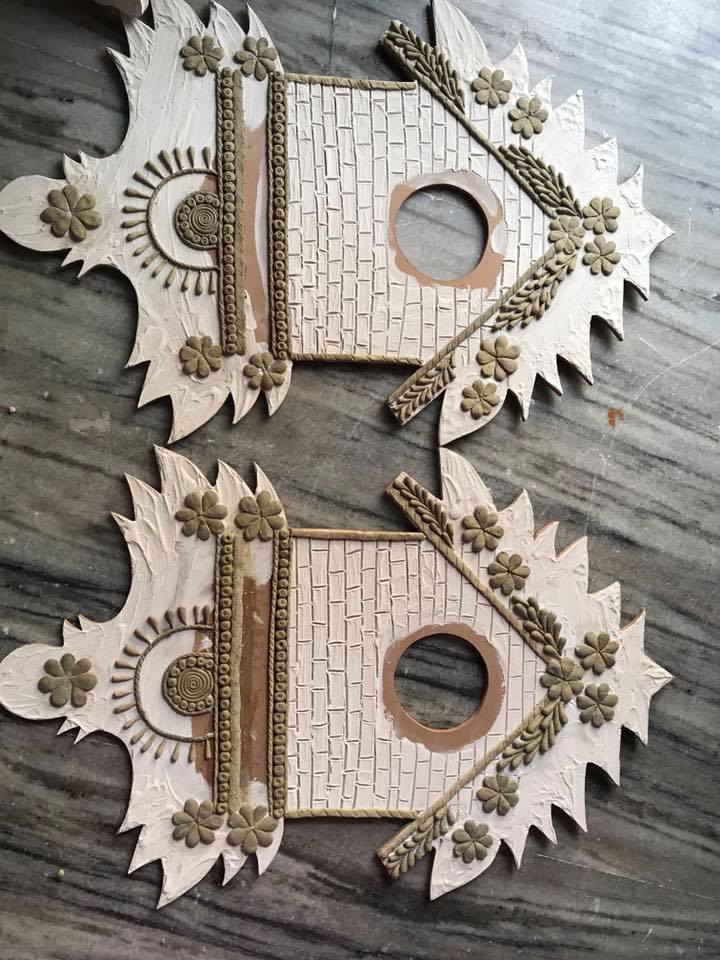 Add base colour
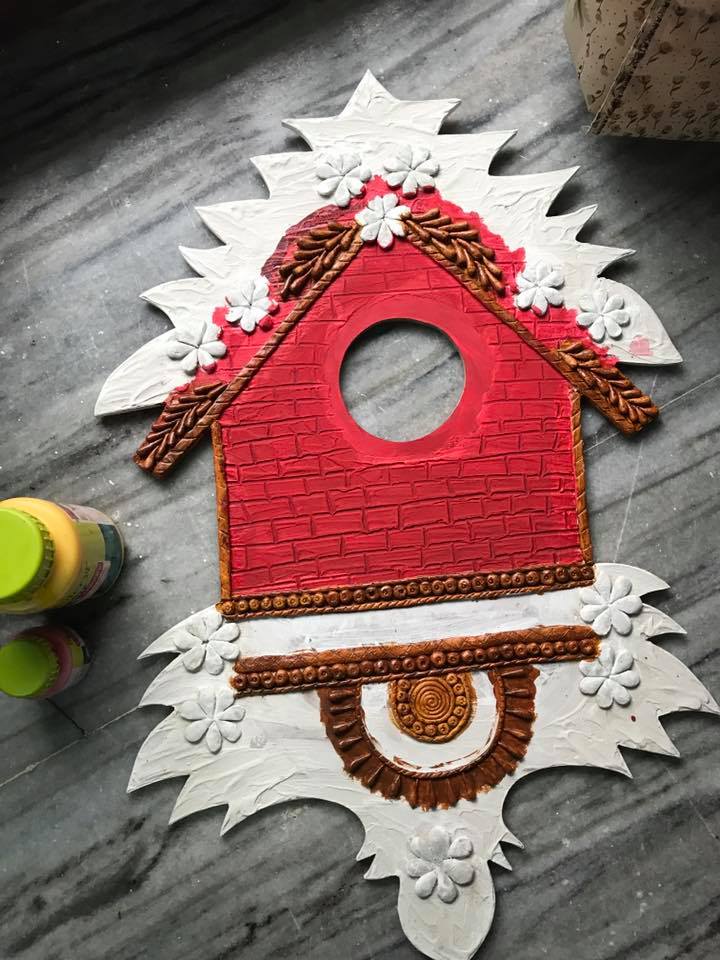
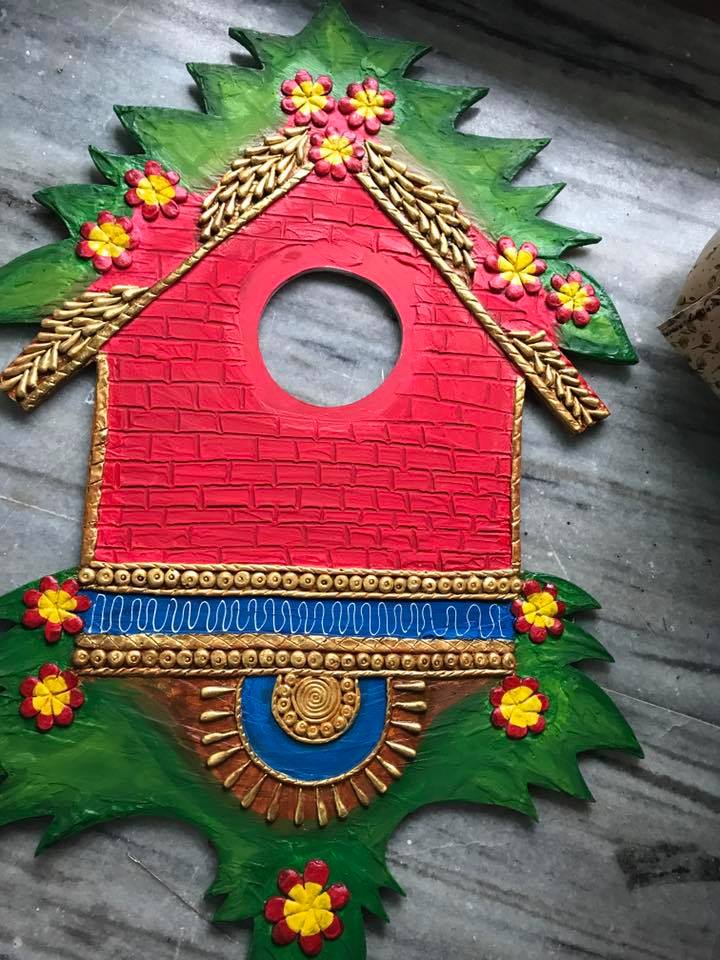 Do the details by outliner
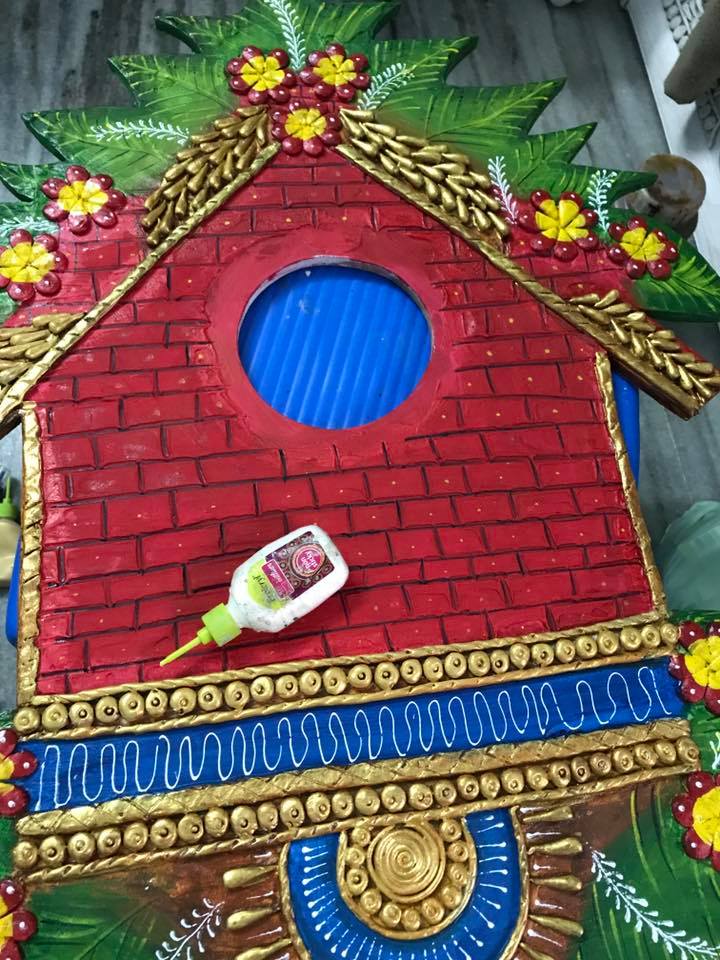 Apply varnish
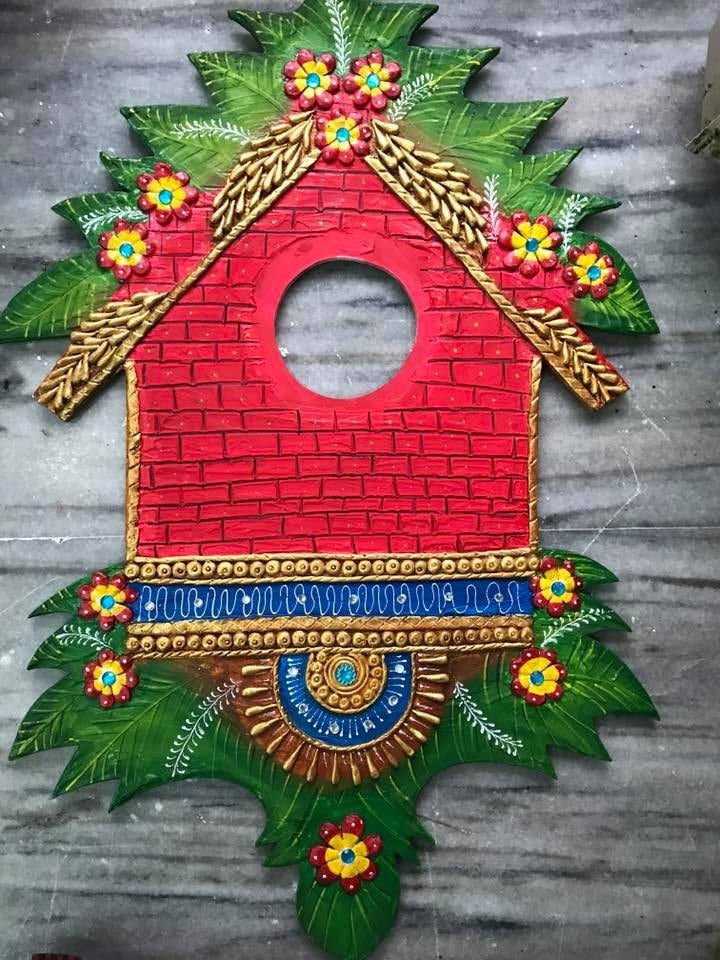 Paste the clock on the board
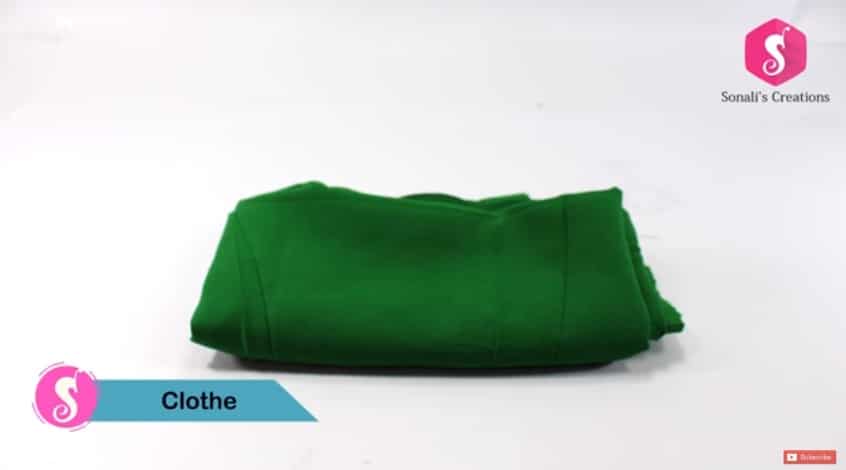
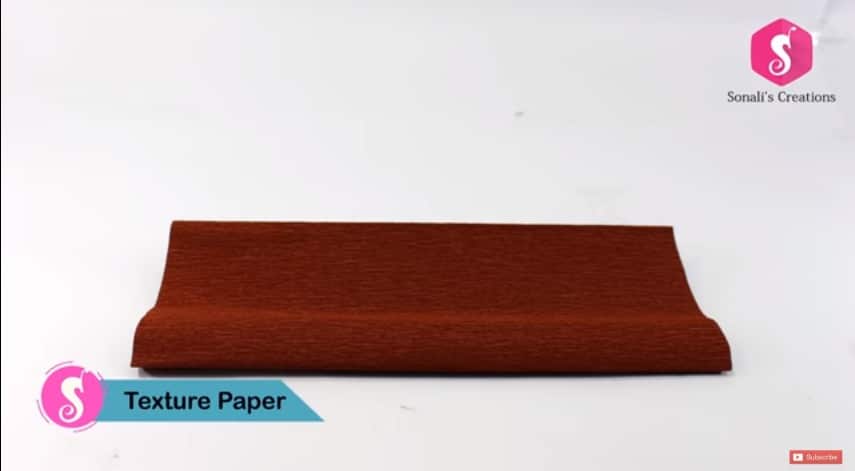
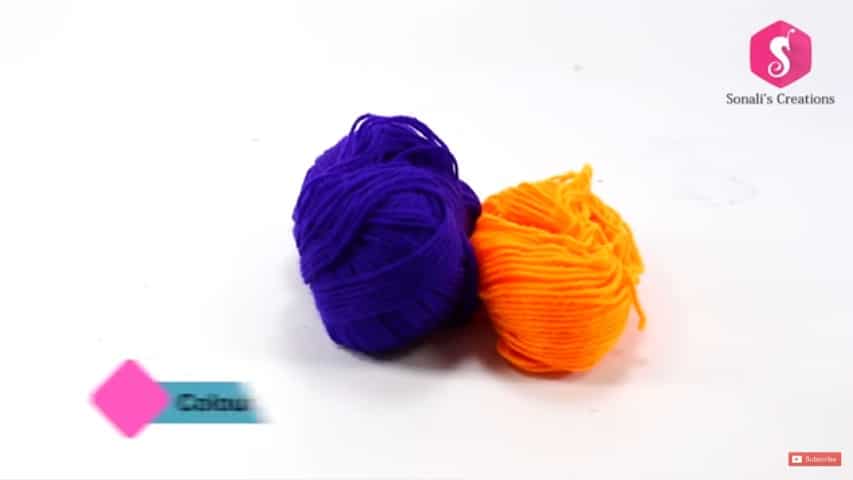
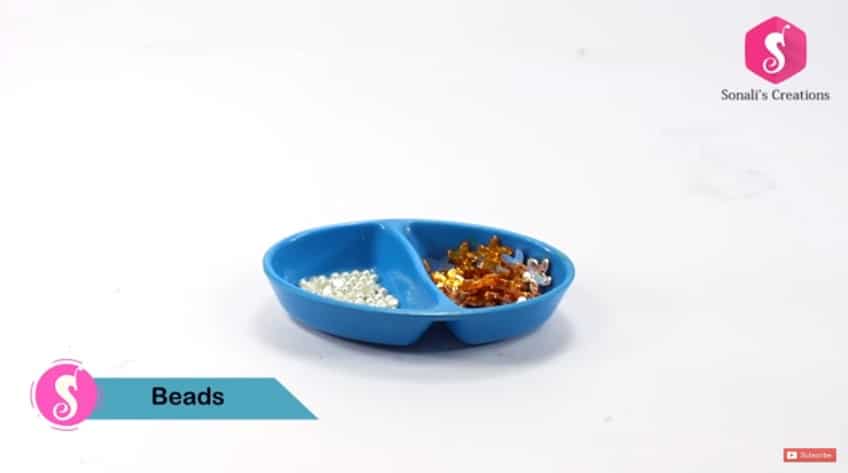
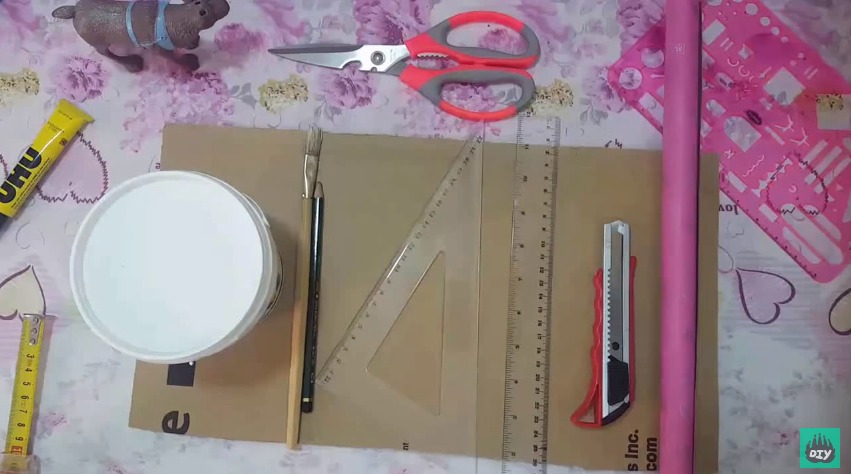
 Required Material:
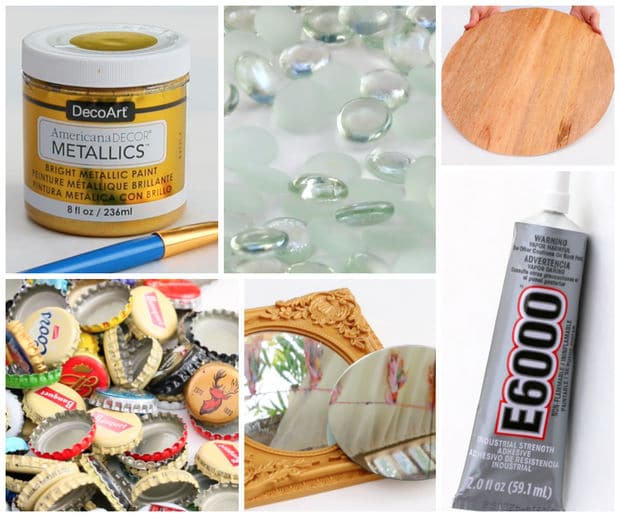


 Creating the Concrete Form: