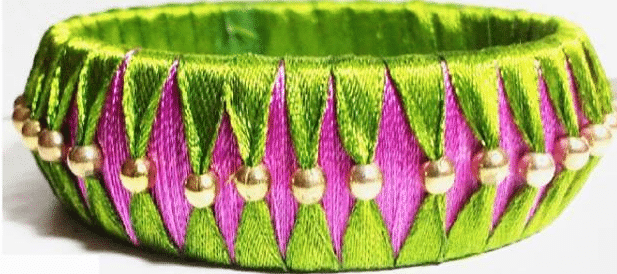
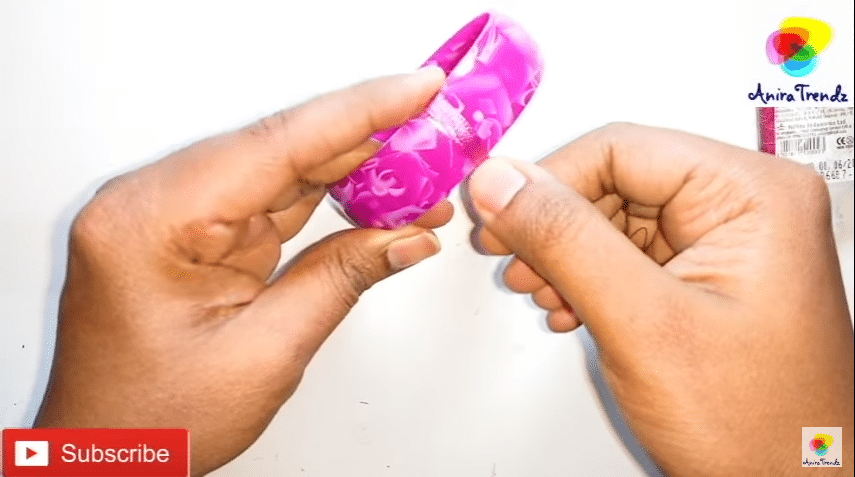
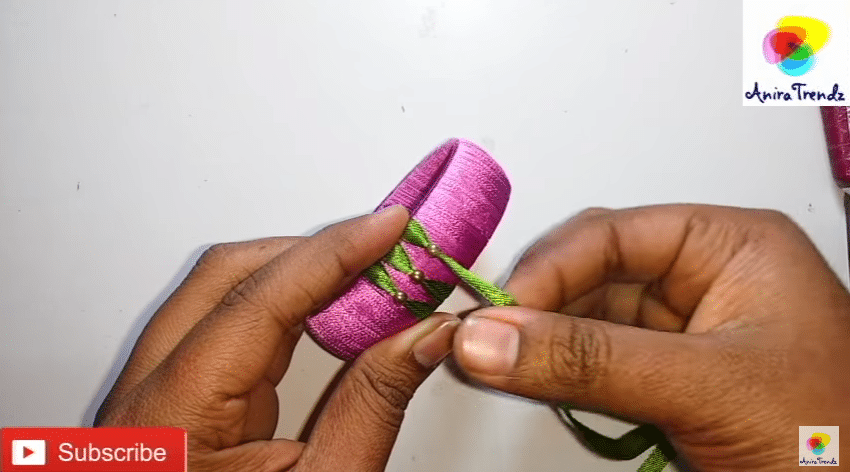
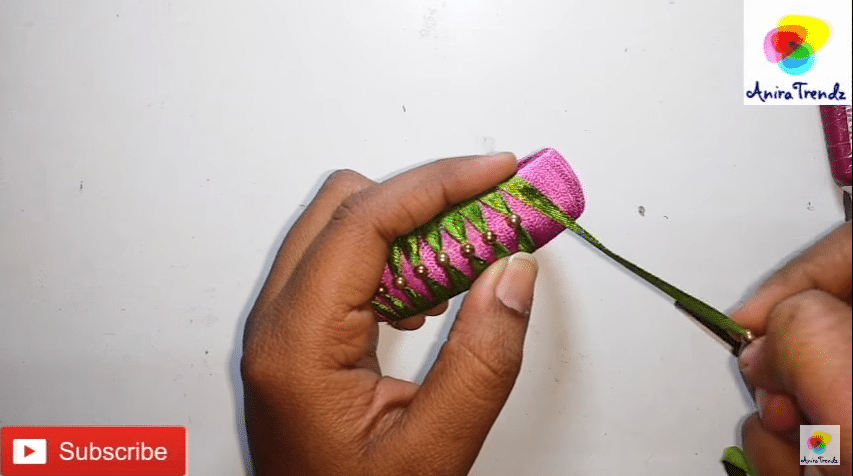
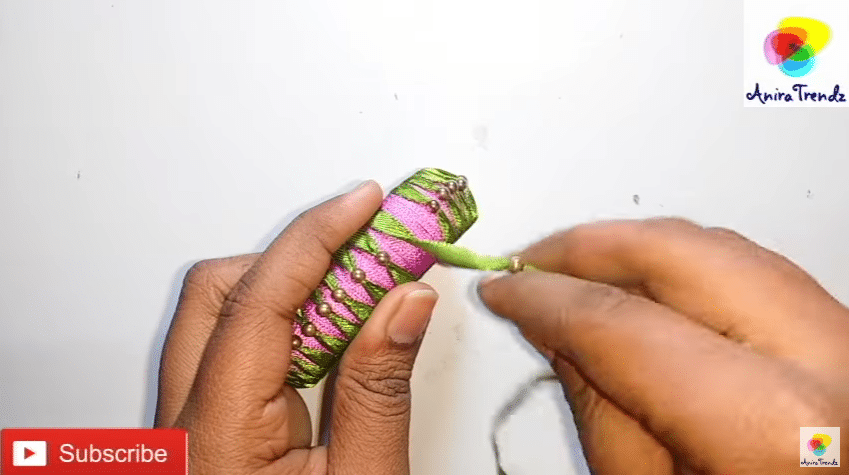
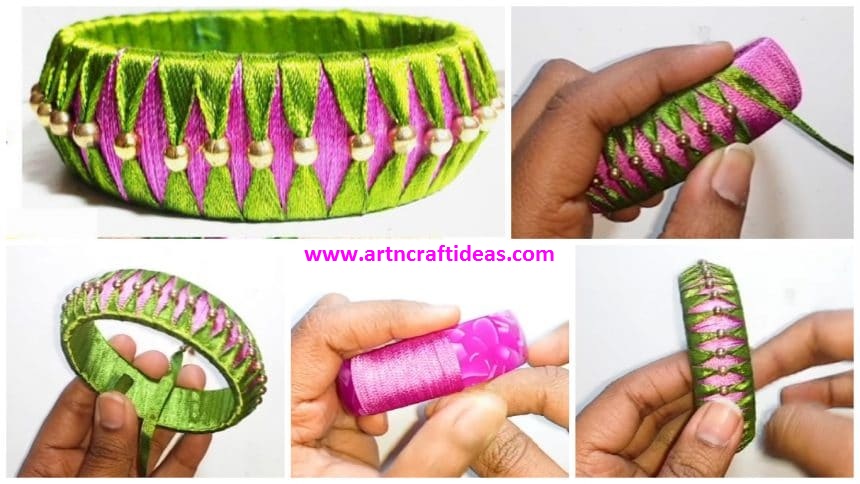
Explained how to make silk thread bangle using ribbon and beads.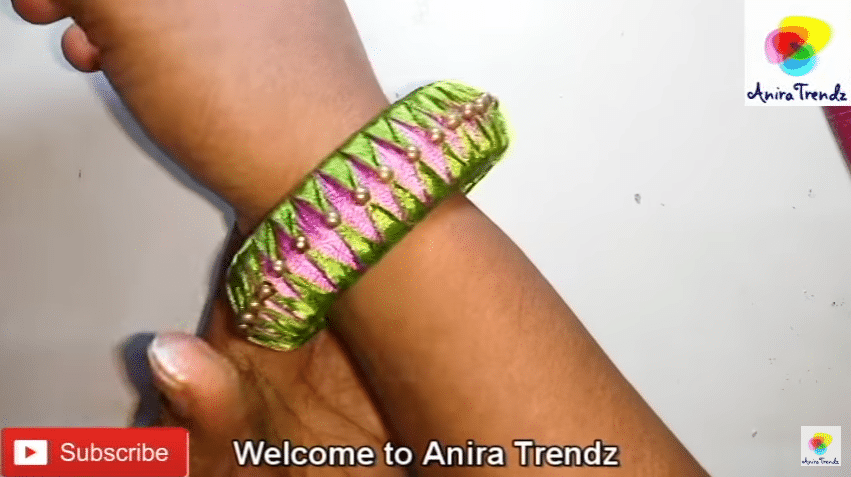
 Required Material:
- Ribbon (1cm or below)
- Silk thread bangle
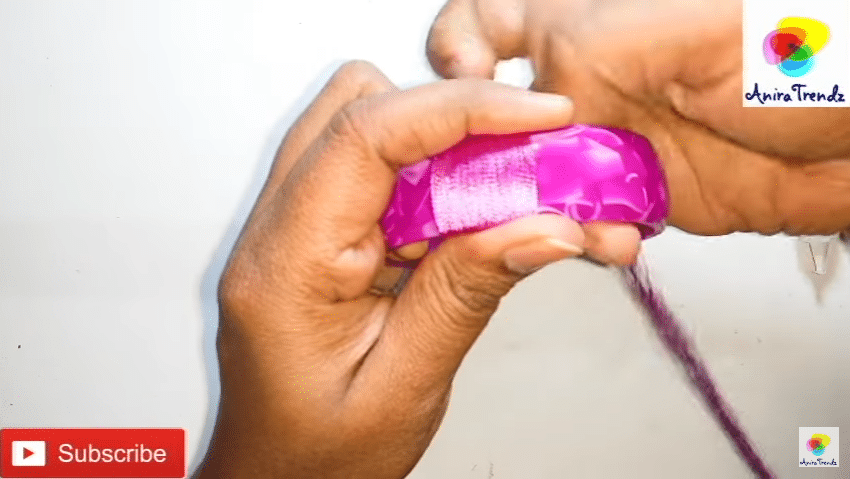
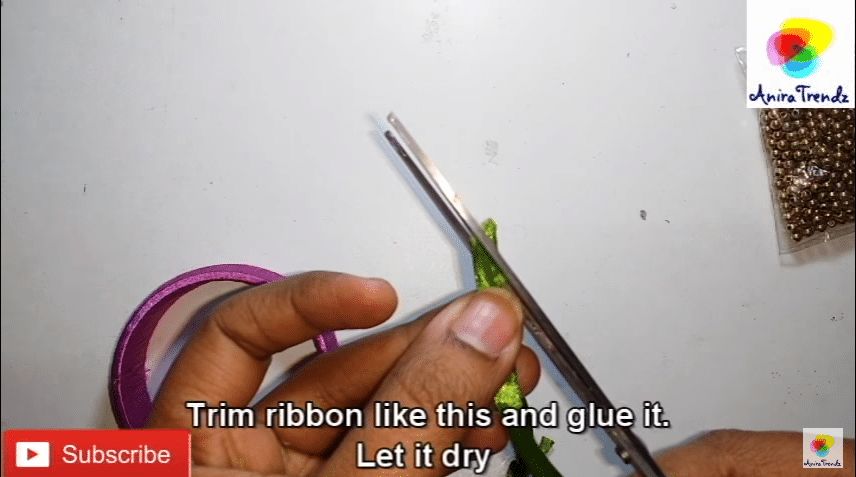
Beads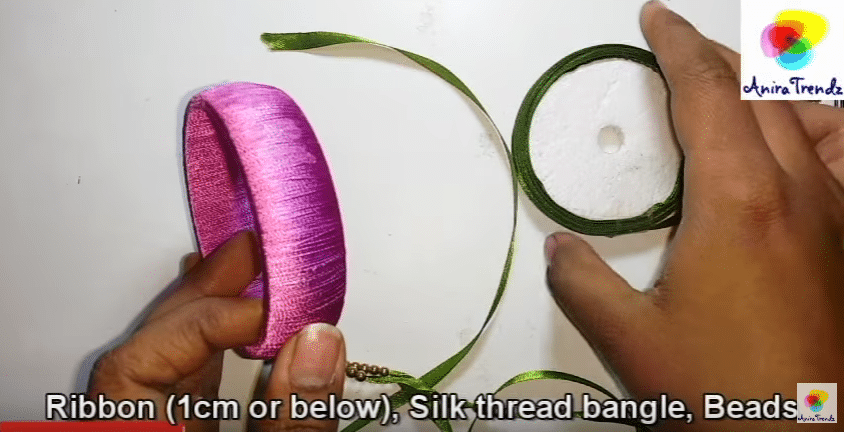 Trim ribbon like this and glue it.
Let it dry.
 Here is the finished bangle.
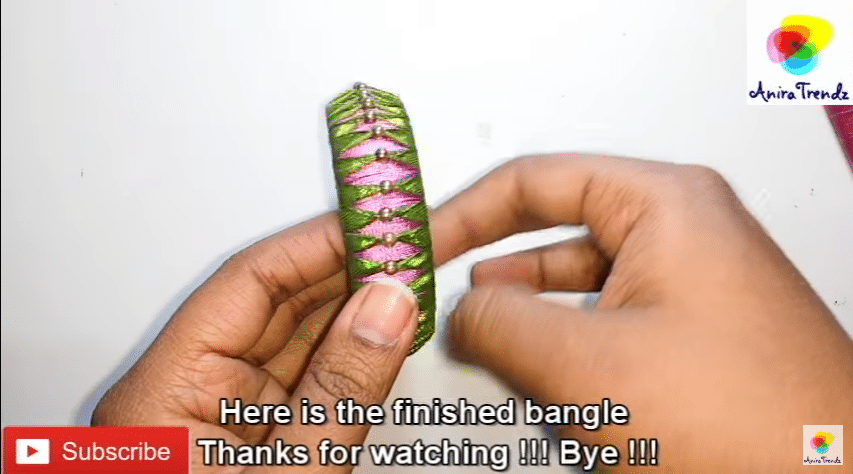
Get Daily Art and Crafts Ideas & Tutorials…
Explained how to make silk thread bangle using ribbon and beads. Required Material:
Beads Trim ribbon like this and glue it.
Let it dry.
Here is the finished bangle.
Have you got loads of newspaper lying around? Are you feeling crafty? Well, you have come to the right place.
In this tutorial, I will be telling how you can turn your old newspapers into something good-looking and useful. So follow along.
 Step 1: Required Material
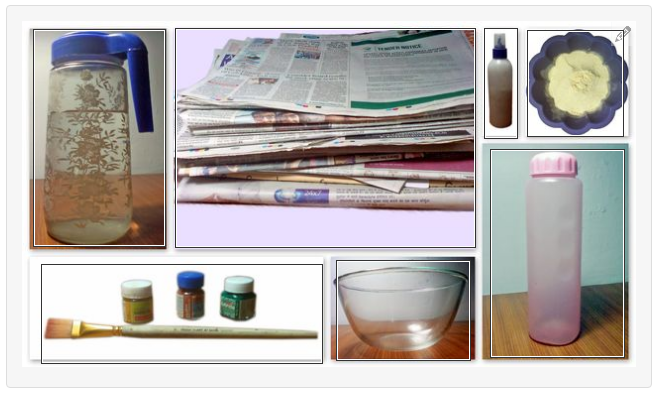
And that’s it.
Let’s get making.
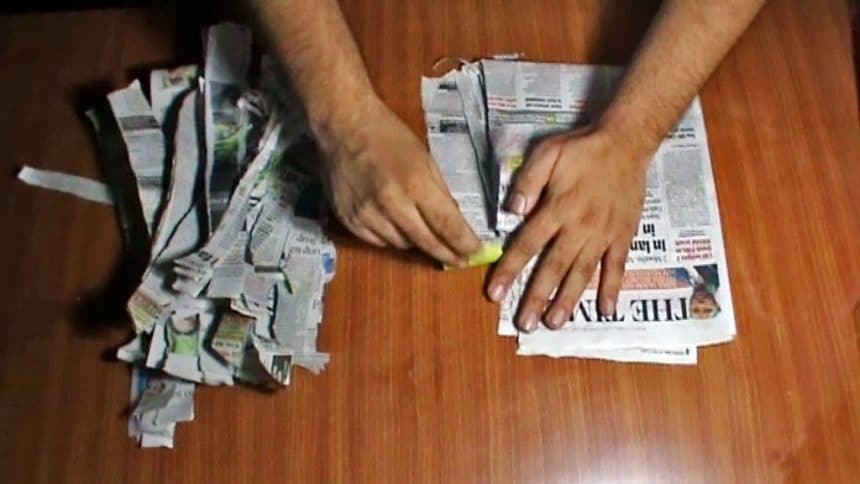
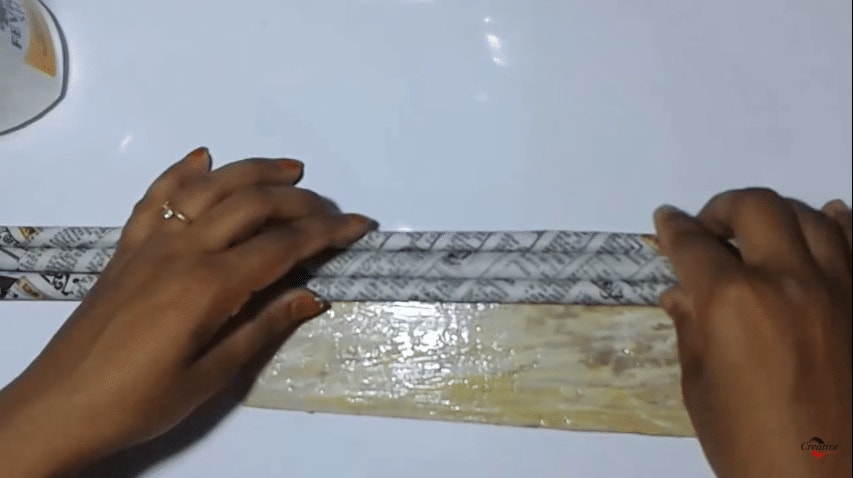
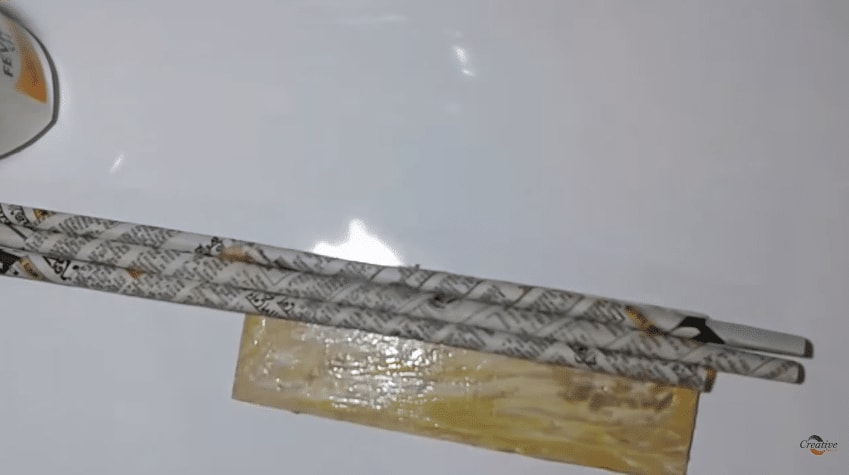
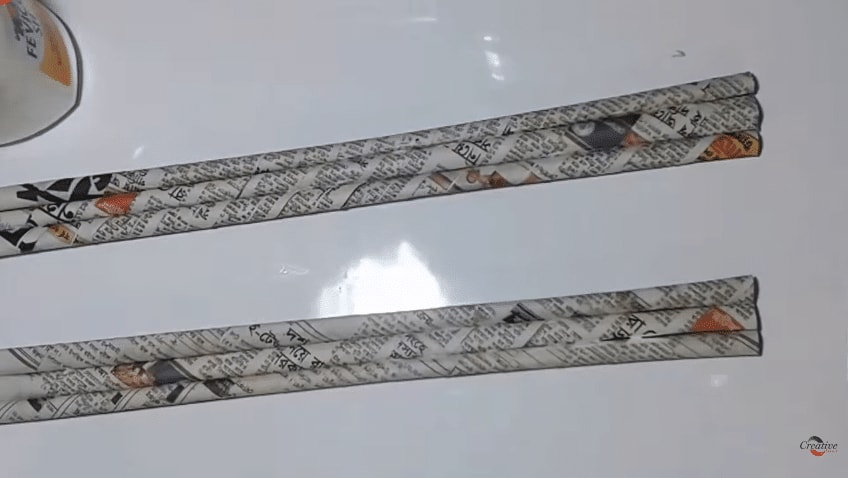
Start by shredding the newspaper in 1 inch wide strips. You don’t need a lot, these stripes of newspaper will only be used to make the container of our pencil holder, which will not be very thick.
But you can shred a lot because we will be needing them in later steps anyway.

Traditionally the glue used to make paper mache crafts is made by mixing flour and water. and we will be using the same in this project. But you can always use regular glue if you want to.
The glue made out of flour tends to be messy, but it adds to the fun.
To make paper mache glue, take a cup of flour in a mixing bowl and gradually start adding water in it while constantly stirring it. Keep doing it until the mixture turns into a smooth paste. The paste should be neither too runny nor too thick. Click here to watch the video. (Don’t worry, the link will open in new tab.)
TIP 1: Don’t make a lot of paper mache glue at once, because after a day or two, the glue will not be as sticky. So only make as much as you will be able to use in one day.
TIP 2: Use something strong to stir the mixture. I learnt this the hard way, after breaking one spatula.

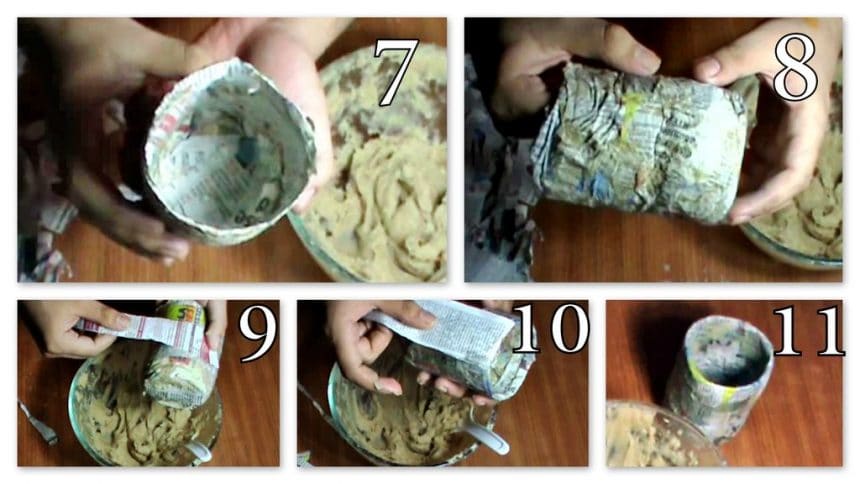
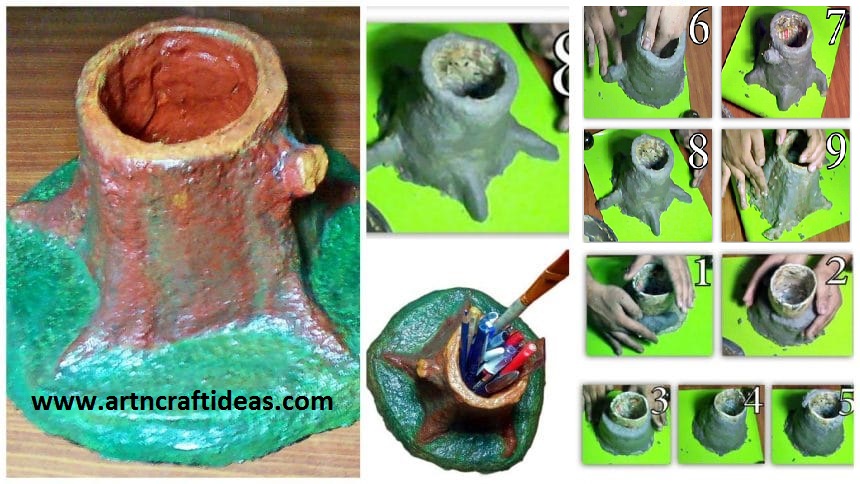
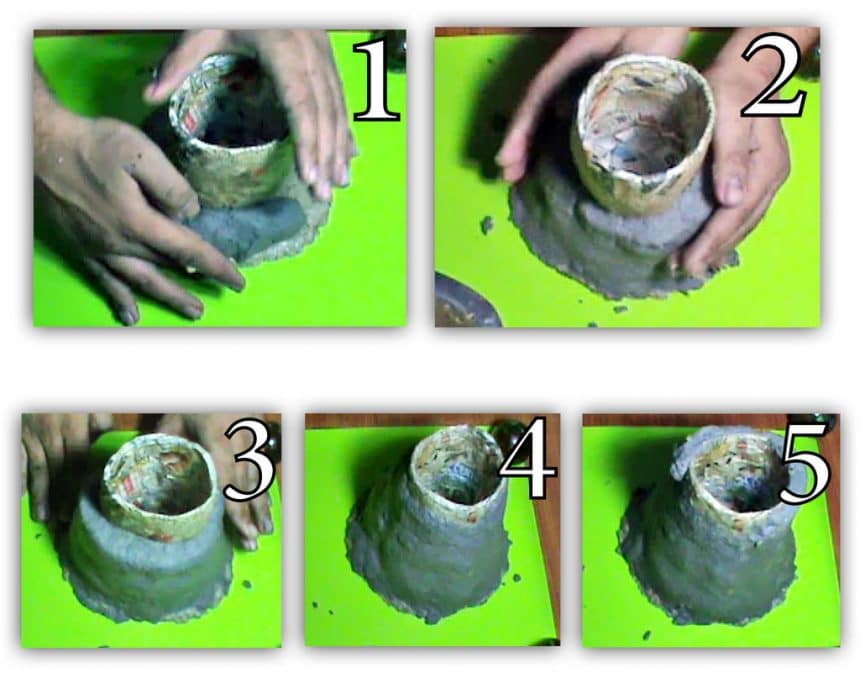
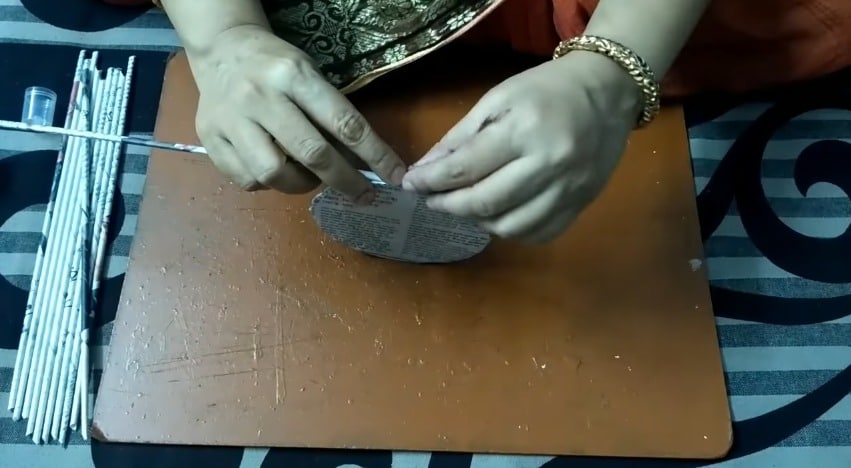
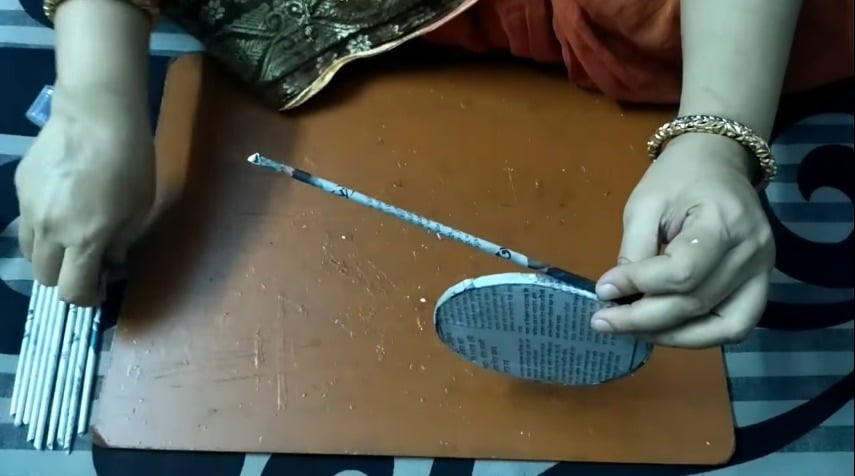
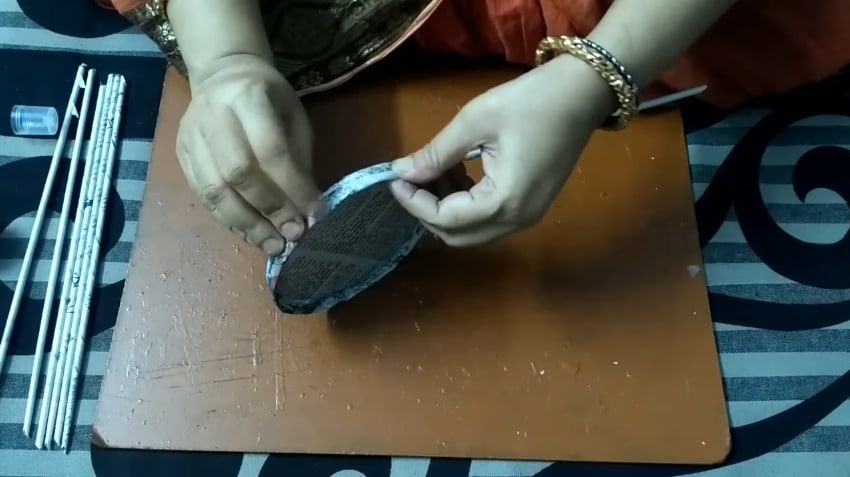
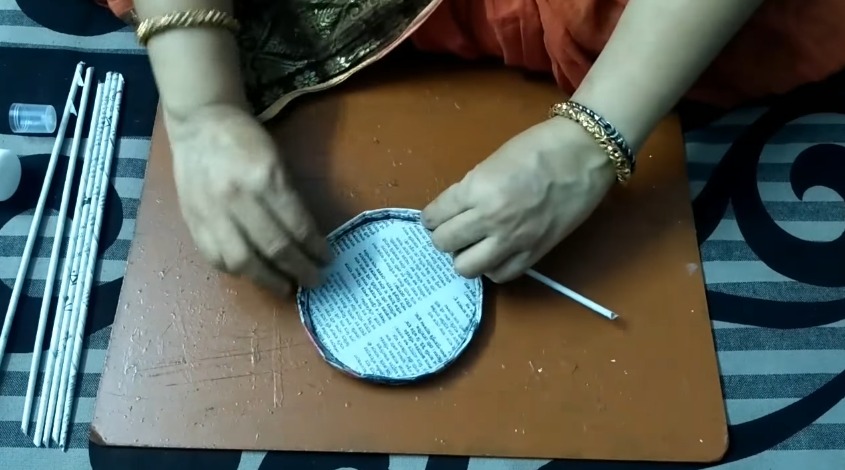
To make the container, dip the strips of newspaper in the paper mache glue, once the whole strip is covered in the glue, remove the excess and start laying it on a bottle or any other such thing as shown in the picture above (numbered as 1, 2, 3, 4 and 5). Lay the strips perpendicular to one another in order to give the container more strength. (Click here to watch the video.) Keep doing this till your container is two layers thick (see the picture numbered as 6). Then leave it for drying overnight. On the next day, carefully remove your container from the bottle. You may have to use some force, but be gentle, you don’t want to break it. If necessary, use some prying tool to get it out. Don’t panic if it breaks slightly, It will be fixed in a moment, but try not to break it in two or three pieces. At this stage, your container should look somewhat like the one shown in picture above, numbered as 7 and 8.
After removing the container from the bottle, start covering it with newspaper stripes once again. This time, you have to make it thick enough so it is no more fragile.
One important note: let your container dry after every layer, otherwise molds could ruin your pencil holder. I dried mine in the sun, but if the sun is not in your favour, use your oven. Keep it in a warm oven and leave the door slightly open so water vapour could easily escape.
By now you may be wondering that the container looks so ugly. Yes you are right, it is. But it will no longer be, get prepared to make it look beautiful.
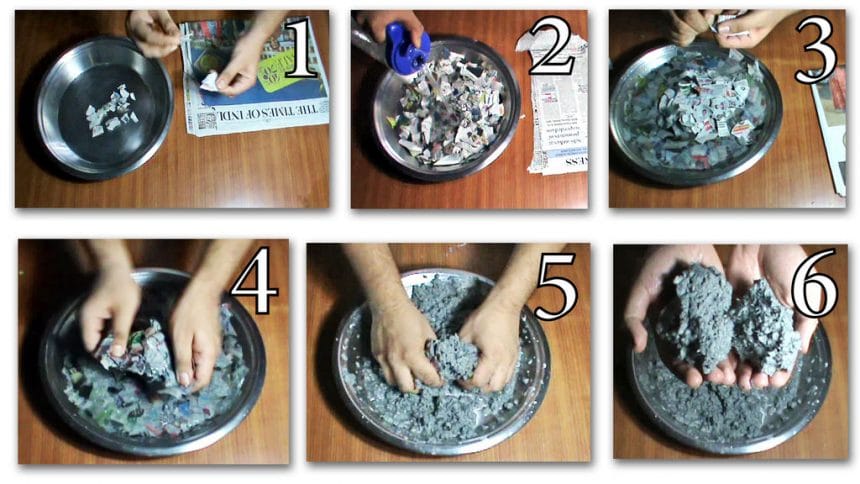
Start shredding more newspapers, but this time shred in smaller pieces. If you have a paper shredder, go ahead and use it, it will make your work a lot easier because you need a lot of shredded newspaper. Keep the shredded paper in a large bowl.
After shredding, add water to fill the bowl and let the paper soak in water for around 12 hours, it will make the process of making paper mache clay much easier.
Now that the paper has become soggy, start destroying it. (Take a look at the picture above or watch the video linked above.). Take your time and turn the paper into smooth pulp. Make sure there are no lumps in the pulp, because they will trouble you afterwards.
When you have turned the whole thing into pulp (like in picture numbered as 6 above), remove the excess water by straining and squeeze the pulp. You just need the pulp to be moist, there should be no water dripping from it.
Once you have got your pulp out of the water, add some paper mache glue to it and mix well. I added the pulp and paper mache glue in about 3:1 ratio. you don’t have to be precise.
If done correctly, you should now have your paper mache clay ready for next step. Your paper mache clay should look somewhat like bread dough.
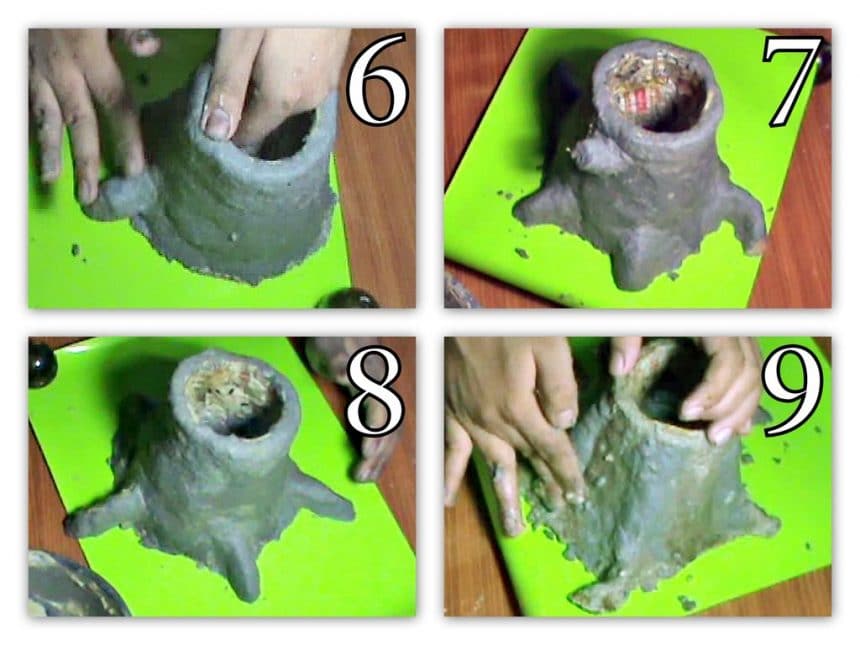
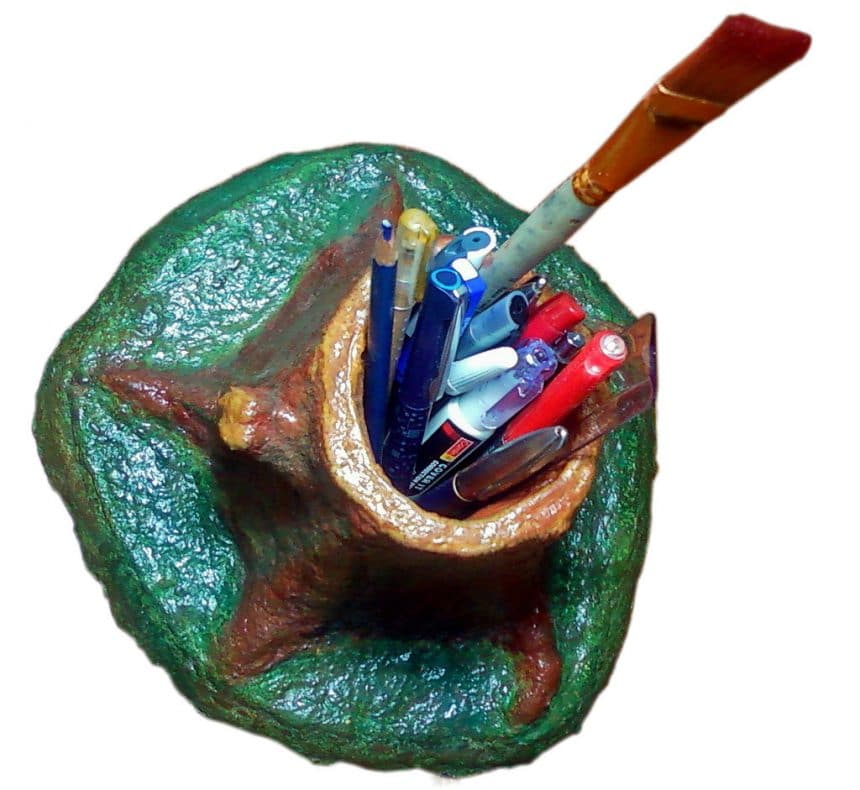
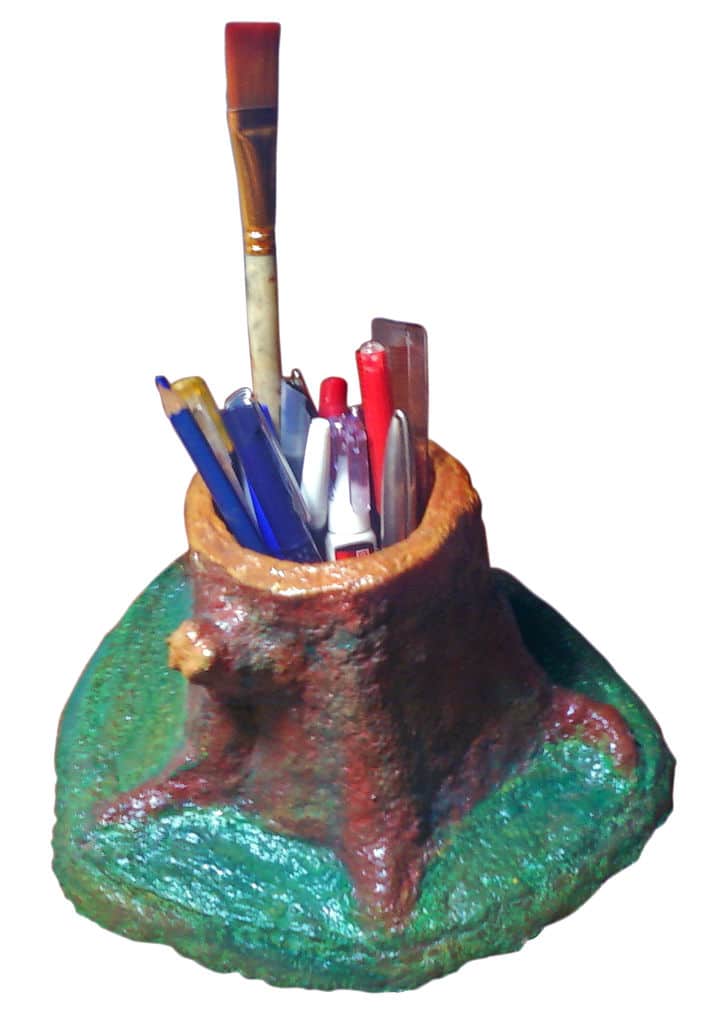
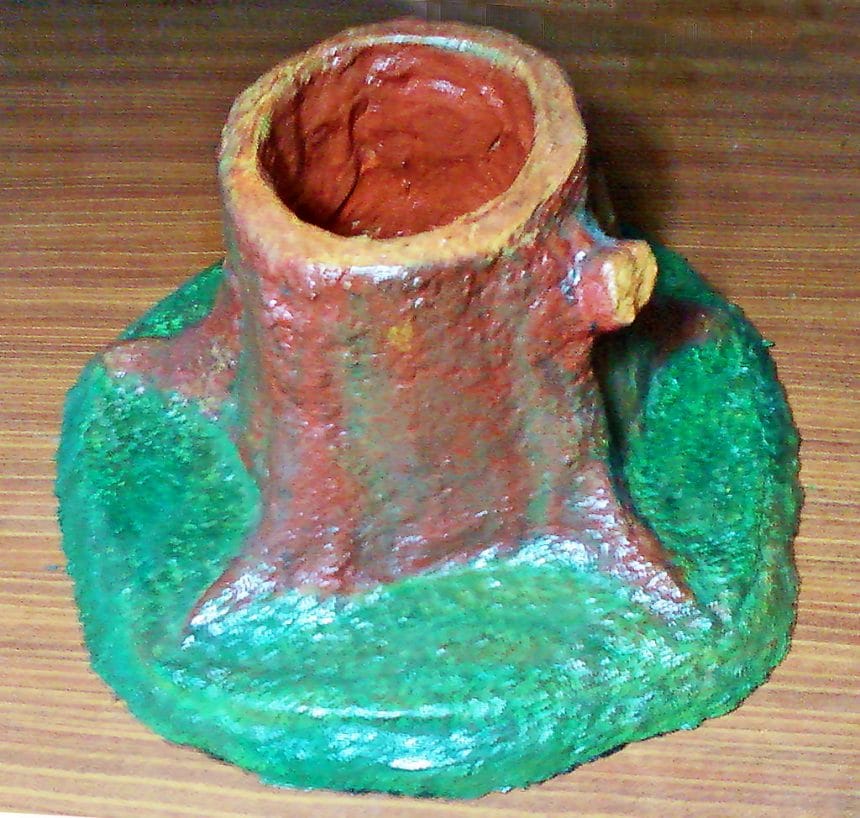
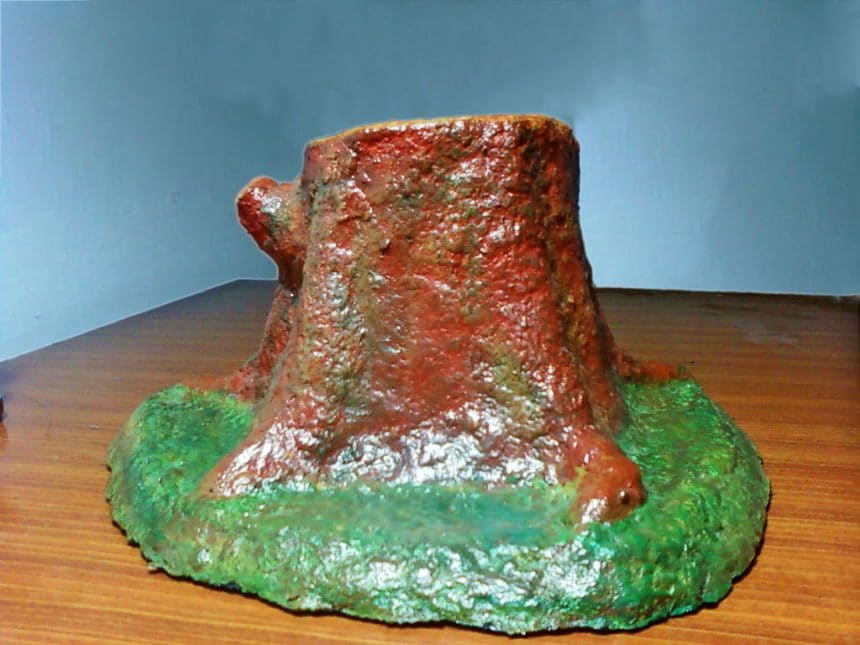
Now that you have made paper mache clay, use it to sculpt around the container using your imagination. Use plenty of paper mache glue to make your sculpture smooth. I made my pencil holder look like a tree trunk (take a look at the images above), but you can get creative and make something else.
After you have done sculpting, dry it in the sun for at least 7 to 10 days before proceeding further. It has to dry completely not only from outside but also from inside otherwise molds will find their way to your pencil holder, and I don’t think you want that. So make sure it dries completely.
When I was making my pencil holder, the sun was not in my favour, so I had to use my oven to dry it.
You can do it too, Keep your pencil holder in warm oven and leave the door slightly open so the water vapour can escape.
TIP: Make sure there are no cracks tn your sculpture as they will reduce its strength. Fill any cracks with paper mache clay and plenty or paper mache glue.
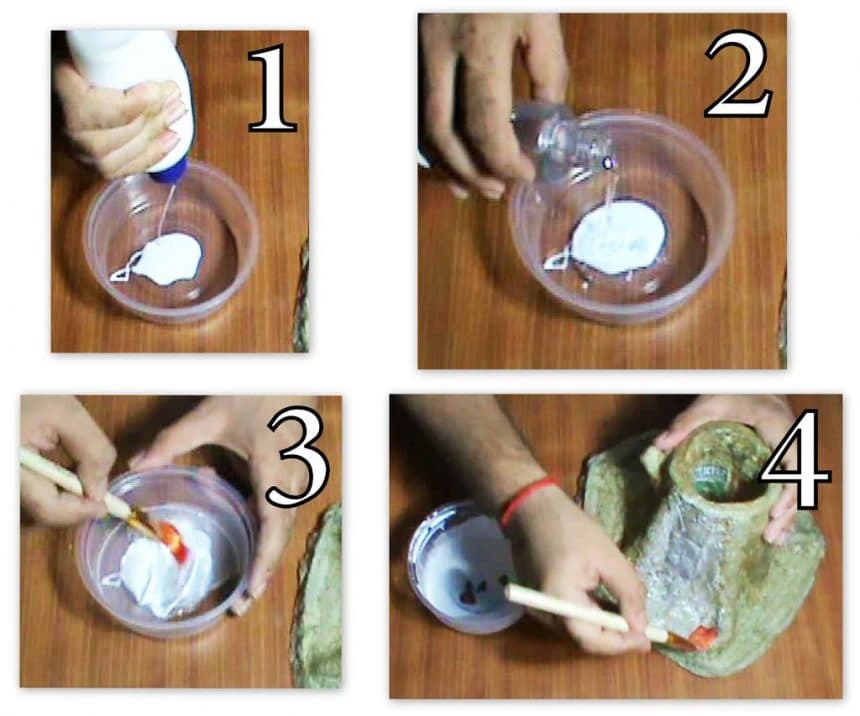
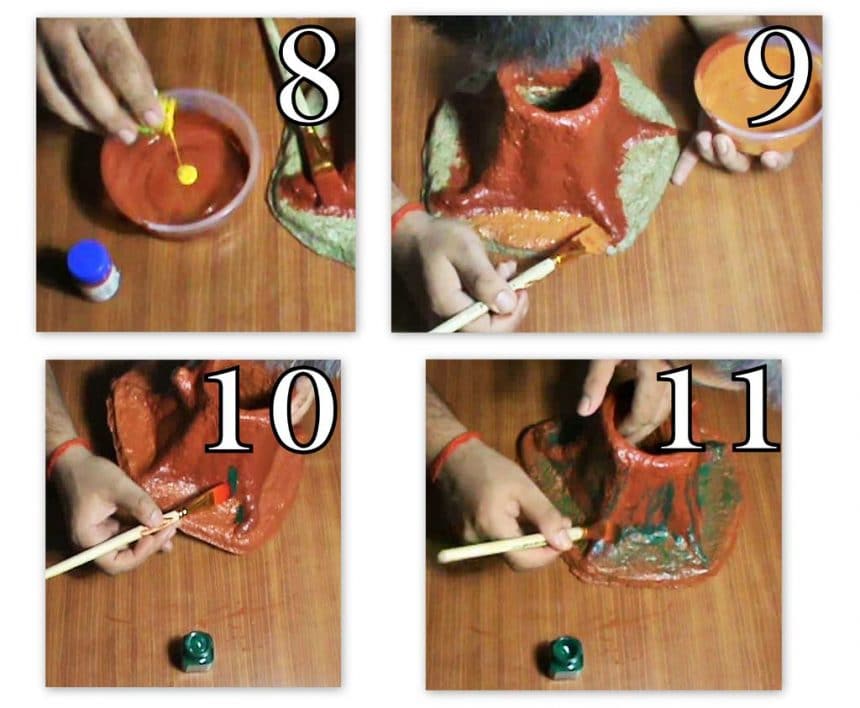
Now that you have completed sculpting your pencil holder, let’s paint it to make it look even better.
But before painting it, cover it in a layer of PVA glue. Any PVA glue will work. Mix one part of PVA glue in one part water, and apply it on your pencil holder. It will make your pencil holder stronger.
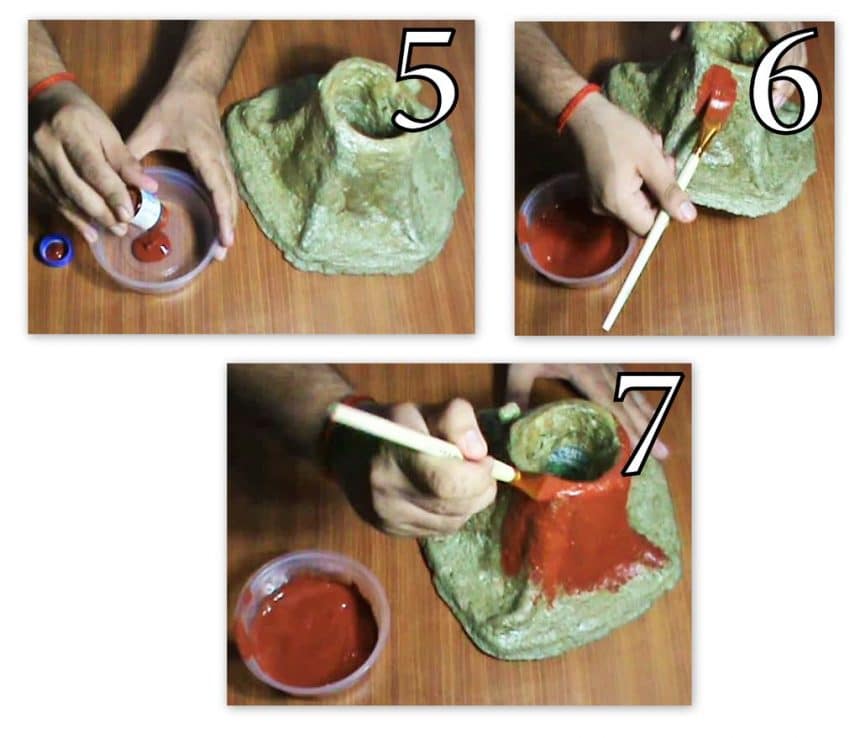
Once the glue has dried, go ahead and paint your pencil holder according to your imagination using acrylic paint. Acrylic paint, apart from looking good, will seal your pencil holder so no moisture can enter and ruin it.
You can use any other paint if you want to but, you will have to seal your pencil holder with some sort of acrylic sealant to make your sculpture weather sealed.
Now go and make your own, and if you have any questions, feel free to ask me. Best Of Luck.
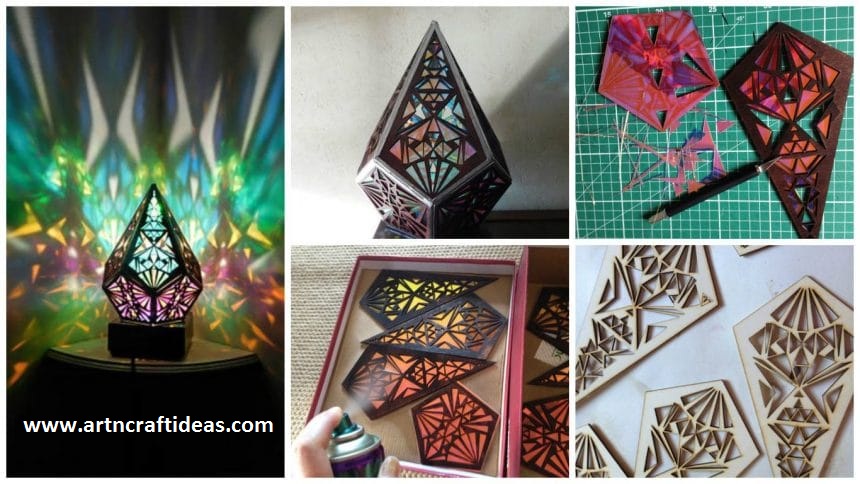
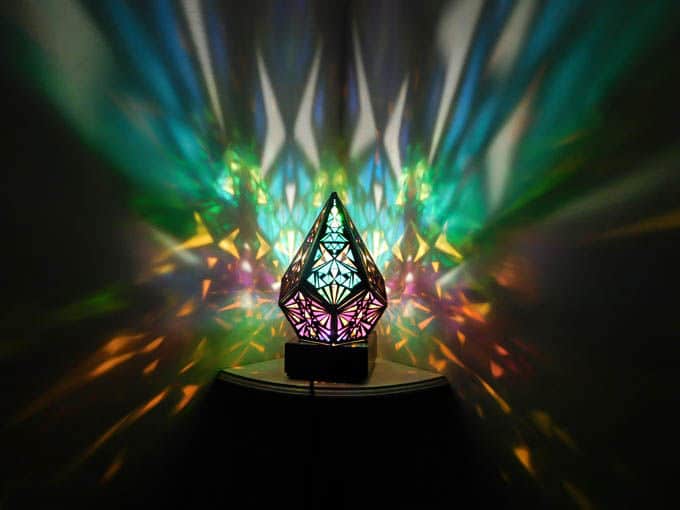
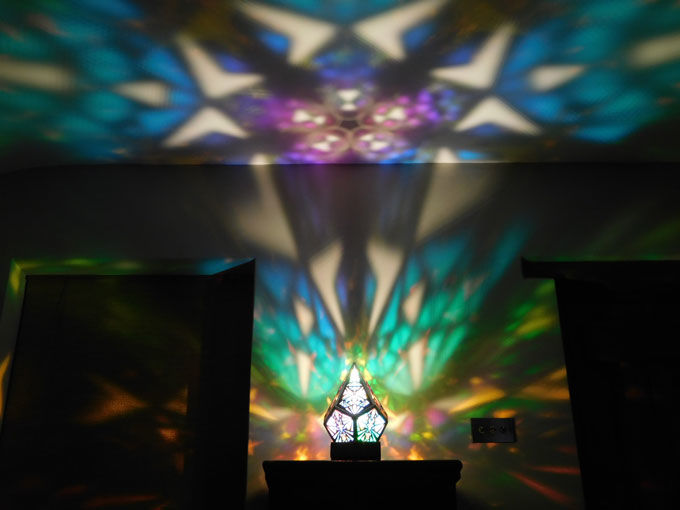
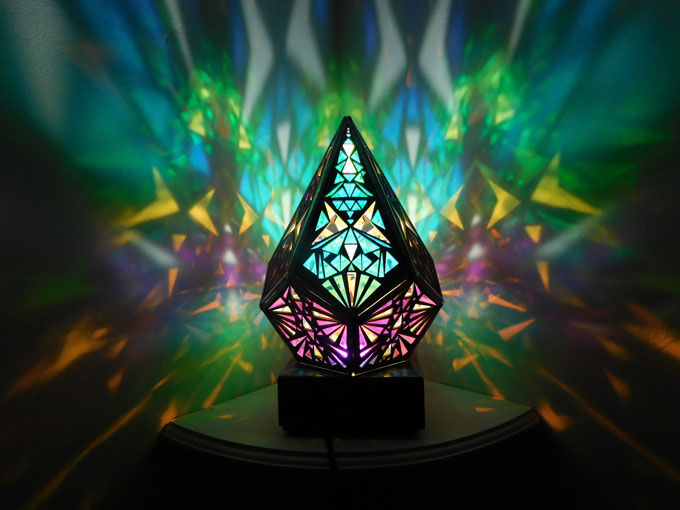
The Five Pointed Prism lamp is made up of ten geometrical panels, which makes a prism, displaying the same repeated pattern all the way through giving out beautiful rainbow colours around your chosen space
I use only LED lighting in my designs to contribute to keeping the environment friendly.
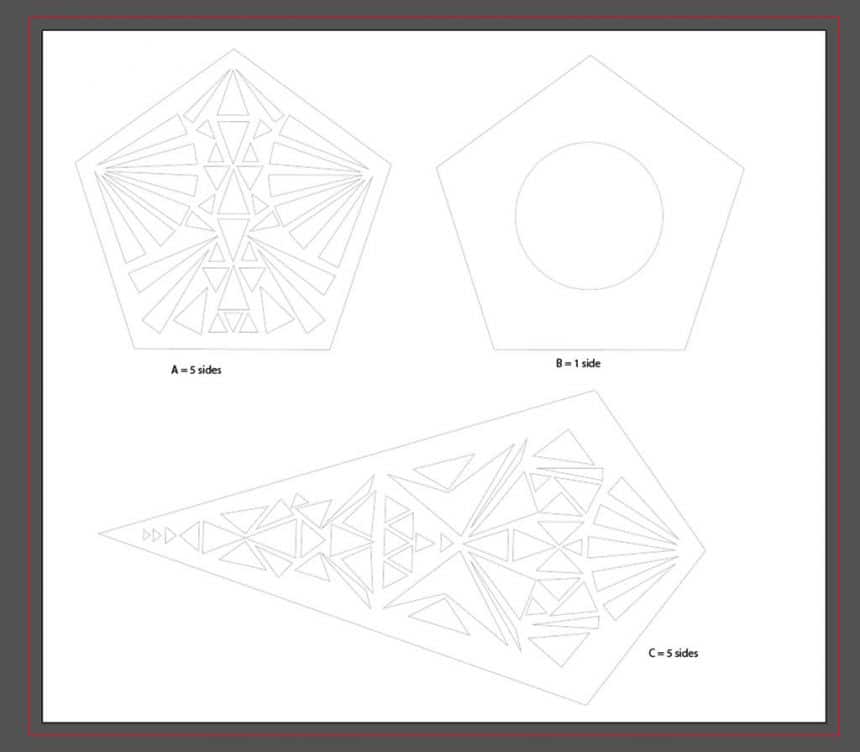 I begin by drawing my design on paper with rough sketches. I really enjoy geometrical shapes so I wanted to design one. I have had many failures on this design as I was not getting the mathematical measurements correct but I got there in the end. This is then drawn in illustrator to make this mathematically correct. I then send this file to a local laser cutter company to get these cut out of birch wood.
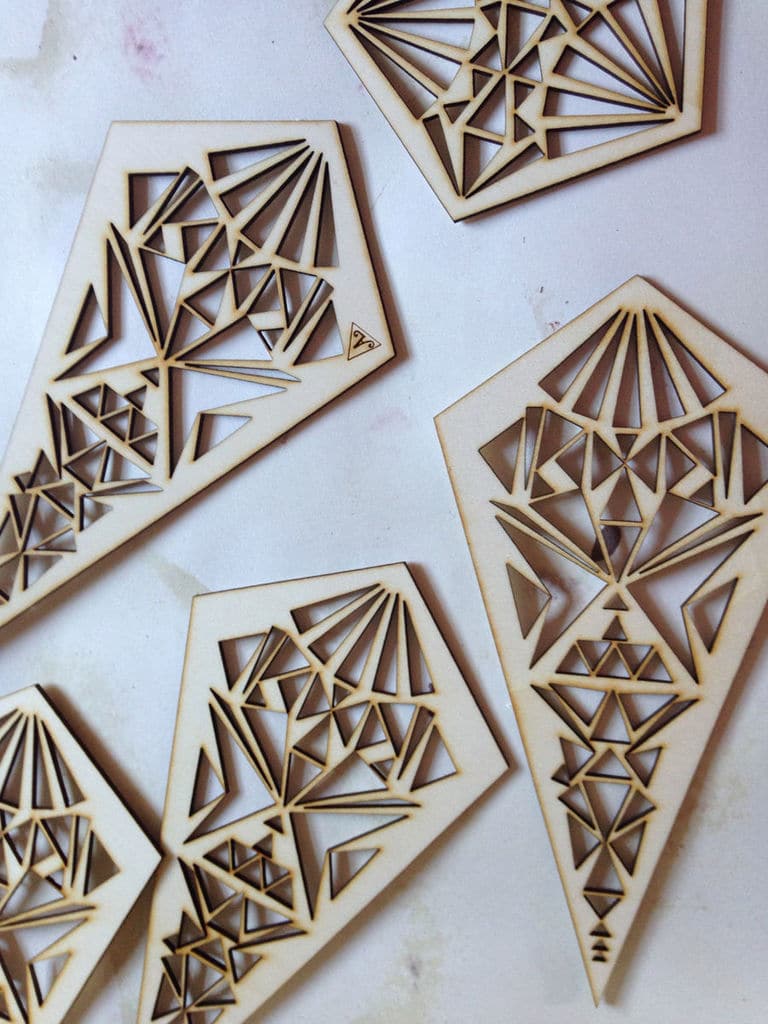
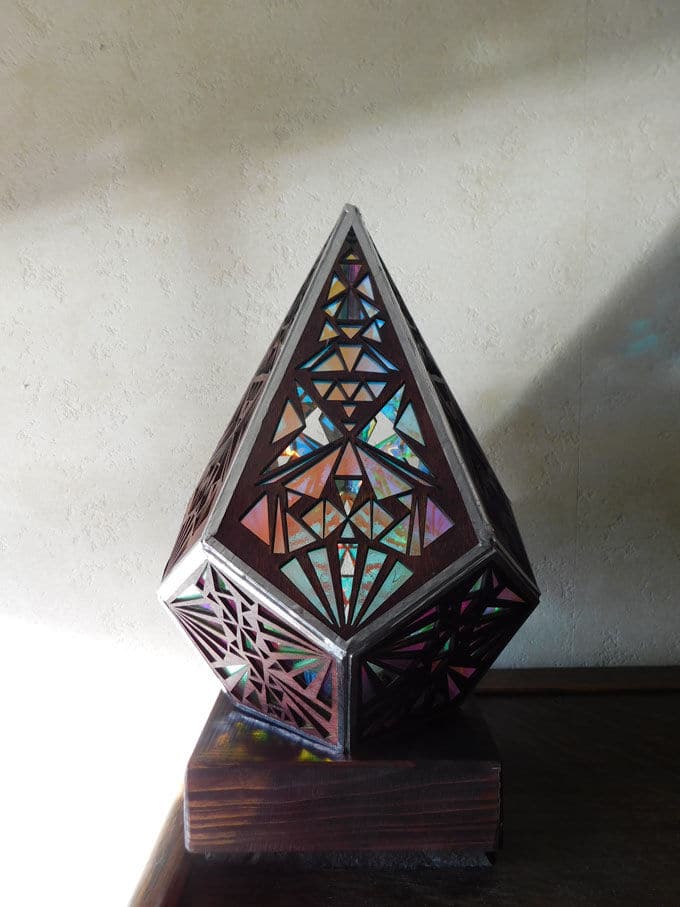
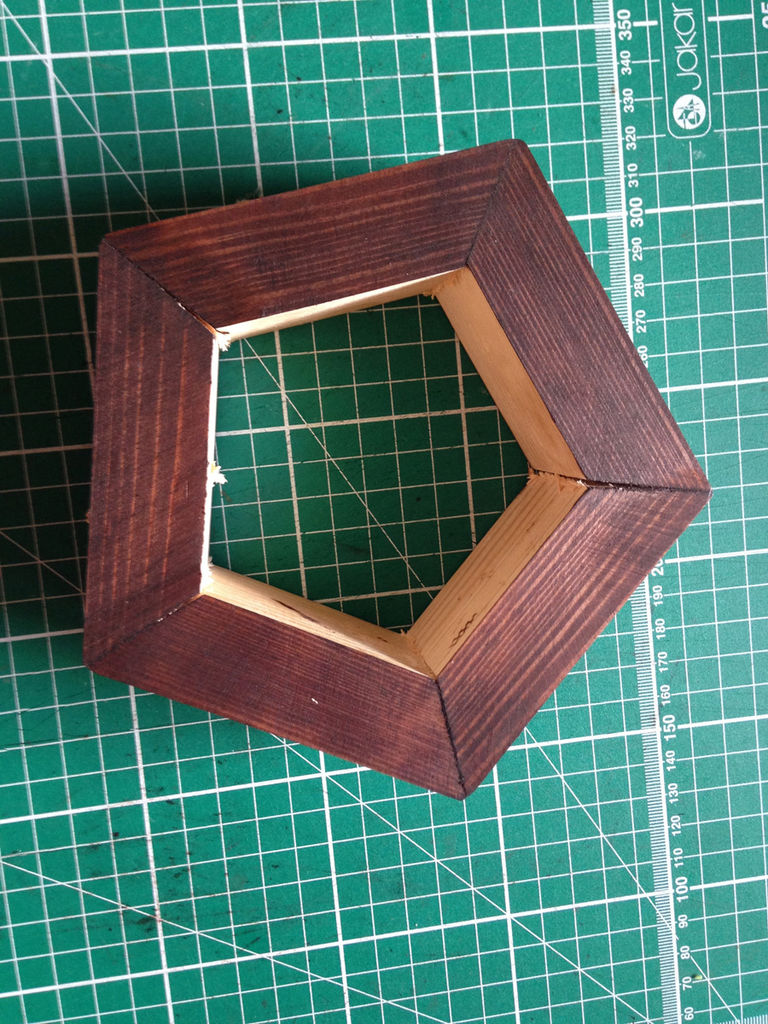
When the 10 templates have been cut (5 large and 5 small) to make a prism shape, I then stain the wood in a rich dark chocolate colour and leave to dry.
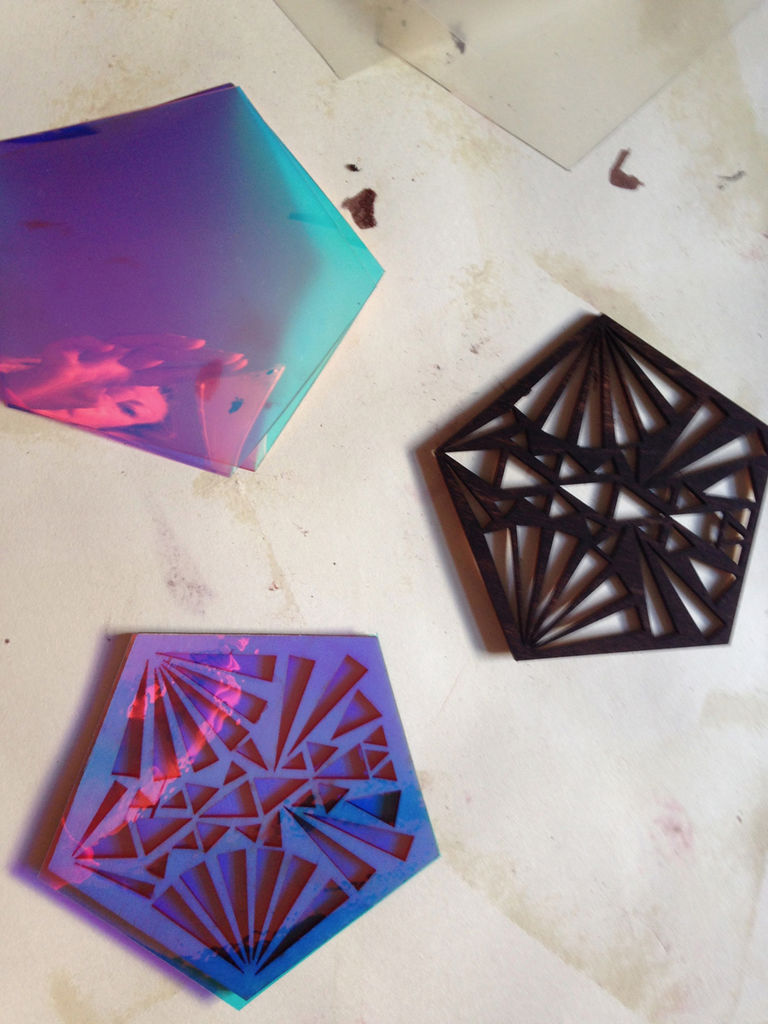
To get the wonderful colours, I use an acrylic iridescent fil.
Adding the acrylic film:
I then cut out the correct size shapes out of iridescent acrylic film by hand, This acrylic film is super colourful, covering the whole rainbow spectrum, purples, pinks, oranges, greens, blues and from metallic and copper colours, depending where you view the material from as this changes in an instance from one angle to the next
This is then stuck to one side of the wooden templates.
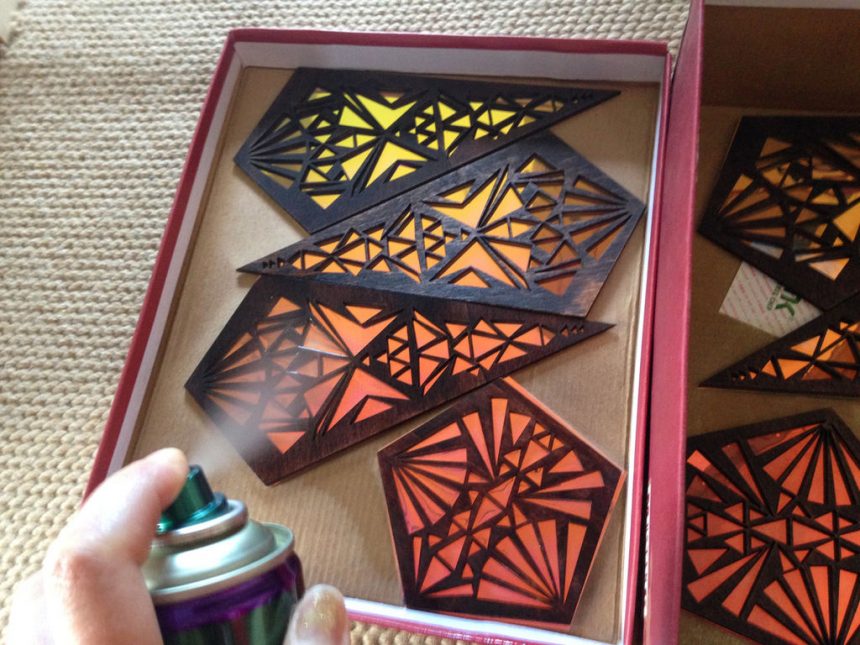
I have to spray the wooden template to set the film as it has an adhesive so this stops any dust attaching while its sticking to the wood.
As seen in the images, you can see the film gives out a real colourful coppers & metallic colours as well as blues/purples, this is the great thing about the material. While this is setting for 24 hours, I get to work with making the wooden base.
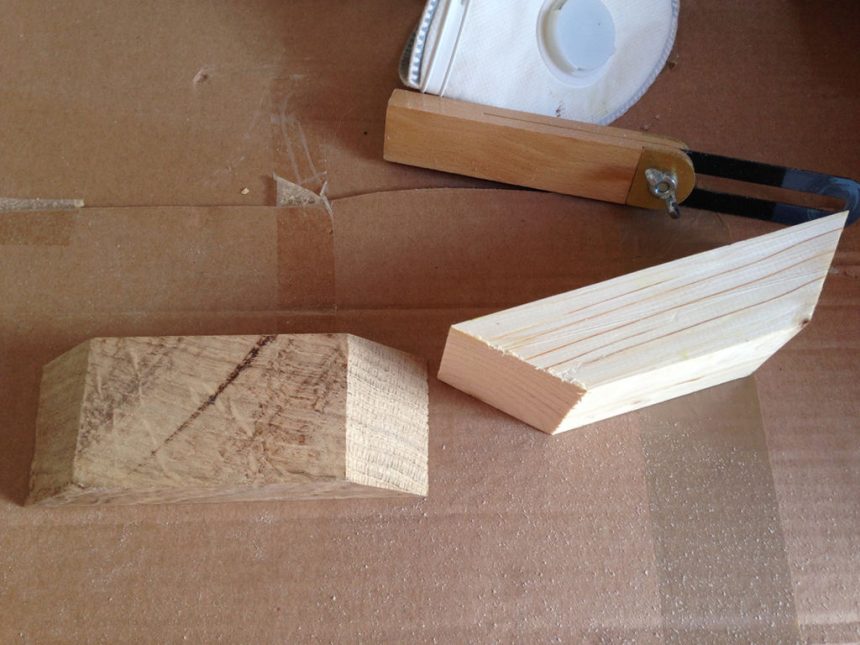
The wood varies from oak, ash, birch, rose, walnut, basically any thing I can get my hands on, from local saw mills, suppliers and wood merchants. Up cycled wood comes into my projects a lot as I like to use wood which people don’t require any more from tables, chairs, doors any thing really. I also find wood in forests.
You have to make sure the wood is air-dried for at least a good 18months other wise the wood splits.
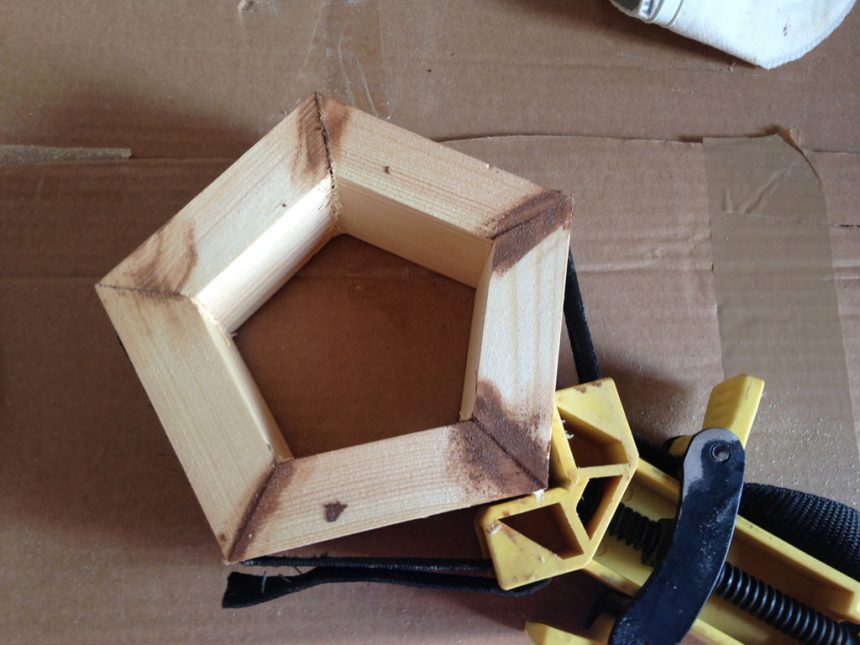
I then cut this to size on my a table saw. I then clamp 5 sides together and leave to set for 24 hours. When set, I then sand this down with 3 different grits to get a clean finish, leaving the wood smooth and soft.
I then stain the wood in the rich dark chocolate colour to match the wooden templates.
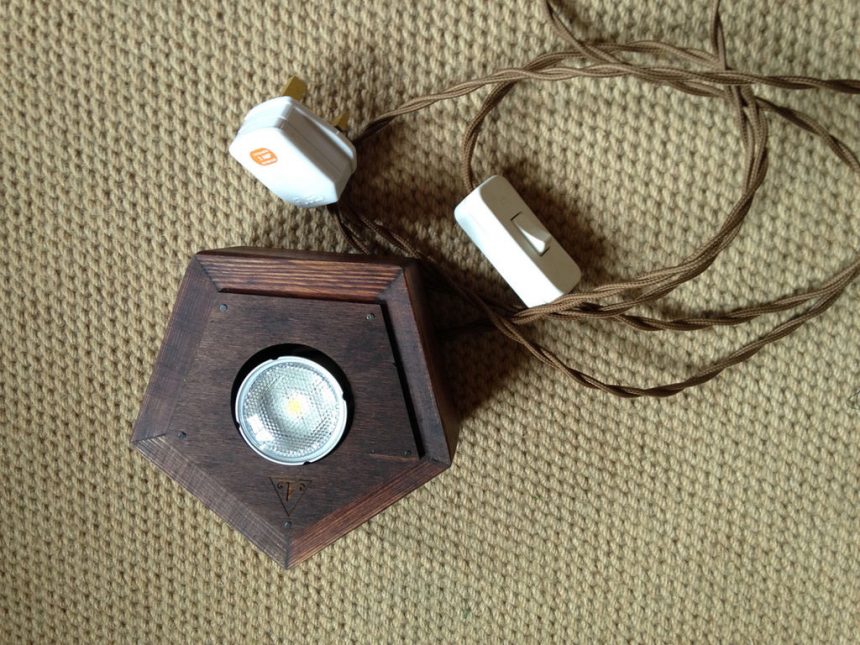
Next stage is wiring up the lamps. I use a vintage spiral cord and only use LED bulbs for my lamp.
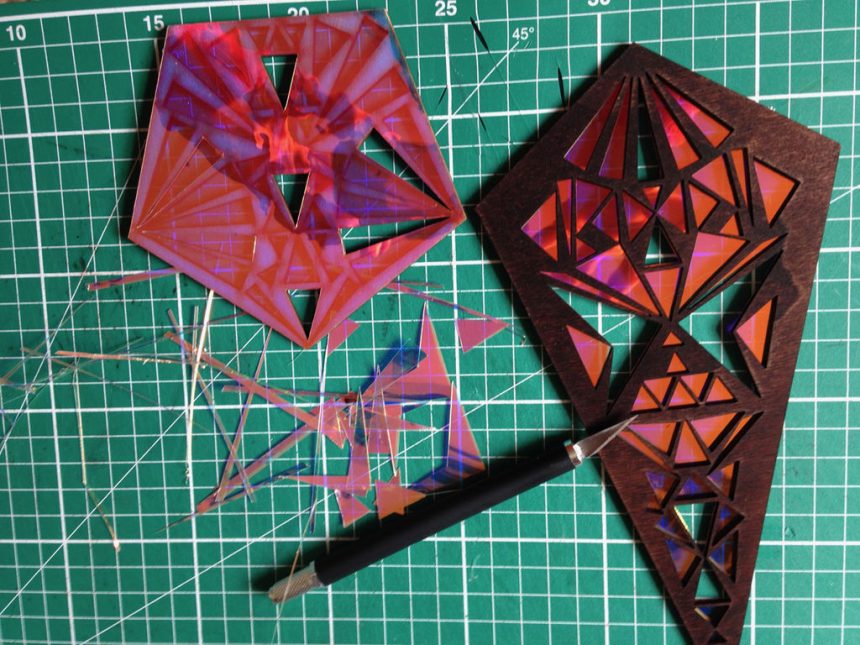

Now the acrylic film is set, I use my craft knife to cut out shapes with in the template. This takes time as I have to be vary careful to not cut where is not need as this will show through when light is projecting. Cutting the shapes out lets the natural light beam through.
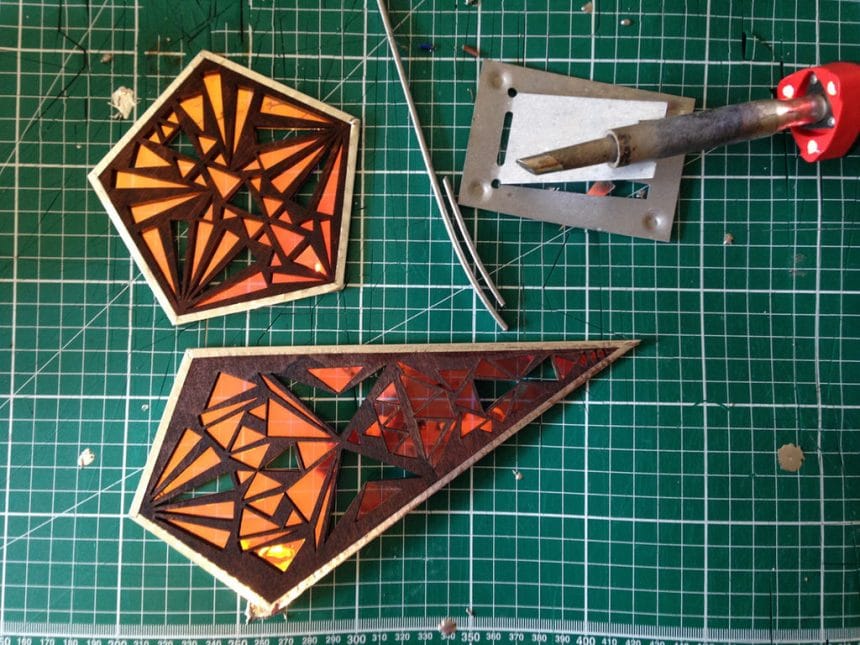
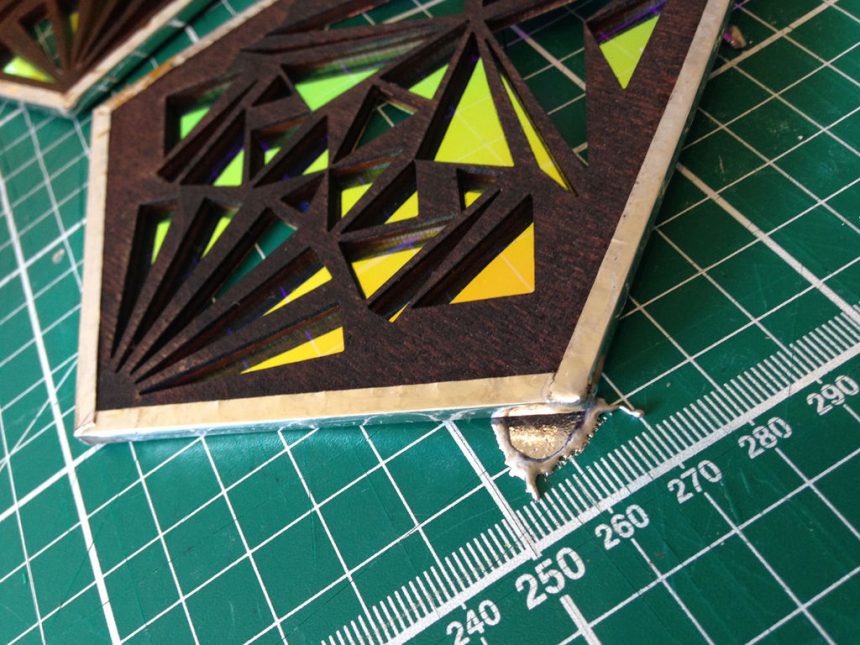
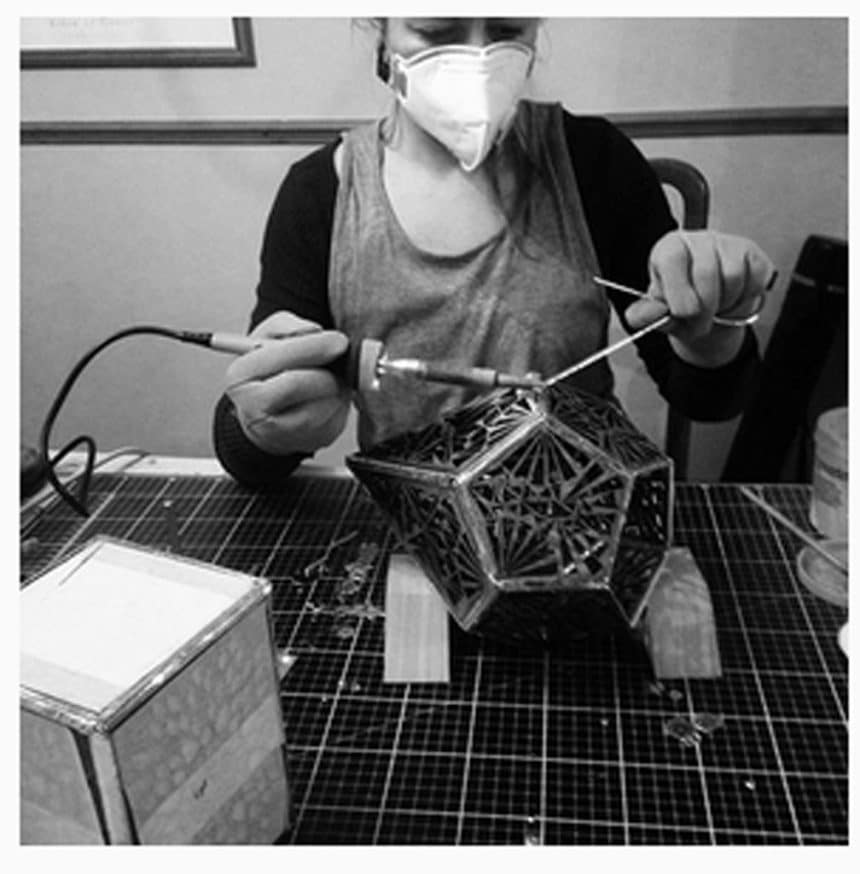
I then copper foil each template and the solder each template individually around both side with soldering iron. I found this to be the best way in constructing the lamp.
To assemble my lamp:
This part is tricky, as I need two pairs of hands to do this so I ask fellow artists and my family to help me with this part. It’s very fiddly and getting the angles correct is challenging but well worth the finished out come. I do the soldering while I have an extra pair of hands to hold the templates to gather so I can pin them together with the solder. When the structure is complete, I then can go round the whole lamp and tidy up and fill all the gaps in with solder to make it neat and tidy with clean edges
The lamp sits at a height of 37cm and width 23 x 23 cm
I hope you have enjoyed my processes. If you have questions, then do ask.
courtesy: Amberlightsuk
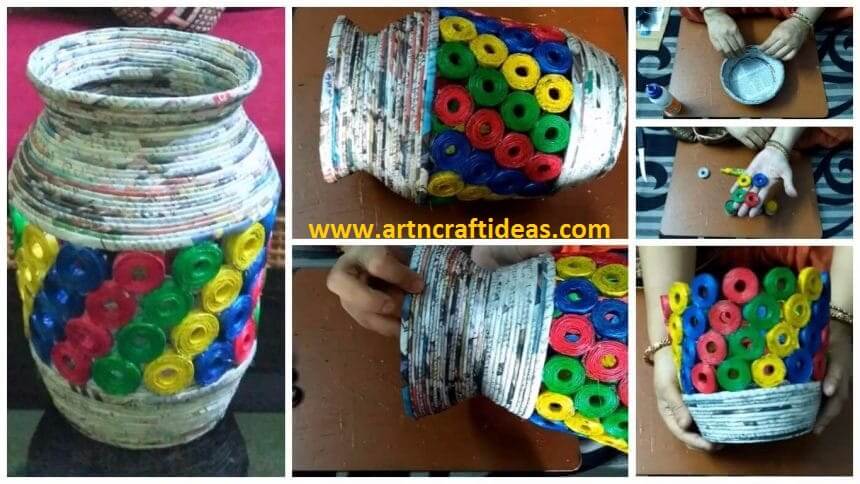
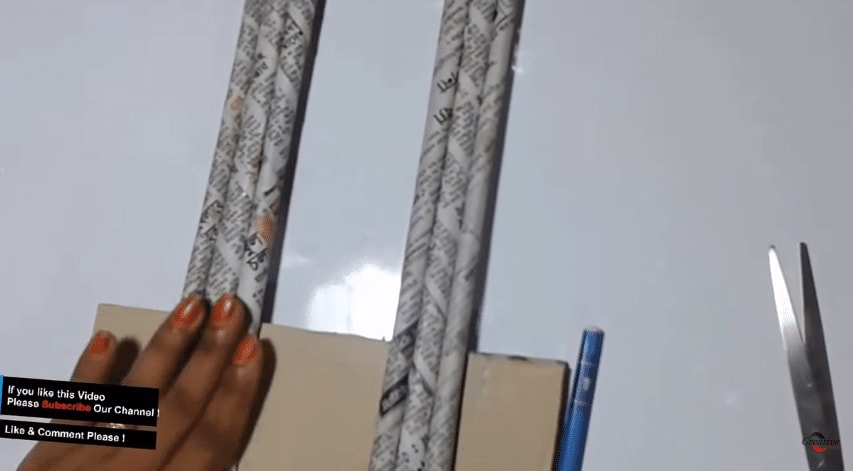
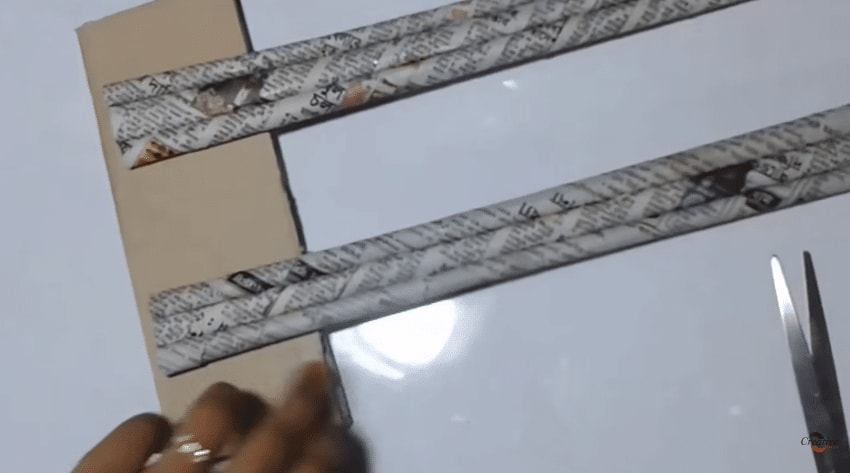
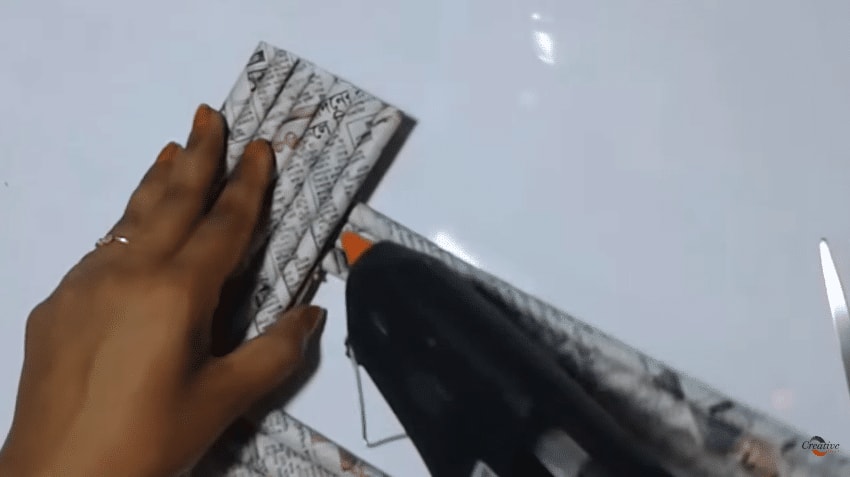
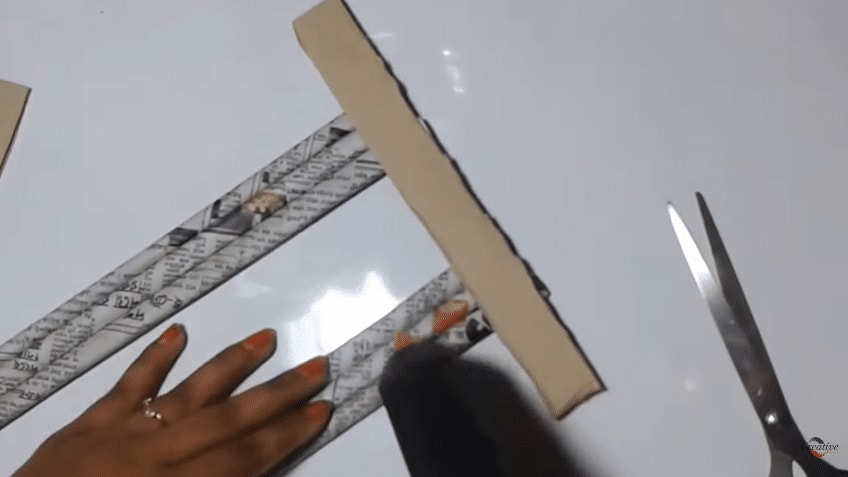
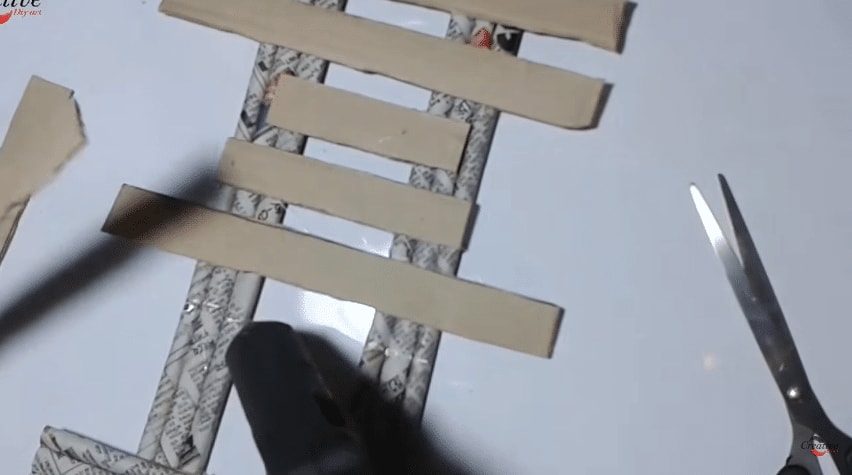
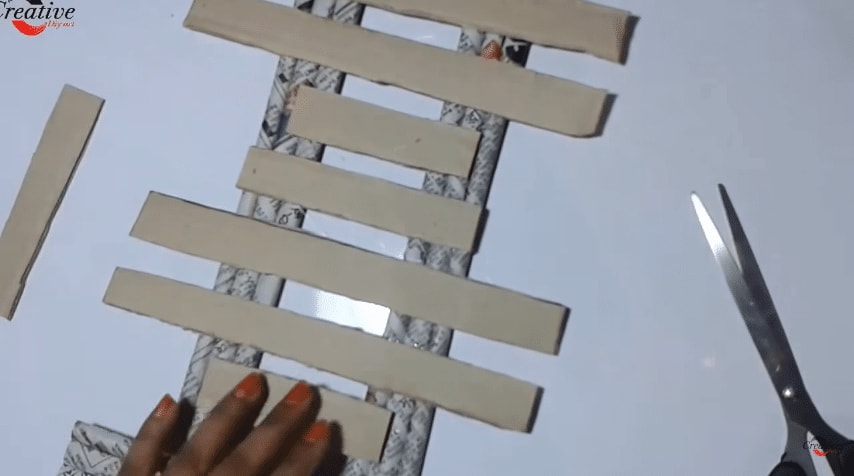
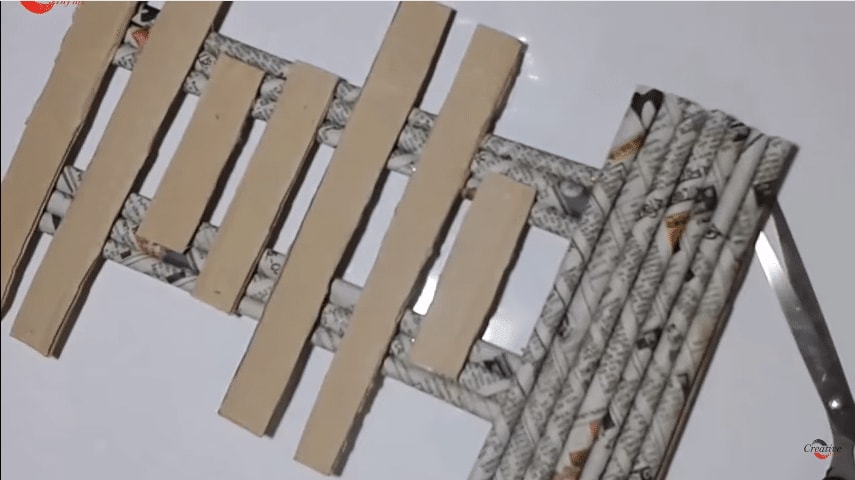
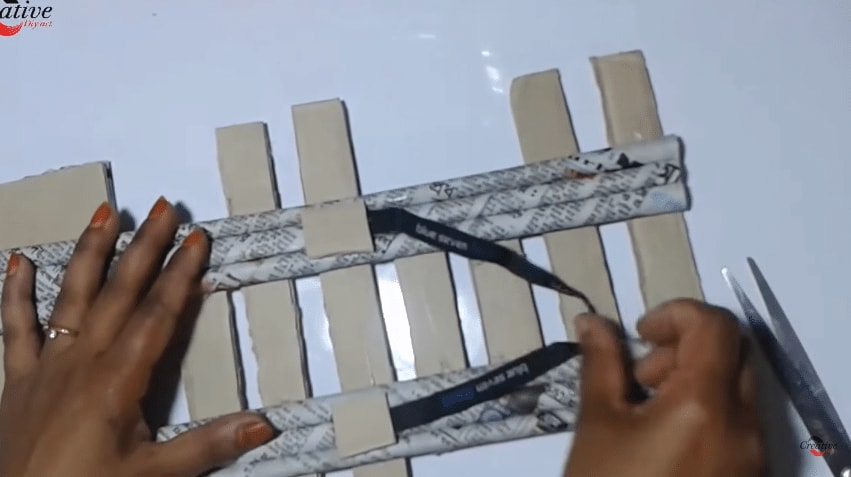
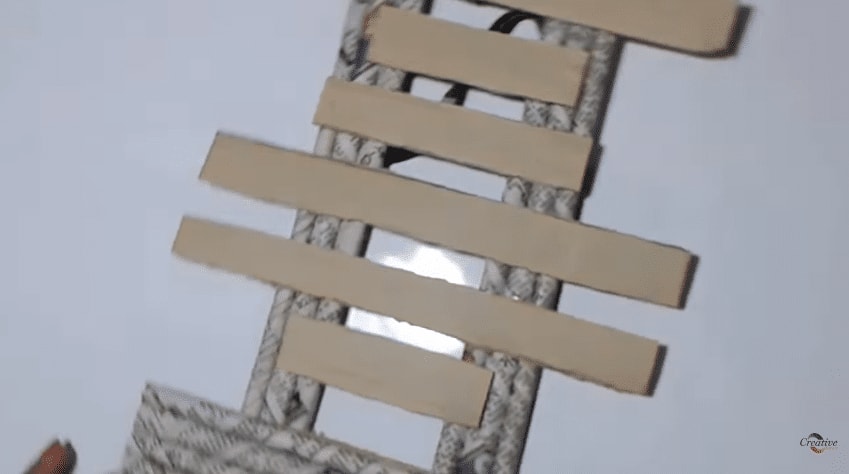
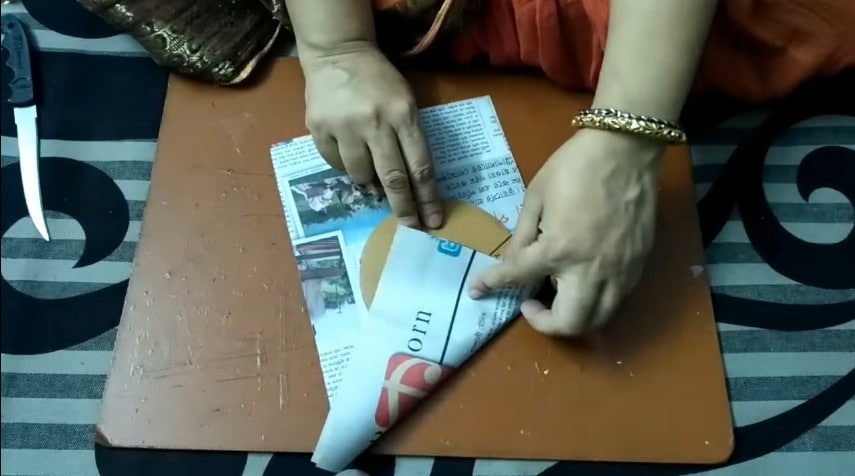
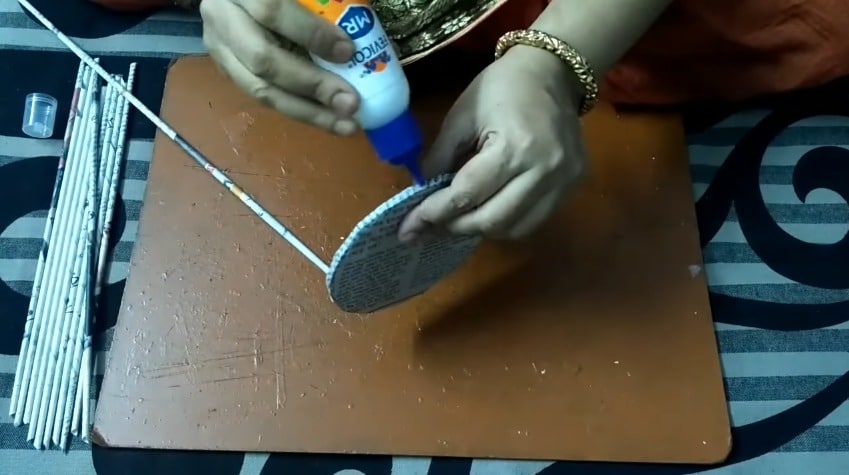
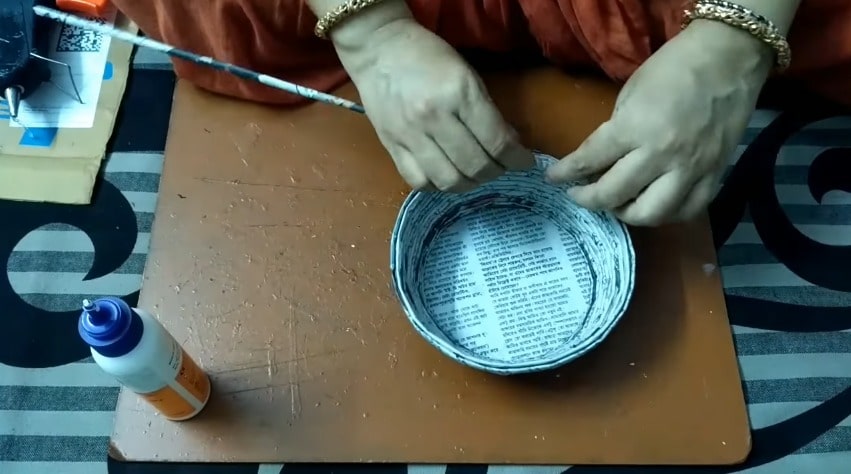
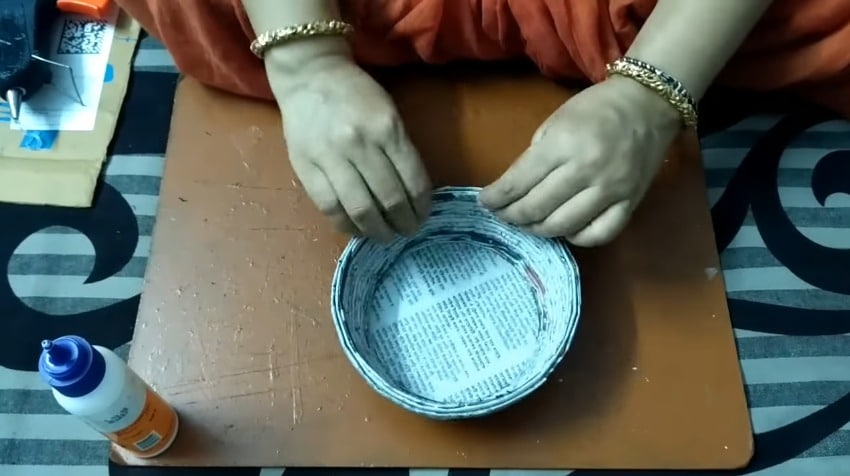
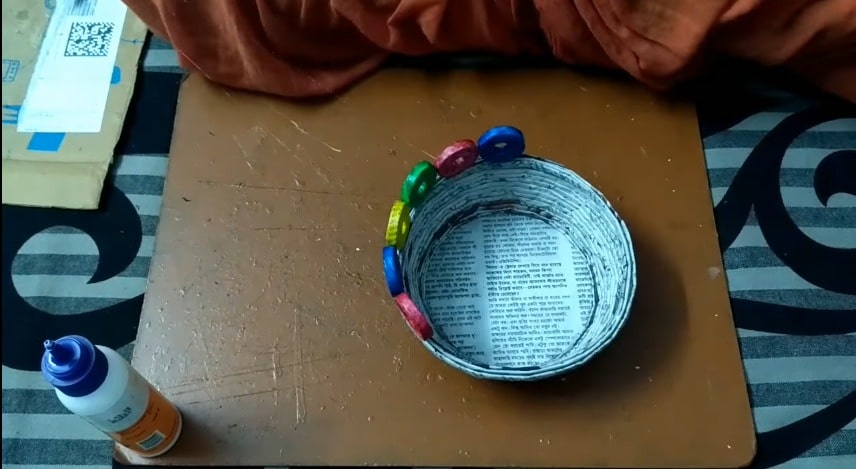
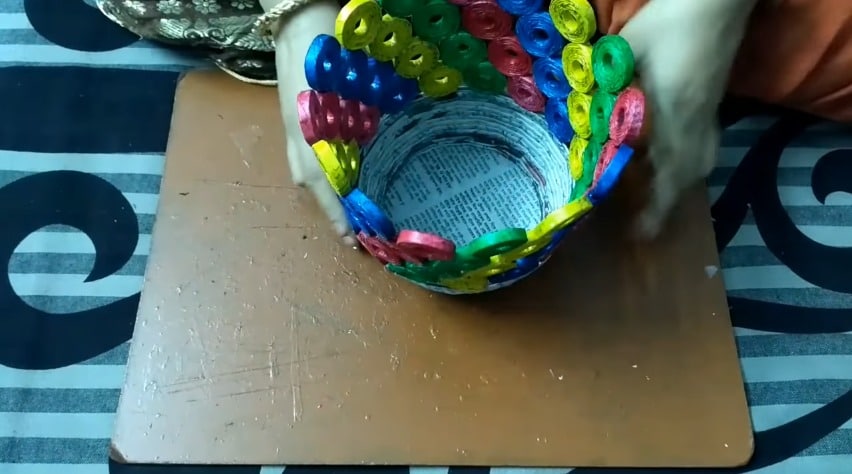
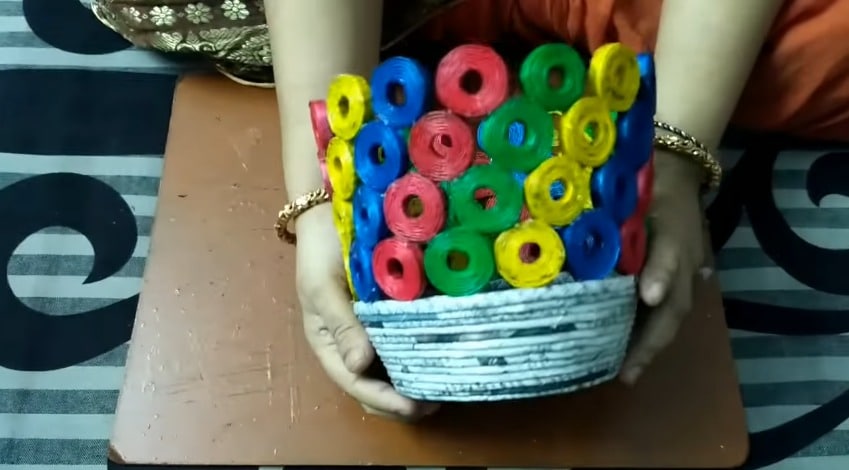
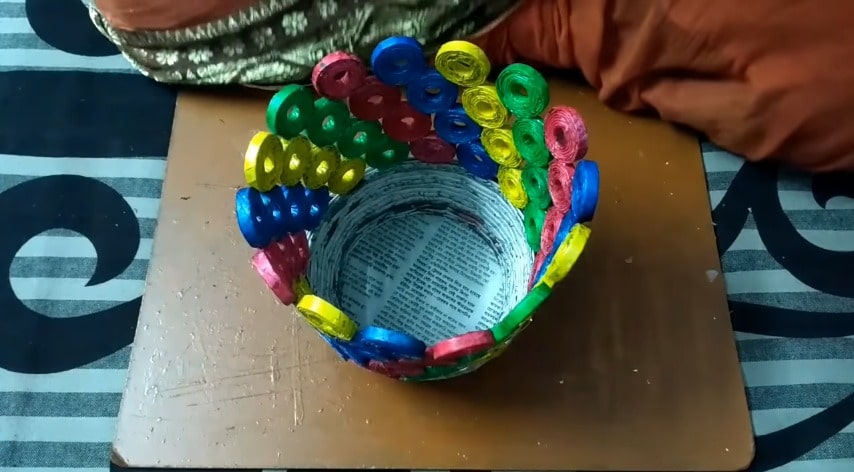
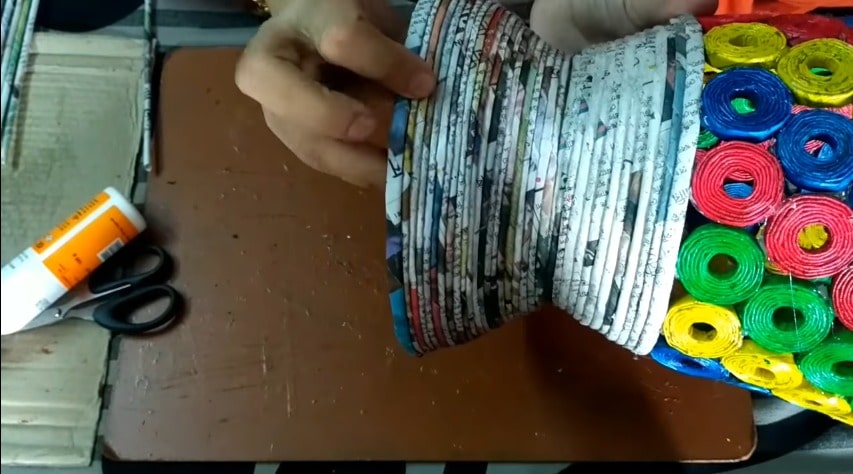
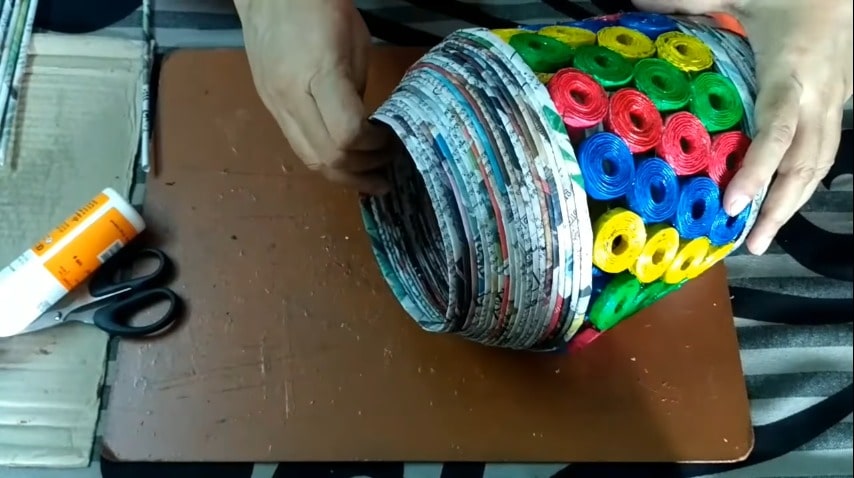
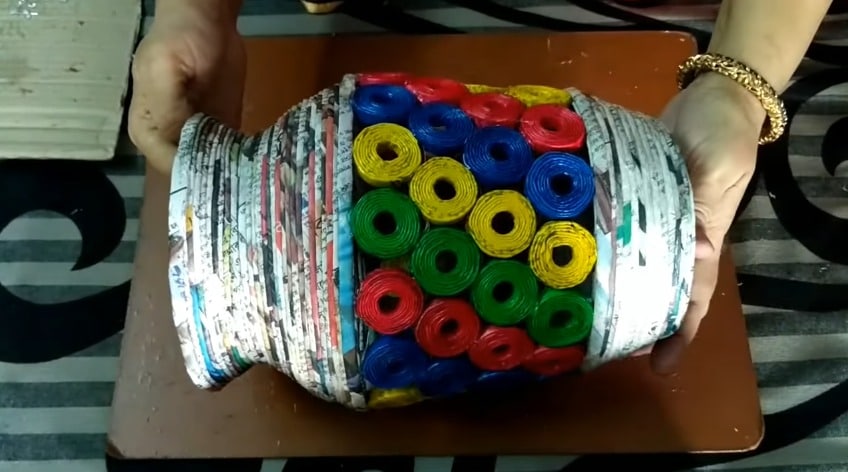
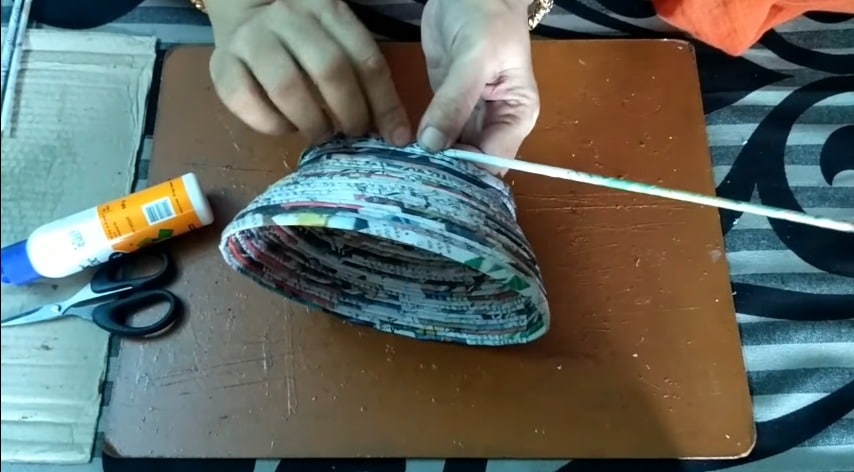
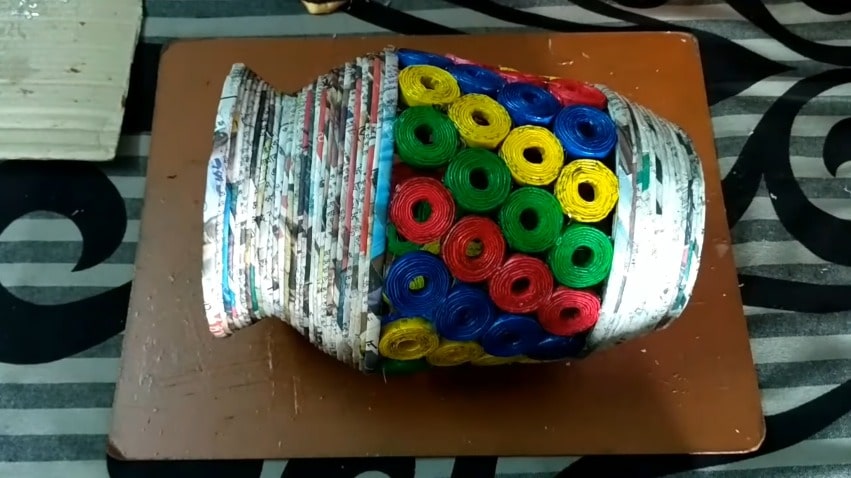
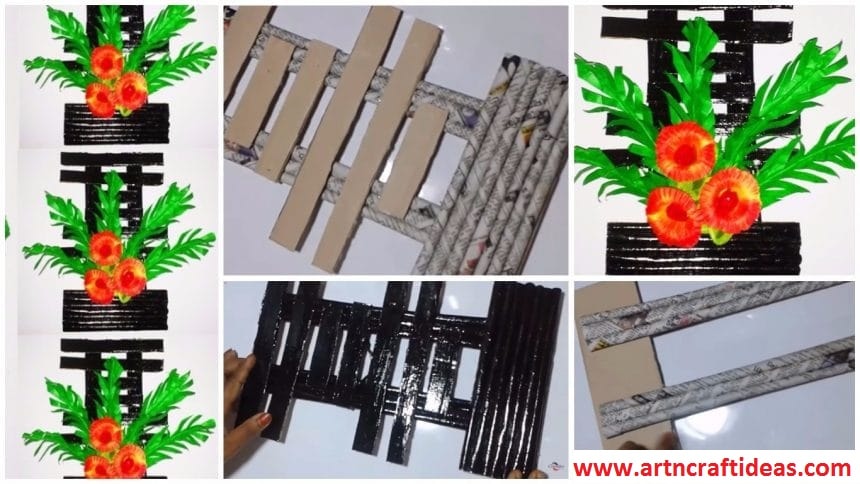
Beautiful Newspaper tubes jar or vase: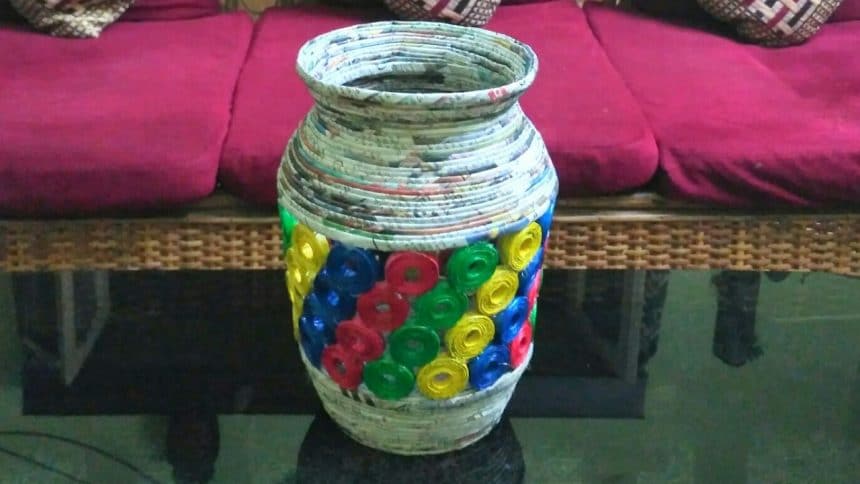
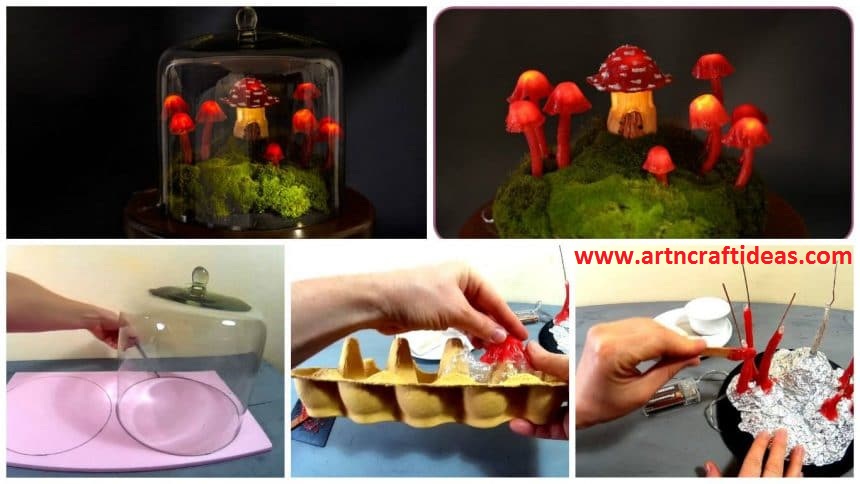
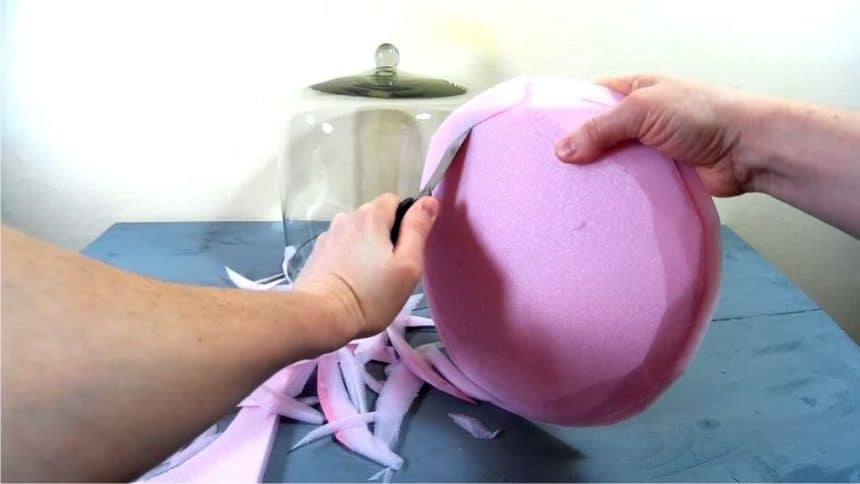
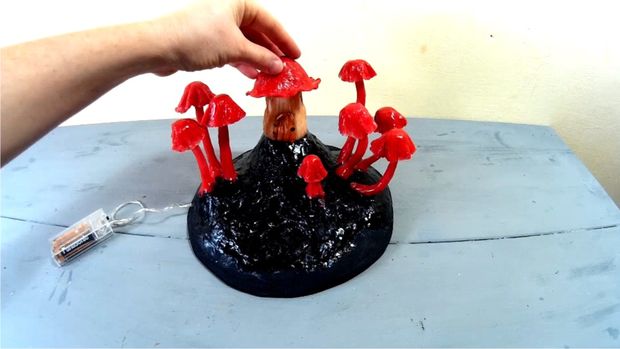
Hi, in this tutorial I made a fairy garden terrarium with mushroom lights and a fairy mushroom house. I used some extruded polystyrene (xps styrofoam), battery operated led lights, transparent sanitary silicone sealant, tin foil, copper wire, hot glue, a little bit of polymer clay, moss and acrylic paint. I also used a glass cake cover.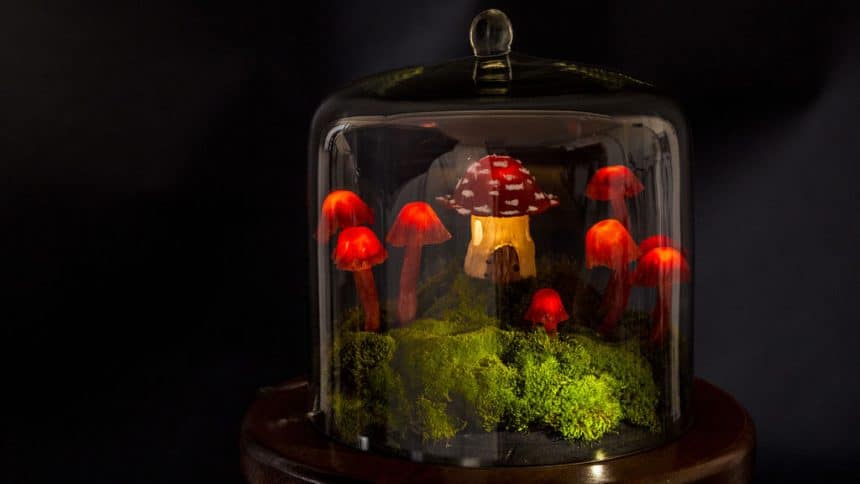
 Step 1: Preparing the Board
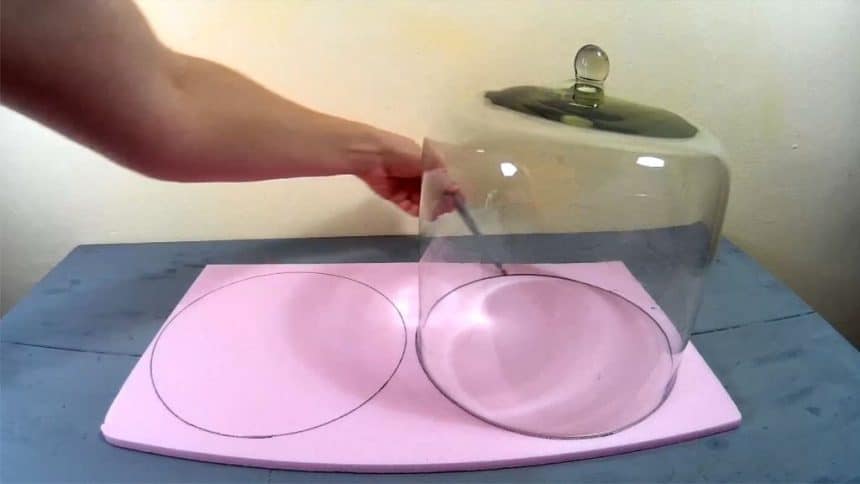

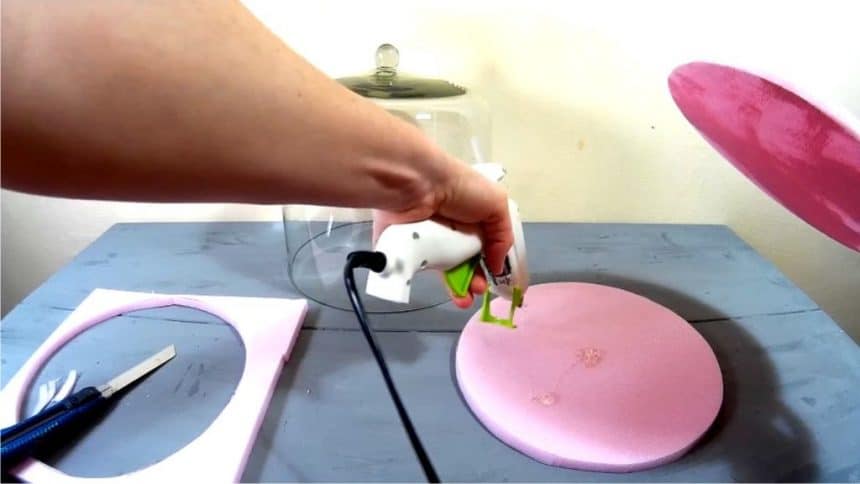
 I first cut the styrofoam board to fit the glass cake cover. I adjusted the corners with a cutter, then I painted it black.
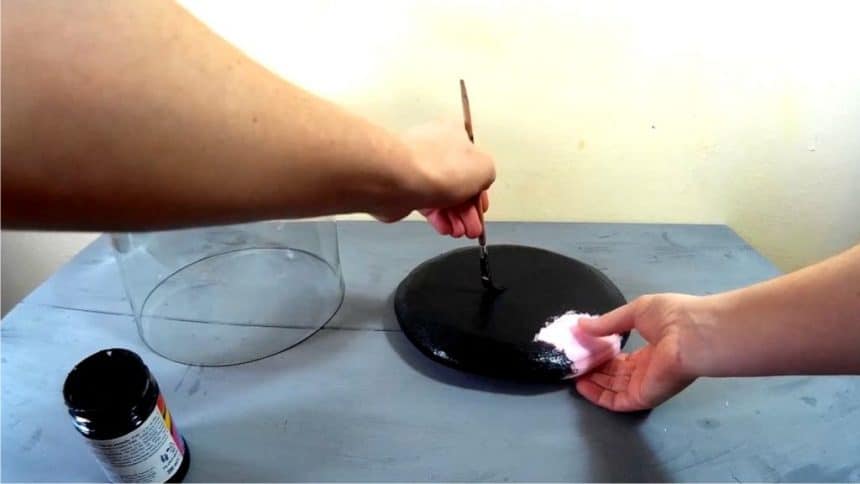 Step 2: Adding the Lights
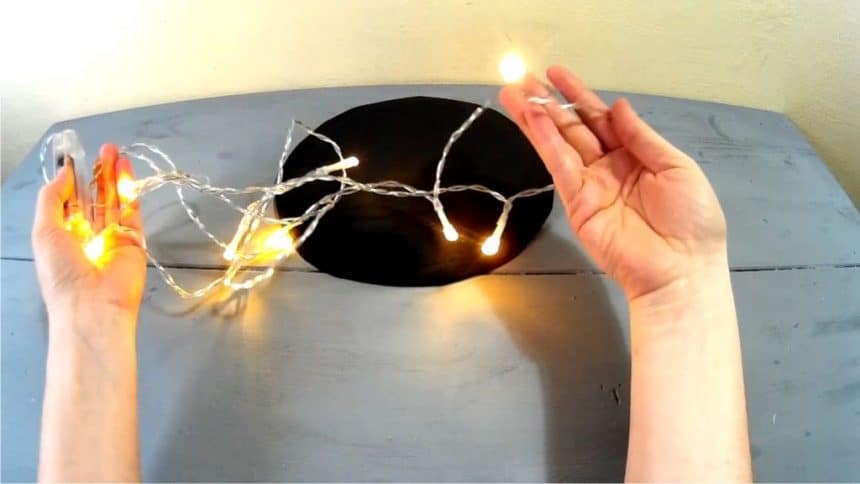
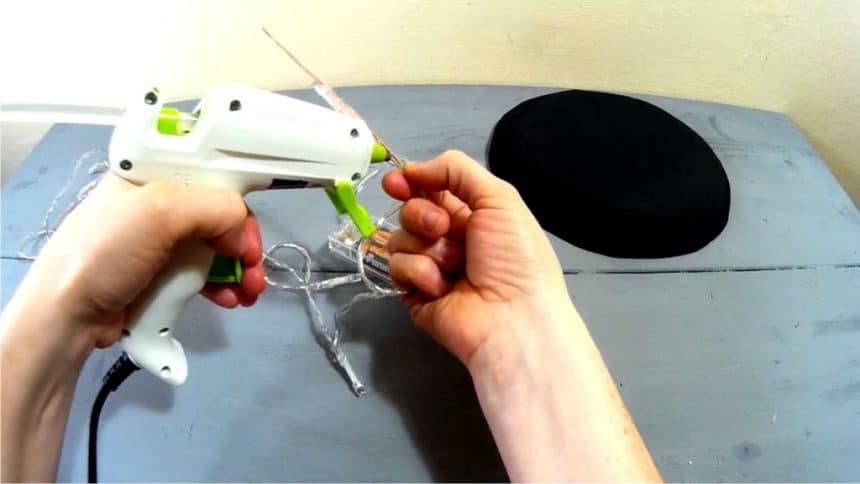
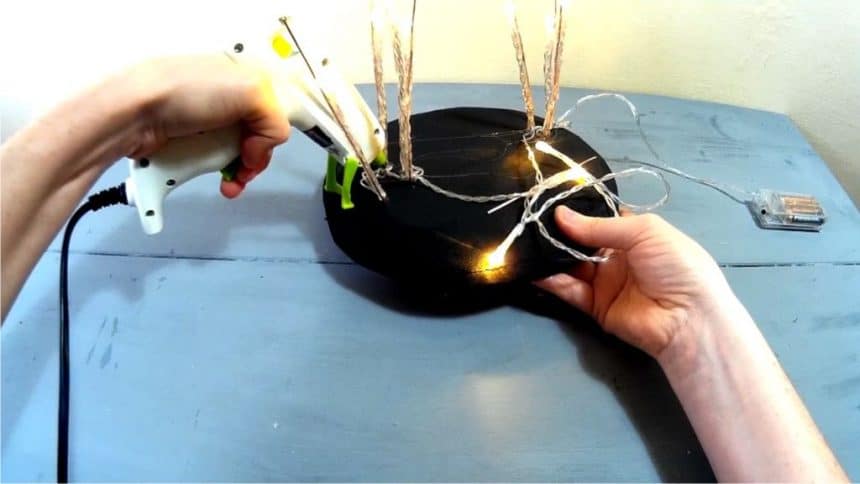
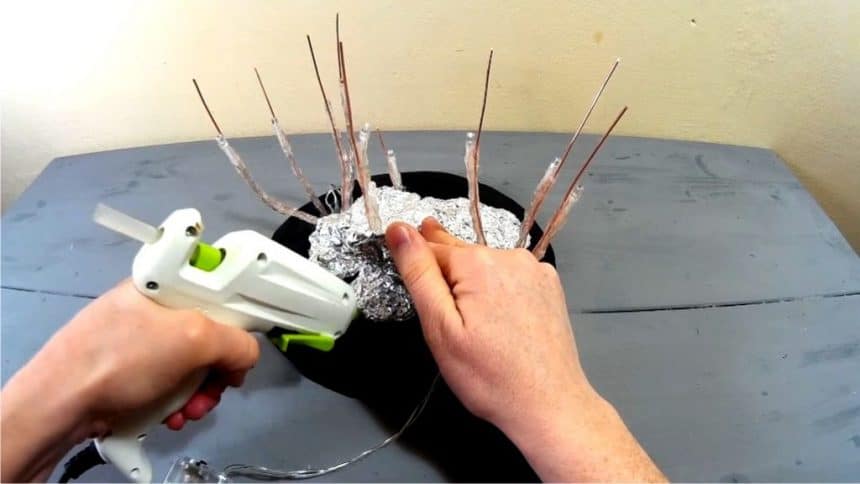
I then glued the lights to some pieces of copper wire. I made the wires in different lengths and also left more wire on the upper side (that will be helpful when making the mushroom caps). I glued the copper wires to the foam board with hot glue. I added some volume to the board using tin foil and hot glue.
Step 3: Making the Mushrooms
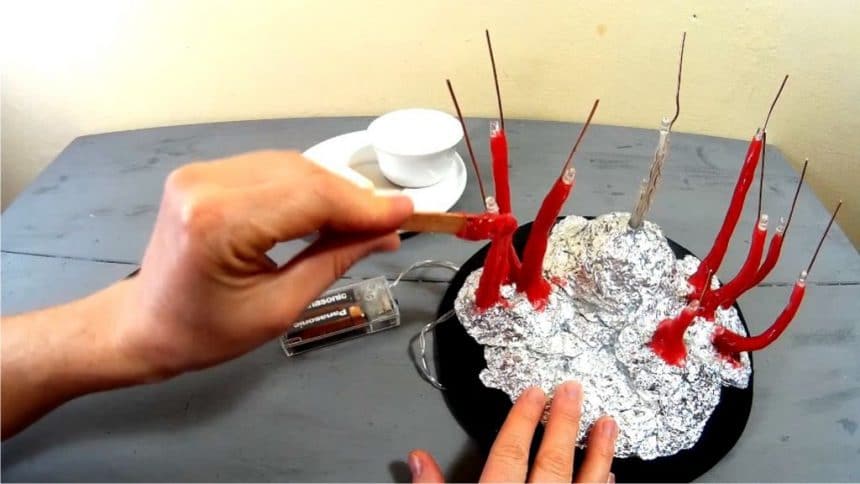
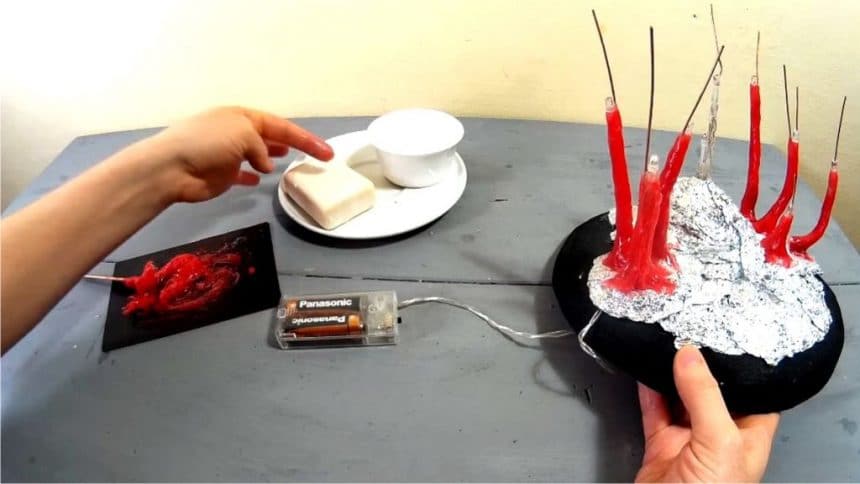
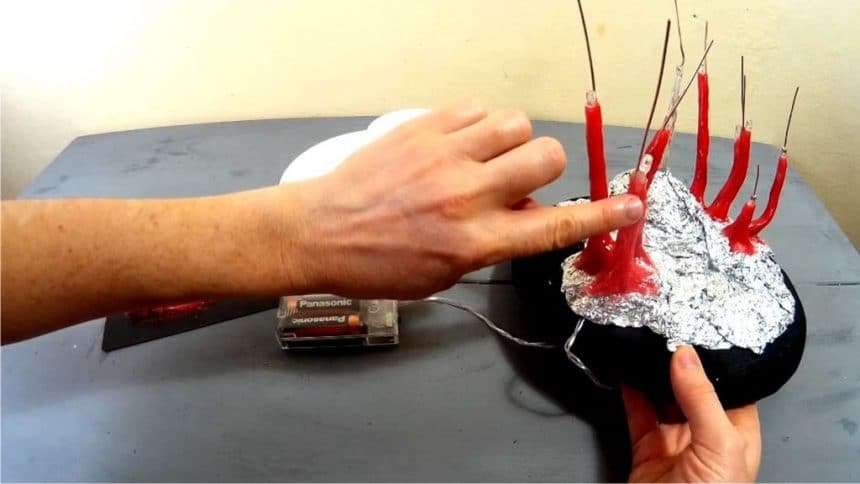
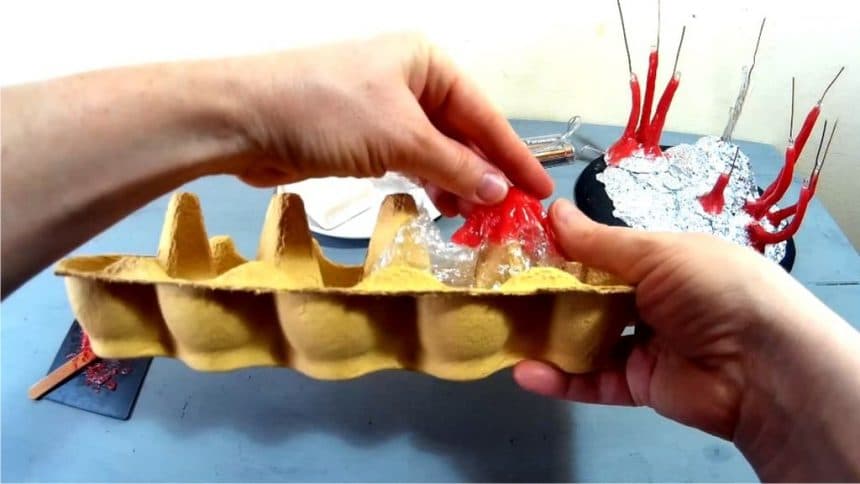

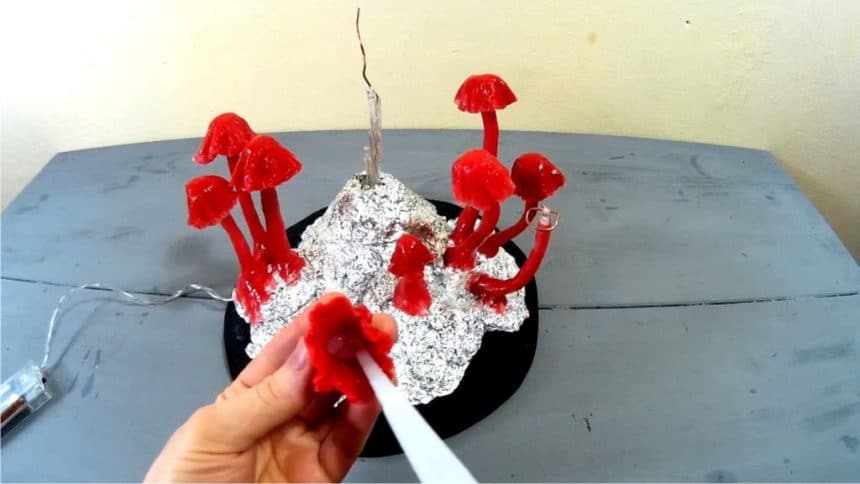
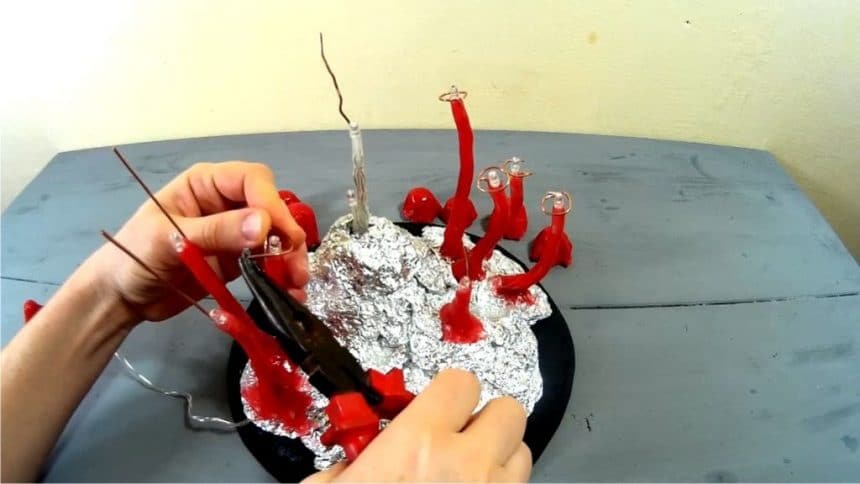
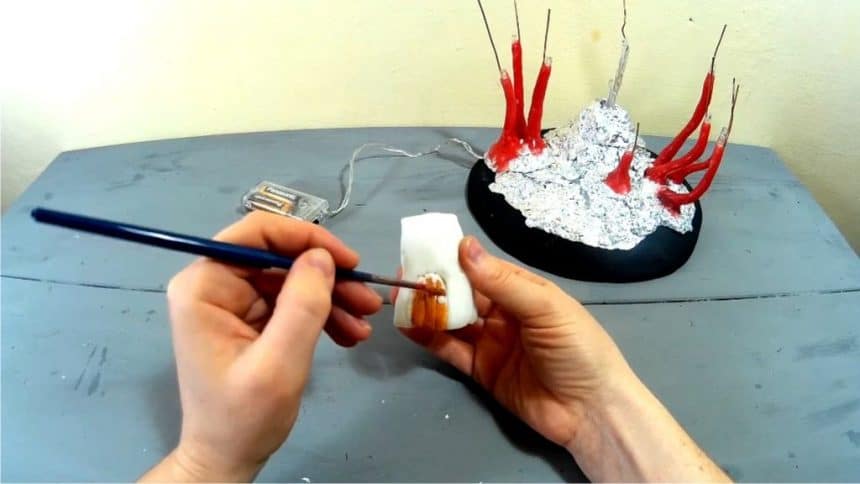
I mixed some red acrylic paint with silicone and made a paste. I applied the paste on the wires and leveled it using soap and water. For making the mushroom caps I used the silicone paste and wrapping foil. I applied some paste on the plastic foil and covered it. Then I started shaping it into a mushroom cap. For making the round shapes I used the cones inside of an eggs carton. I also covered the tinfoil base using the same silicone paste in black. Using some tin foil I made a cone and covered it with polymer clay. I sculpted a little house, baked it and painted it with acrylic paint.
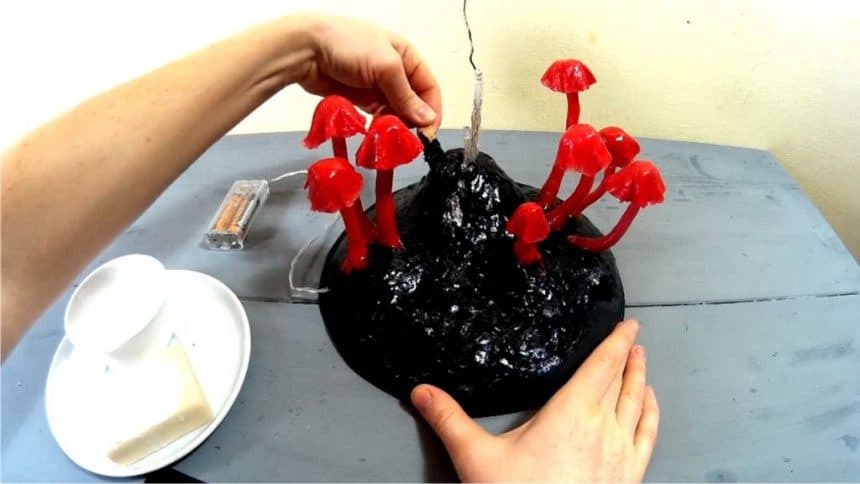
Step 4: Moss and Details

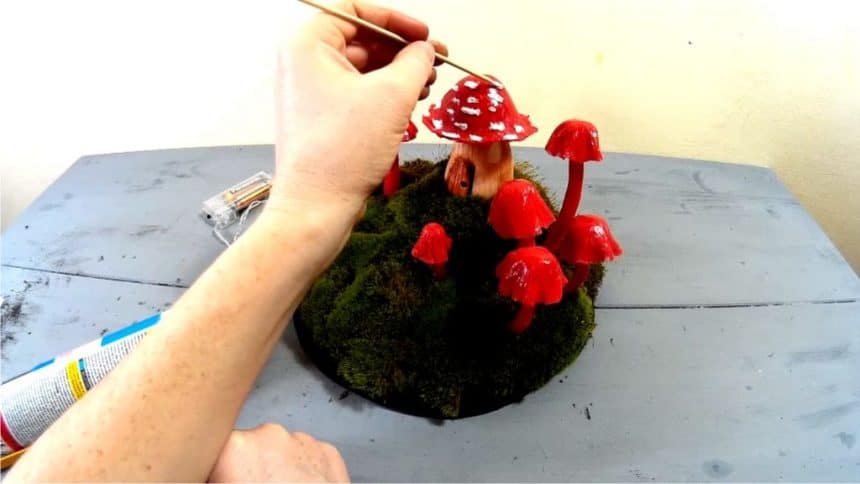

I placed the moss over the board, carefully mixing the patches and used toothpicks to fix it in place. I also made some cute white dots on the house using white silicone.
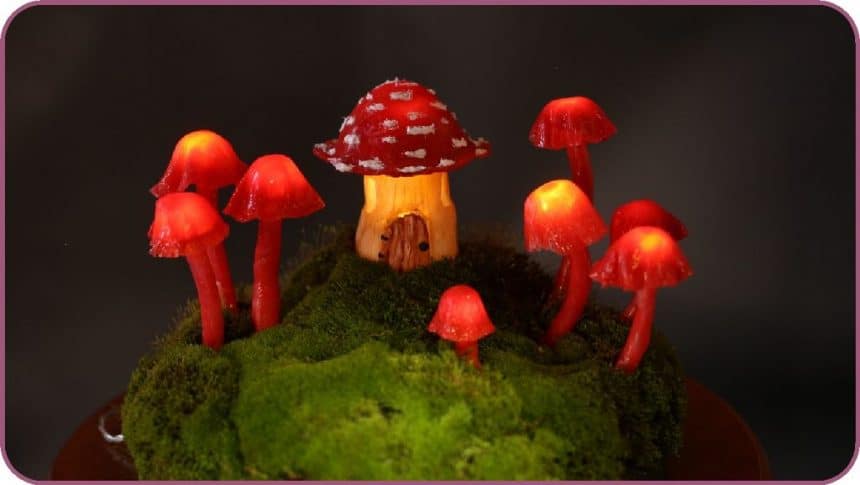
I love the result!
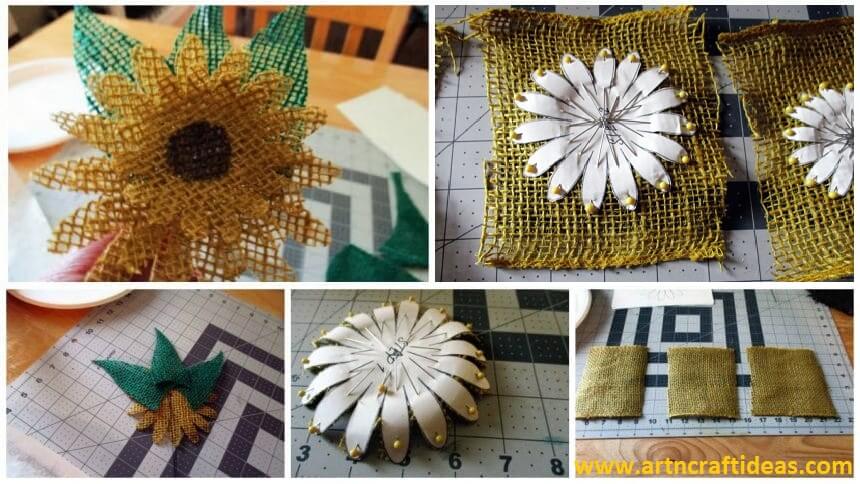
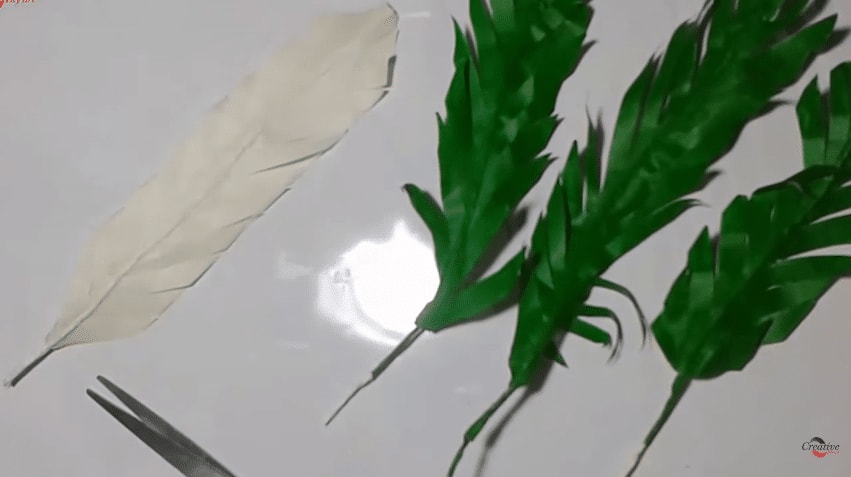
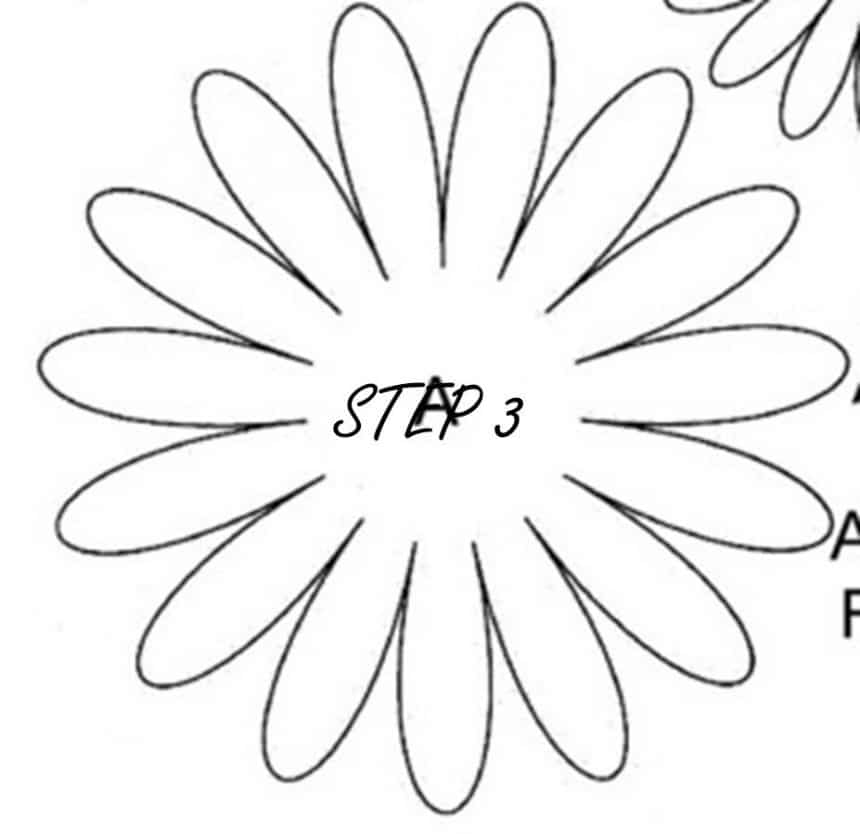
Beautiful Sunflower pick for fall wreaths. You can make any color you like. I hope you have fun making this flower. Step 1: Required Material
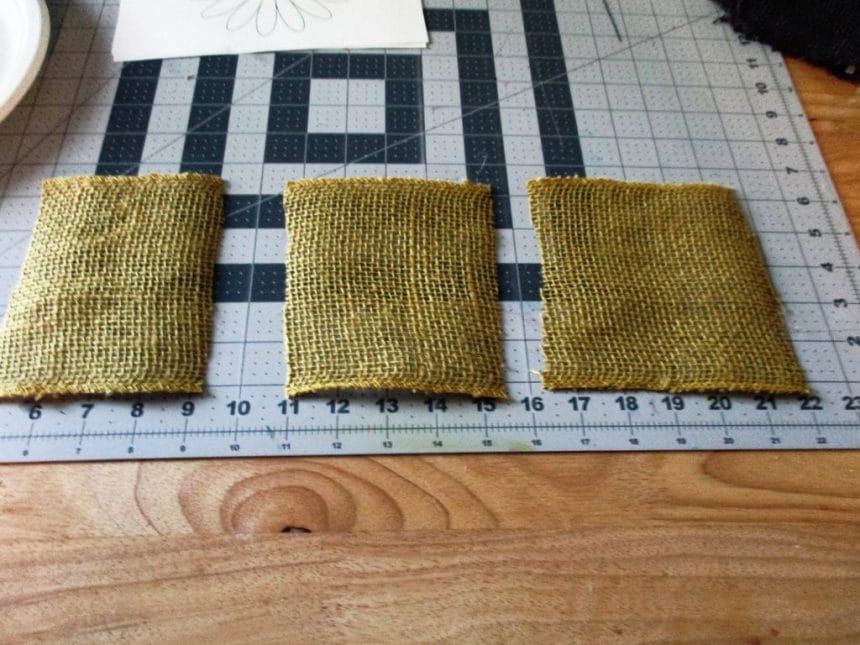
15″ of 5 1/2 wide burlap – color of your flower
5″ of 5 1/2 wide burlap – green for your leaves
Scrap piece of brown burlap for the center
Cutting mat
Decoupage
wide sponge brush
1 fine gauge wire
Scissors
Flower template mine came from http://www.freekidscrafts.com
I could not find a leaf template so I have included a picture of what I free hand cut
2 paper plates
one plastic rectangular bowl
Straight pins with the heads on them
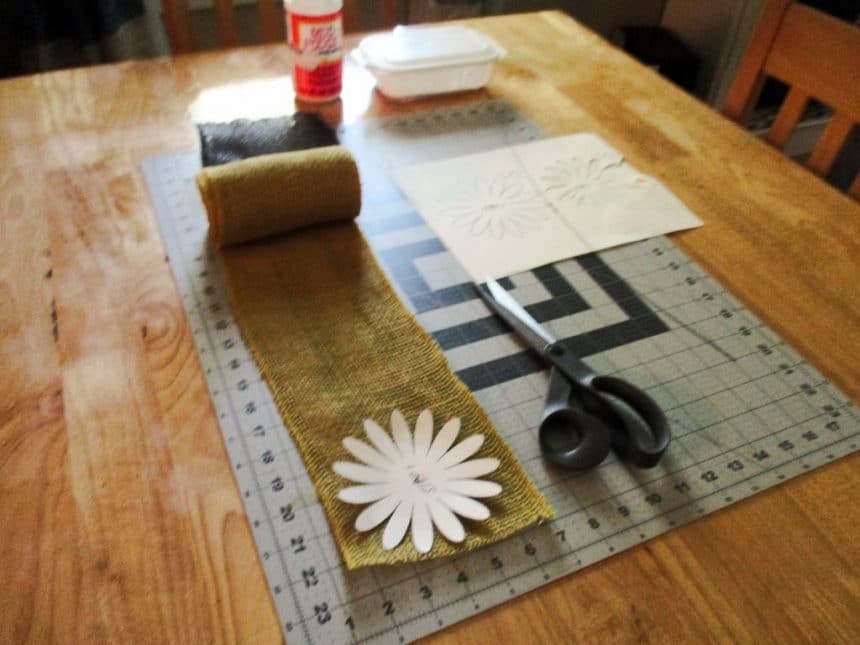
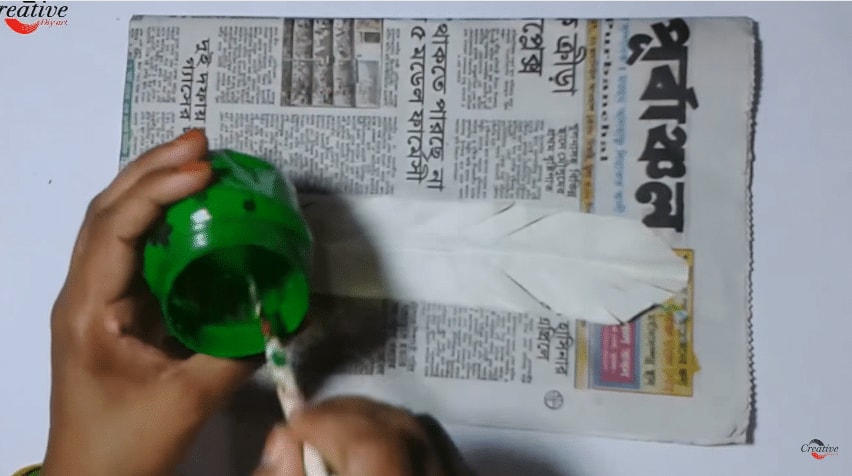
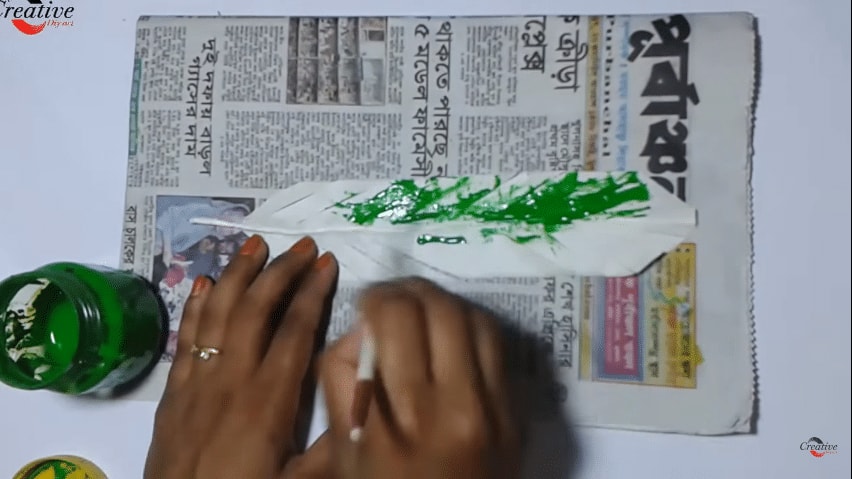
 Step 2: Decoupage
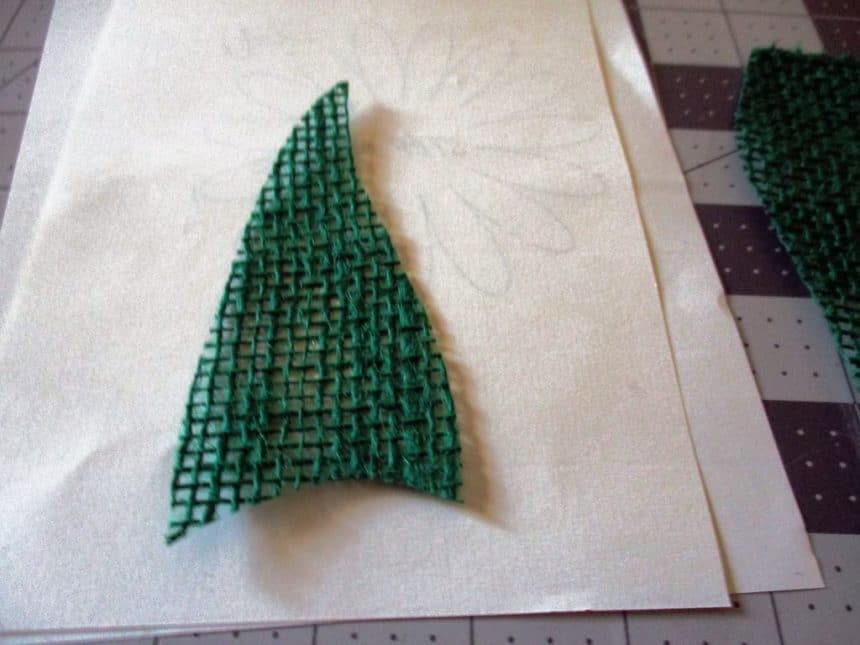
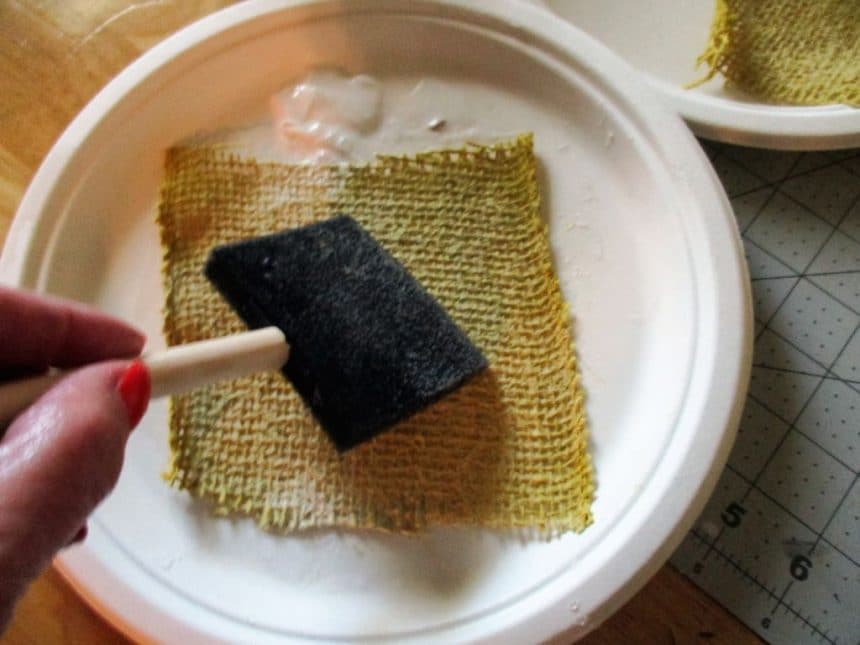
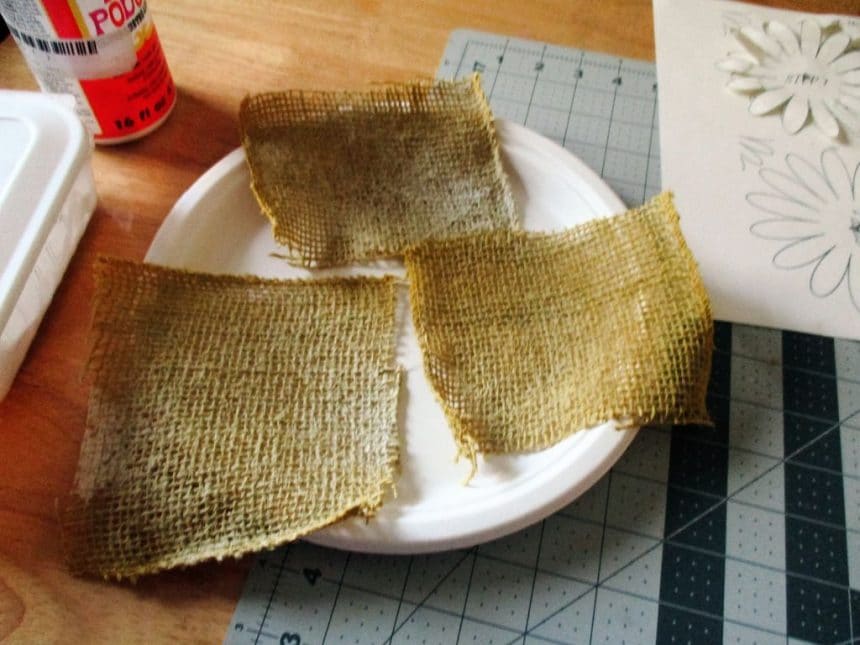
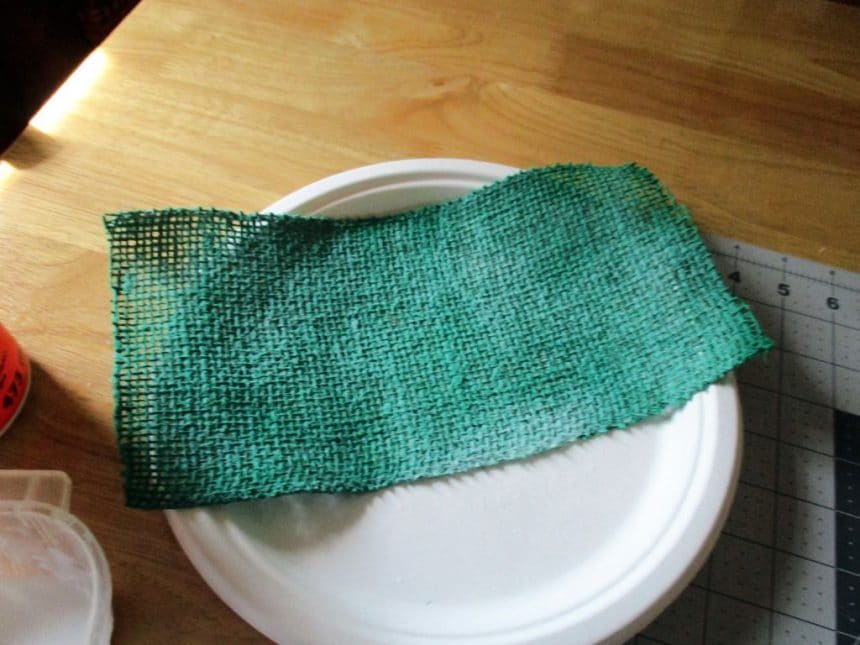
Pour about a half of a cup of your decoupage into the plastic bowl.
then pour enough water into the decoupage to make it thin. You will know it is thin enough when it drips off your brush.
Use your first paper plate and lay your burlap piece down and start brushing until you have covered the whole piece.
Place the piece on the clean paper plate and repeat. I did take another plate for the 6″ of the green burlap.
I let my dry overnight.
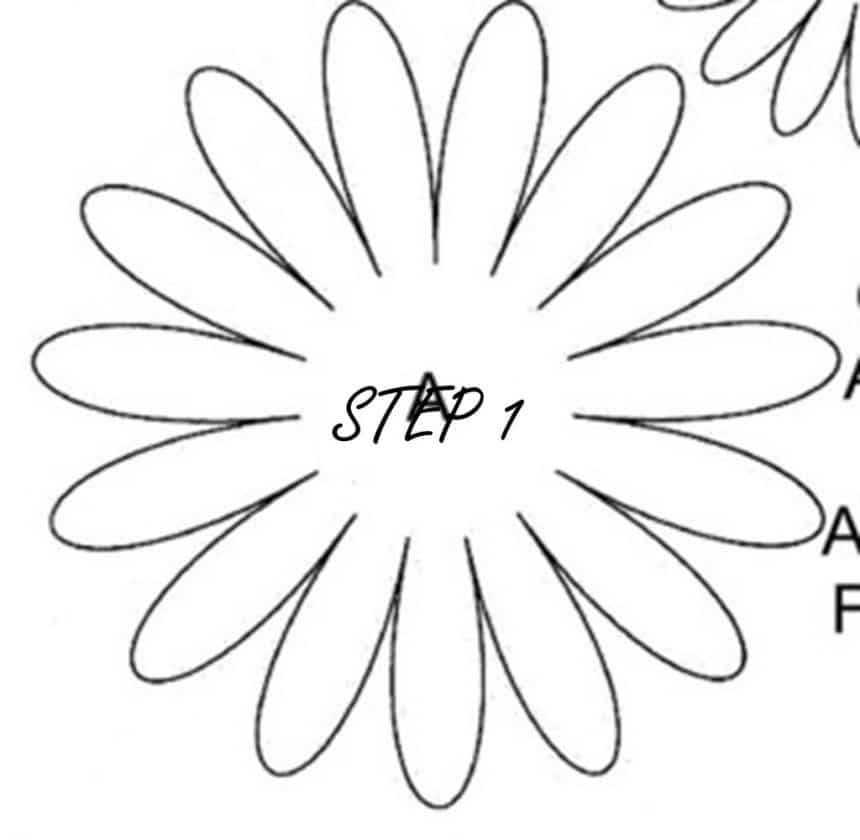
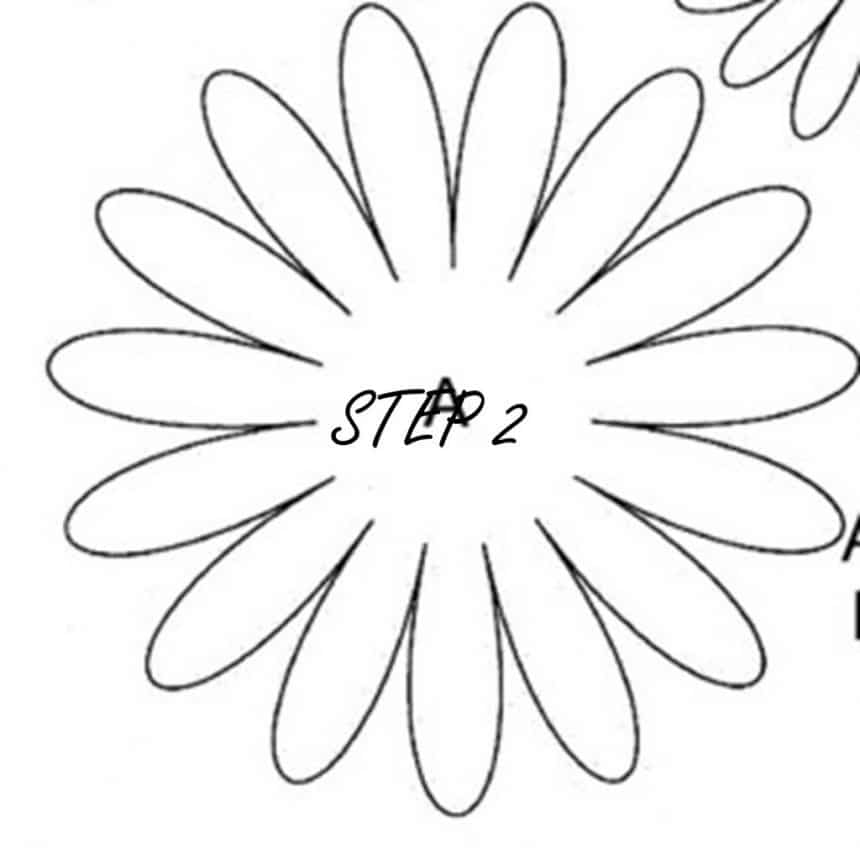
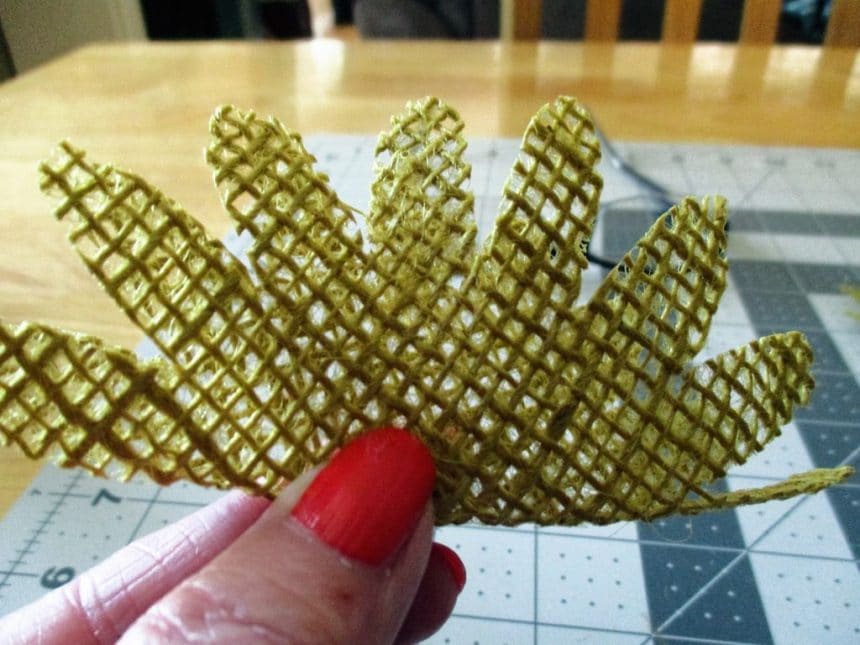
Step 3: Pin and Cut Flowers Out
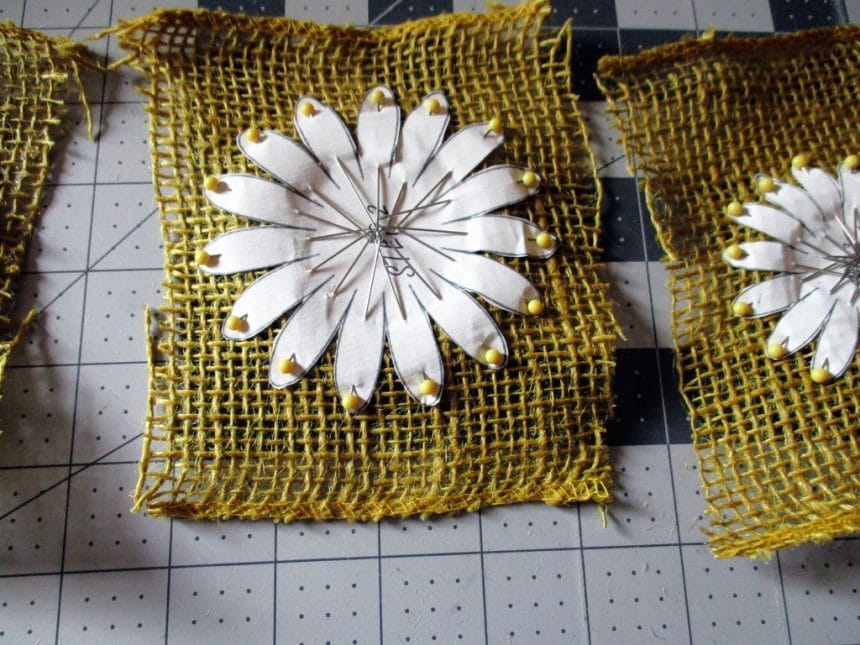
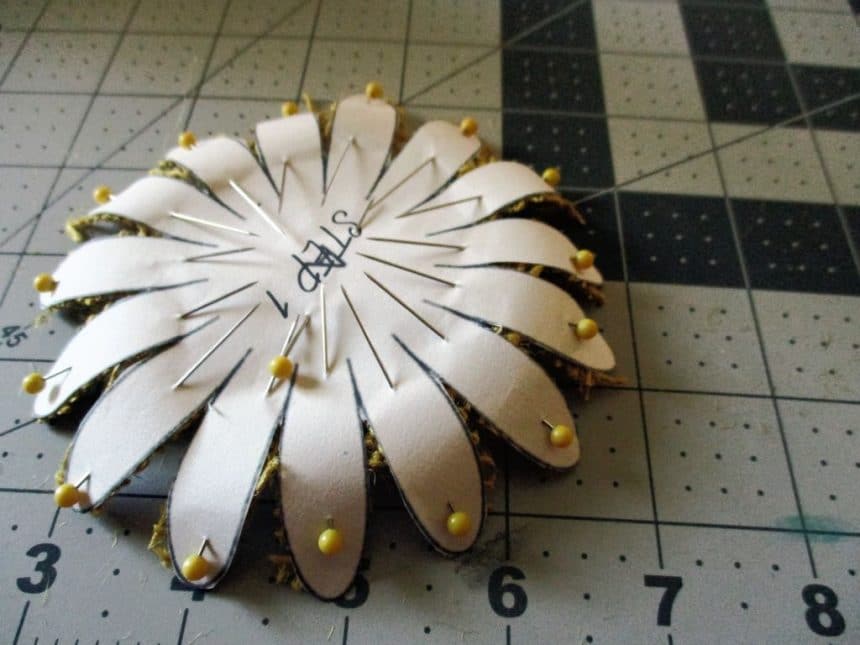

You will need to cut your flower templates out. I downloaded the flowers and then resized them to 5″, 4″, and 3″.
Take your straight pins, I use the ones with the heads on them, and pin from the top of the peddles to the center.
Now a trick I use is to start with a paddle and cut around the top then do the same thing with each peddle until you have gone all the way around. I then turn over the paddle and cut the opposite side of each paddle. Look at the picture of the front and back of the peddles and you will see this gives you a clean cut.
Now take your pins out and you will be ready to assemble.
Step 4: Putting Your Flower Together

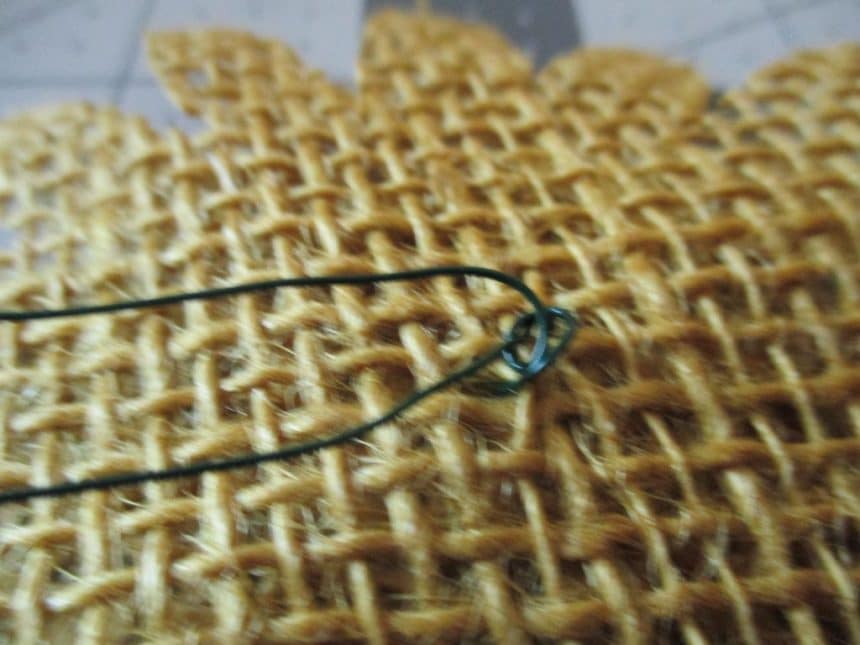

In the first picture you will see I am using my fingers to fold the flower in haft, I will do this on both sides of the flower to find the center.
Now stack each of your flowers and turn over to slide the wire through the center. If you do not want to use the flower for a pick skip this step and glue each one in the center.
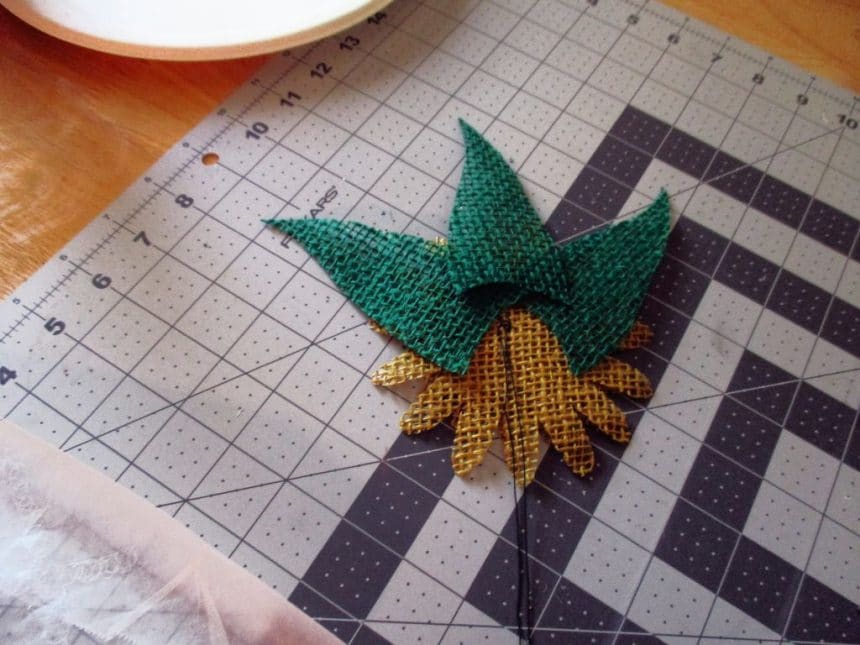
Turn over and glue your center circle of brown burlap in the center.
Turn back over and lay your leaves, you can use as many or little as you like, to the back of the flower.
Glue the leaves on.
That is it and now you have your burlap flower as a pick or you can make and use on hats, headband, anything you like.
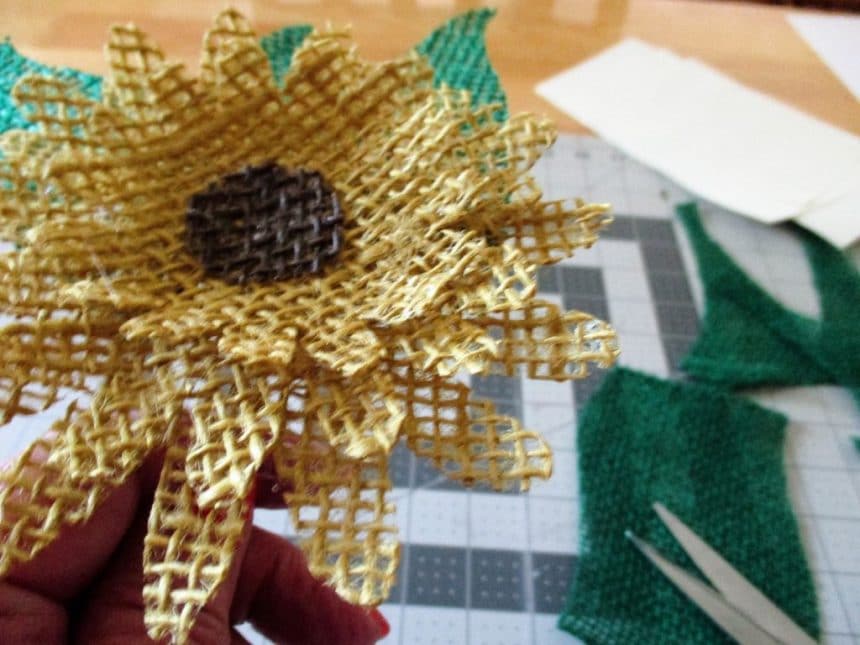 Hope you enjoyed this.
courtesy: toj66
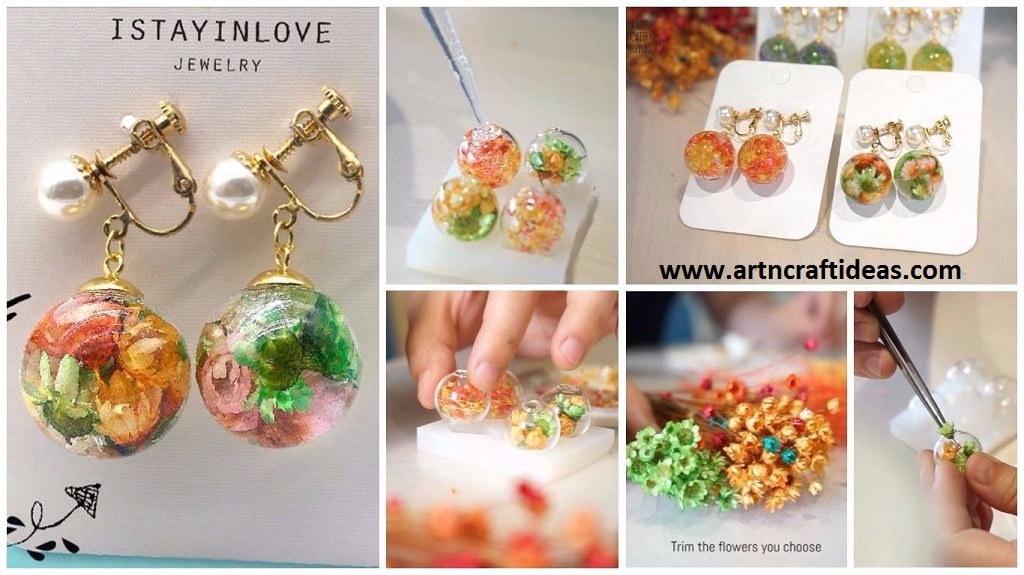
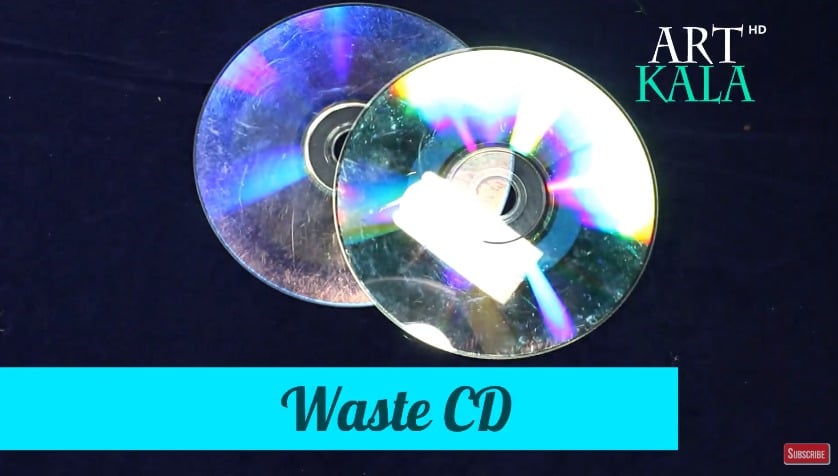
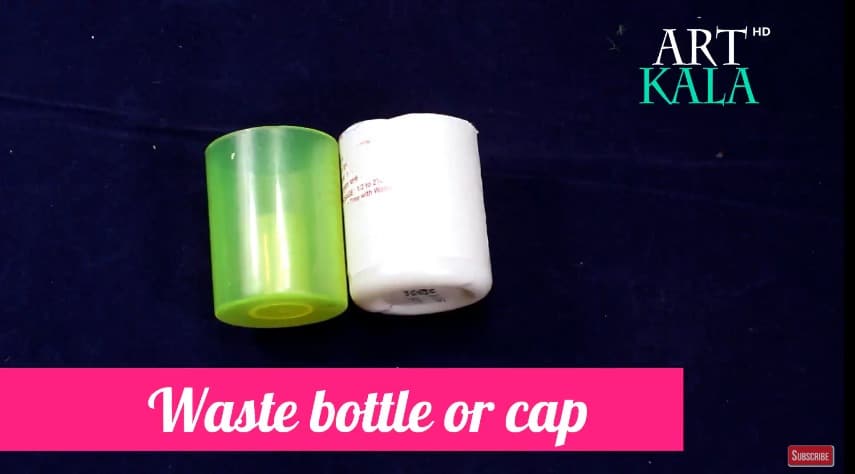
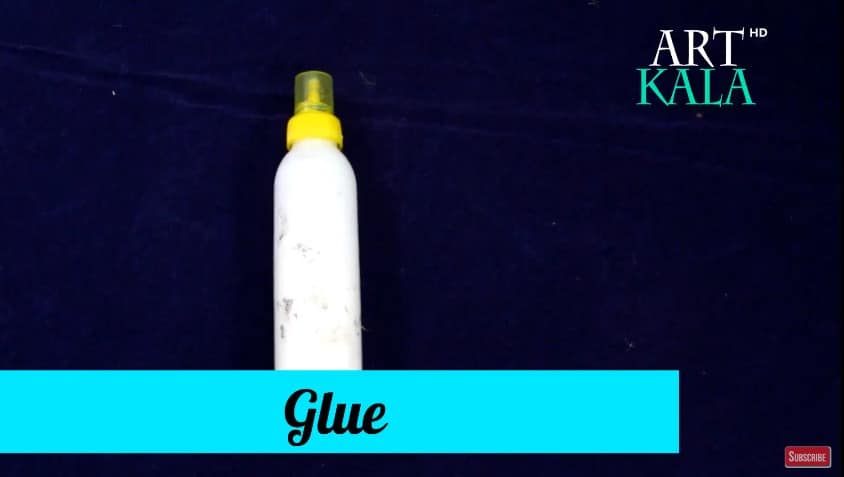
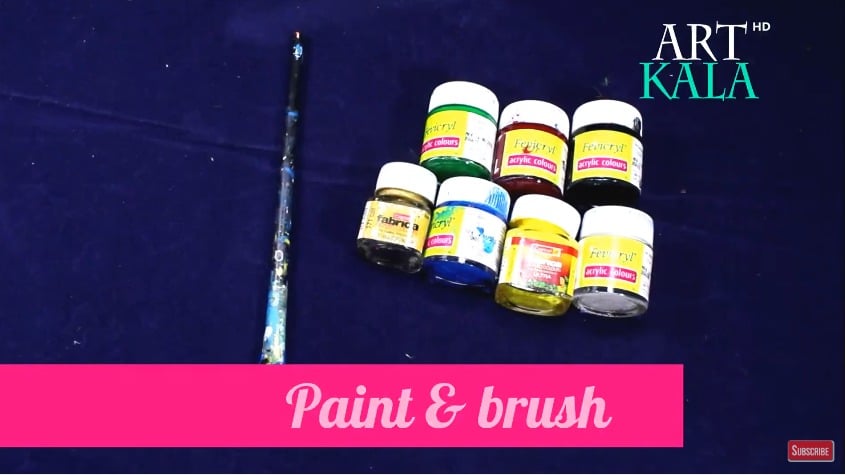
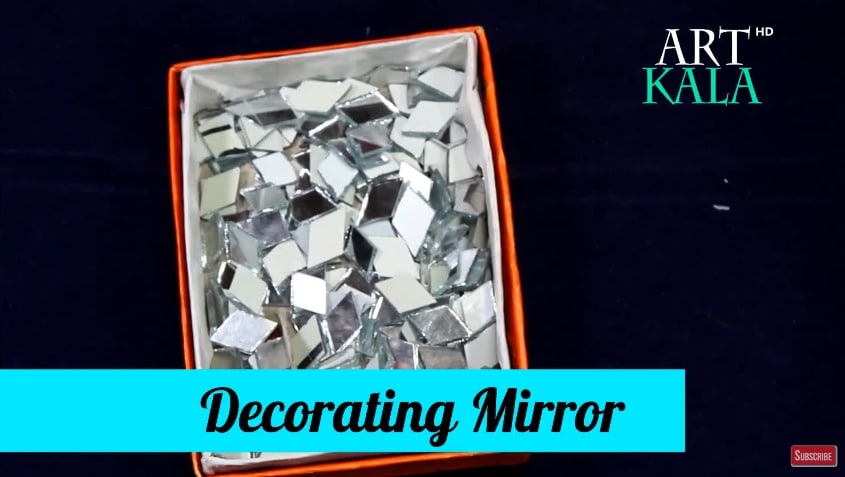
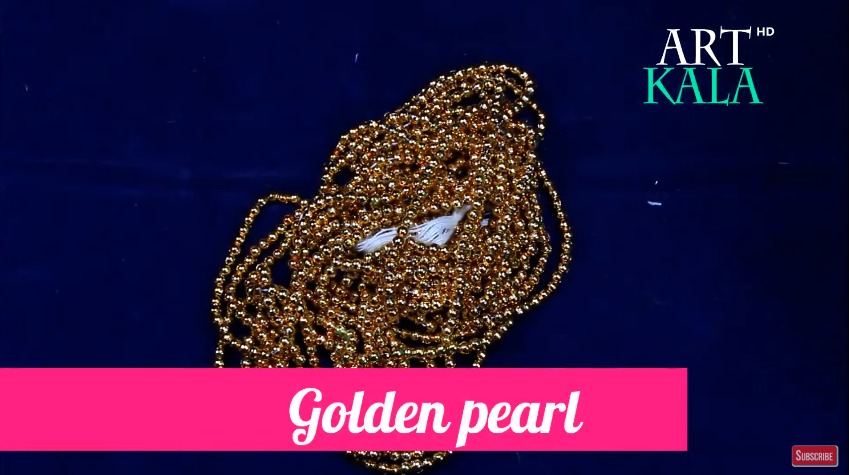
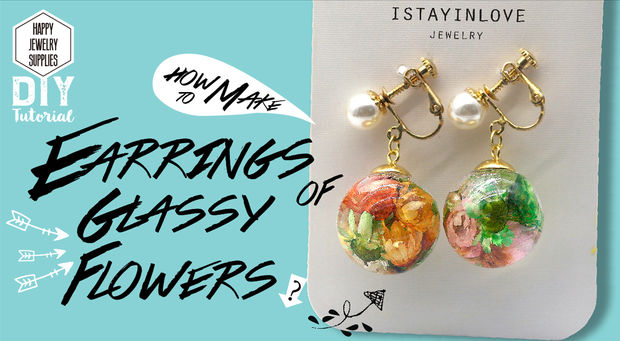 Required Materials:
Glass Bottle
Resin Glue
Dry Flower
Pearl Earrings Clip etc.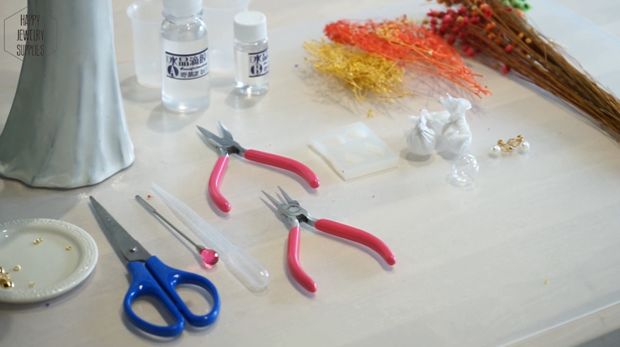 Step 1: Balance
Put the 4 glass-shells on the silicone mold to keep it balanced during the producing process.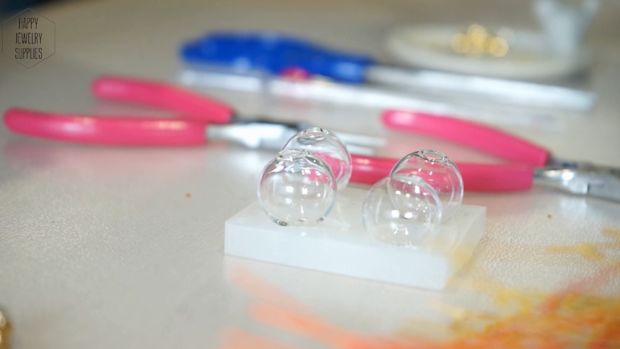
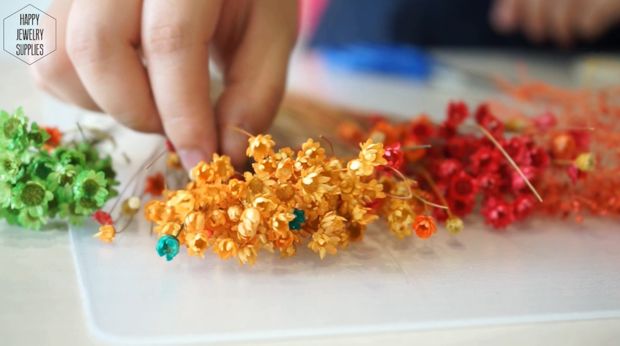
Step 2: Choose the Beautiful Flowers You Want
The selecting of flowers: Pick up the flowers you that are fond of and be careful about the matching of the colors. This action will help you make the color more astonishing.
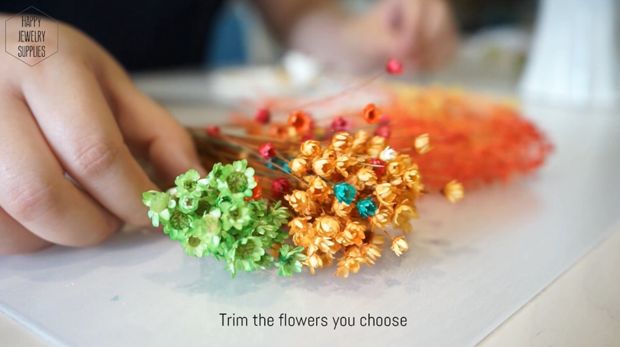 Step 3: Trim
Trim the flowers you pick. You shall decide the size and length of the flowers according to the size of the glass cover.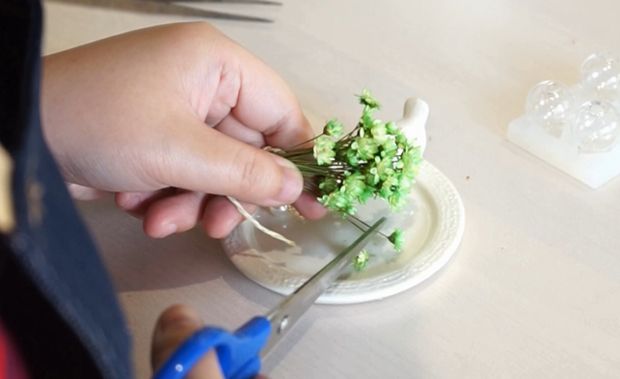
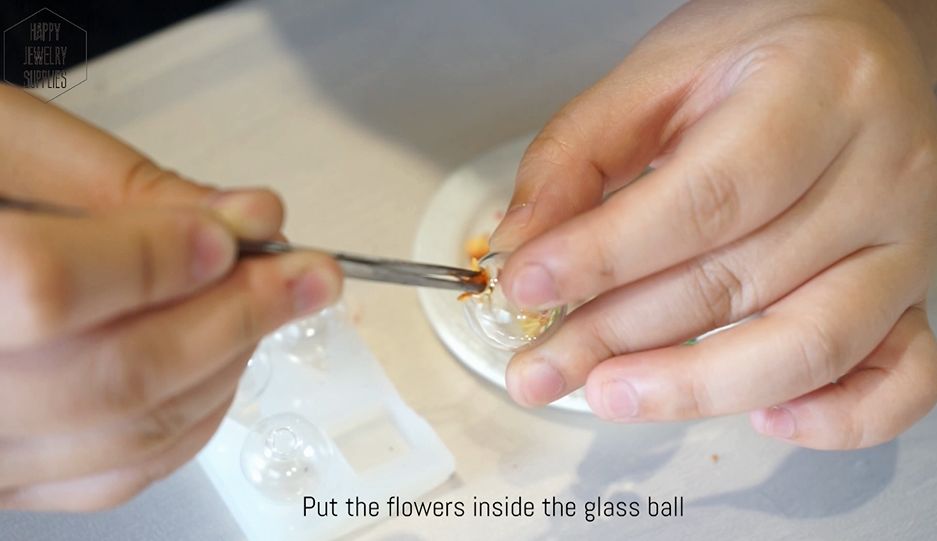
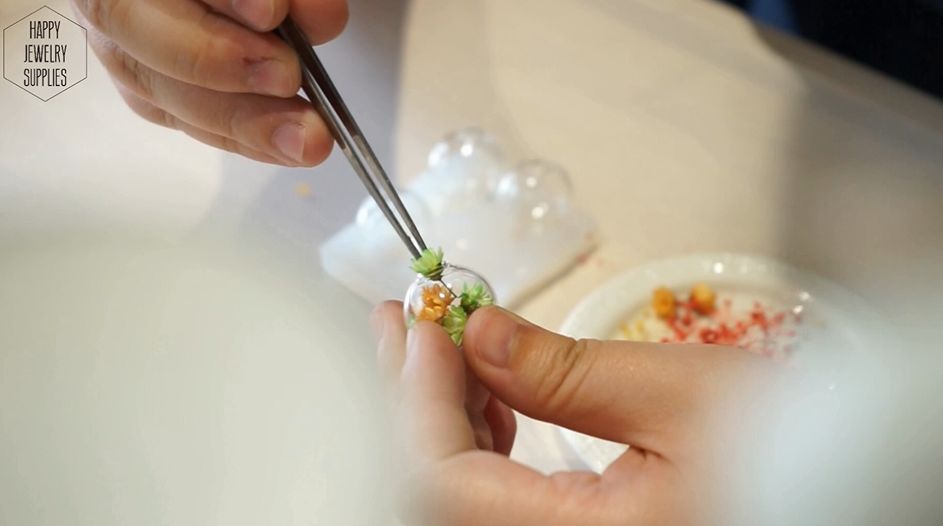
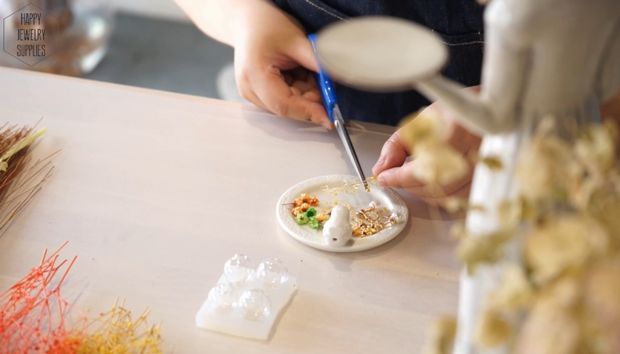 Step 4: Fill
Use tweezers to fill up the glass cover with the colorful flowers you just picked and be careful about the matching of the colors.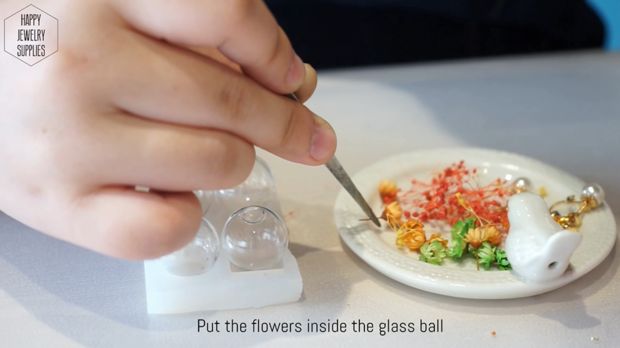
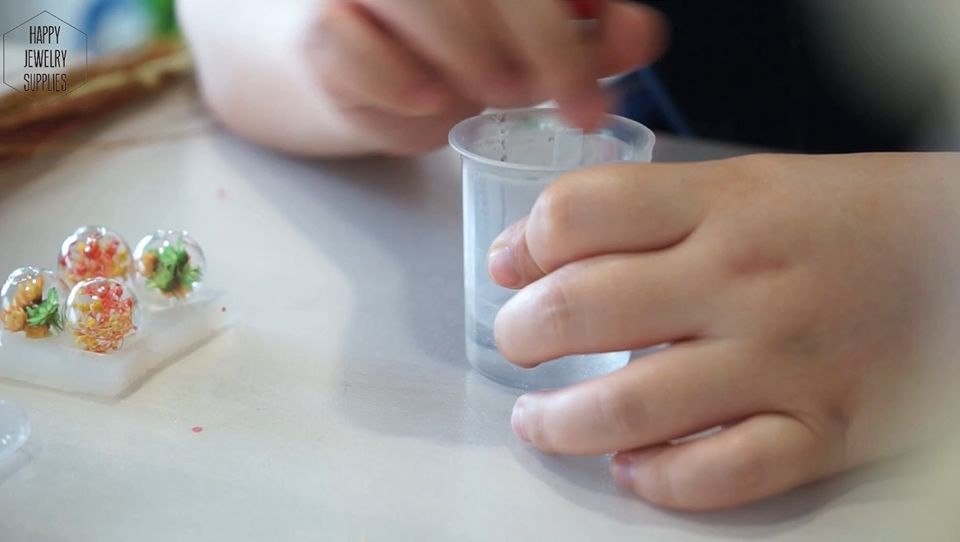
 Step 5: To Prepare the Resin Glue
Prepare the resin glue as follow. The proportion of the A glue and B glue is 3:1. Usually, we will prepare 2 different cups and these 2 cups will be used for loading A glue and B glue. Mix up the 2 types of glue and make sure you stir it evenly. Wait till the bubbles are disappeared.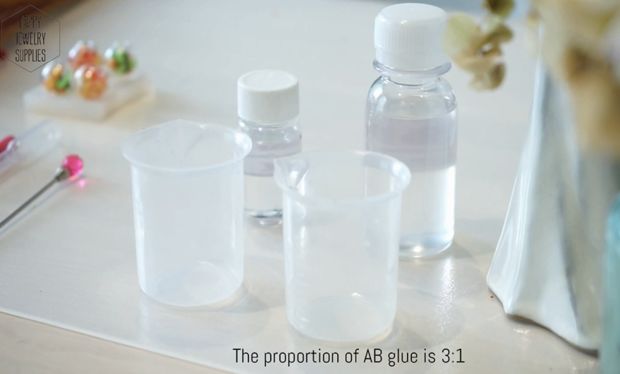

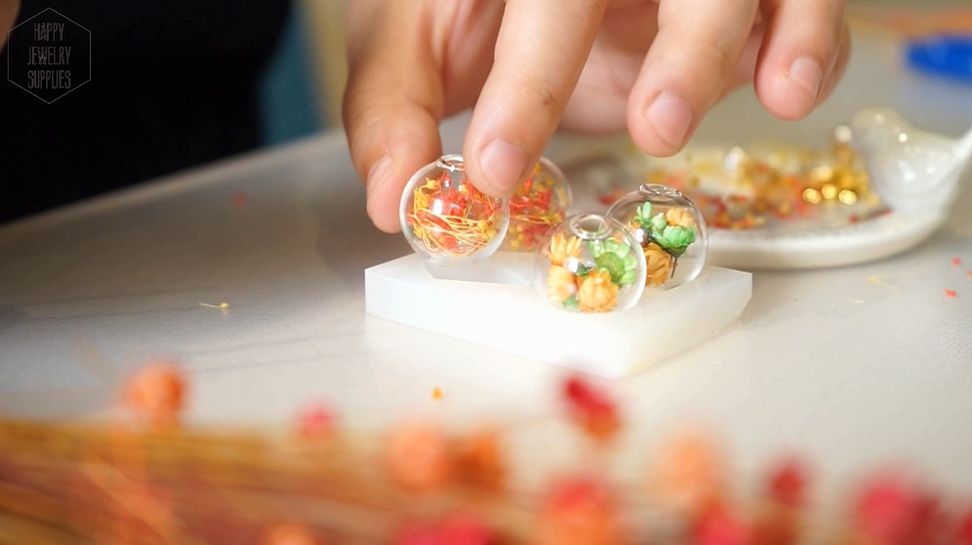
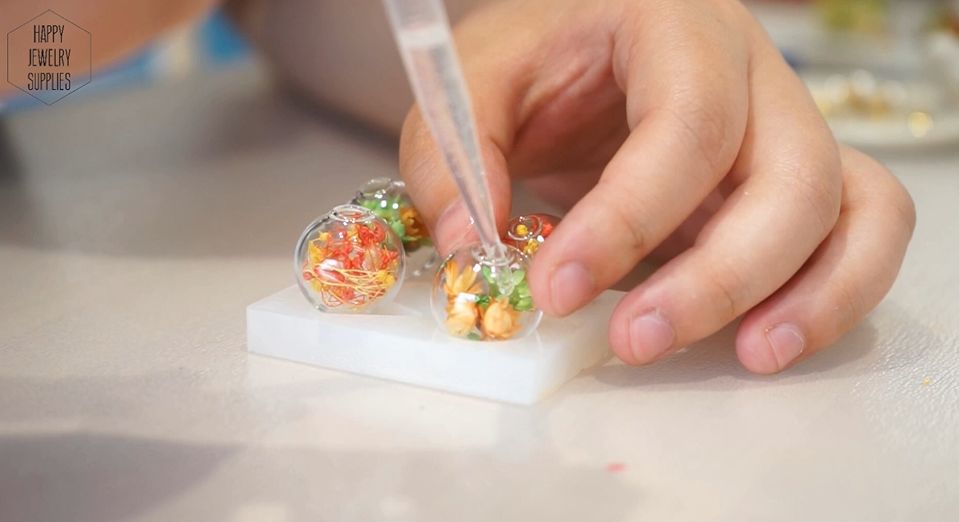
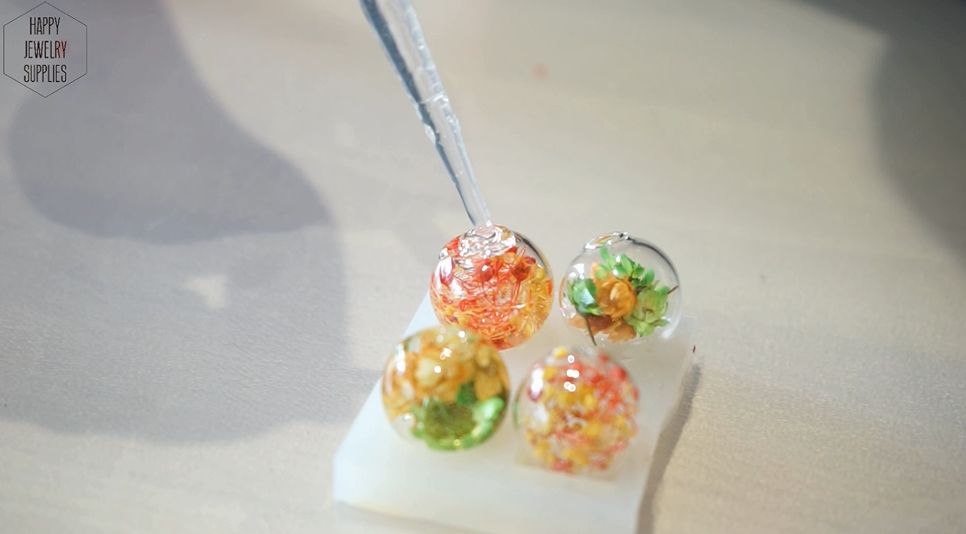
 Step 6: Fill the Resin Glue Into the Glass Bottle
Now we will use a dropper to take some mixed resin glue and slowly fill it with the glass cover till the glass cover is completely filled up.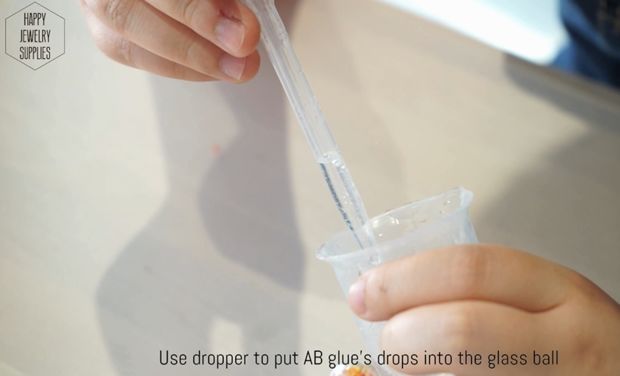
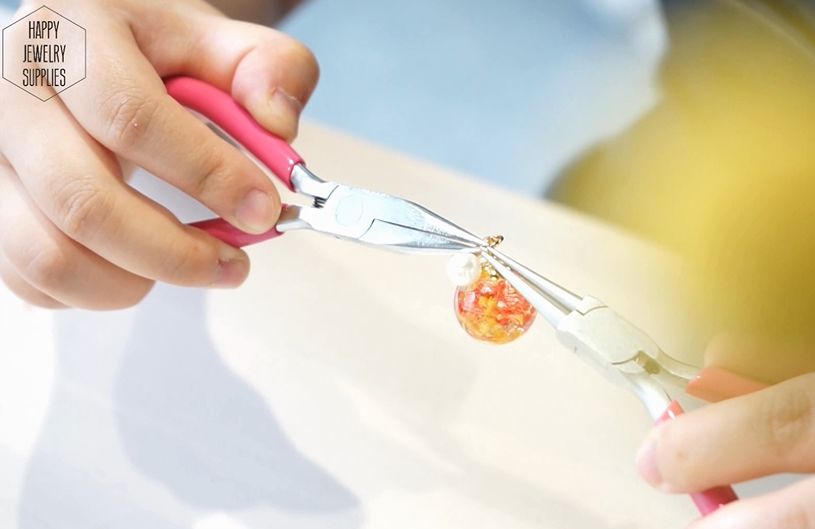
 Step 7: Put on the Top Cover
Put the metal cap onto the glass cover. Lay it away for 12 hours for the glue inside it to dry up.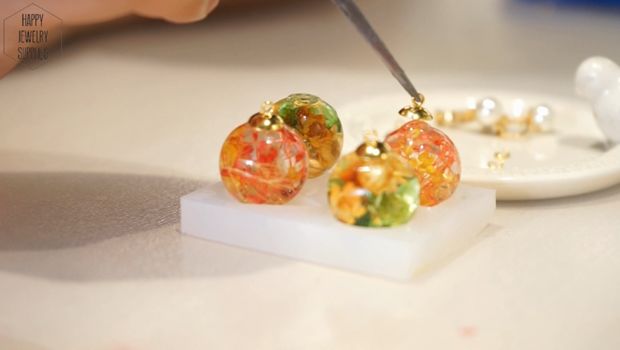
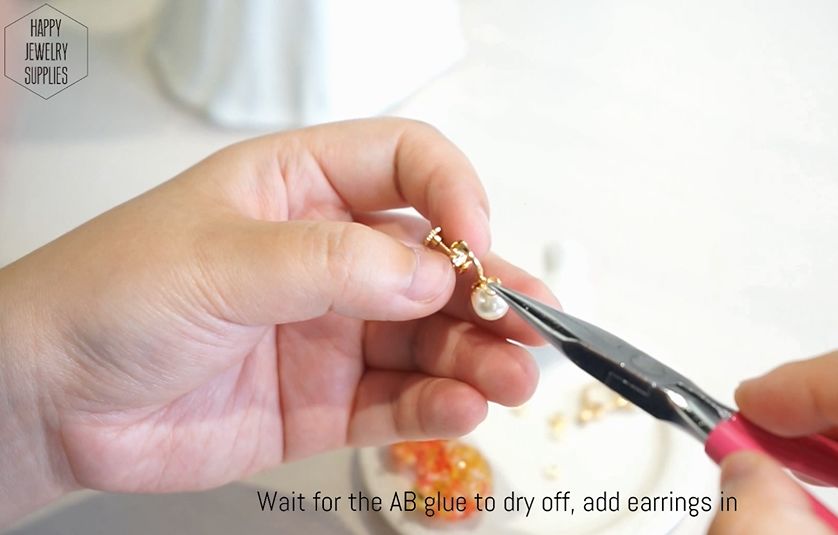
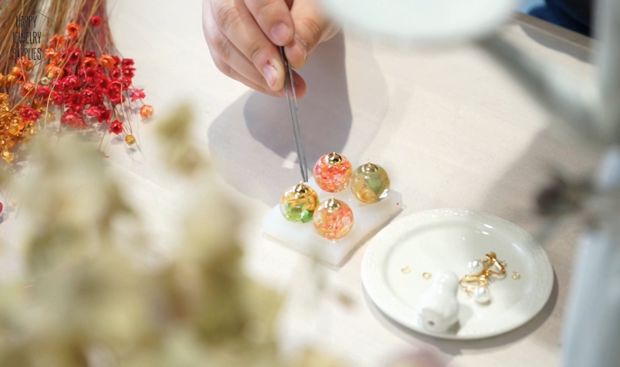 Step 8: Combination Resin Glass Bottle and Pearl Earrings Stud
Match up the coagulated glass cover with the pearl ear studs.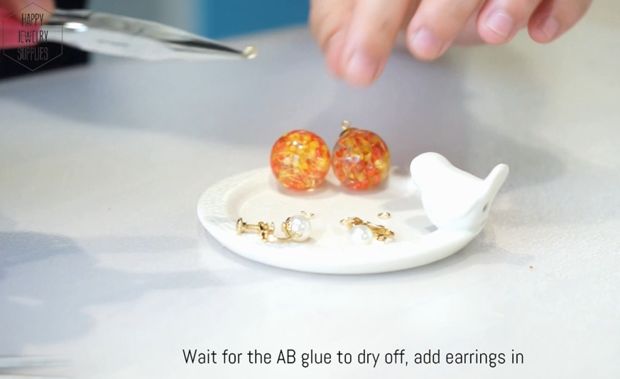
 Step 9: Packaging
Attach the finished products onto the card tags.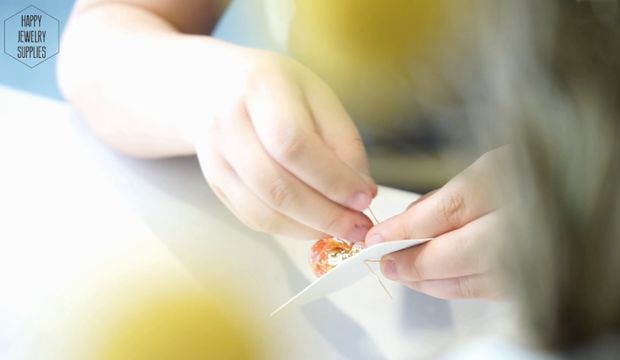 Step 10: Complete!!
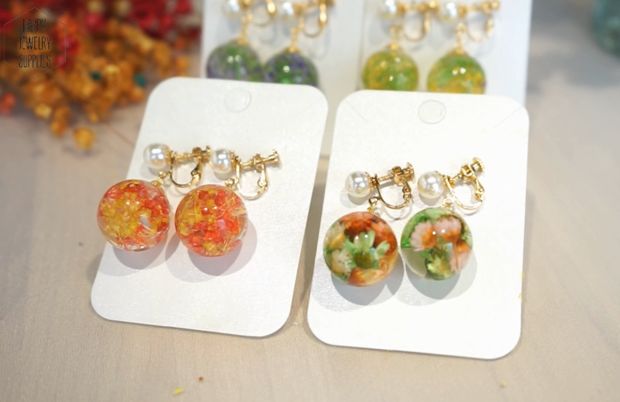
Candle holders are heat-proof containers used to hold and display candles safely. They are almost always made of glass, metal or cast iron. Some are plain and purely functional, while others are decorative and used to improve the look of a home. Candle holders are also used as part of religious rituals.
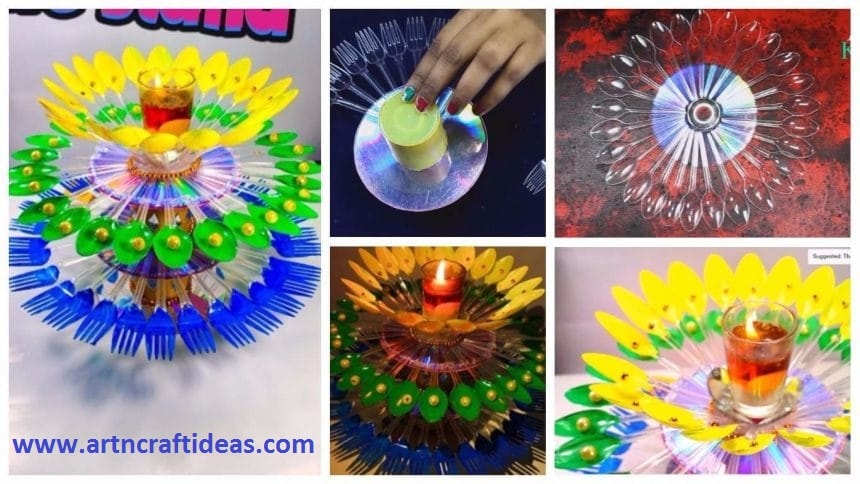
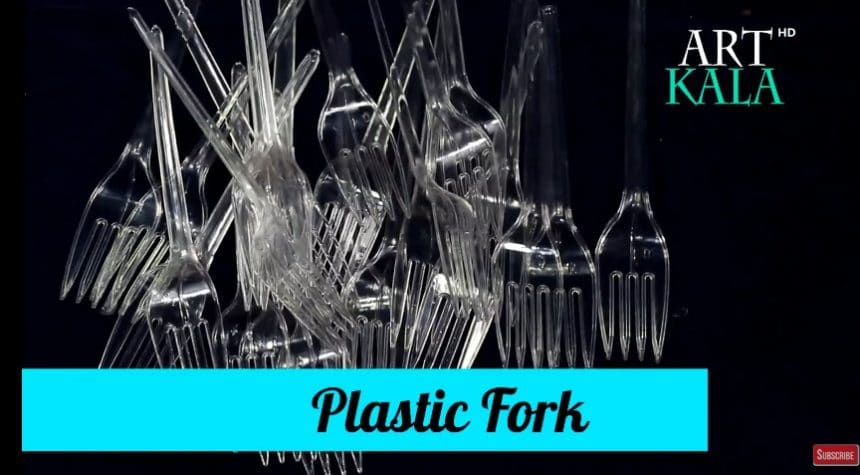
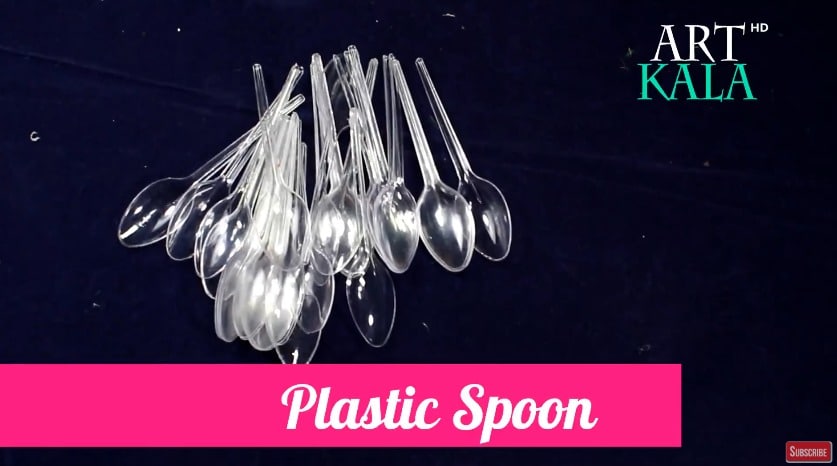
Candle holders come in different shapes and sizes to hold differently sized candles. Some are shaped like tall glasses and are used to fully enclose a tall, wide candle such as a pillar candle. Others are simply plates, which are placed underneath the candle to protect the surface underneath, such as a wooden table. A votive holder is a small jar used to hold votive candles.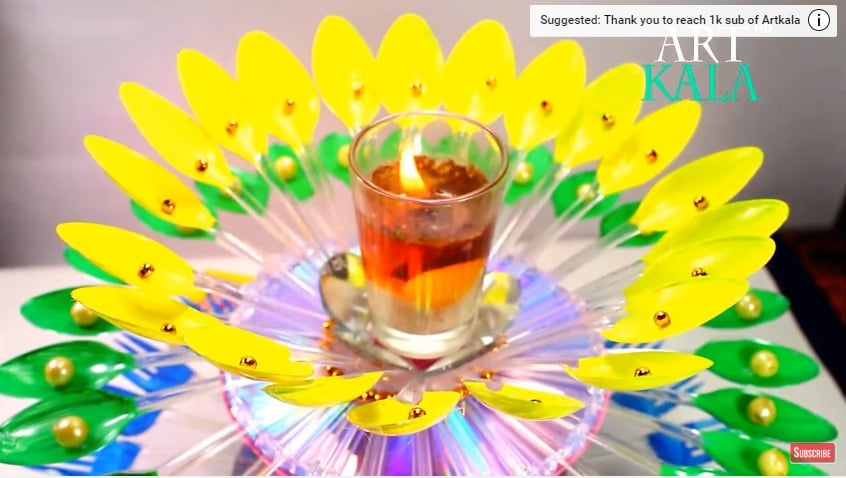 Required Material:
 Step.1
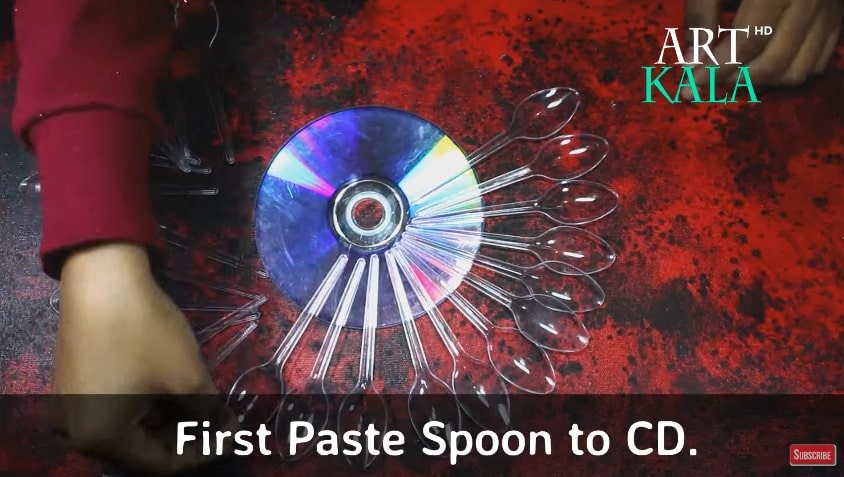
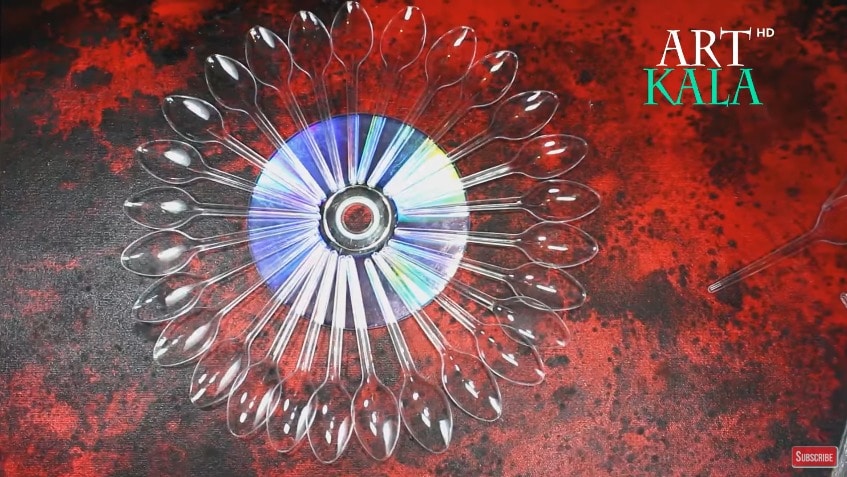
 Step.2

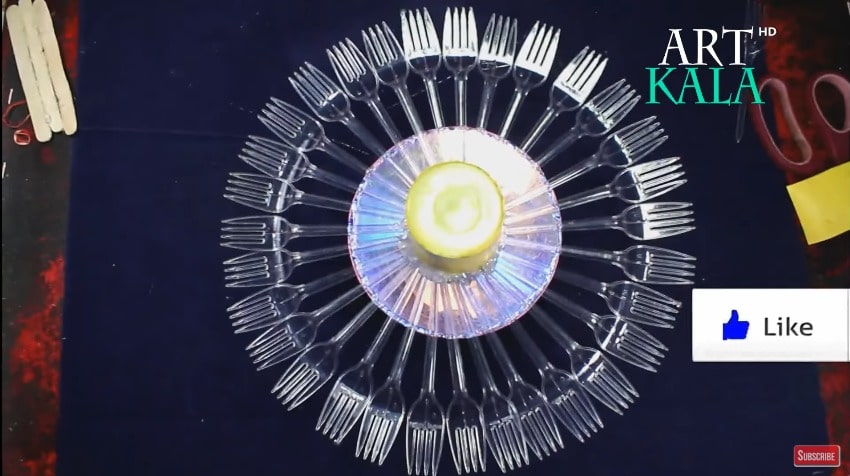
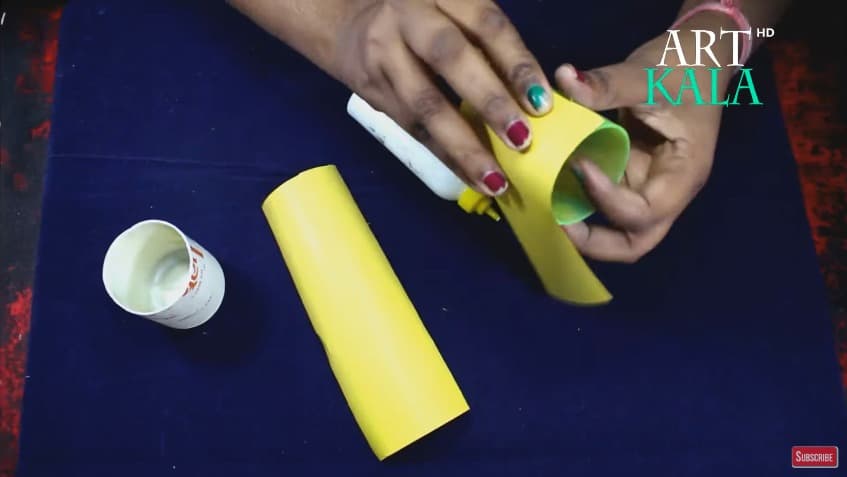
 Step.3
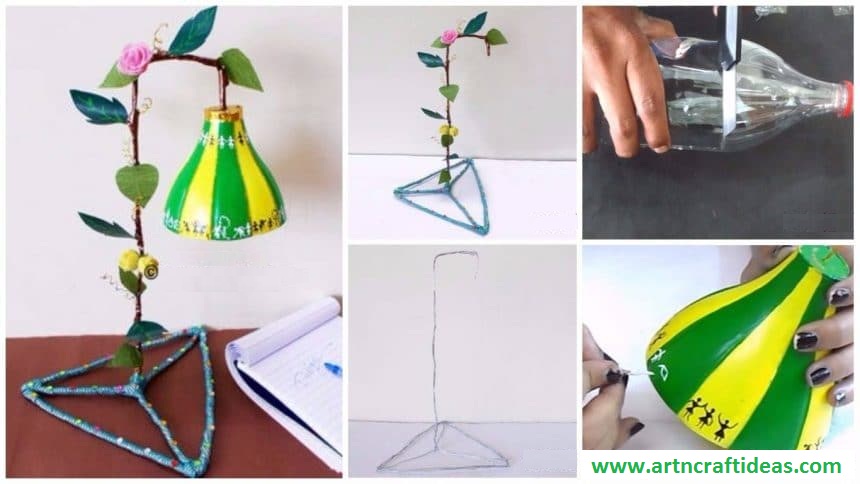
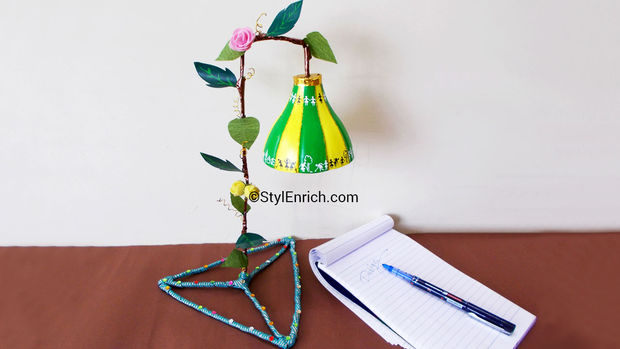
Lampshade made using plastic bottle
use your waste plastic bottles and make with them a beautifully recycled lampshade.
Required Material:
 Step 1: Cut the Plastic Bottle
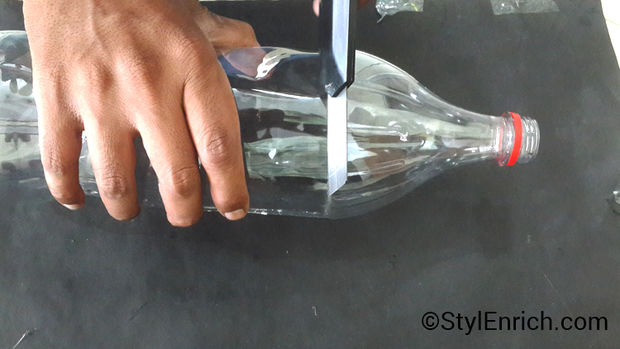
Take an empty plastic bottle and hold it horizontal. Cut the upper part of it carefully with a knife. This is to make the head of our lampshade.
Step 2: Paint the Plastic Bottle
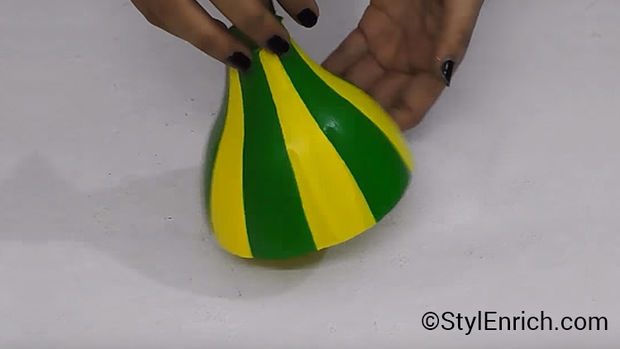
Now paint the plastic bottle with green and yellow color. You can use acrylic colors for this.
Step 3: Draw Characters
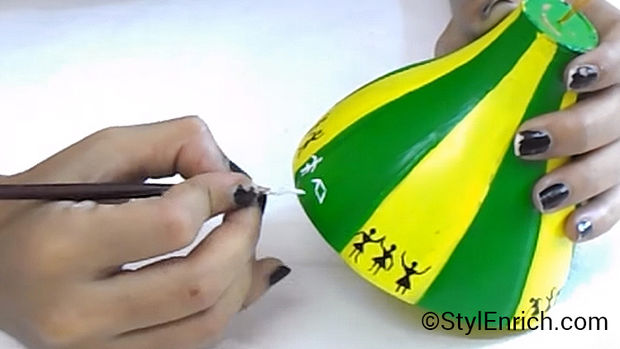
In order to decorate further draw some tribal characters on the plastic head using black color. This type of drawing is called “Warli” art which is an ancient drawing art form in one of the tribes living in the forests in India.
Step 4: Final Look of Lamphead
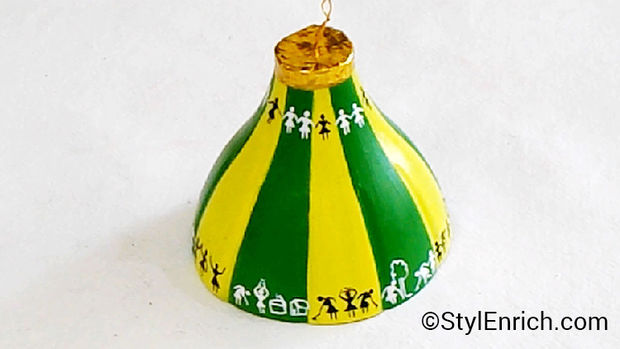
This is how your lampshade head will look like after drawing is done.
Step 5: Make Plastic Leaves

Now we will make some leaves. For this, cut a small plastic piece from rest of the bottle and cut it further in leaves shape. Paint and decorate these plastic leaves in green colors and add detailing.
Step 6: Make Crepe Paper Leaves
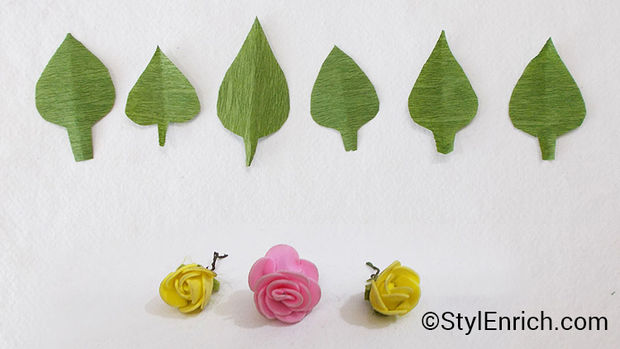
Next, take a crepe paper and create some leaves out of it. Also, collect some ready made flowers from the market.
Step 7: Create a Wired Stand
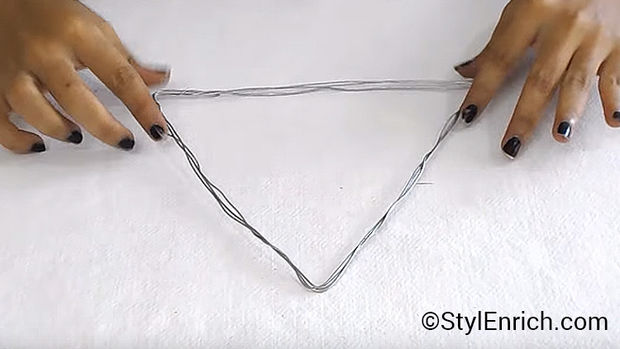
Now take the wire and form a triangular shape with it. This will form the base of the lampshade.
Step 8: Complete the Stand
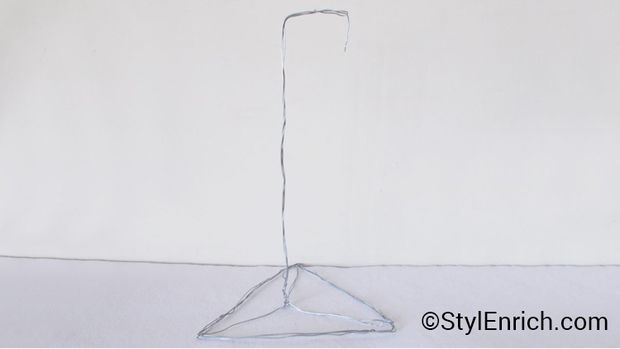
Erect the stand and it will look like this.
Step 9: Decorate the Stand
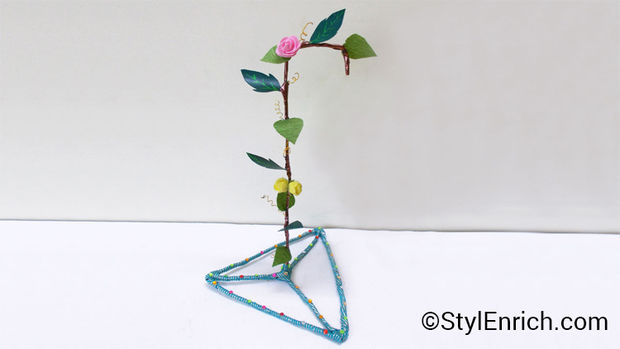
Now cover the stand with color tape and attach the plastic leaves and crepe paper leaves on it. It will start looking more beautiful!
Step 10: Fix the Lamphead to It
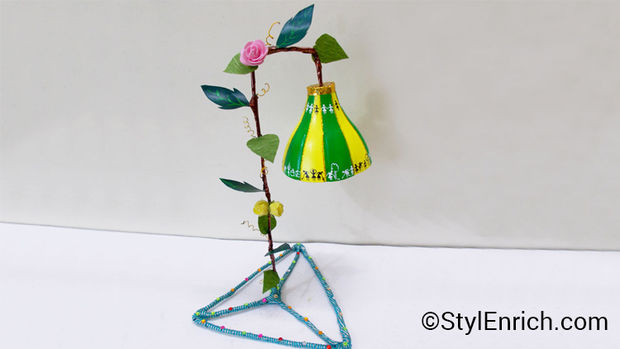
Now attach the lamp head to the stand at the top. Use glue gun to make it tight. Make a hole at the top of the lampshade and insert the stand shaft in it to fix it tight.
Step 11: Our Lampshade Is READY!

Finally, fix small torch light inside the lamp head with he help of glue gun. Now your lampshade craft is ready!
courtesy: Ananvita
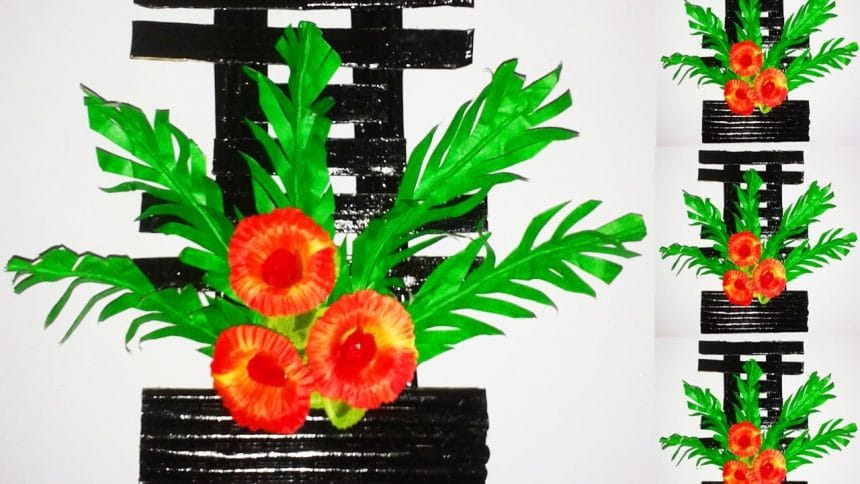
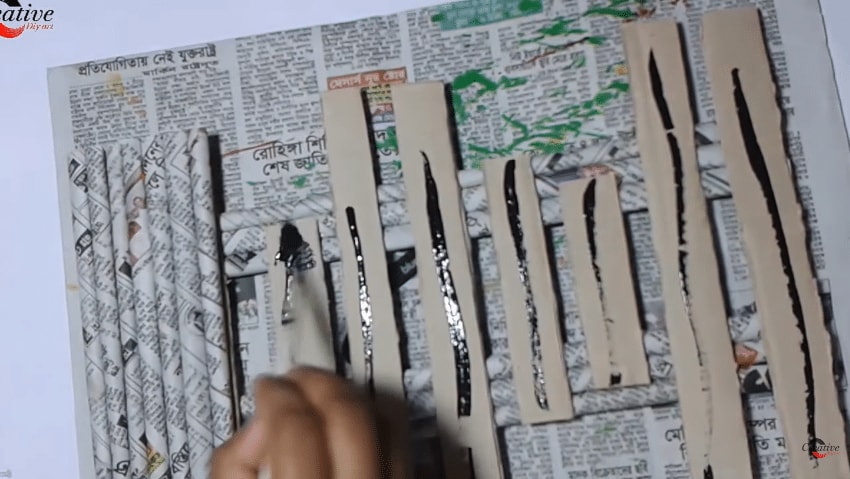
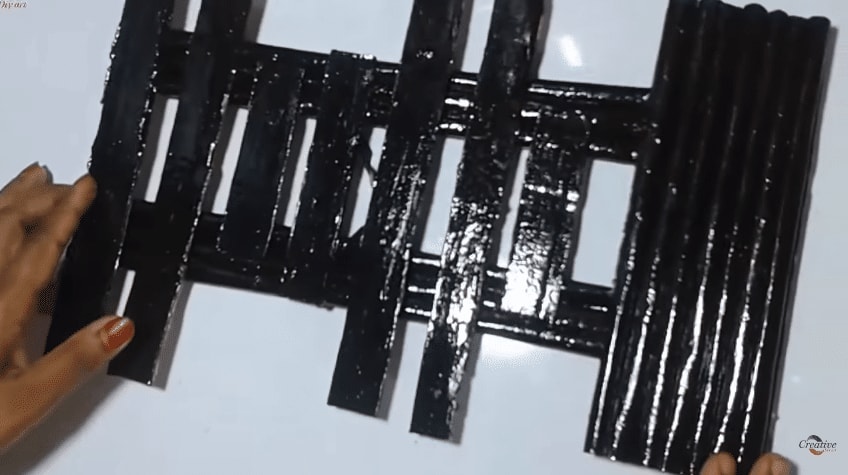
Beautiful Handmade Newspaper Wall Hanging (Best Out Of Waste)