Here is a nice tutorial to create a silicone transparent floral bracelet that you can brag about. For those of you who love handmade transparent bracelet, we will share a silicon wristbands that you can place decorative figures inside today.
![]()
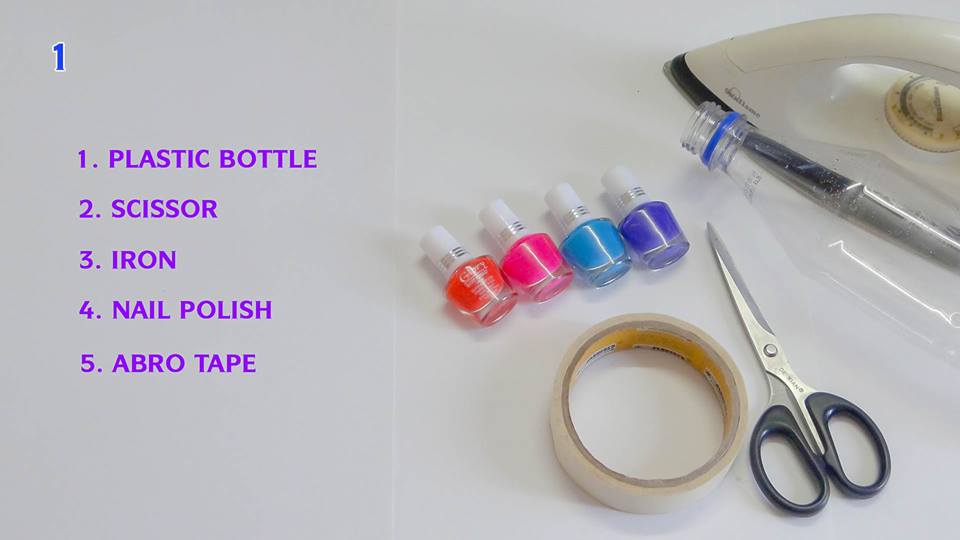
Required Material:
- Bracelet mold for epoxy resin,
- Double component epoxy resin,
- A container to mix resin,
- Stirring stick,
- Dry leaves,
- Toothpick,
- Scissors
You can use everything you can shape for the mold, adjust the thickness according to your bracket. But then choose something that can be easily broken down because it can be difficult to remove after the silicone frost. Other than these, you can use varnish to give shine, and likewise leaves, plastic flowers ornaments to put in silicon.
![]()
We pour the mold transparent silicone that we have set for our knowledge and quickly place the pine leaves in your hand without waiting for the freezing. At this stage, the toothpicks are used to penetrate the silicone. You can use a thin apparatus.
![]()
We them wait 2-3 hours in a dry place for a while to allow the silicone to fully freeze and dry.
![]()
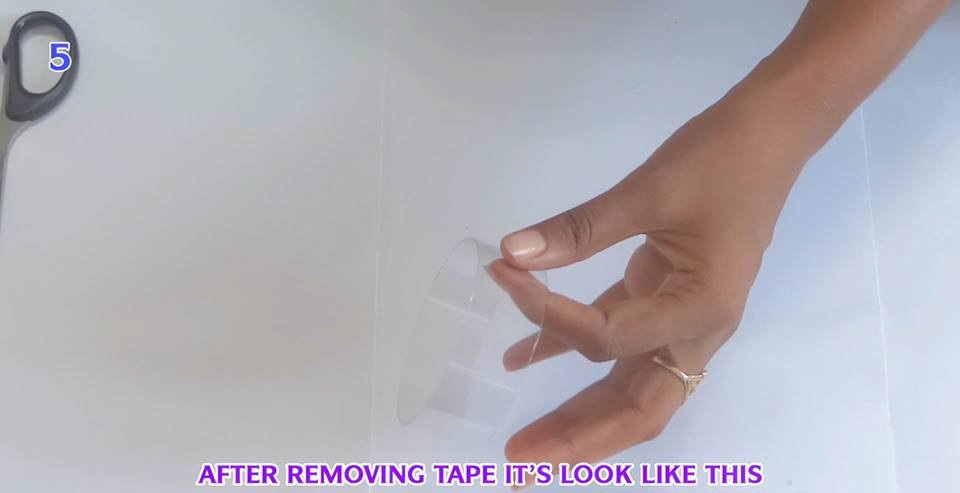
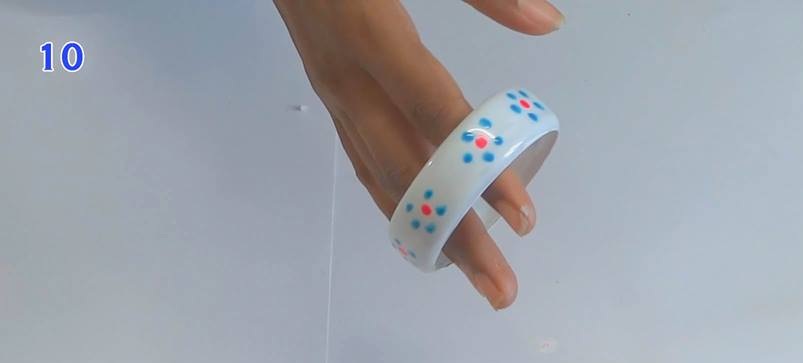
We carefully remove the drying silicone Wristbands.
![]()
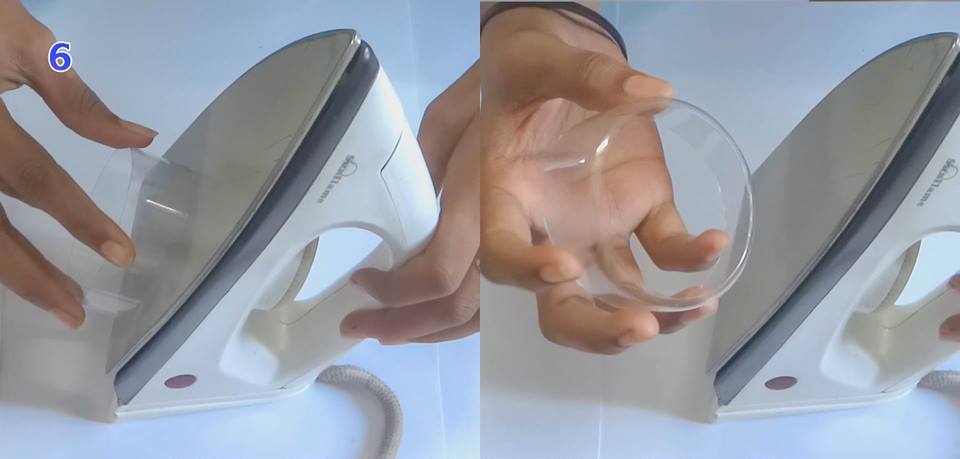
With a very thin sandpaper we take the roughness and eliminate the sharp corners.
![]()
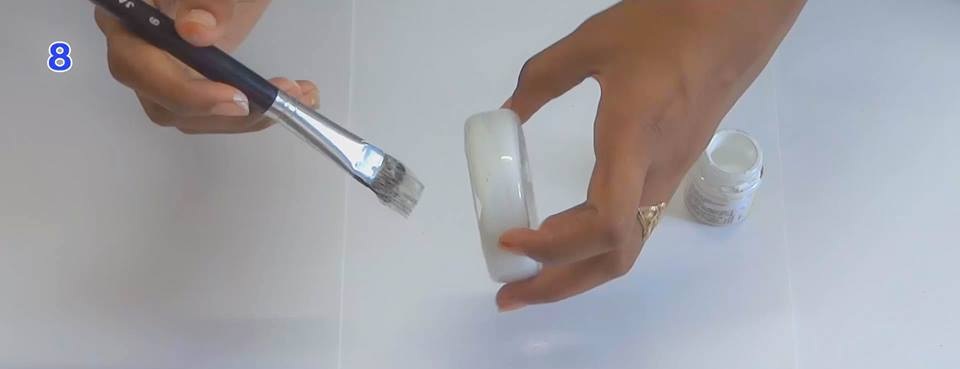
We then apply the varnishing process and leave it dry.
![]()
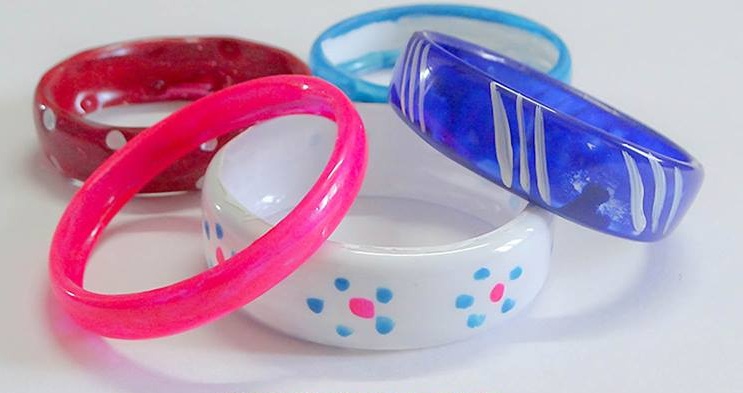
Our ultra stylish silicone bracelet is ready to use!
![]()
More Bracelet stylish:
![]()
Hope you like this transparent floral bracelet.
We would love to hear your thoughts in the comment section below. And be sure to like us Facebook for more ideas!
Thank you for visiting our website. Keep Creating with Art & Craft!


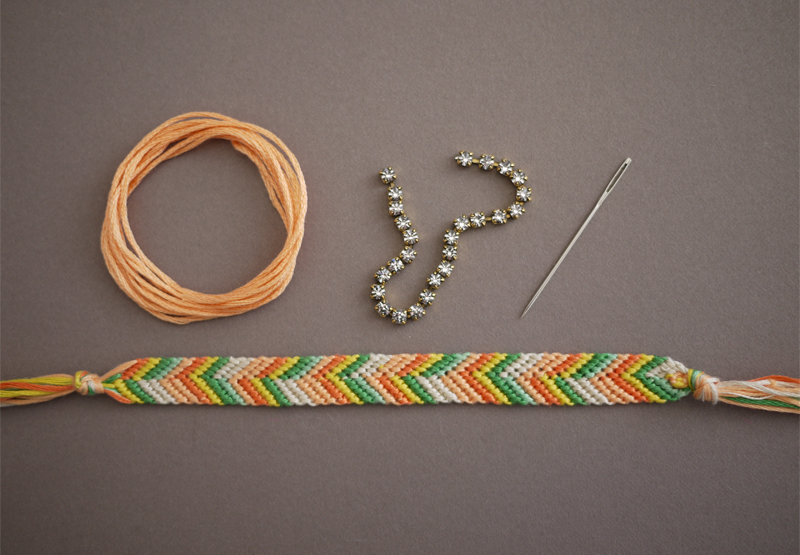 Thread the needle with embroidery floss and tie the end into a double knot. Push the needle through the back of bracelet. Lay the rhinestone chain along the middle of the bracelet, using the chevron pattern as a guide.
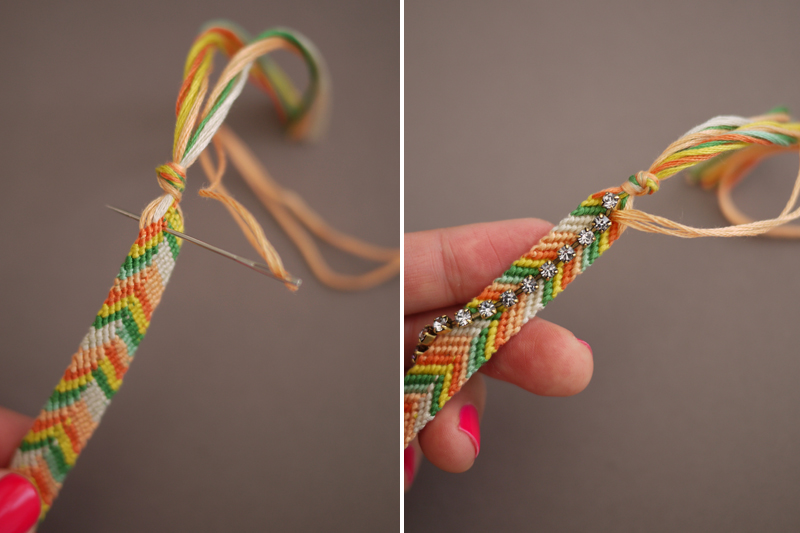 Stitch the floss between the first two rhinestone links, pushing needle out the middle of the bracelet. Bring the needle back through the middle, this time further down between the second and third links.
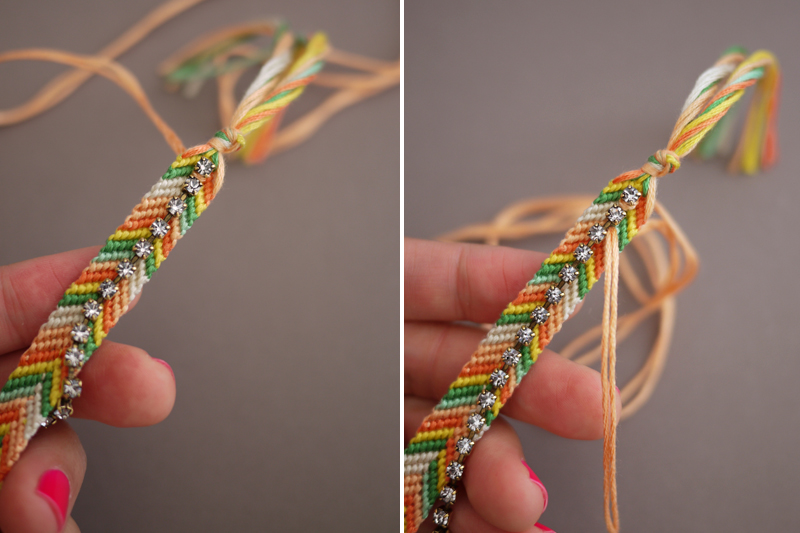 Continue stitching between the rhinestone links. After the very last stitch, tie a double knot on the backside and trim the ends.
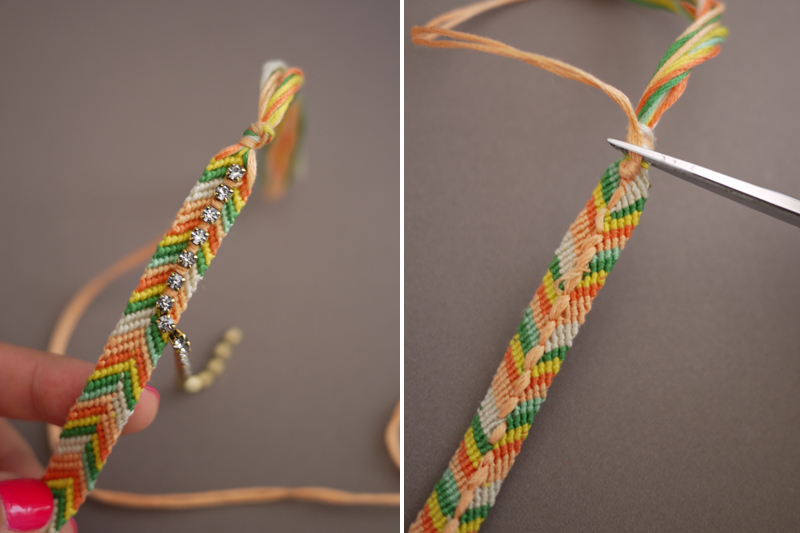 Your friendship bracelet is sparkling and finished!
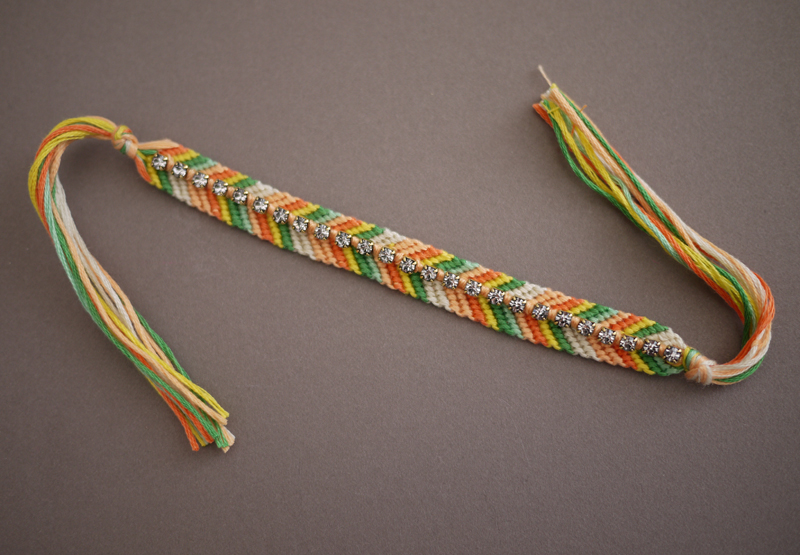
 Use a Sharpie or marker to make 5 evenly spaced marks along the middle of the friendship bracelet. From the backside, push the point of the scissors through the mark to create a hole.
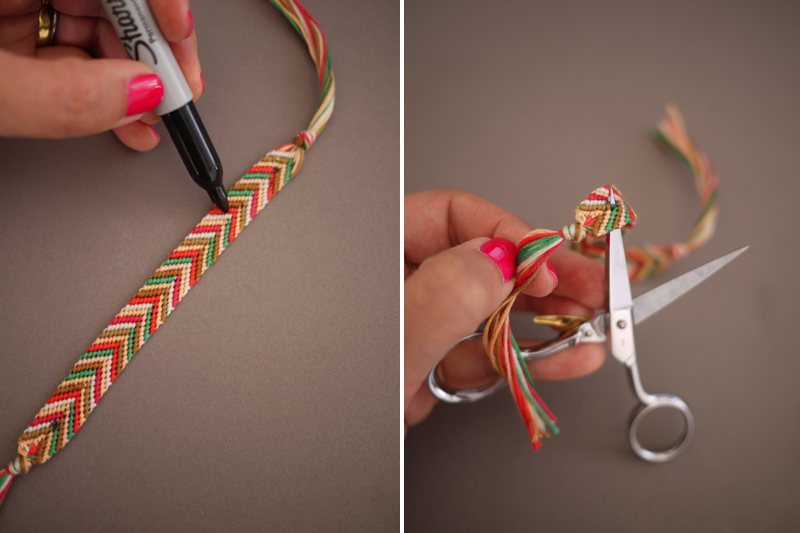 Push a screw through the hole. Twist the coned spike onto the screw and use a screwdriver to tighten.
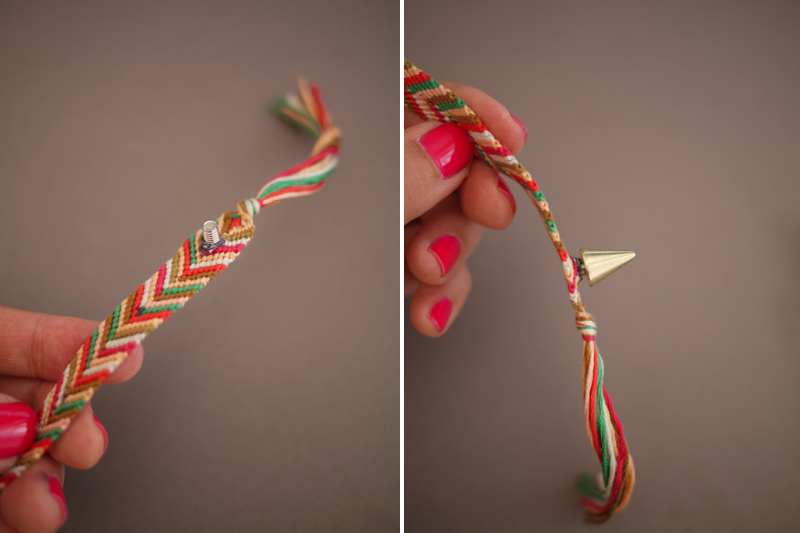 Repeat the steps with the rest of the spikes. Voila! Your friendship bracelet has a spiked spine.
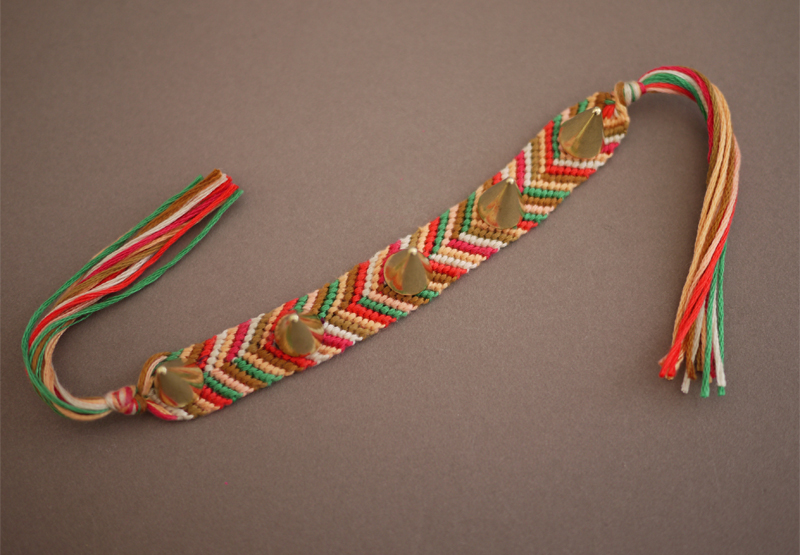
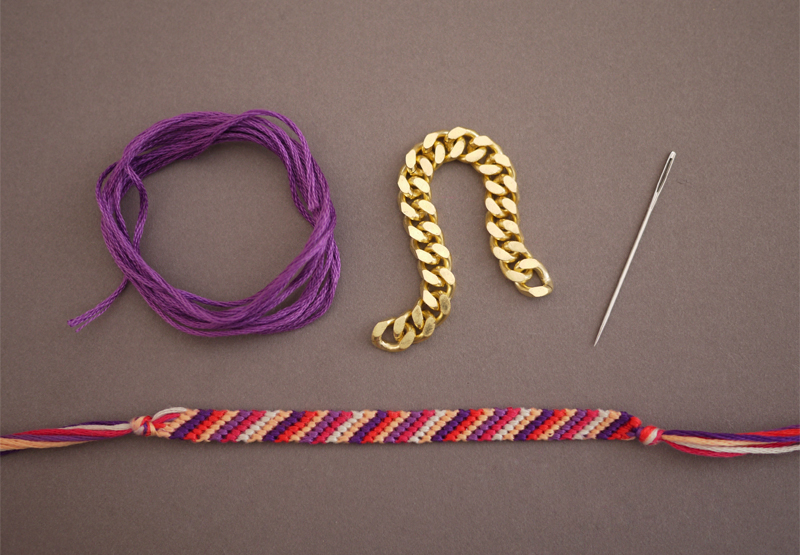 Thread the needle with embroidery floss. Untie one end of the friendship bracelet and re-knot it with the tail of the threaded embroidery floss. Push the needle through the outer edge of the backside of the bracelet.
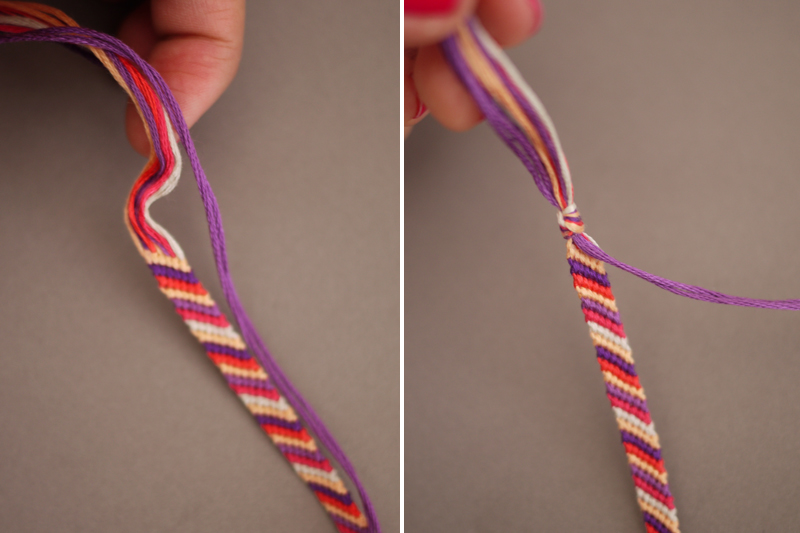 Lay the chain flat, against the edge of the bracelet. Thread the needle over and through the first link. Push the needle though the backside about two rows down. Depending on the width of each link, the row count may vary.
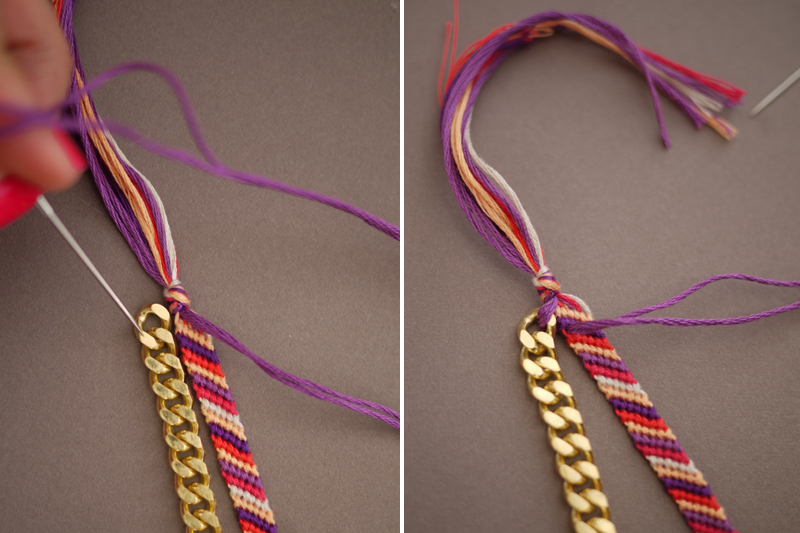 Keep stitching. Make two stitches around the last link, untie the knot and re-knot with the last of the floss. Trim away any excess.
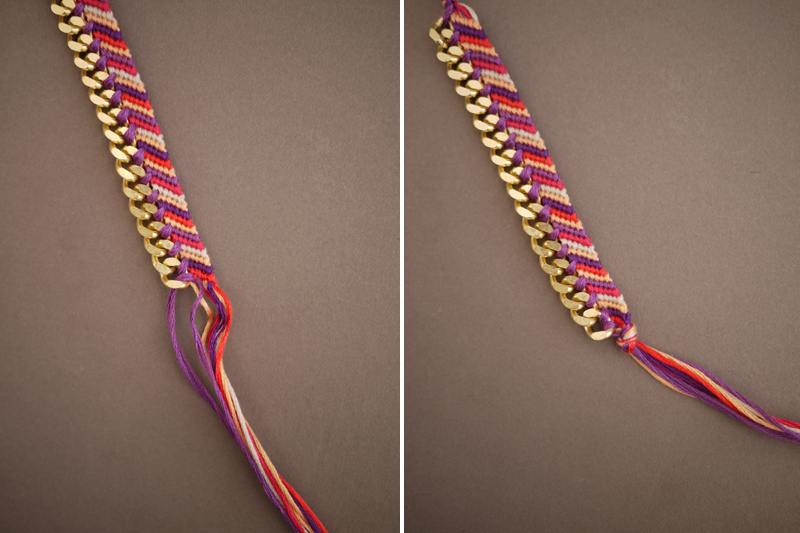 Your chain trimmed friendship bracelet now has an edge – how simple was that?
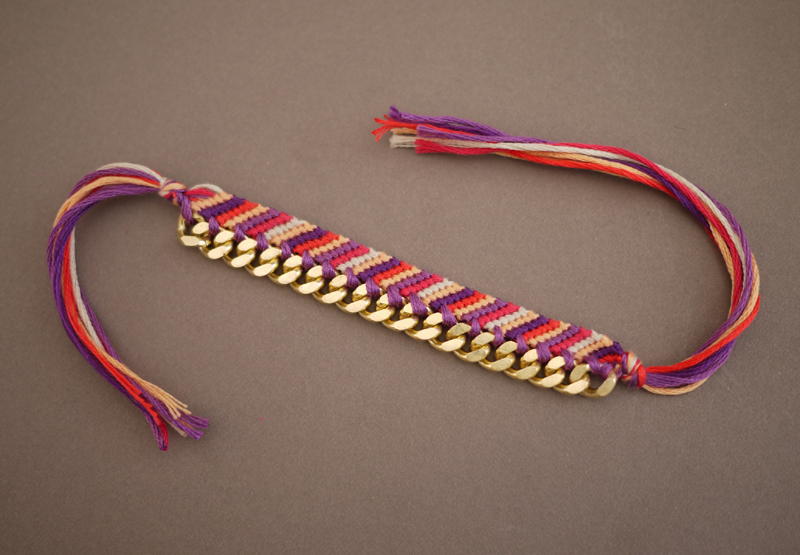 Stack ’em, give ’em away and you’re officially ready for summer.