Crafts from natural materials are perhaps the most favorite form of creativity in children of all ages. Working with natural materials retains heat and hands of the master and always carries a positive energy. Very beautiful crafts can be made from seashells, acorns, chestnuts, dried leaves, etc. But the most original, and at the same time easy to manufacture work can be obtained from the usual pumpkin seeds.
Pumpkin seeds – this is an easily accessible natural material to work with which it is possible at any time of the year. Pumpkin seeds can produce a wide variety of original crafts, such as floral bouquet. I bring to your attention a master class on making flowers of pumpkin seeds. These flowers turn out very beautiful and original, and most importantly – they are easy to make and do not require great physical and financial costs.
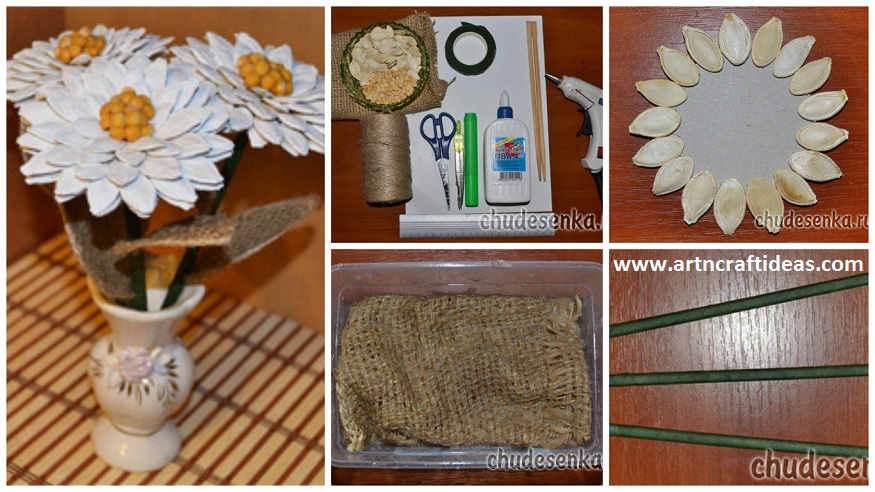
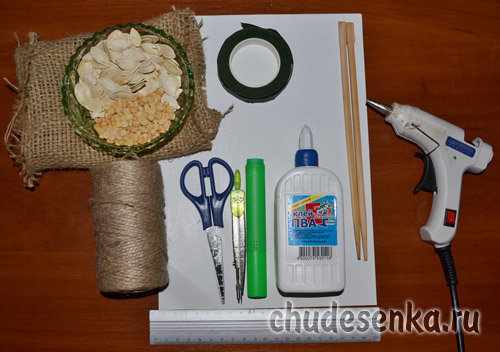
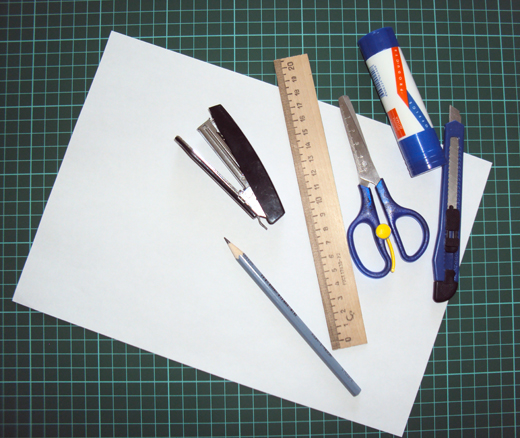
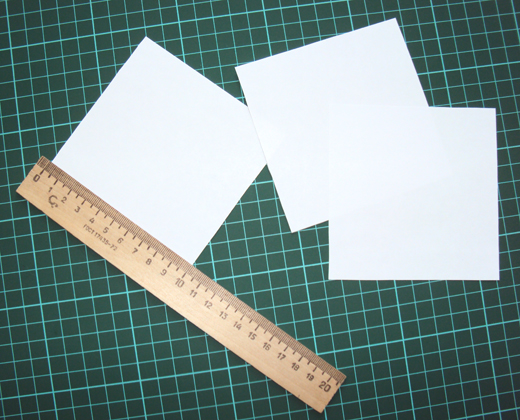
Required Material:
1. Pumpkin seeds;
2. Peas;
3. Silicone adhesive;
4. PVA glue;
5. Floral tape;
6. Hessian;
7. Wooden sticks;
8. cardboard sheet;
9. Jute yarn;
10. The compass;
11. Simple pencil;
12. Scissors;
13. Acrylic paint white;
14. Brush;
15. Ruler.
 Before you begin, you must treat the burlap so that it becomes rigid and does not crumble. To this mix of PVA glue and water in a proportion of 50 to 50 and fully put in the sack solution. After that, the fabric should be dried and ironed.
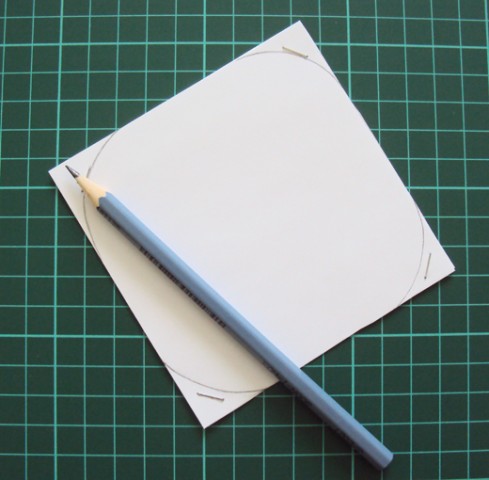
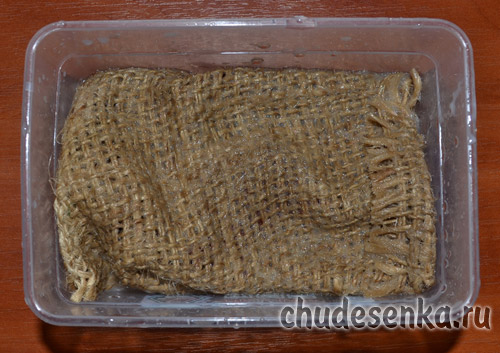 While dried burlap, let us direct manufacturer flowers. The basis for the colors to be a circle of cardboard. Using a compass draw a circle on the cardboard with a diameter of 6 cm., And cut it.
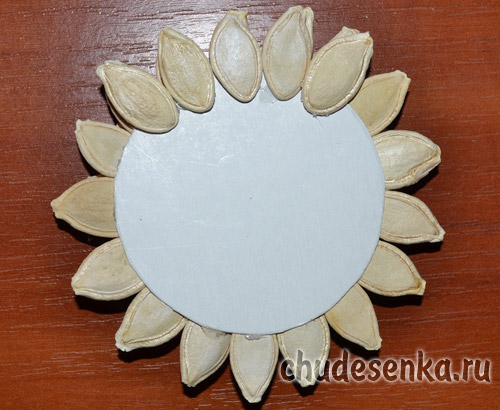
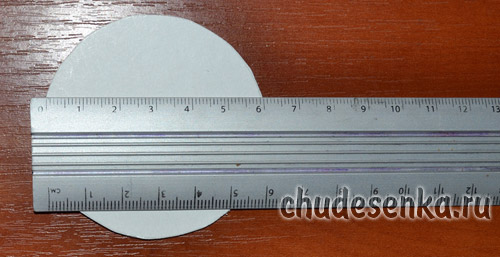 Now take the pumpkin seeds and using a silicone adhesive or glue “Moment”, pasted them in a circle. Paste the seeds so that their sharp edge was on top.
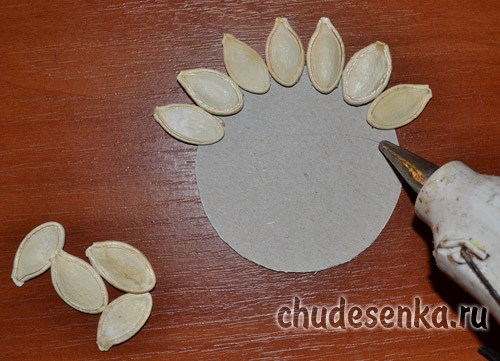 The first row of seeds prepared.
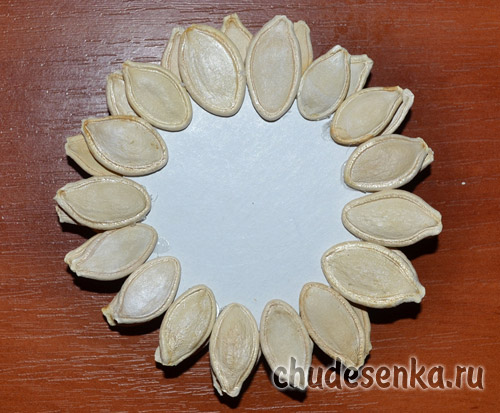
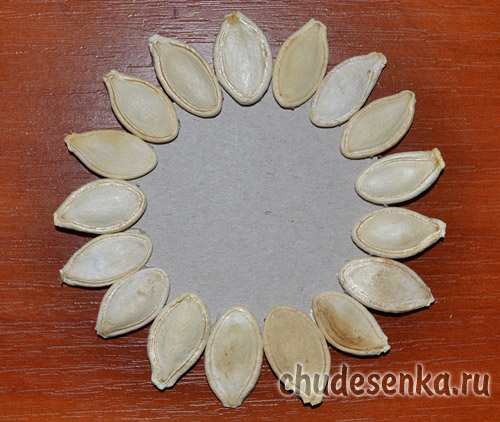 Now just glue the seeds of the second row.
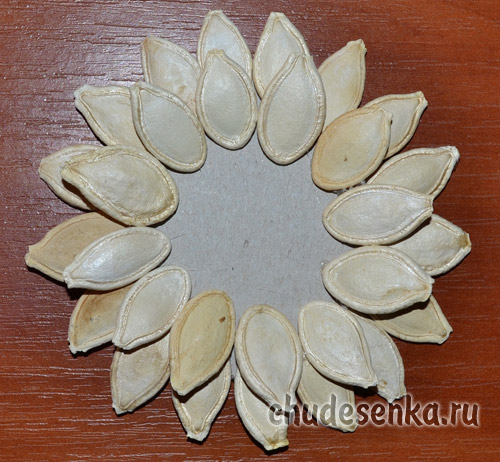 Sunflower seeds in the second row should be staggered and overlapping with respect to the first row. Also, do the third and fourth rows of seeds.
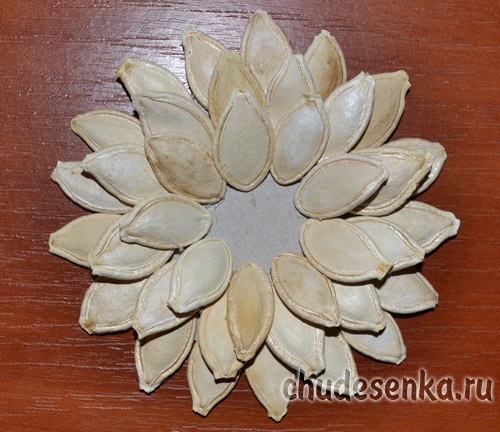
The middle of the flower reserve not glued.
Now we turn over our flowered on the back side and glue have to this side of a row of seeds.
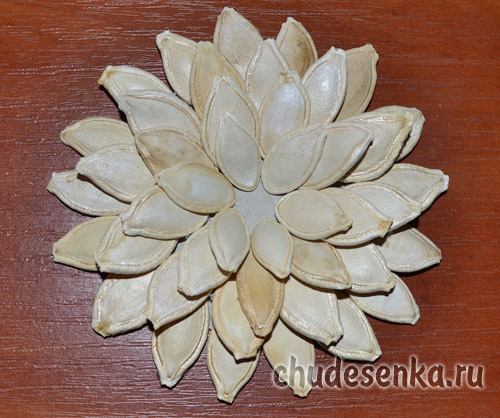
 Since our bouquet will consist of three colors, then make three for flowers.
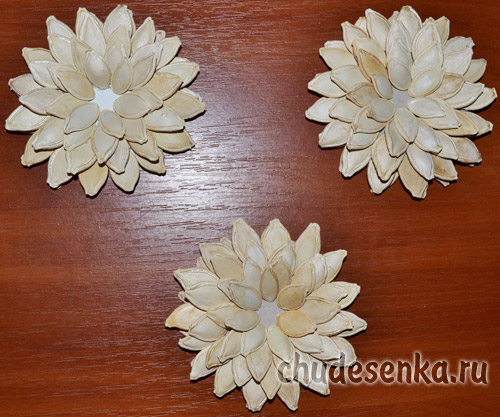 Pumpkin seeds, which we used for the flower petals are not very beautiful yellowish tint, so we using white acrylic paint, paint them white.
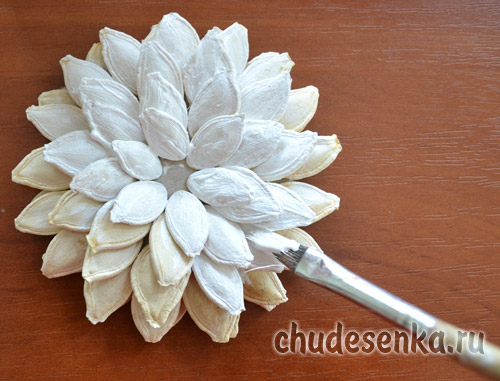 We leave flowers alone until they are completely dry.
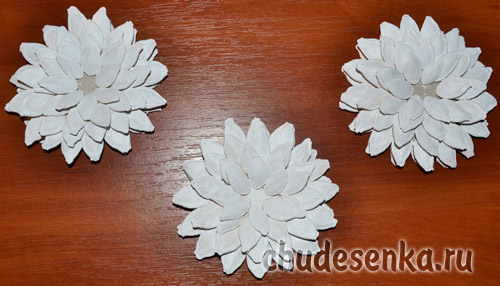 Until the paint is dry, we do not lose time in vain and will prepare two cardboard parts: a circle with a diameter of 6 cm, and lepestochek, the height of 7 cm, and width – 4 cm…
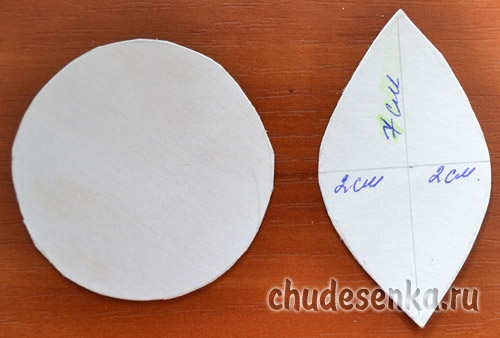 The carton blanks are put on the pressed and dried burlap and encircle their contours.
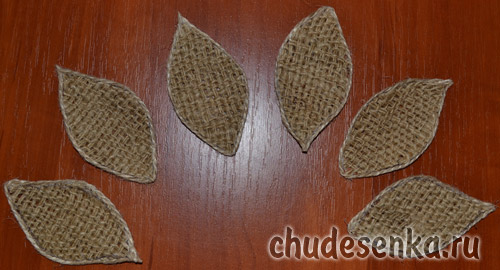
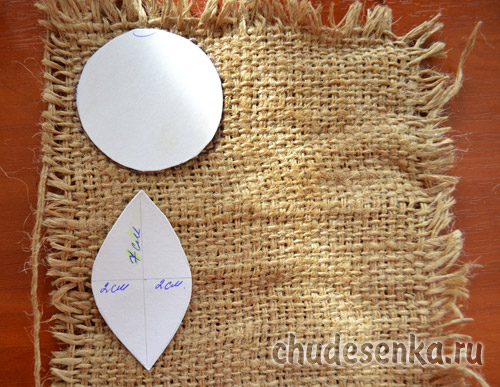 Circles will need to cut 3 pieces,
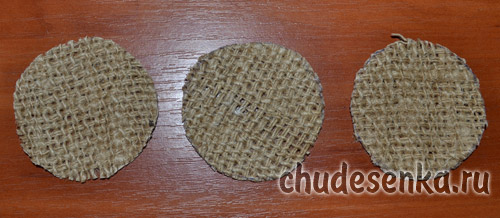 and petals – 6 pieces.
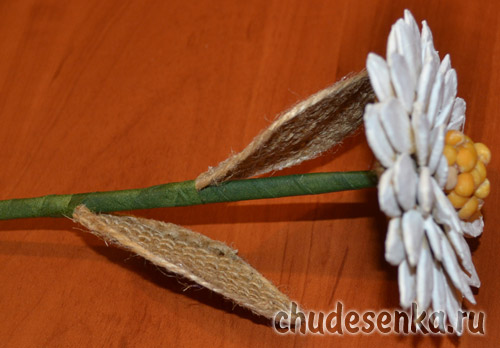
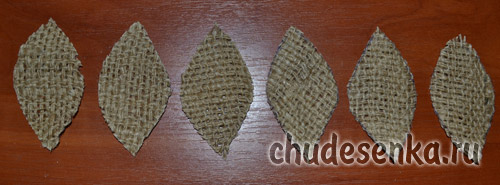 Next a burlap circle glue on the reverse side of a flower preform.
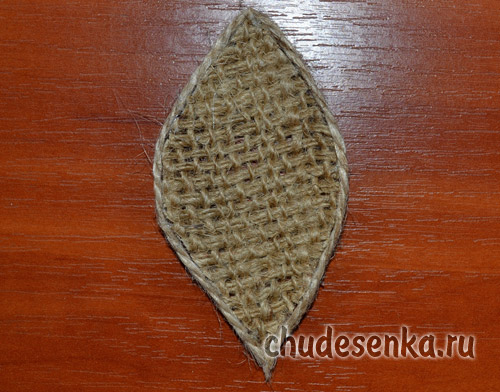
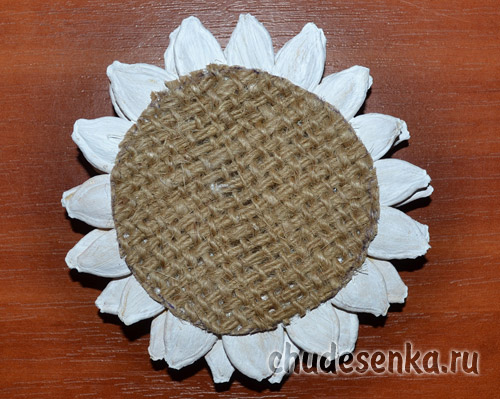 And along the contour cut petals from burlap, we stuck jute thread.
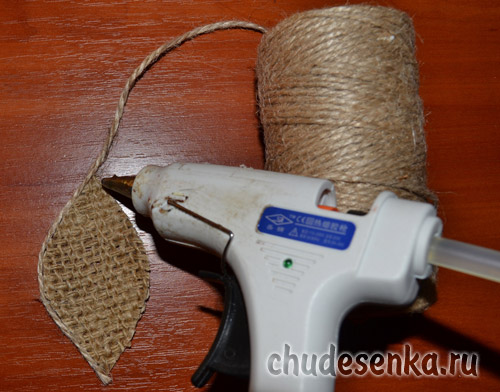
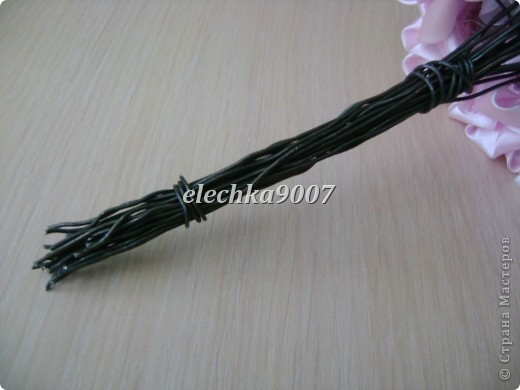
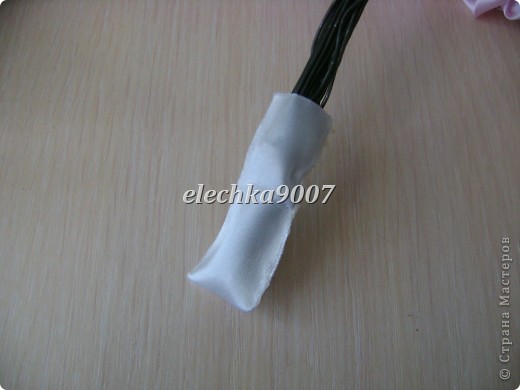
 And now it’s time to prepare for the stems of flowers. To stem can be used straight branches of the tree, we took advantage of chopsticks for sushi. Take floristic tape green and completely wrapped with it every wand.
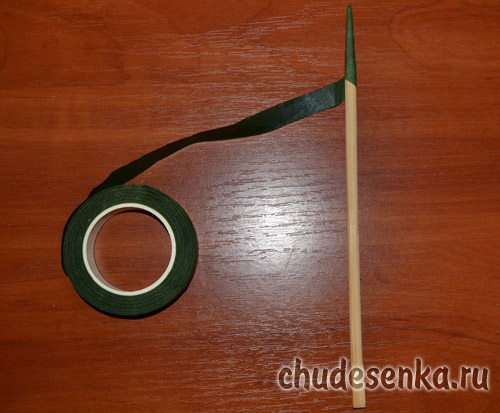
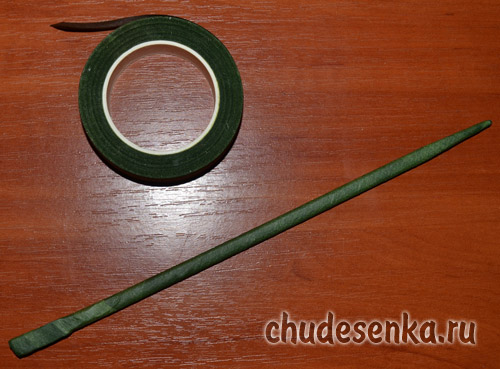 If you do not have floral tape, you can use the corrugated paper. We make three identical stems.
 Now we collect our flowers. In the middle of the flower Do the workpiece hole
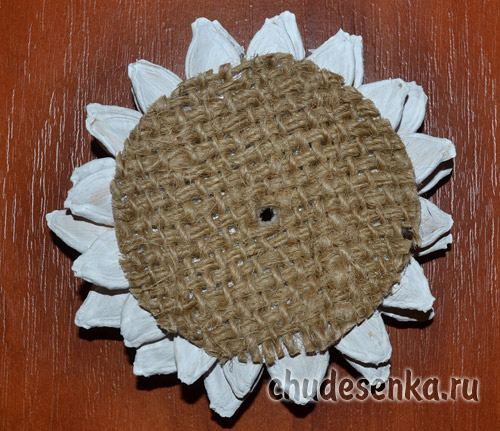 and insert the stem into it ready.
 In the middle of the flower glue yellow peas, which for strength from above abundantly watered with white glue.
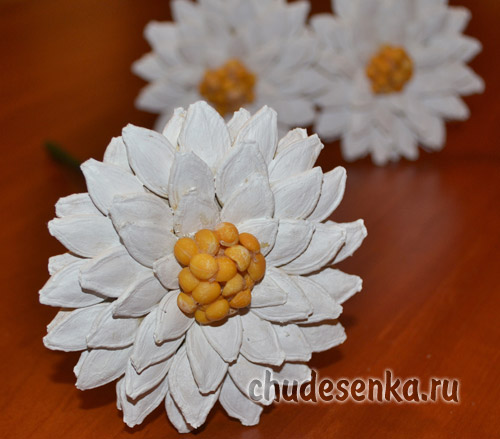
Also, instead of peas can be used dried corn kernels, buckwheat or grains of pepper.
And finally left to attach the petals to our flowers. Fasten them using floral tape or corrugated paper.
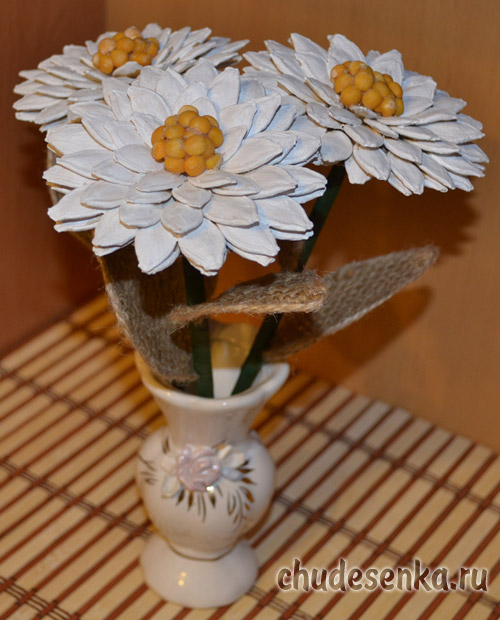
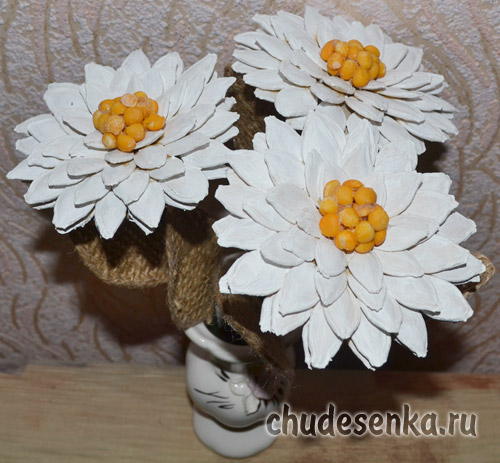
 That’s all – flowers ready! It remains to put our bouquet in a vase. This original bouquet decorates any space, especially natural corner in the school or in kindergarten. Good luck and success!
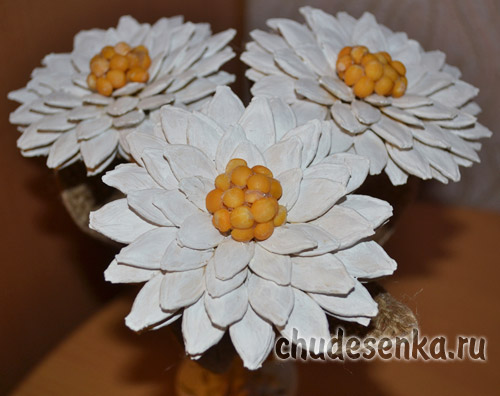
Source: Chudesenka
Thank you for visiting our website. We seek to always bring the best for you.
Did you like the Tutorial ? Leave your comment.
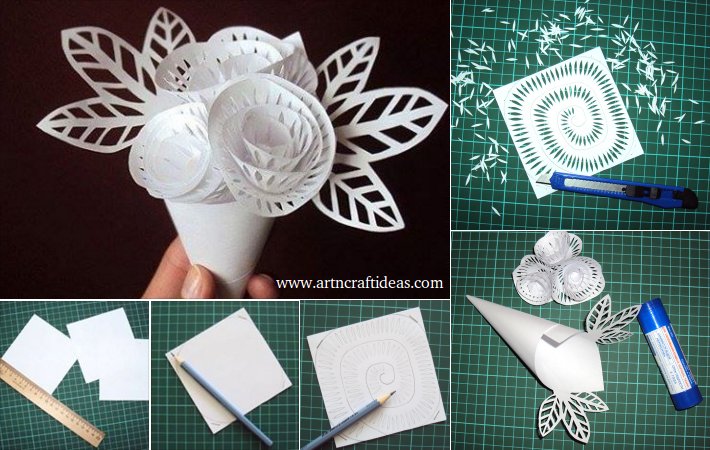
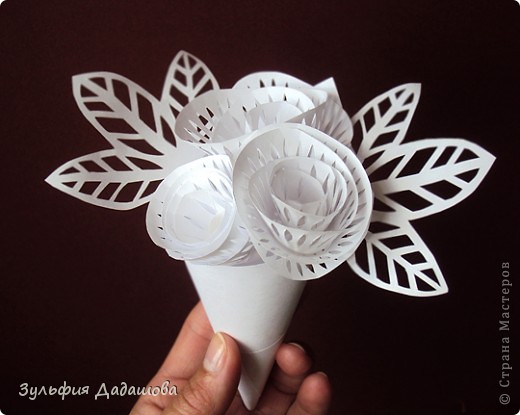
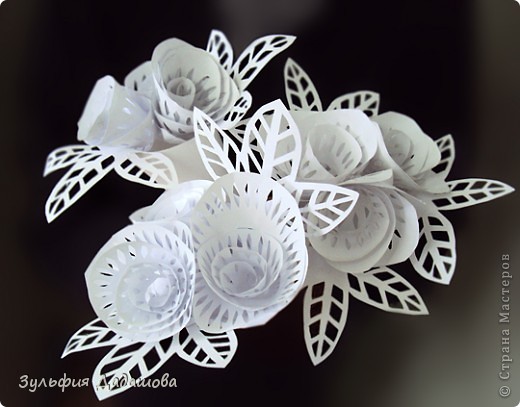
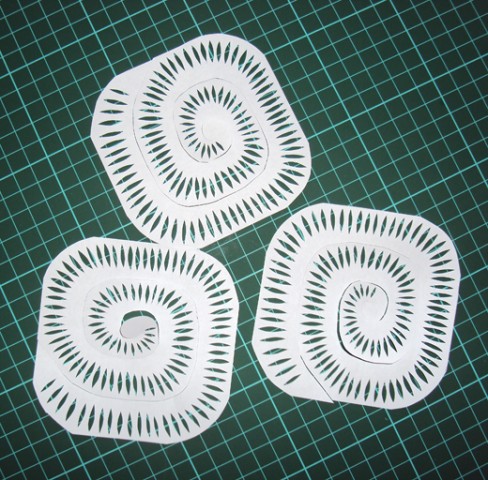

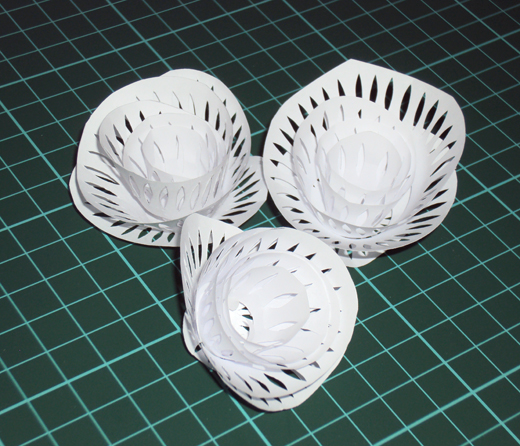
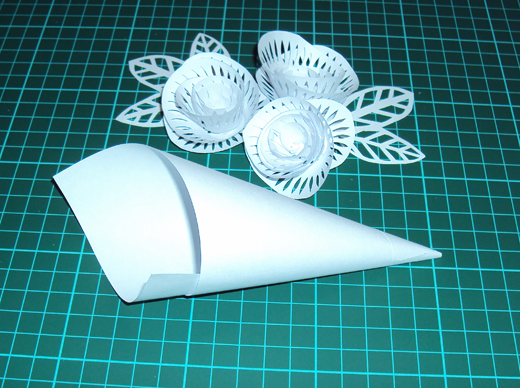
 The folded in half along the long side.
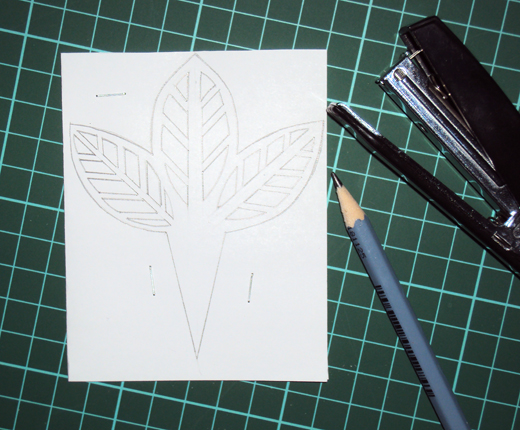
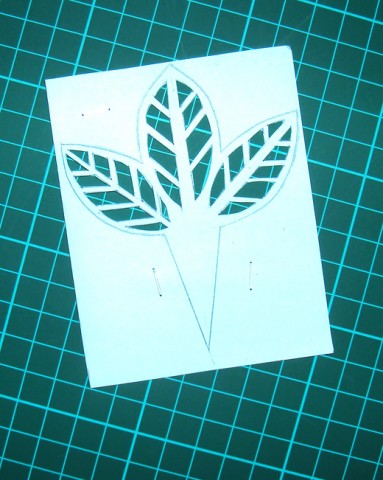 Then – along the contour.
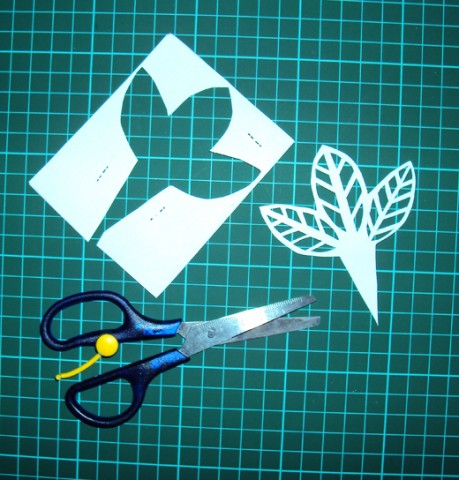
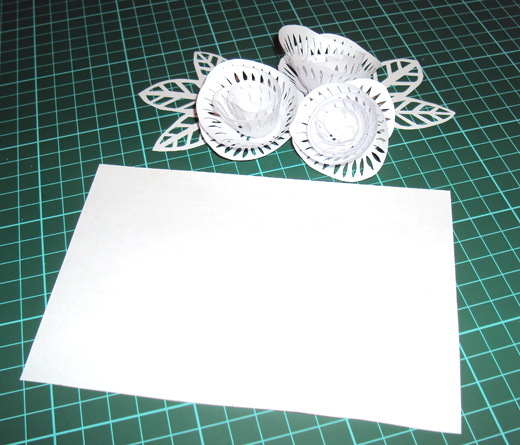
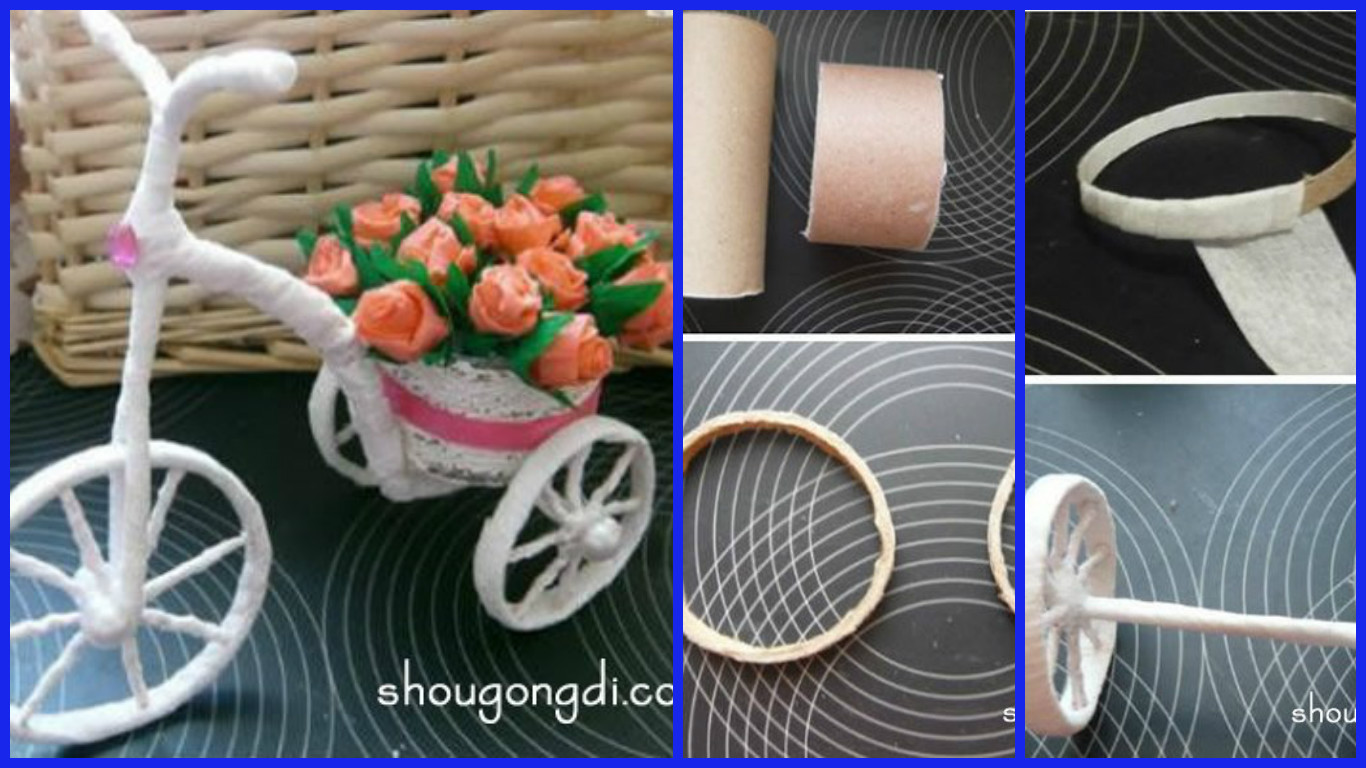
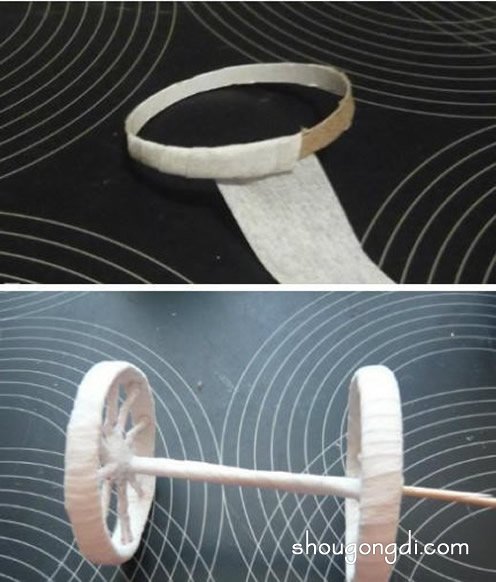
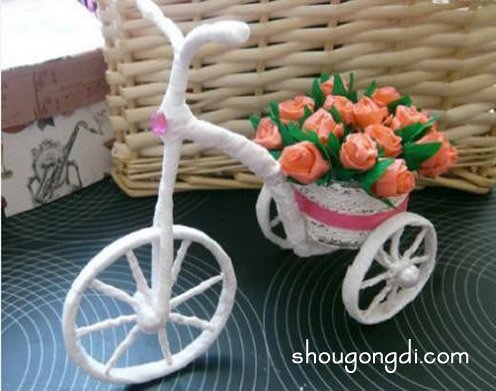
 Pretty three floats handmade models, simple and yet beautiful, love for the children by hand to DIY. . Ready reel spool, wire and wrapped with white paper were made tricycle Che Gulu and body, and then together. . Not very detailed steps require everyone to use their brains, oh. .
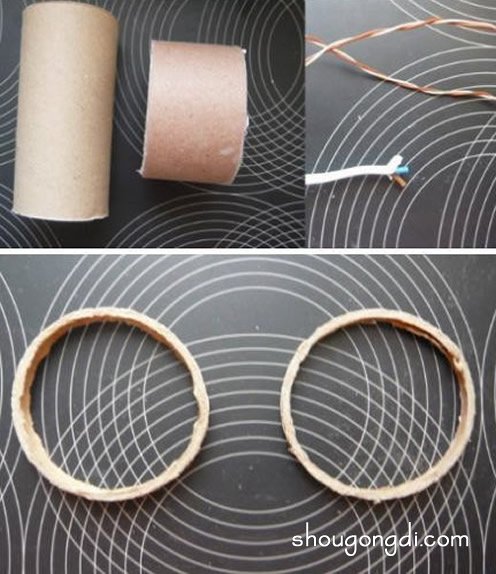

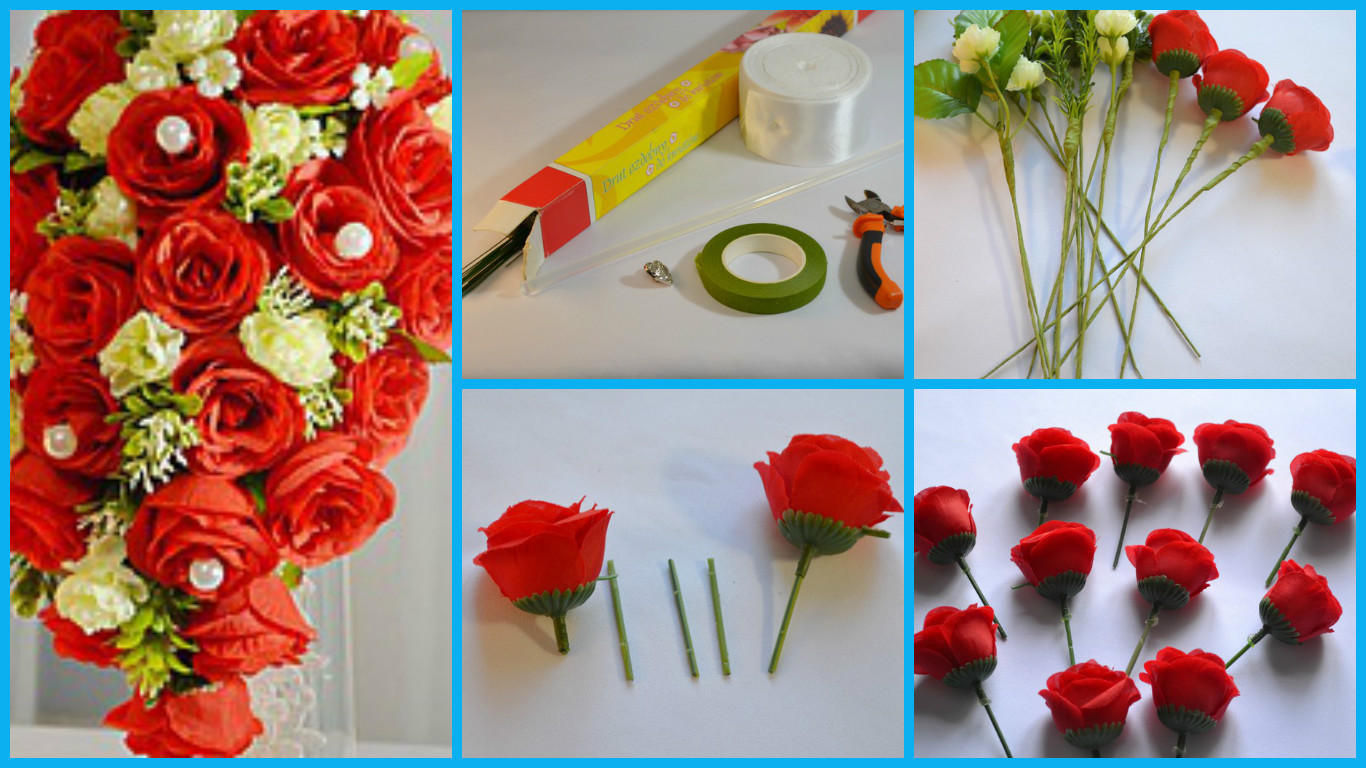

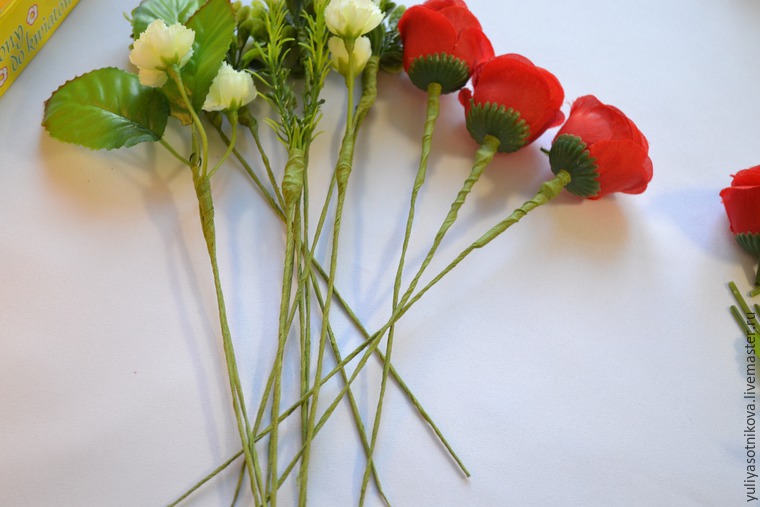
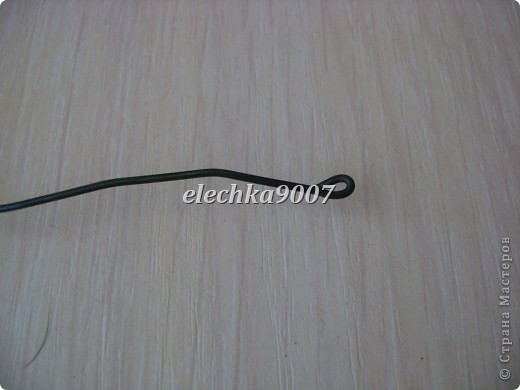
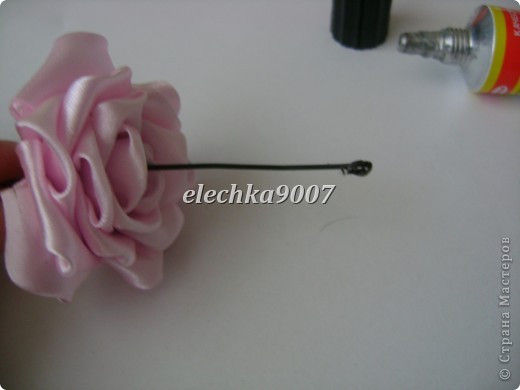
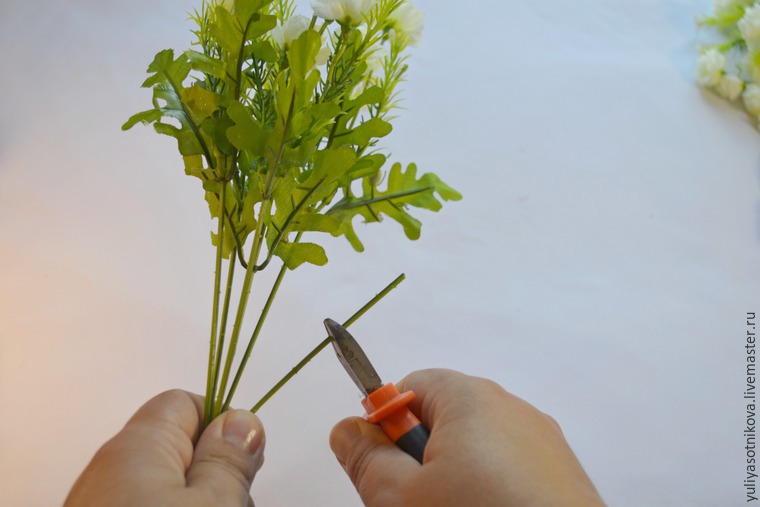 Cut it into pieces, centimetre 4-5. Such pieces will need as much as the heads of roses we’ll use.
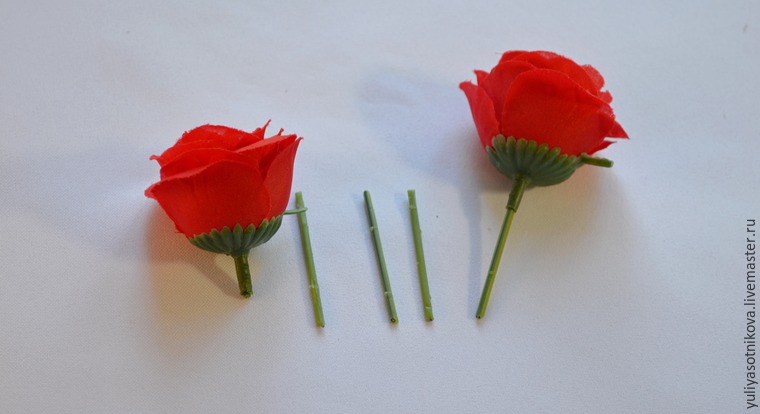 Next, we need to put on the head of the wire segments roses. To do this, we are on the tip of the wire we put a drop of glue and put on our roses. It looks as follows:
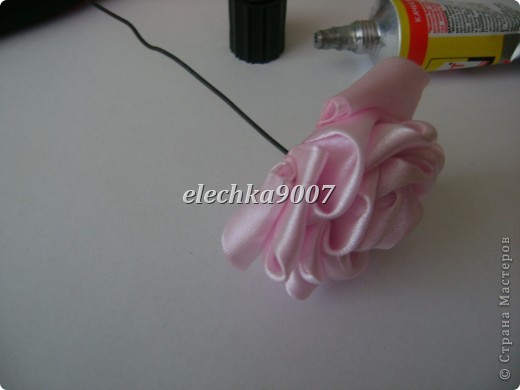
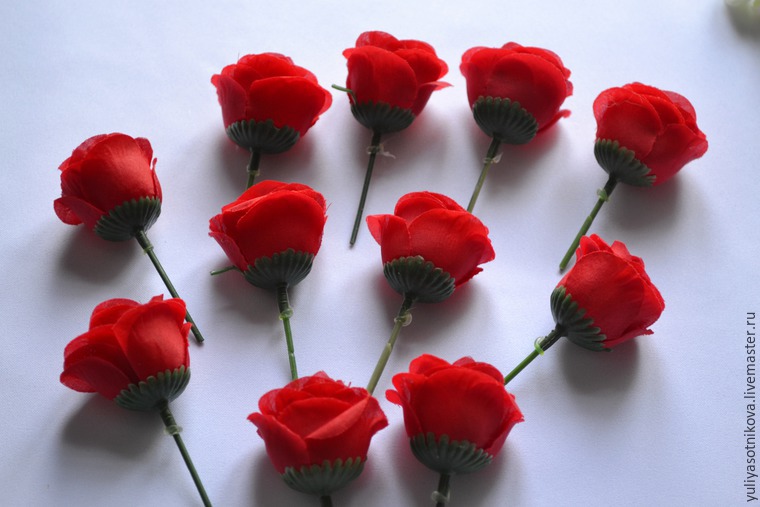 We continue to form stems. Take the wire and florist primate it to our legs so that the ends of the wires were down, prolonging the existing legs. In the same way we do with the rest of the flowers and greenery.
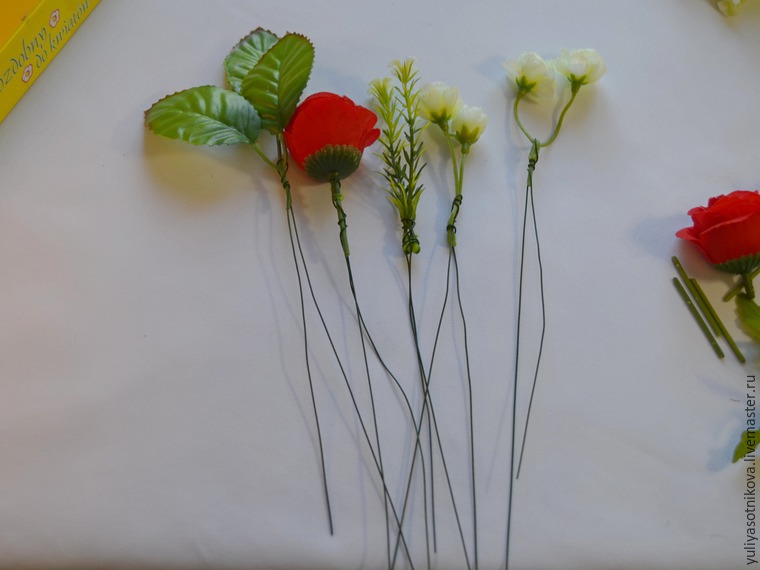 Now we need to wire propitiate. To do this, take the tape and from top to bottom, a little stretching her tight and carefully amalgamate she ends our wire. That’s legs and ready. At first glance, someone who has not worked in the technique of taping, the process may seem long, but when “the hand is already packed,” it is done quickly.
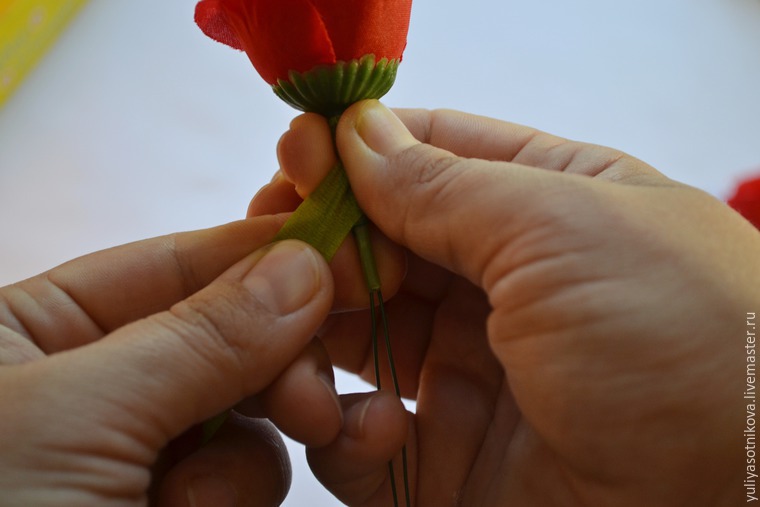


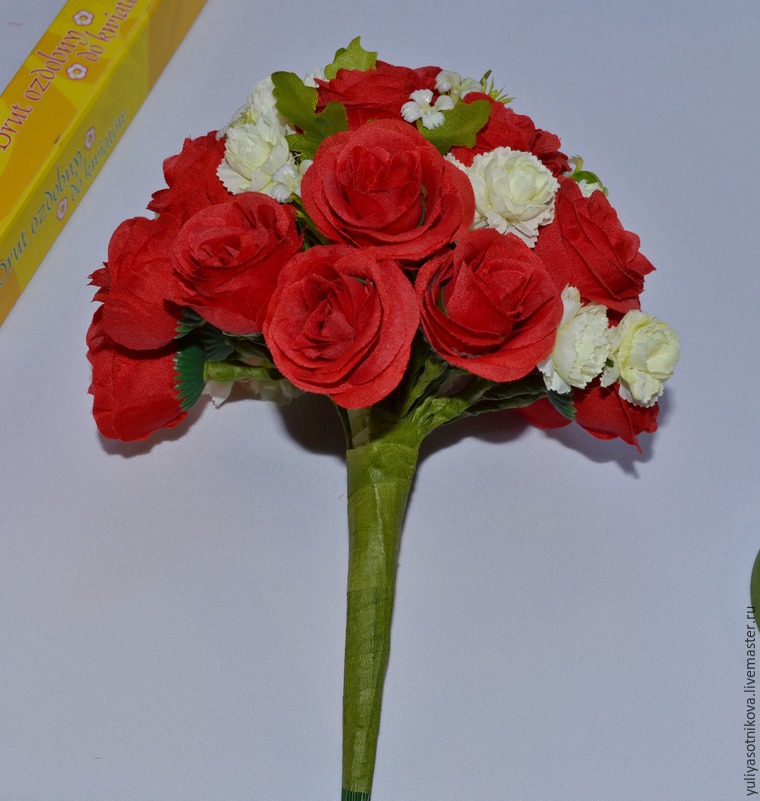
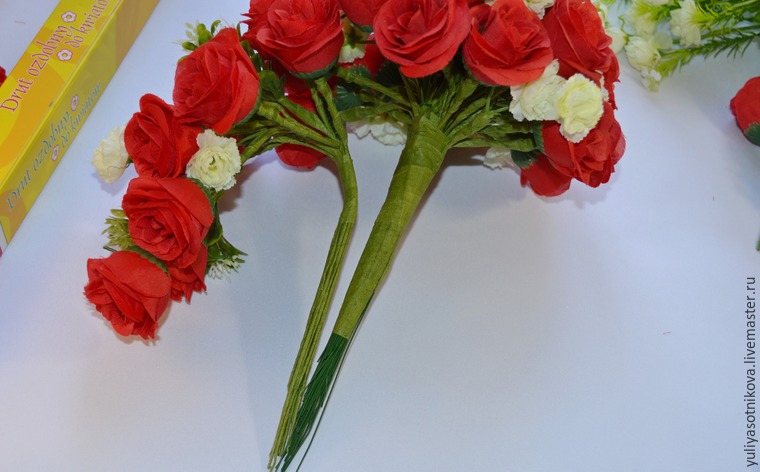
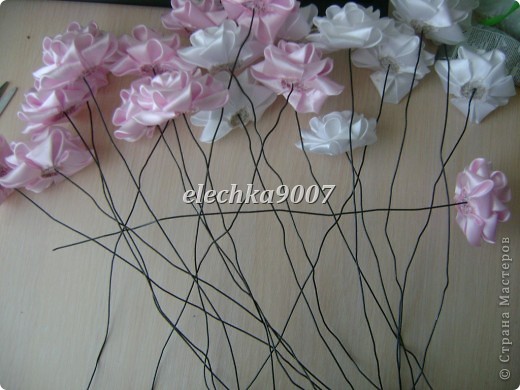
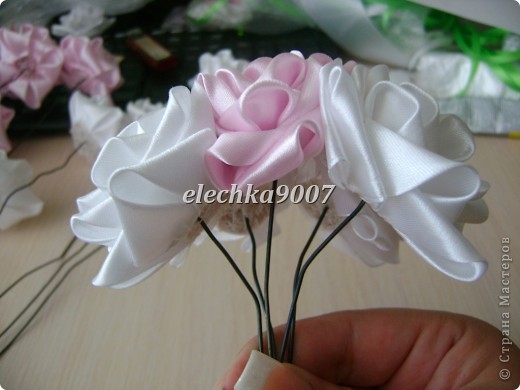
 Now you are ready to assemble. Take one at the flower and begin to put them together to form a “cap” of the bouquet.
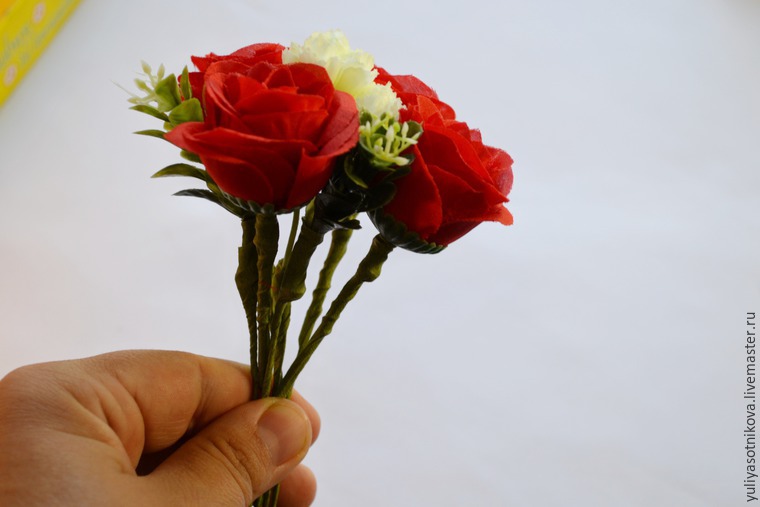 It is better to do so: lay down a few stalks, tap-recorded tape. Then added another and again recorded.
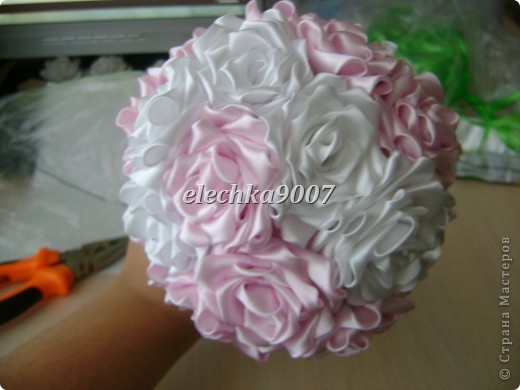
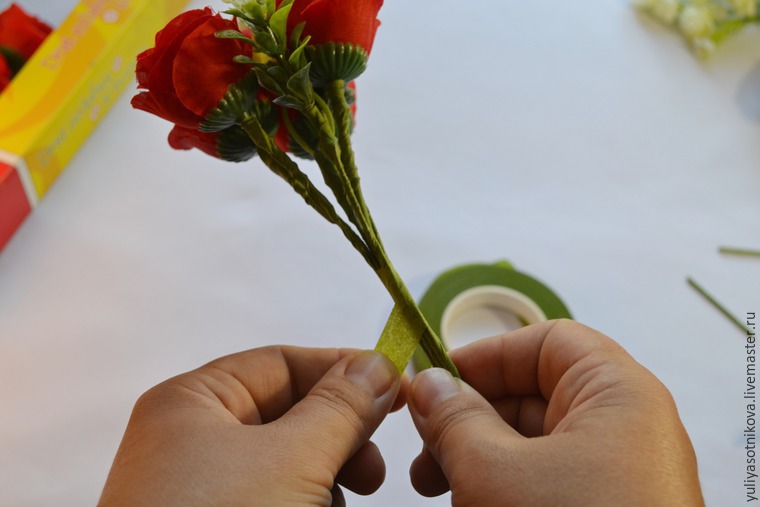 So we continue to put a flower in the flower, alternating red and white and adding a small green, trying to give the bouquet shape of a hemisphere.
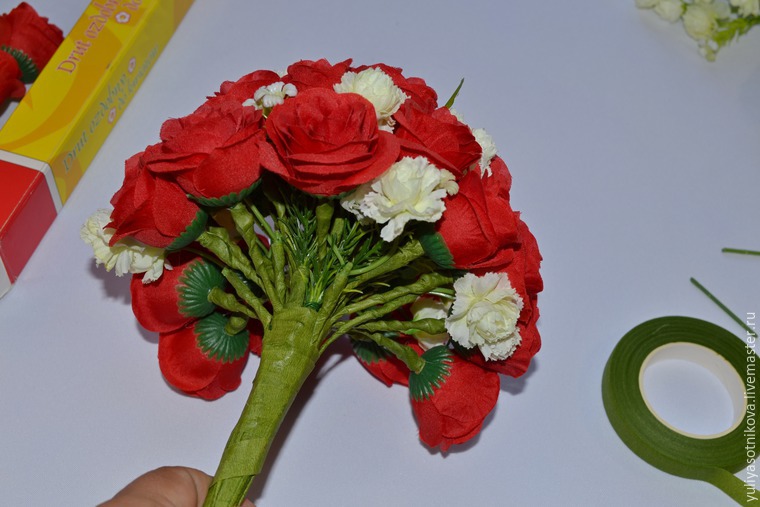
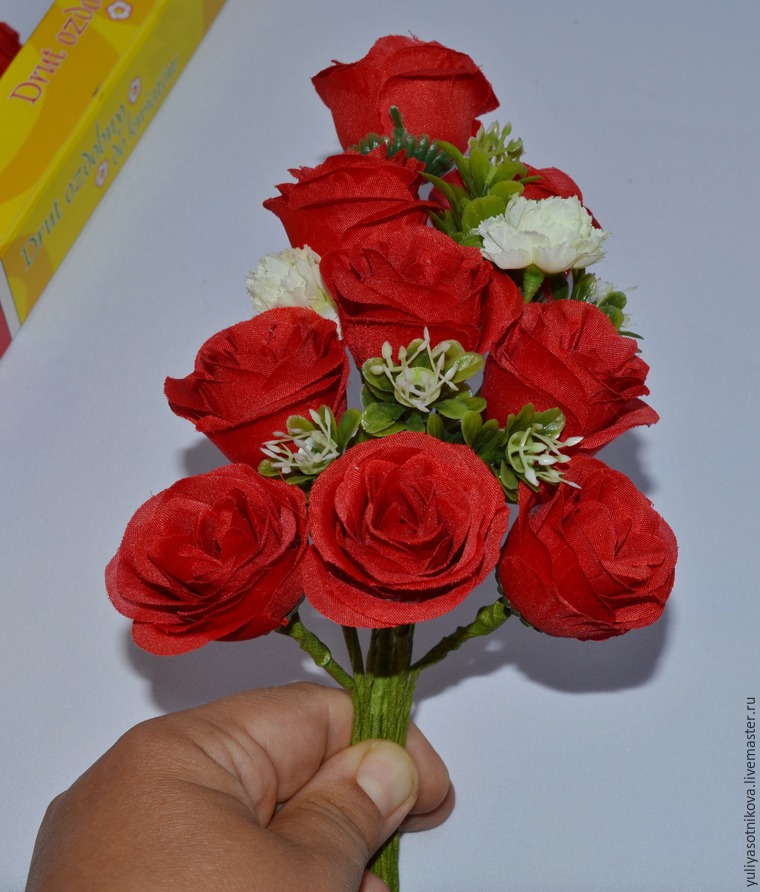
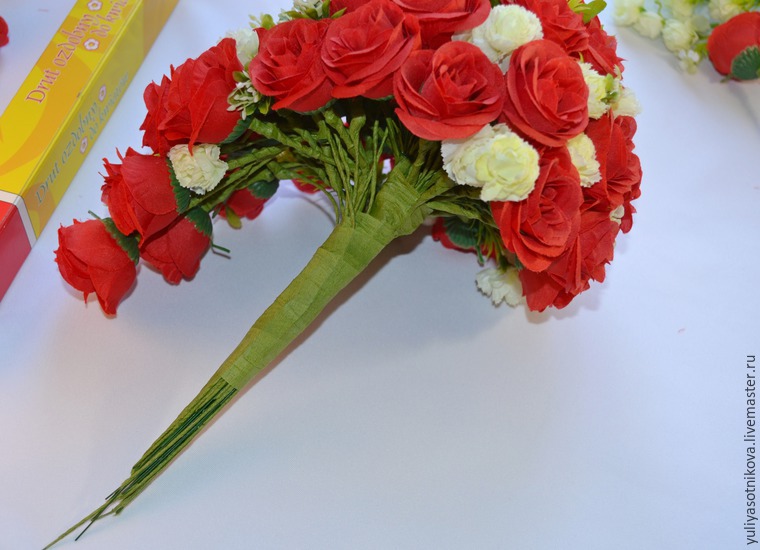
 Here it was possible to stay and start to decorate the handle of the bouquet, but as he we should be cascaded, we will form a part of its drop down. To do this, take in hand a rose, then, below (below the height of the head), are putting two other roses. Below them three pieces. In between, do not forget to insert a carnation and greens. And since several rows depending on how long we want to make the cascade. In form it resembles a Christmas tree.
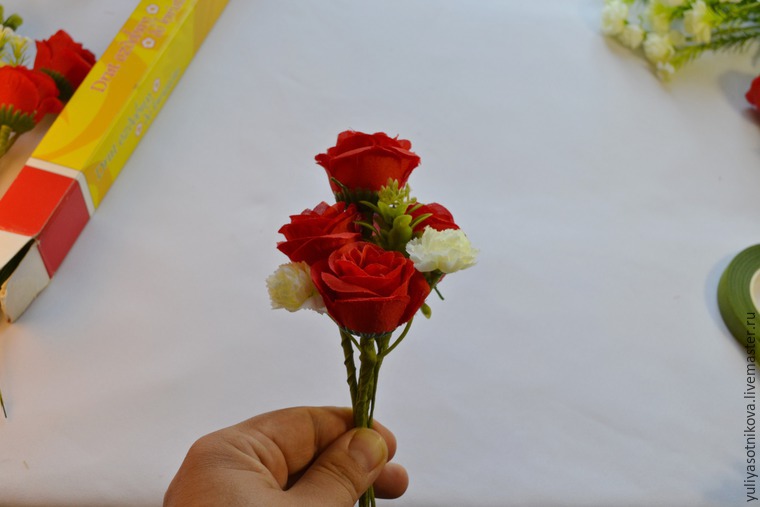
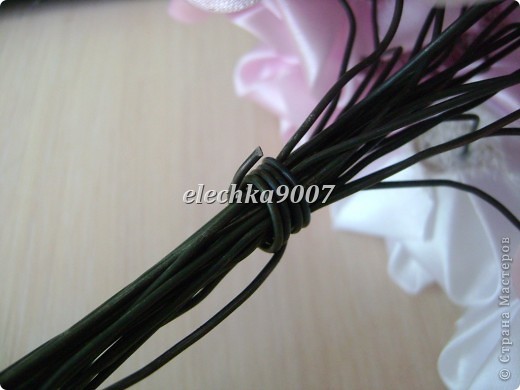
 Next, you need to connect the top and bottom of the bouquet. To do this, we bending the lower part and are putting it to the top so that together they constituted a single unit. We fix tap-tape.
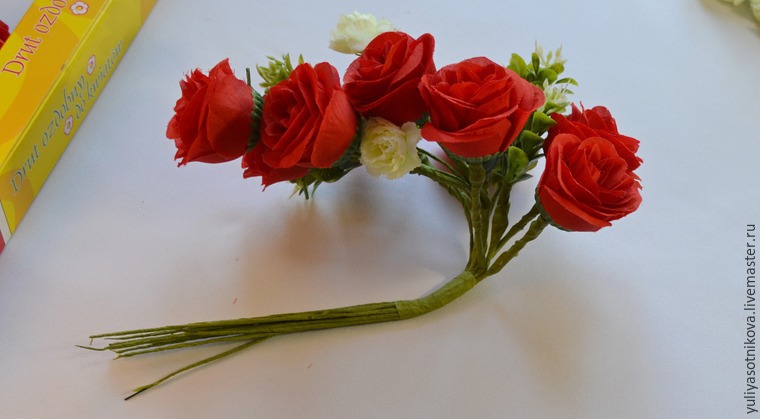
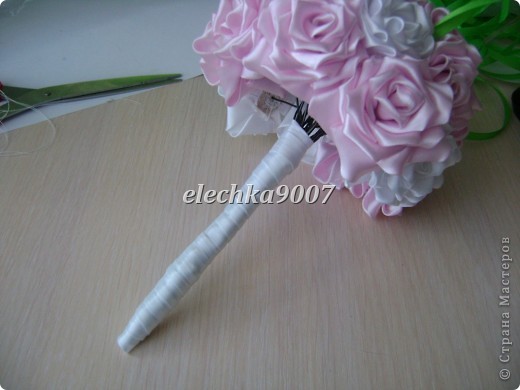
 Now start to decorate the stem of the bouquet. First, on the edges of the leaves of roses surrounded by cushioning the foot and again fix tap-tape.
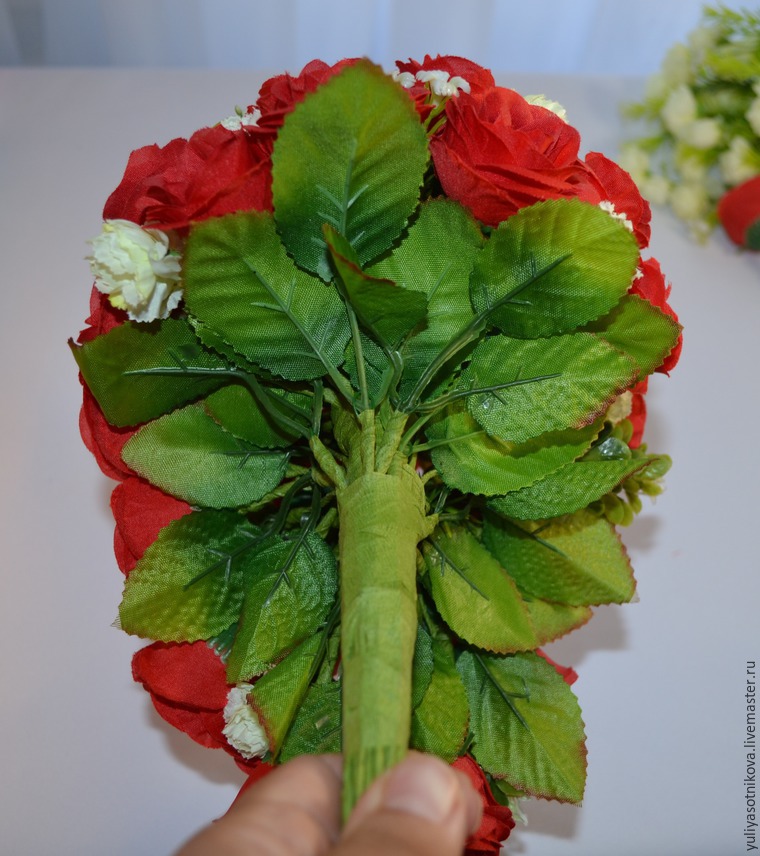 Satin ribbon width 4 cm cut into 8 pieces of 10-12 cm. Each leg folded in half are bent, as shown in the photo and fix with glue.
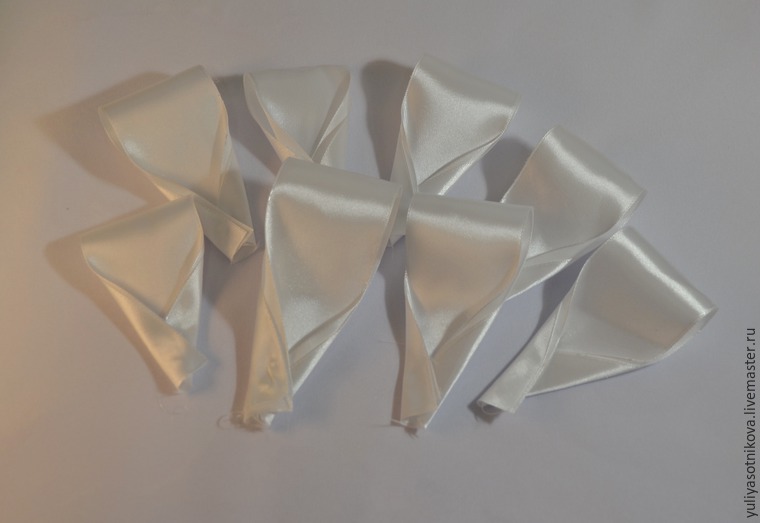 These blanks around the perimeter of foot paste bouquet.
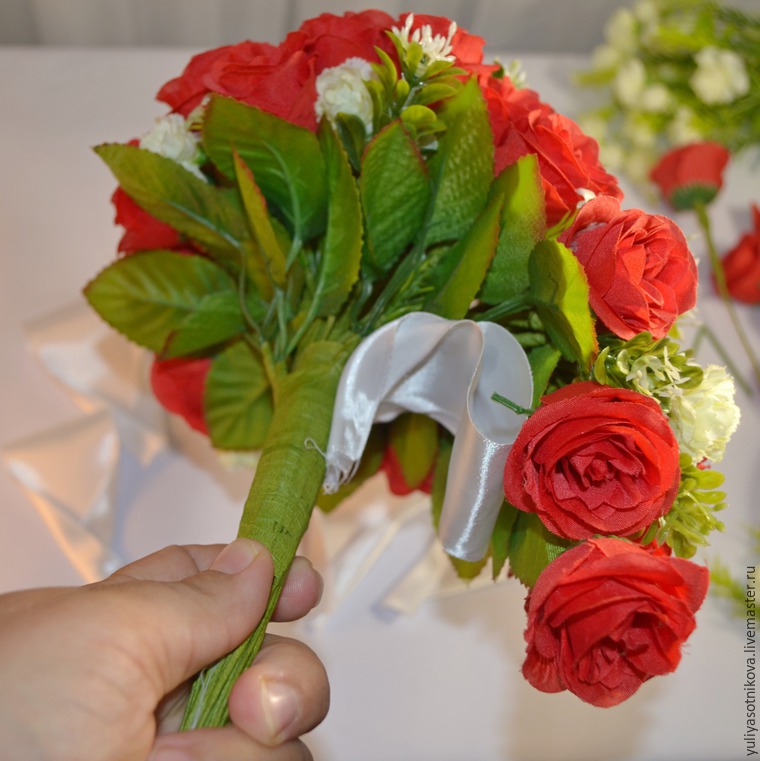
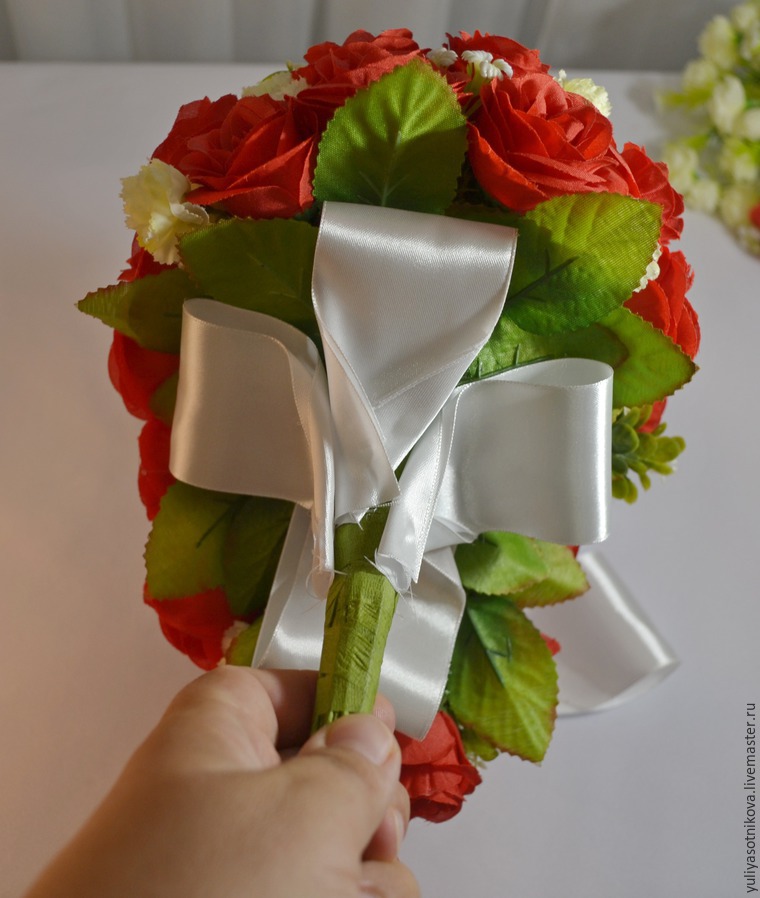
 Determine how long we want to leave the leg and cut the excess stems clippers. Again, fix their tap-tape.
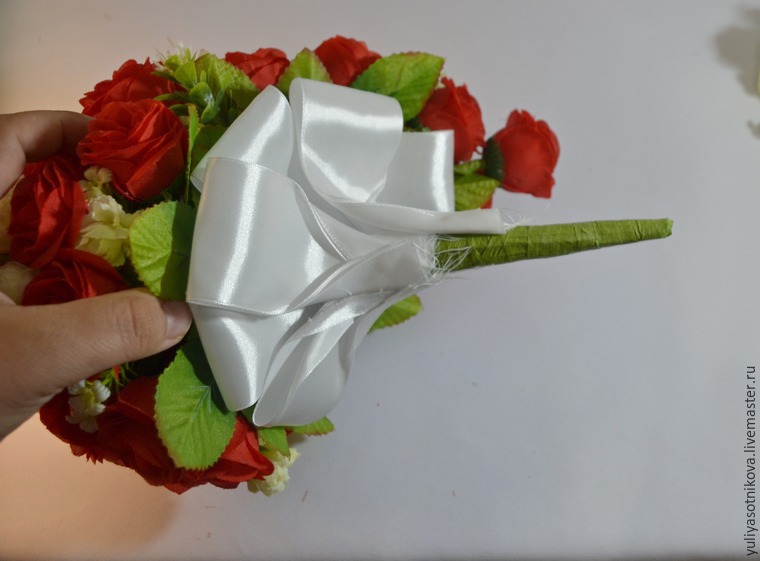 Then decorate the leg across the length of the ribbon width of 2.5 cm.
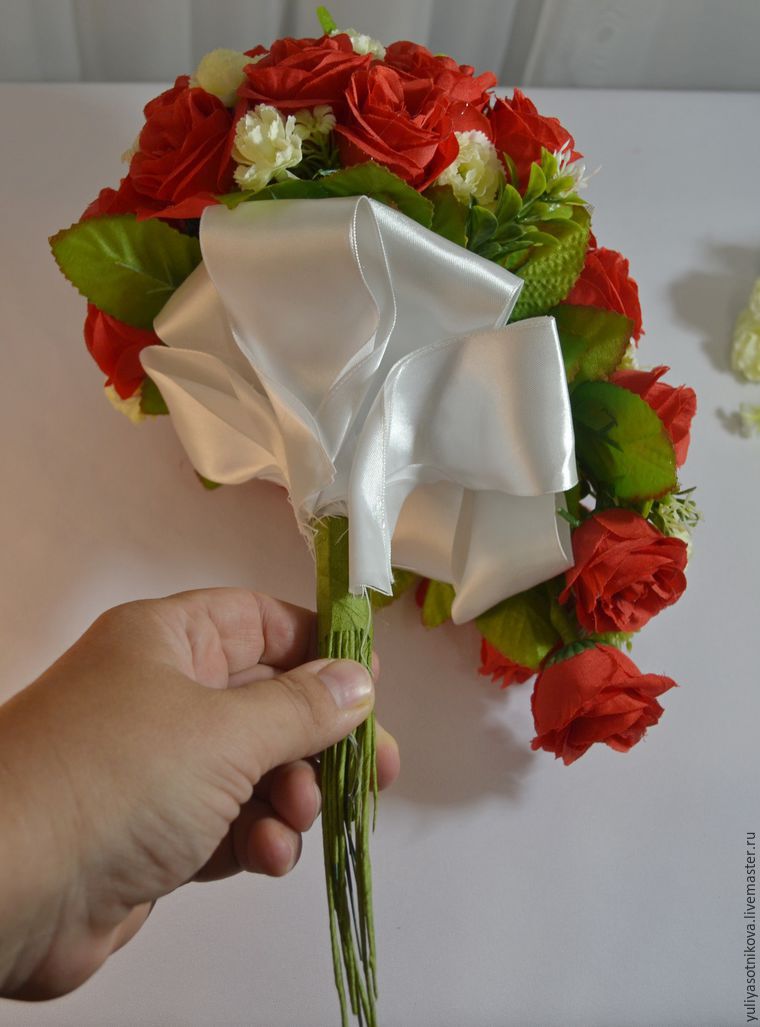
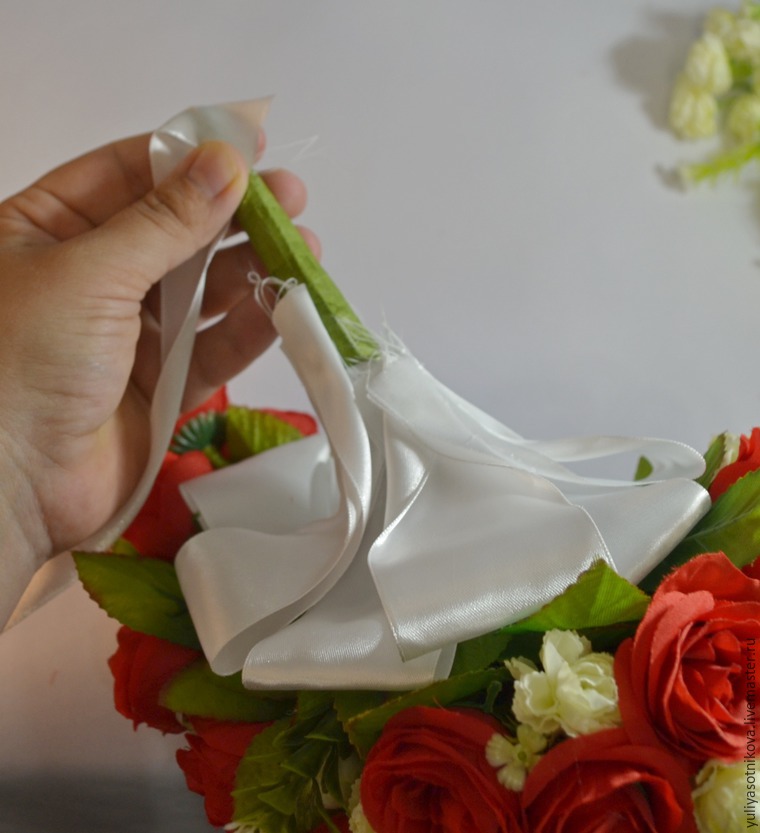
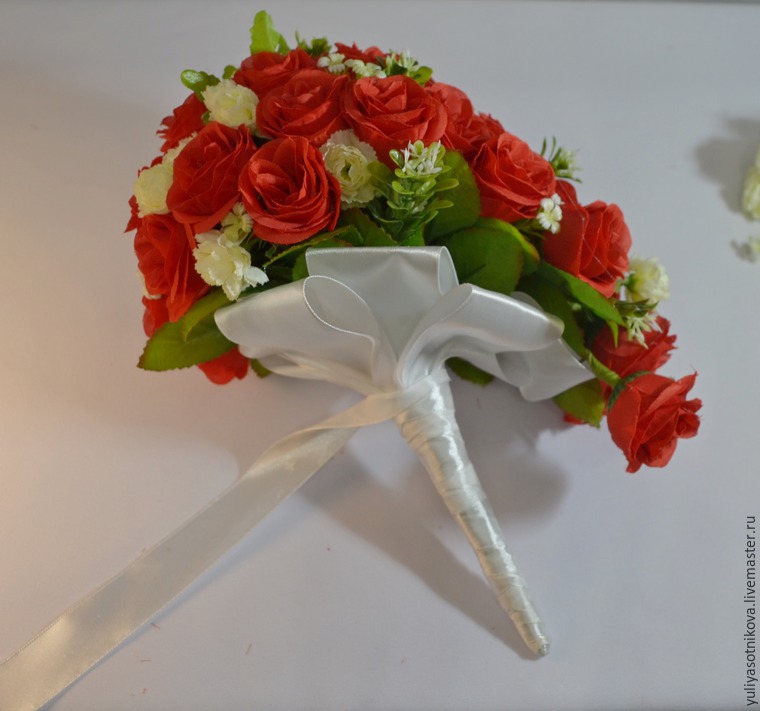

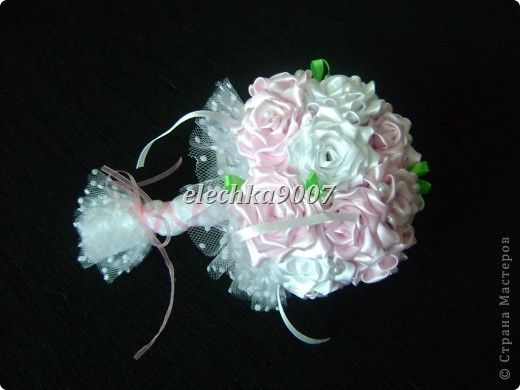
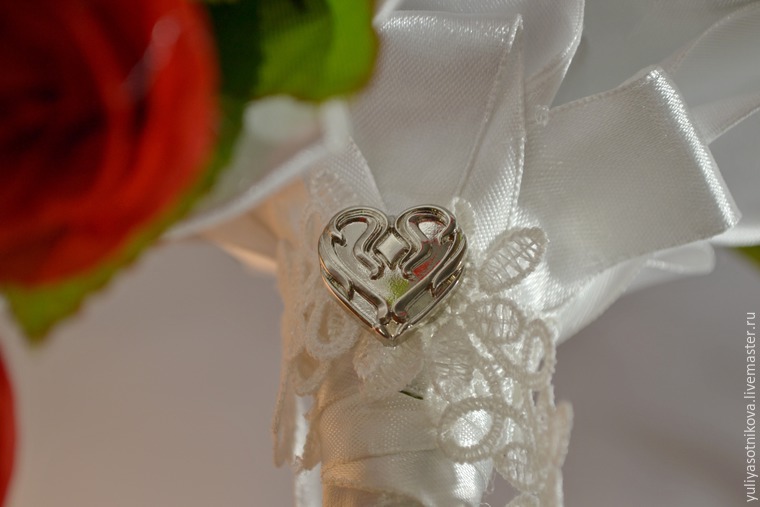
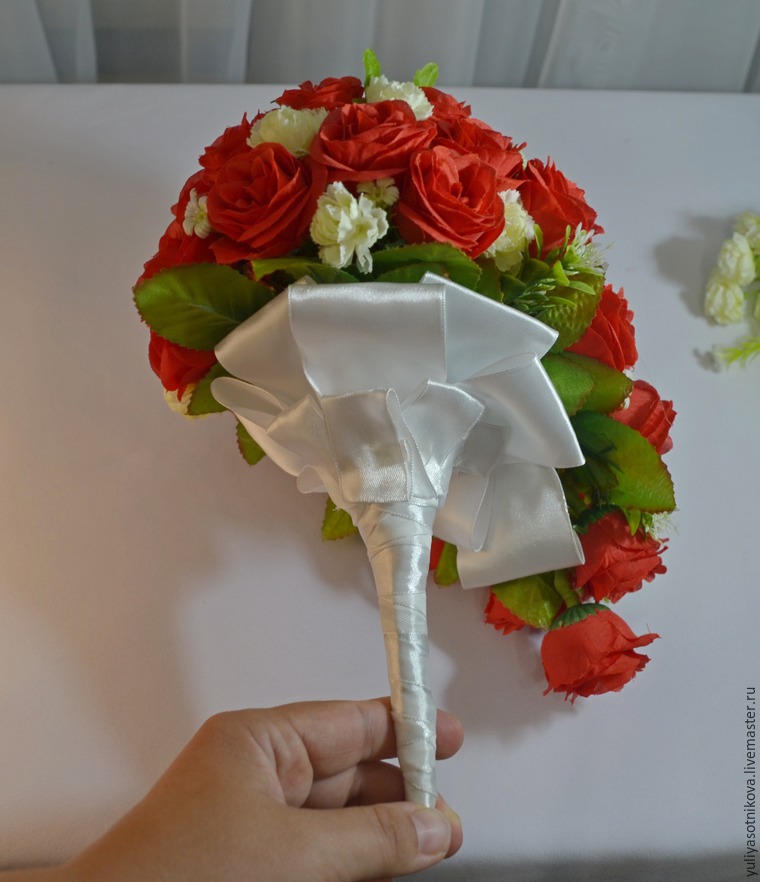 In the centre of some of the glue in beads roses. On foot, the top we tie or glue lace ribbon and decorate with decorative buttons.
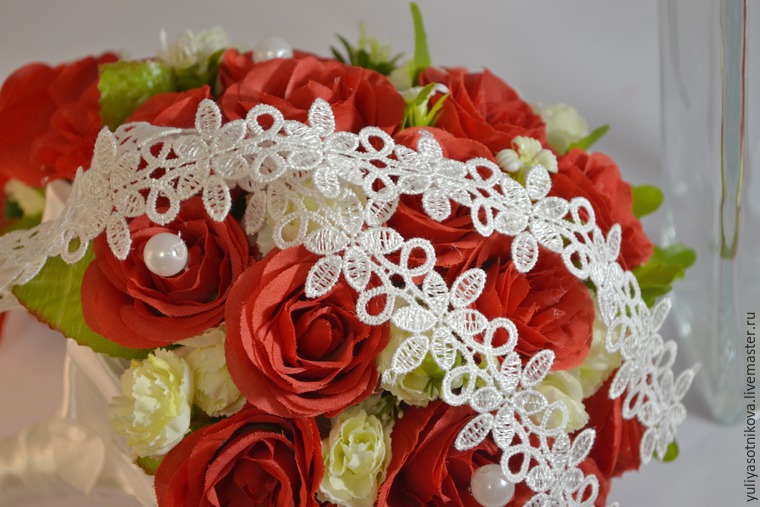
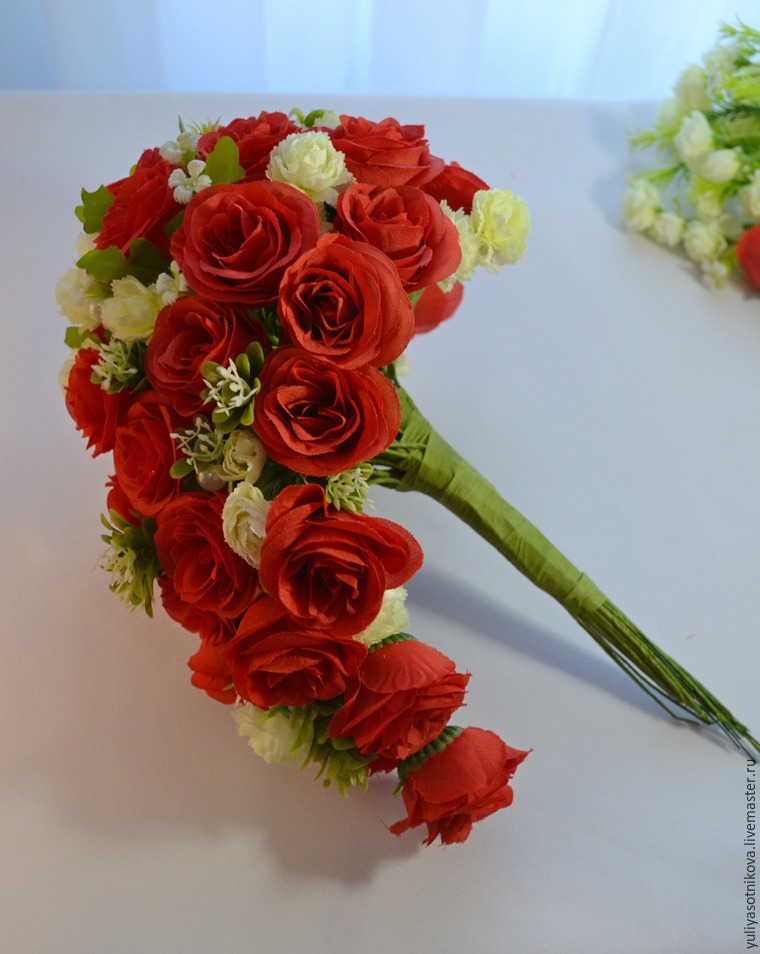
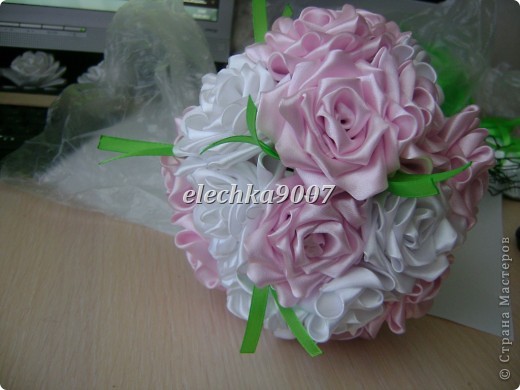
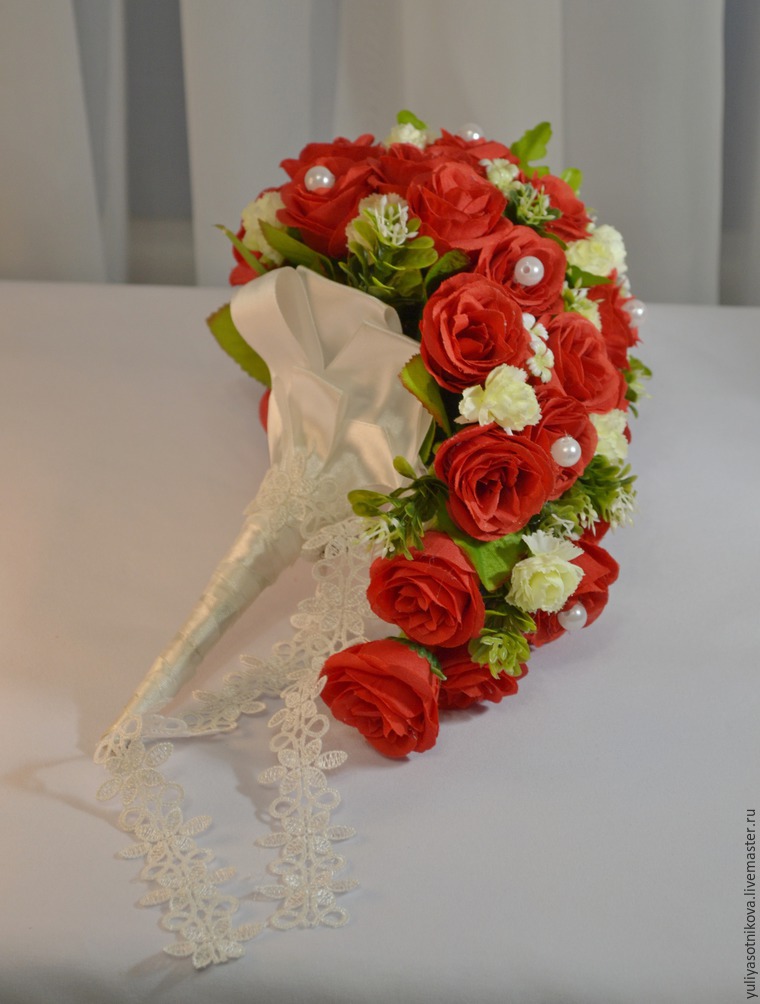 Well that’s all, our bouquet is ready! If my master class you like, or you find it for yourself something useful, please click ‘like’, because he is involved in the competition.
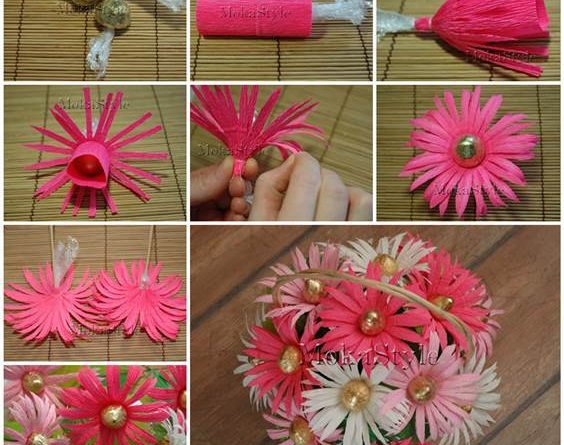
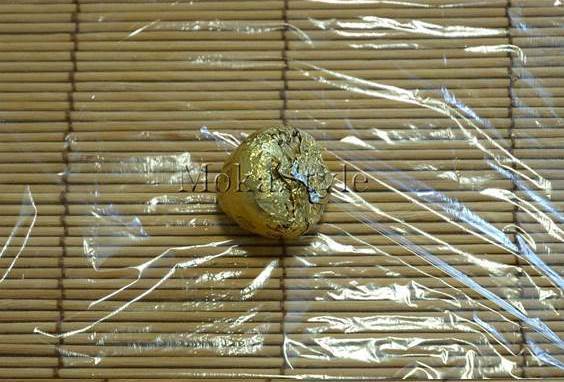 2. Wrap the chocolates with cellophane.
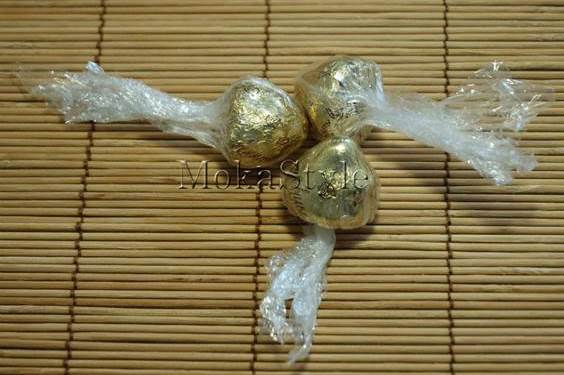 3. Cut a piece of rectangular crepe paper (size depends on the size of the chocolate).
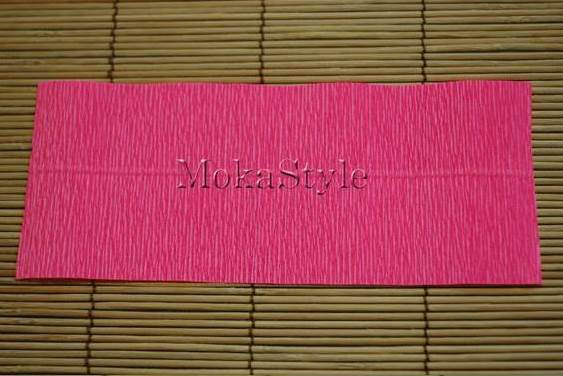 4. Wrap the chocolate in the crepe paper piece.
 5. Tie one end with thread.
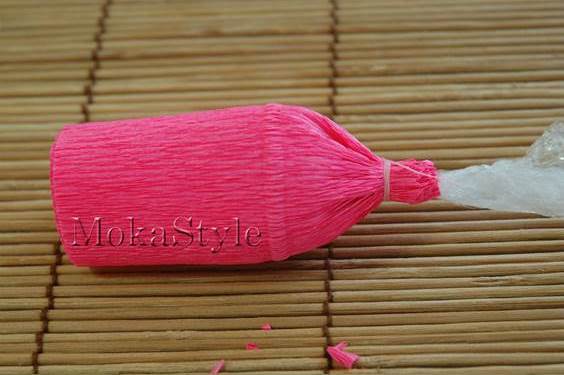 6. Cut the outer layer into fringes as the petals.
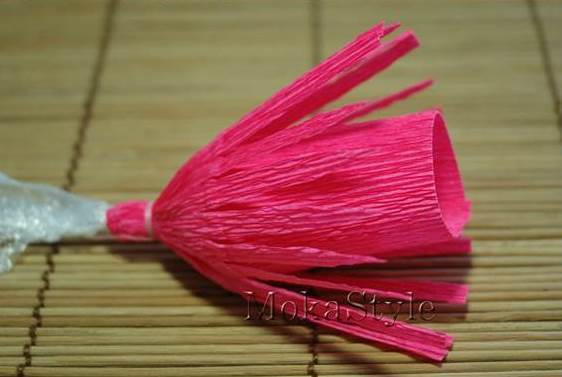 7. Twist the fringes outward.
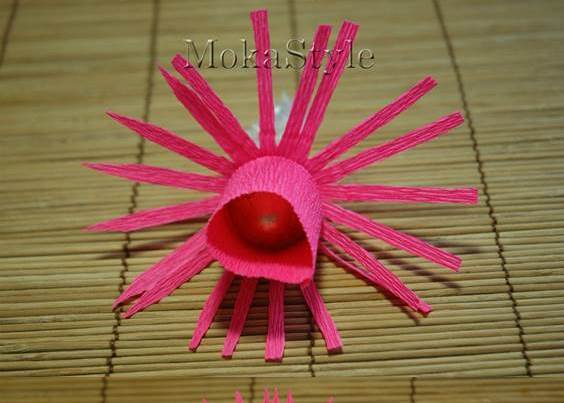 8. Cut the inner layer of crepe paper into fringes and twist them out.
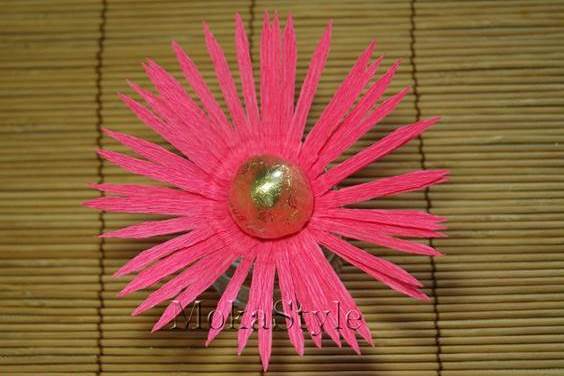 9. Press the petals with your fingers to make them curly.
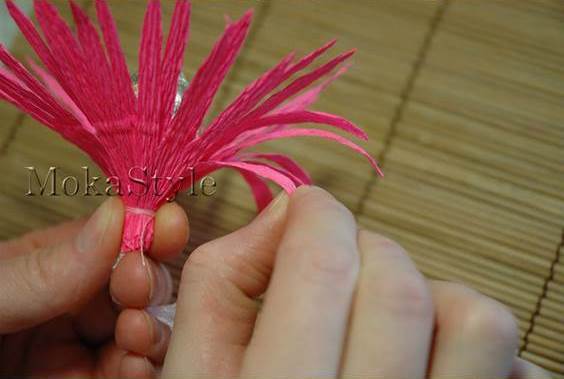
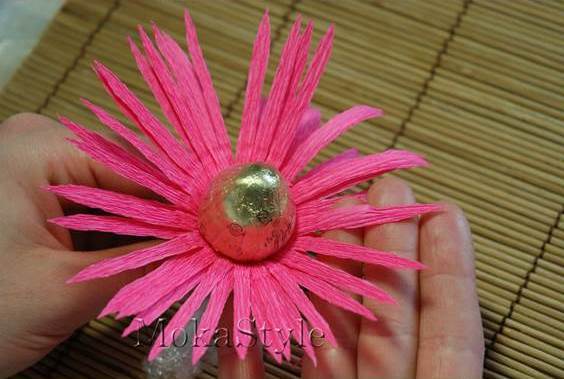
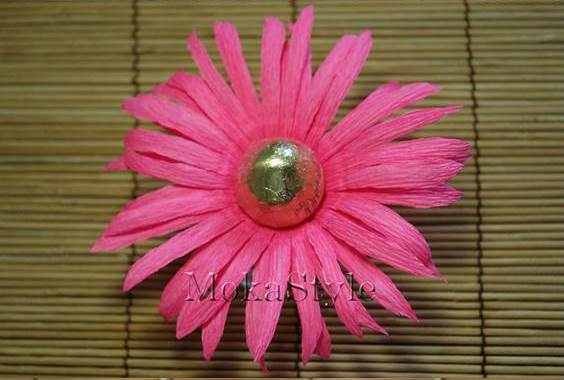 10. Insert the wooden skewers through the middle of the flowers.
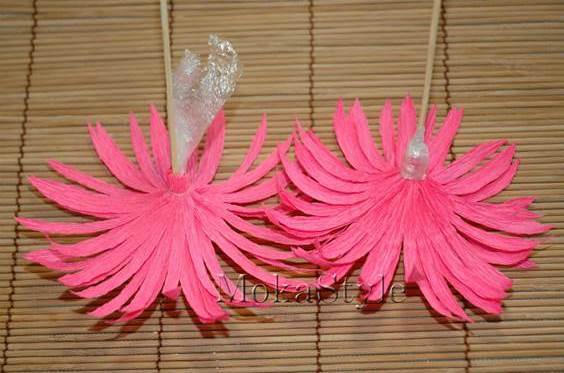 11. Make more flowers with different colors of crepe paper.
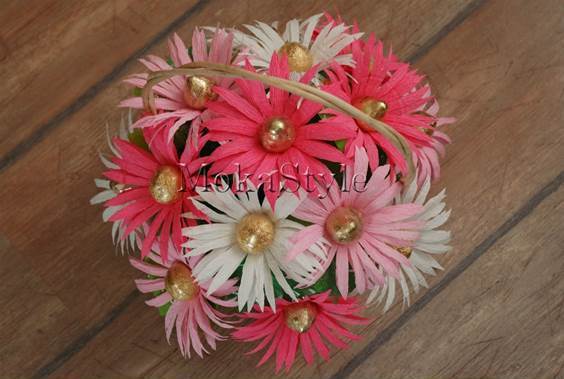
 12. Place the bouquet of flowers in a basket. Enjoy!
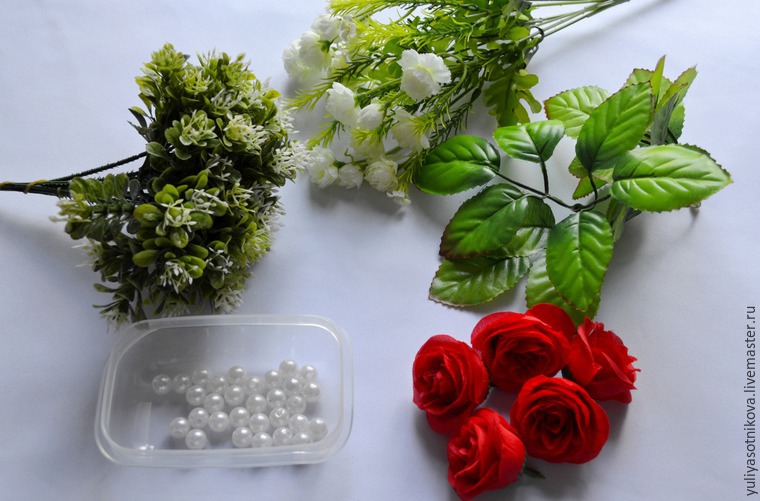
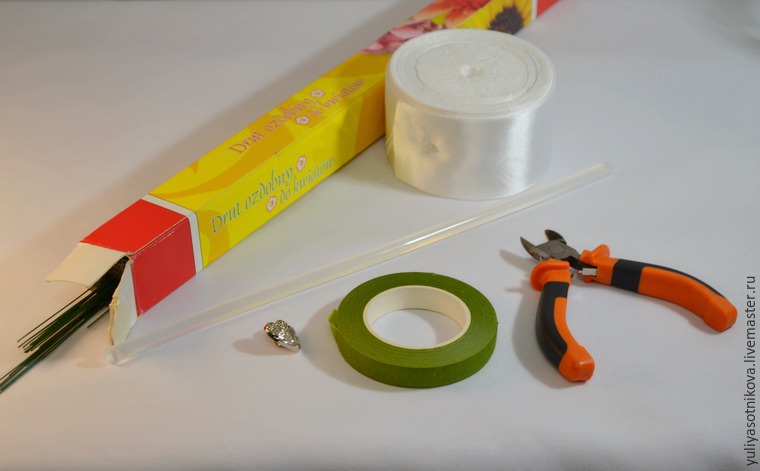
 Required Material:
 2.
2. 3.
3. 4.
4. 5.
5. 6.
6. 7.
7. 8.
8. 9.
9. 10.
10. 11.
11. 13.
13.