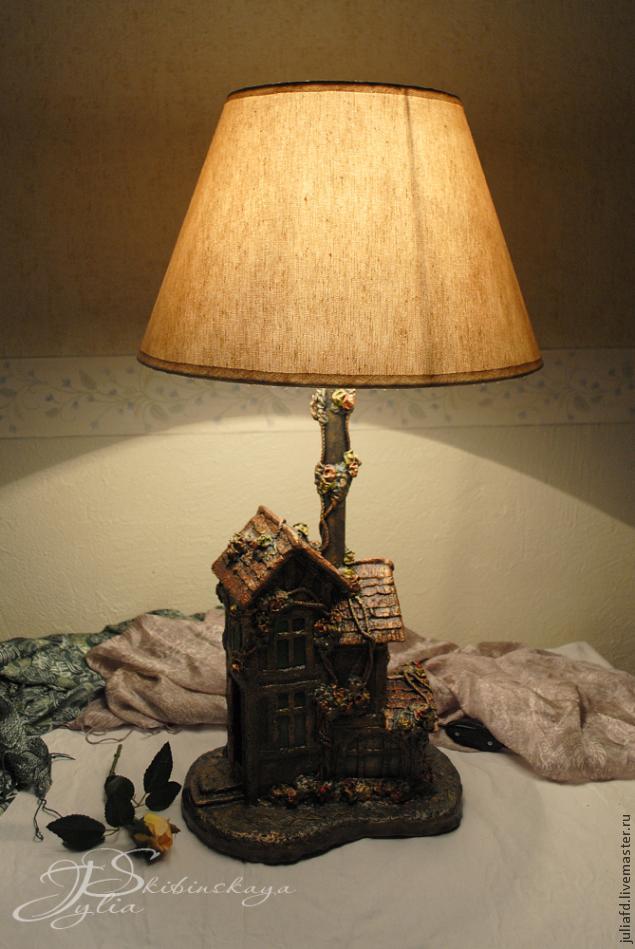
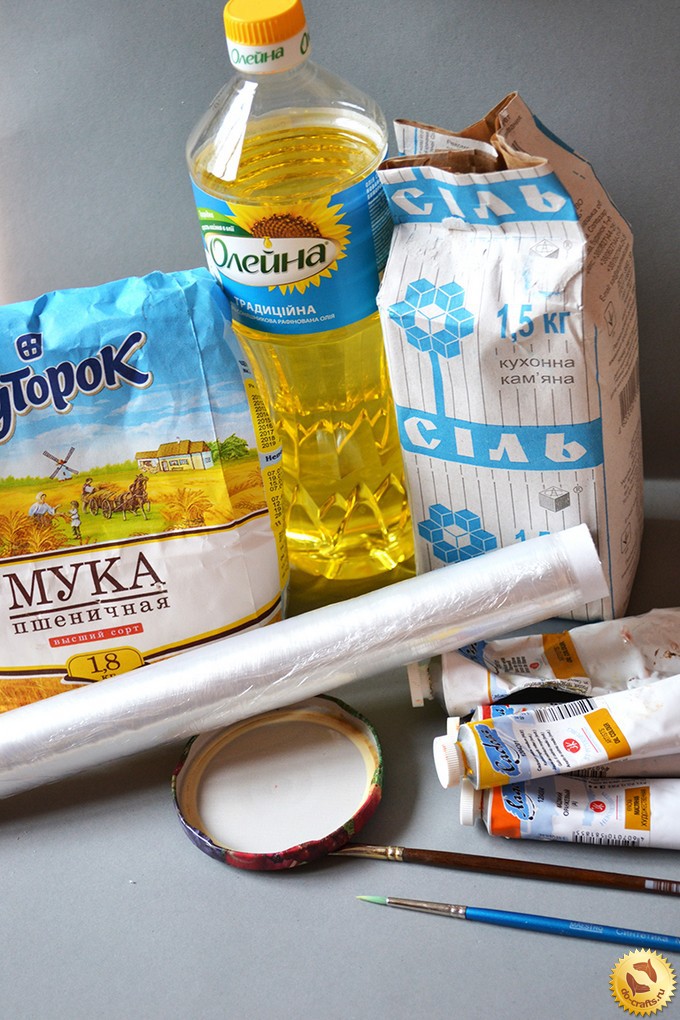
Required Materials decorating bottles:
1. Bottle
2. The self-hardening modeling paste on the air.
3. Ground.
4. Acrylic paint
5. Bed
6. The varnish bitumen and lacquer on wood.
7. The adhesive liquid nails.
8. Latex putty.
9. Patience.
10. A bunch of ancillary material, which is we need for every kind of decoration.
Getting Started!
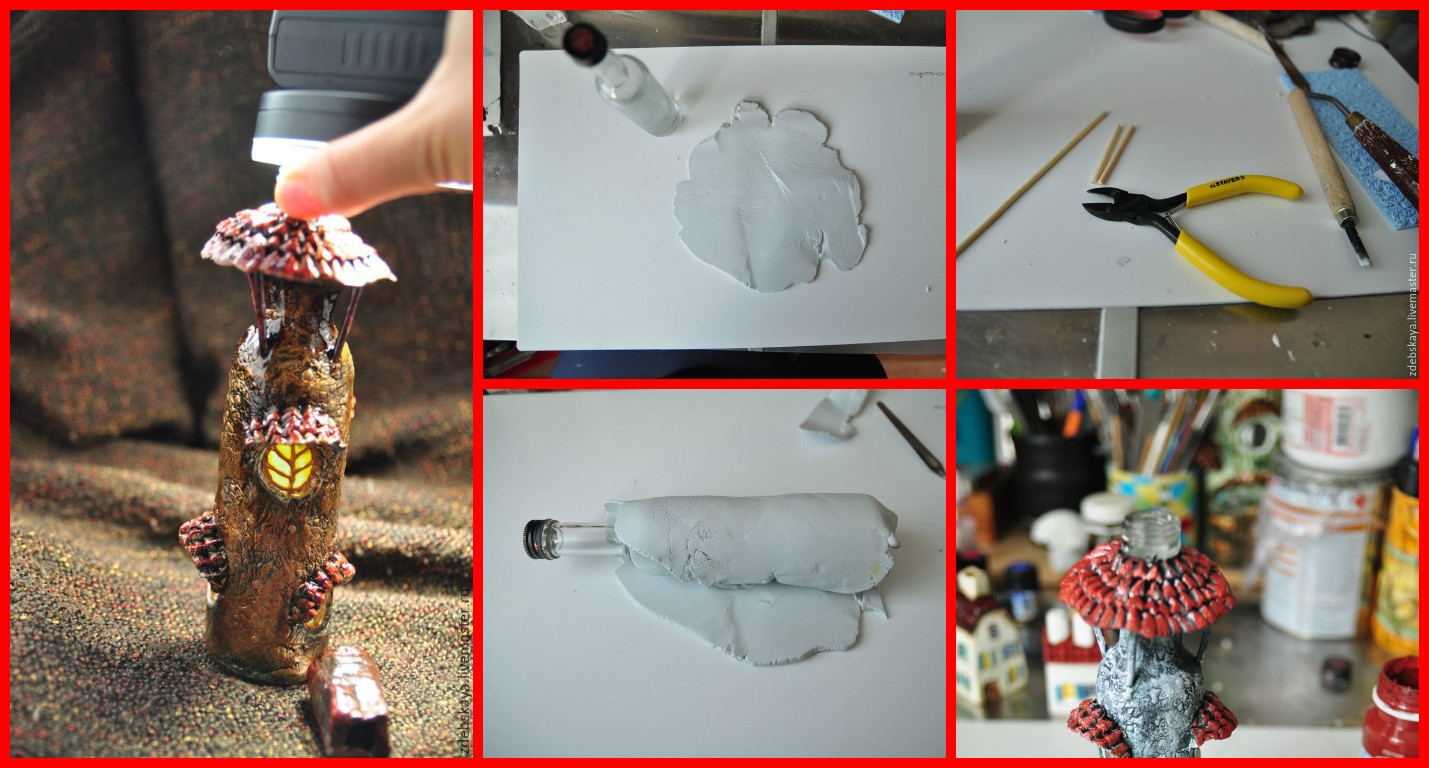
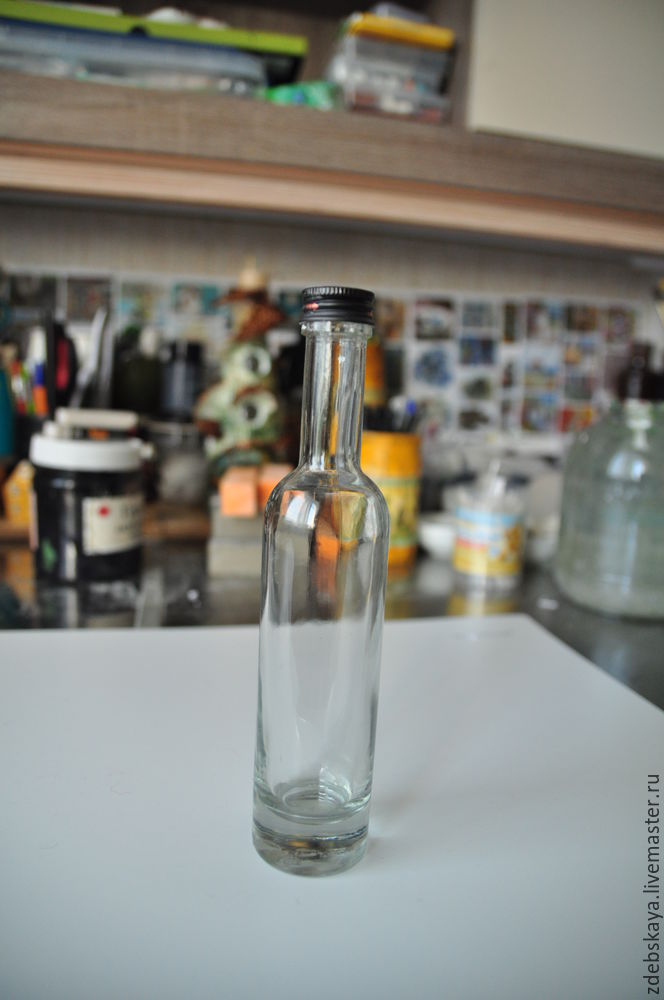
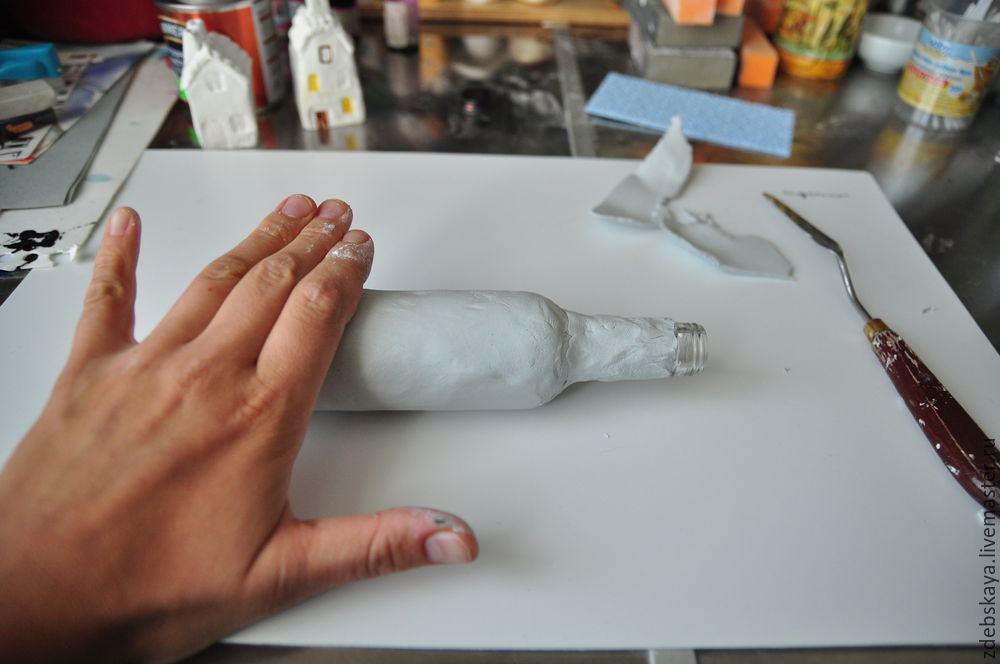
1. Take a bottle, from which we are going to do beauty. I have a small bottle of 100 ml. From bottle to decorate, remember, the longer the bottle, so it will be harder in the end! Were washed, stripped from it all labels, remove the traces of its past 🙂 then degreased her squeaky. And here we get a clean bottle!
 2. Then uncork pack your clay … it can be a variety of pasta. I have tried many, many, can do a separate review of pasta 🙂 But I will not, until … Well, take the pasta and make a cake thickness of 0.5 cm – much as possible, but thinner is not particularly recommended the paste dries crack.
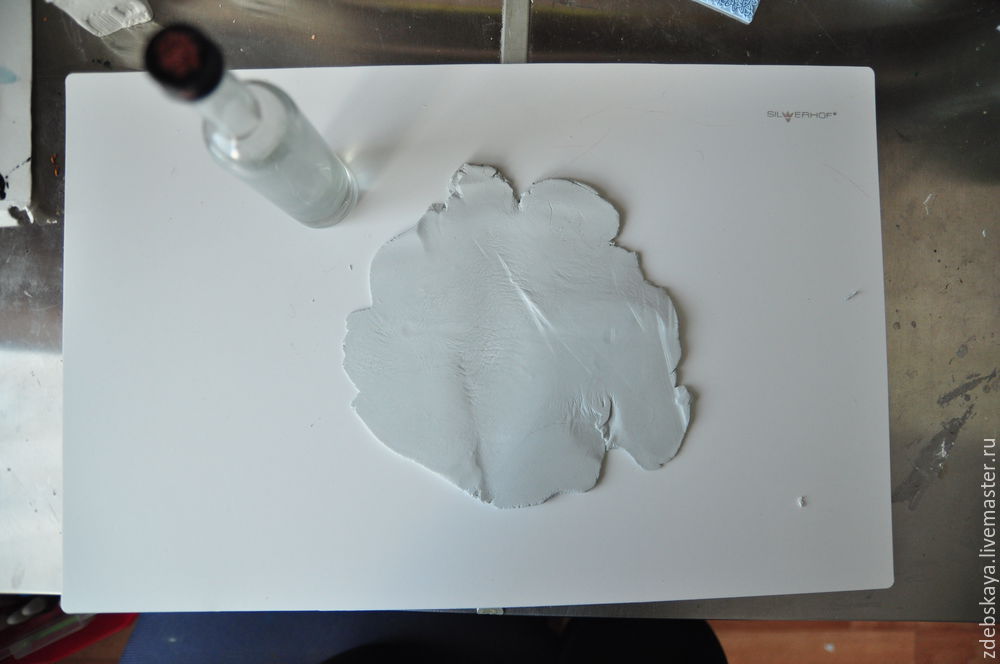 3. Roll out the cake bottle with a rolling pin.
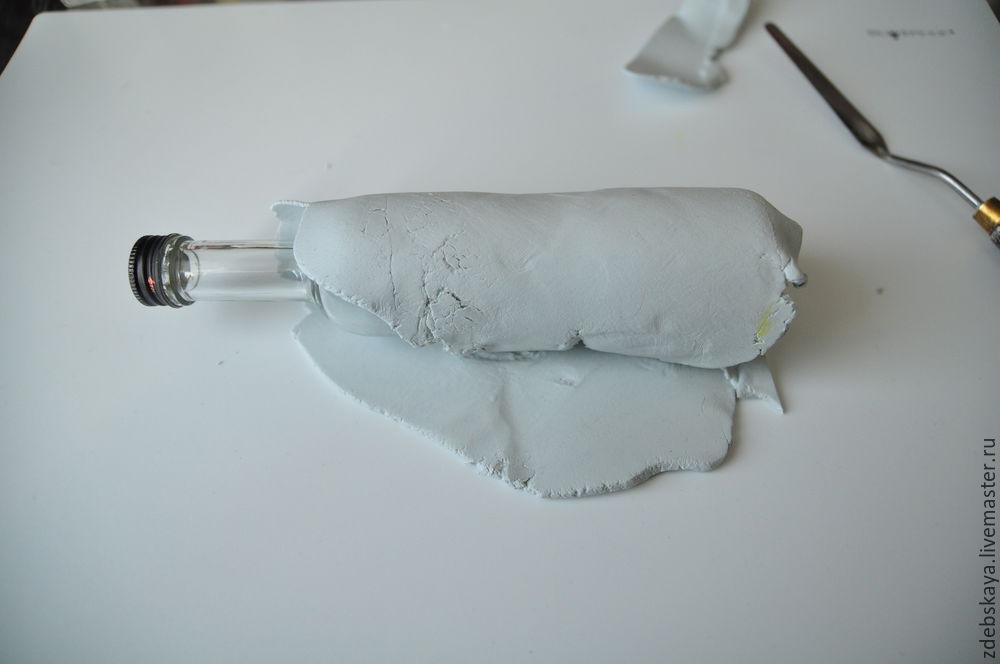 4. Then this bottle tortilla wrap.5. Excess tear off, cut and crush fingers, and then Roll the little bottle with the paste.
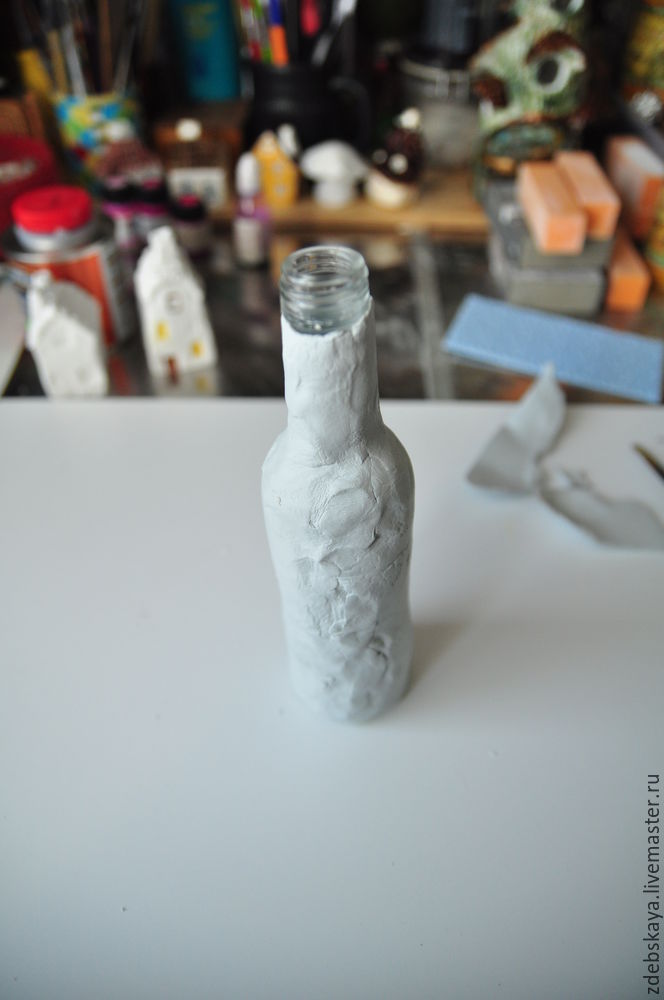
 6. Then take the cap off the bottle, it will we do windows
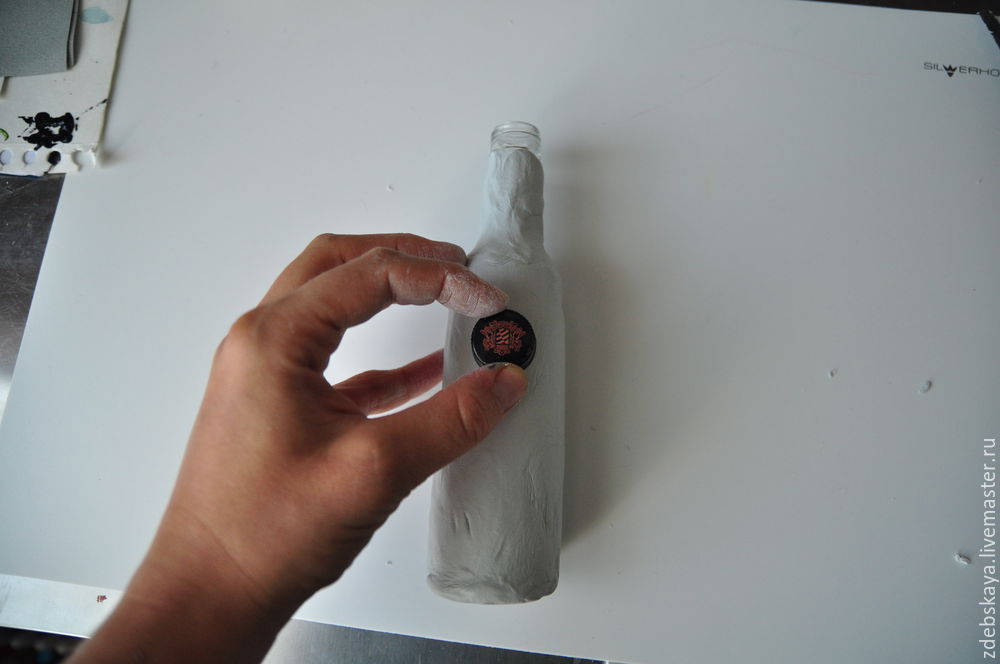 7. After forcing necessary to remove the paste – to dig, so to speak. How you do it does not matter, I do it with a palette knife.
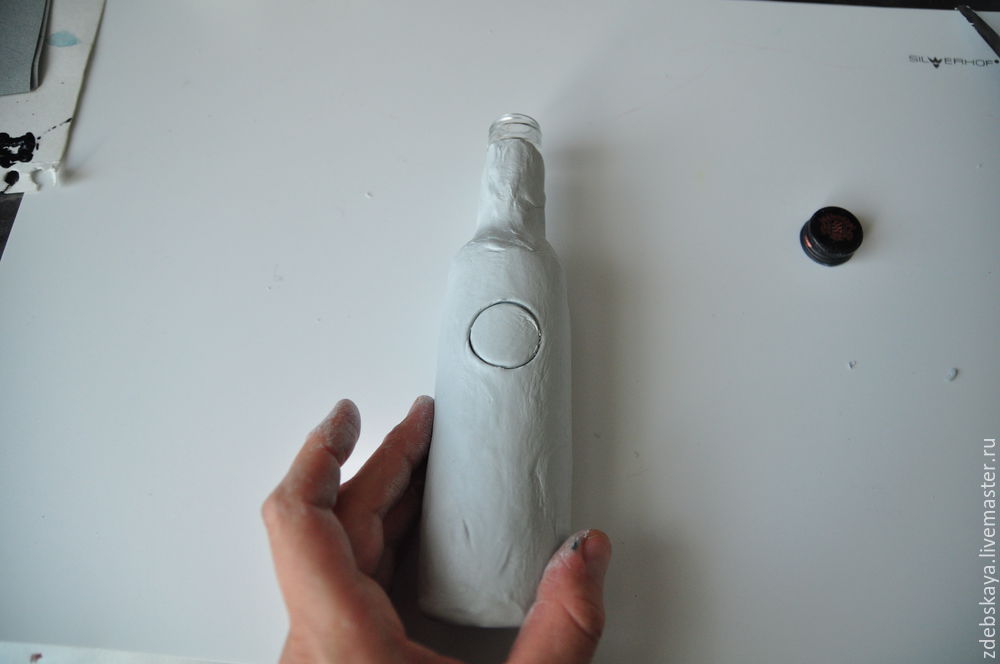
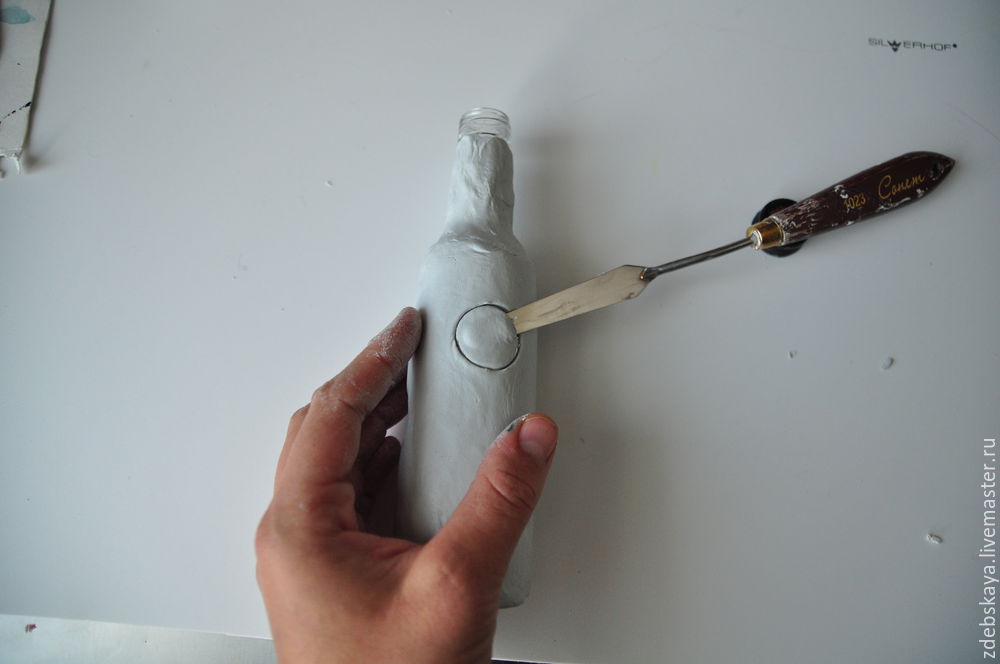 8. Next, cut out the door. Well, the rest of the windows, and we get just such a thing:
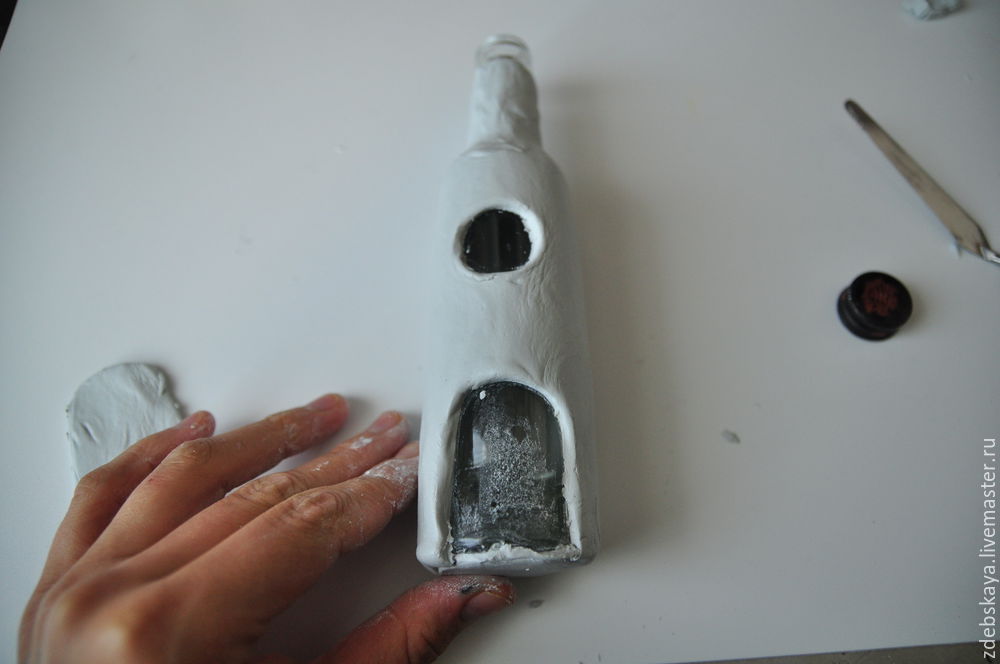 9. The door, which cut not throw out. Her I decorate separately. You can do it in a different way, but directly in this bottle, I’m doing it!
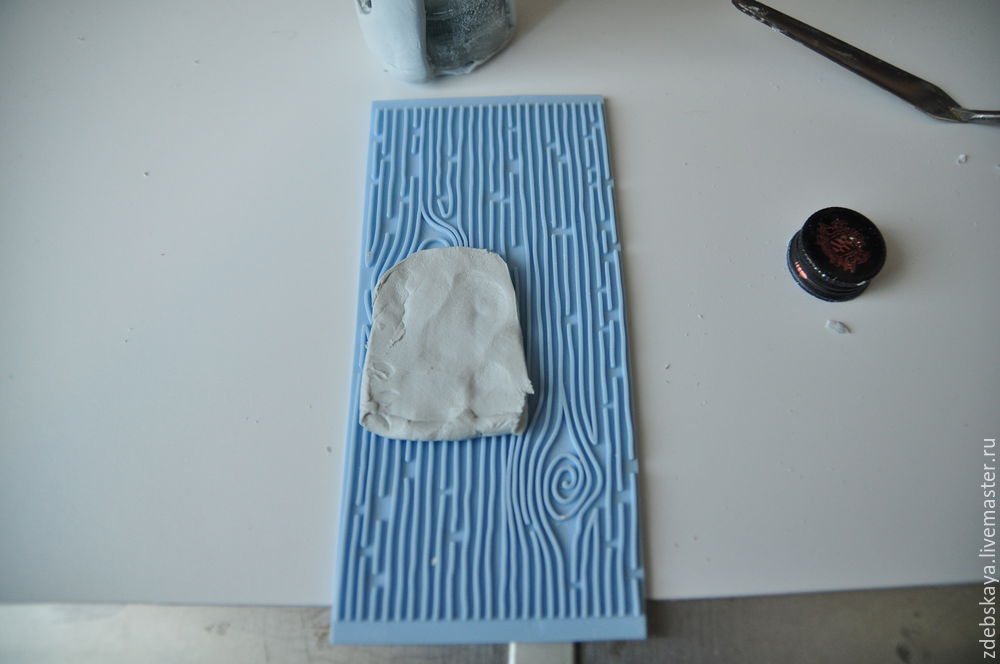 There is at my such things, they are not required, but doing the workplaces easier and more fun 🙂 Here I do not have photos, I laminated places the bottle on a blue plaque with floral ornament, and here was such a texture on the bottle itself. This time, I forgot to take pictures!
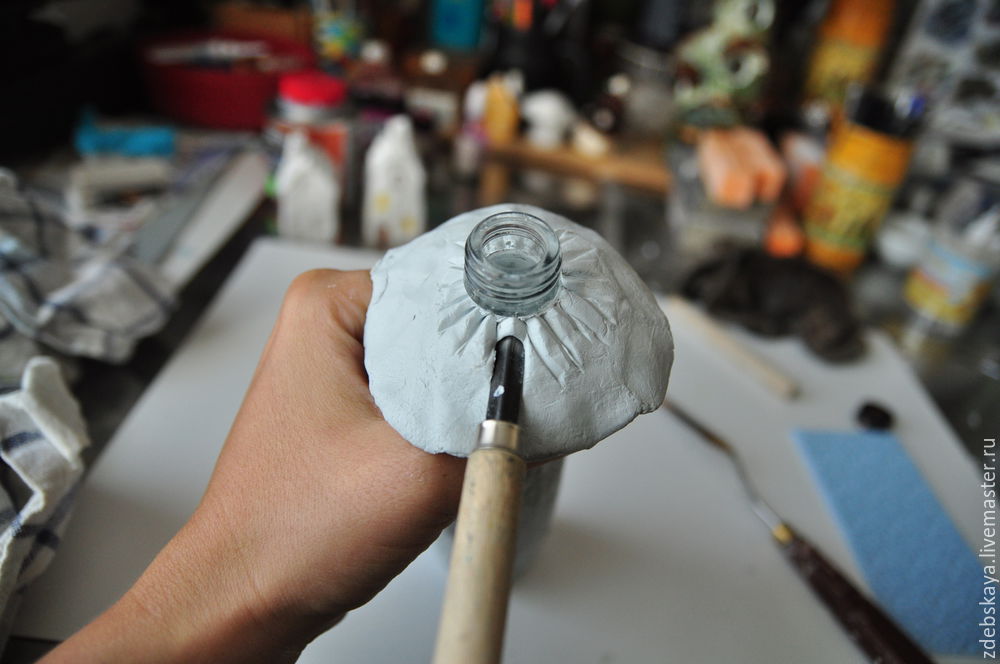
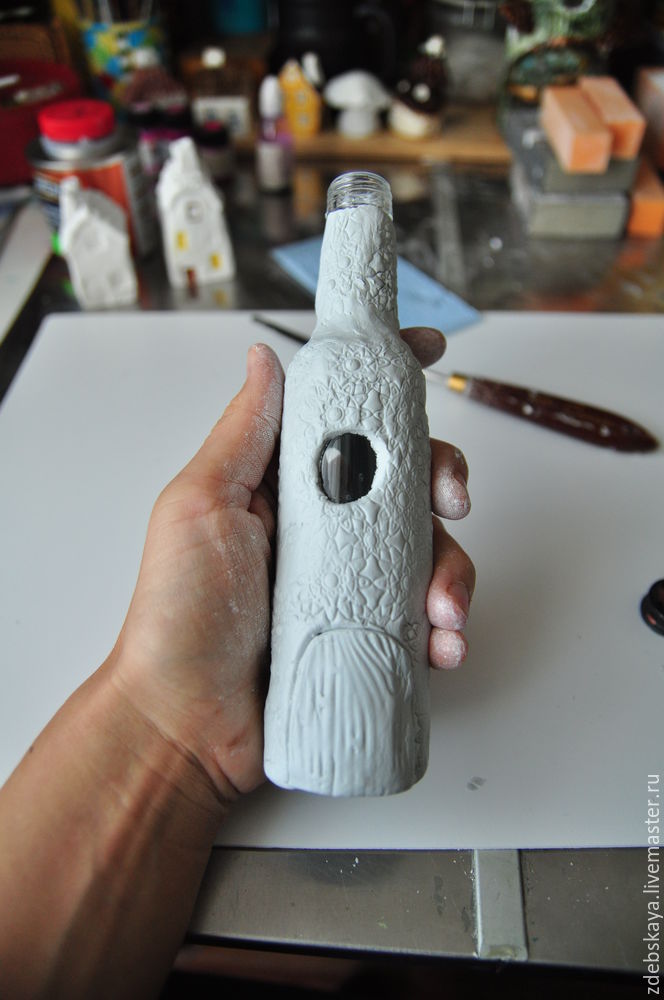 10. Then, my house shall be a roof. Her I do, forming a thick sausage and wrapped around the neck. Crush with your fingers, get the “mushroom hat”.
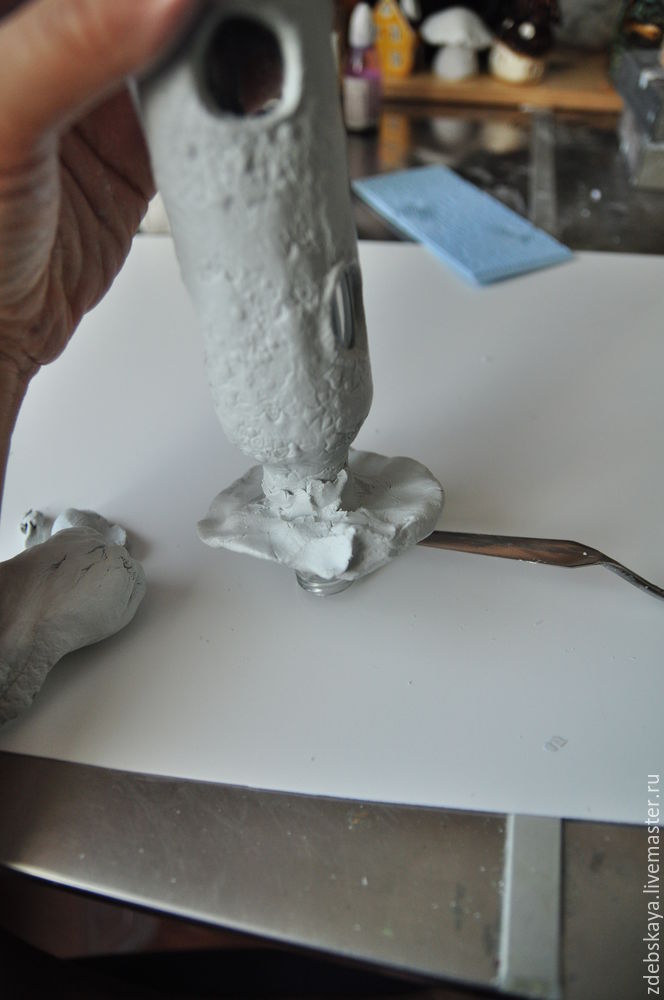 Hold your fingers, crush hat and bottom.
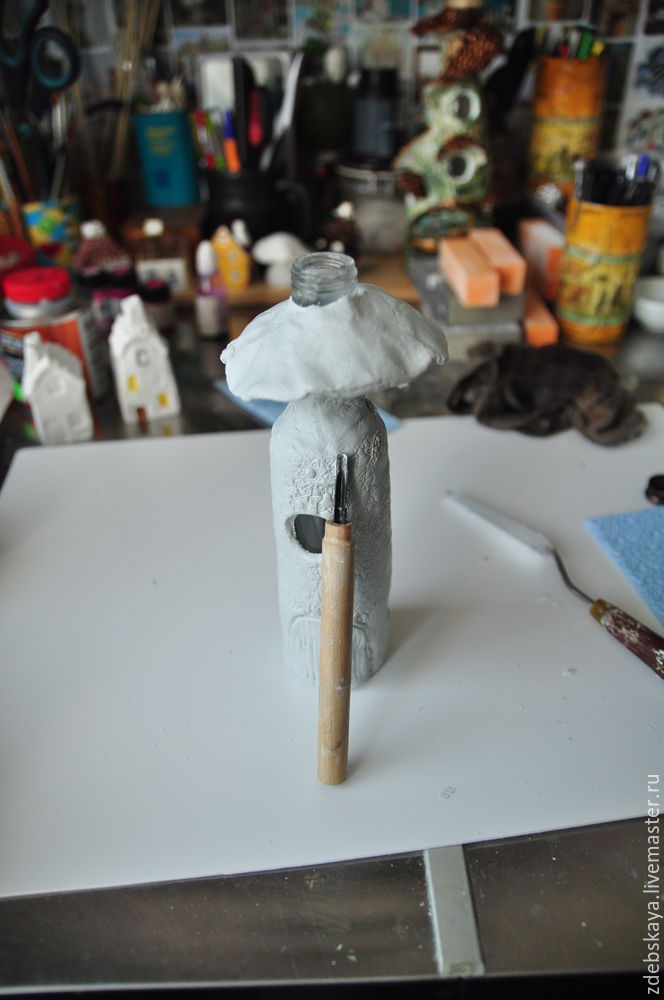 11. Then, take the tool, I have this tool on a tree, but I think that any angled do the task just as well. And start doing the roof. I will not describe, look at photos, I think it is clear that if the inquiry.
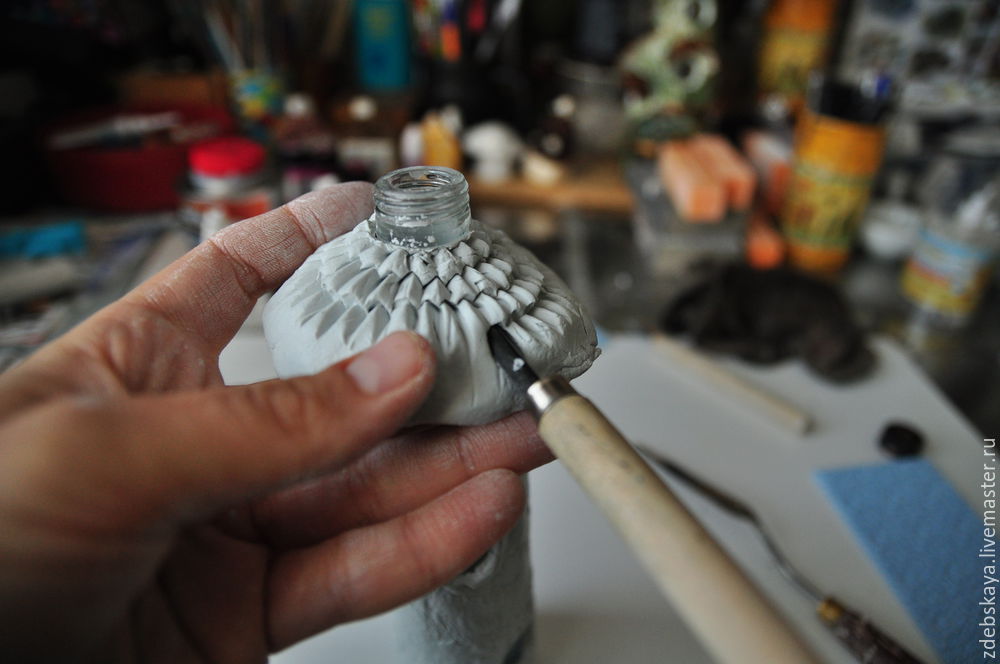
12. By the same principle do canopies over windows.
13. Next, I wanted to have this house were beams. The final project is not, therefore, do everything for the dictates of the heart!
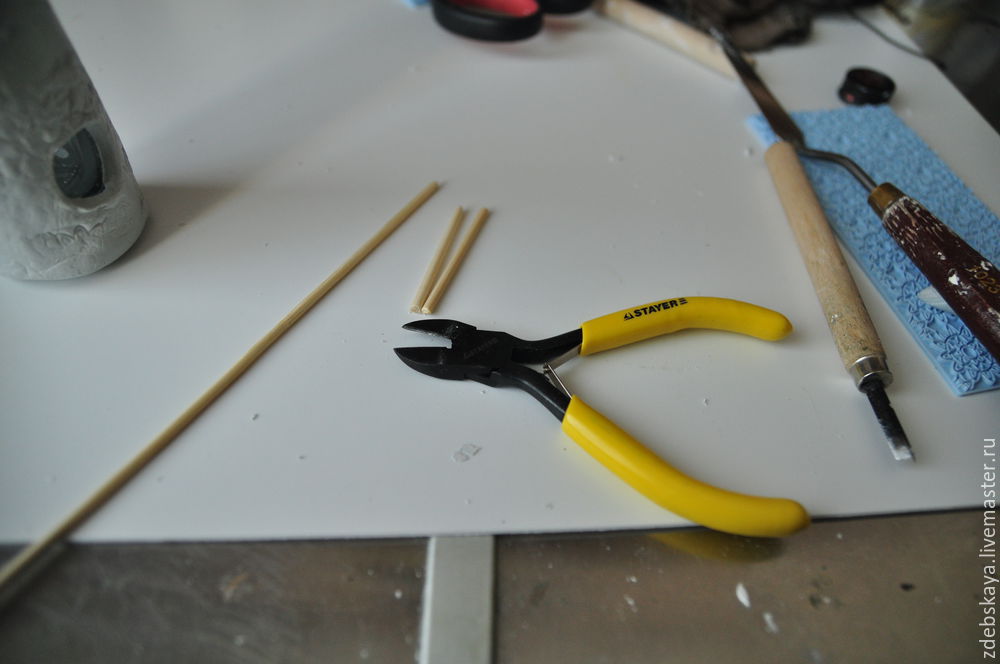 Chop a long stick on the beam, it is desirable that they were approximately equal, and stuck on the roof.
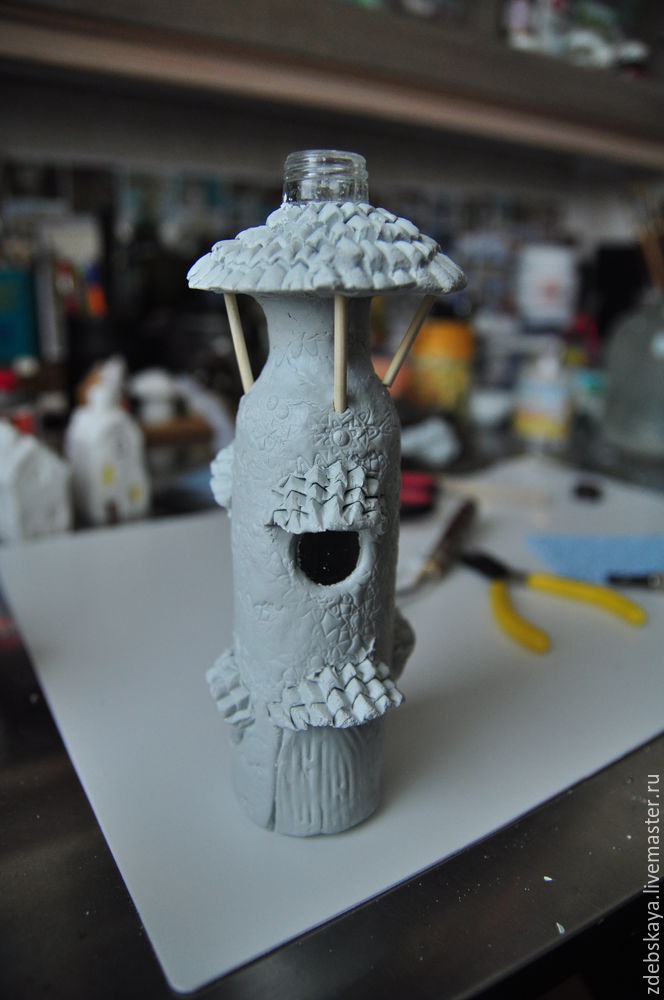
14. All are now allowed to dry for a day. It can be more. At first, until the paste dries, glances, some pasta pop very much. But then I tell you about methods of struggle with the cracked product location.
15. The evening of the second day, and I view the loss!
Here, one of the peaks in the window. To this end, I have liquid nails. visor attaching adhesive and pressed down. Checked, will hold a bang. Moreover, this adhesive can then be covered with paint.
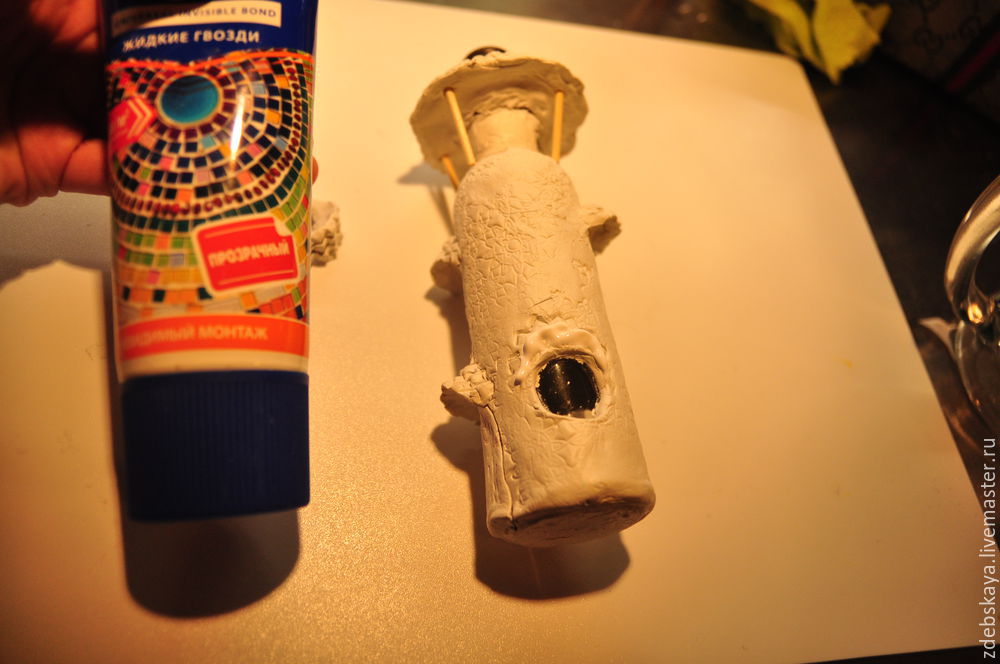
 16. Excess adhesive remove. A further view, where there is a crack.
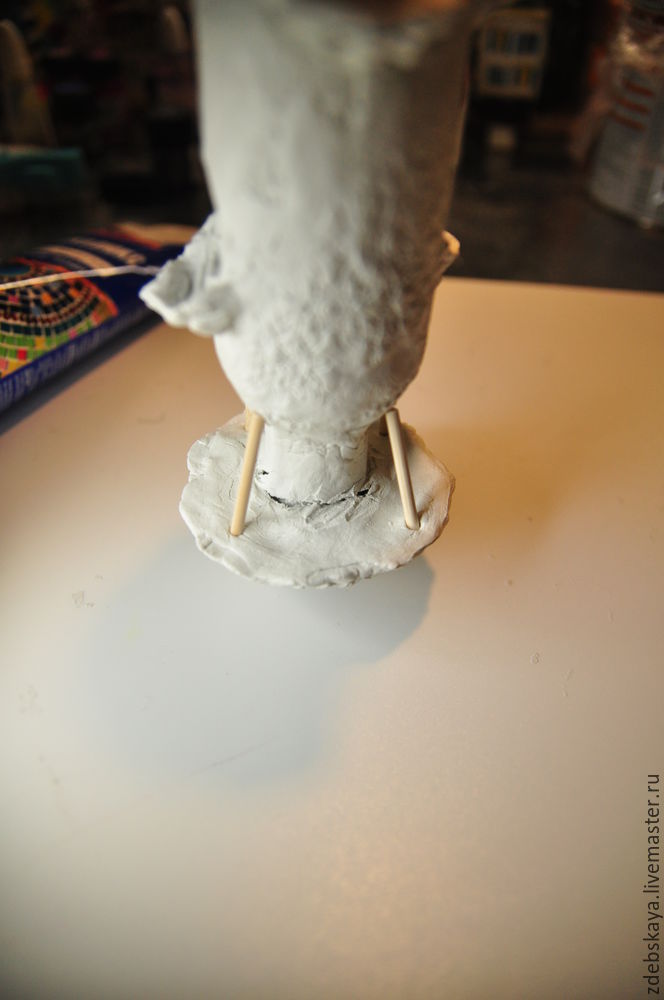
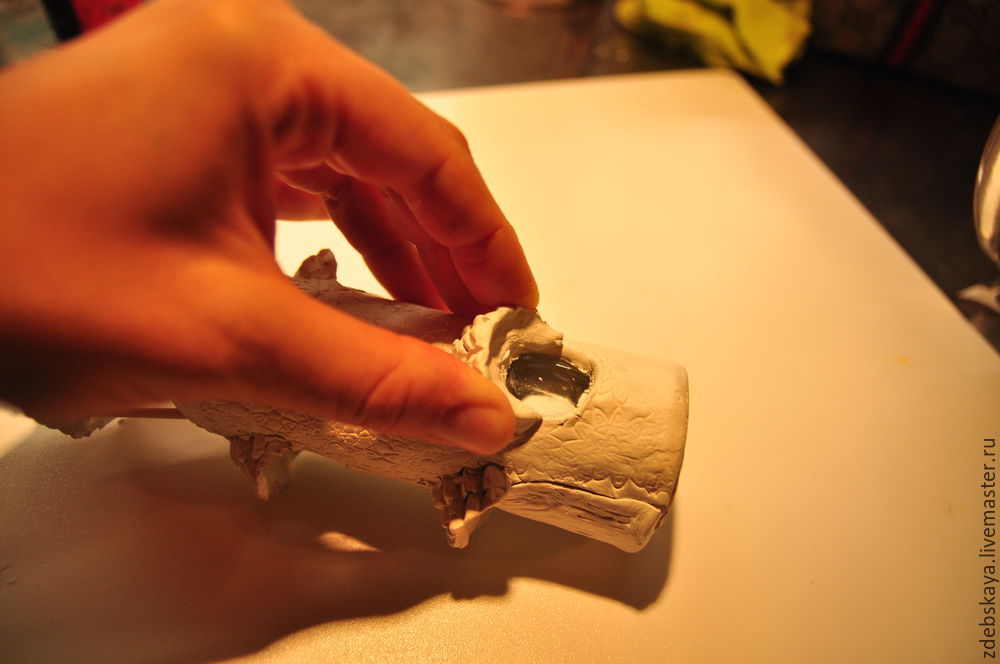
17. Here, it became clear that such defect should be clean. And we do it with latex filler. Because sometimes you have to put putty in remote places, I go it’s “shoving” syringe without a needle, of course, but it turns out very handy!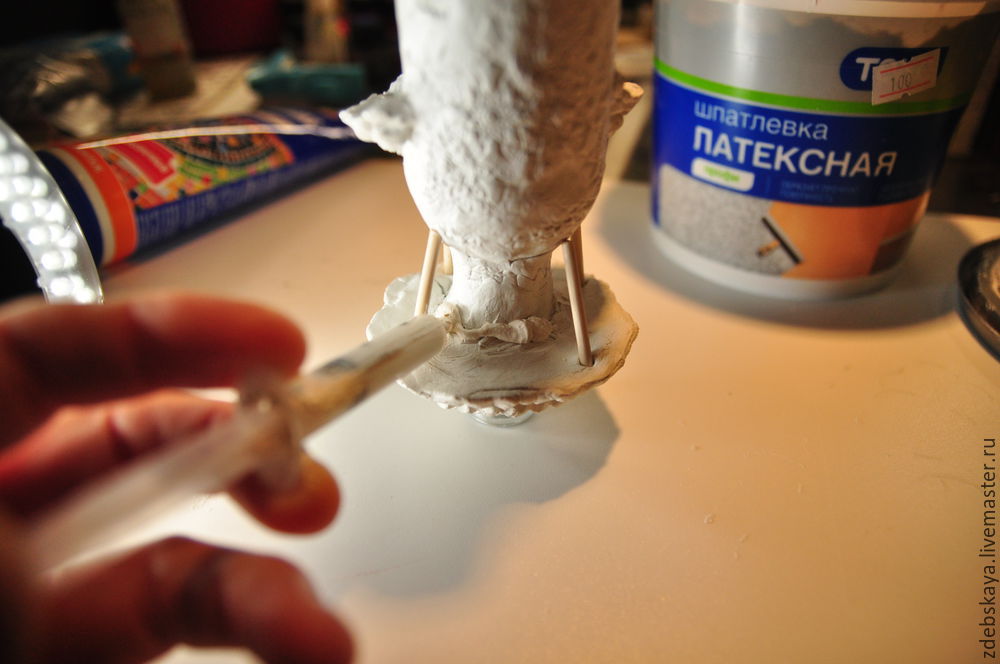
Then, crush fingers, smooth that came to hand, I have this latex paintbrush.
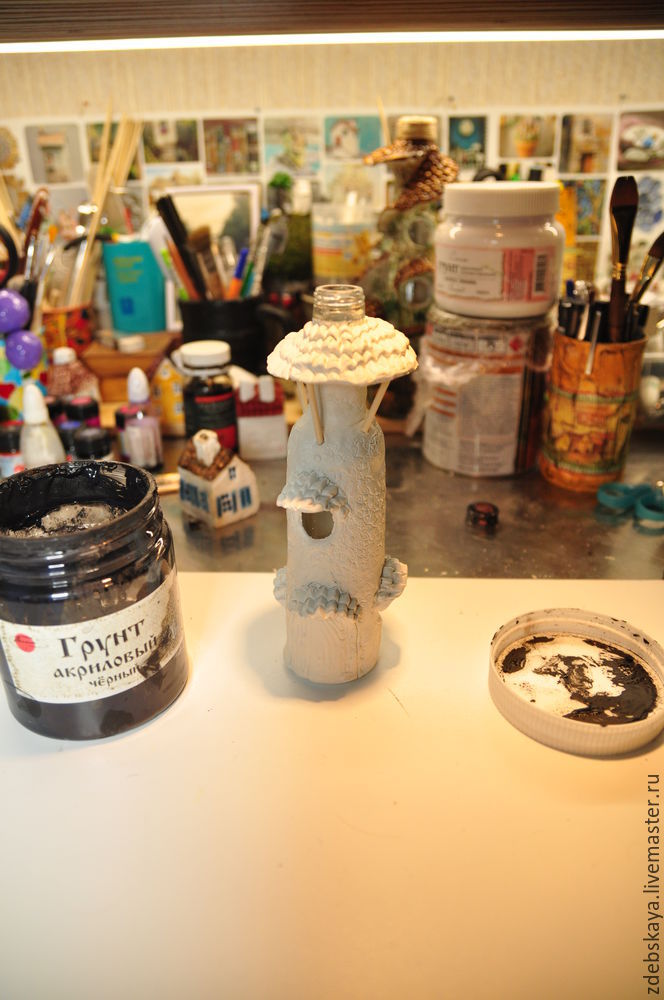
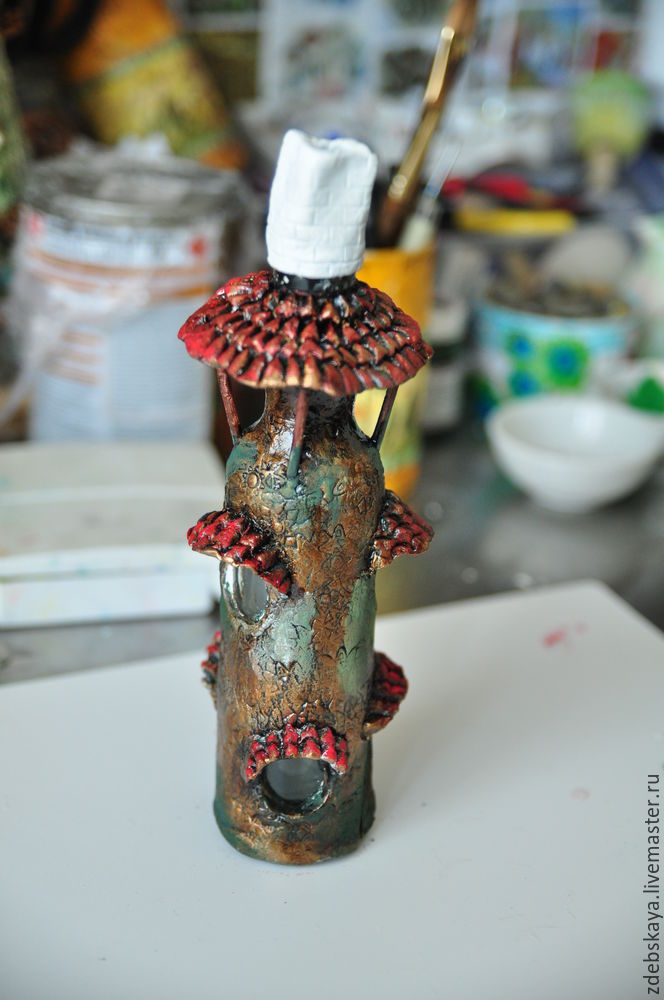
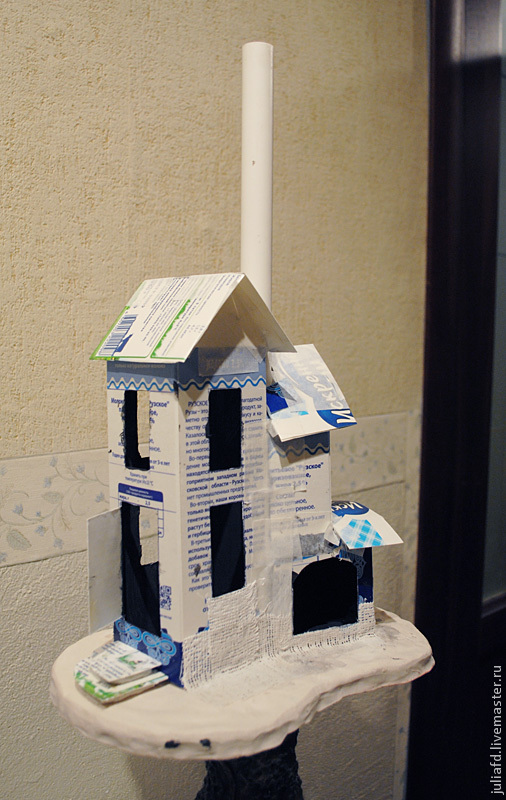
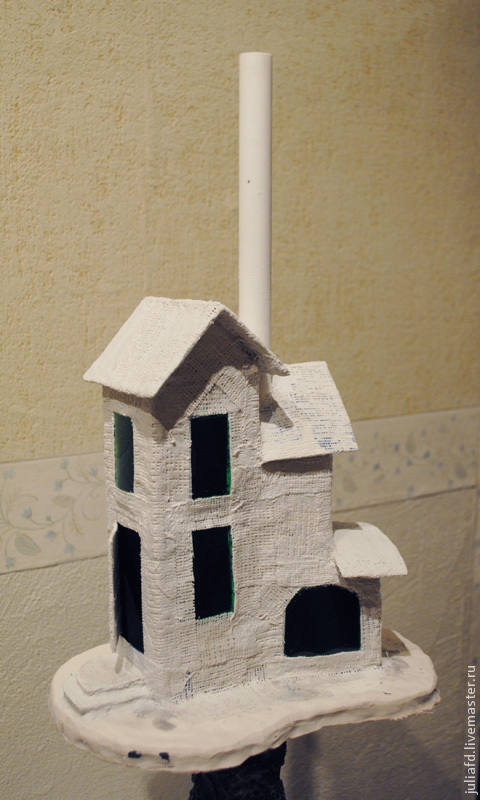
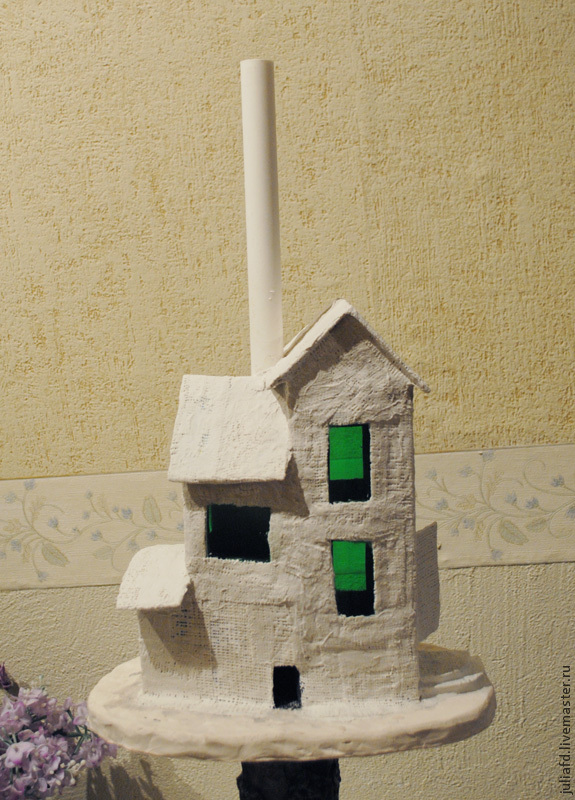
18. Stage primer. I’m a different soil house. At this time, I take a black ground. And proceed to the primer. Brush leaves the band, especially noticeable on large surfaces, so I bottle body sponge of soil and roof in a remote place with a brush, there are extra relief stripes – we are not a hindrance!
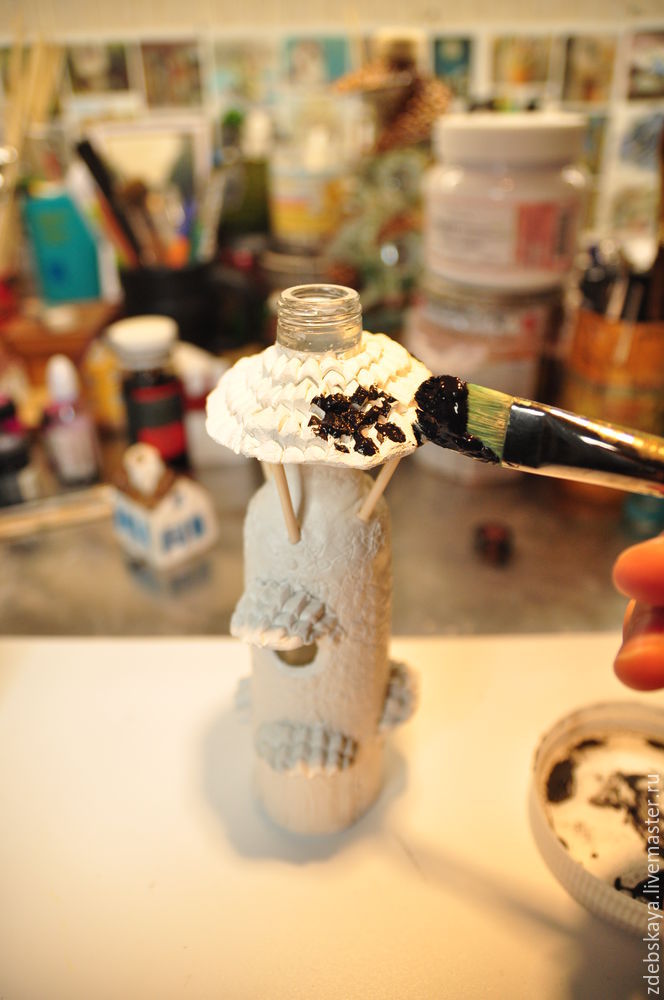 We get an absolutely black bottle!
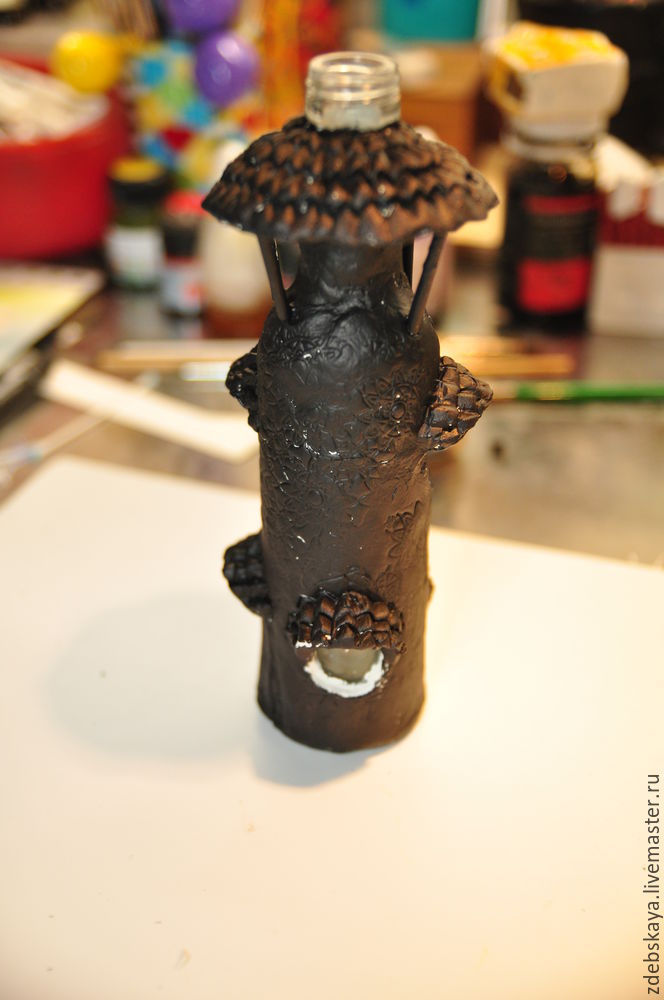 19. We continue to paint. Now I take just such a green acrylic. Acrylic dries quickly. While I paint, it dries on the brush, and not to run into the bathroom and wash the brush without end, leave them to soak in a jar of water, and the very next take the brush. So, the green paint. Solid is not painted, in some places, and it turns out:
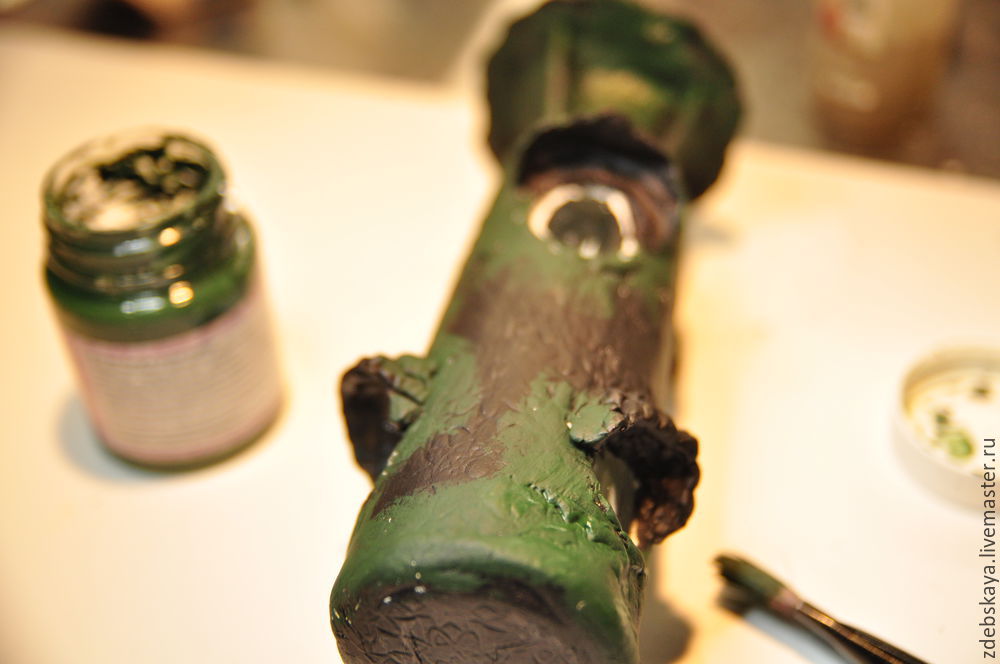 20. Then I put or render a surface, without rubbing white primer.
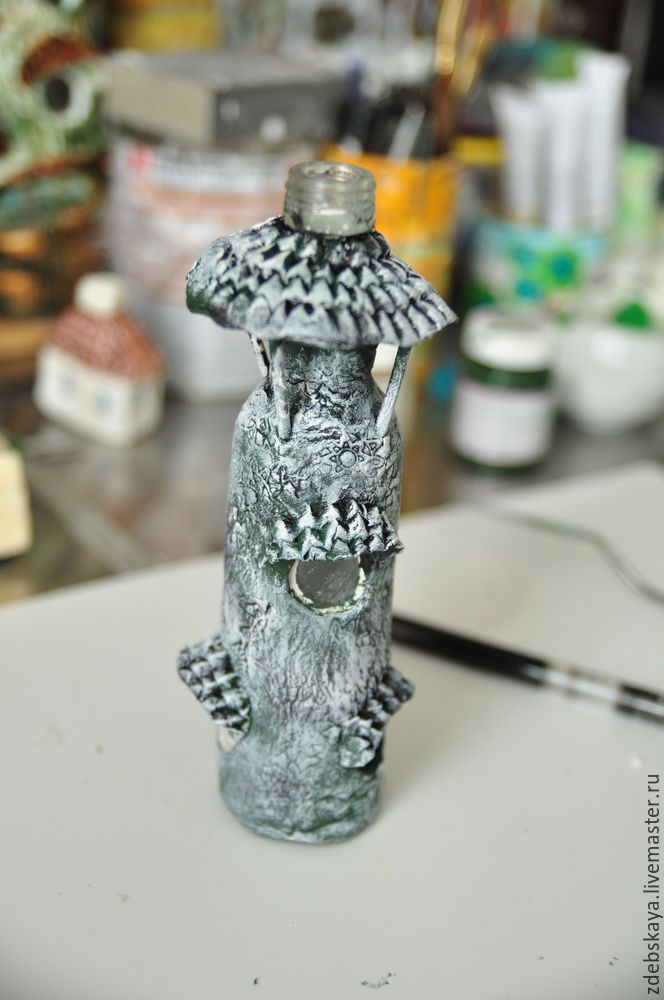 21. Coloring roof. They are red, you may have a different color.
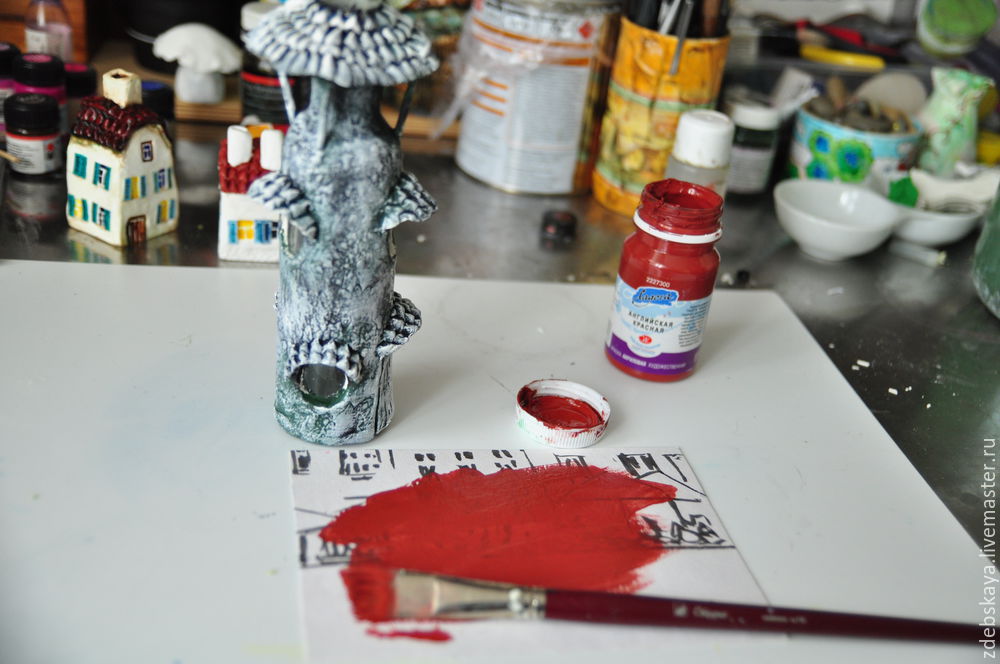
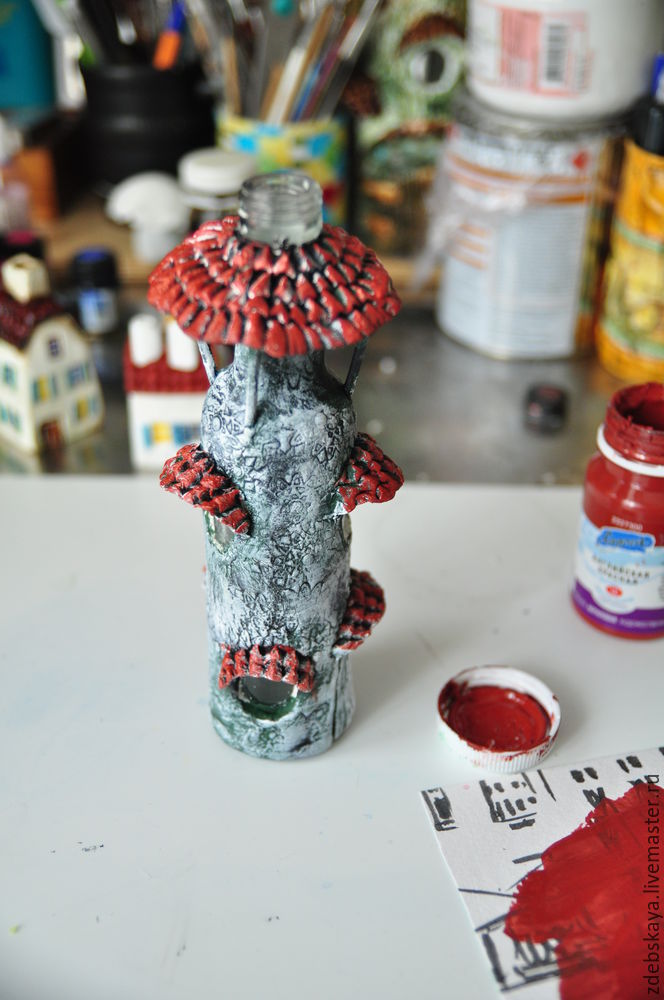 22. Then take the bronze and thinly bronze acrylic, so that the apparent texture of the bottle. Excess paint on the brush palette and rented on any unnecessary piece of paper.
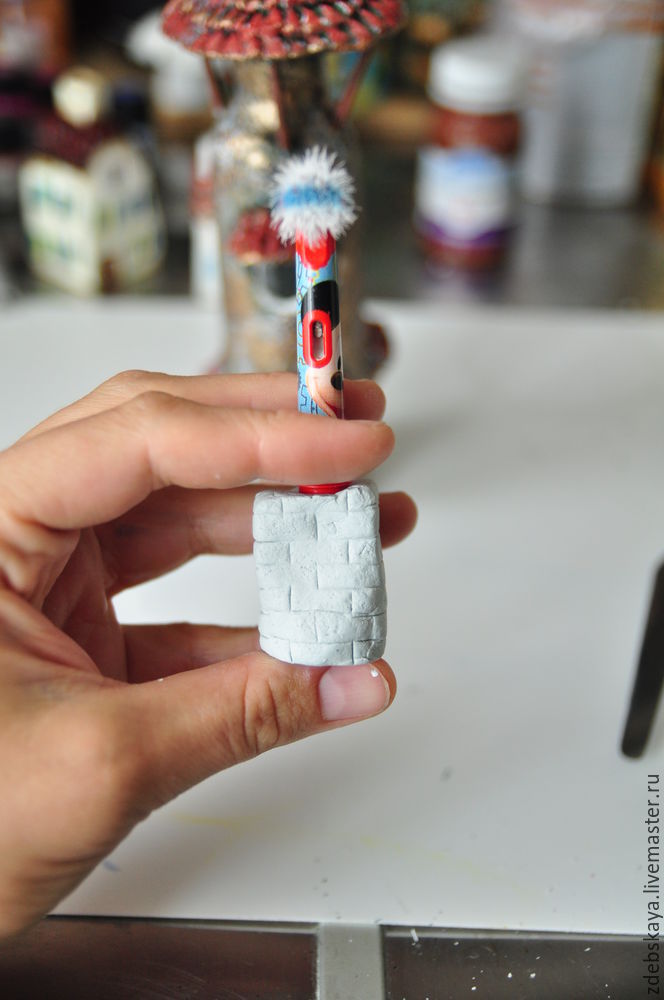
 23. Now remember that the pipes in the house no. Ah … it is necessary to fix it! Bottle drying, lipid pipe. In a similar manner as a bottle. Just expand on masonry.
 24. Then, take an old toothbrush and attach the texture of bricks … Well, can not they be smooth in our old fairy house!
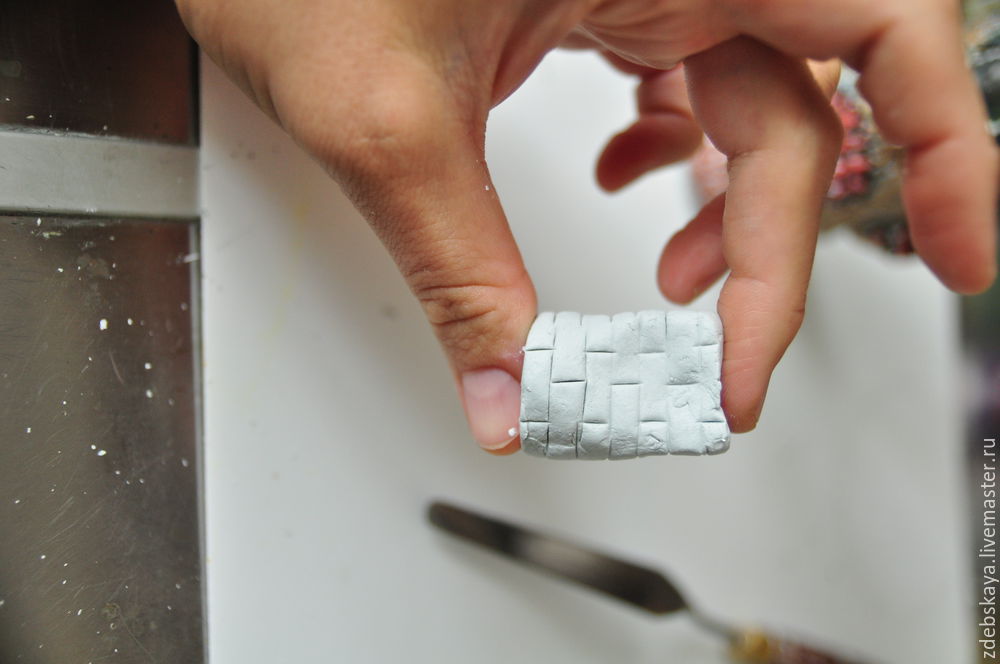
 Then try on pipe-stopper on the bottle and change in its sole discretion. I, for example, wanted her little “grimaced.” I have so much fun. It turns out this way.
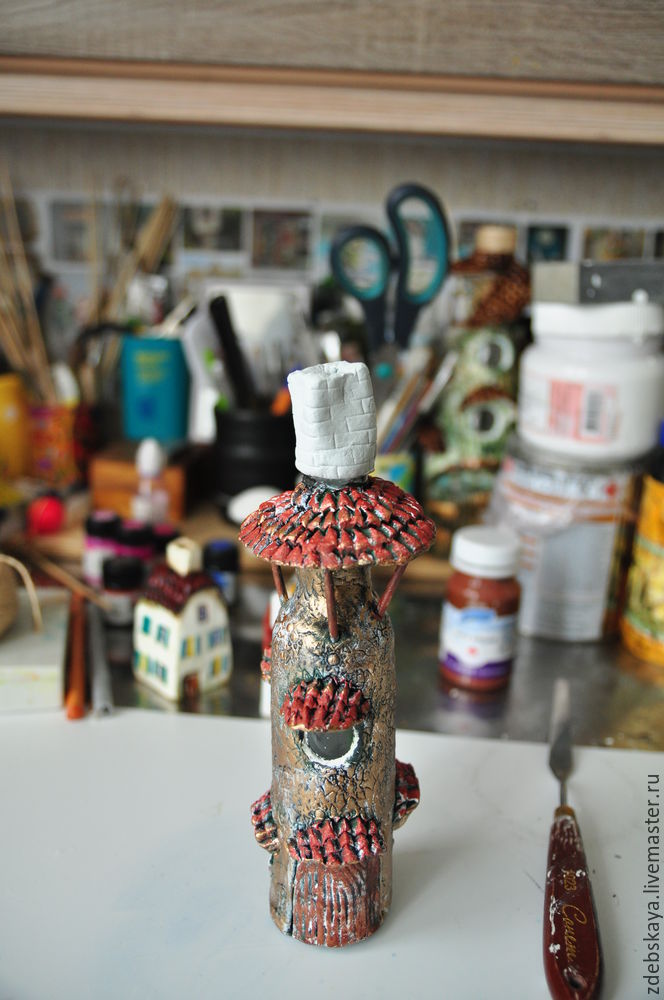 25. Now take my favorite bitumen varnish. When I opened it the first time, he turns up his nose, saying that stinking of varnish is not met. And now nothing at all to me, and it does not smell that strange 🙂
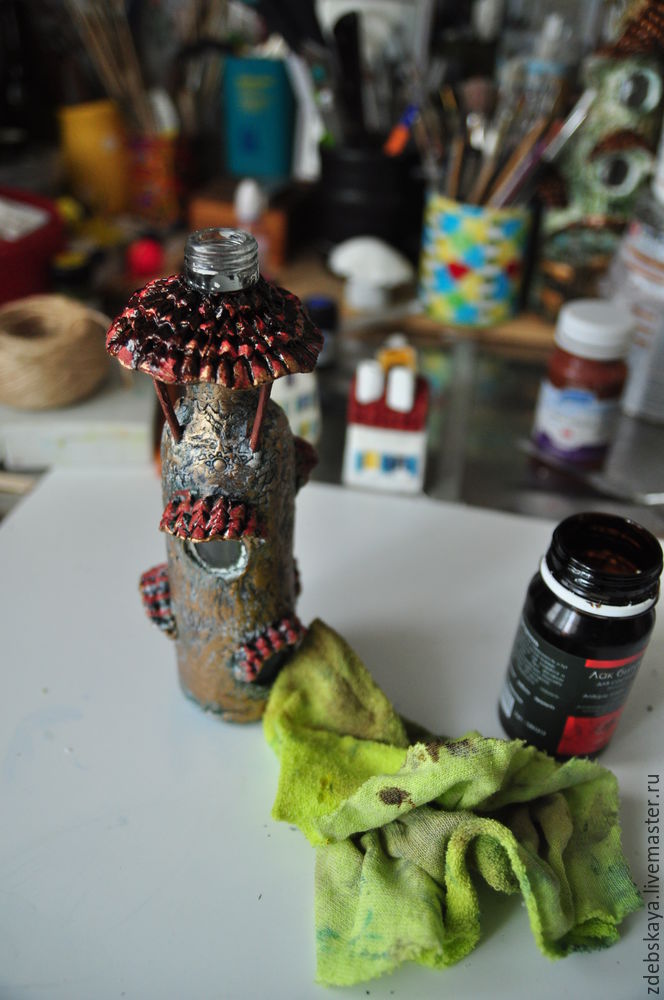 26. I start from the top down, that is, from the roof. I put or render a varnish, and then take off the excess with a cloth, lightly feathered at the same time!
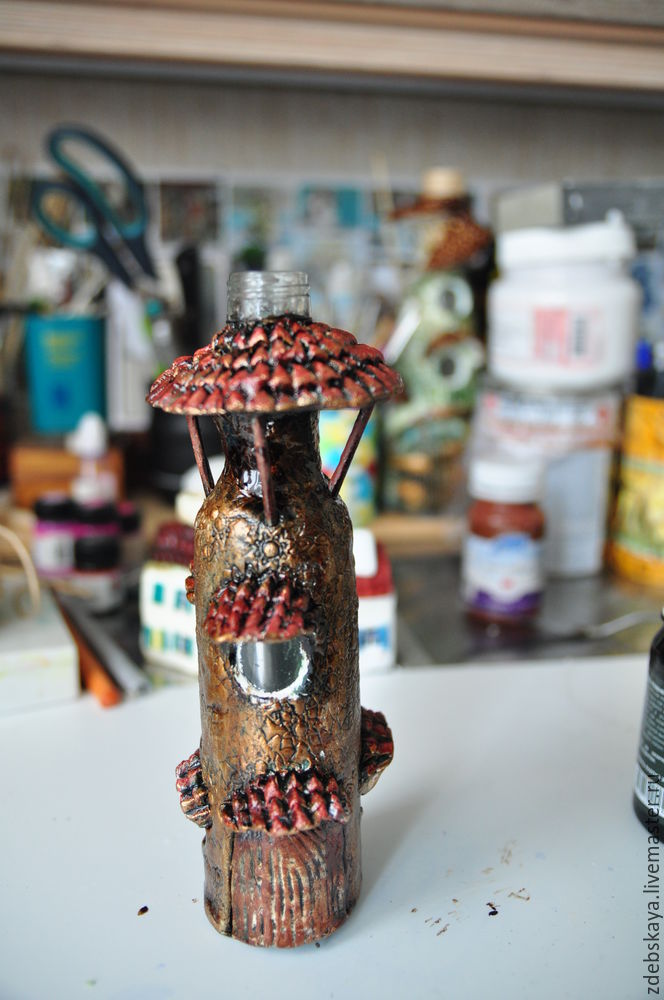
27. Leaving the bottle dry. Maybe the whole night, and I can get to it late at night.
28. toning pastels bottle, pick up the color I needed … and more!
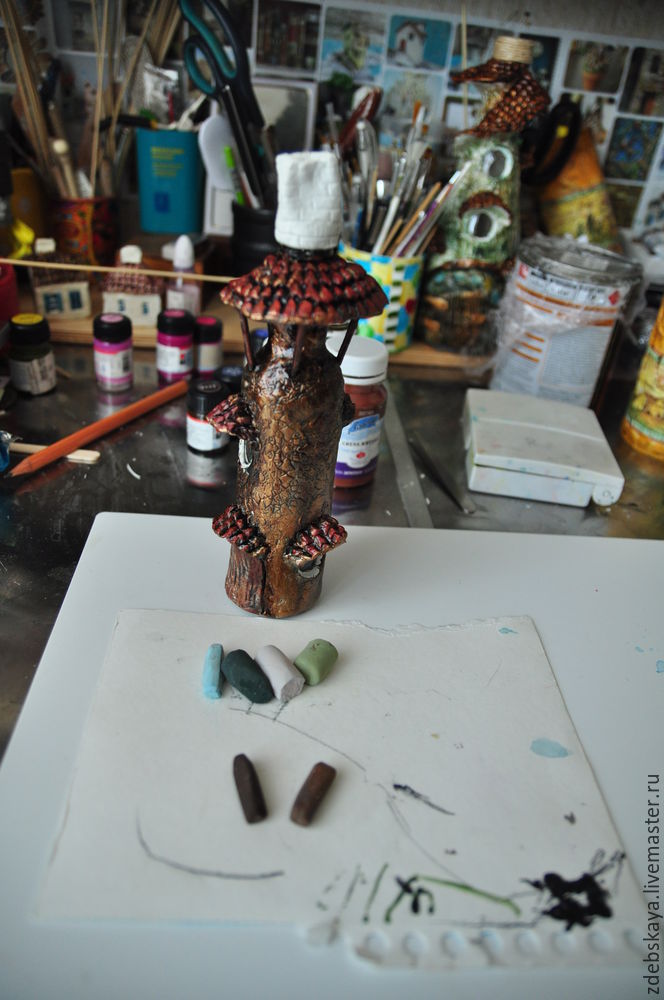
29. Then take the cloth and rub clean excess pigment.
30. Then again taking bronze and allocate some space.
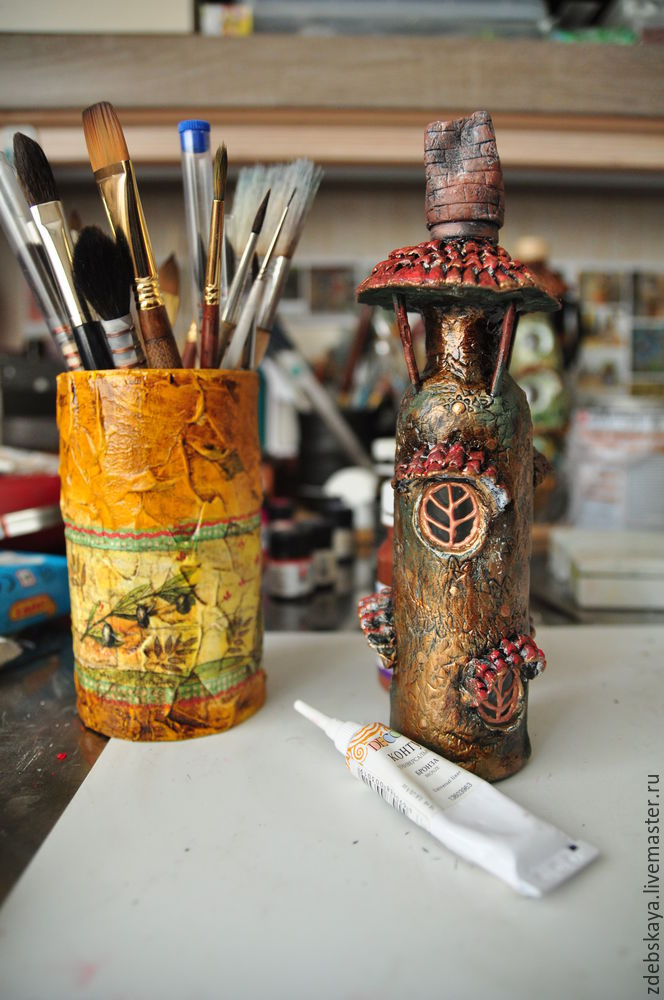
31. Then take the path and acrylic windows make the house. Circuit dries fairly quickly, but it is better to leave him alone for a few hours. And then spend it the line, and then when working with the product accidentally smashes … not tell how long it will go to fix 🙂
32. About the plug will not tell apart, it is clear that it passes all stages, as well as the bottle.
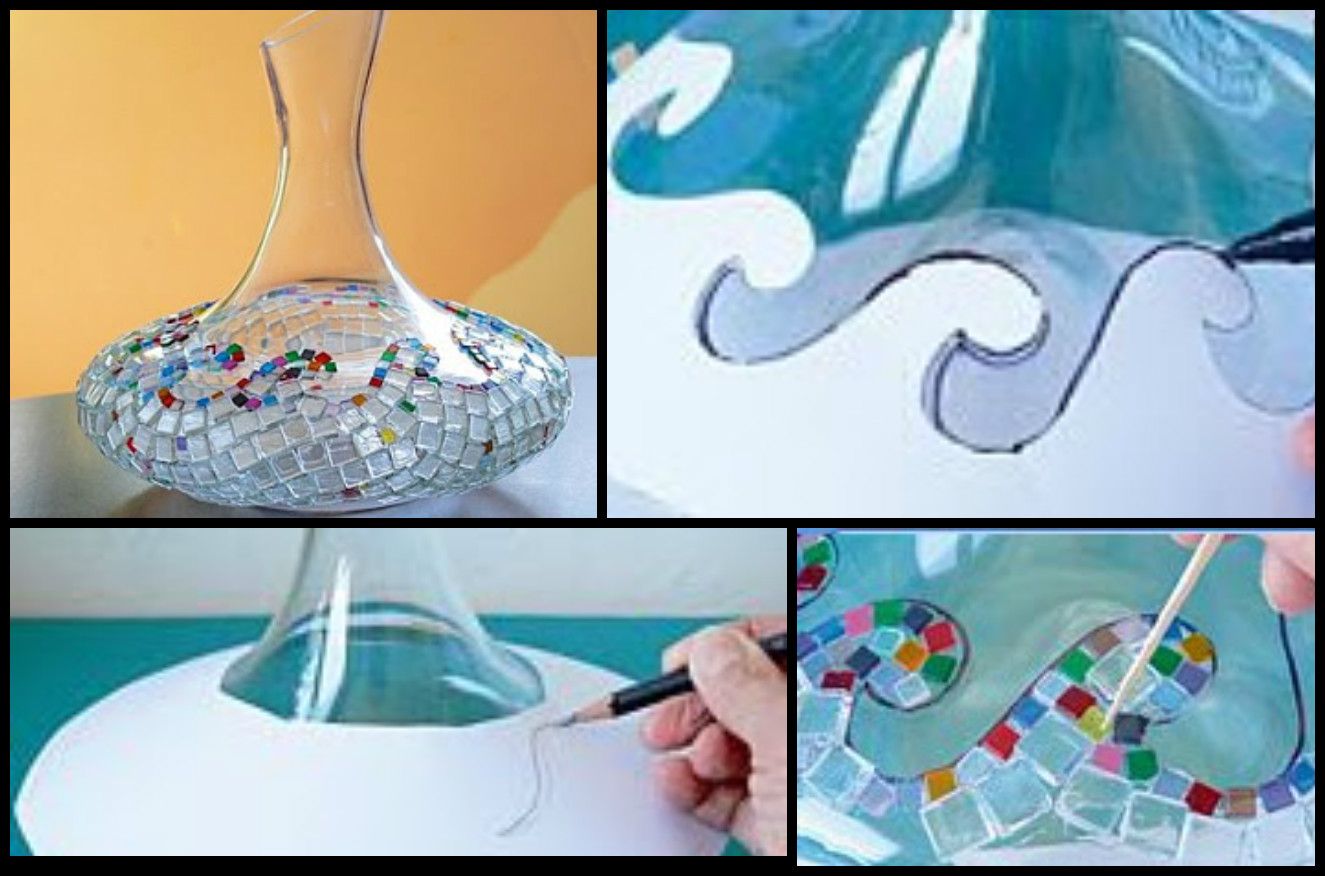
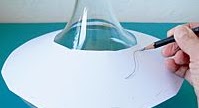
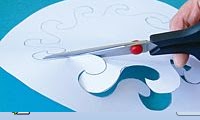
33. Then, the windows can be painted, and can be left as is, it is as you like 🙂 To paint the windows need a stained glass paint color that wishes your soul – the main thing that they were transparent.
34. cover the entire bottle of varnish or, as they say, professionals, reverse polish (I hearing this expression cuts, so everything is in a rural). And I leave it to dry for the time specified in the instructions.
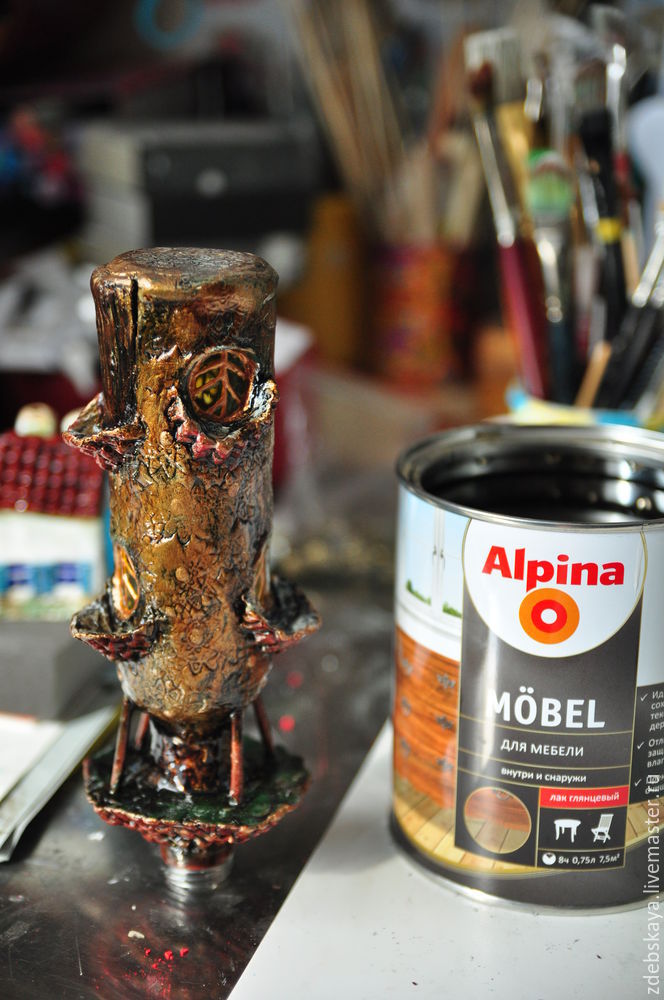 The varnish I take the tree. Look, I specially photographed icons in the lacquer. This paint does not smell. It’s important for me.
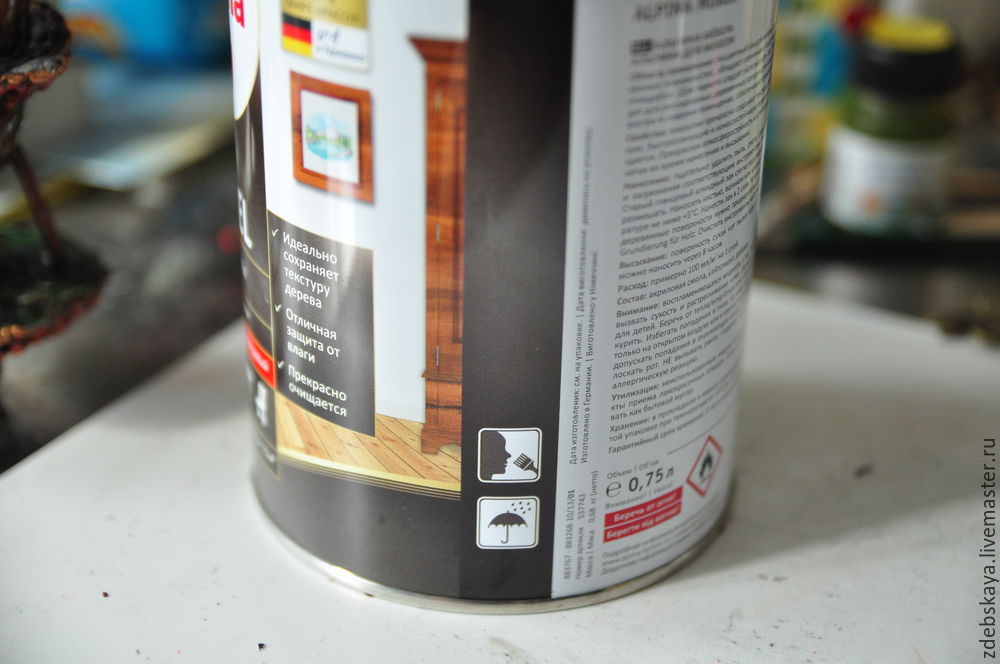 35. After drying varnish I stick to the leaf mounting adhesive. It keeps well and becomes transparent when dry. And best of all – an assessment of the result!
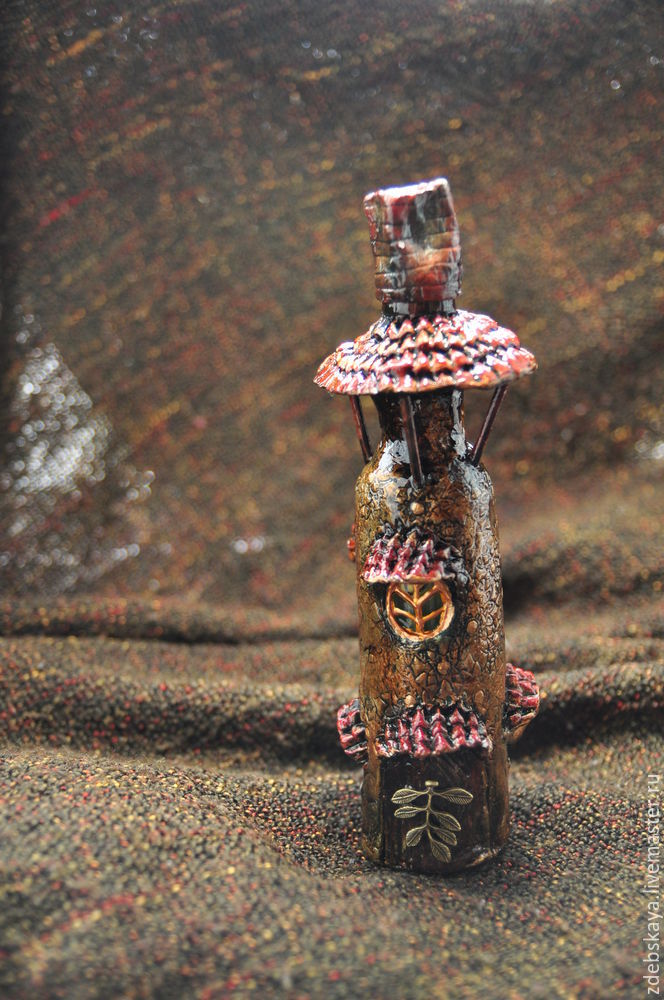
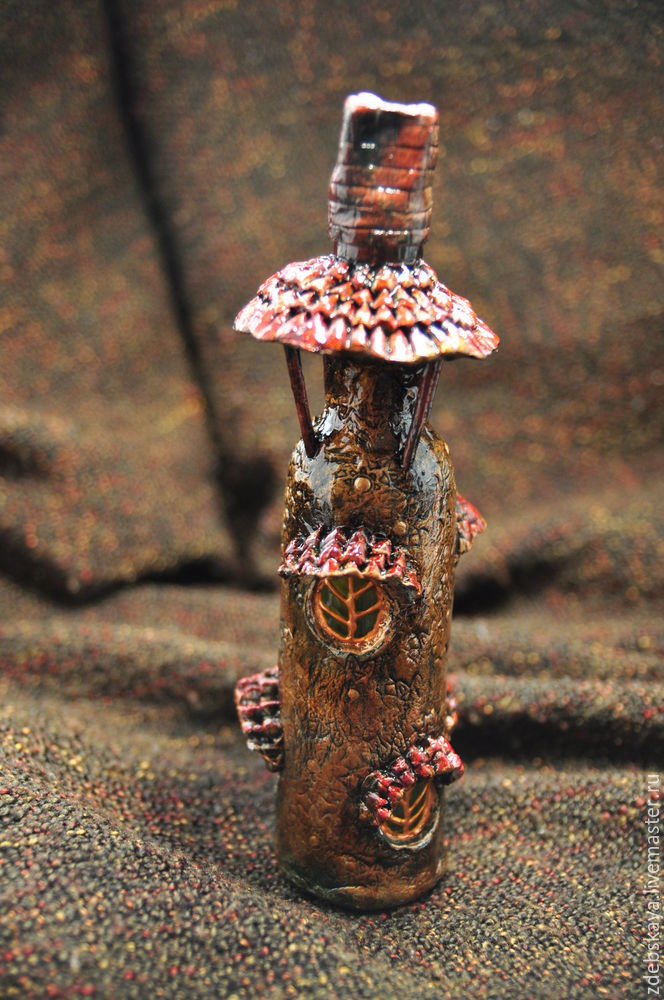 And as the light of the windows, when viewed against the light.
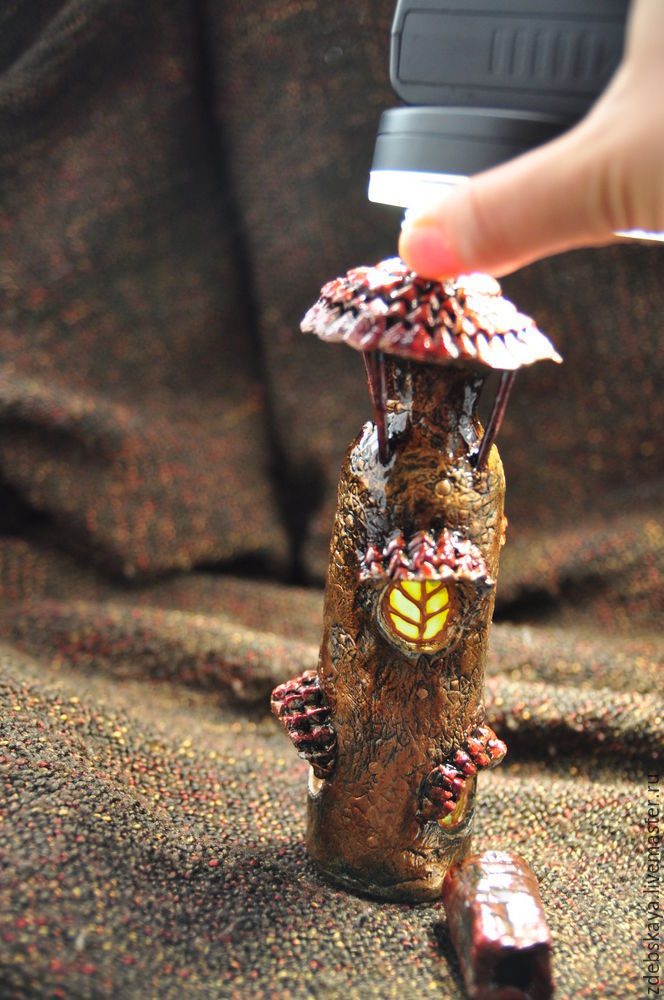 I think if you are in trouble with the electronics, it is possible to come up with a small battery-powered light bulb, then the house will be light. And so, quite a functional bottle turned out. It is possible to pour something, well, a tube or roll a note 🙂

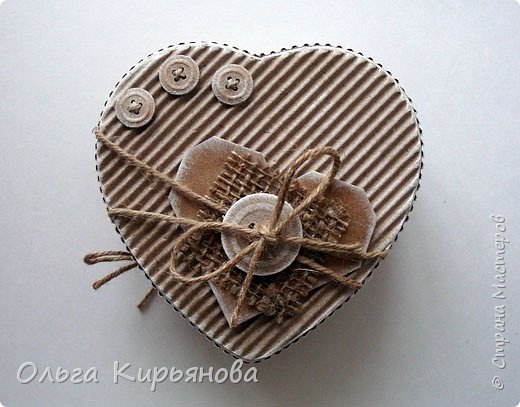 It – heart box-box, which can be stored for very different small things.
 And here’s a surprise! This tiny origami hearts. And these little notes with very necessary,
 Required Materials:
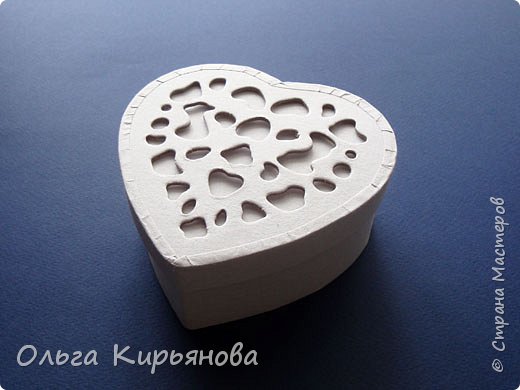 I start with a surprise. I wanted to make little origami hearts of kraft paper for sketches (80 g). Folding.Here is the . I square 5×5 cm. Ready hearts tinted white ink pad.
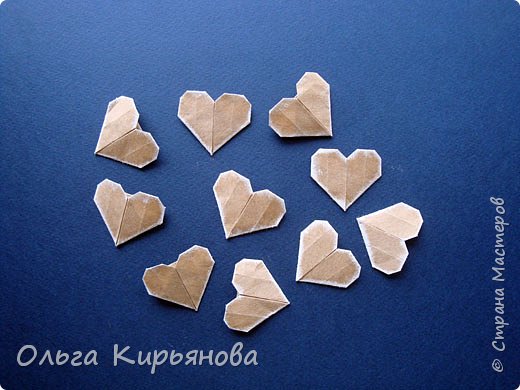 I really like these hearts! We with my students often do them. The heart has a pocket where you can put a note, souvenir or sweetness. However, I was the slightly pasted hearts front flap to the inner corner to the pocket has become more formalized. And the side corners folded differently. In the original MK proposed bend them back, and I replaced these folds with a “recessed inward” and too little glue.
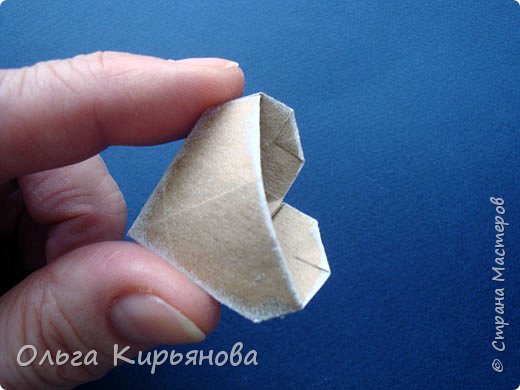 It prints on the same kraft paper, which makes up the hearts, the most important words.
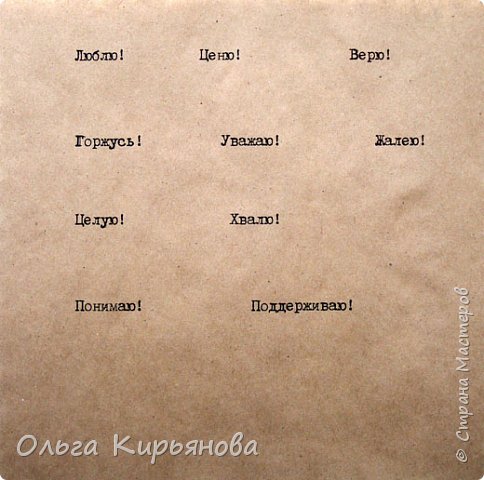 Cut the sheet into rectangles 5h3,5 cm so that each piece was one word. Twist rectangle tubes, the ends of the smoked white pad and put on a note in every heart.
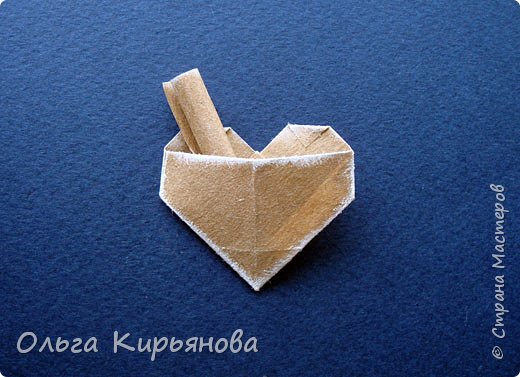 On the front side of each heart pasted a piece of burlap 2×2 cm. Because of kraft paper for sketches weight of 200 g cut down the little buttons using a hole punch embossed “Buttons” with a diameter of 13 mm. Glue them to the stiffness of 3 pieces pile and also smoked. He slipped into the holes thin jute twine …
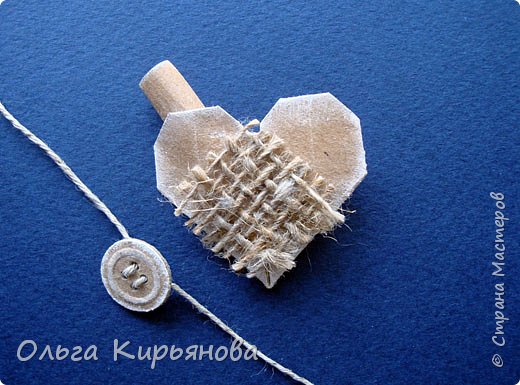 … And bandaged hearts.
 That’s how it looks from the other side.
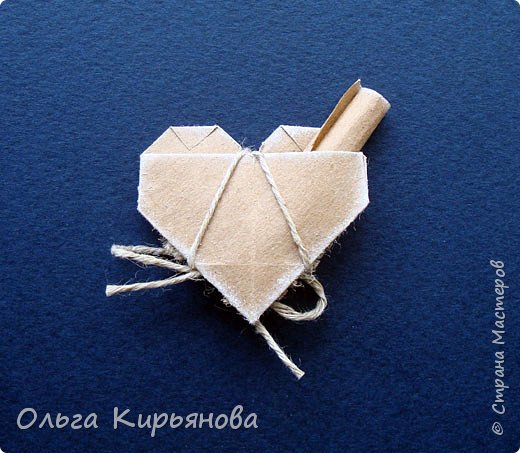 Ready hearts.
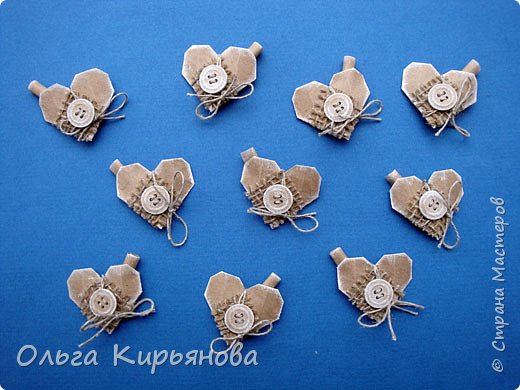 I estimate the cover design of heart boxes. From the sheet of packaging, cardboard cut out the heart, circling the box cover. I smoked white pad. I have no retail box (large) corrugated board and more shallow. This sheet was embedded in some packages, I do not remember from under that. To sustain style folded another heart origami from the same paper (9×9 cm square). Also, I smoked. Attach a piece of burlap 4×4 cm. Has made a button with a diameter of 2.5 cm (glued together 5 pieces) smoked. He slipped into the holes buttons thick jute twine and tied a bow. I tried “wrap” the heart of twine (slipped the ends of pieces of string under a layer of cardboard). Liked.
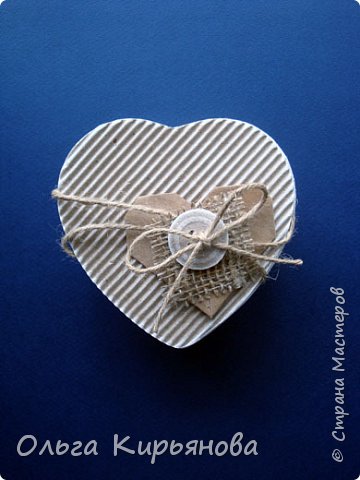 I decided to add three small buttons, as heart-surprises. They must first “sew” crosswise thin twine, glue the ends on the wrong side buttons.
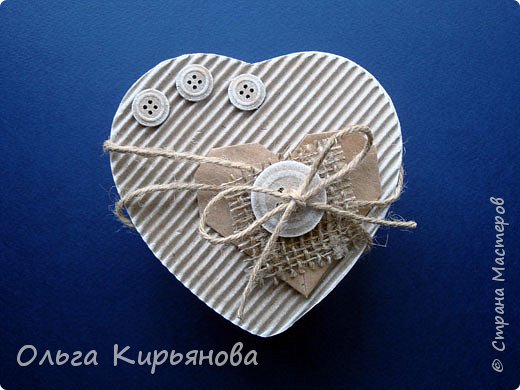 The end cap pasted strip of corrugated cardboard, ink pad walked on slices. Samu box also plastered strip and tied with string. Now you’re done!
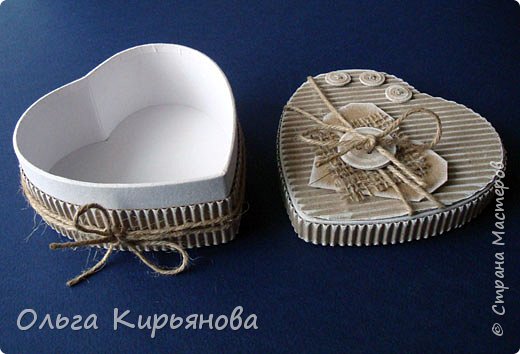 Heart box is empty.
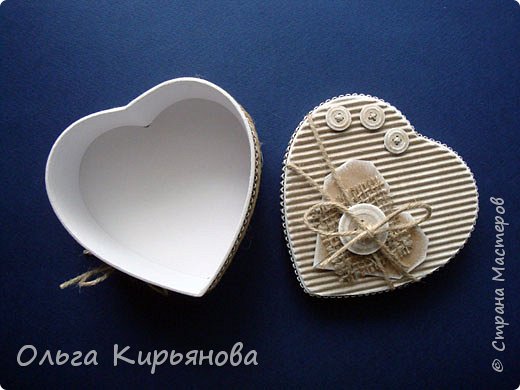 And then, finally, Surprise hearts take their place! Boll is not filled to the top, so you can add to it more and more hearts!
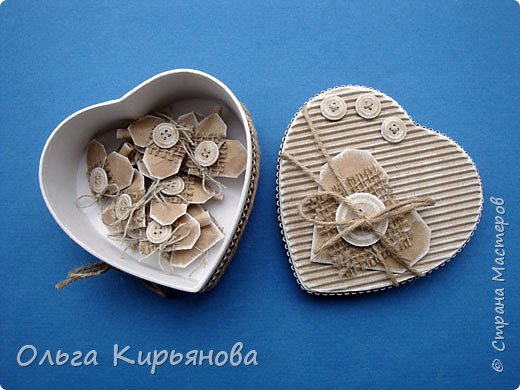
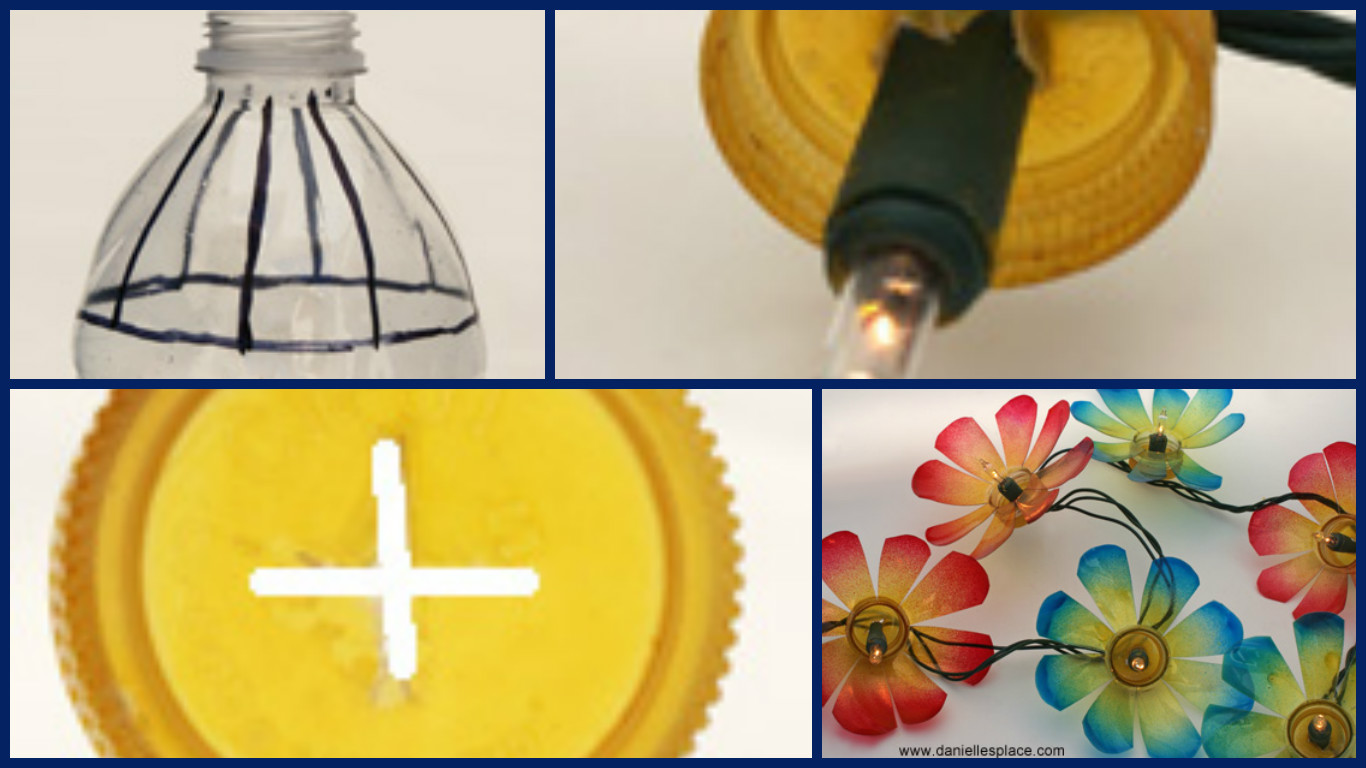
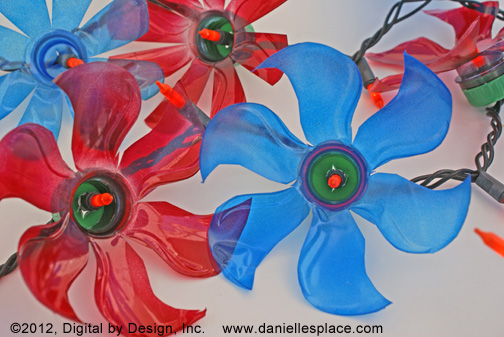
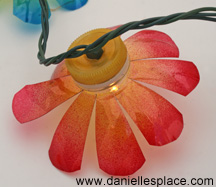
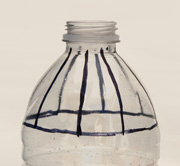 While our flowers are dried, do cross-shaped cuts in the lid with a knife or scissors.
 Fix the cover on a garland.
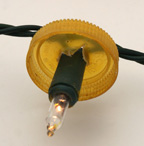 Screwed dried flowers to garland attached to the cover.
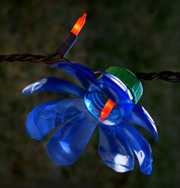
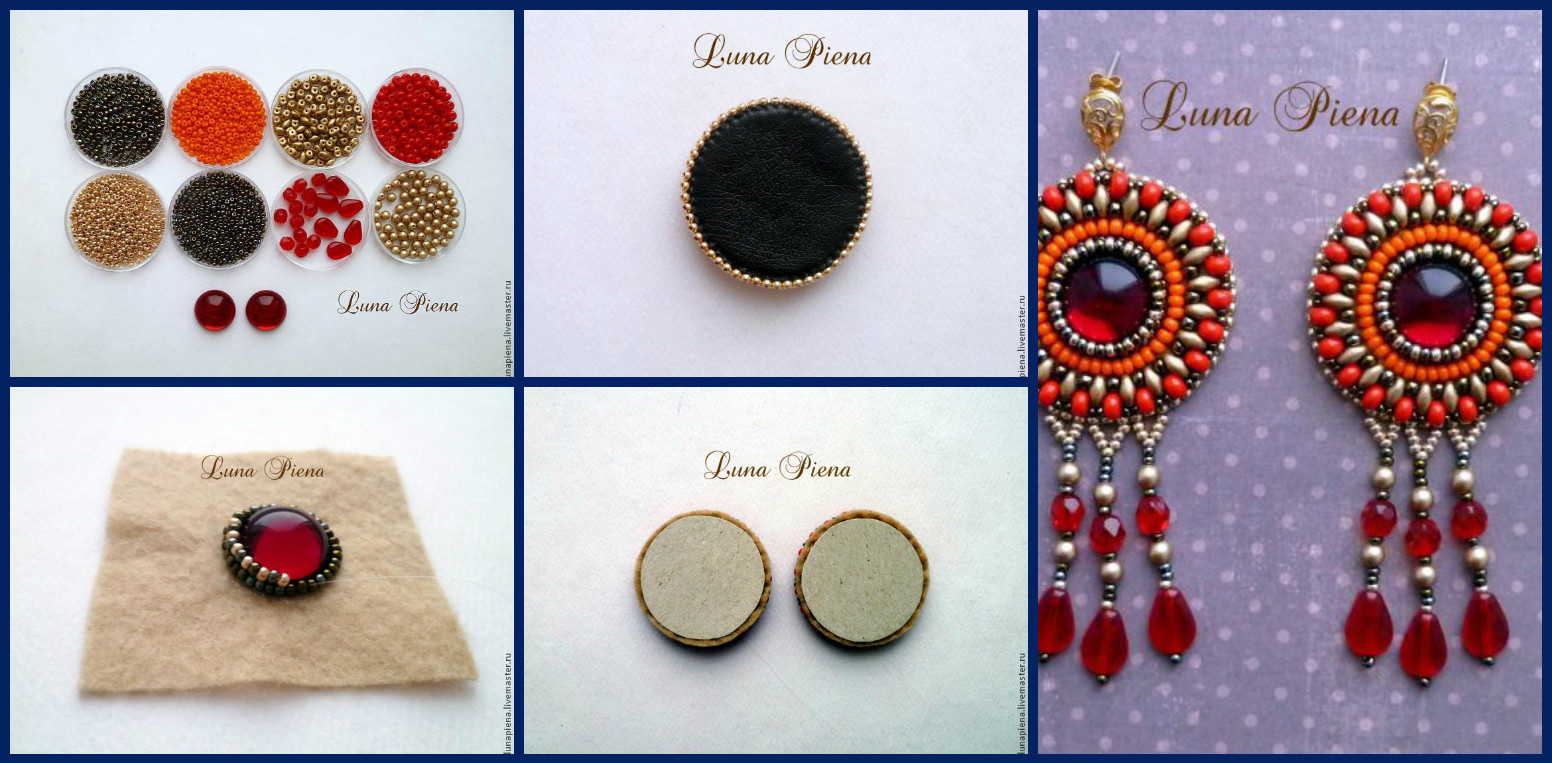

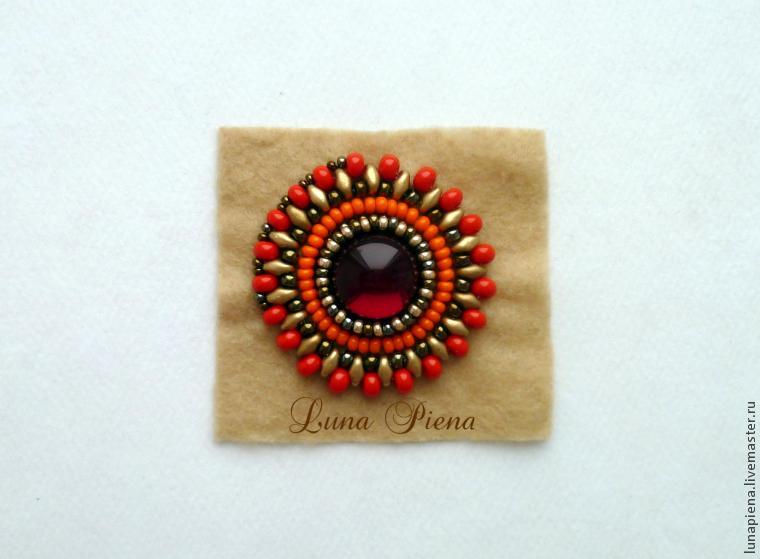
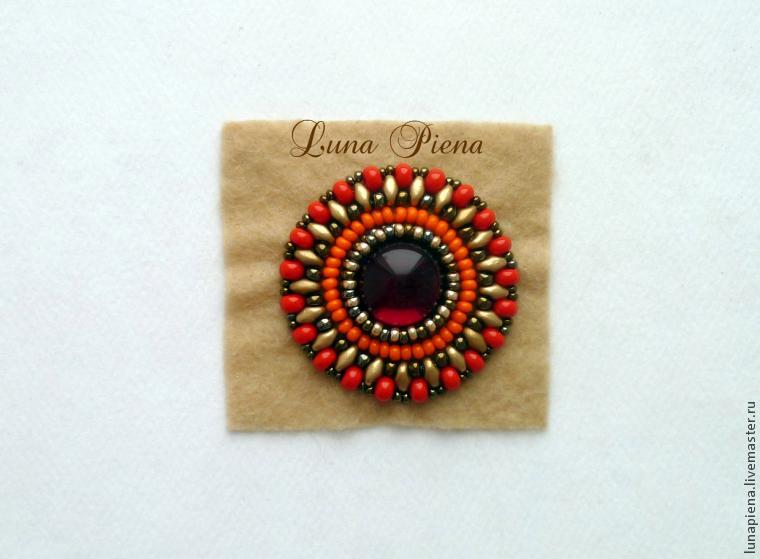
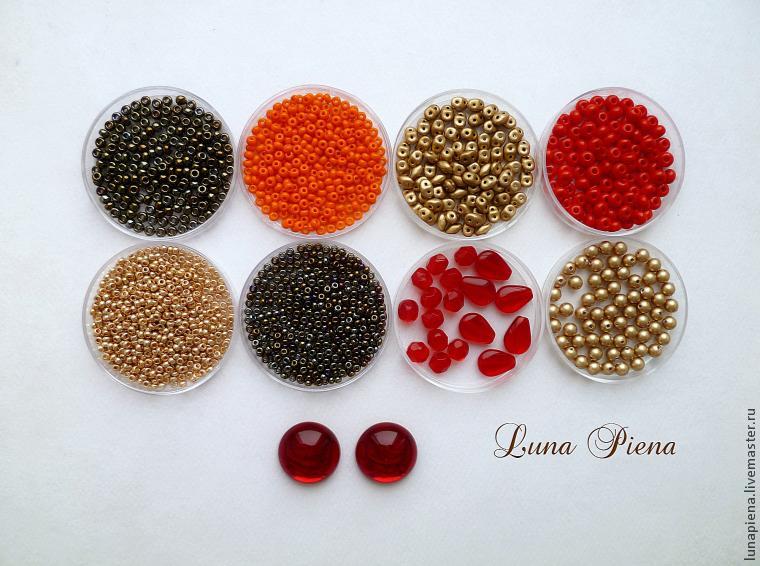 Getting Started. Glue felt on the glass (I use superglue for glass) and is sheathed in the technique of tapestry weaving. I will not dwell on the description of this technique, The first row of sheathed with brown beads №10
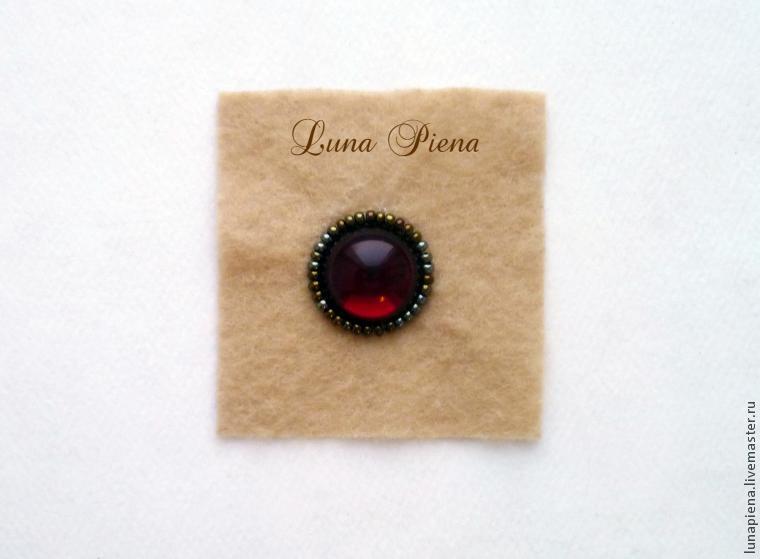 Further, alternating, sew beads №10 gold and brown.
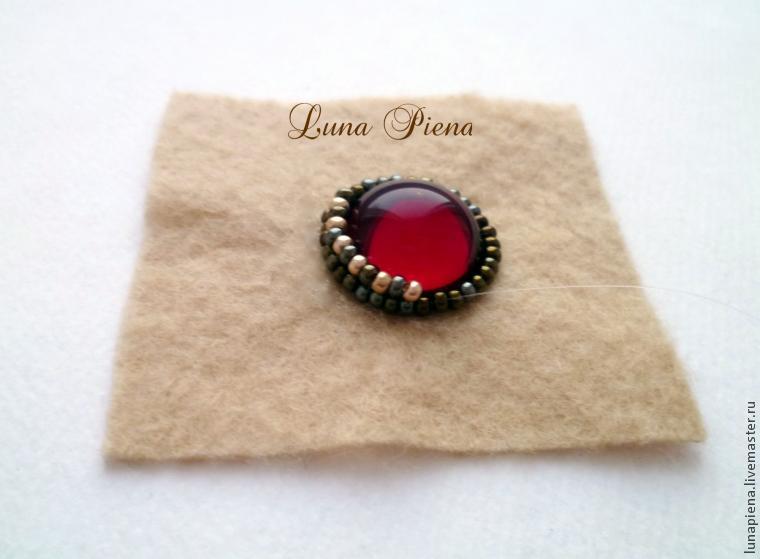
 Here is the steering cabochon:
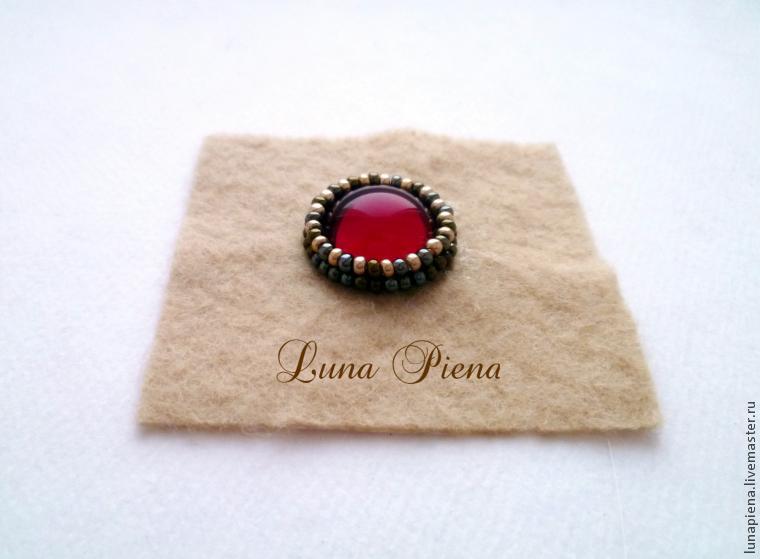 Around cabochon beads sew a number of №9 orange. I advise you to sew on a bead, so it will be smoother
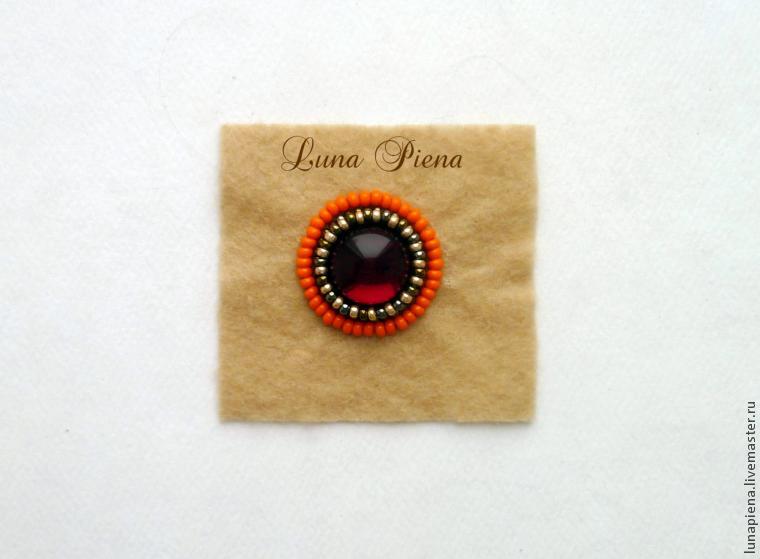 We proceed to the beads Superduo. Sew them, alternating with brown beads №8.
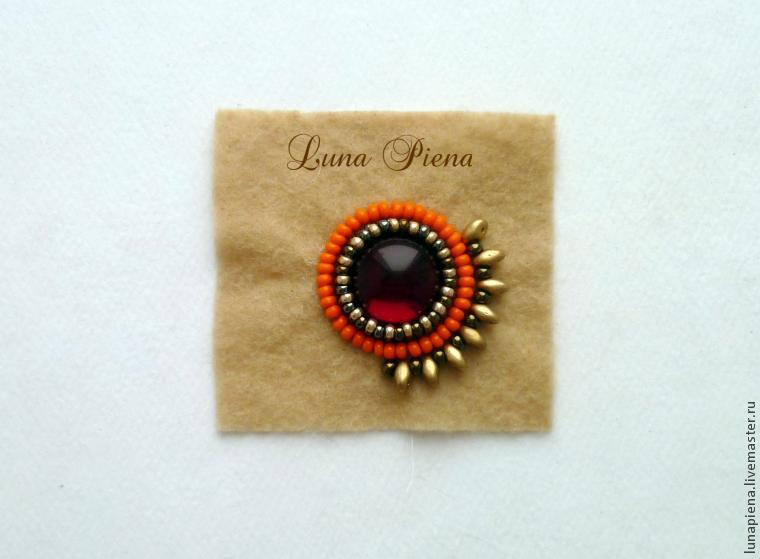
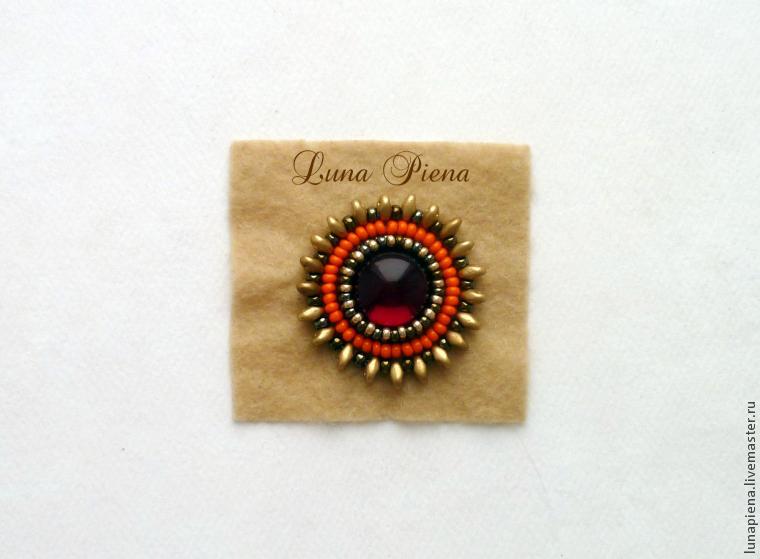 Above brown beads sew red beads №6, passing through the second hole beads Superduo.
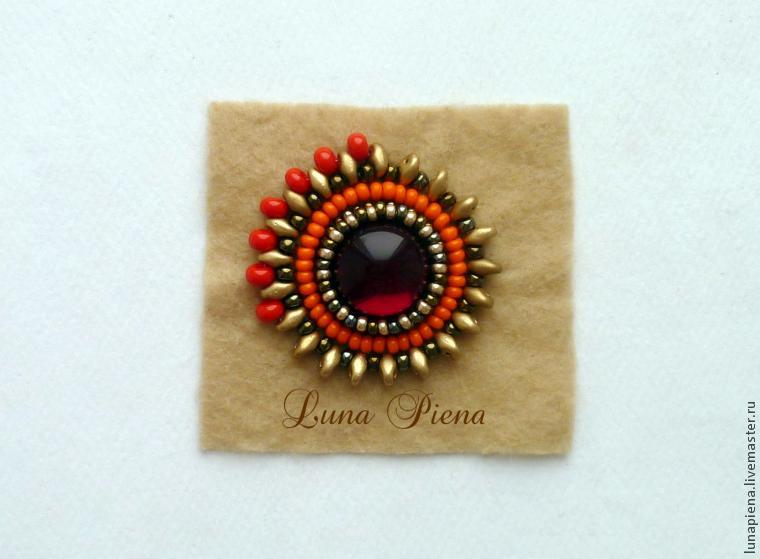 Over Superduo sew beads on the two brown beads №11, passing the needle through the large red beads.
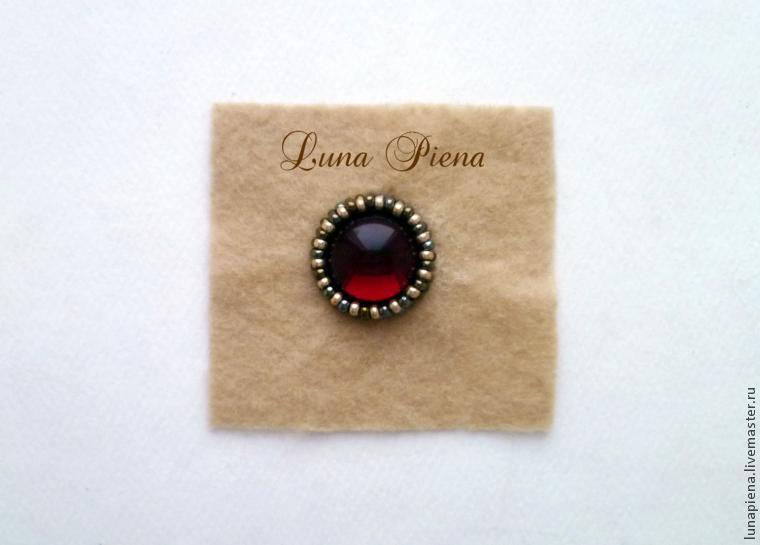
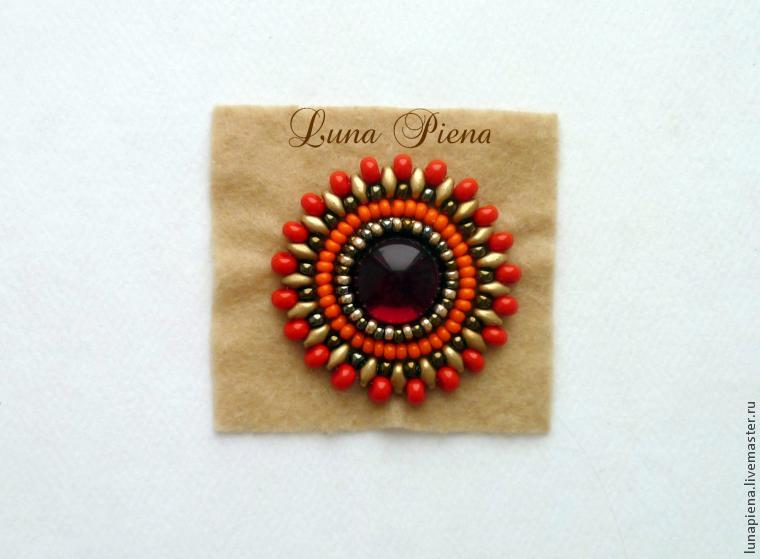
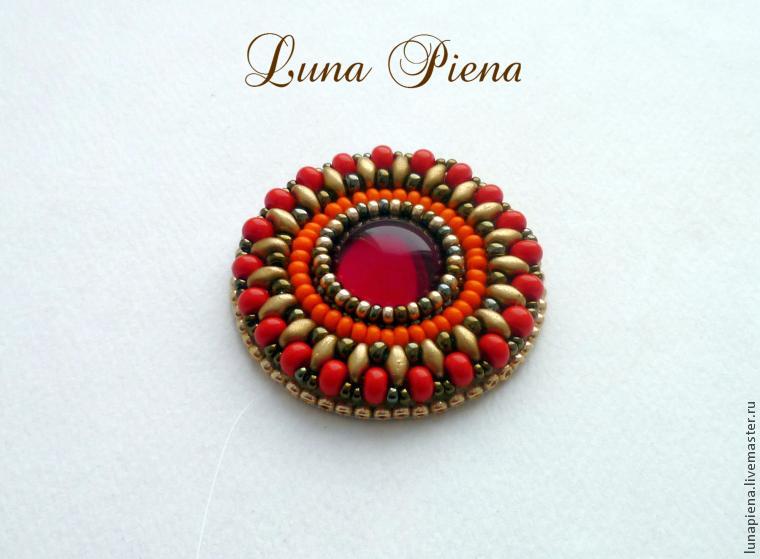
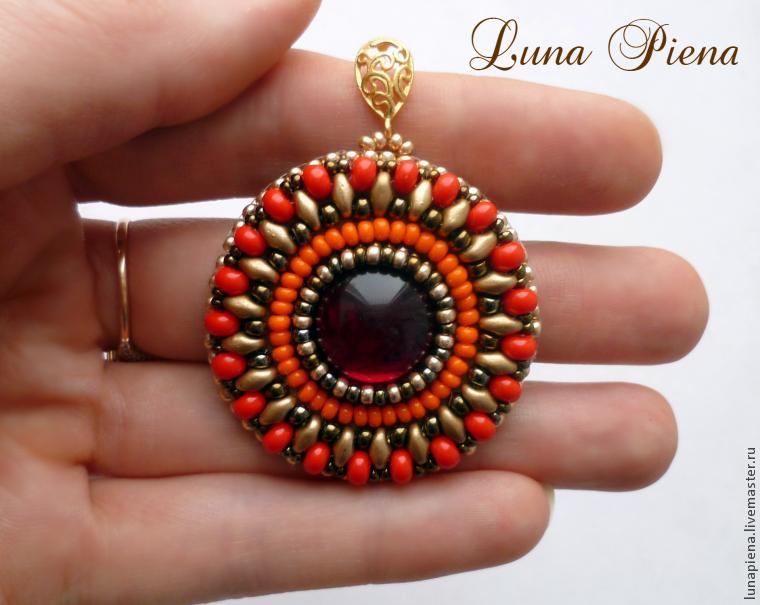
 Cut embroidered items and proceed to the wrong side. I stick to seal cardboard and then glued to the skin.
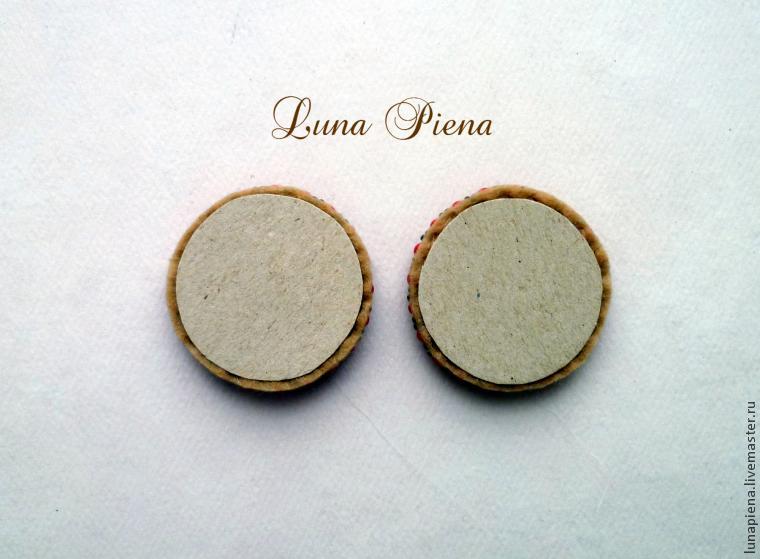 When the product is dry, carefully cut out and proceed to the processing of the edge beads №10 gold. Pass the needle through the beads strung edge products and display the needle from the front.
 Tightens and pass the needle under the beads from the bottom-up, so the entire edge sewn products.
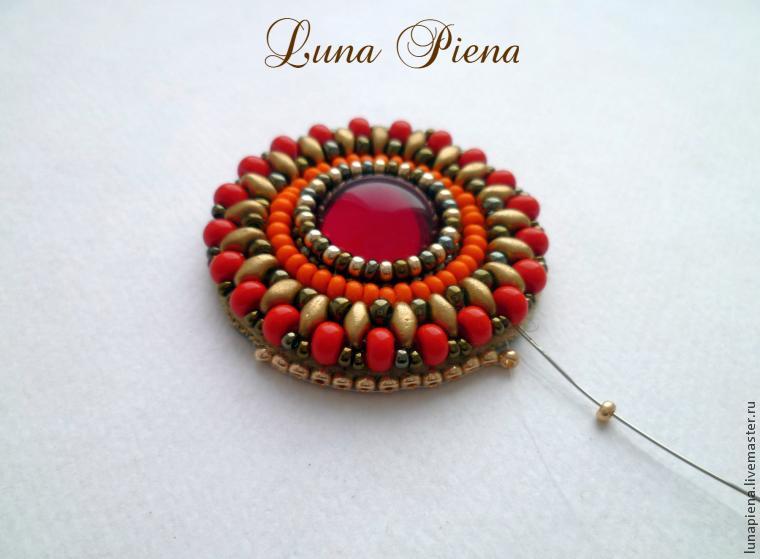
 It looks like the reverse side:
 Fasten fastener. Draw the thread through the bead of the treated region. We collect two gold beads, fastener and again two beads. We form a loop and fasten.
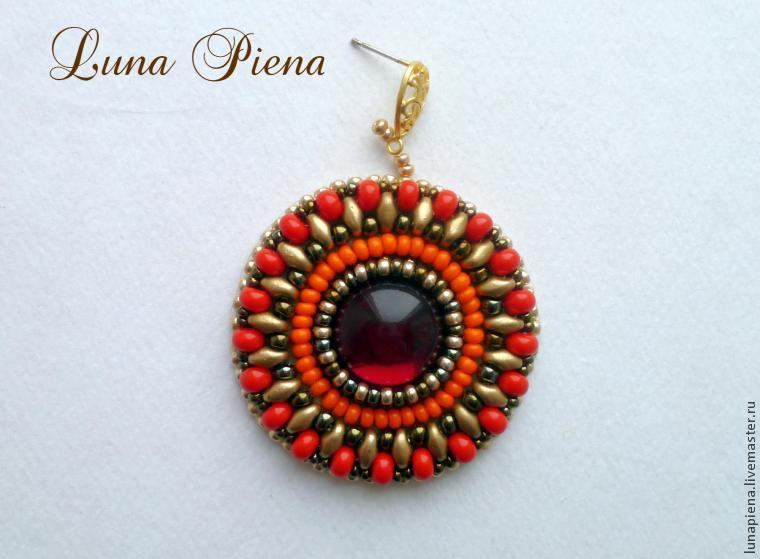
 We proceed to the suspension. Earrings I embroidered monofilament Suspension is better to take the yarn (nylon, polyester). Draw the thread to the bottom of the product, visually outlining the location of the three suspensions. We collect beads and beads, as shown in the photo.
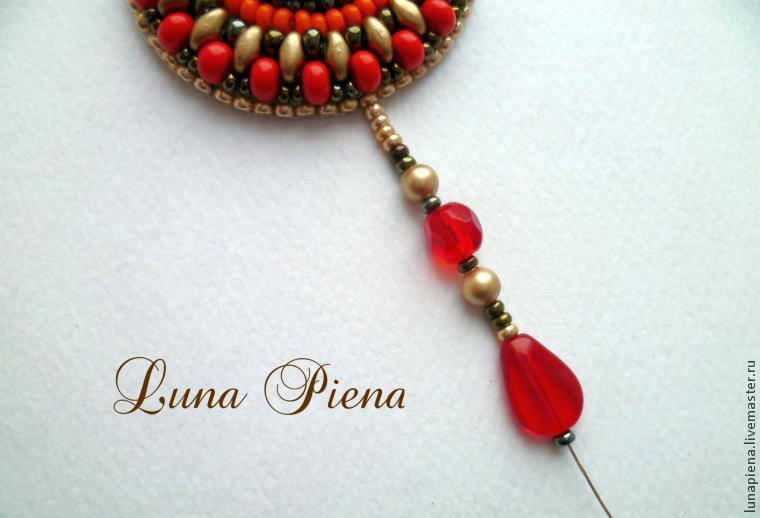 The second suspension will be slightly longer. Third legalize same way as the first.
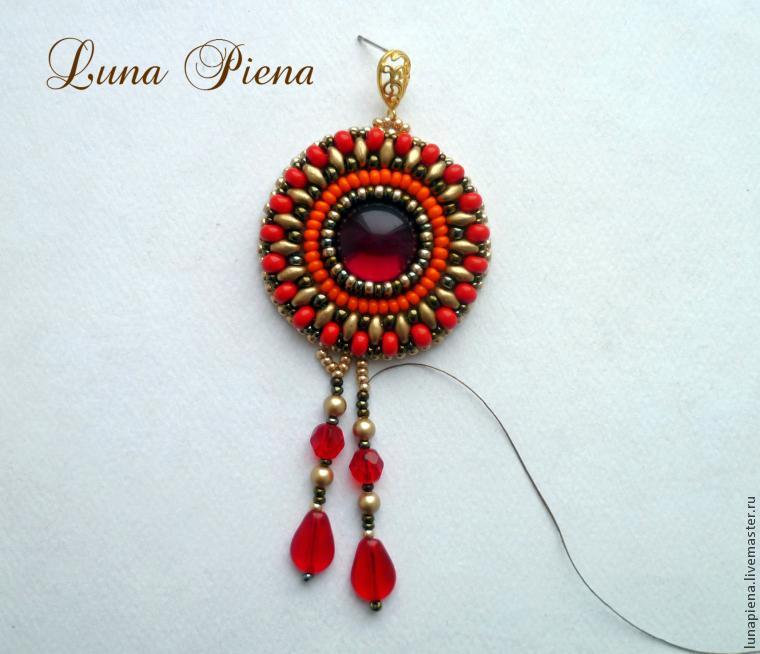 Finished with pendants, fasten thread. Our earrings are ready!
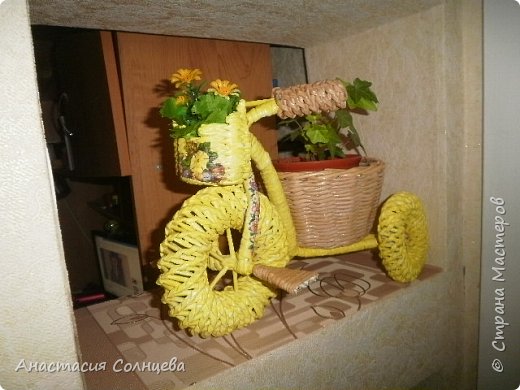 here is a great turned out to me !! She did the first time, but it seems like now and you. we trailed)
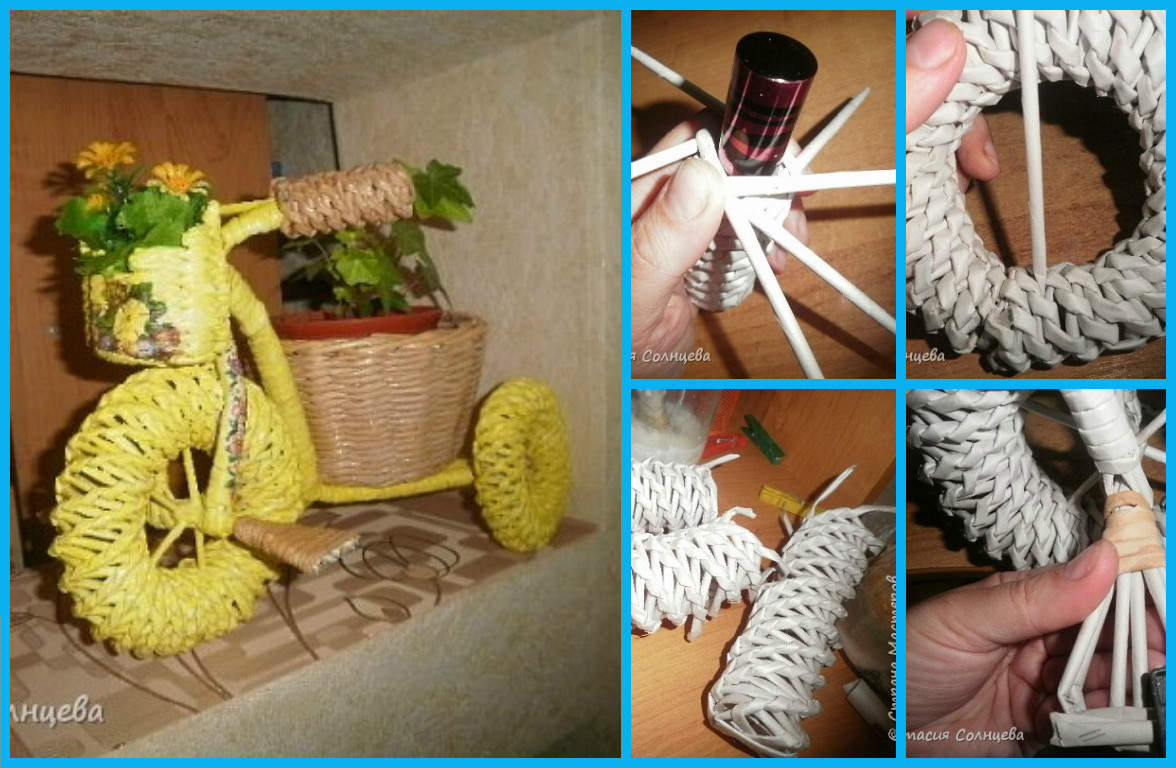
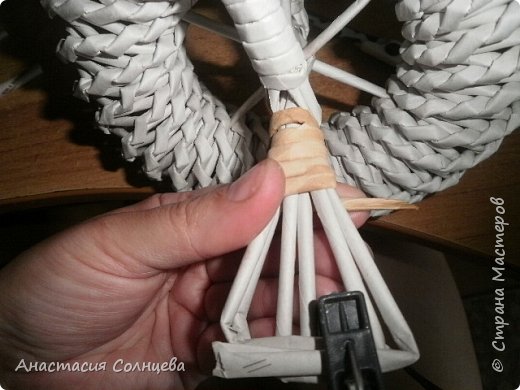
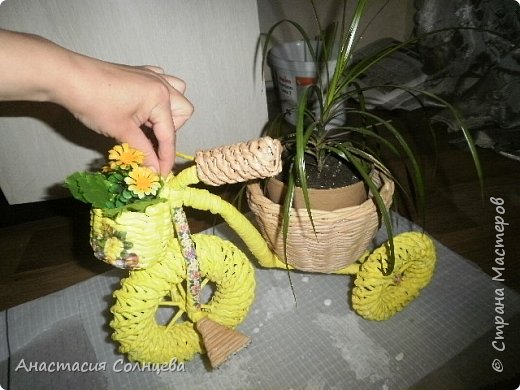 and so weave three spiral tubes, the diameter of the small wheel on twisted 1.5cm labial .a large wheel diameter of 3 cm (in a jar of acrylic paint TIP: each tube to take the glue otherwise imparting wheel will form like this …
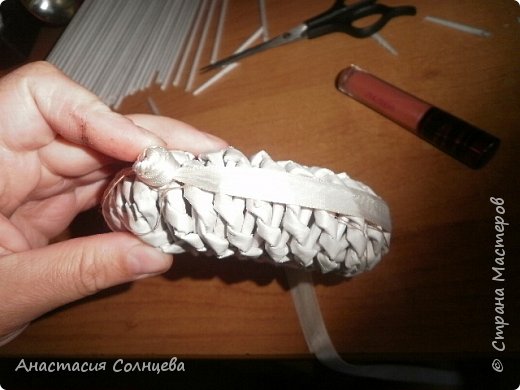
 Here is my first wheel, everything fell apart (((and so weave a length of 29cm all three lanes, turn a wheel, we coat with glue the edges and that’s how I did (you can sew thread), but I took the ribbon and strongly bound, like this
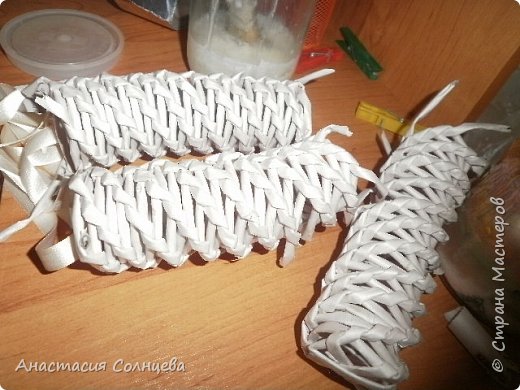
 leave overnight
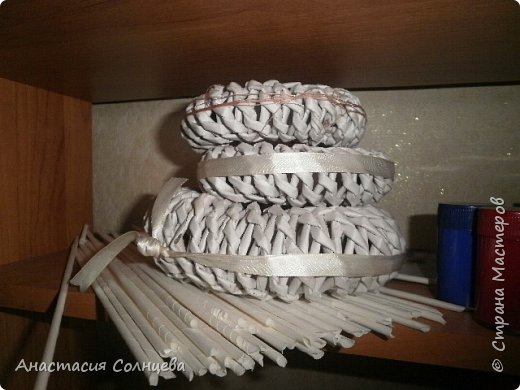 We threaded tubes so as to get the “spokes”
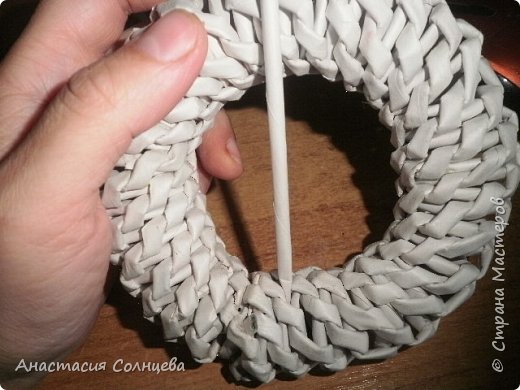
 in small 4spitsy, a large wheel 6
 do first rear axle, three tube bend (tubes) and sticks to the inside
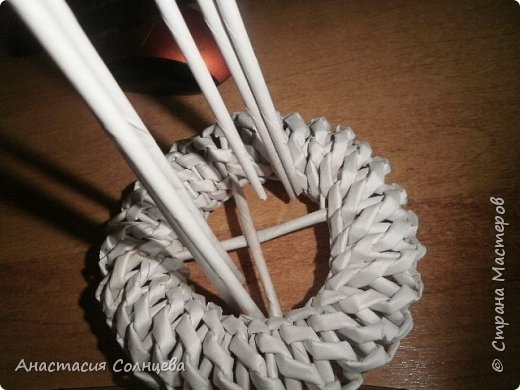 anchoring thread
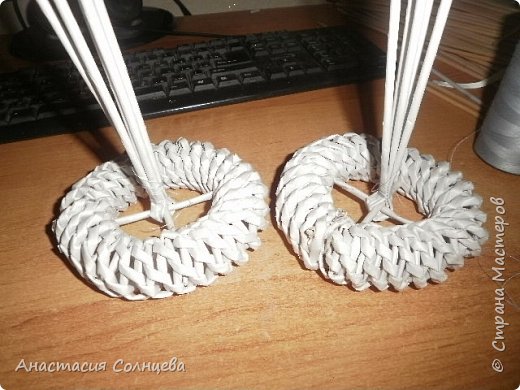 tails and connect the wheel thread
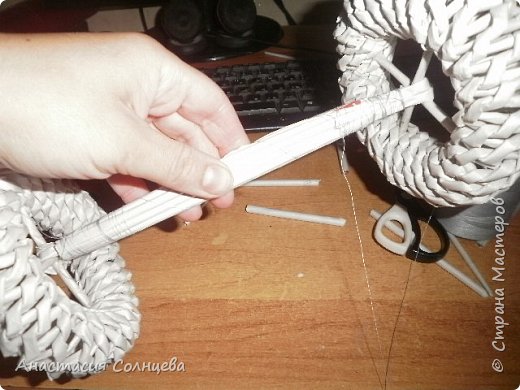 again take 3 tube
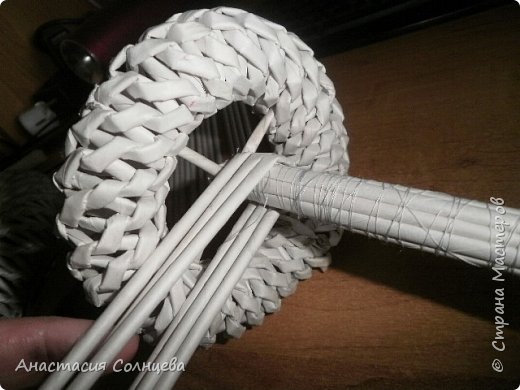 connect crisscross and connect
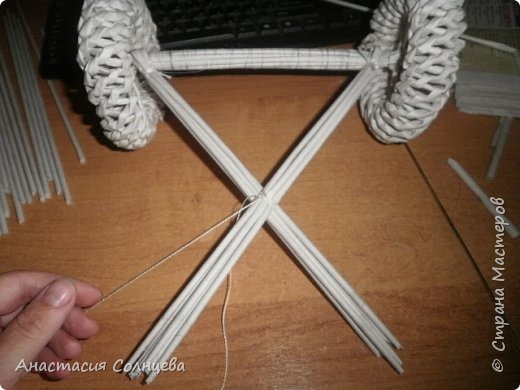 front wheel: 6 tubes take conventional threaded to Sredinka and connect on both sides
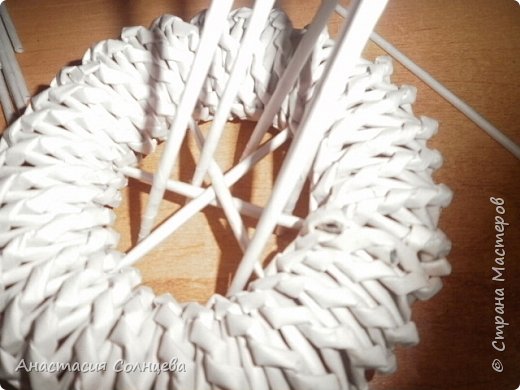
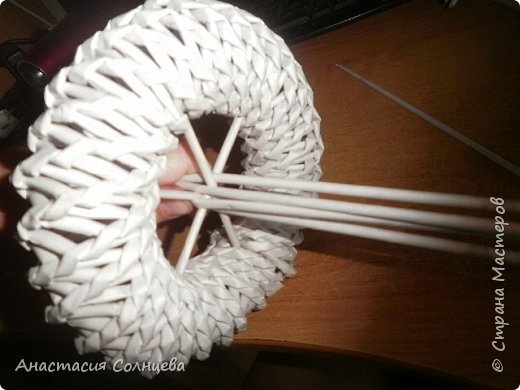 ie, left and right
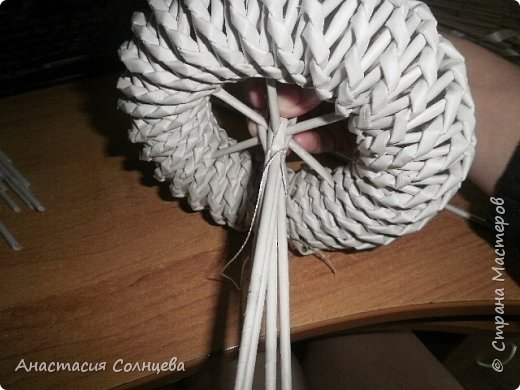 they put on another 3 tubes connect and entwine thread tube
 we do plug
 second and anchoring, and the tails are driving
 We put on another 3 tube in place of the plug connections, anchoring thread
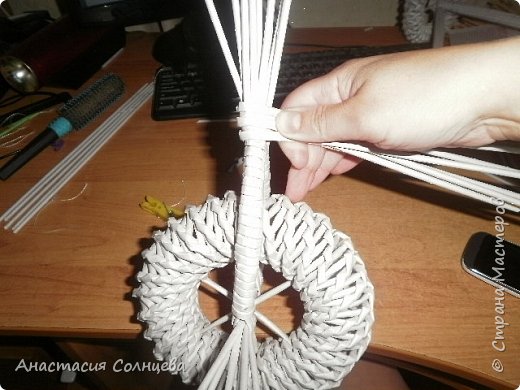
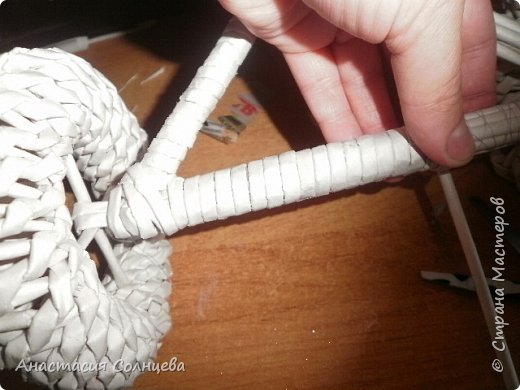
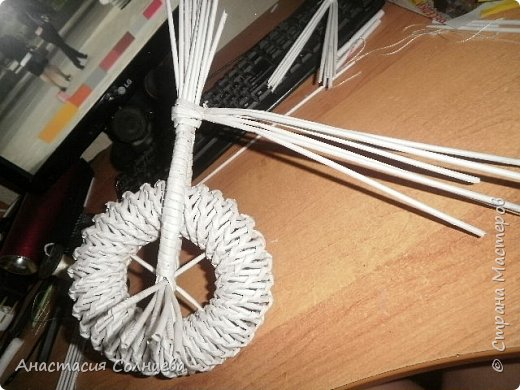 weave knob on the steering wheel 9cm
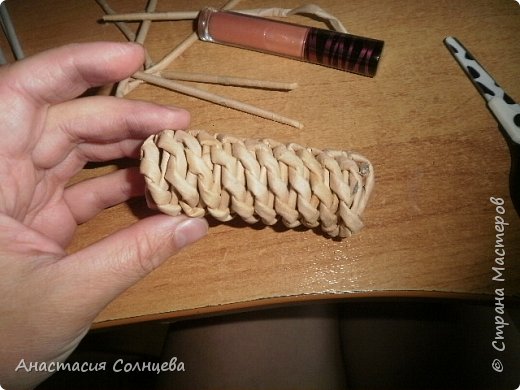 share
share entwine and put on glue
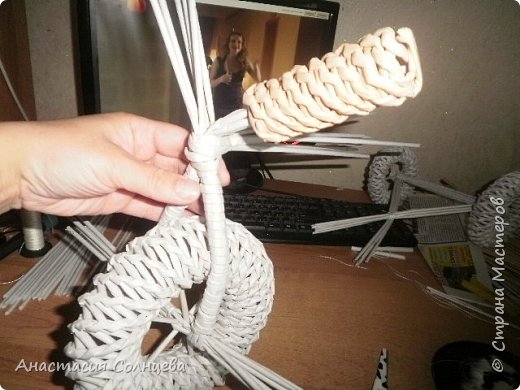 Here frame plus.soedinyaem
 and begin to wrap the entire frame
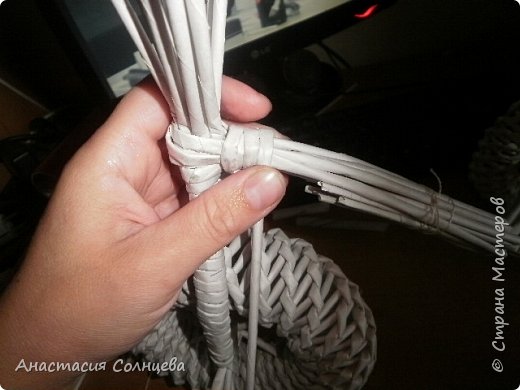
 as my daughter says FIDALIKI)))) take the tube on the front wheel, divide by 2 pieces
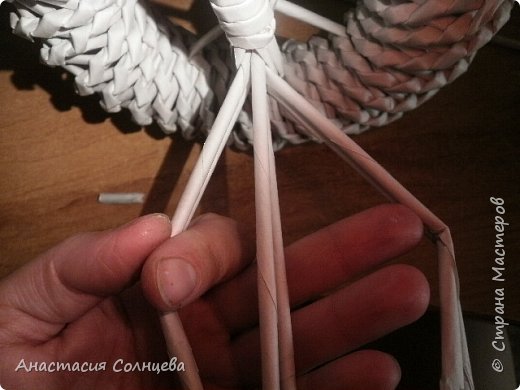 form a triangle and entwine, tails I cut off
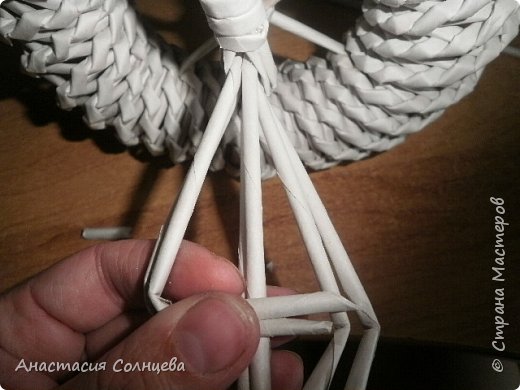
 white paint, dry them
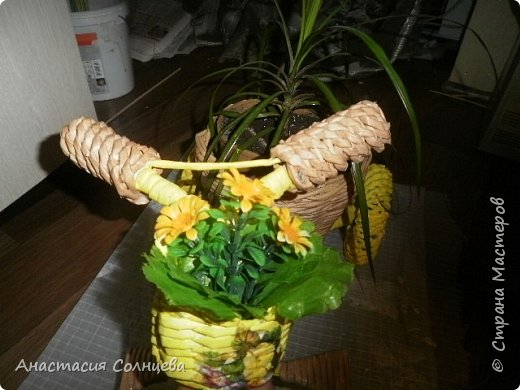
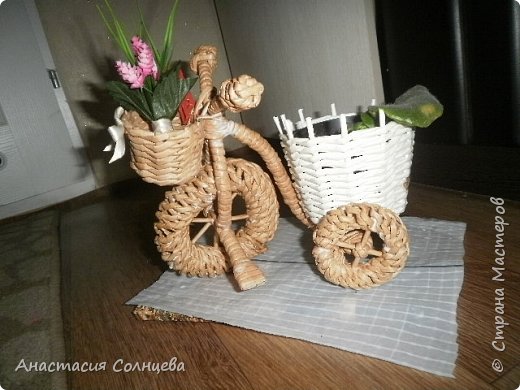
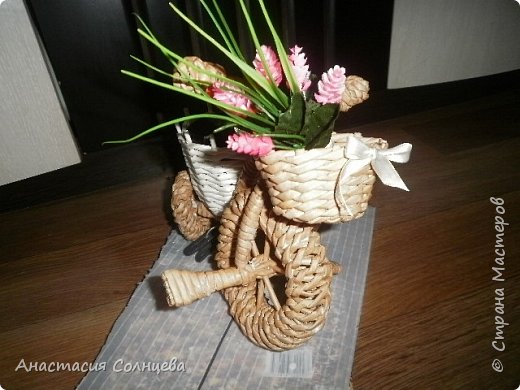
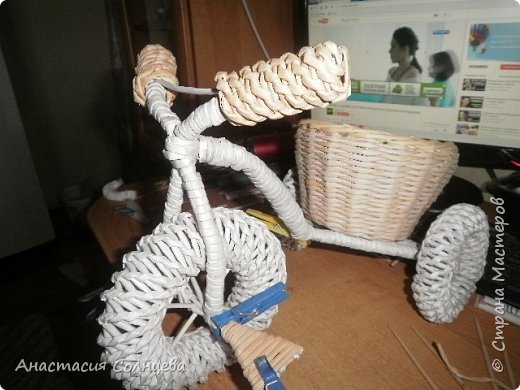 He wove this basket’s front will hang on the handlebars
 something like that
 and here is another
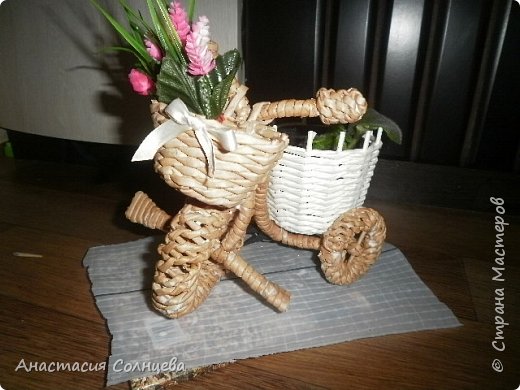
 I wish you success in the work, I hope has been useful for you!
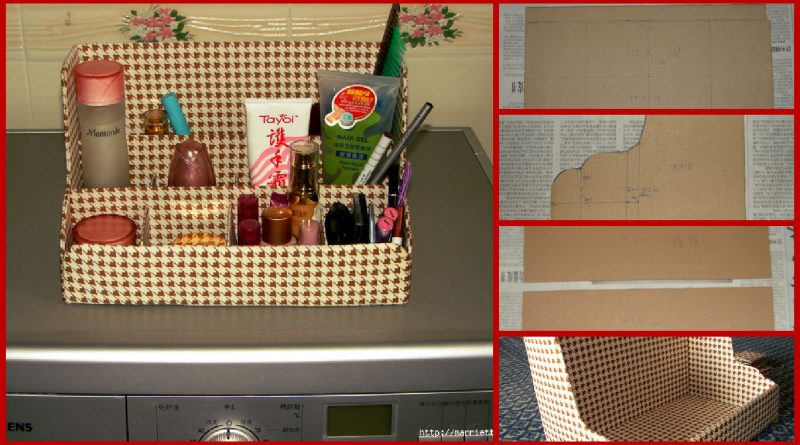
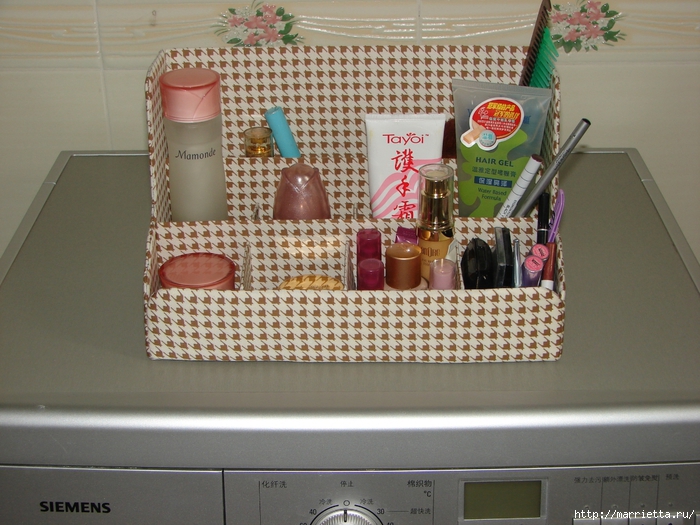
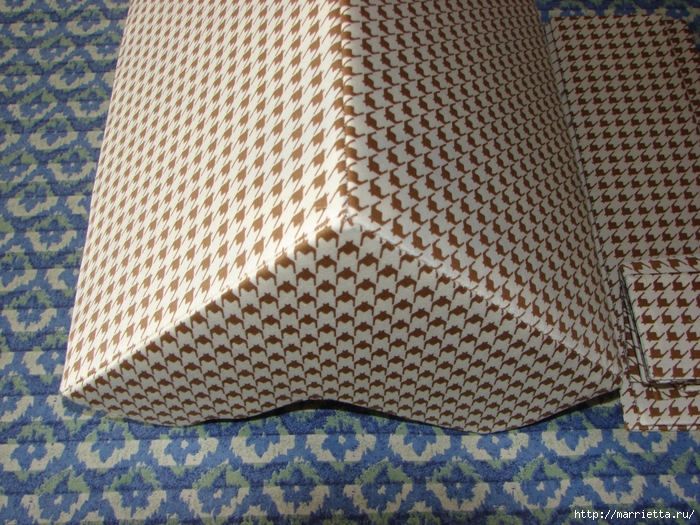
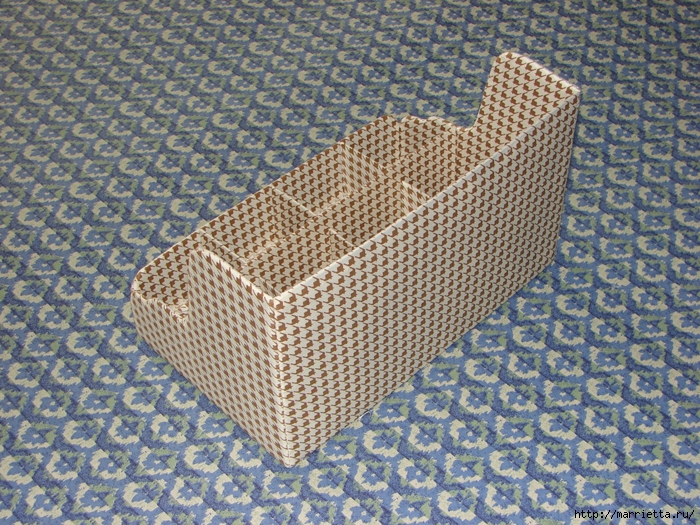
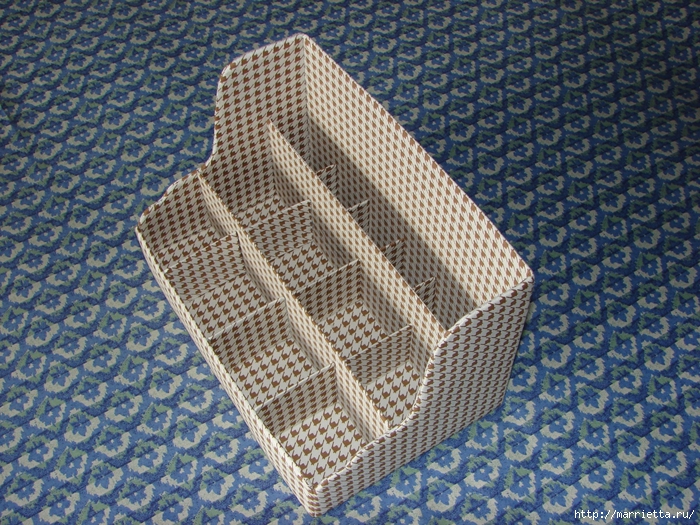
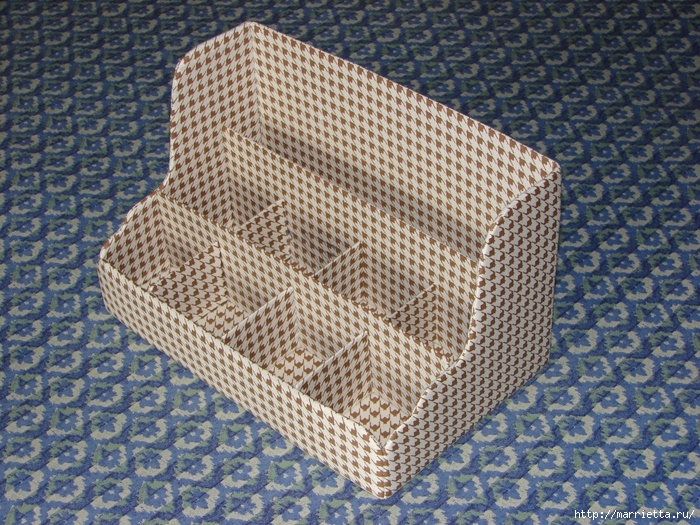 cut out of cardboard two rectangles measuring 30 cm by 18, we get the bottom shelf and the rear wall
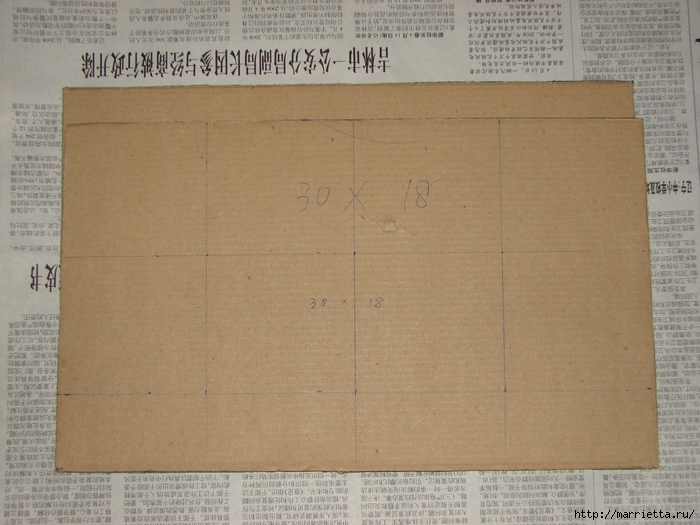 Cut 2 squares with a side of 18 cm and attach a decorative shape, as shown in the photo below. It shelves
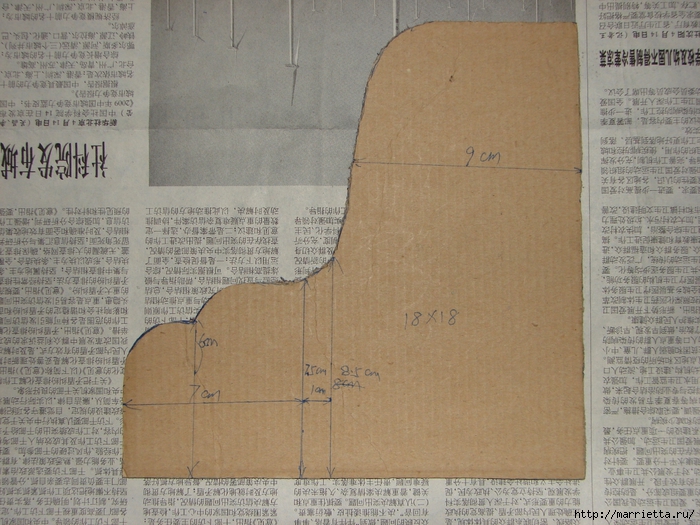 Cut shelf front panel 30 by 6 cm. Note the rounded corners on one side
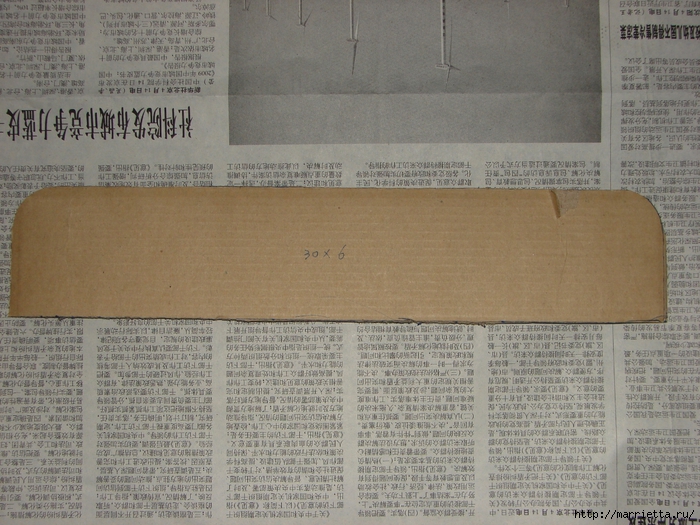 Cut two rectangles 30 and 10 30 cm by 8 cm, this will be the inner crossbeams
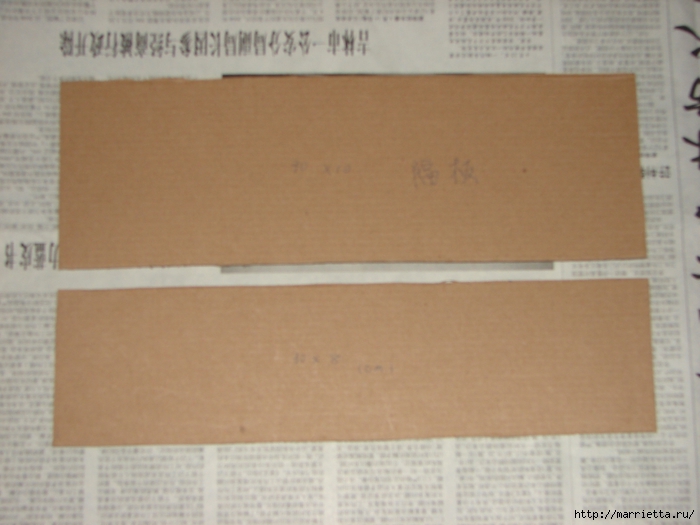 Every detail of the tight-fitting cloth with synthetic padding
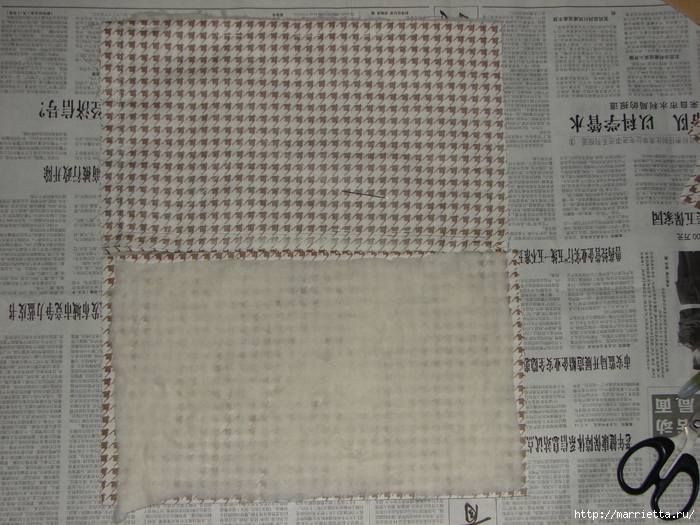 All items are sewn by hand, blind stitch. You can simplify your work, first build a shelf, cardboard, glue, etc.)
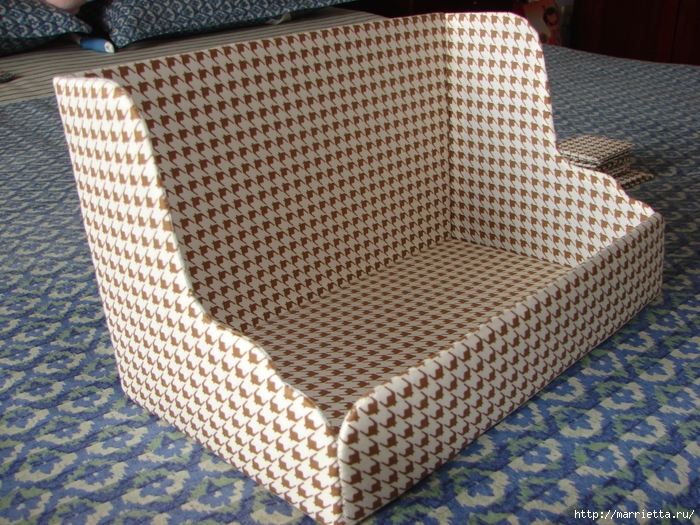
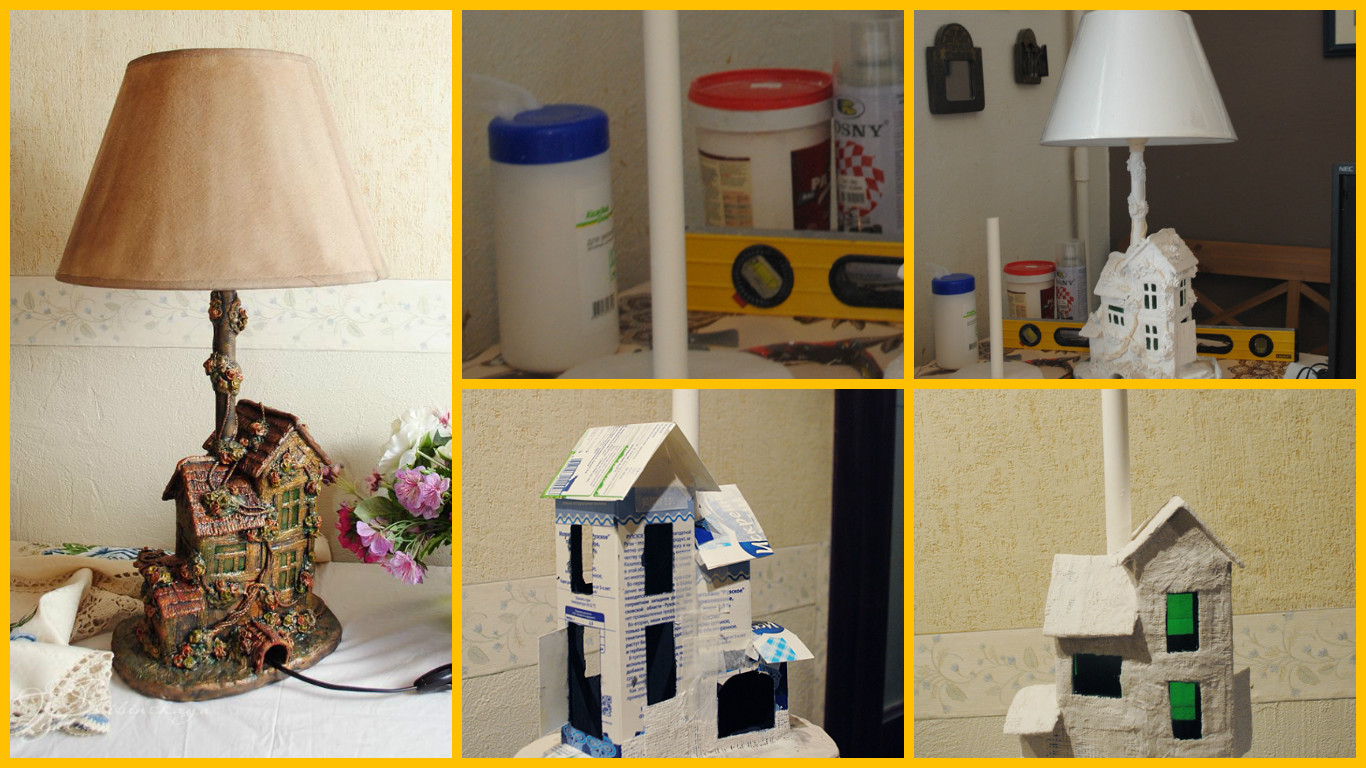
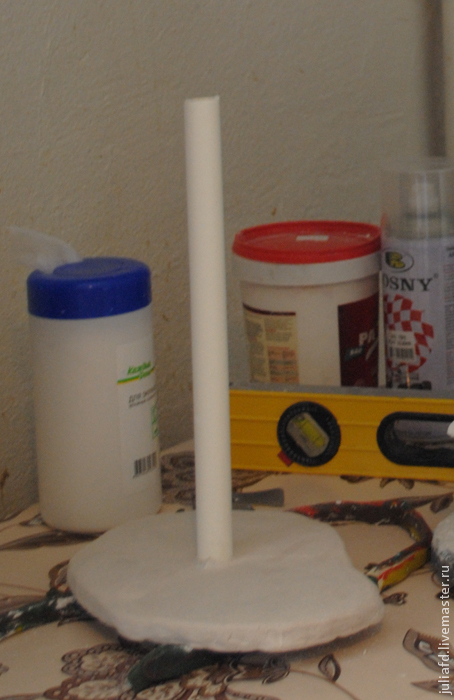 2. The walls and roof – are building a frame house
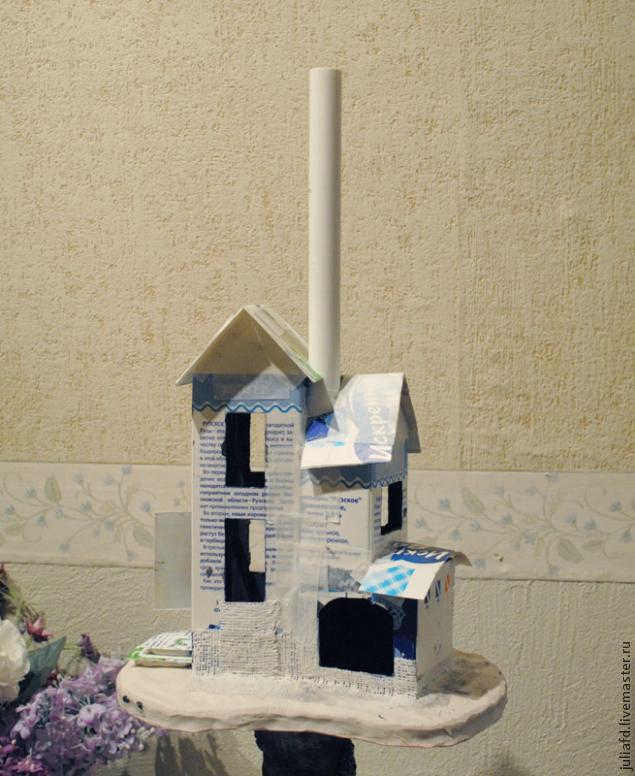
 Next outside our construction glue on the adhesive tape pieces of plastic bottles in the window openings and paste our whole design first layer of plaster bandage.
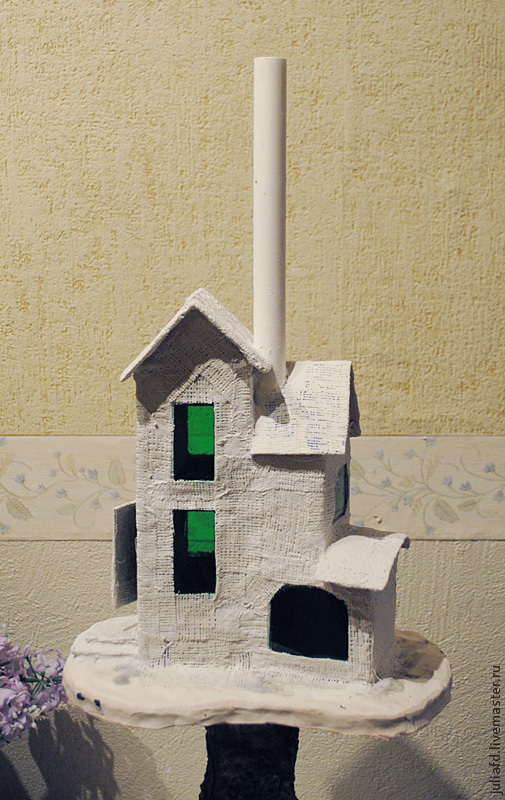
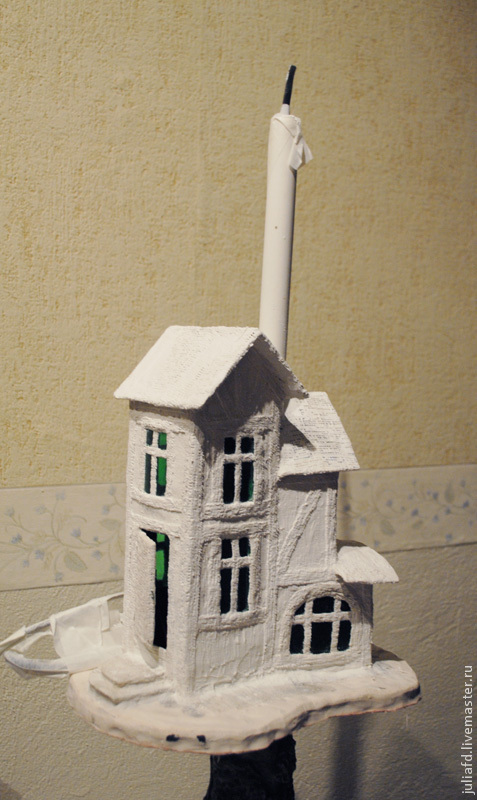
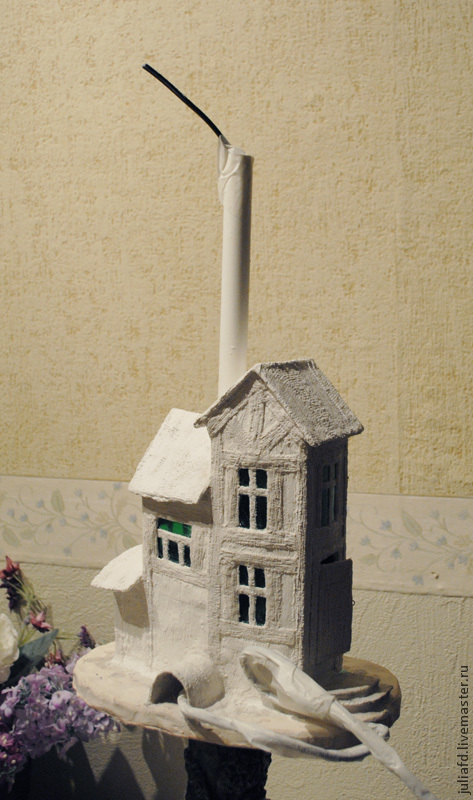 after starting a sketch of the layout wall plasterer. I use a simple, soft brush. Plaster wall background levels. And the layout of wooden beams I put longitudinal strips to simulate wood on wet plaster.
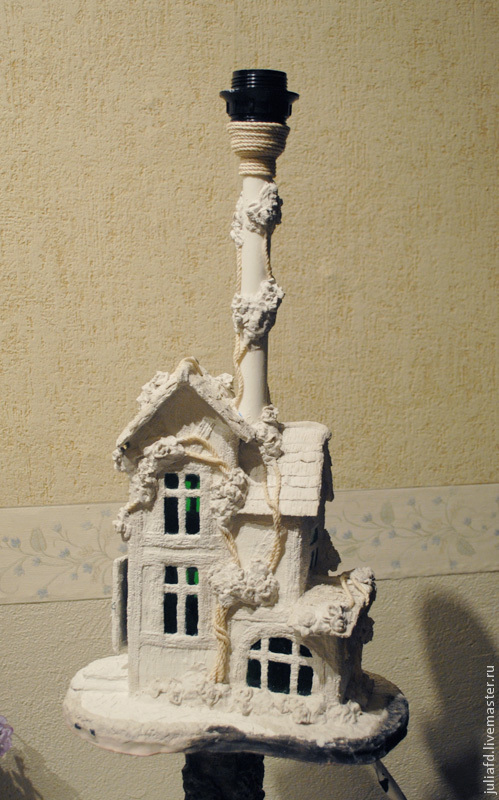
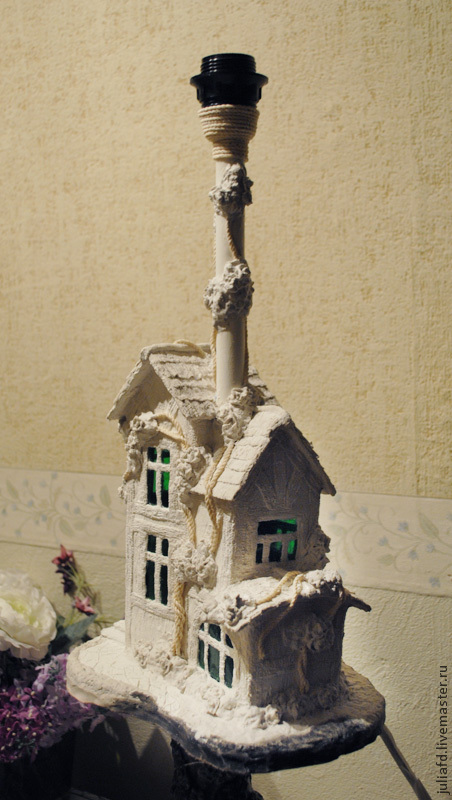
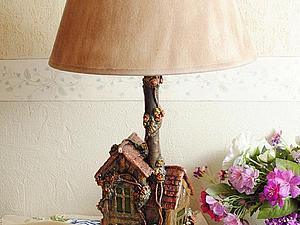
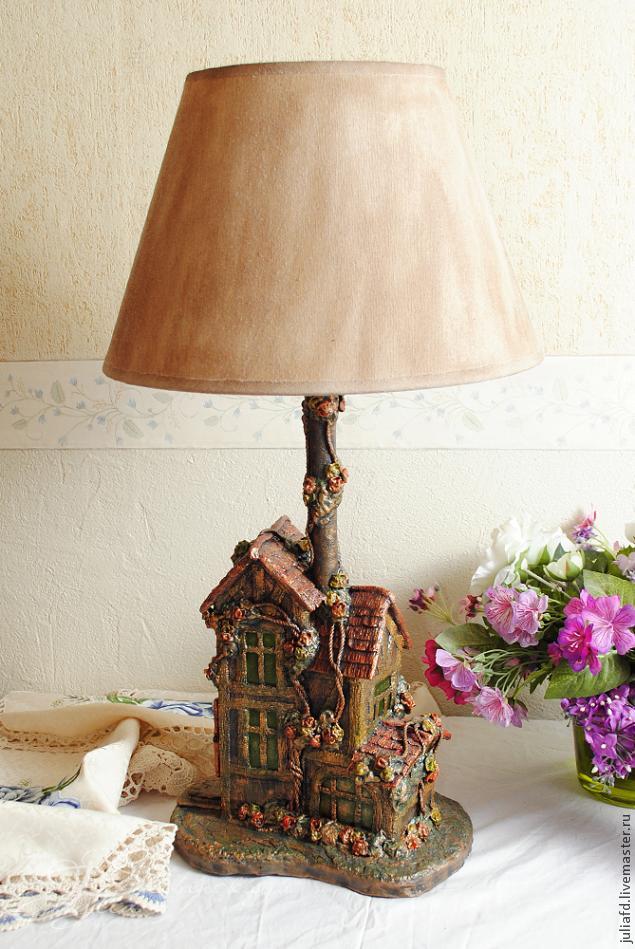
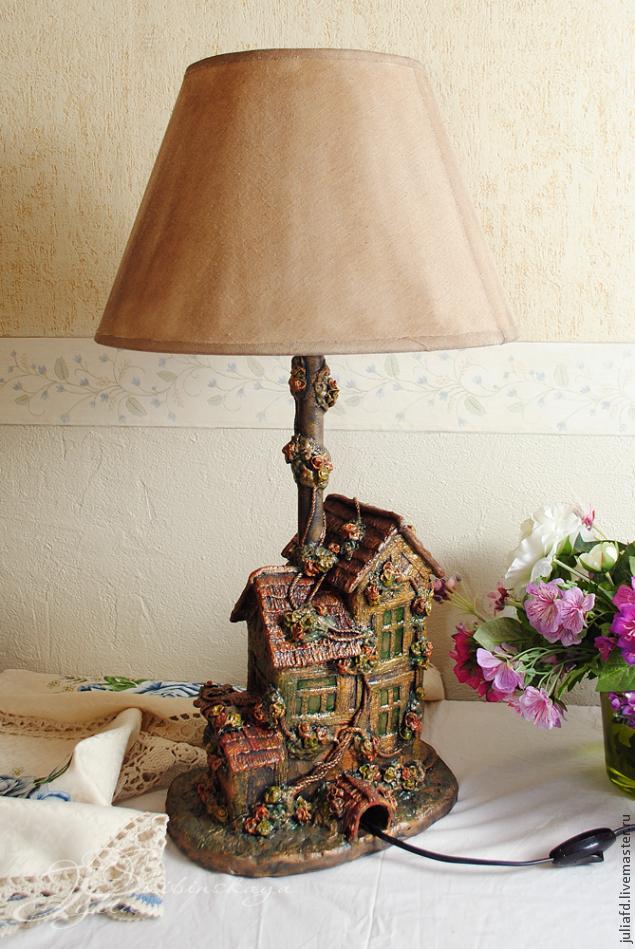
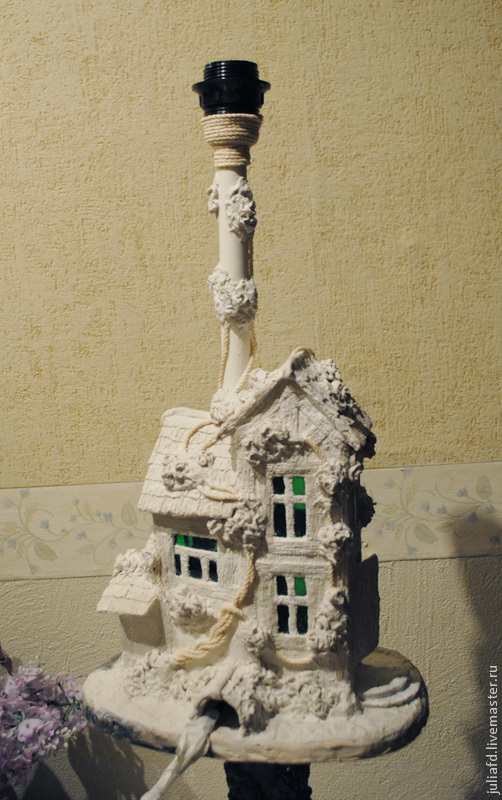 And we do the first fitting lampshade.
 5. Painting and final finish.
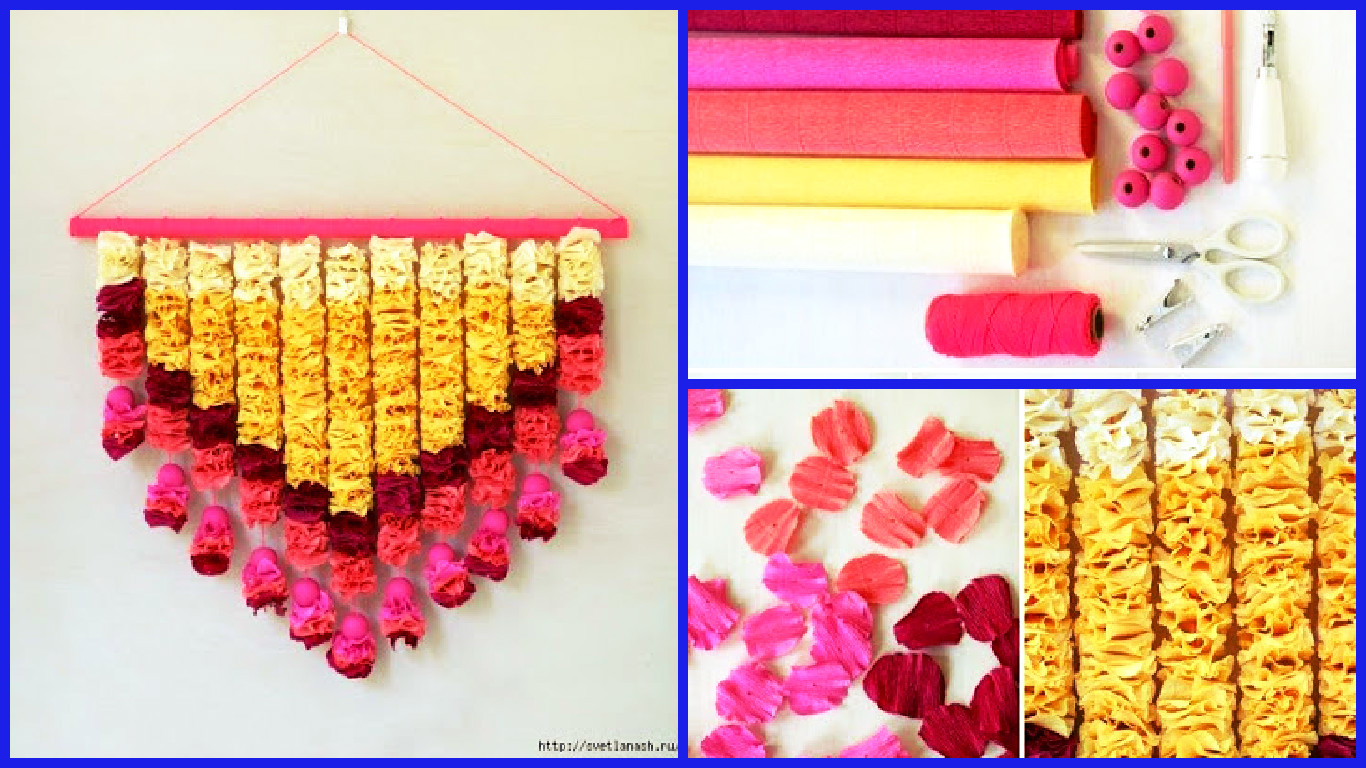
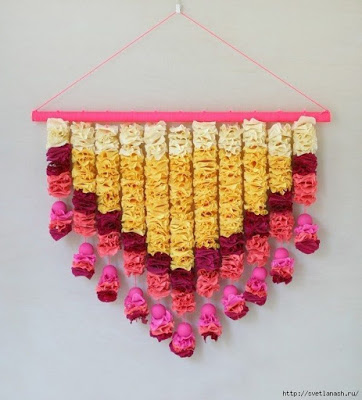
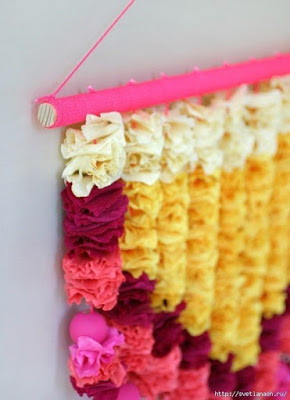
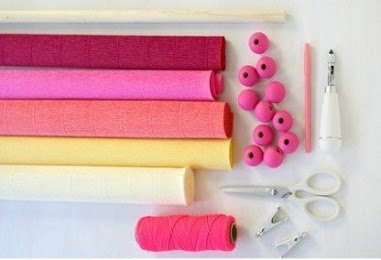 Step 4: To fluff up the petals, gently pull the edges of the paper, creating a kind of ripple. You can stretch several petals, to save time.
 Step 5: Tight bolt threads. Tie long strands around the bolt every 5 cm. On them, you will be stringing the petals.
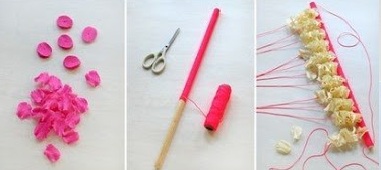 Step 6: petals are strung on a thread and tighten the knot at the end of each tape obtained. Alternate the colors of the petals, to get the palette.
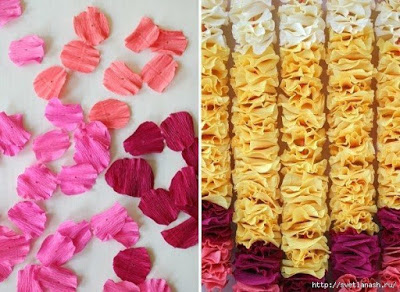
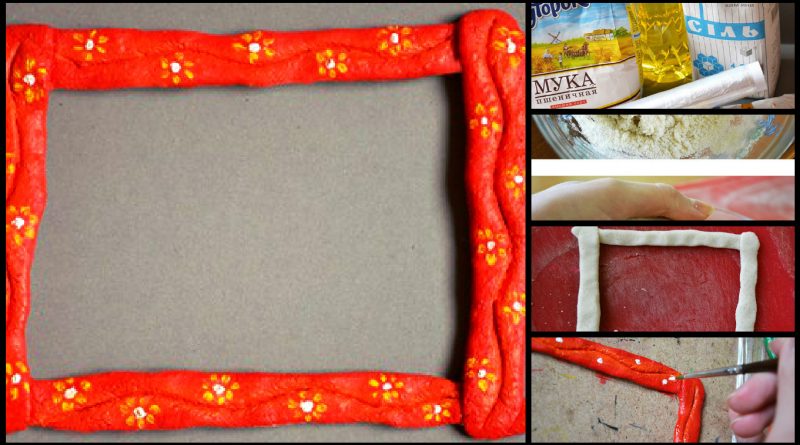
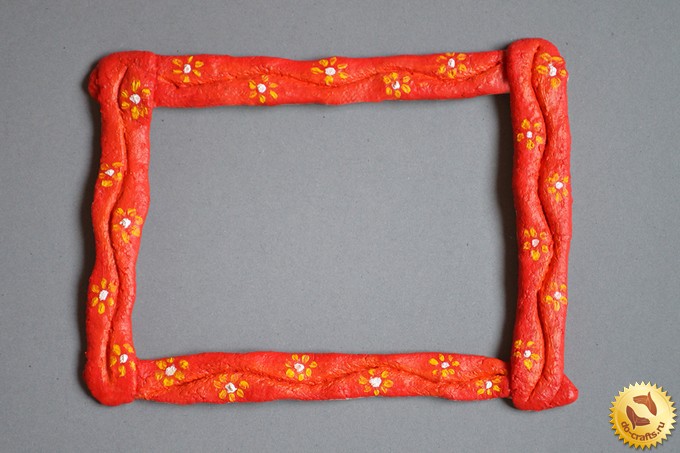
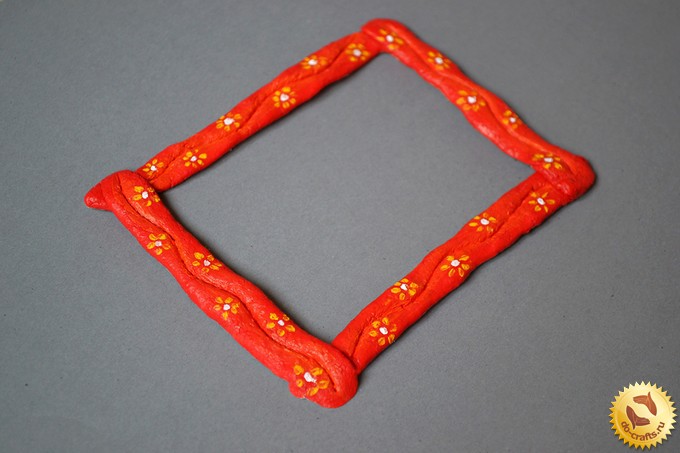
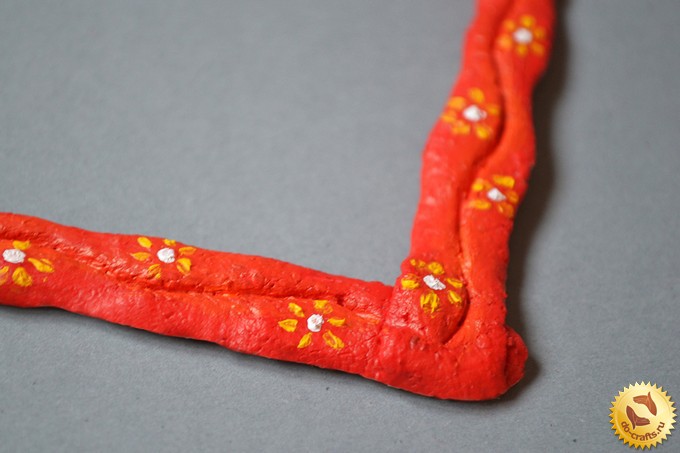
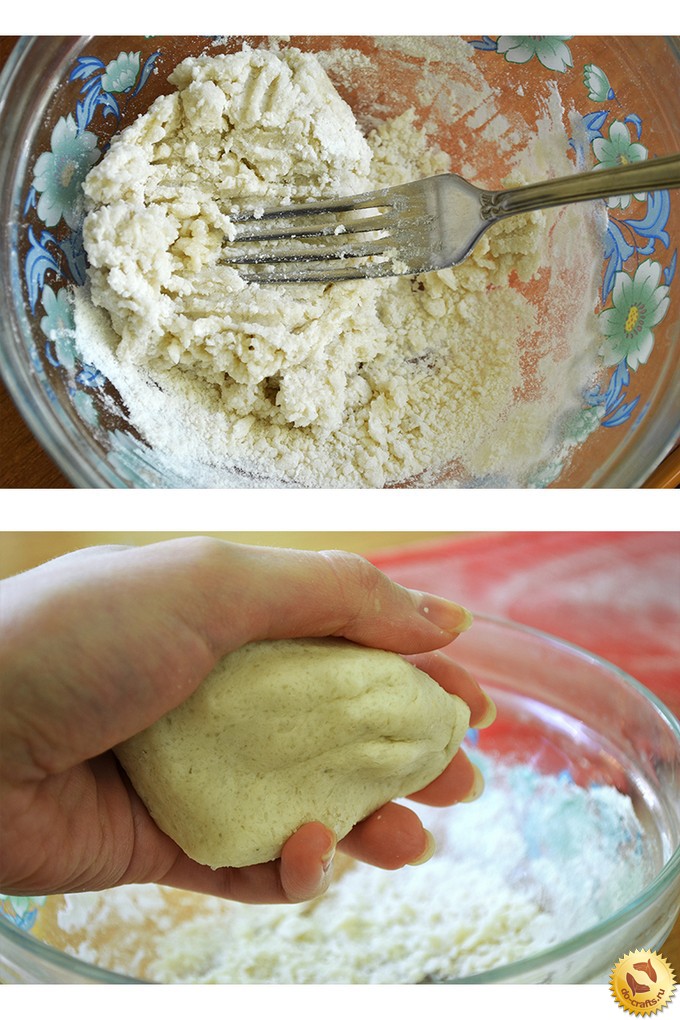 2. Further, the obtained sausage dough do four, two of which must be slightly shorter than the second pair.
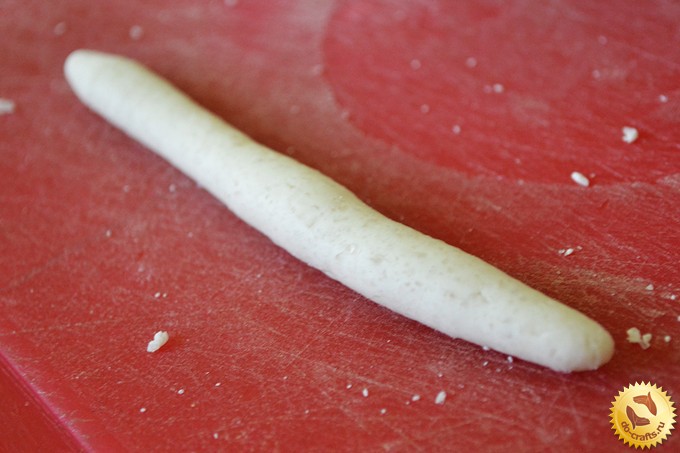 3. Push the sausage fingers, thus making them thinner. Thereafter applying them perpendicular to each other.
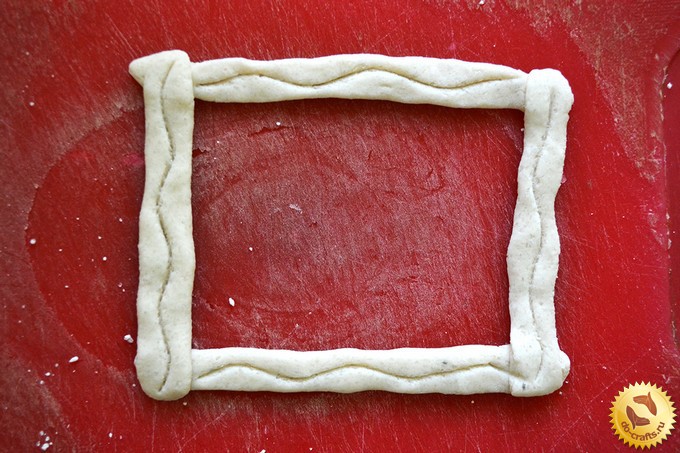
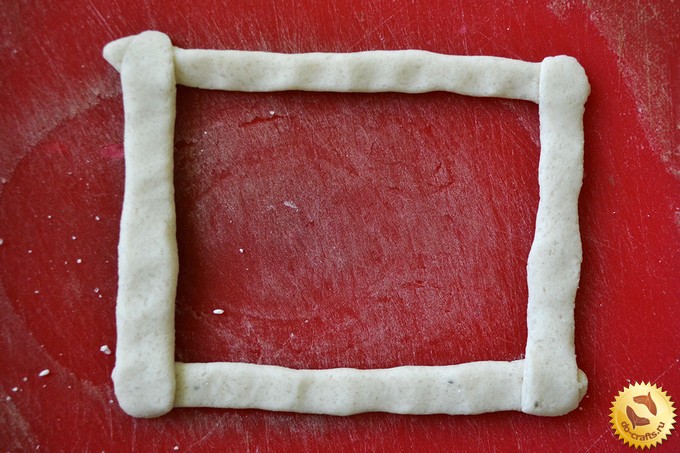 4. Take a toothpick and cut through the wavy pattern along the sides of the frame.
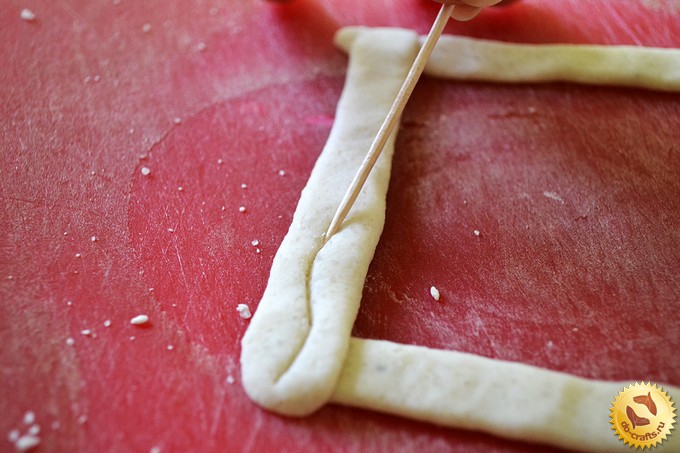
 6. Now wrapped with cling film surface on which we paint the picture frame.
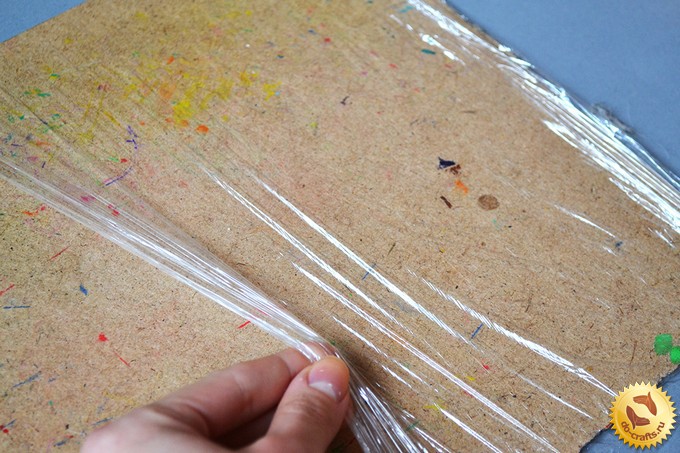 7. squeezed from tubes of red, yellow, orange and white paint.
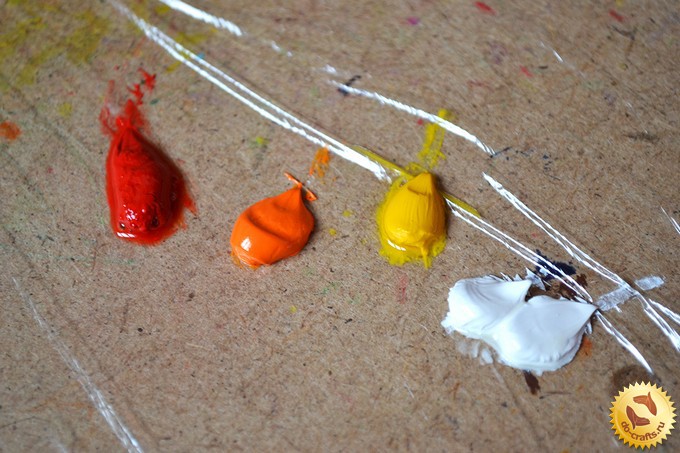 8. We take a broad brush and paint the frame in red color (occasionally damp brush in sunflower oil).
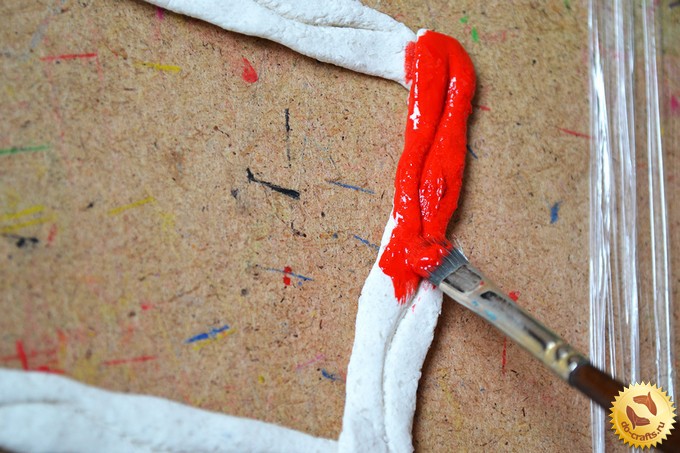 9. We look to have been painted over all the edges.
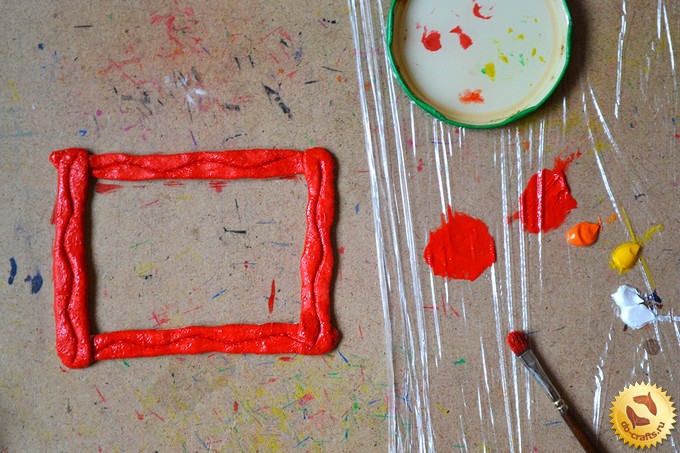 9. We look to have been painted over all the edges.
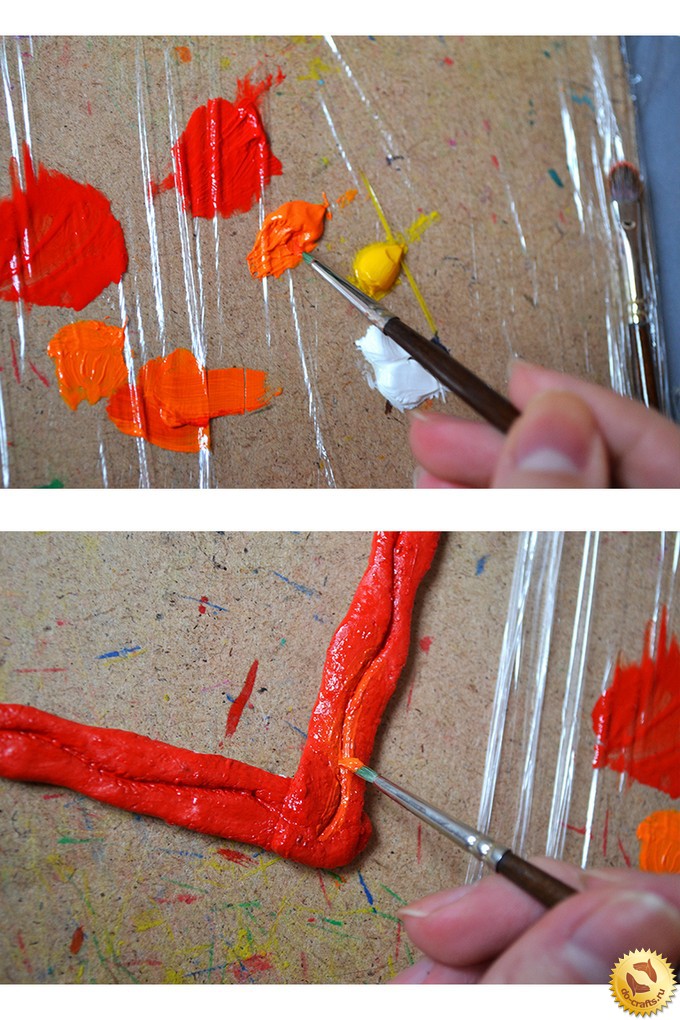 11. Wait until the frame is dry (for several days). To expedite the process, you can bring a table lamp.
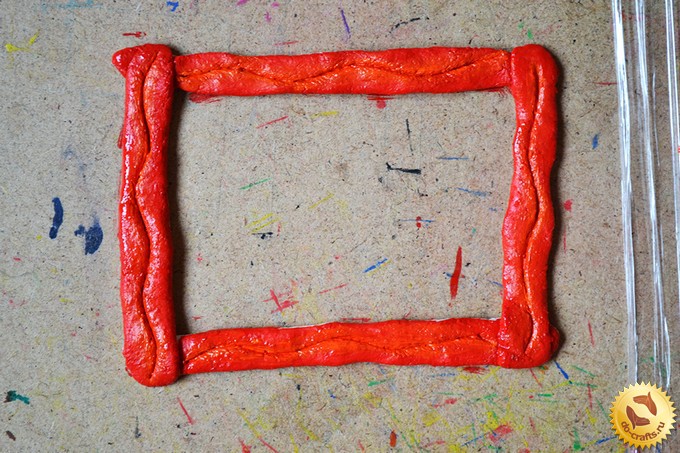 12. Further, the thin brush set white spots along the wavy pattern.
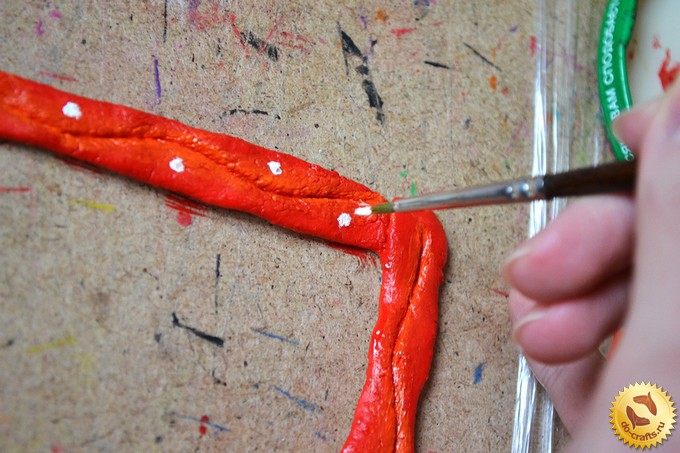 13. After that, take the yellow paint and paint the petals of flowers.
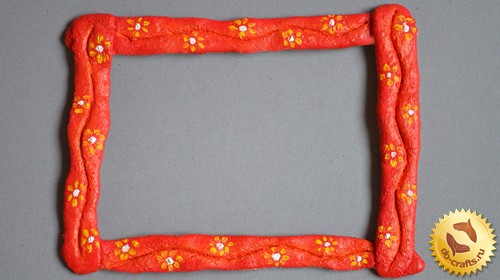
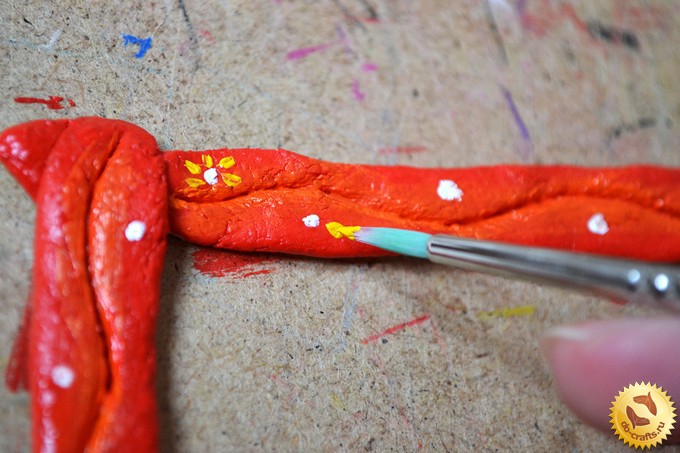 All the work is done. We are waiting for a couple of days, then you can paste a picture framed.