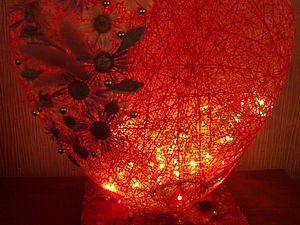
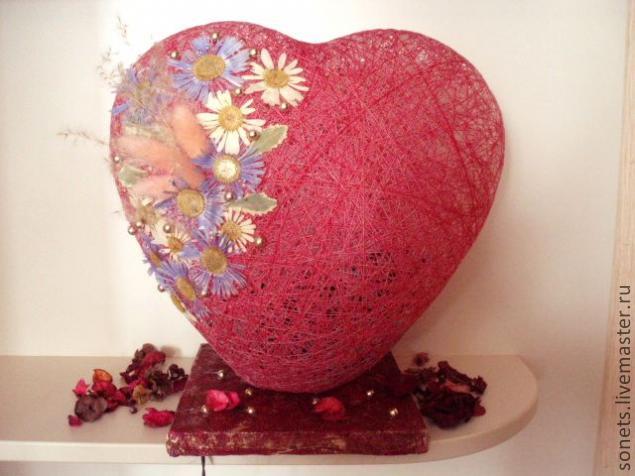
Lamp-night lamp “Loving Heart” (published in w. Master (Belarus))
In anticipation of the holidays, we overcome suffering – “What to give to your loved ones?” I want something unusual, surprising, no matter what do not like. I would like to express our overwhelming feelings, and the words hard to find? Let’s give your favorite marvelous light “Heart”. With this gift, you will be able to say everything without words.
The night can give mothers on Women’s Day, girlfriend or daughter for a birthday, a favorite on Valentine’s Day heart “beats” from the senses and that’s it. Light a lamp in a romantic evening only strengthen your feelings.
And you can just for yourself, your favorite, to create a miracle. The interior of the bedroom, it certainly attracted attention.
everything you need to prepare in advance.
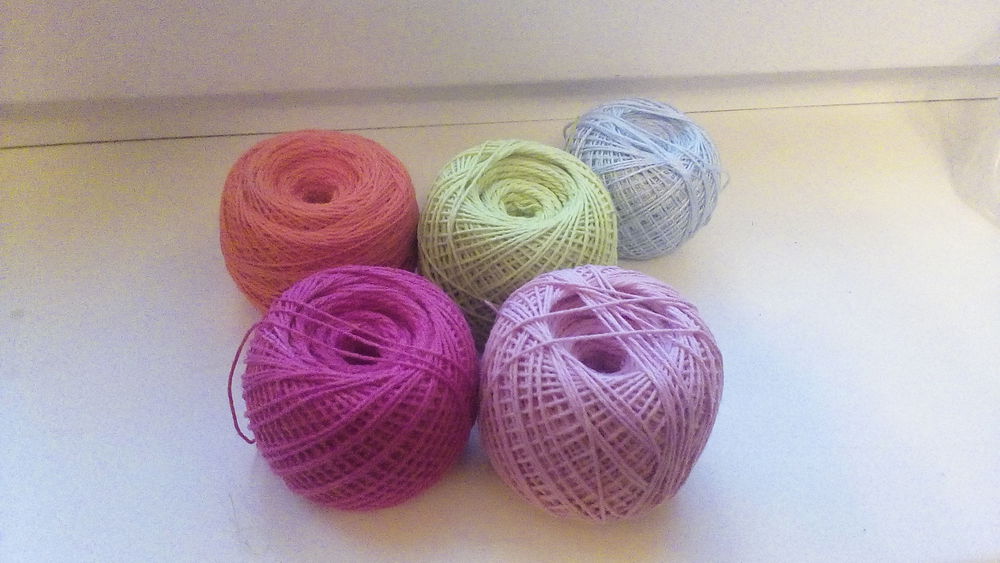
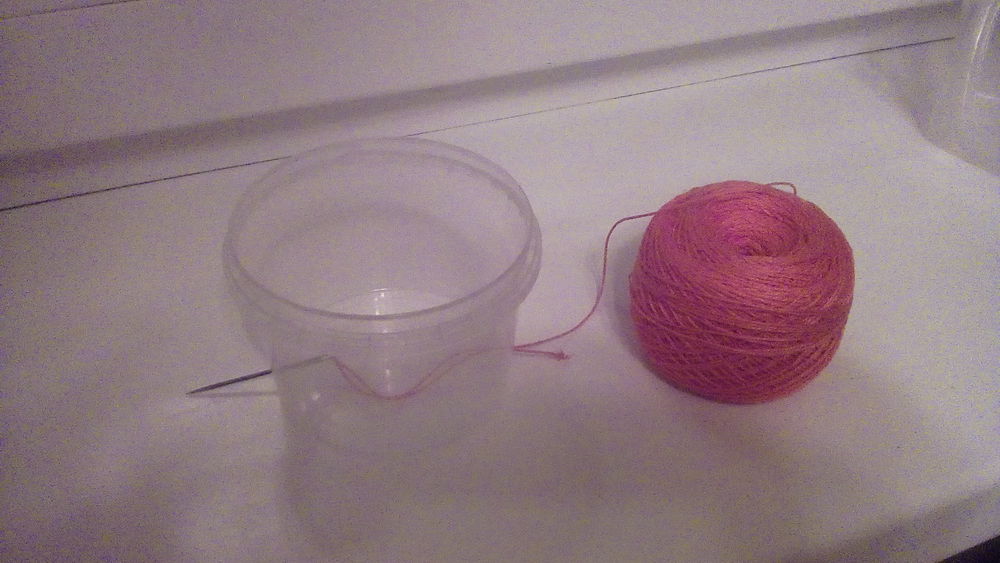
- 1 -2 thread spool (pink or other colors), the color of a lamp depends on your decision.
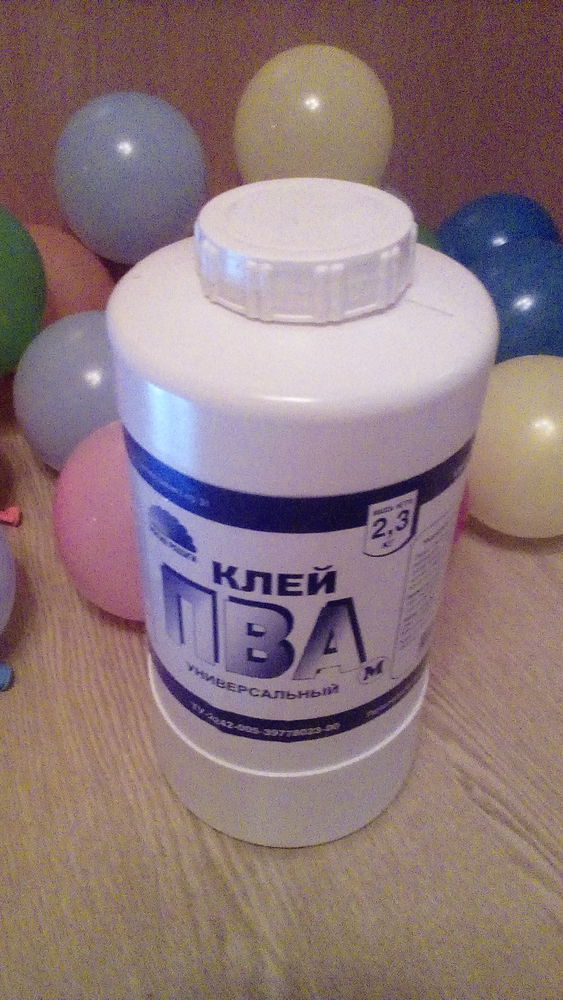
- 2 PVA glue, not less than 100 ml (not the building!) Adhesive point or hot glue (glue gun)
- 3 thick needle, long
- 4 ball in the shape of a heart (you can make a light and around for yourself). For the master class, we took a round ball.
- 5 square-shaped plate (20 ’20) of a thickness not less than 1.5 cm. You can replace the wooden photo frame with wide planks or solid cardboard box.
- 6 napkin color (can be replaced with cloth or acrylic paint). The stand can be issued and in its sole discretion)
- 7 -tailender a roll of toilet paper.
- 8 dried plants and artificial flowers, beads, feathers, in short, something for decorating our hearts.
- 9 drill
- 10 blinking Christmas tree garland.
- 11 scissors
Getting to the manufacture of
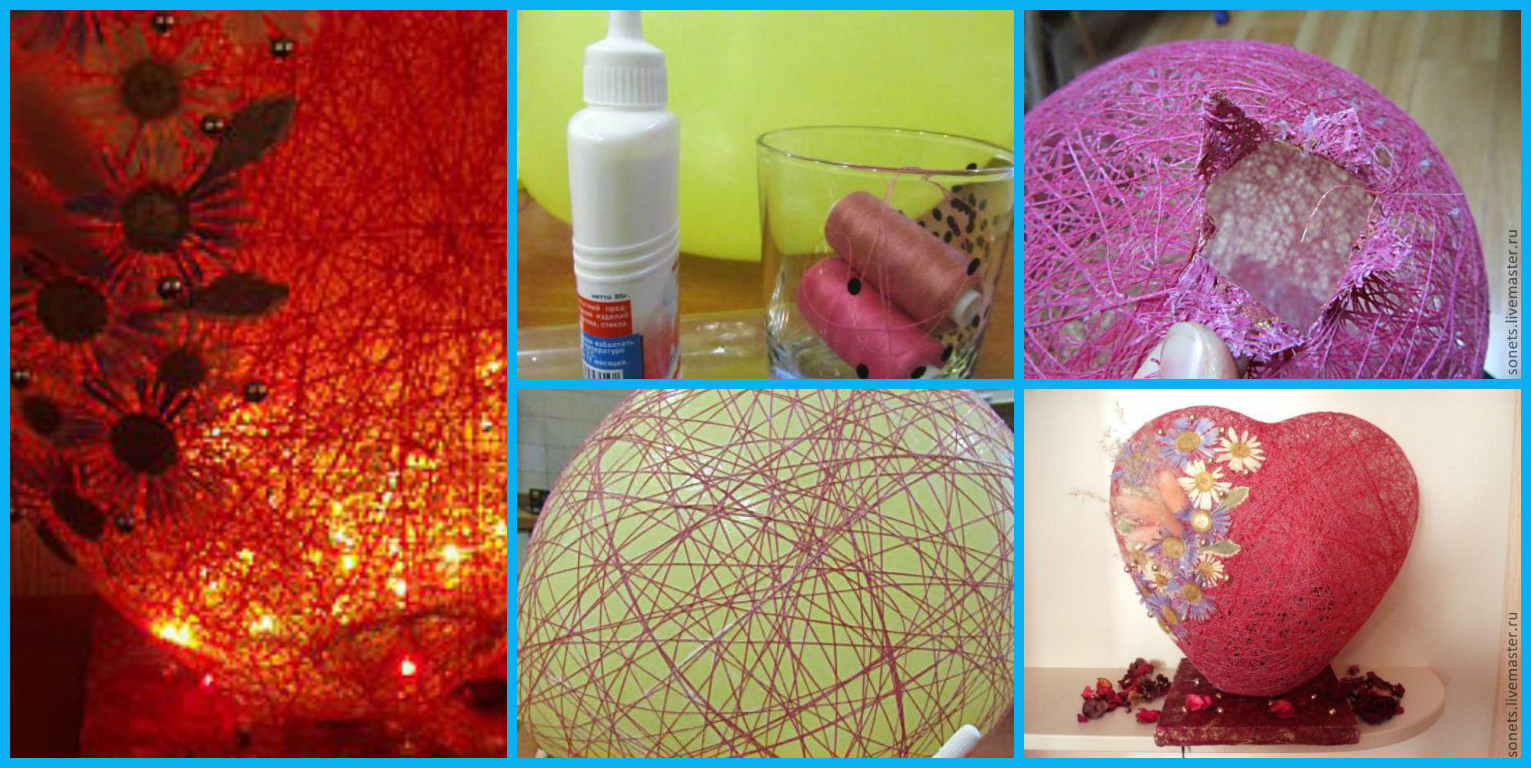
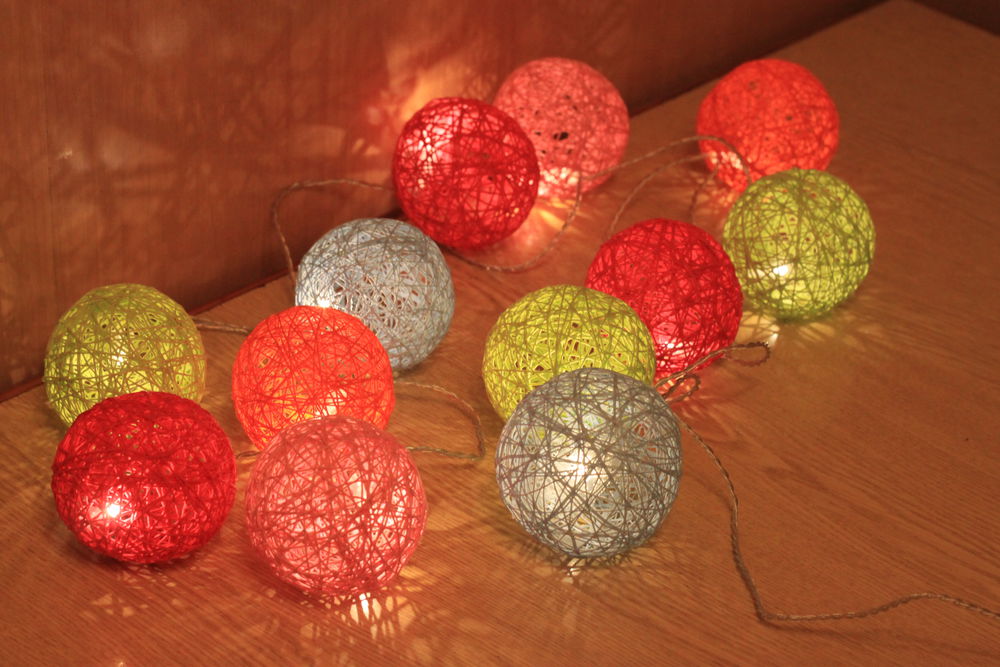
1 First, make shade for our lamp. Inflate balloon heart to medium size. The size of the inflated balloon and will be the size of our lampshade.
2 bottles of glue PVA bottom pierced with a needle with two vdet in her thread.
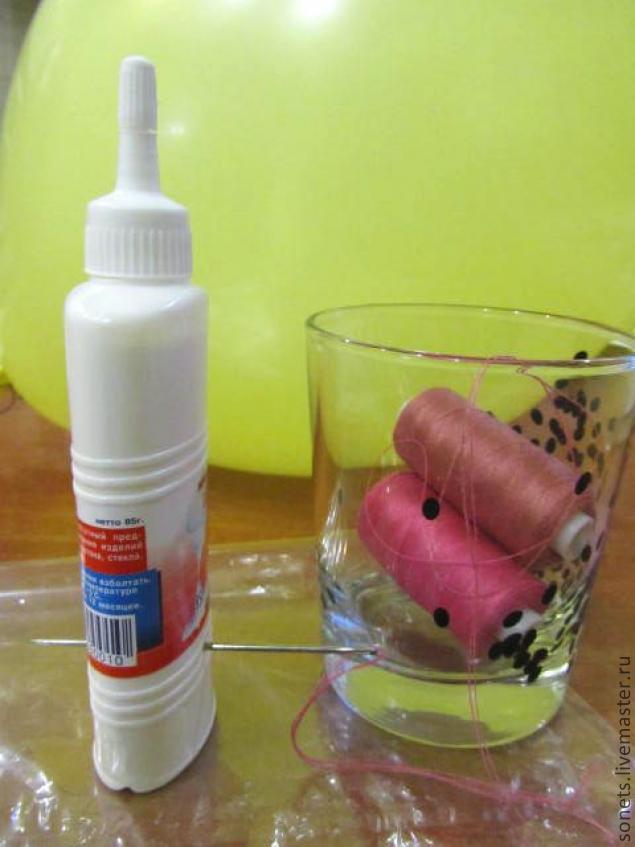
Figure 1) extends a needle through the bank, took out the other side, take out the needle thread. Pierce the bottom necessarily banks unnecessarily. the thread must always be wetted with glue, and the amount of adhesive in the work decreases. For the convenience of working with a thread spool, and a jar of glue put in jars.
3 end of the thread tying the tail of the ball and start winding a ball
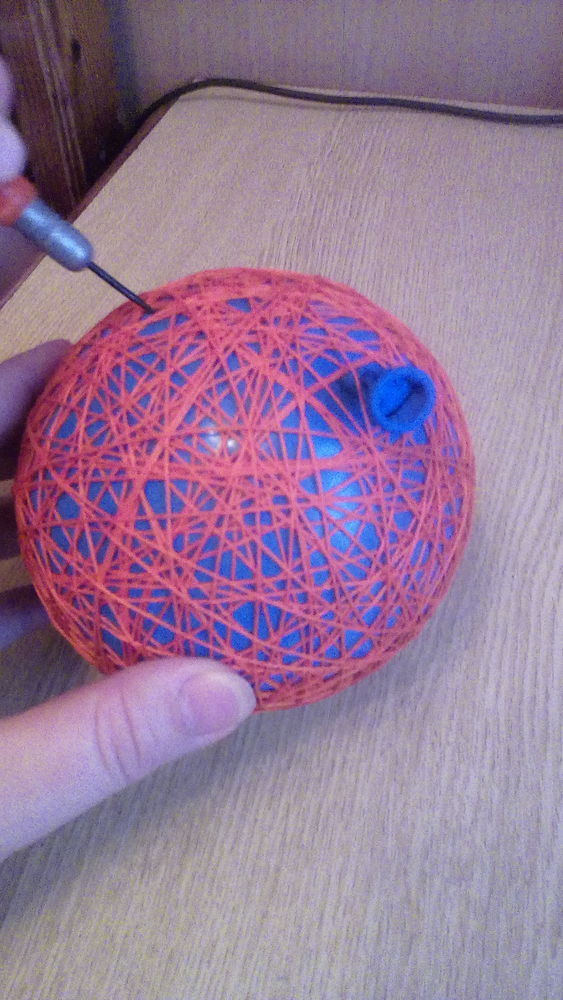
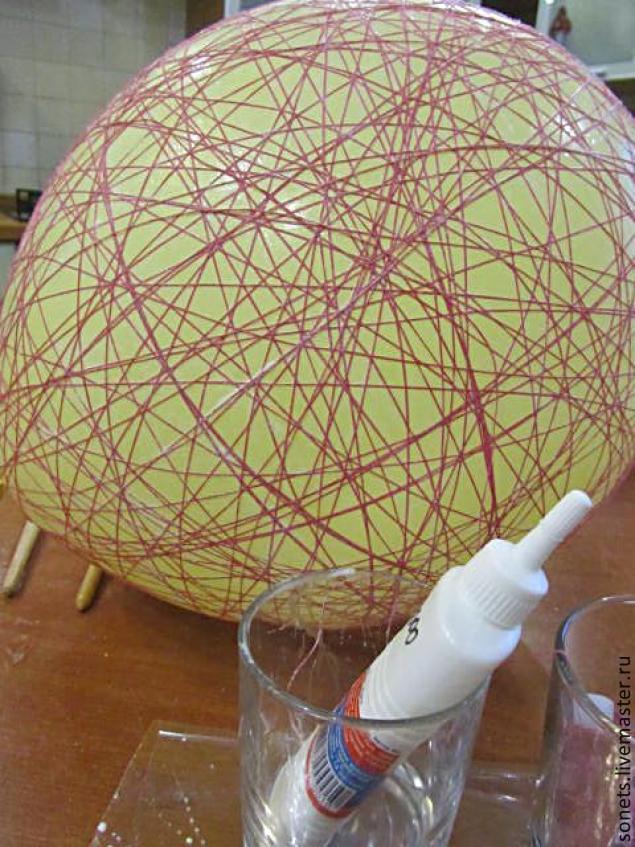 Fig. 2). The thread must always be wetted with adhesive. Initially, it will be inconvenient and thread all the time to slip the ball, but we’re stubborn, hard-working, we will succeed!(Figure 3) tauten thread diagonally lengthwise, crosswise. After 10 min, the winding becomes easier. (Fig. 4)
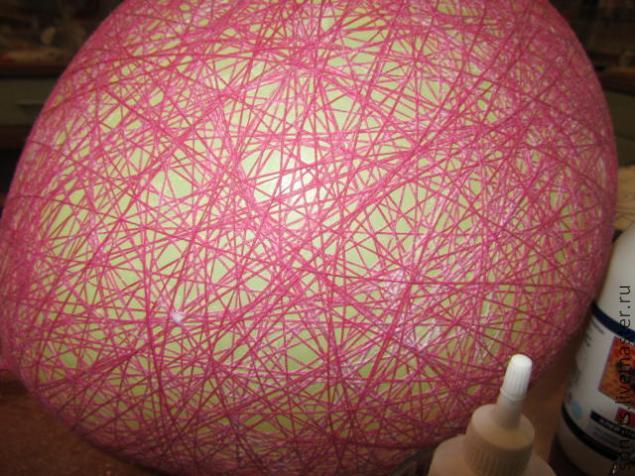
First, we get the hand and understand the principle, secondly, the thread stops the slide, unnecessarily. It will cling to the wound.
Roundball winding easier than the “heart”. The “heart” do not forget to wrap the “ears”. Look where we are sending to the emptiness and thread. Drum thread pool is not empty. If the glue is ended earlier thread, just it from other banks. That wound ball (Fig. 5) Leave it to dry. When the thread is almost dry, punctures the ball. Threads will be tough and will keep the shape.
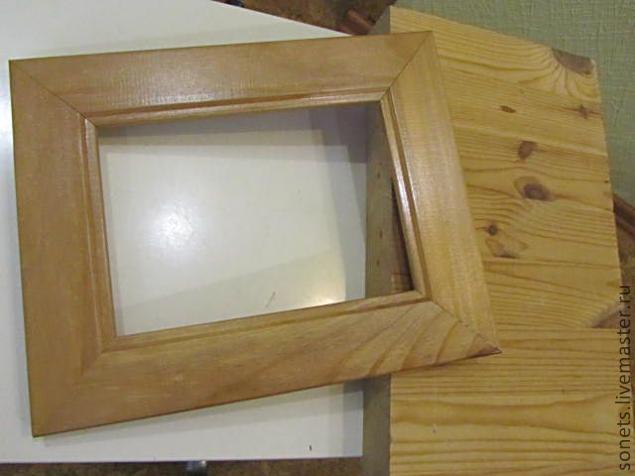
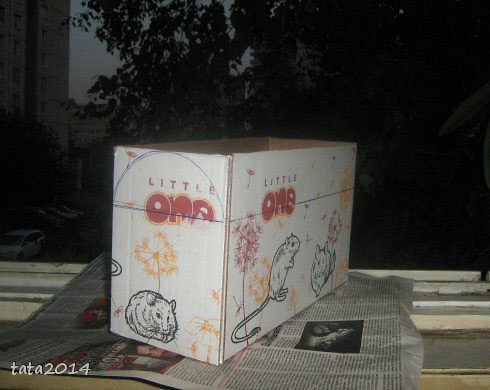
4 Getting manufacturing base. I took a stand for the tablet. Drill a hole in it (you can help one of the men, but not one for which it will be a surprise. Although …. Maybe he was. He did not even guess what it is and why.) The hole should be of a diameter that through it might get through Christmas tree garland. Instead, you can use a thick plank picture frame, replacing the glass with a thick cardboard. Or, in extreme cases, try the box with a thick, dense cardboard, not too thin. (Figure 6)
 5 over the aperture ring of glue cardboard, cut from of roll of toilet paper. We attach it with glue well bay. Outside strengthen a strip of paper, grabbing one corner of the ring, the other coming on board. The board. I pasted cloth (PVA) and a bit overshadowed gold acrylic paint. (Figure 7 and Fig. 8 and Fig. 9).
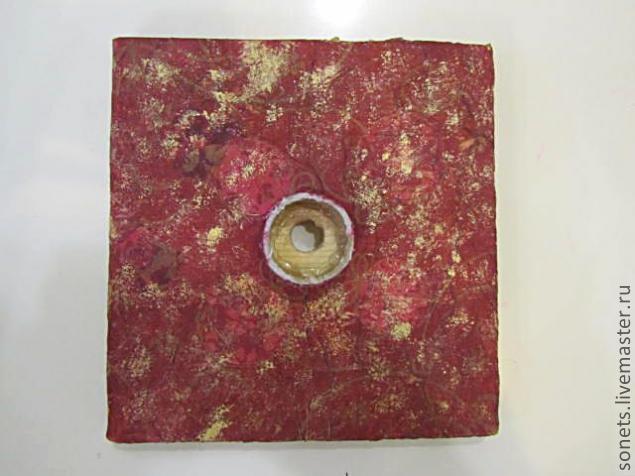 On the reverse side, plates make a groove for the wiring from a garland (Fig. 10)
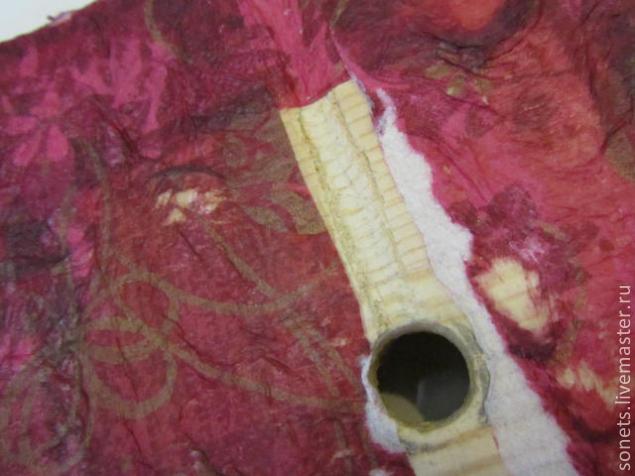 6 Threads almost dried up? Punctures the ball. The ball should unstick itself from the thread. Therefore, it is not necessary to wait until dry. If the ball has dried thoroughly and piercing not unstuck from the thread, will come to his aid. Through the thread is passed a pencil or any wand inside her trying to unstick the ball. If the thread balloon wrinkled, pressed, then we, the same wand inside his straightened, but still try to do everything patiently and carefully. The ball was torn inside the thread. (Fig. 11)
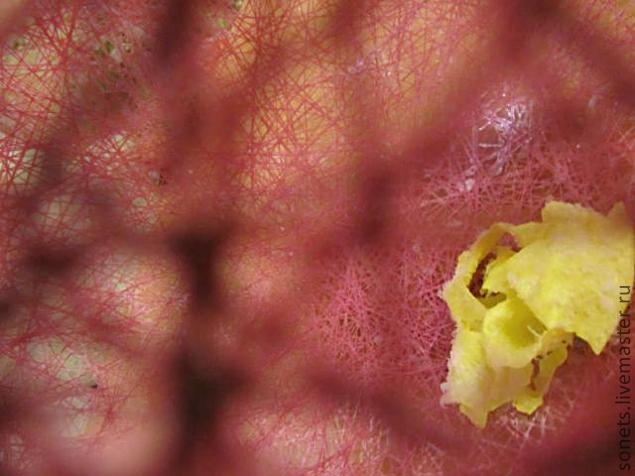
We’ll get it through the skin. It is more convenient to do it with tweezers.
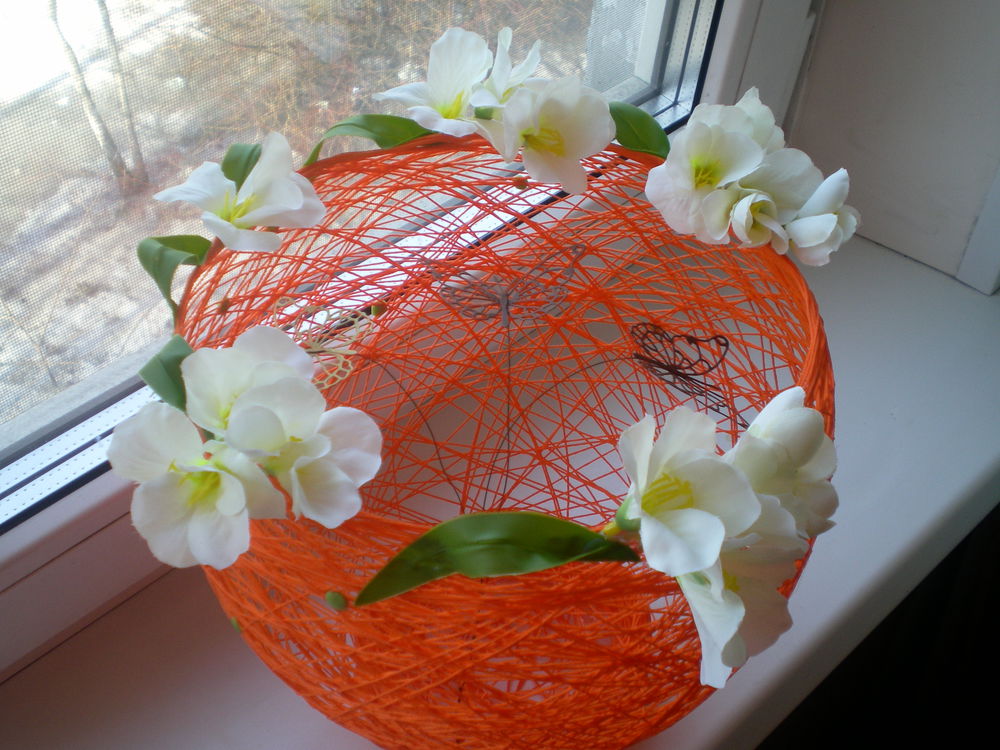
7 At the bottom of the ball (where was the tail), cut out a hole in the form of a lotus. (Fig. 12).
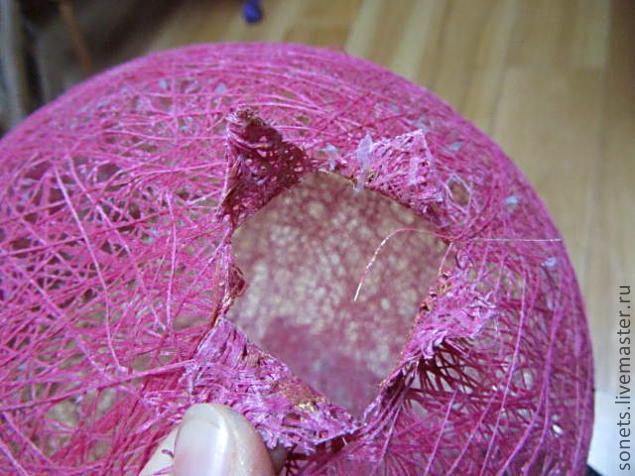 The hole diameter should be with our ring. And it sits on must be tight. (Figure 13).
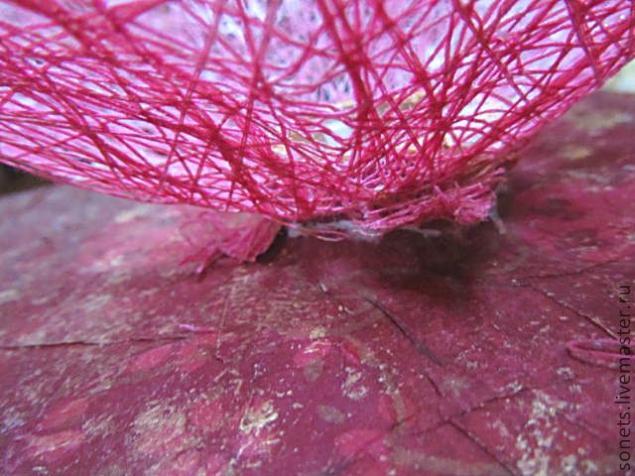 Dress up the ball on the ring, pouring glue. The petals are glued to the outside of the ring. Then you will feel that the ball as if he falls, and “asks” on the stand. Just press it and the place where he sat down on the stand we coat with glue. Just make sure that the lamp was flat, not tilted. (Fig. 14)
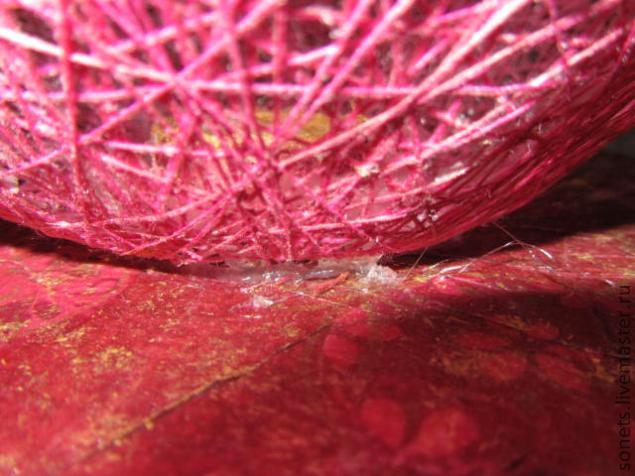 8 Zadekoriruem our “Heart” (in our version, to explain the ball.) I used dried flowers. But you can come up with something of their own. Stick to your decor thread, make “heart” of the most beautiful and loving. (Fig. 15)
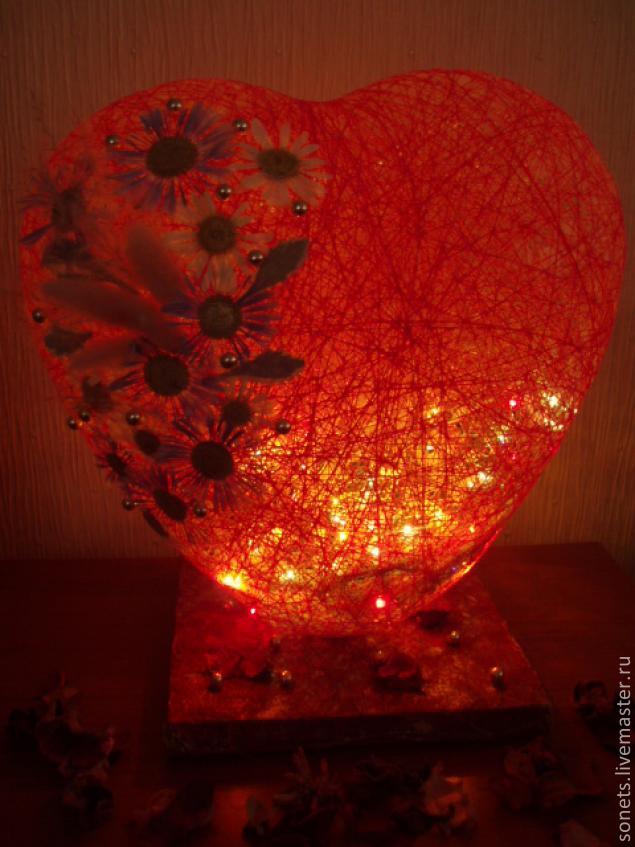
 9 Bottom stand pokes through a hole in the “heart” of Christmas garland. Outside the reserve wire that embarks on the groove and attaches it with glue or adhesive tape.
 Enjoy your evening
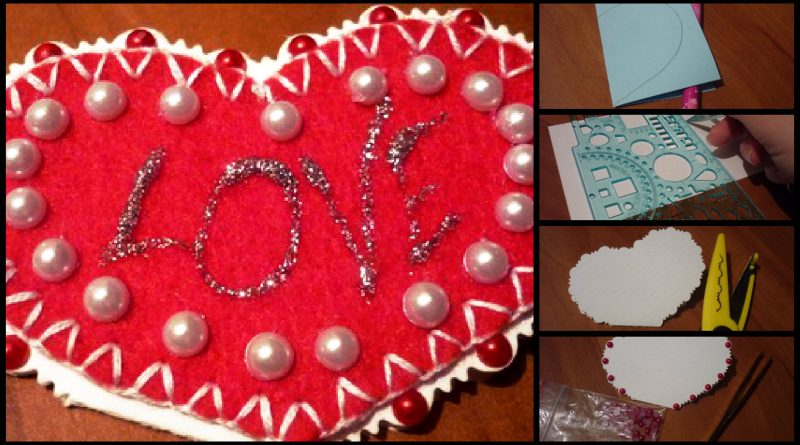
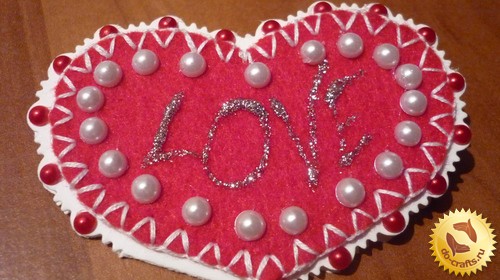
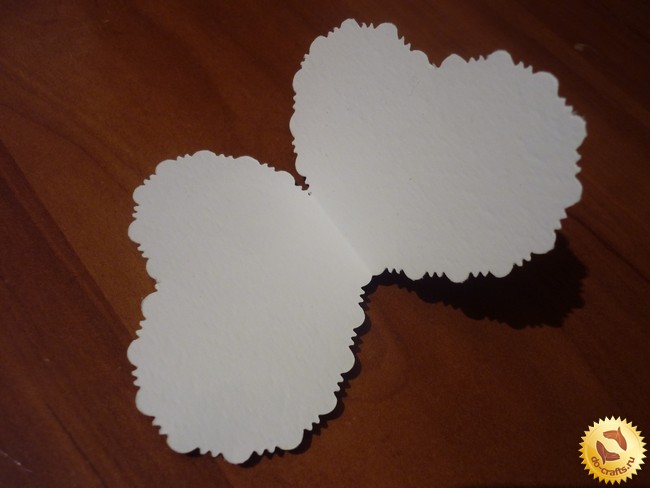
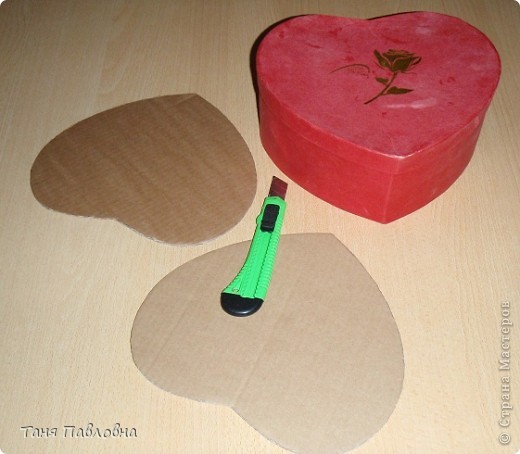
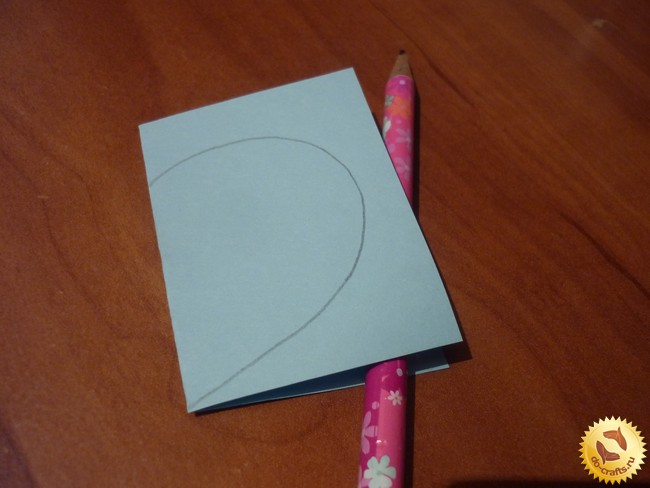 Take the white cardboard such size that in it together next two hearts already familiar size. Divide the cardboard pencil into two equal parts and then perform blunt scissors a ruler on the same line a little pushing. Eraser to erase the line from the pencil.
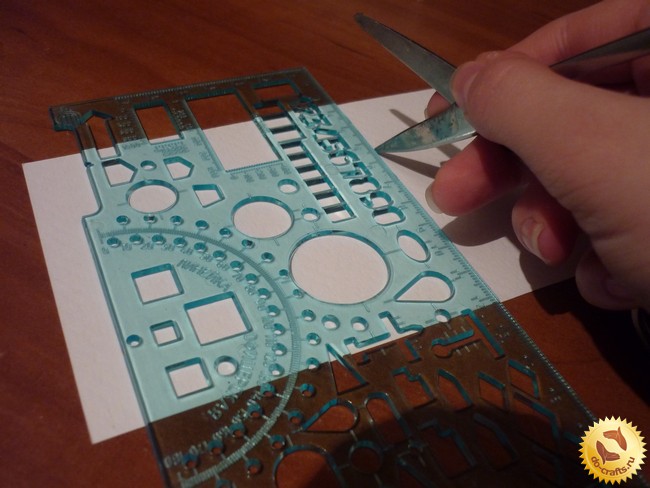 Bend the cardboard on the sunken line. To place, the fold is putting heart so that it touched the edge of the pointed end. Encircles the template.
 Cut along the contour curly scissors except for folding seats.
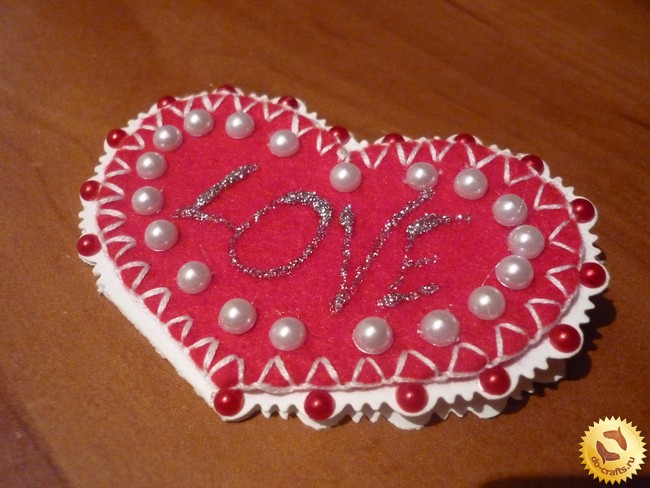
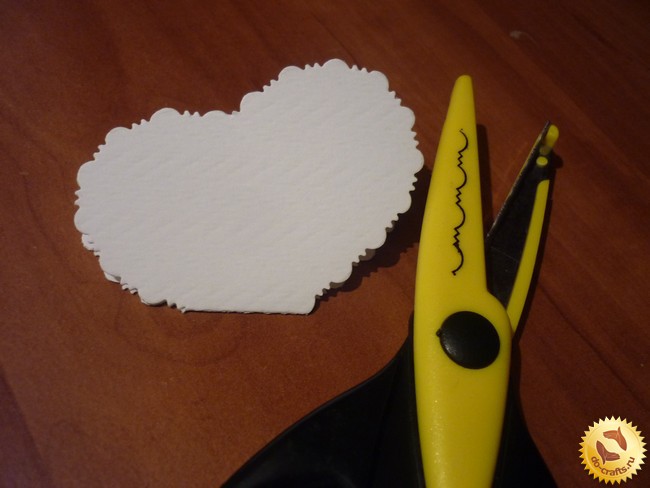 Trace the same pattern on a red chalk felt.
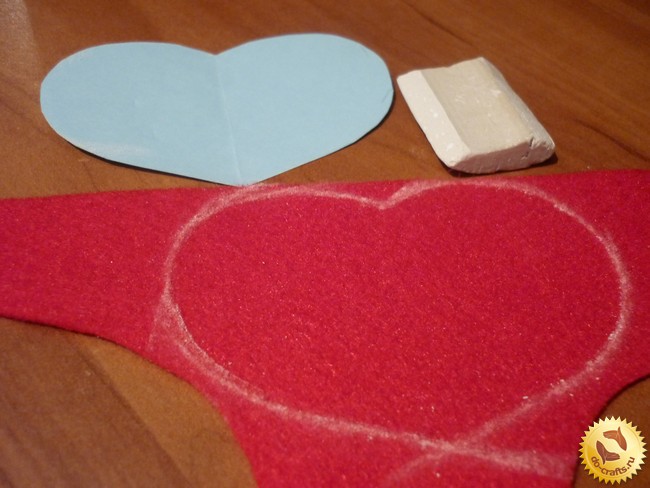 Cut Felt heart, making the indentation of 0.7 mm from the edge of the chalk. That is, felt heart must be smaller than that of the cardboard blank. Departing should be the same.
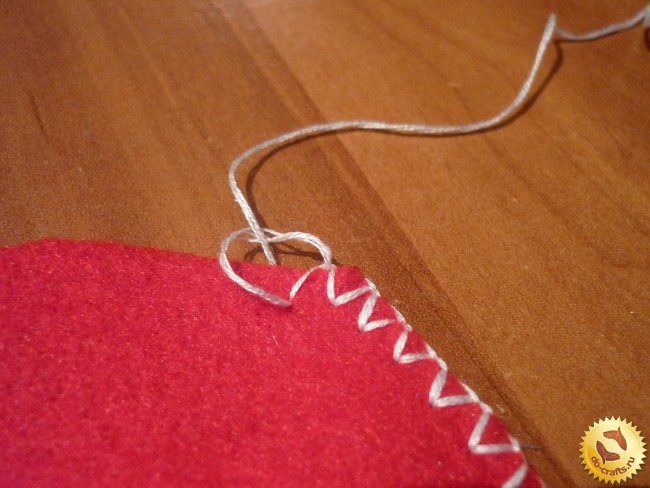
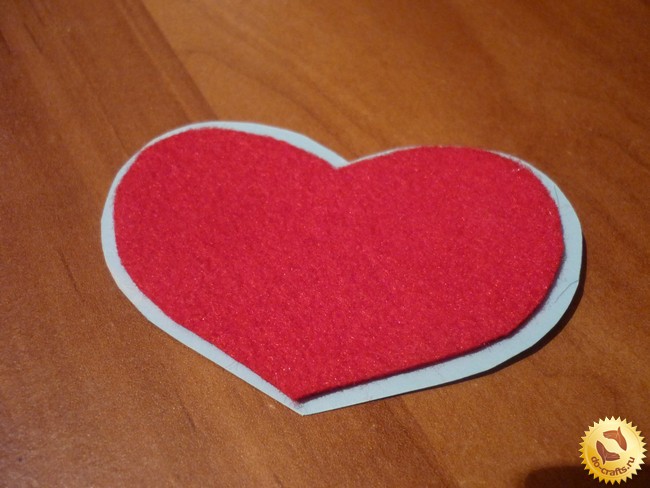 The edge of the felt heart processed loopy forked suture. First delaying loop in one direction and then in the opposite direction, thus penetrating the needle through the same hole.
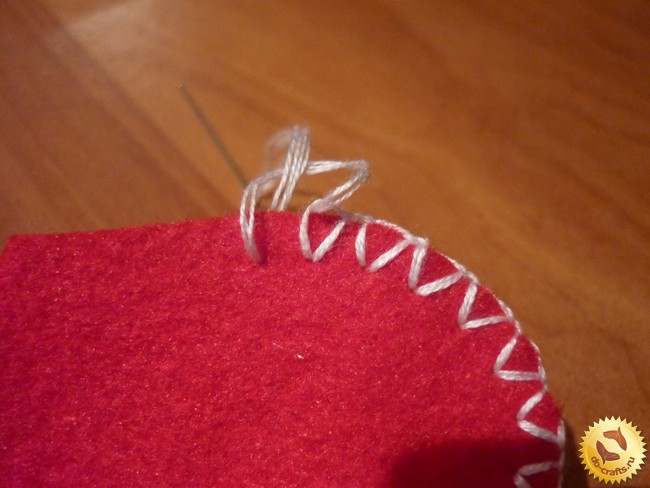
 The cut edge of scissors curly decorates red pol bus NAMI.
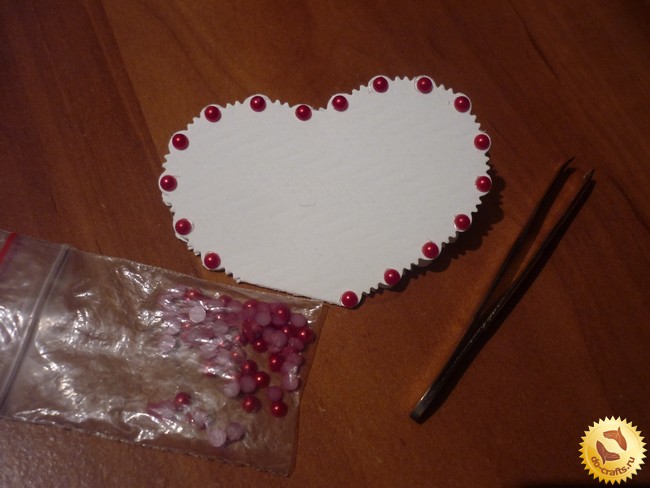 Then on top of sticking embroidered Felt heart and decorate the edge of the white pol bus NAMI. We place them one by one between the red.
 Silvery glue draws the word love. To this end, squeezing a bit of glue and stretch it in the right direction. After applying the adhesive must be dry.
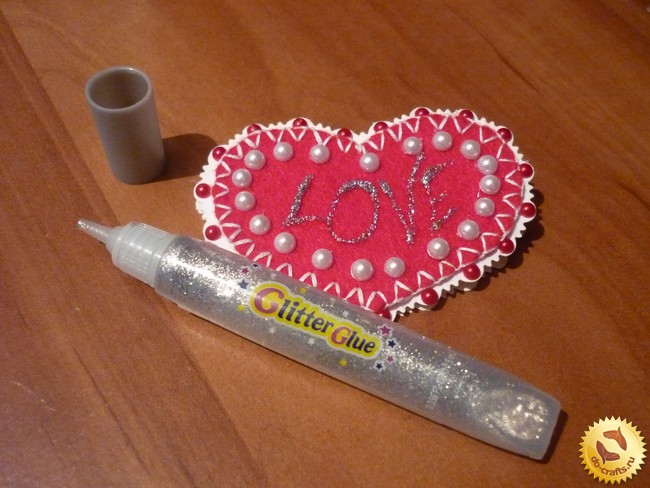 So we have made with their own hands Valentine, which remains the only sign and sends to the recipient.
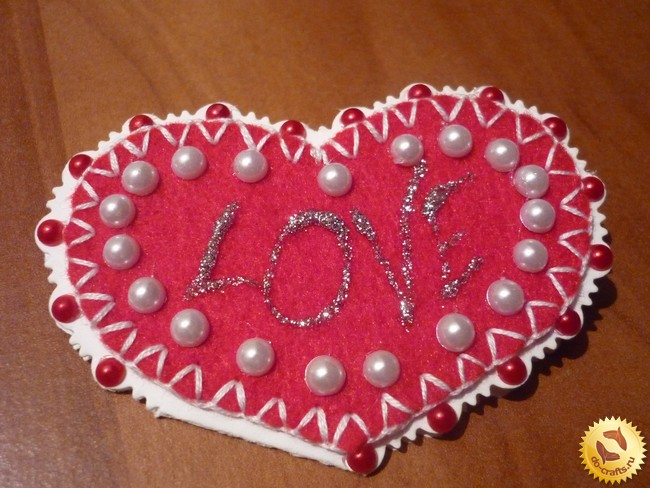
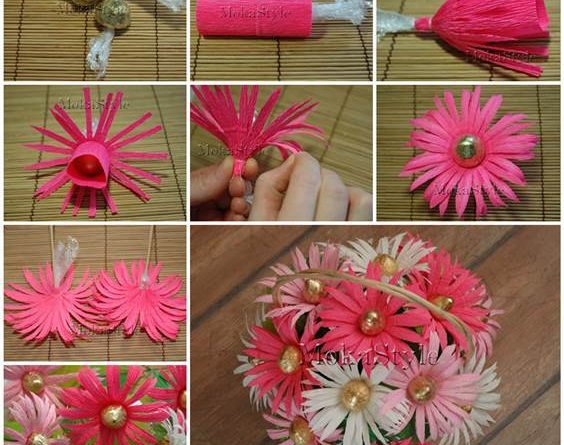
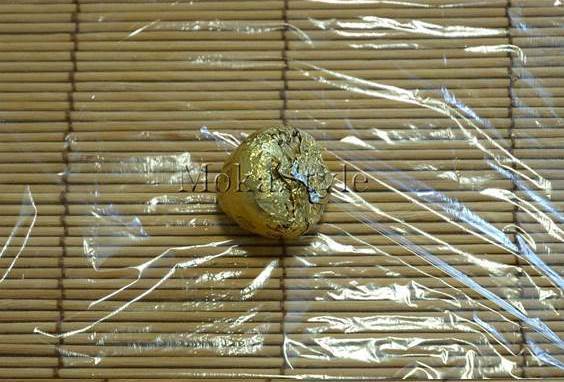 2. Wrap the chocolates with cellophane.
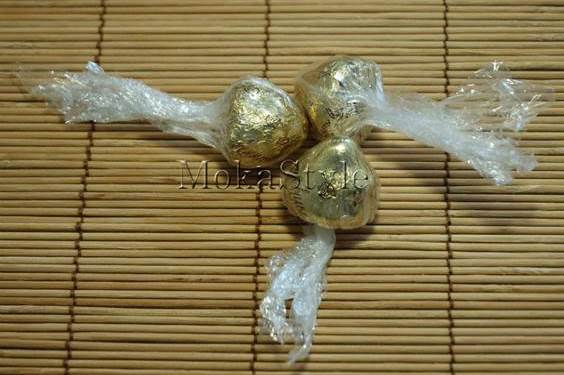 3. Cut a piece of rectangular crepe paper (size depends on the size of the chocolate).
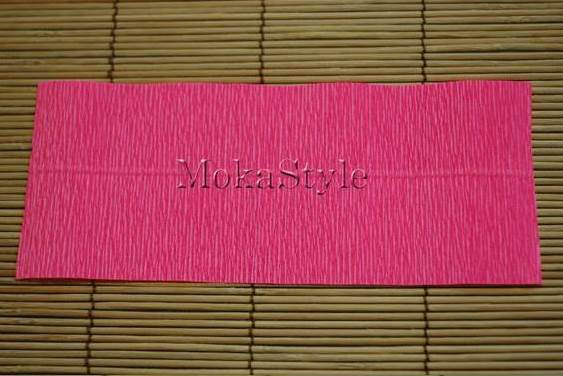 4. Wrap the chocolate in the crepe paper piece.
 5. Tie one end with thread.
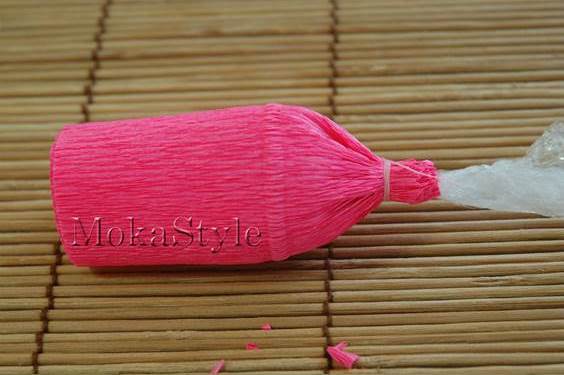 6. Cut the outer layer into fringes as the petals.
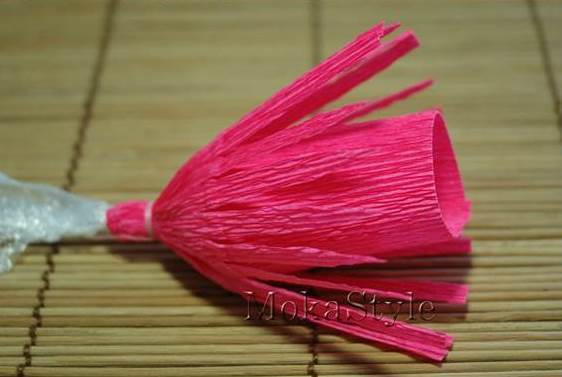 7. Twist the fringes outward.
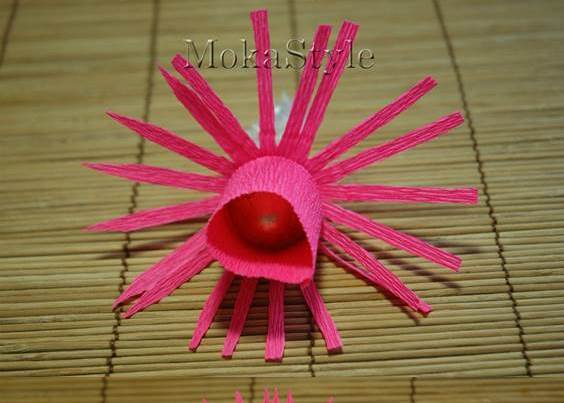 8. Cut the inner layer of crepe paper into fringes and twist them out.
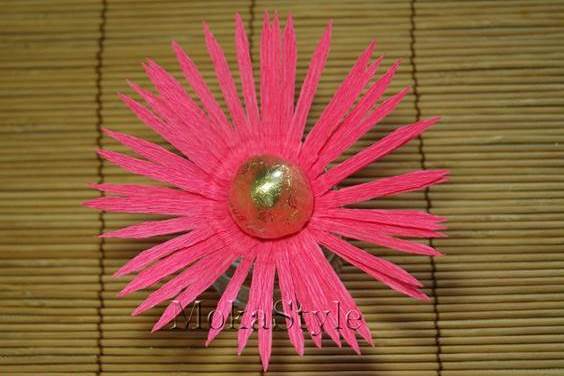 9. Press the petals with your fingers to make them curly.
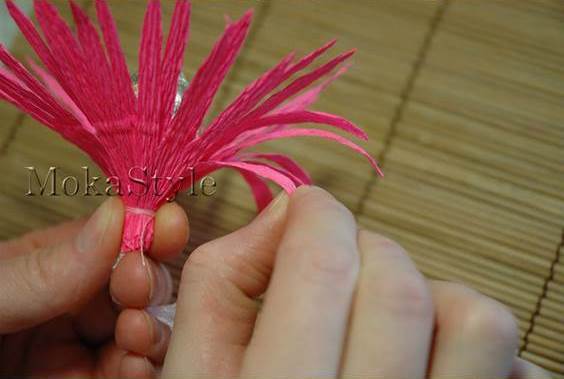
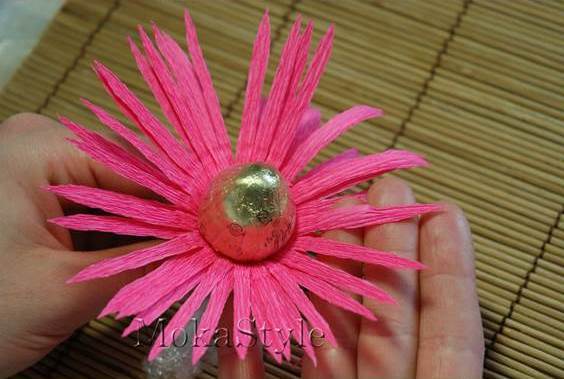
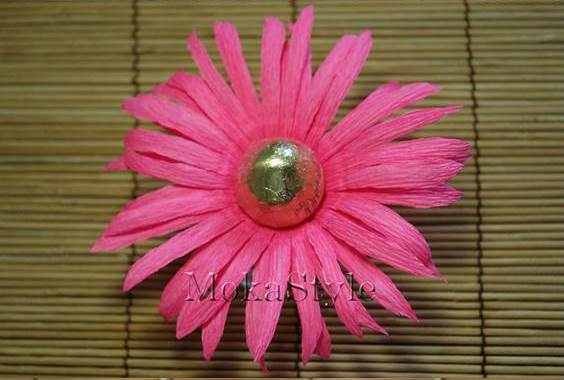 10. Insert the wooden skewers through the middle of the flowers.
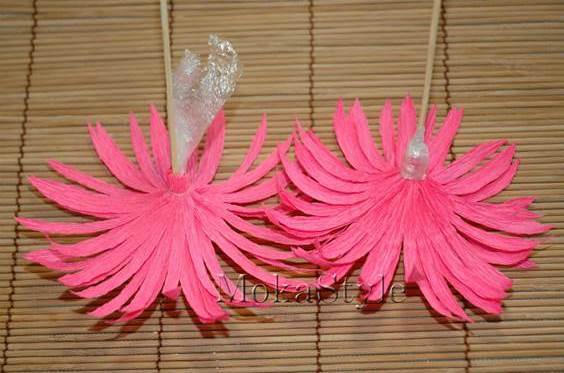 11. Make more flowers with different colors of crepe paper.
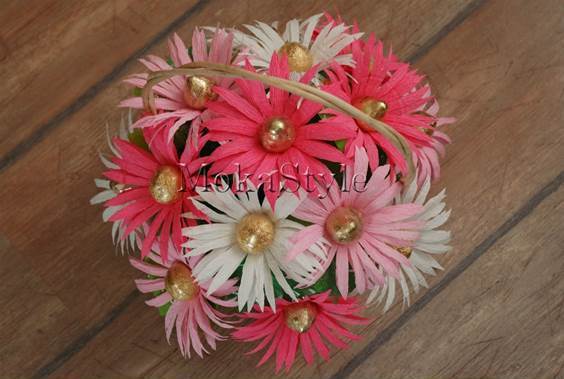
 12. Place the bouquet of flowers in a basket. Enjoy!
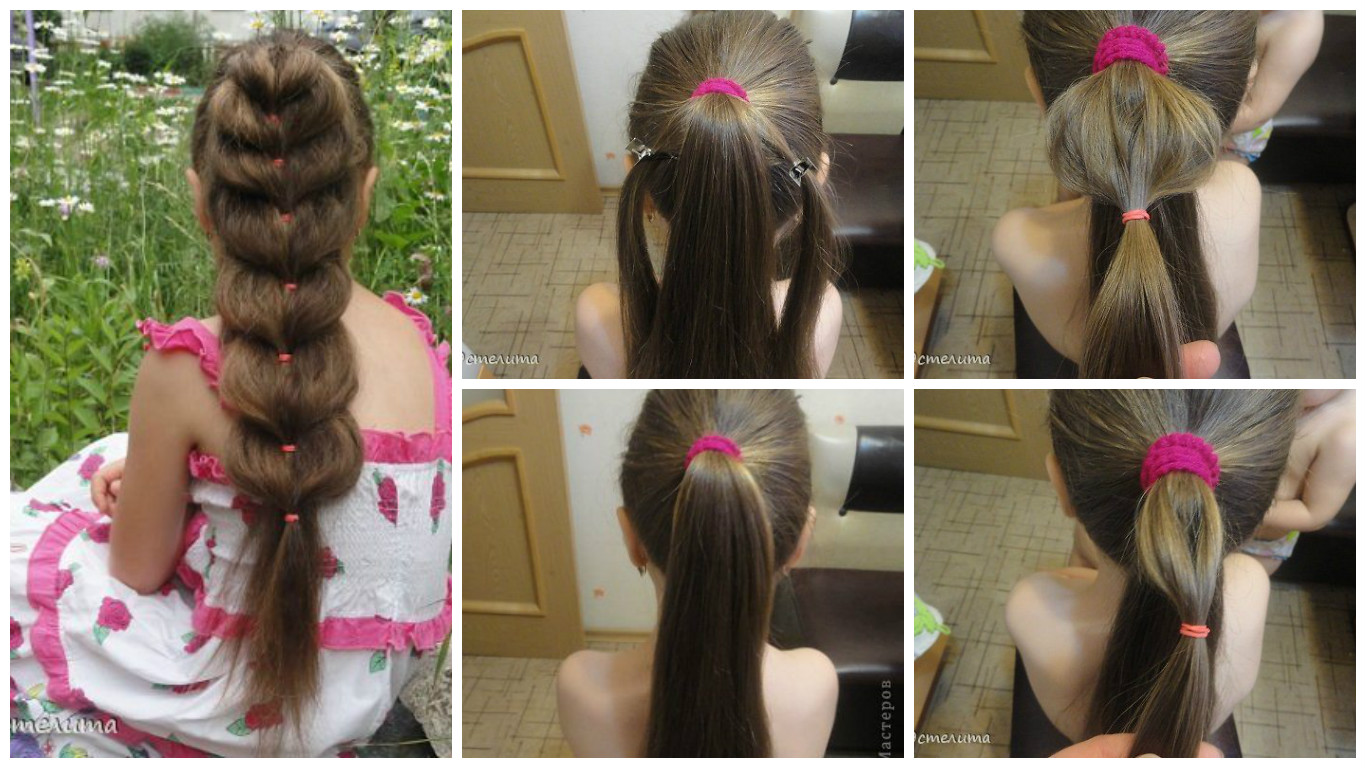
 Taking the hair in a ponytail and fix the rubber band
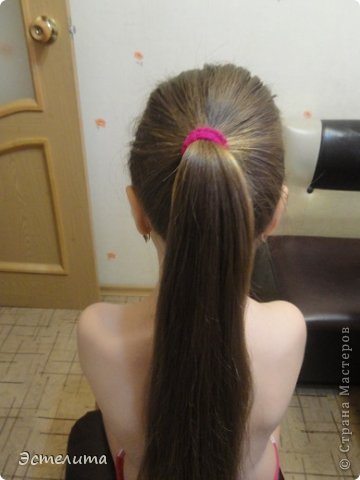 On both sides take away uniform hair strands
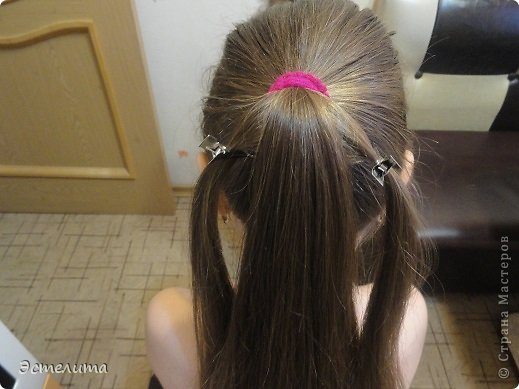 We connect them and fix the rubber band
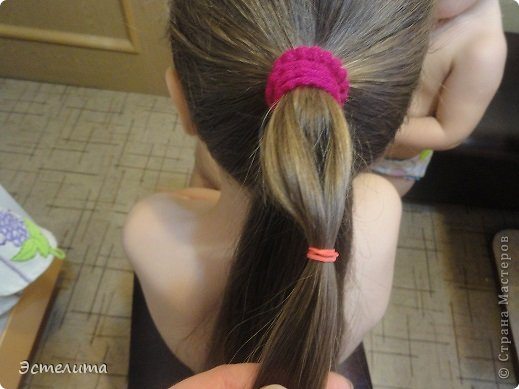 Gently pull strands
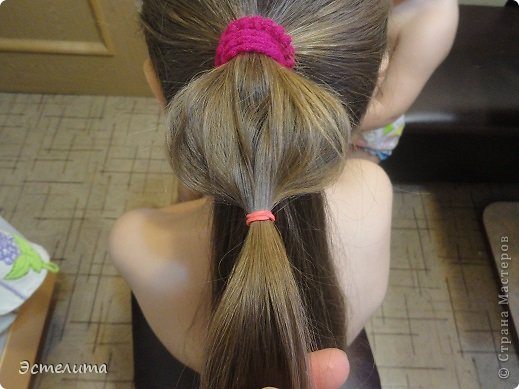 Taking the following strands on both sides
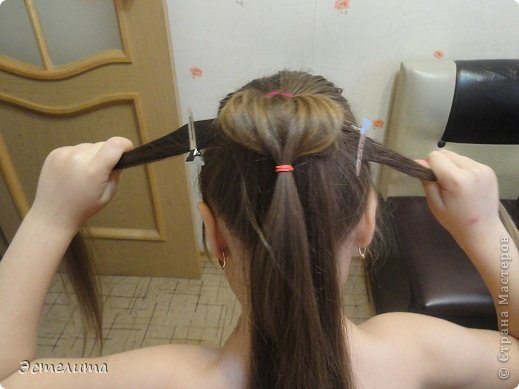 Putting them together and fix the rubber band
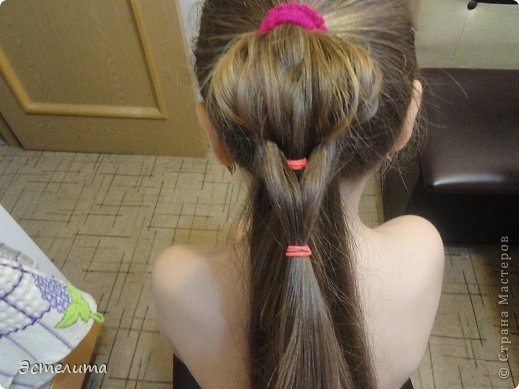 Gently pull strands
 Do this as many times as allowed by the length of hair
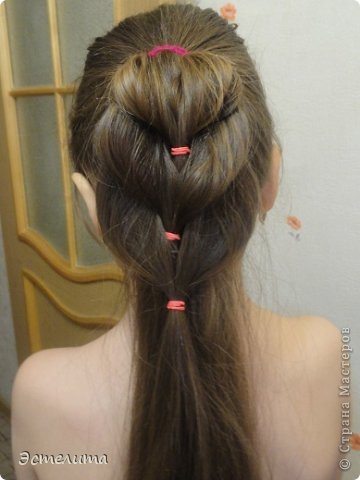 And here we get a result!
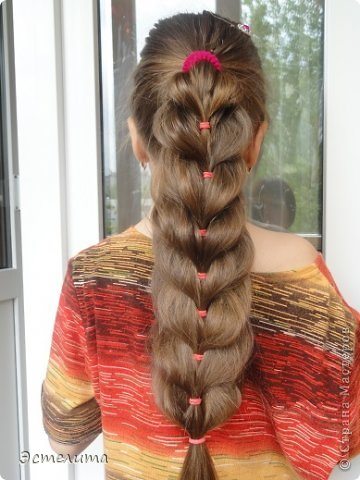
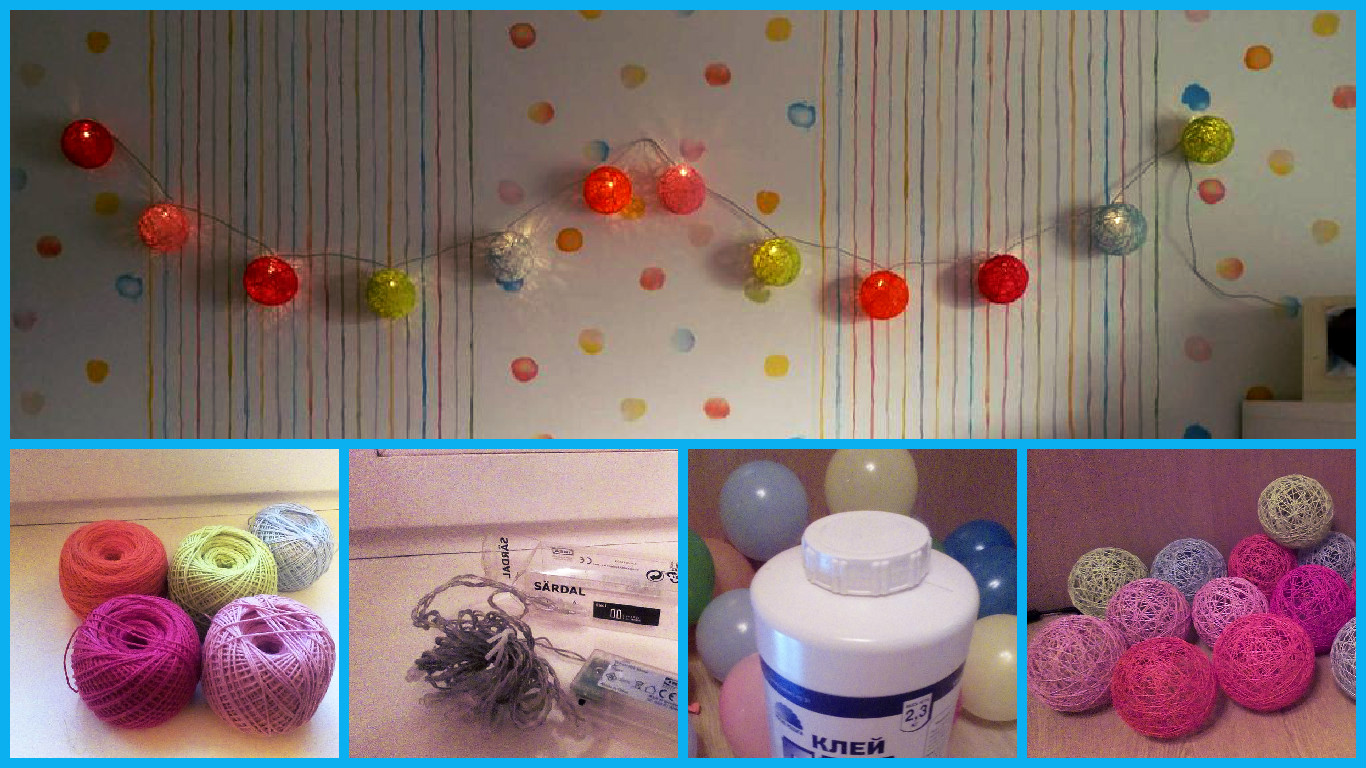
 Garland. I buy them in Ikeja. The Chinese are not suitable as light bulbs on them very much, and a small distance between them. Well and reliability again. This garland on batteries. She has a huge advantage: you do not get attached to the outlet. It can be hung wherever you want;
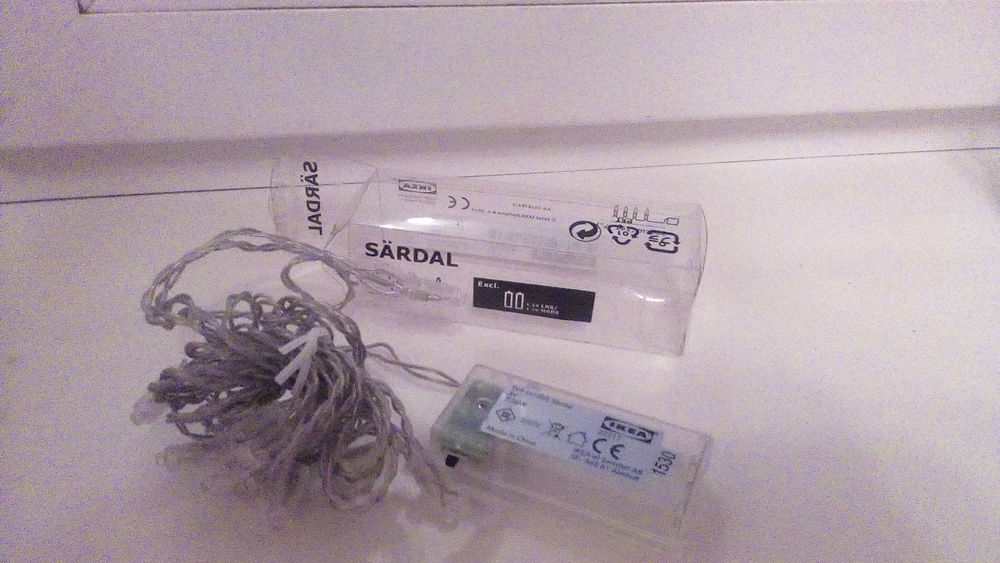 – balloons. The smallest that can buy. I buy them just a big package, it is cheaper. More to come but pharmacies they have gone missing;
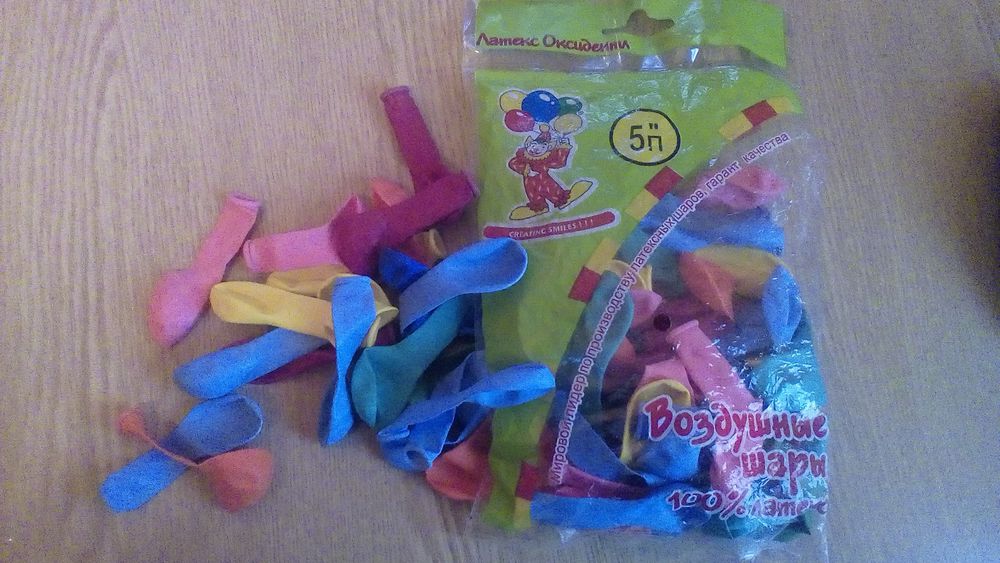

 There is also a nuance. The needle must not be much thicker filament. If the hole will be a very large, then the thread is too wet, the glue will flow down your arms. If the hole is too small, then the thread will be almost dry and the ball does not get strong.
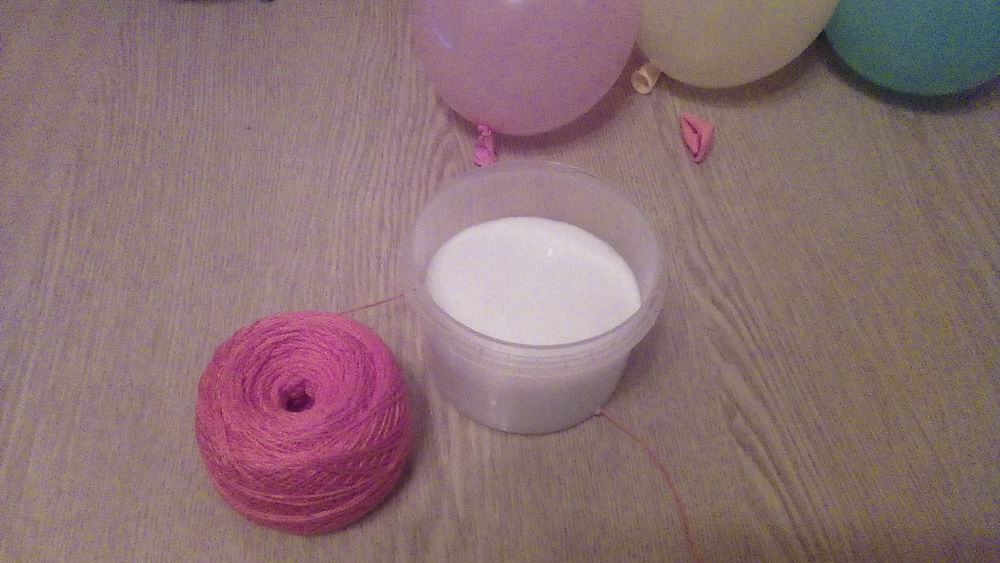
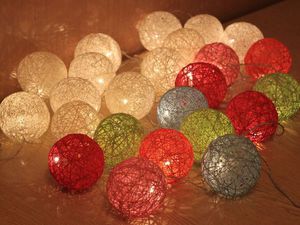
 That’s what we’ve got:
 After that, everything is very simple. We put in the small gaps between the thread bulb garlands. For reliability can be secured with hot glue. Install the batteries and come up with your child a place for garlands!
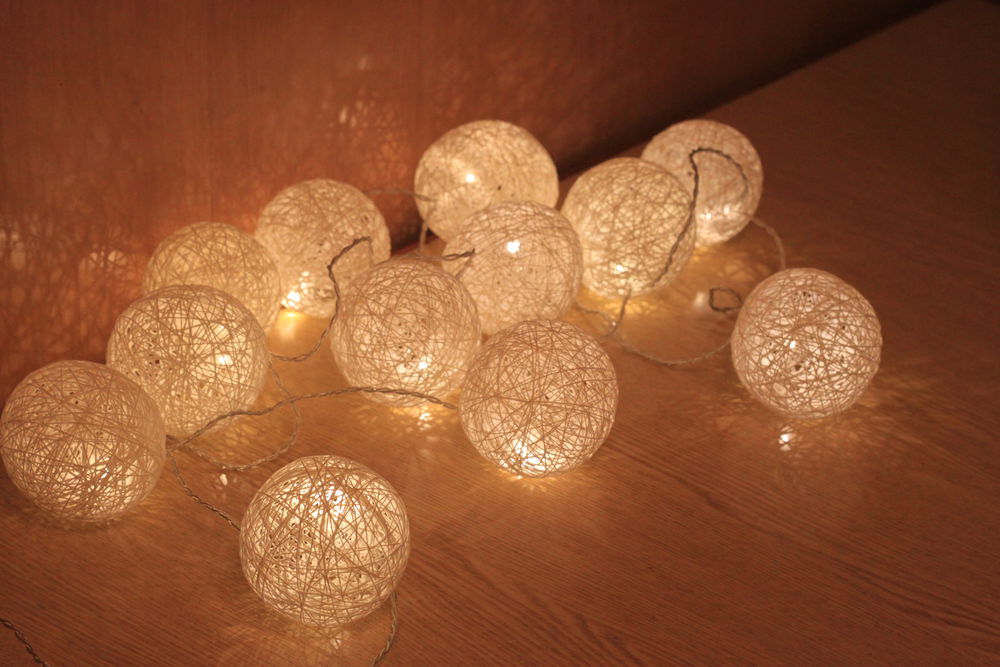

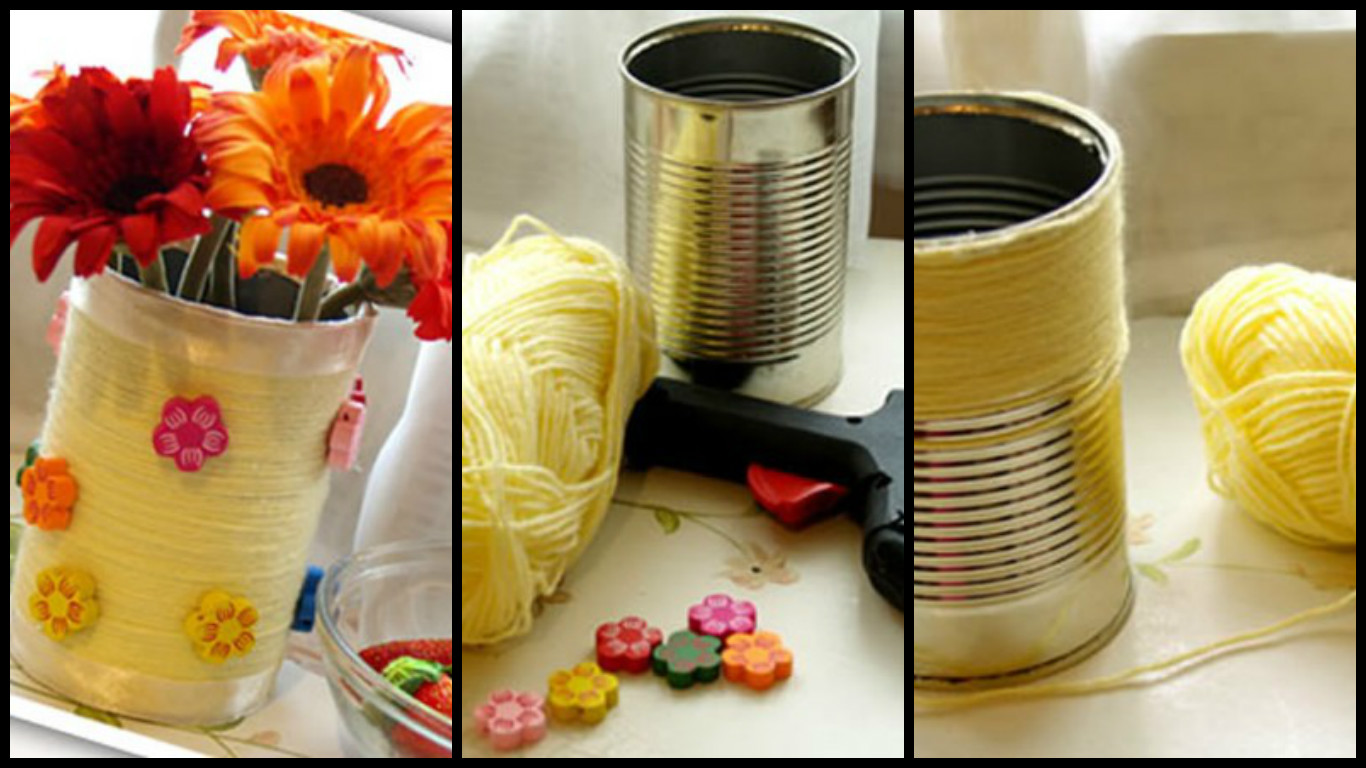
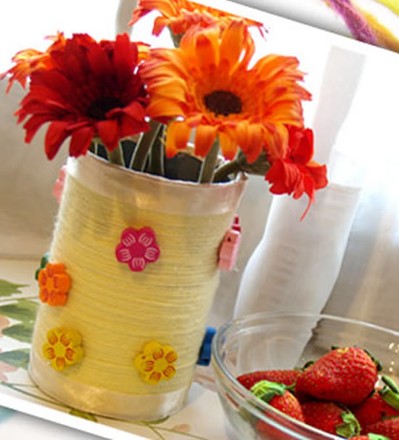
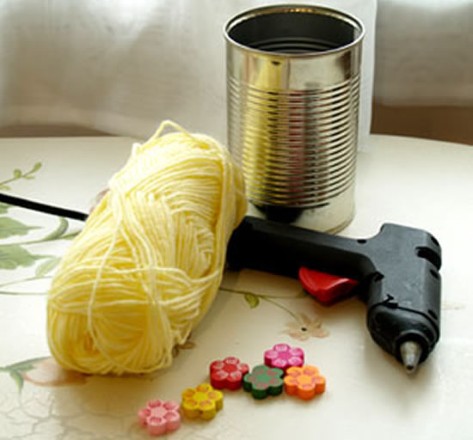 1.Once washed and sanitized milk can. Start winding the yarn ball by the length of the can, with the help of hot glue to the tips.
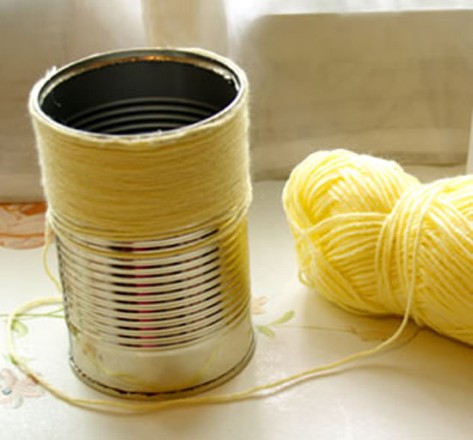 2.Then complete the paste also satin ribbon at the top and bottom to give a special touch.
 3.Glue the decorations on the milk can, using hot glue. Allow to dry.
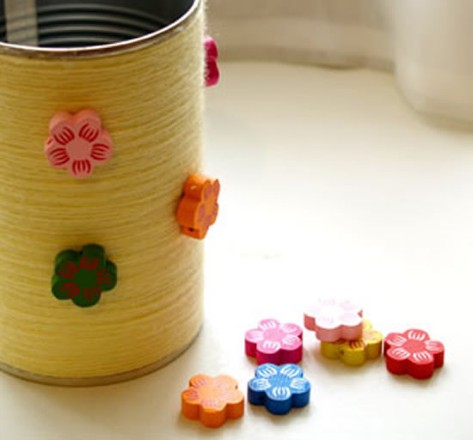
 5.It can serve as pencil holders, such as flower pot or whatever your imagination desires.
 Gallery will be a lot, you’ll excuse me, but photoshop them and do not have time to integrate.
 FROM plastic bottle cut throat and podplavlyaem bit of an edge over the fire, then the paper is not torn on the edges. I apologize for the background because the first did not think to do MK
 From People poll yay Tso cut out (not necessarily perfectly smooth, the main form). The diameter is the same as in a pot, or maybe a little less, then the lid will stay on flowers
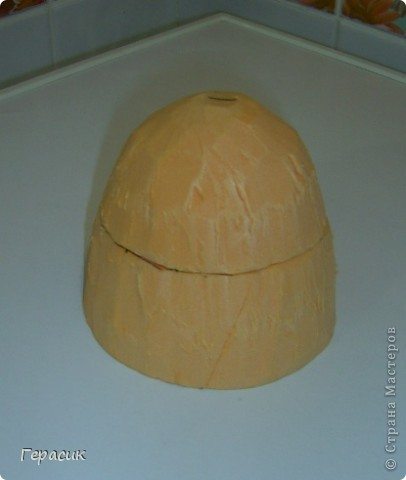 At the bottom of the hole do (oh, by the way, and here are the update cents).
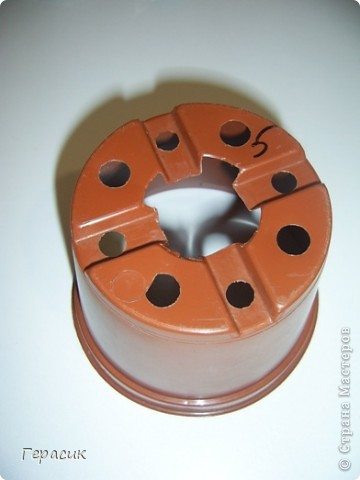 Included perfect, as if well conceived
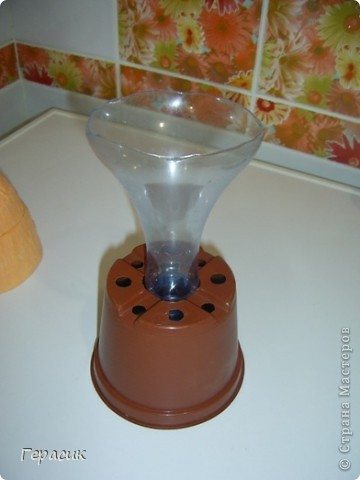 Stand almost ready
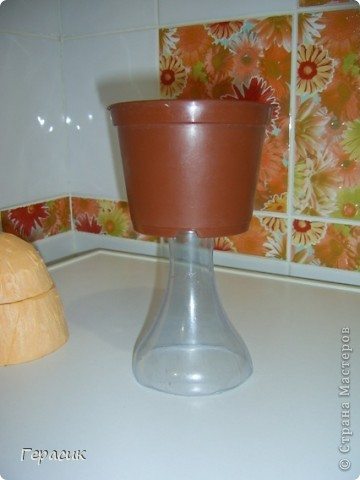 That’s actually this is my idea
 A further twist any flowers, but smaller is better
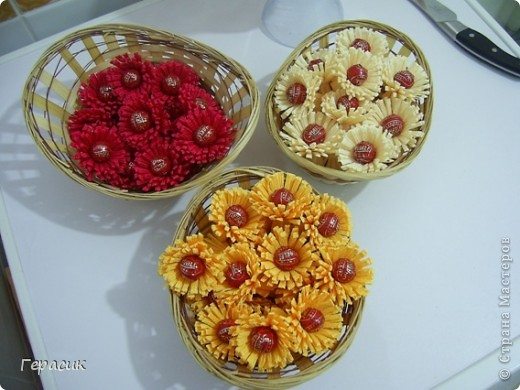 Vtyrkivaem flowers in egg
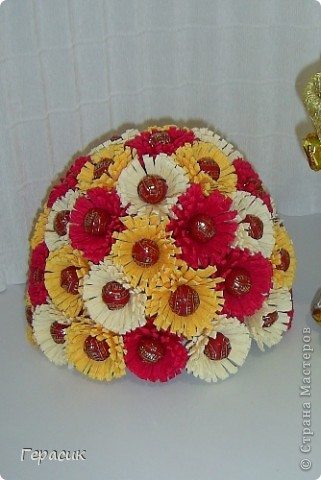 Flowers do not insert to the workpiece edge to remain porch that decorates flex hose. And the very bottom I painted, but it is possible to seal the same flex hose
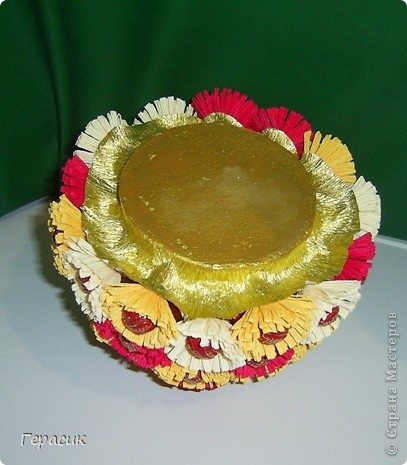 And here I took “replacement player”. The first pot was not enough, so I did the flowers too long legs, had to be replaced. But the point remains the same: a vase decorates flex hose
 Kristen?
 added UK Rasha Lok
 added UK Rasha Lok
 Together
 Inside spread ground chocolates
 READY
READY
 Well, finally done!
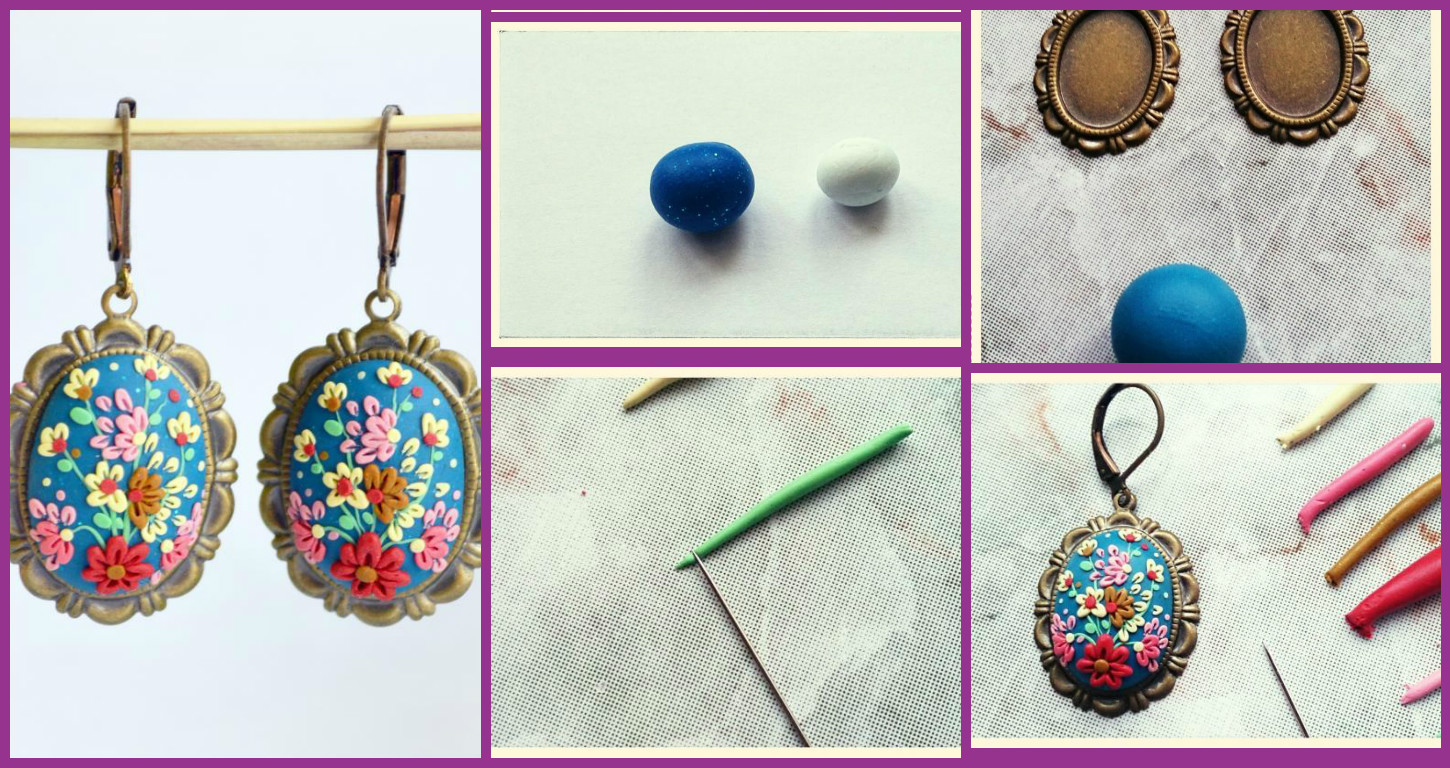
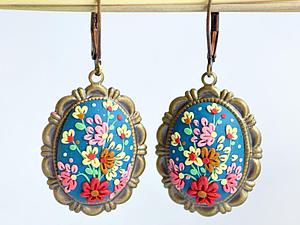
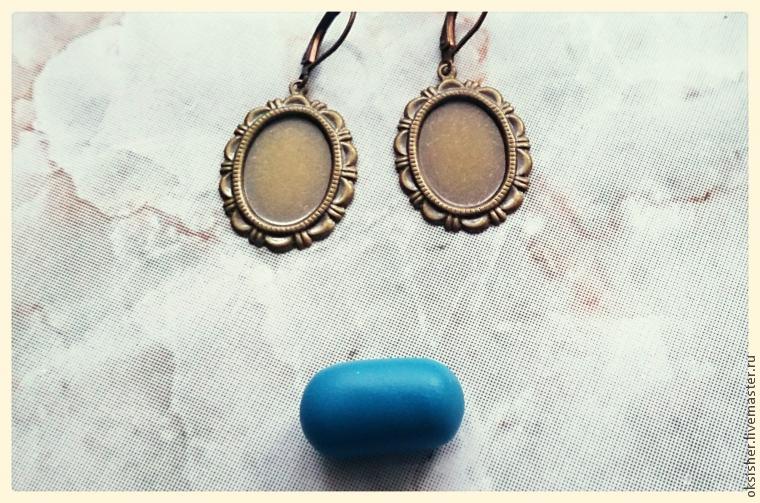
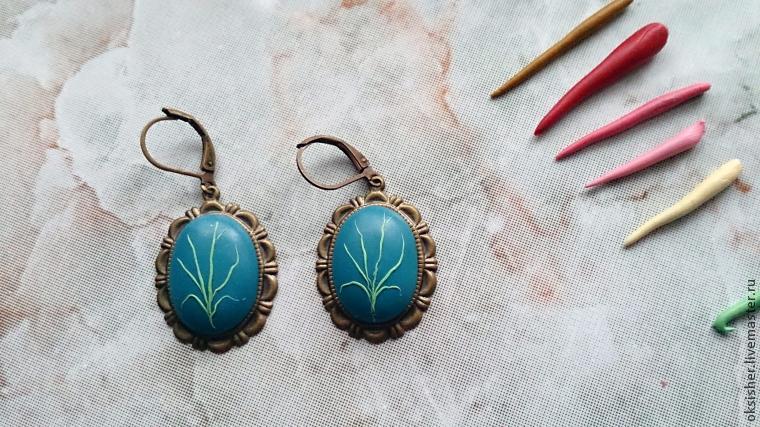
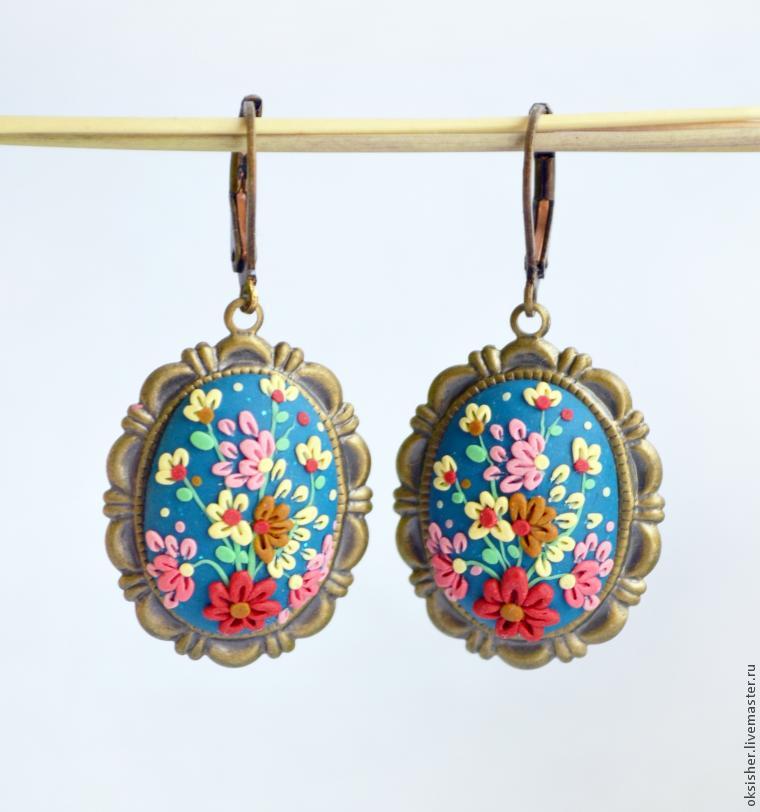
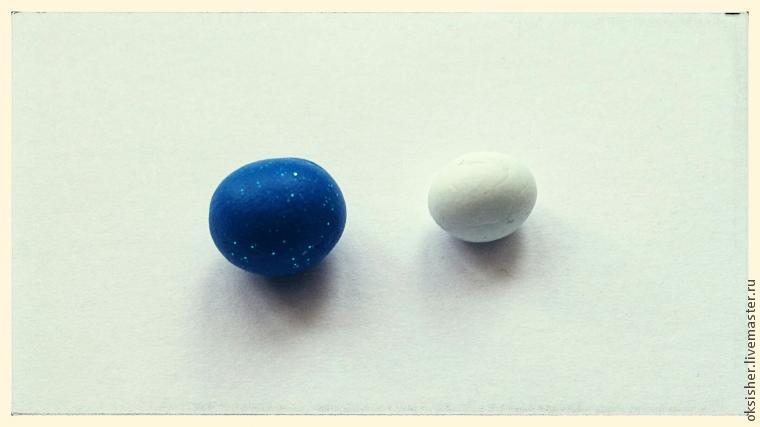 After adding olive green clay.
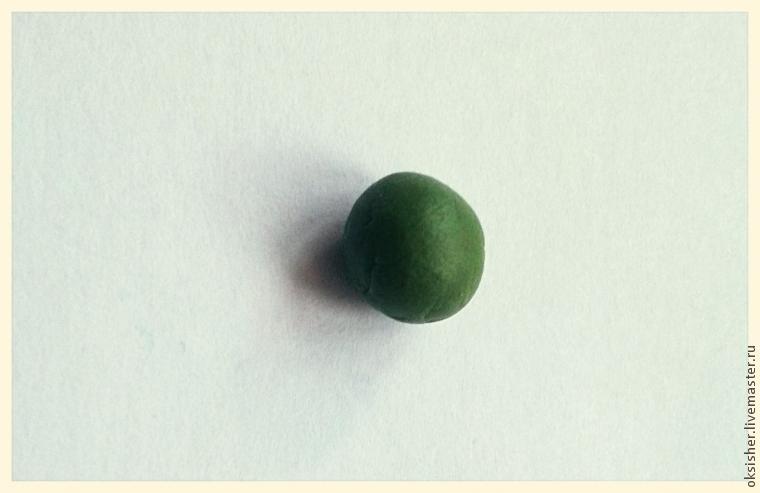 Adding it so much that in the end turned out here that color as celadon.
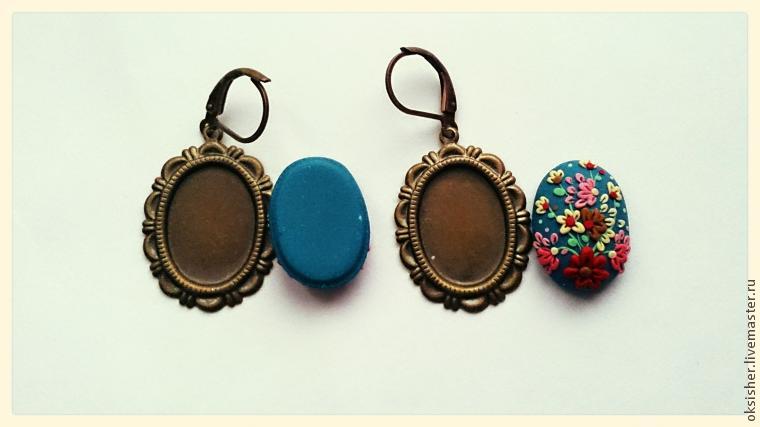
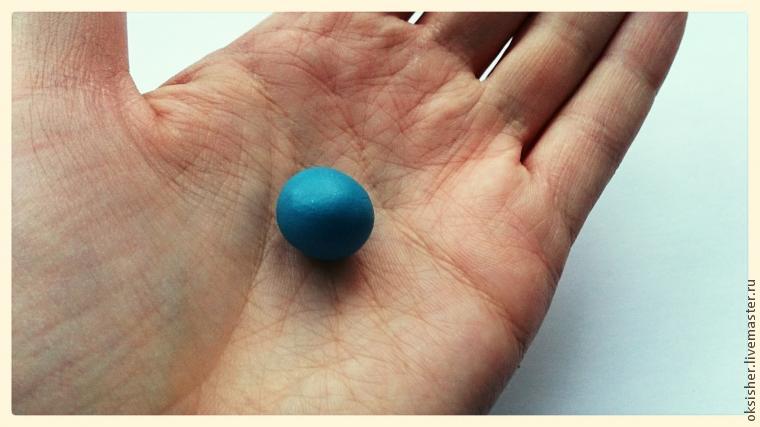 Take the metal framework for earrings and get the ball.
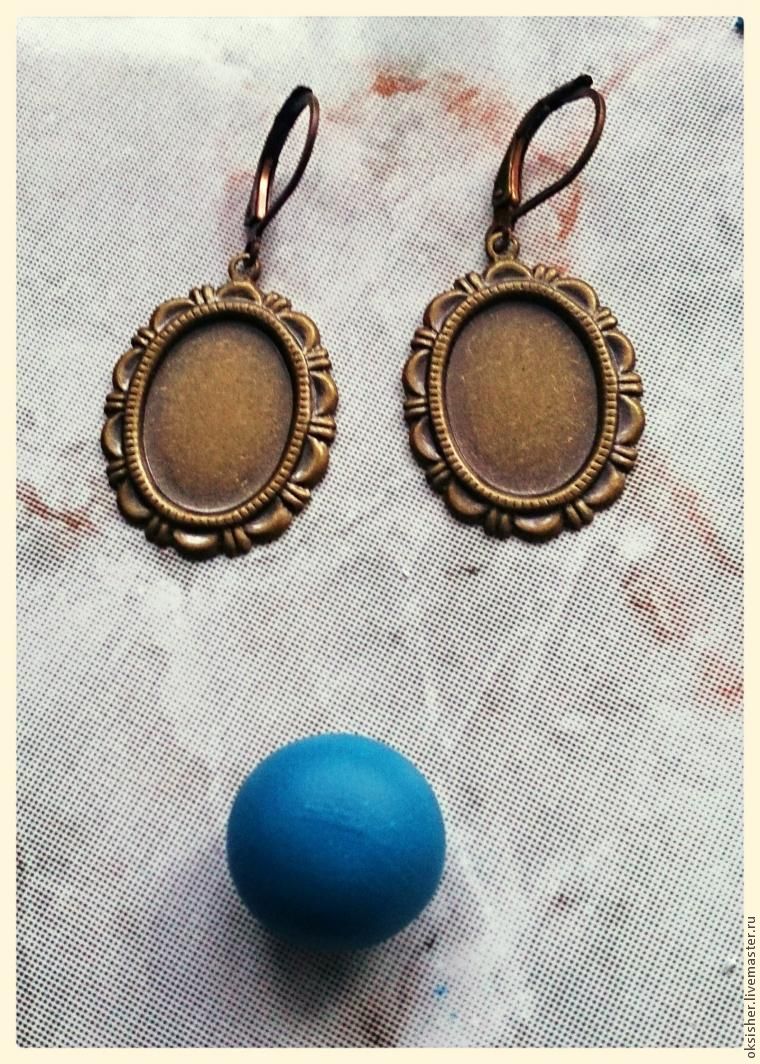 Now we need to share our ball exactly in half. To do this, we perform with a scoop of the following manipulations:
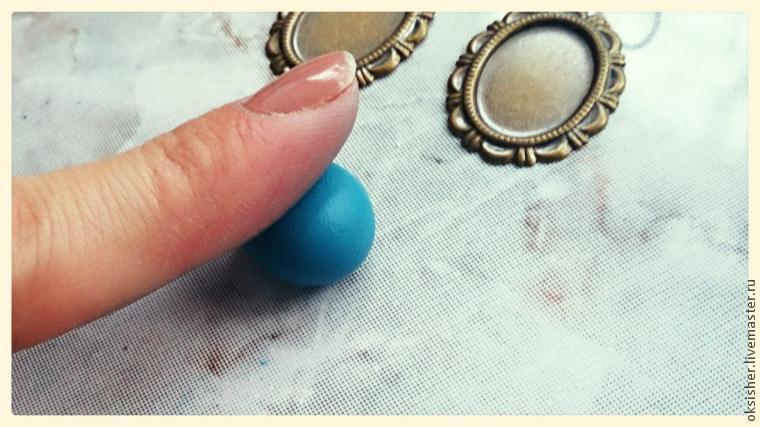
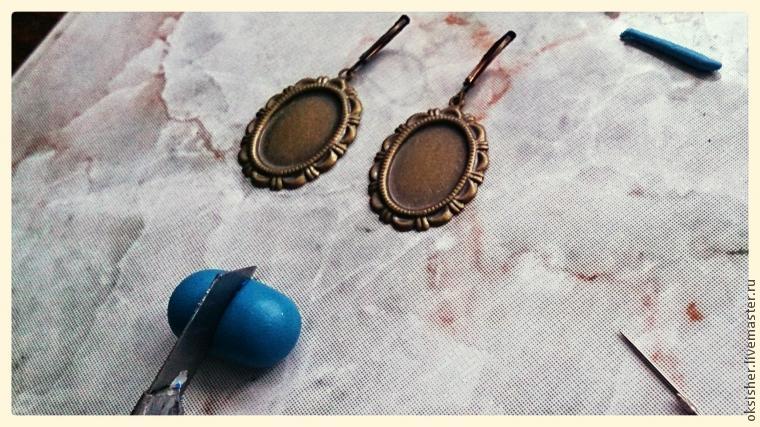 The resulting halves of the roll into two balls.
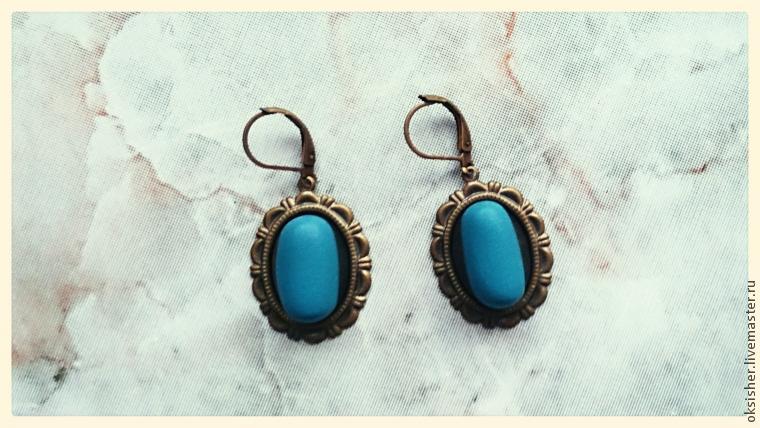 Take the base with clay, the clay is pressed down the middle of the palm (where there is a small depression) and was equal to our clay finger on the edges of the frame (if necessary, crushing and rubbing a finger).
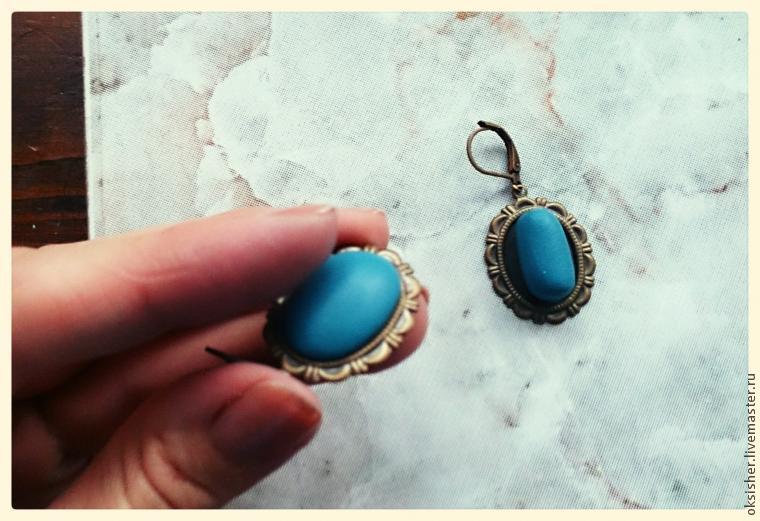 It is important to make sure that the clay is even across the surface of the setting.
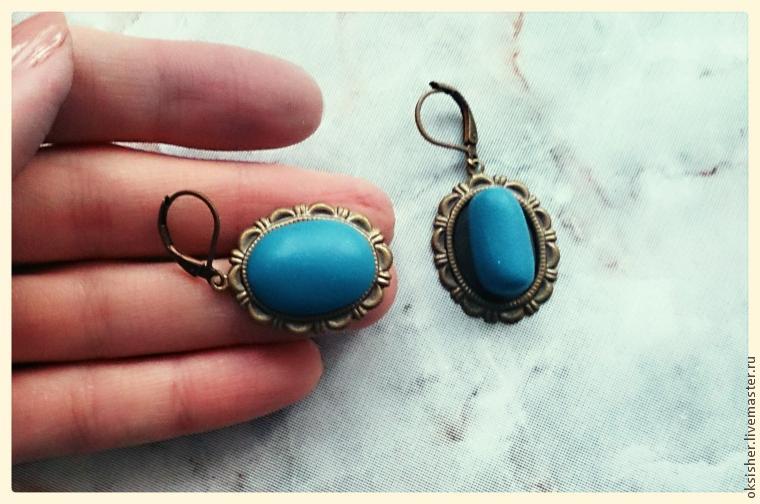 It is important to make sure that the clay is even across the surface of the setting.
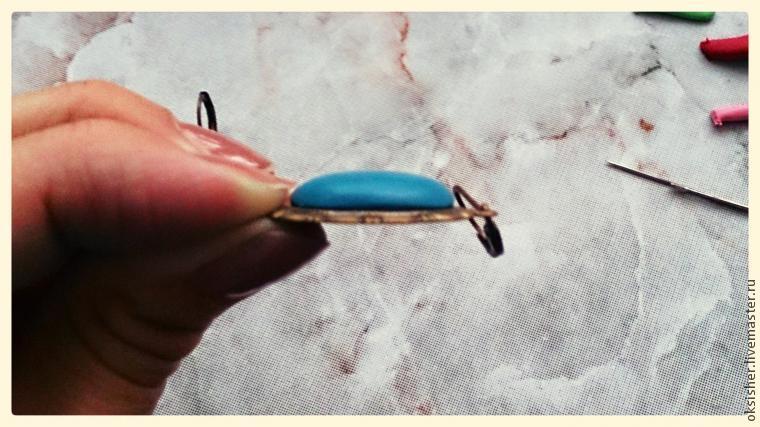
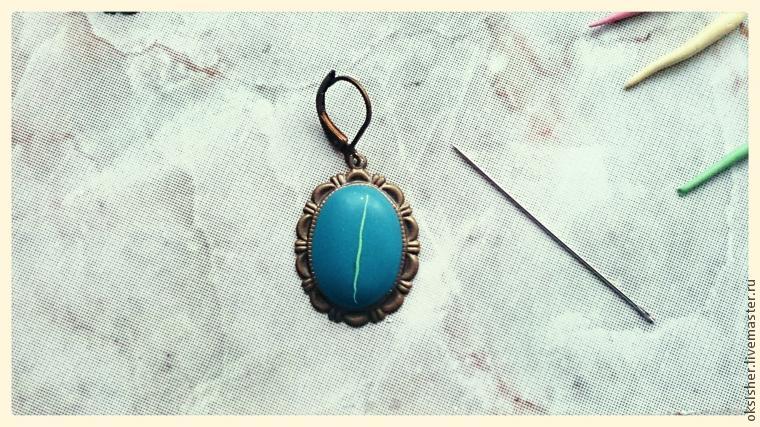
 I have prepared in advance such sausages we need colors.
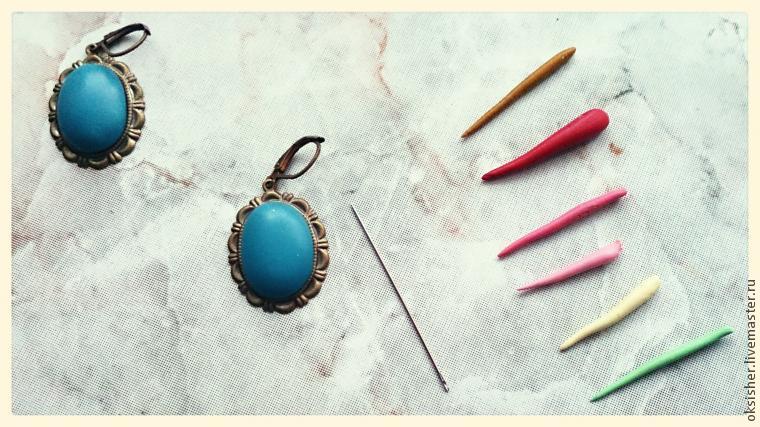 Take the needle green, in an amount such that it was possible to roll a thin sausage for the longest branches of our “flowers of the tree.”
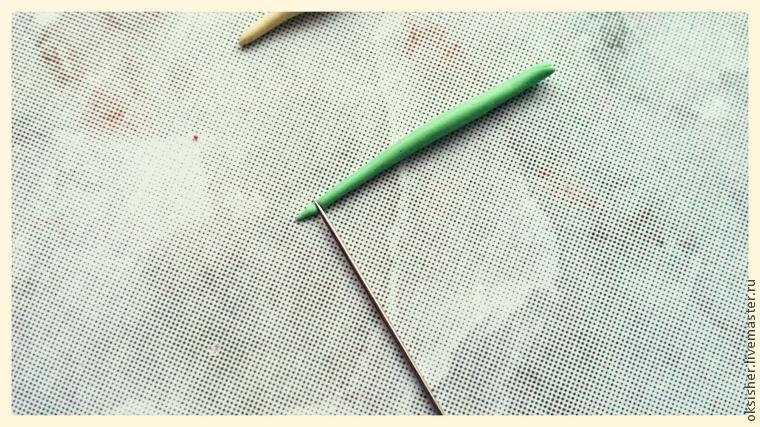
 Carefully take the sausage with a needle and using it and are putting our finger on the base of the twig. Use your fingernail to gently press down sausage along its entire length.
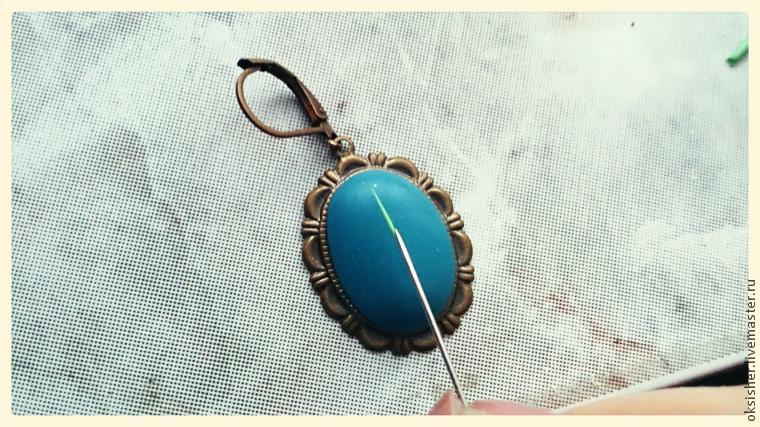
 In this way, we lay out all the “tree”, looking at the photos.
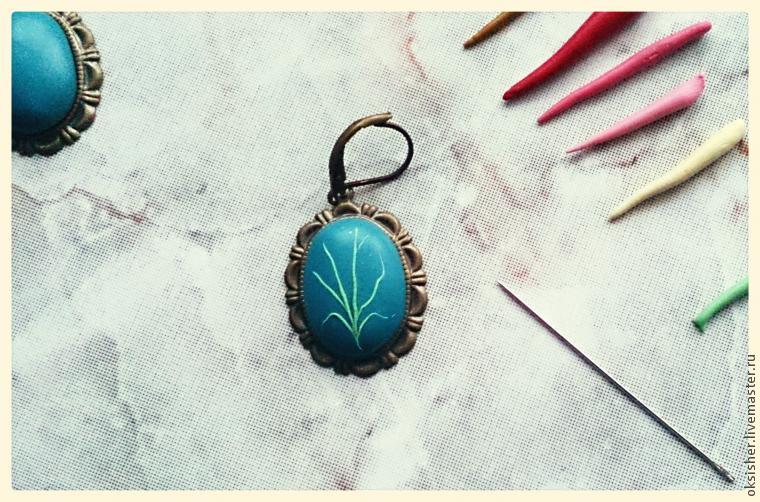
 Flowers I put upwards. Bottom increasingly large flowers are placed on top – small. The first flower is red. Take the needle red clay.
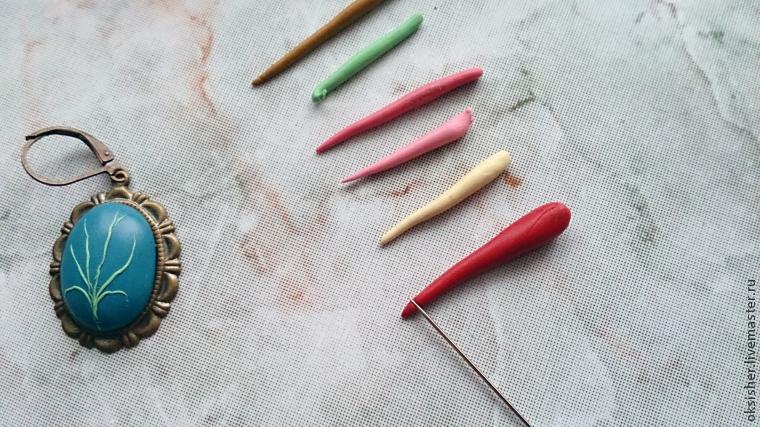 A small piece of clay slips into the palm of your finger. It is important that the clay was not homogeneous and crumbled! It should look like this.
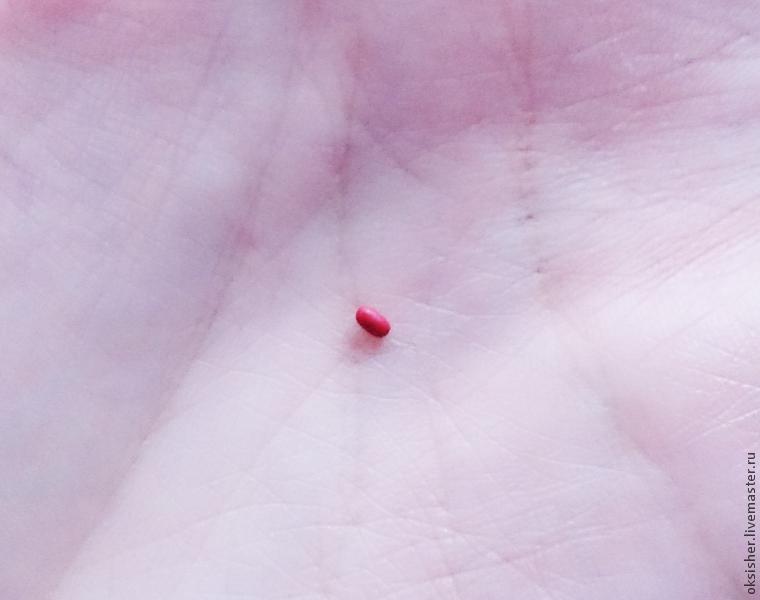 Take the needle and gently put on top of a “tree”, drawing from the middle to the end of the petals groove, thus pinning it to the base.
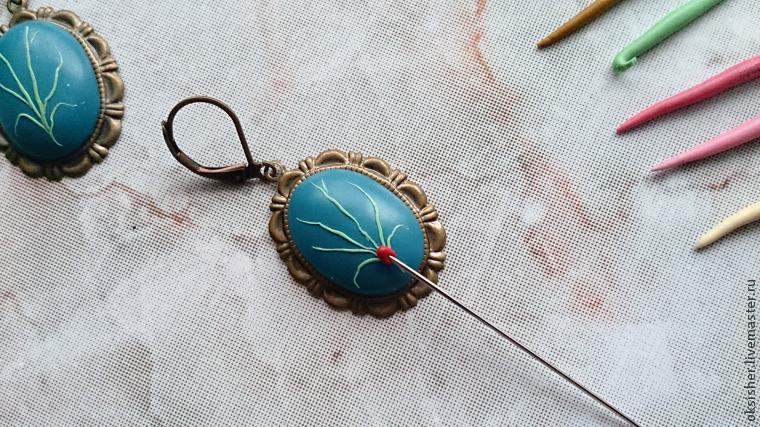 Further, as we put each petal circle. At the end of the flower gently press down with your finger.
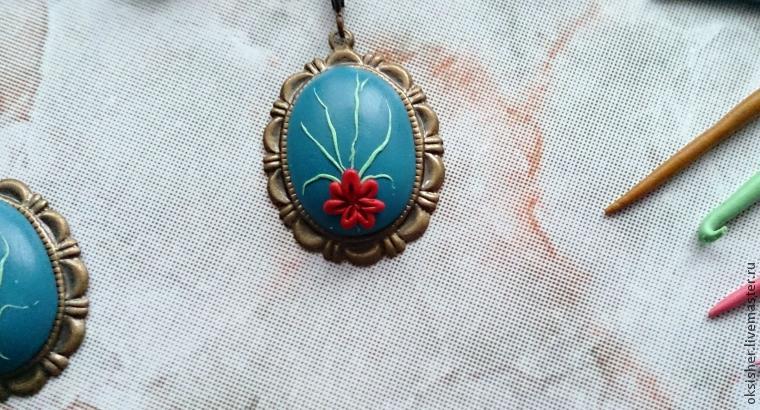 We continue to put the flowers from the bottom up.
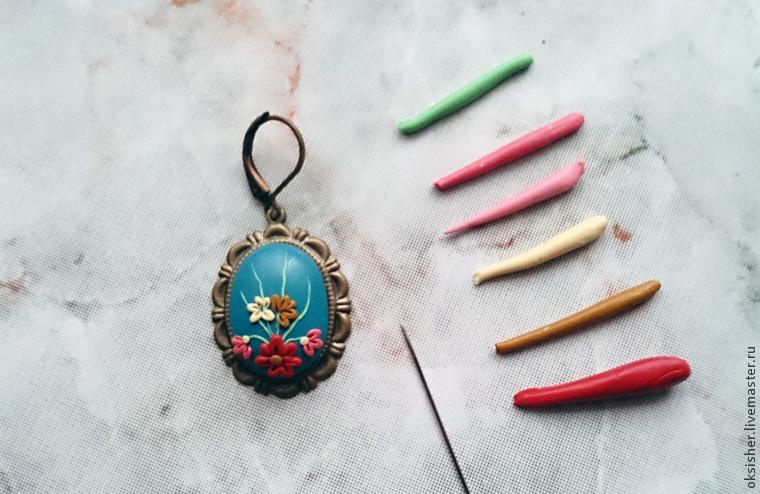 Lower pink flowers we put a dark tint, top pink flower – light. Serdtsevinki flowers do with a small ball of clay and press down gently with your fingernail.
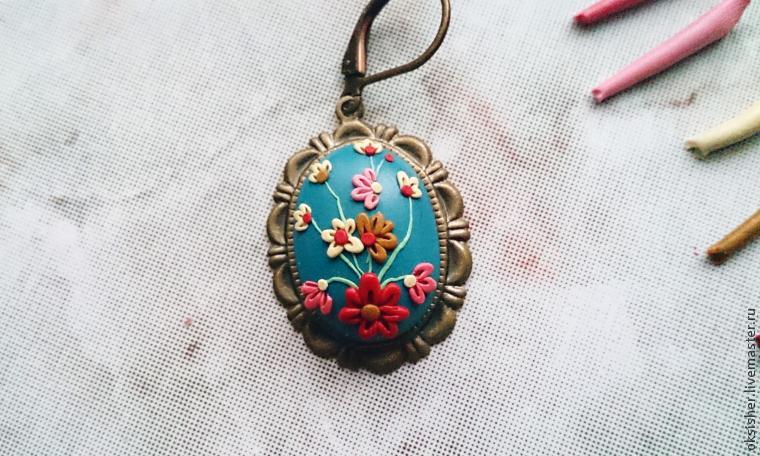 All the flowers in place. The painting looks unfinished. Apply extra petals tinged color light corresponding to each.
 Prior to the full completion of the picture we put the leaves where they are appropriate, and we put the finishing touches in the form of small dots.
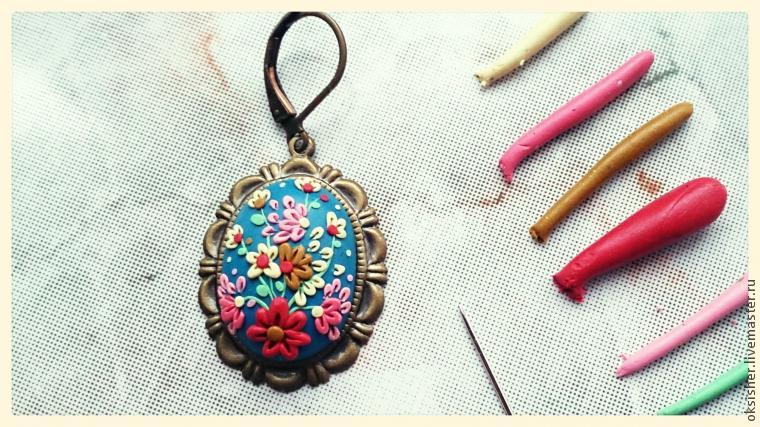 The picture is ready! We perform just as well and the second earring.
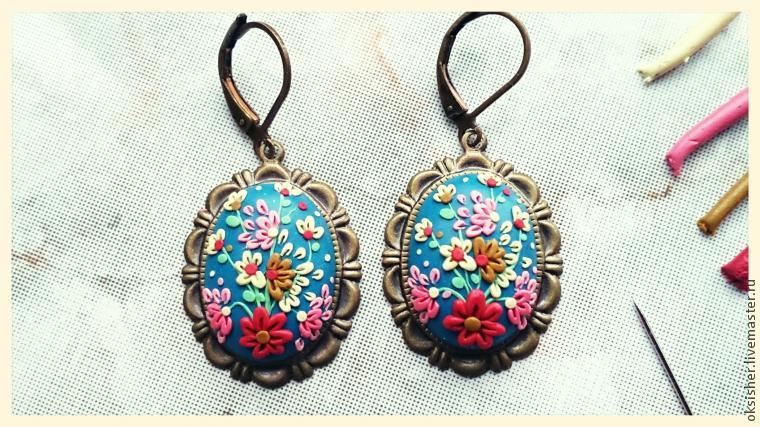
 Glue clay to a metal substrate using superglue or gel-adhesive polymer clay. It is important to apply the adhesive in a moderate quantity, so that when you press the glue leaked out.
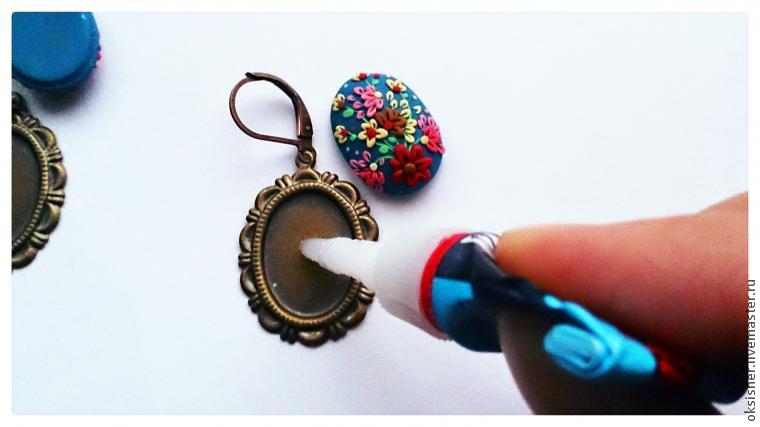
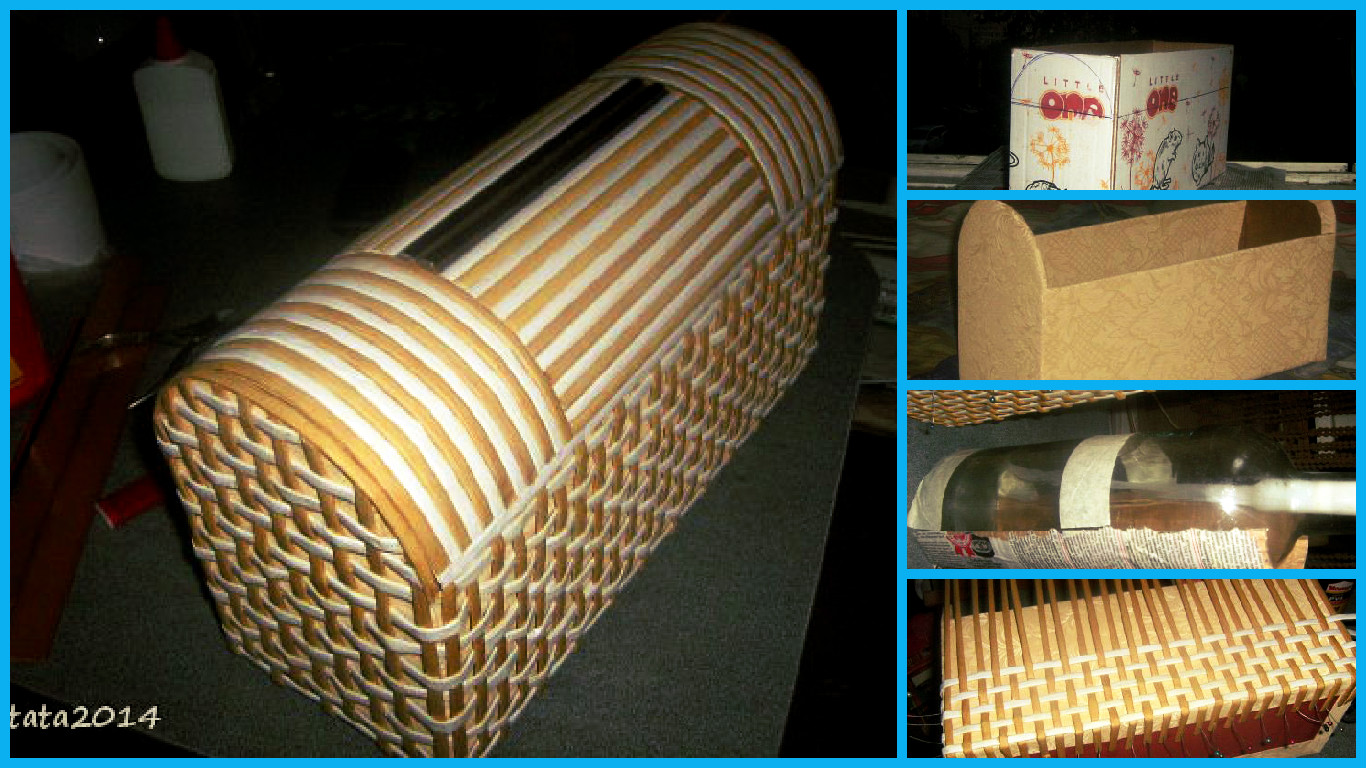
 When depleting to the top, fold the ends of the strips and glue them inside.
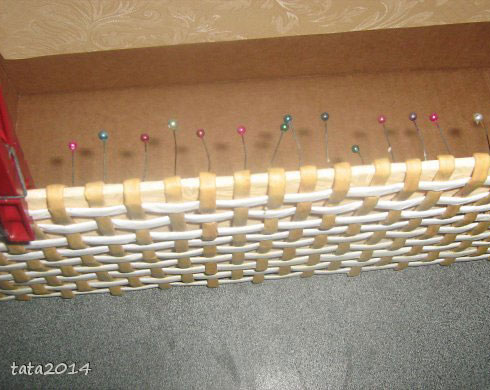 Here is the inside
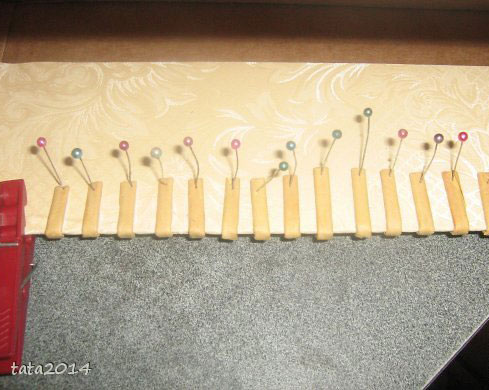 • While the glue dries, get the trunk lid. This MK bottle width equal to the width of the chest, so there is nothing to adjust the size is not necessary. Wet the cardboard and attach it to the bottle using adhesive tape. When the board is dry, it should be several times Procrit PVA glue.
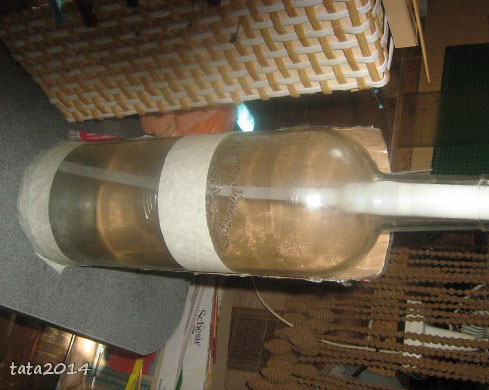 For greater reliability, you can glue the paper.
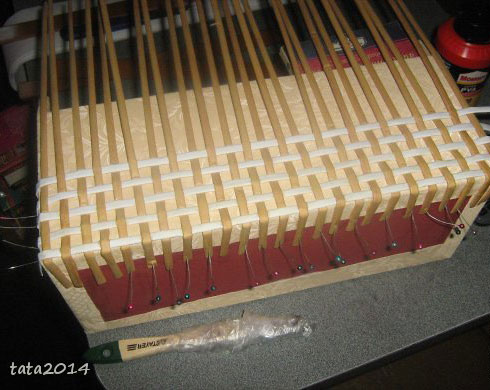
 • As long as dry cover, continue to braid the side of the trunk. Where should you need to build a strip?
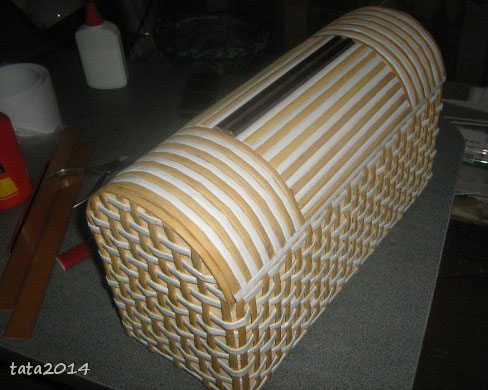
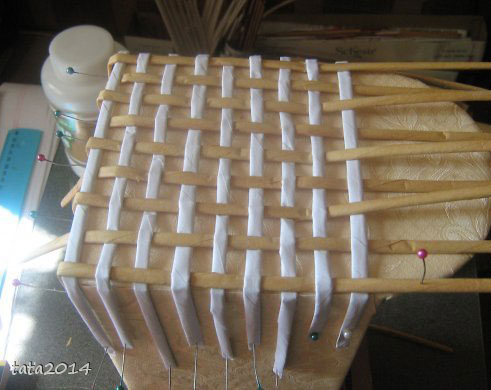 High lateral part is ready. Trim the excess from the strips and glue well.
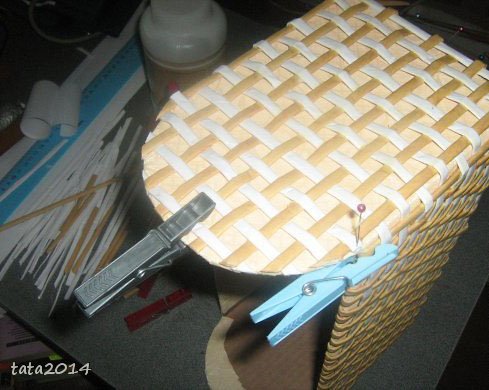 Continue to braid the trunk. Remember to stick to the bottom of the strip, the strip MK yellow.
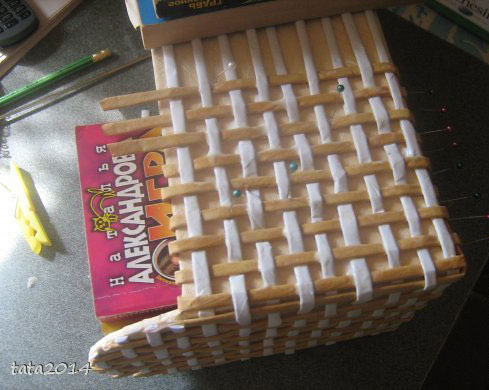 As a result of your labors get here is a neat and beautiful chest.
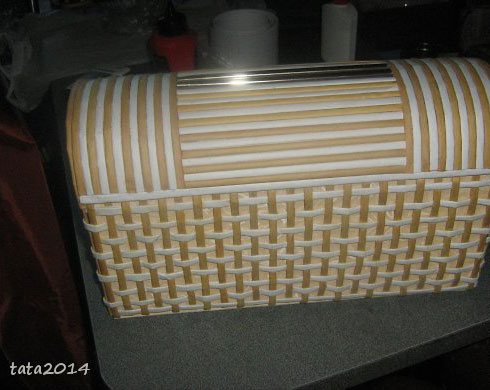 We admire? Now continue to work.
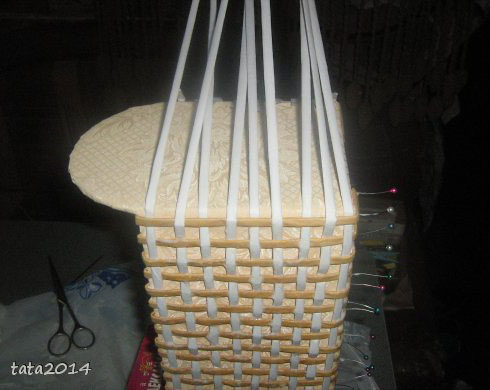 Edges to look neat and beautiful.
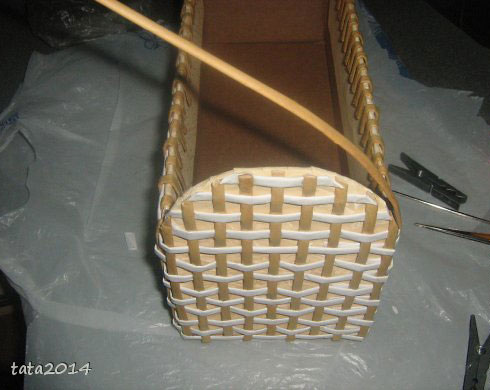 The lid of the chest the same color as the trunk itself, going upstairs to 6 cm.
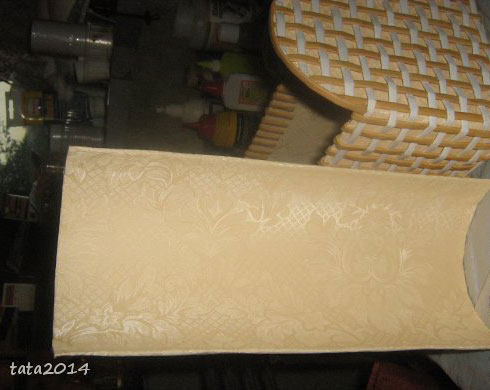 Try to design converged smoothly.
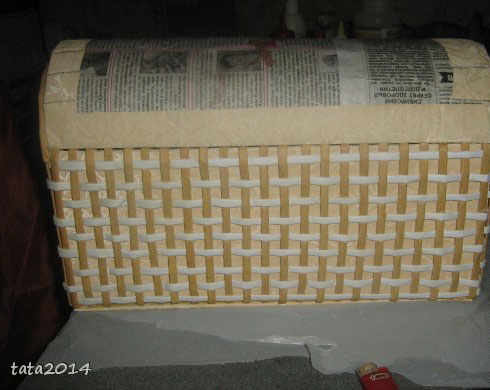 Arrange the cover as desired. Connect your imagination and forth.
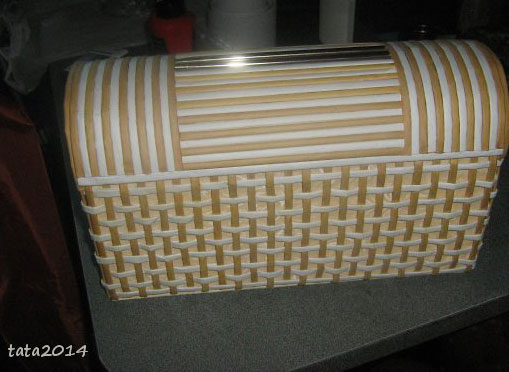 As a result of this work should be the following.
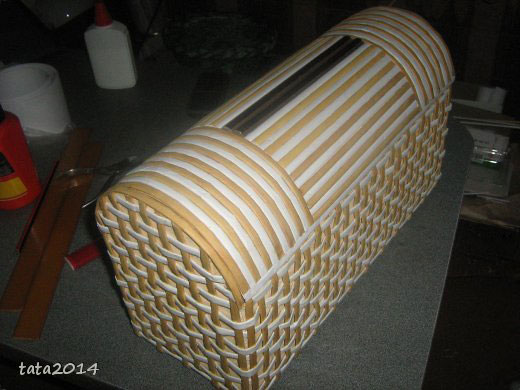 But, of course, calls for a chest decoration. Be creative and create. Let things made with their own hands, endows you with kindness, beauty, and warmth.
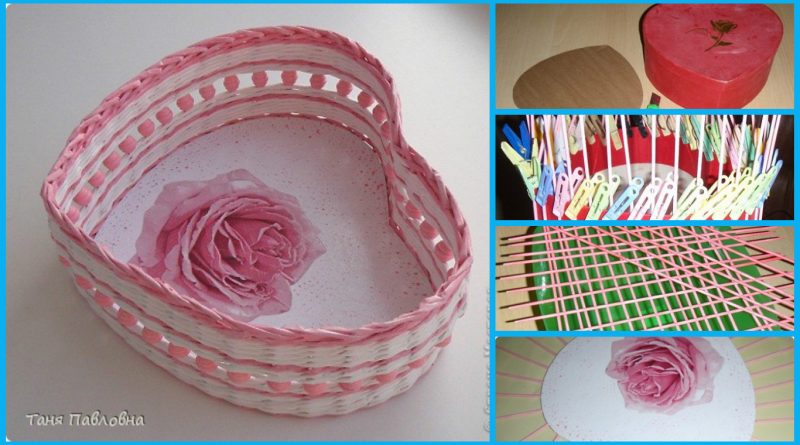
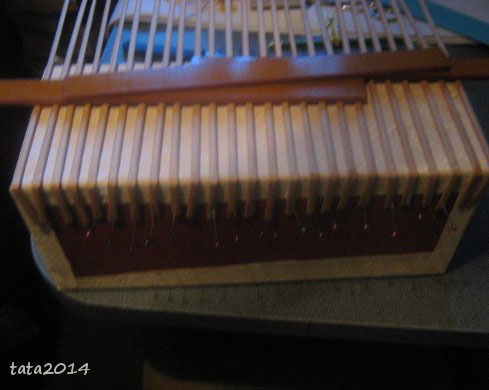
 Measured basis, divide the desired distance between the stanchions. If you can not without a trace, corrects the distance. I got 1,8sm. Normally, less is better.
 Postpones 1.8, starting from the center of the “heart”
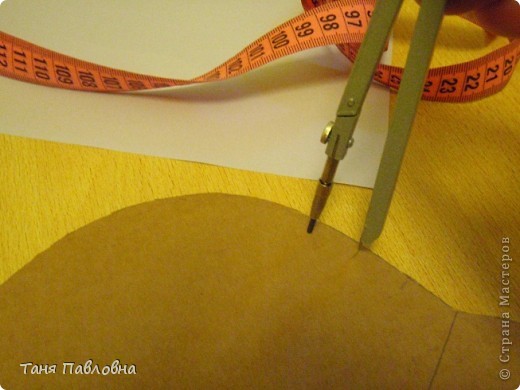 It turned out this way …
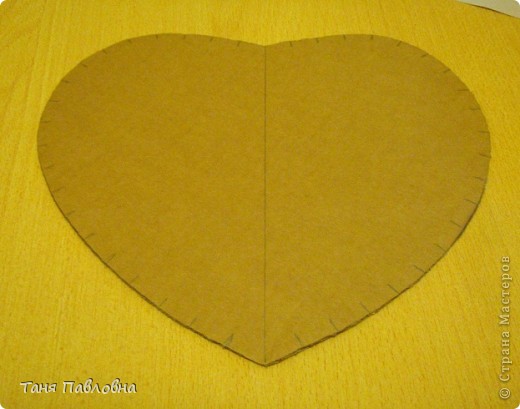 I prepare the paper
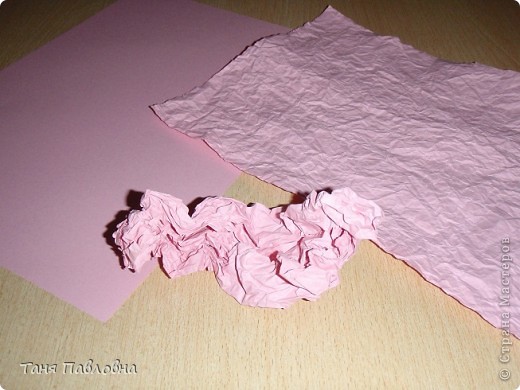 and more … The paper pasted on cardboard with white glue and left to dry. A bit dry and put under load, so as not curled hours on 12. The process of bonding is not removed, fascinated.
 While the bottom of a dry, paint tubes.
 Expanding to dry and leave everything until the morning.
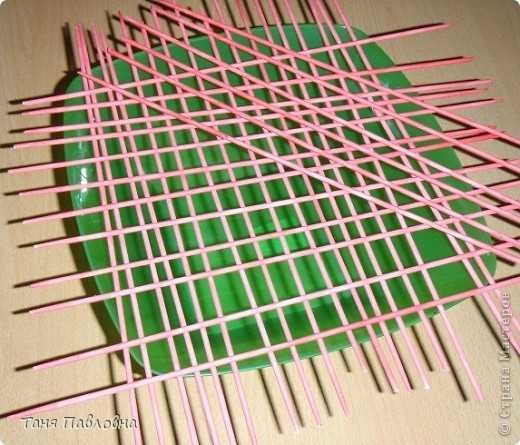 And in the morning for a surprise. That such a result is obtained. Apparently, the tubes were caught from different parties. I hope that will be enough of a color.
 Clay “Titan” pasting tube
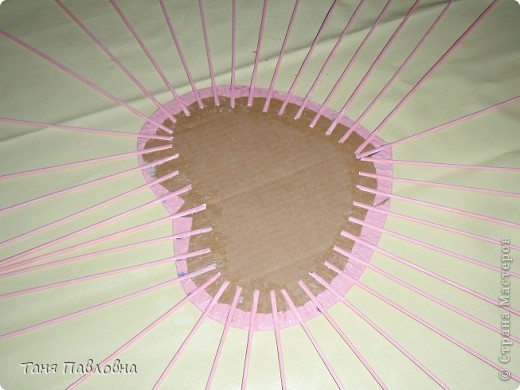 Top pasting the front of the bottoms. The process of gluing napkins too missed. Well, not all at once. Decoupage do with the file. I put the napkin “face” down at the file, pour some water into the center of a little and start to lift the edges to Vodicka gradually distributed on a napkin and no wrinkles. I add a little brush continue to keep raise for all parties. Try to keep the water before the time has not got to the edge (tear). When there is only the edge unglued, helping brush. When the napkin is flat, without wrinkles on the file, carefully poured the water and turn on the bedplate, smoothes. I remove the file from top to drip screed and PVA brush. Land.
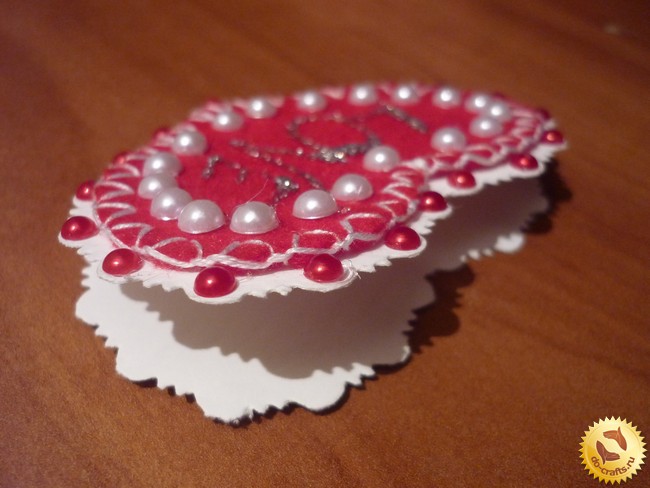
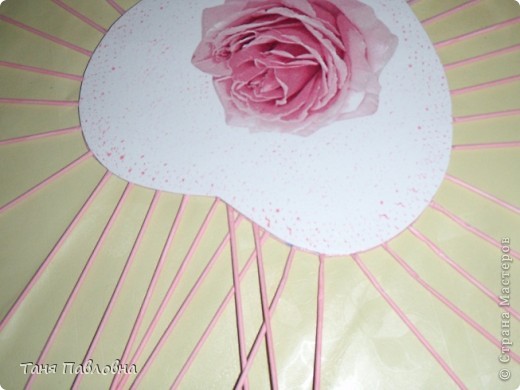 Yes! Two hearts are glued together, too, putting under pressure until it sets. It is better to wait a little longer. Clay grabbed. I begin to braid rope bottom of a single row.
 I lift the rack and begin to weave a rope in the two tubes.
 Get out of shape, that’s what happened. The result is not pleased with what’s nose turned out. It was necessary to equate the braid after varnishing.
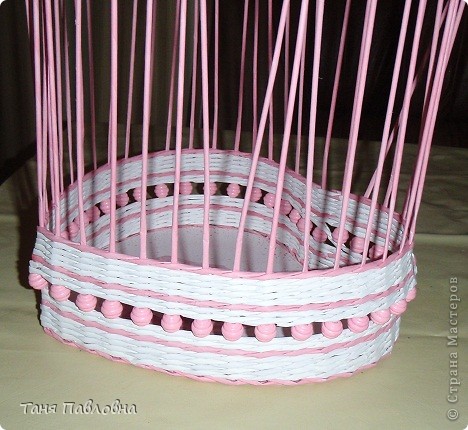 close: in front of the two, in the third
 It remains the last three tubes. The first of them is bent before the two and slips under the first rack start crisscrossing.
 Second-on rising: before the third and the inside of the first braided basket
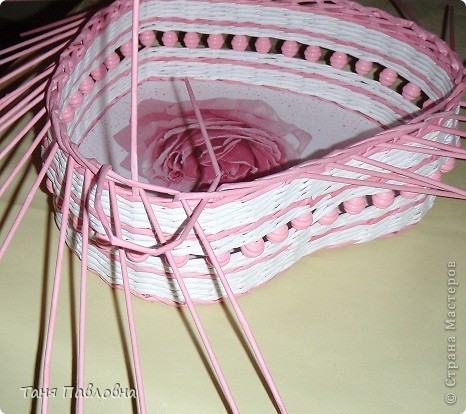 for the second braided out
 by drawing
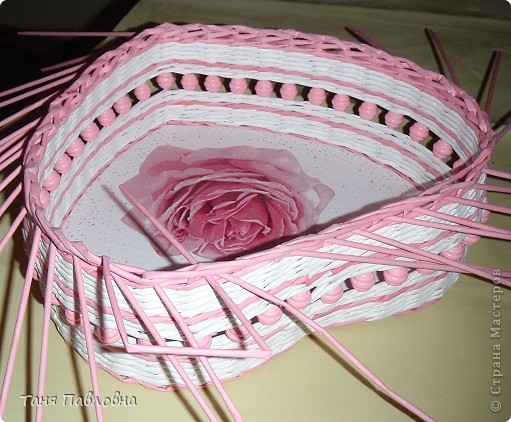 Fotik agreed to work only to that frame. I had to finish without him.
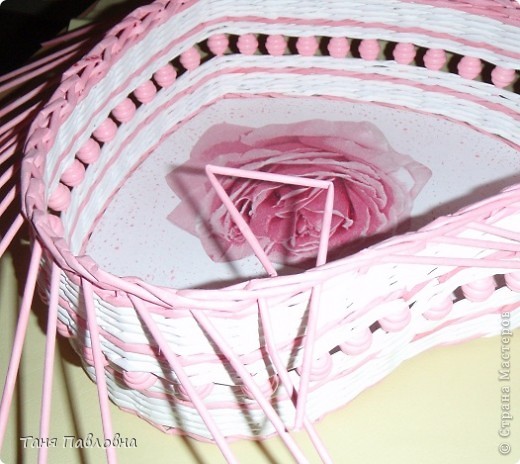 And it is you! This beauty blossomed in my yard, and I am very pleased.