DIY Fashion: Round Neck Design for Kurti with Mirror work

In the exquisite shade of everlasting style, the night dark comes a delicate and warm knitwear kurti adorned in the lovely mirror work at the neck to rouse a vivid polished craftsmanship to the winter miseries. Encourage your winter style in comfortable warmth. The back additionally comes in the comparable mirror work. Combine this lovely kurti with a coordinating churidar, warm tights or with a couple of your most loved pants, and complimenting scarves to set out in vogue style.

Watch video Tutorial:

DIY Beautiful Peacock Design from plastic bottles

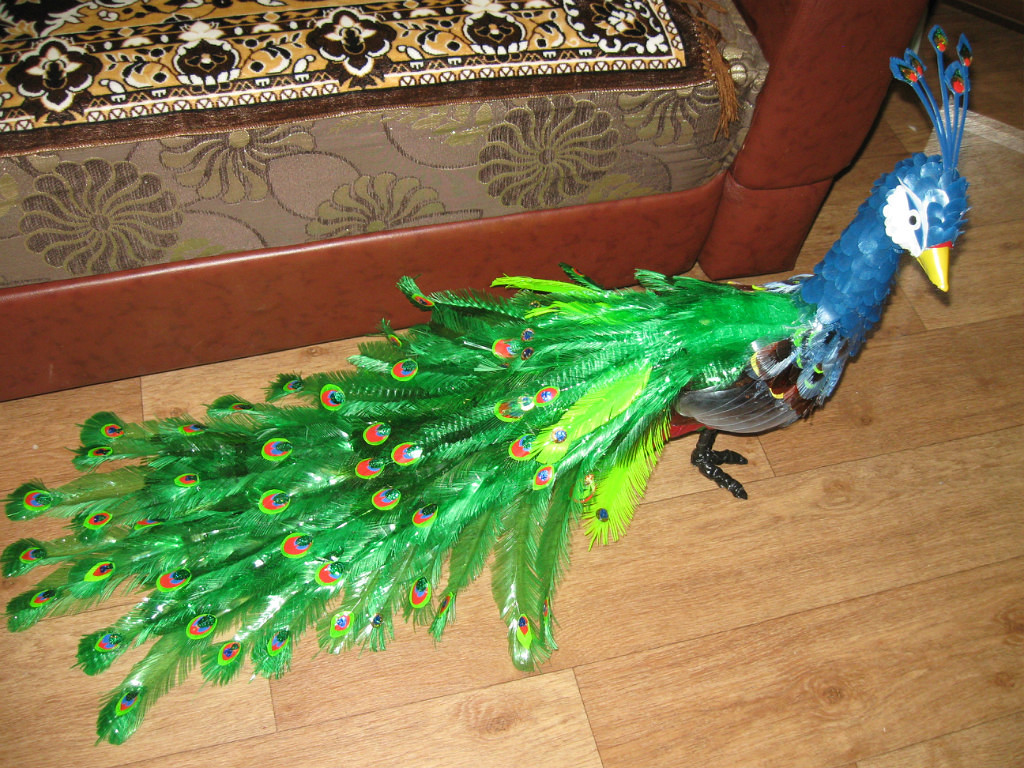
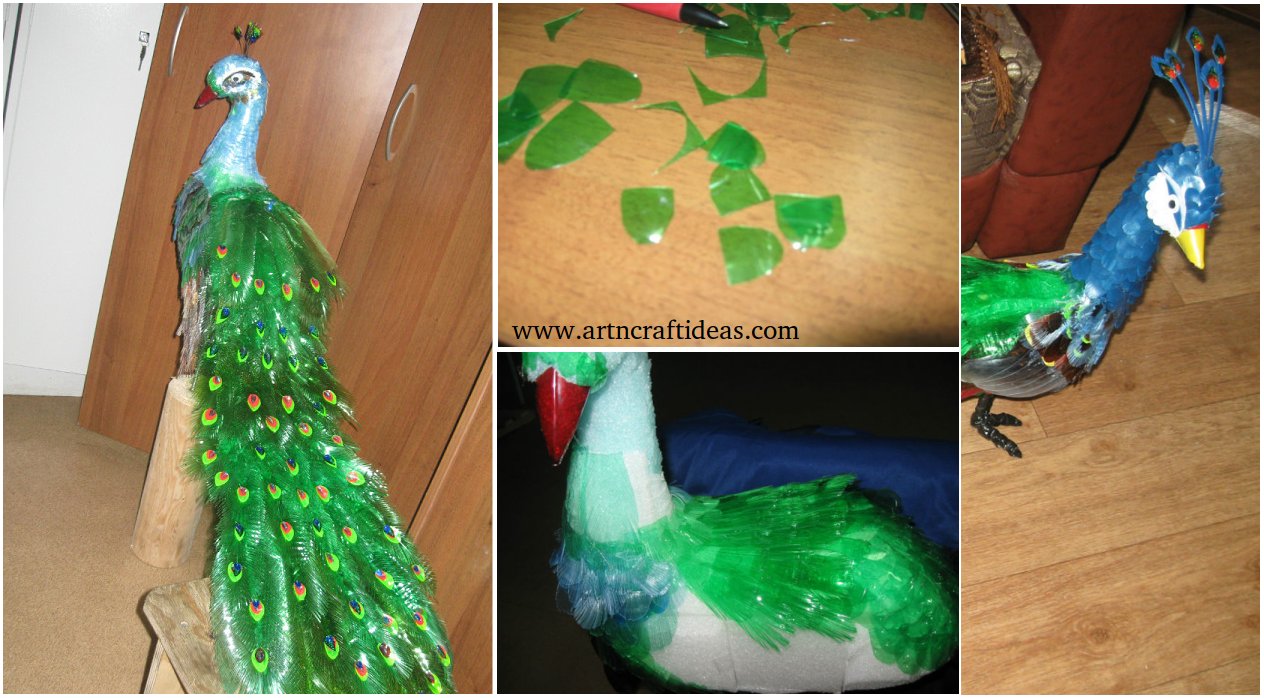
This tutorial shows how to make beautiful peacock design from plastic bottles….which adds beauty to our home.

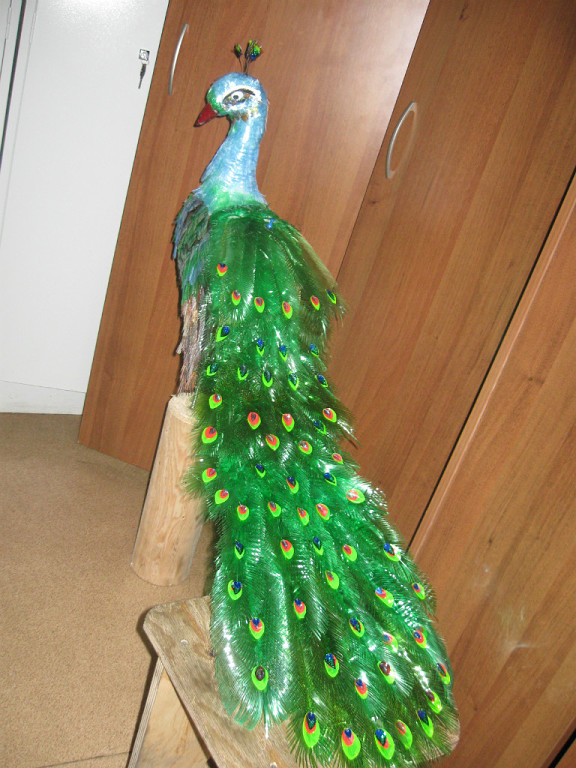
In many countries, the peacock was considered a royal bird. Image peacock symbolizes happiness, beauty and nobility. We decorate our infield solar bird peacock. Miracle bird are made of plastic bottles.

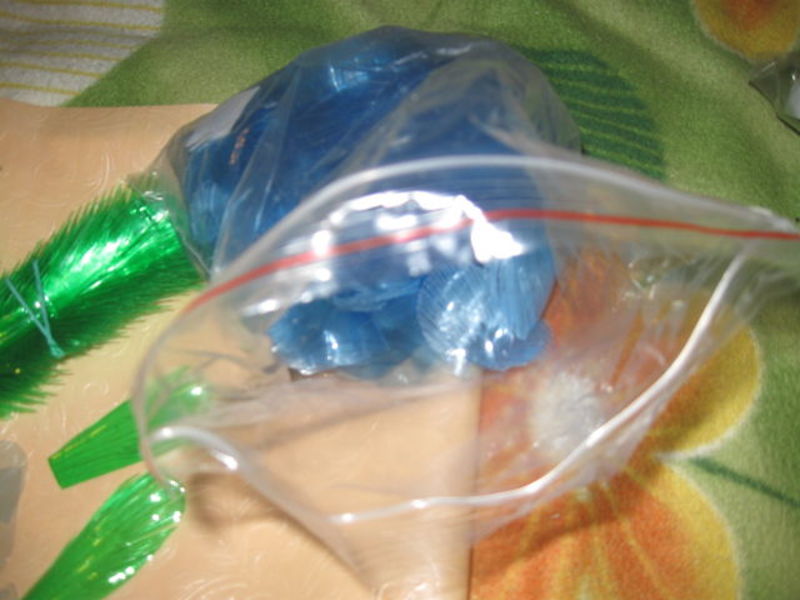
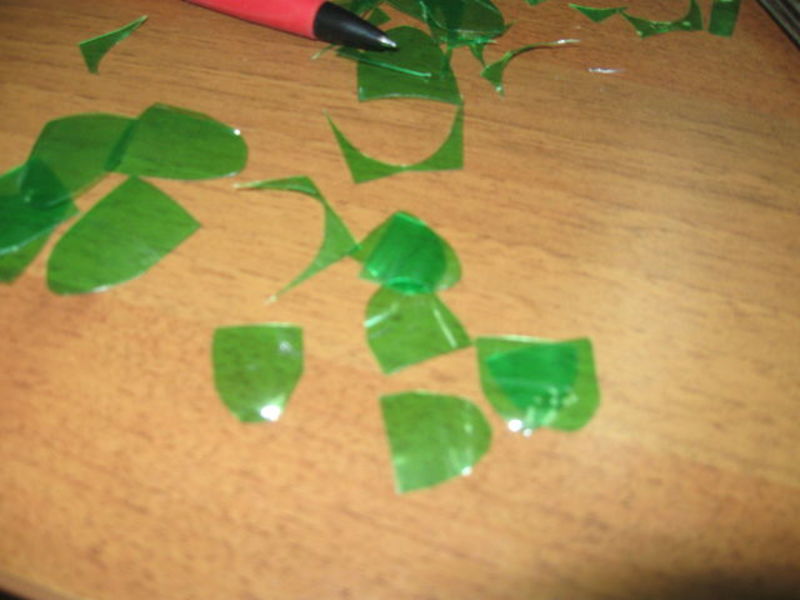
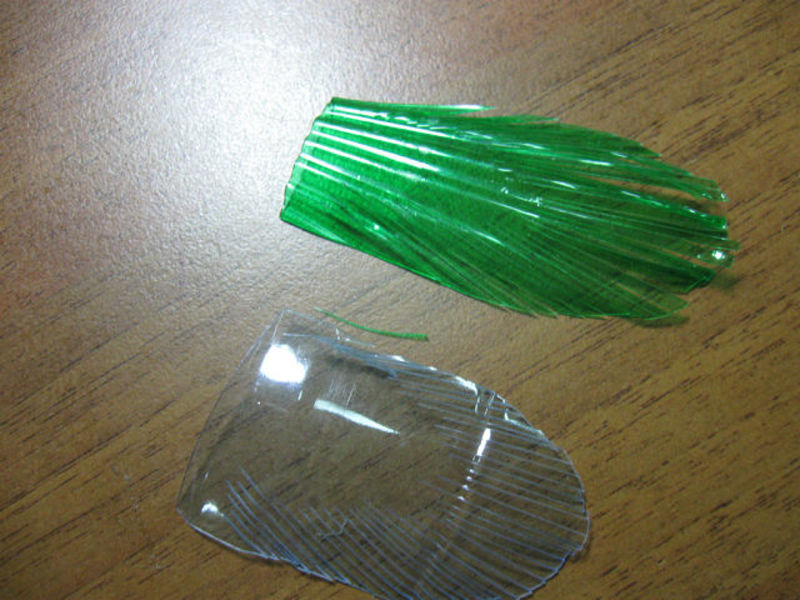
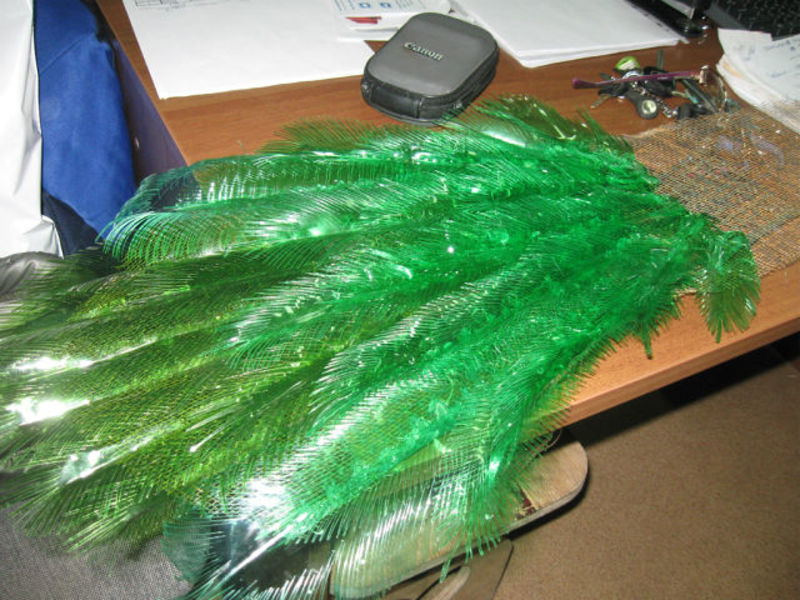
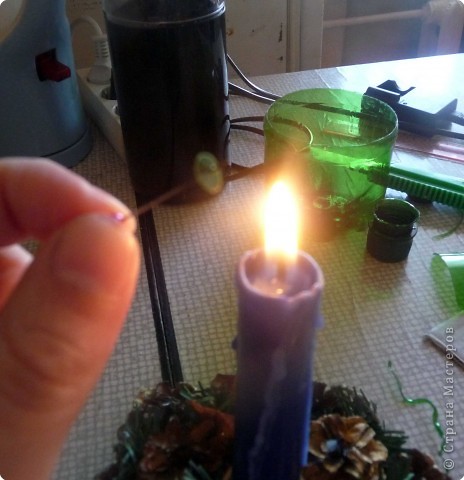
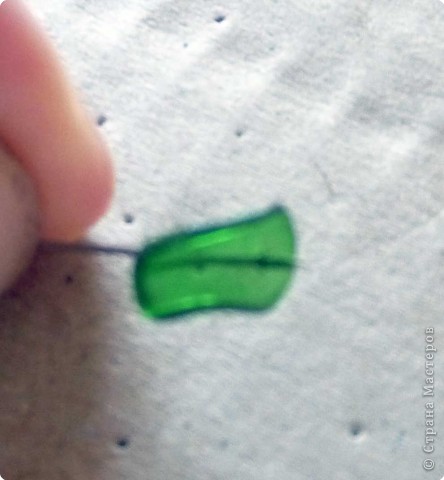
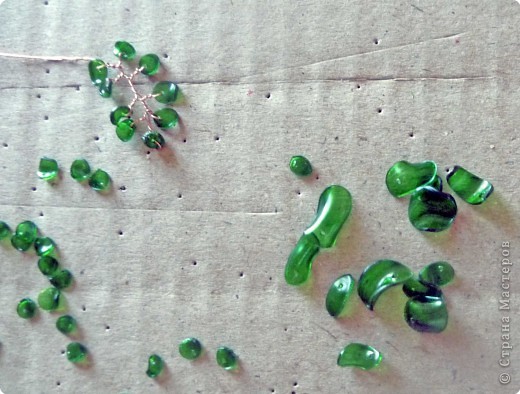
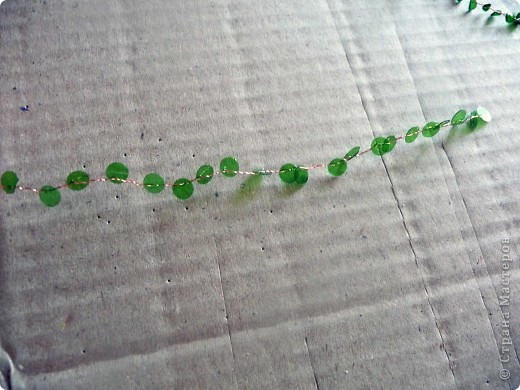
Feathers cut from colored plastic bottles.

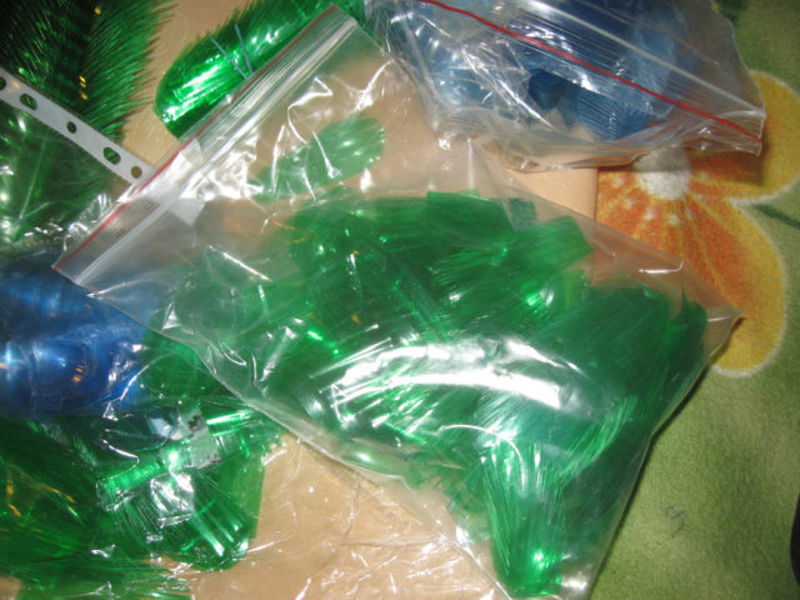
Need a sufficient amount so on packages pile up feathers preform.

Feathers cut into different sizes.

Sort by shape and size of the work-piece to the tail and breast.

Getting to the manufacture of small feathers.

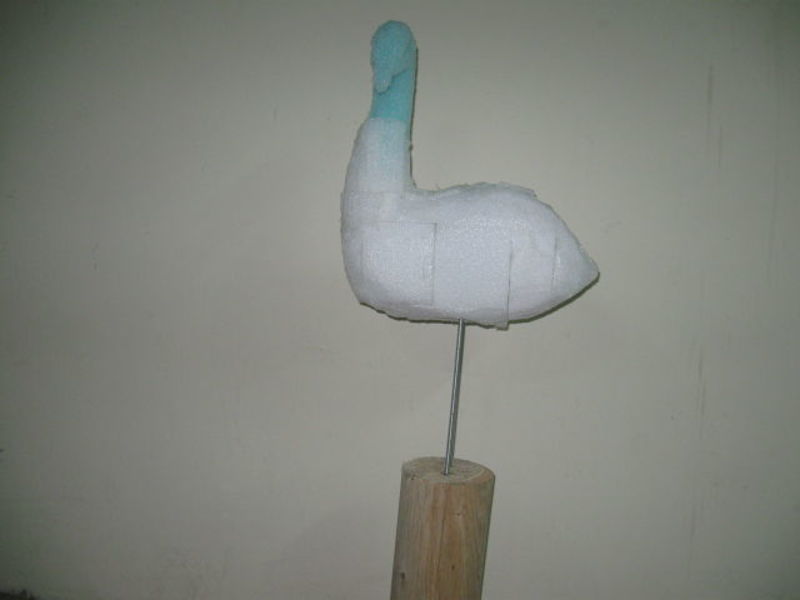
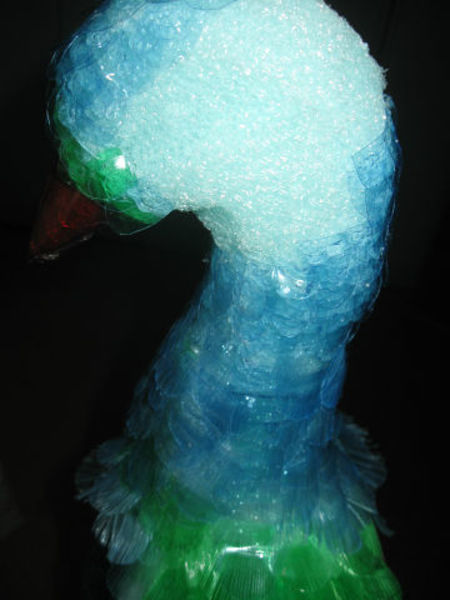
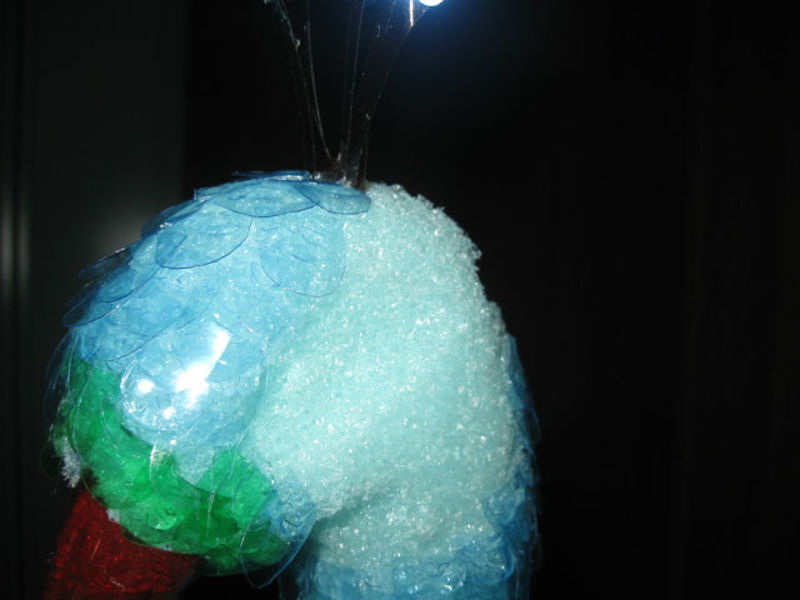
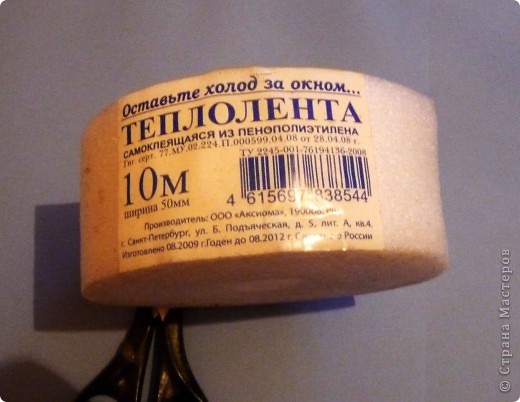
The trunk is cut out of the synthetic foam. It is easy when working and does not crumble.

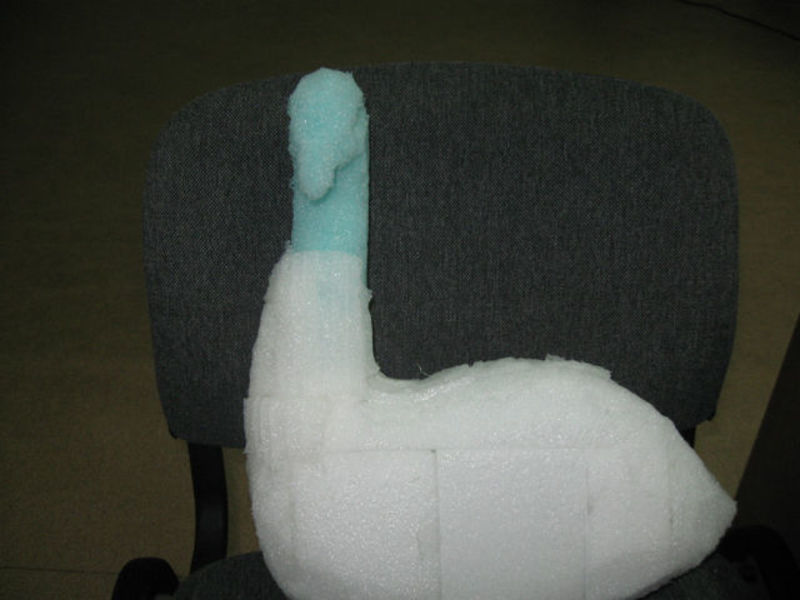
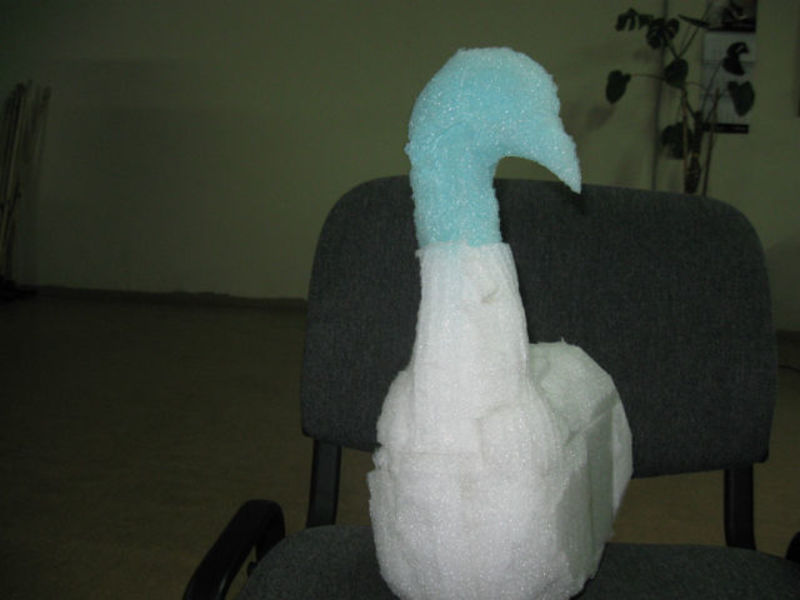
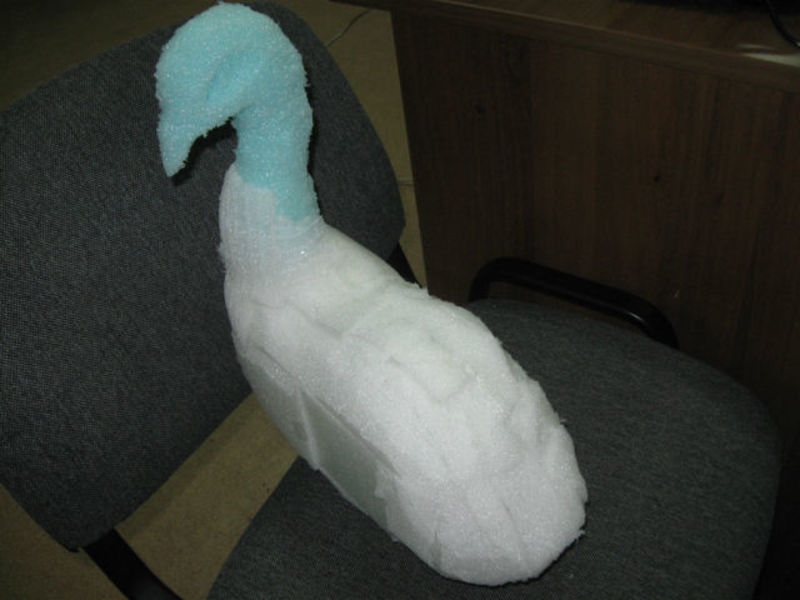
Peacock torso to attach to churbachok legs.

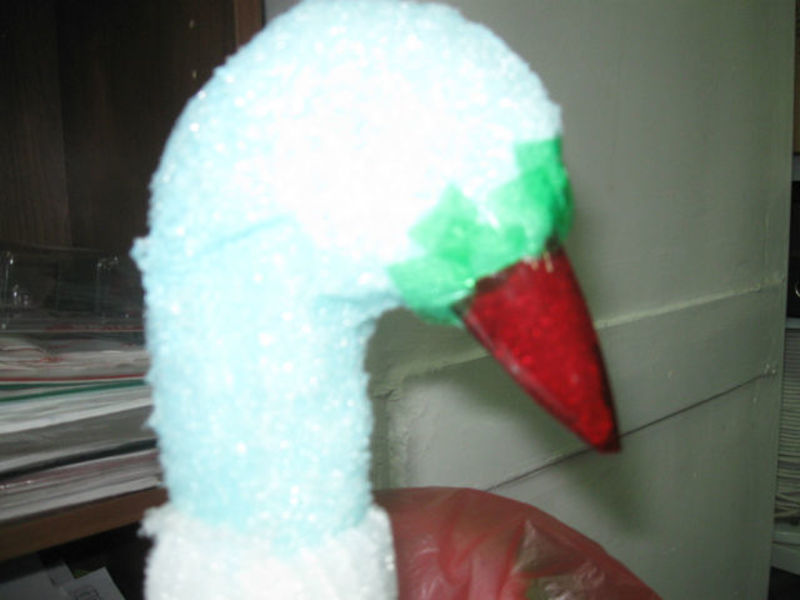
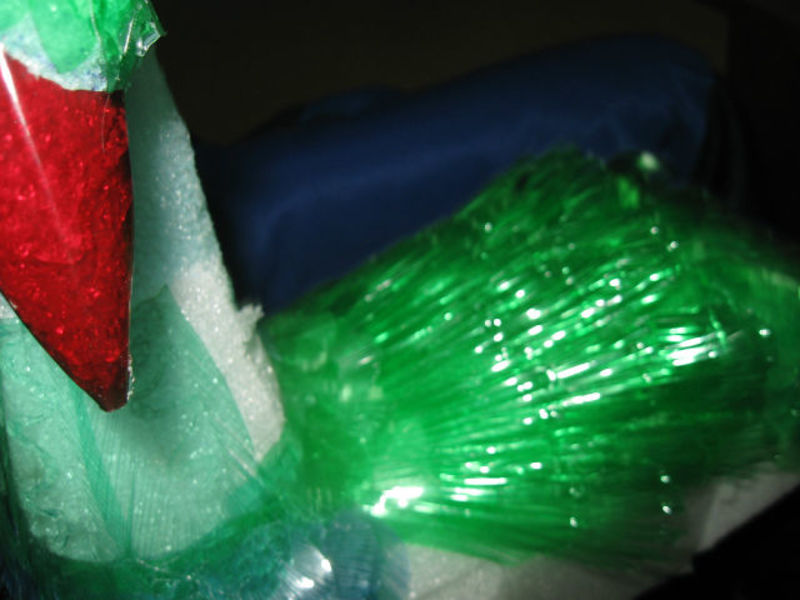
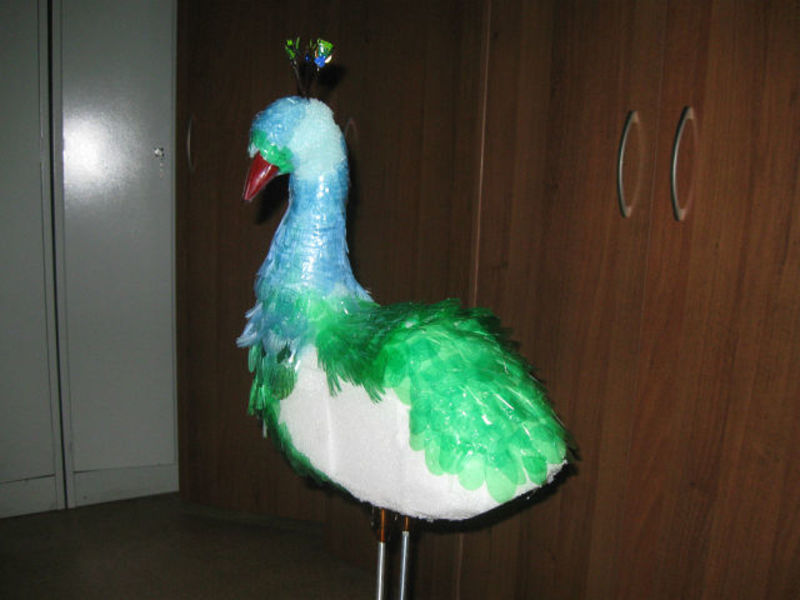
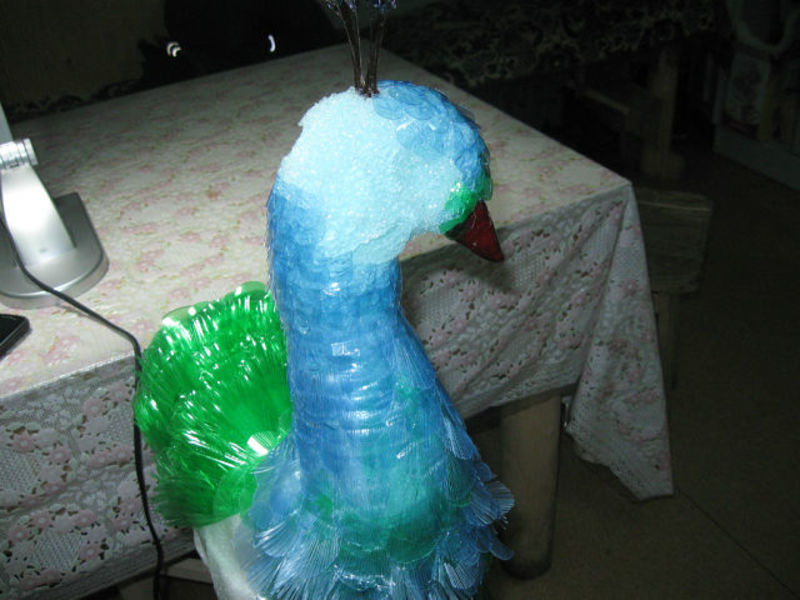
Bottle of red beak cut shape for the peacock.

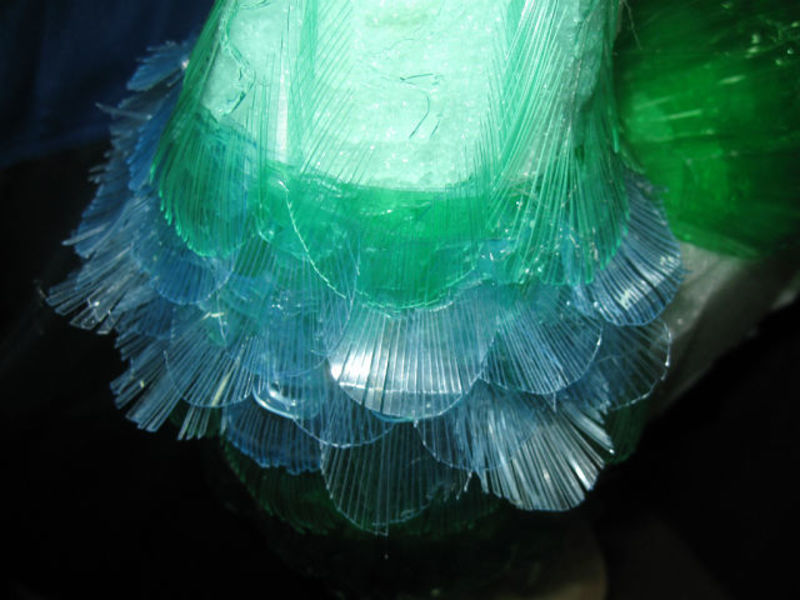
Let us plumage birds. Sheathe colored plastic breast.

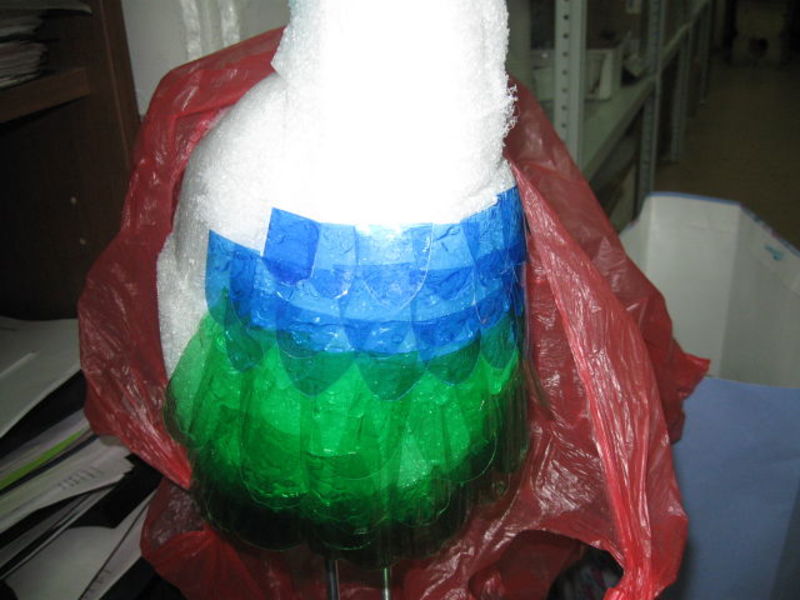
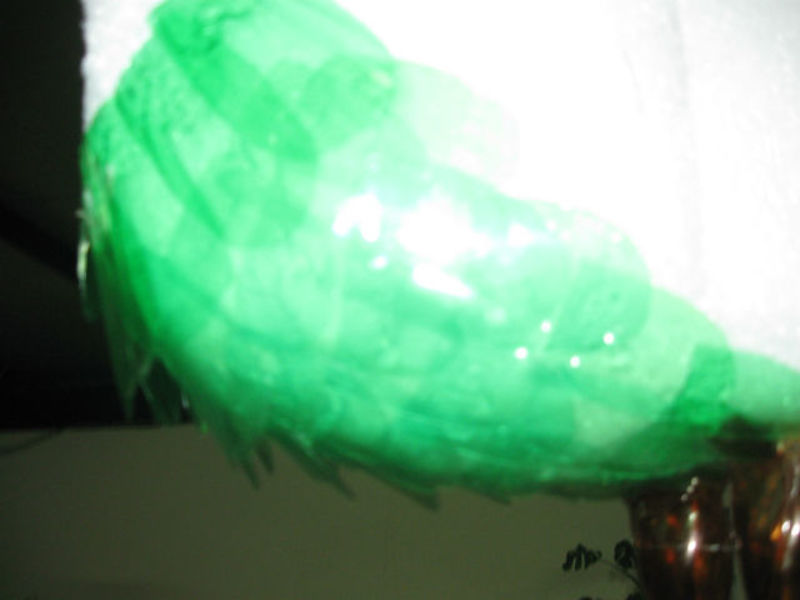
Incrementally glue feathers to the bird.

Feathers secured by an adhesive gun with silicone rods.

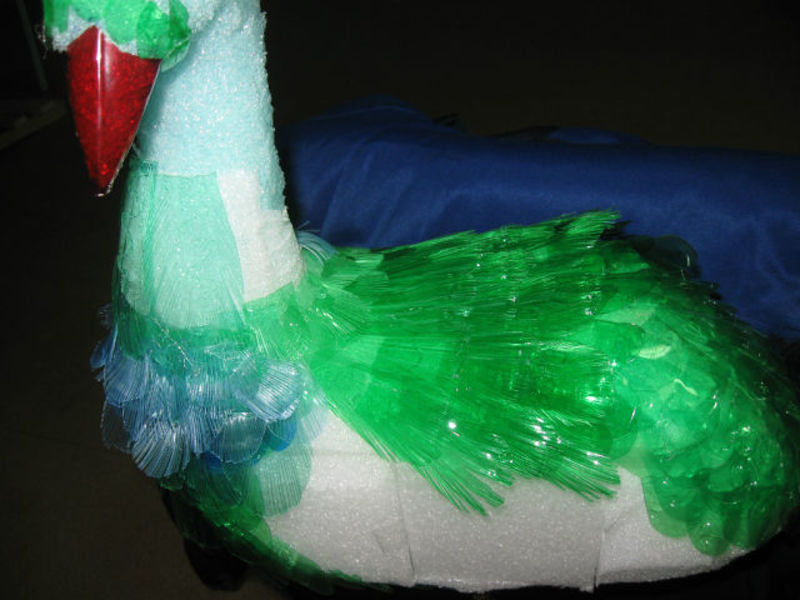
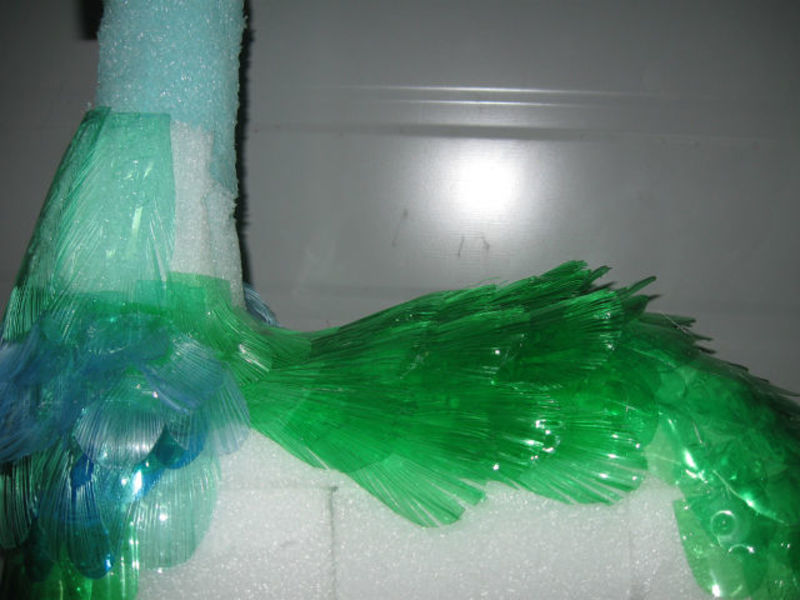
Alternate dimensions and color blanks when attaching feathers.

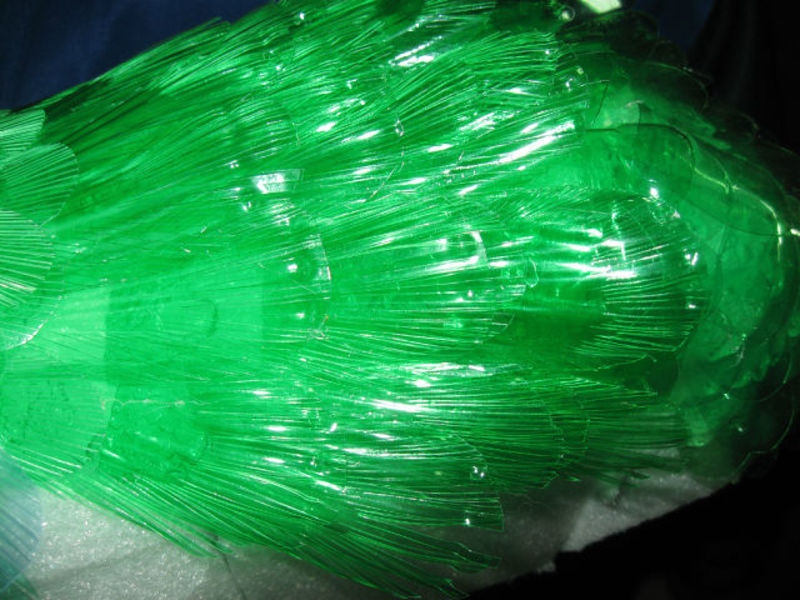
On the back of a miracle bird glue over the length and texture feathers.

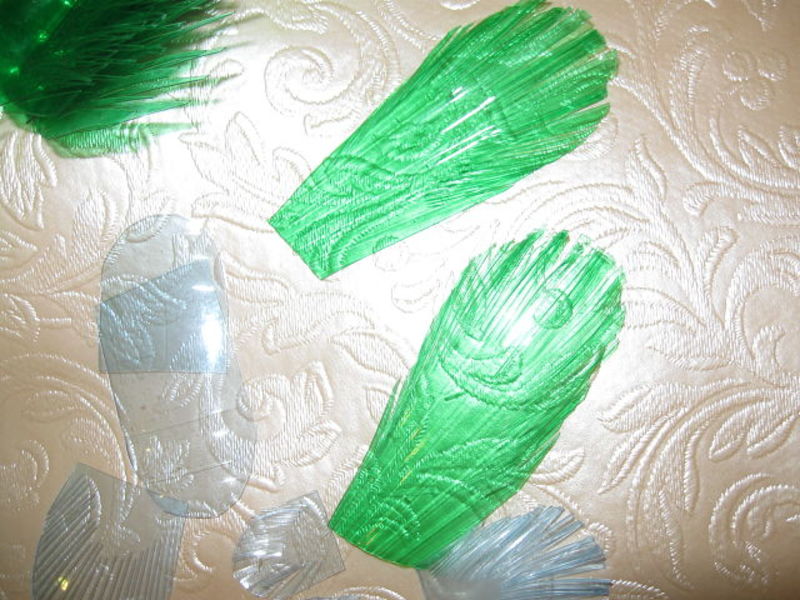
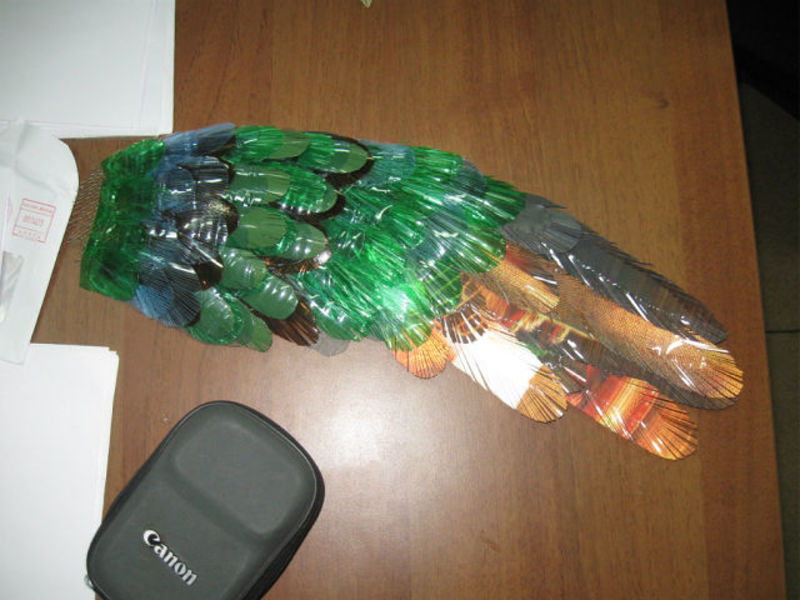
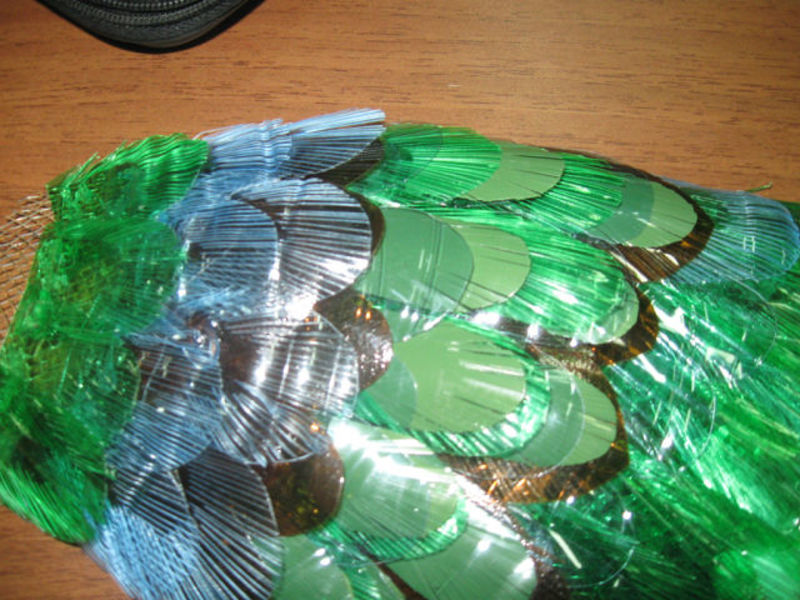
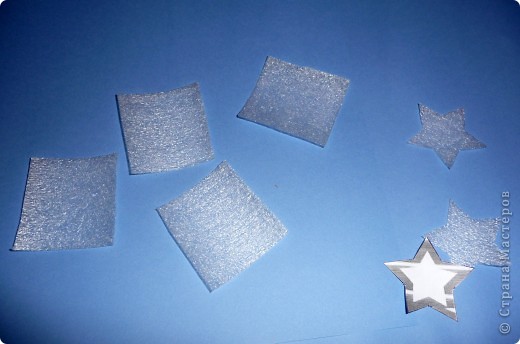
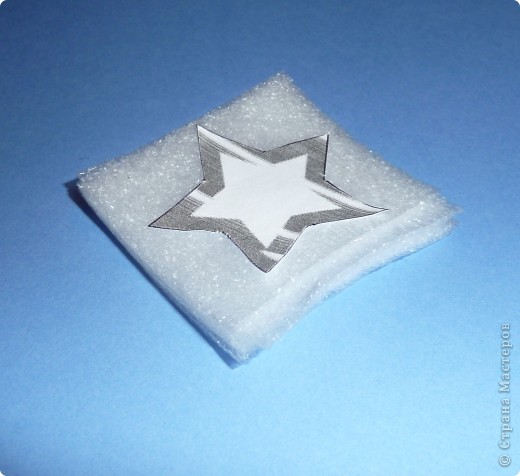
The photo shows two kinds of preparations for feathers.

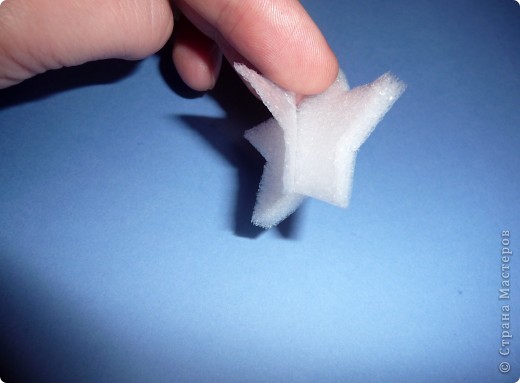
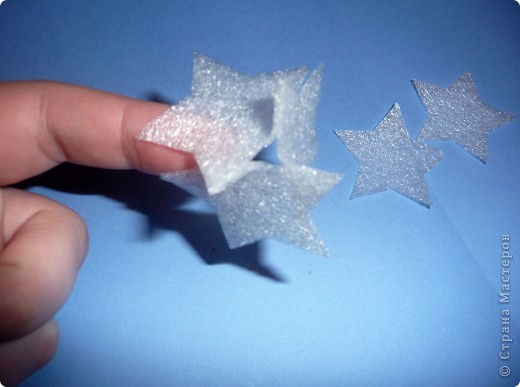
In the course of work.
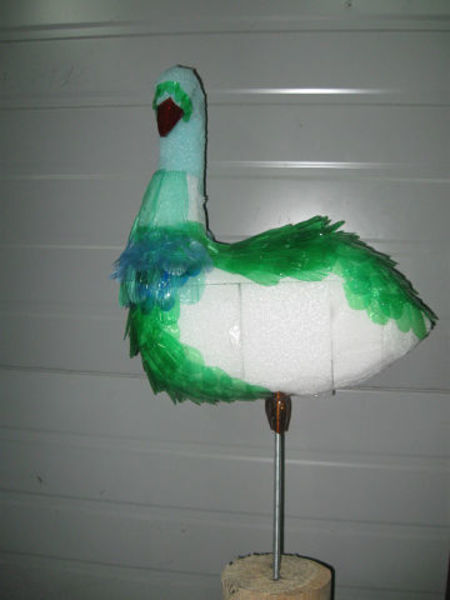
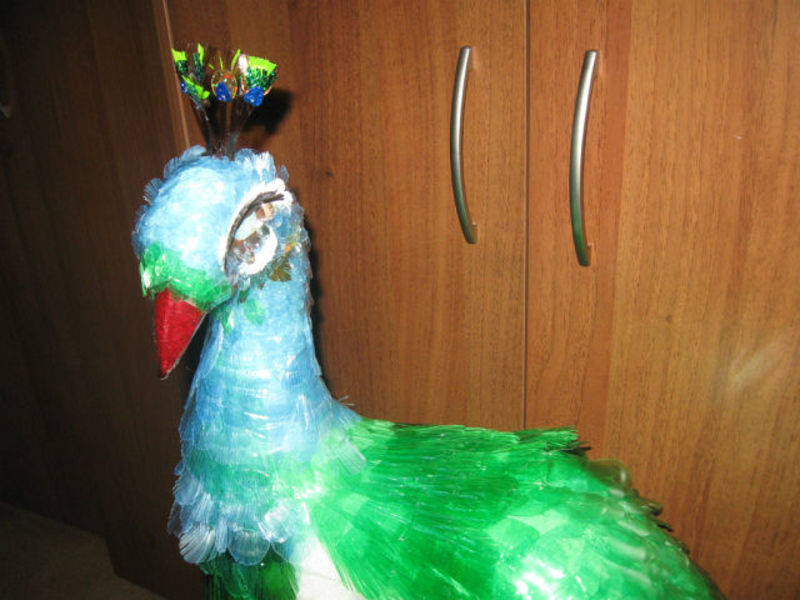
Side view.

Feathers for tuft of plastic cut into thin strips.

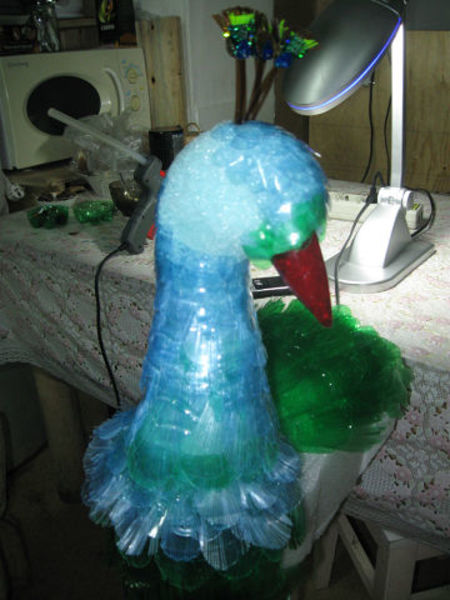
Glue series of pieces on the neck.

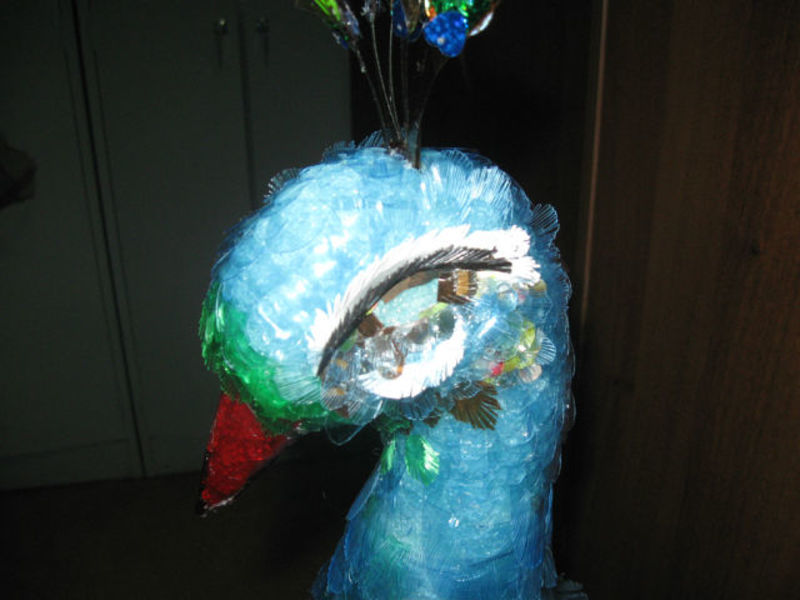
On the head of the oval continue plumage details.

The beauty of the peacock begins to emerge.

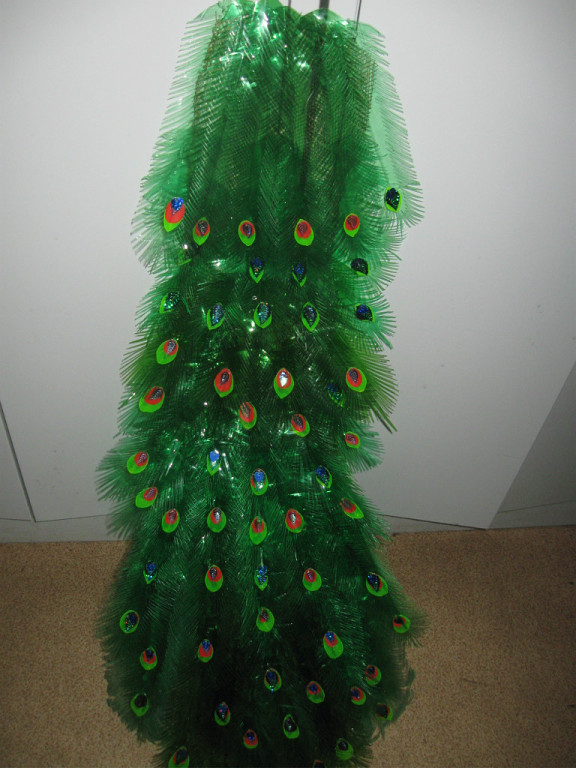
We make beautiful eyes.

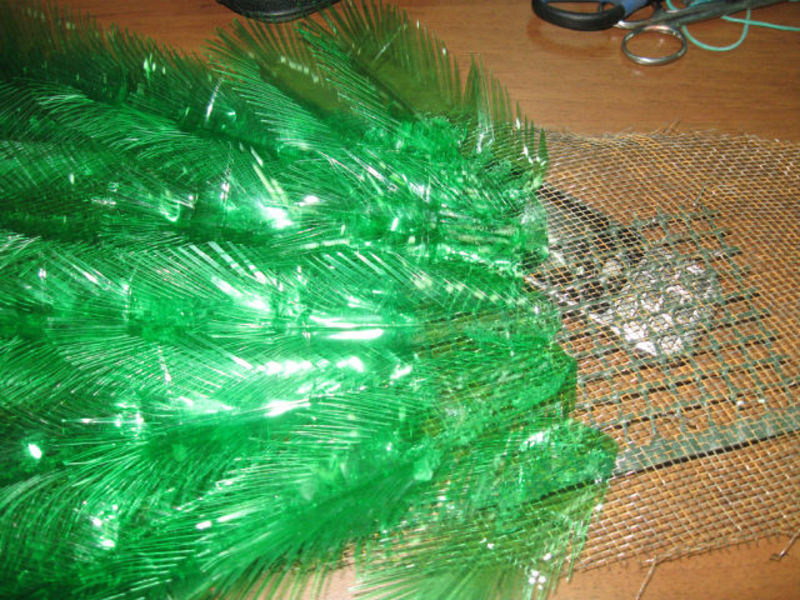
For the manufacture of wings use abrasive mesh. Her fasten the feathers.

Fasten feathers to the grid.

When creating anchoring wing preform in length, ranging from smallest to largest.

Getting to the creation of the tail.

Peacock’s tail, including all colors of the rainbow, was seen as a symbol of wish fulfillment.

We are putting all the parts of poultry. And the bird of paradise and settled in your garden!

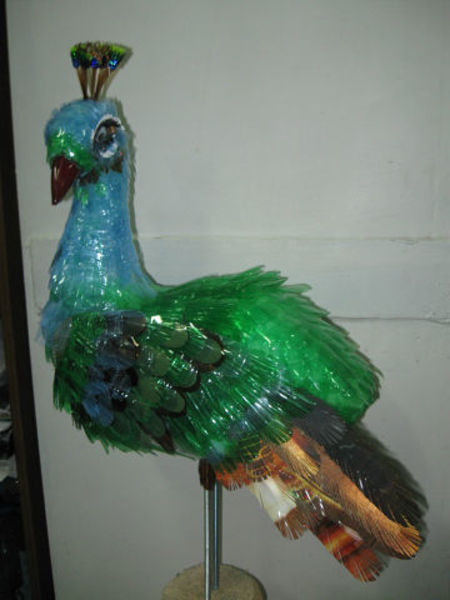
That miracle bird on the face!

Hope you like this tutorial.

We would love to hear your thoughts in the comment section below. And be sure to like us Facebook for more ideas!

Thank you for visiting our website. Keep Creating with Art & Craft!

Recycled Craft: Snowflake foam hands (Tutorial)

Recently, to warm the winter window, and thought of her most favorite Christmas decorations, and most importantly easy as one-two-three.

These are the snowballs (or snowflakes) are obtained from the most ordinary household material.

Template for cutting out stars.

All we will need to operate – a pair of scissors and insulation for windows, which is a thin porous tape with an adhesive layer on one side (width 50 mm, thickness somewhere 1-2 mm). 10 m from the long piece of turns 12-15 snowflakes, if you are using a template full width of the tape (star inscribed in a circle of 50 mm).

Print out or draw a five-pointed star pattern and cut, it will help us to do all 12 elements of the same.

Cut off from the square piece of insulation and adhesive side lightly presses the paper sprocket pattern. Now it is very convenient to cut the desired workpiece (the most common scissors).

Like this. Blank, we need 12 pieces to one snowflake.

To speed up the work I have to cut multiple pieces. To do this, cut into several small squares (4-6, if more it will turn out not accurately).

And glue them to the pile. Adhesive layer to normal the next square and not very strong, and then to paste them back will be difficult. On the sticky side of the last square again glue pattern and cut.

The template I use all the time is the same, if not press down strongly it is easily detached.

Gently layers separated from each other and immediately obtain 6 parts.

Putting it as if it were Kusudama of 12 pentahedral element (1 + 5 + 5 + 1 ). Putting rays sticky side to each other. Nothing extra is not necessary, held for bonding so well.

It is difficult to show the assembly steps in the photos, but something like that.

There is almost all done, it is necessary to attach the last star.

The sticky side of the tape is inside all as a result of the build, so much you can not squeeze, and then slipnetsya.

I’m usually one ray is suspended on a thread and paste the tape to the ceiling, they are very light and well kept there.

Done very quickly, in the evening you can collect 10-12 pieces.

Hope you like these environmental day craft ideas & tutorials.

Which one you like most?We would love to hear your thoughts in the comment section below. And be sure to like us Facebook for more ideas!

Thank you for visiting our website. Keep Creating with Art & Craft!

DIY RECYCLED CRAFT: Bonsai Made Of Plastic Bottle (Tutorial)

Bonsai Made Of Plastic Bottle: Use a sharp utility knife to cut off the base of the bottle about inch above the bottom, and then wash and try the bottle thoroughly.

And so it is necessary to begin with a bottle cut into pieces. I have helped in this case, a hole punch, and nail clippers. In principle, the work-piece can be any shape, but I was thinking round.

Each piece pierces the needle (awl) and gently heat up over the fire. The main thing is not to overdo it and stop in time! Your first piece of plastic will begin to change shape and bend, which is what we need, but if you hold too long, then it starts to boil and firmly adheres to the needle, and if you hold even longer, then burn or turn into droplets and run off.

We get something that’s that. I really liked the unpredictability of the final shape and waviness.

First, I did the piece and after already collected on the wire. But when I decided to try to speed up the work.

Stumbles holes in the blanks immediately gather them to the wire and straight to her brought to the fire.

In this there is little subtlety, start warming need to fingerprints gradually moving to the edge of the wire (if you look at this picture, then moving from left to right), then you will not have the desire at some point to intercept the other end branches (because he HOT).

Everything worked out. Here everyone can decide for themselves how convenient, warm on one Circuits or collect in a twig and heat all at once.

A couple of years ago, throwing empty bottles of mineral water, I thought about the fact that I was losing something precious.

Hope you like this tutorial.

Source: stranamasterov

We would love to hear your thoughts in the comment section below. And be sure to like us Facebook for more ideas!

Thank you for visiting our website. Keep Creating with Art & Craft!

Father’s Day Cards – card with origami-shirt

The idea of ​​shirt seemed to me interesting and not too difficult, especially because I know how to do origami shirt. I learned to do them for a long time, even when a student exchange in the US – then gave me a dollar made in shirt.This folded dollar is I still – I was laid out and with it probably a thousand times.

Here is the compiled Shirt:

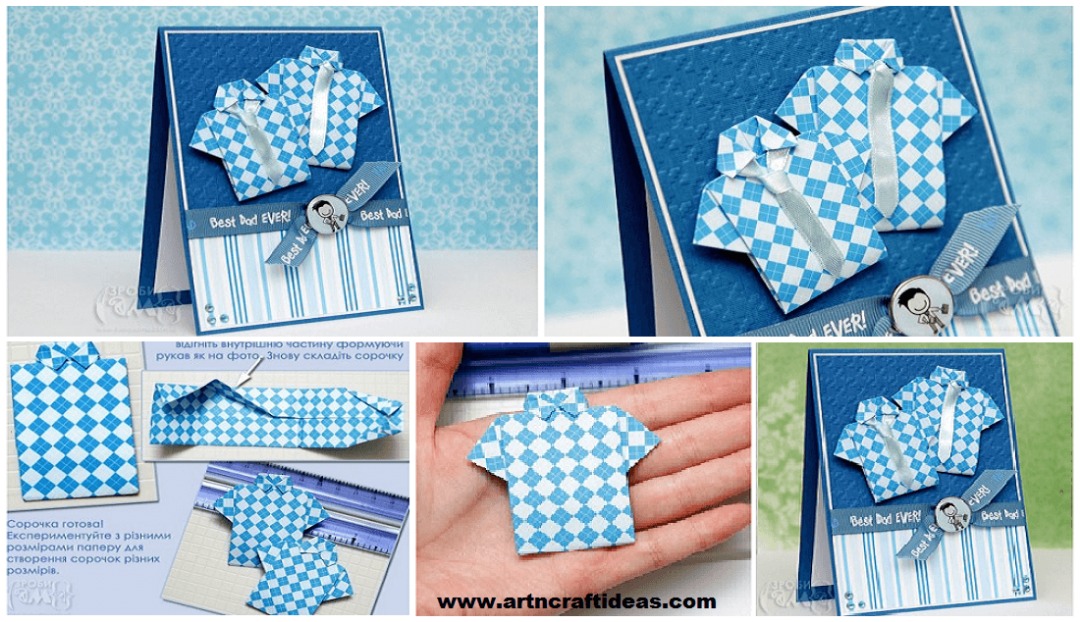
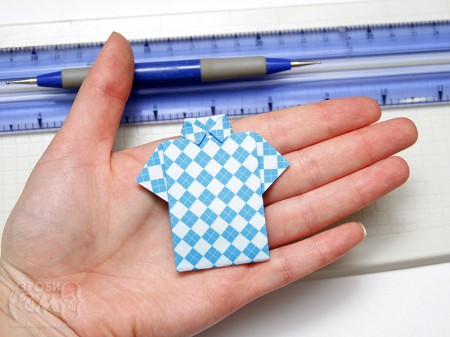
Quite realistic, is not it? On the Internet you will find plenty of instructions to help you add up a shirt in 3 minutes! Here is my version of these instructions, adapted to the size of paper 15 x 15 cm (with a single sheet can be done two shirts). Bend piece from two sides towards the center fold line swipe colonies in the region of 5-7 mm from the upper edge, turn the sheet and bend the top corners at the middle, with the other side of 4 cm to bend the middle, then fold the lower portion (up collar). Lay the foundation shirts and fold the inner edges forming a sleeve, and then fold the shirt. The shirt will serve as the centerpiece of my cards. Actually I made these shirts and two ties complement them with tape.

Required Materials:

  • Letter fine scrap paper 15×15 cm for shirts;
  • Letter blue and white cardboard;
  • Houndstooth folder for stamping ;
  • Bradsy Smirk for Him ;
  • Feed Smirk Best Dad Ever ;
  • Double-sided tape.

Size cards – 10.5 x 14.5 cm (half an A4 sheet). For a card I cut the white lining Size 10.1 x 14.3 cm and a blue square (the size of 9.8 x 9.8 cm), and another strip of scrap paper size of 9.8 x 5 cm. 
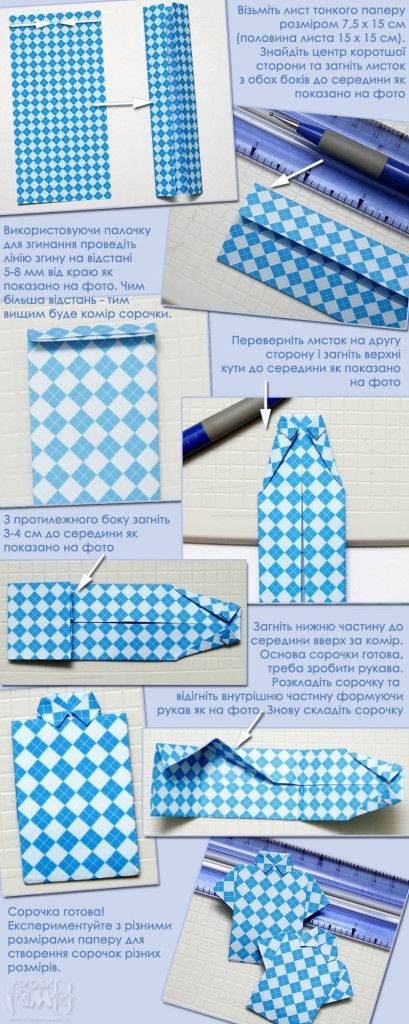
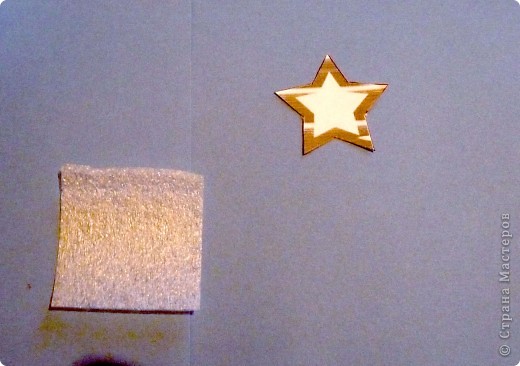
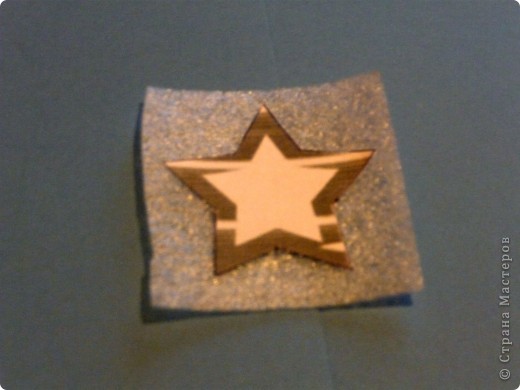
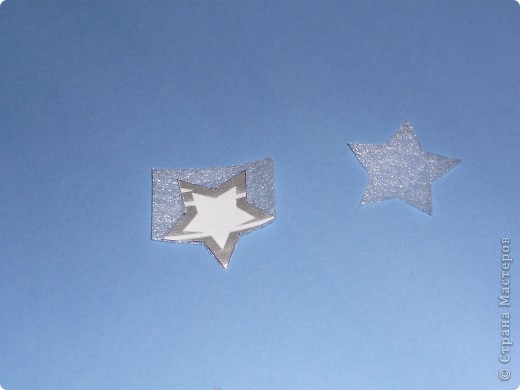
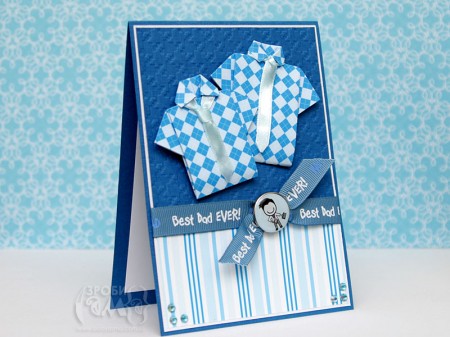
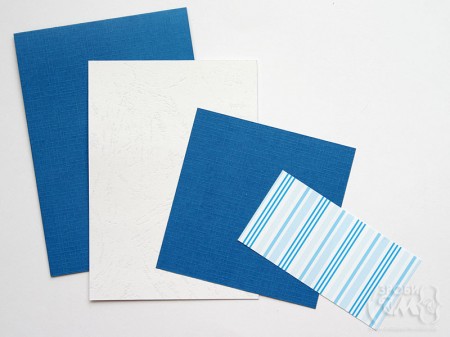
Blue square I squeezed through the machine for embossing that there was a certain texture. But if the machine is not present, then you can do without it. Tied ribbon.
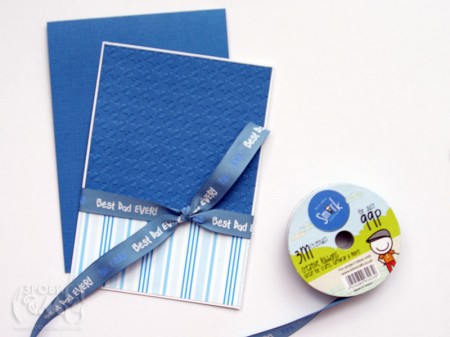
Knot the ribbon I decorated the icon with a funny image. 
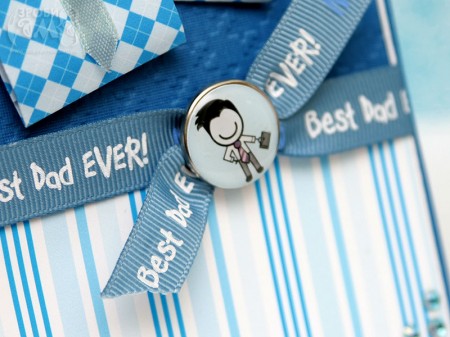
I also graced the back of a postcard and glue the white paper in the middle, so that you can write on it greetings. 
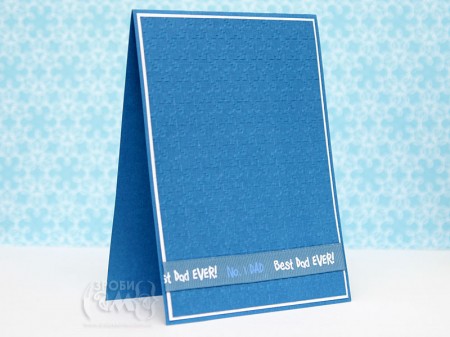
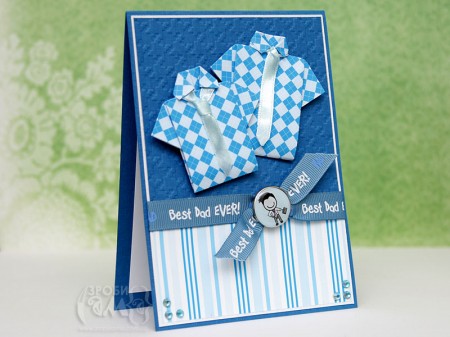
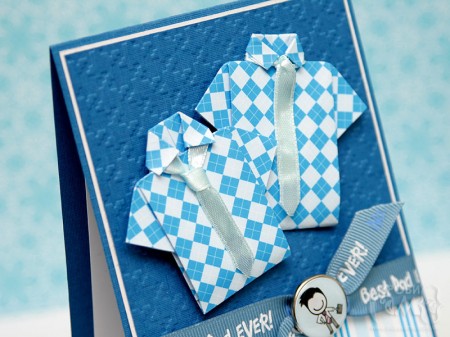
Here is a get the original “Father’s Day card”!

Courtesy: zrobysama

Father’s day gifts: Military Diorama (Tutorial)

For the basis of our awesome fathers day gift we took a set of figurines of soldiers, and the rest is DIY. In the work used all that came to hand. It is the substrate for the laminate, picture frame, foil from a tube of mustard, a failed gypsum fill, and something else.

Under the cut are some photos of the intermediate stages and the result itself.

PS Criticism, advice, questions are welcome.

Actually the very basis for future dioramas. The wall material is the laminate substrate.

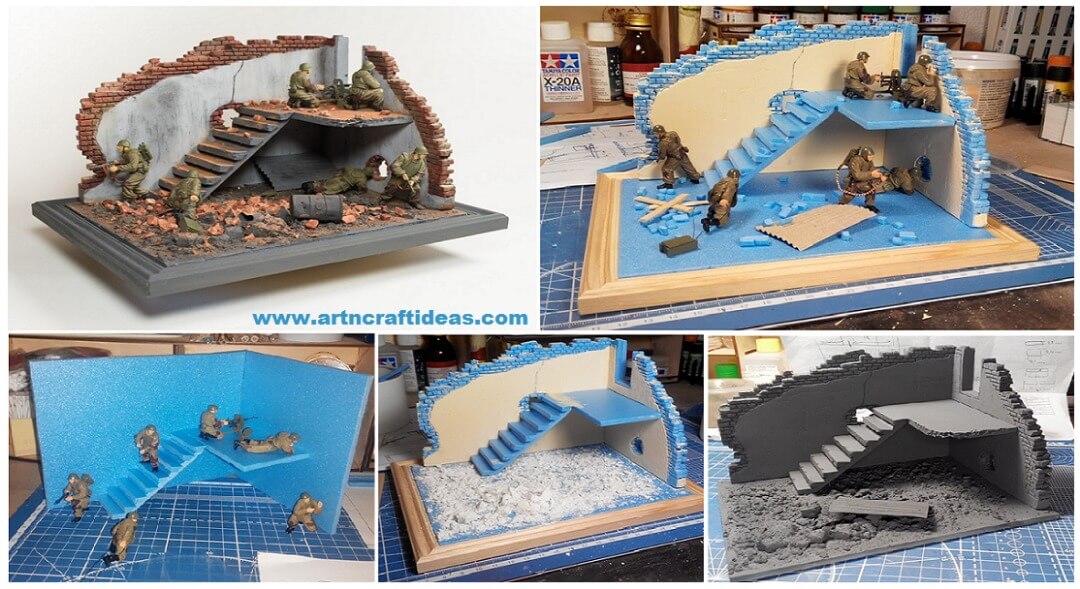
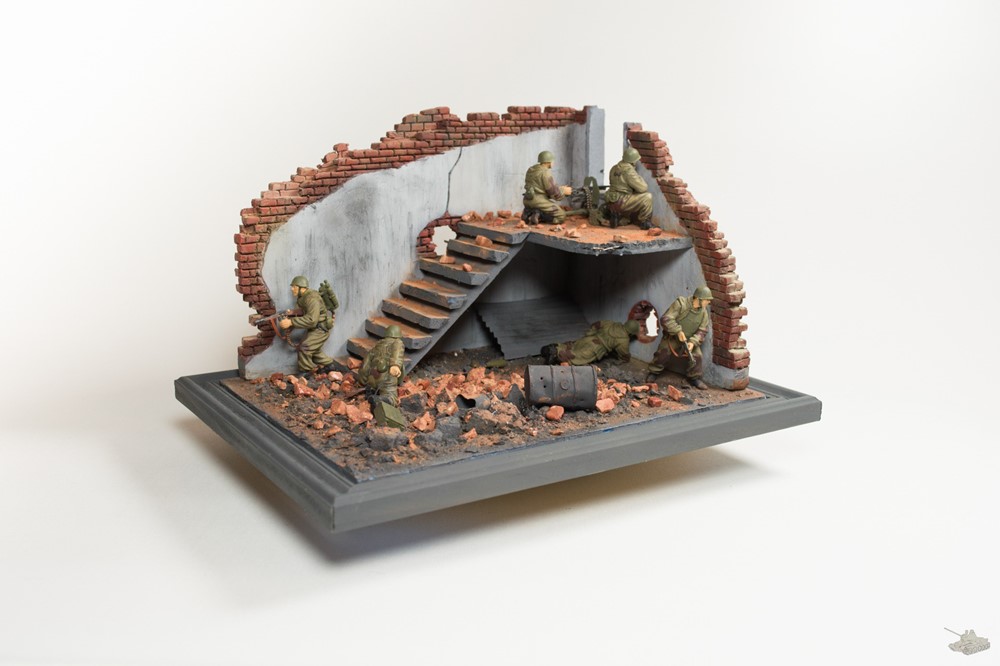
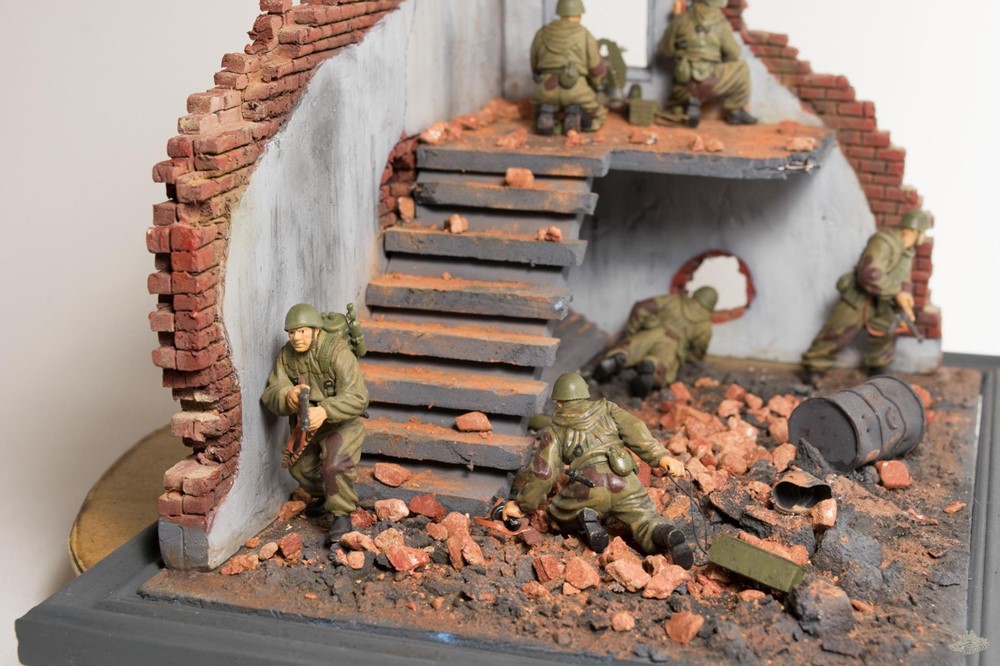
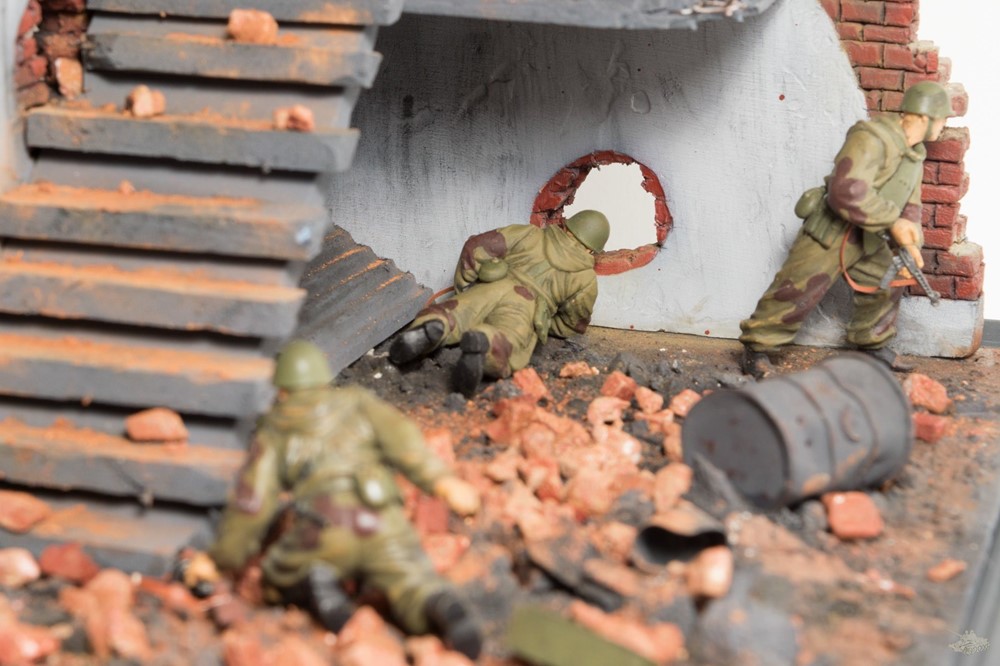
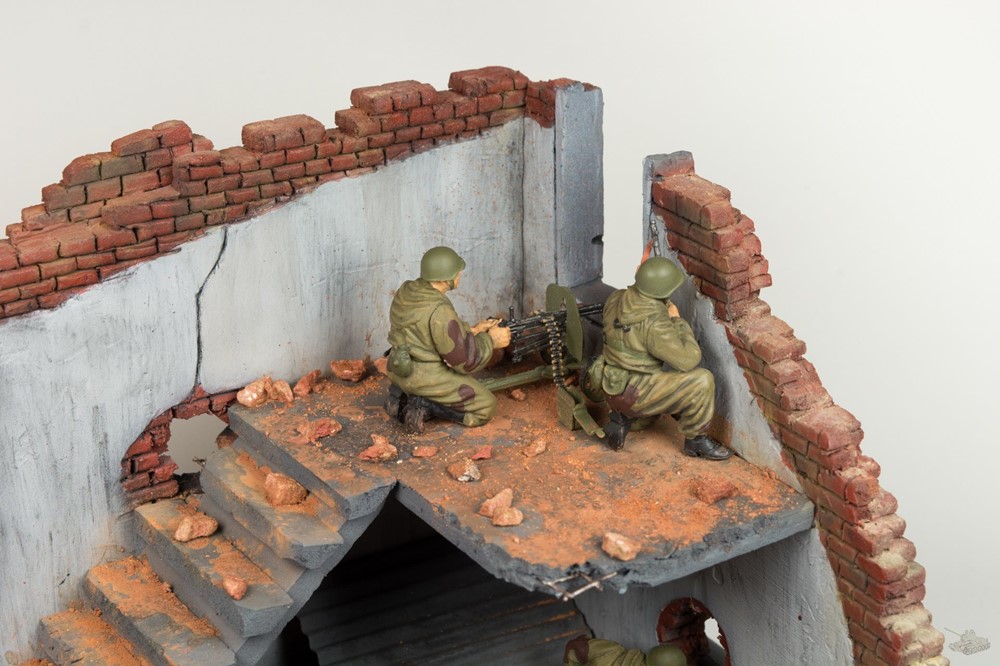
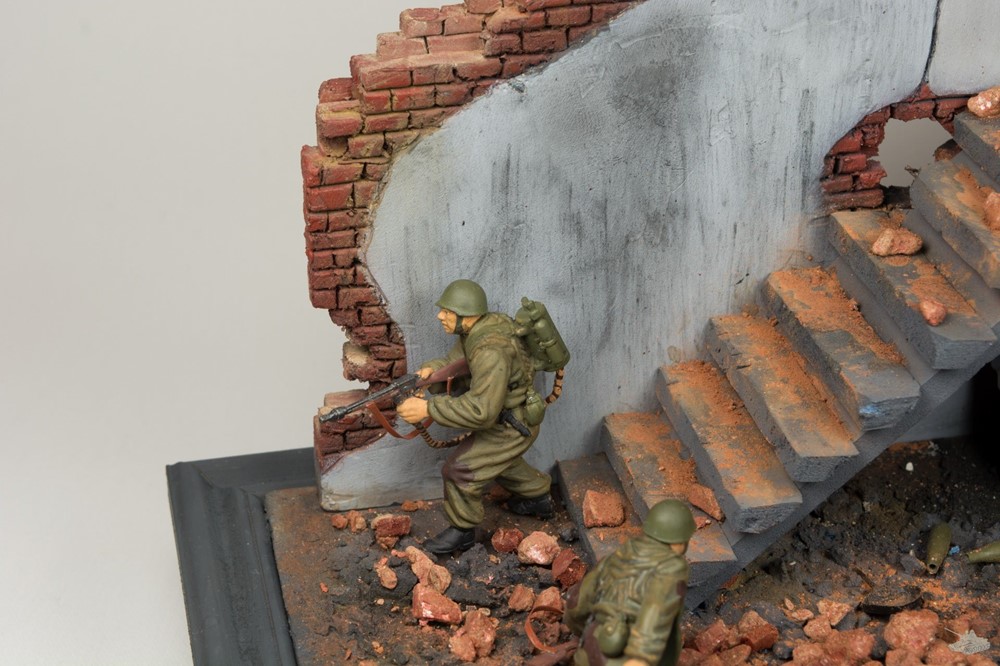
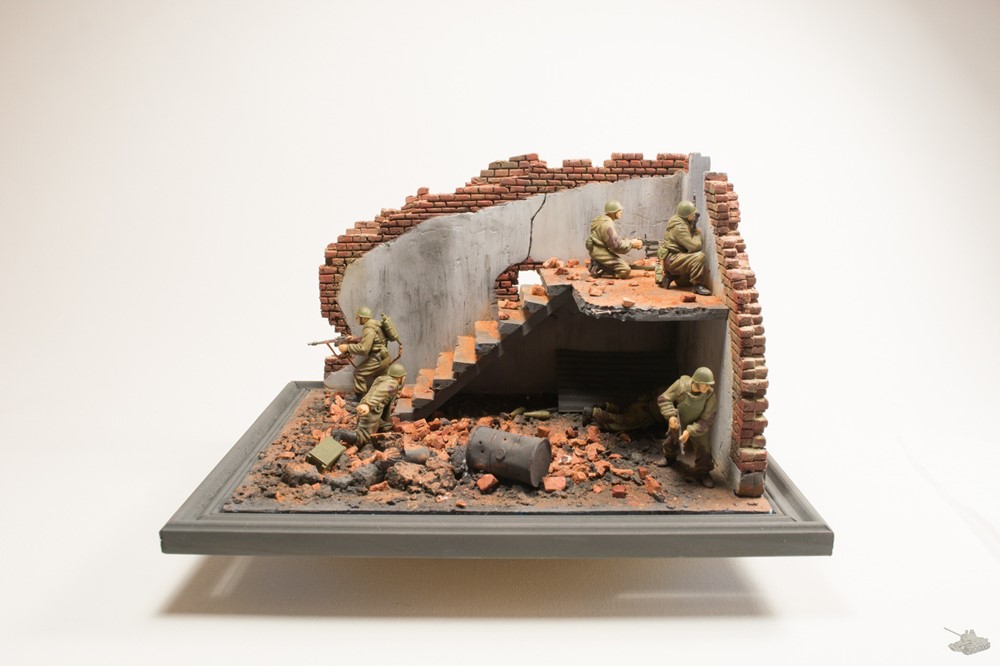
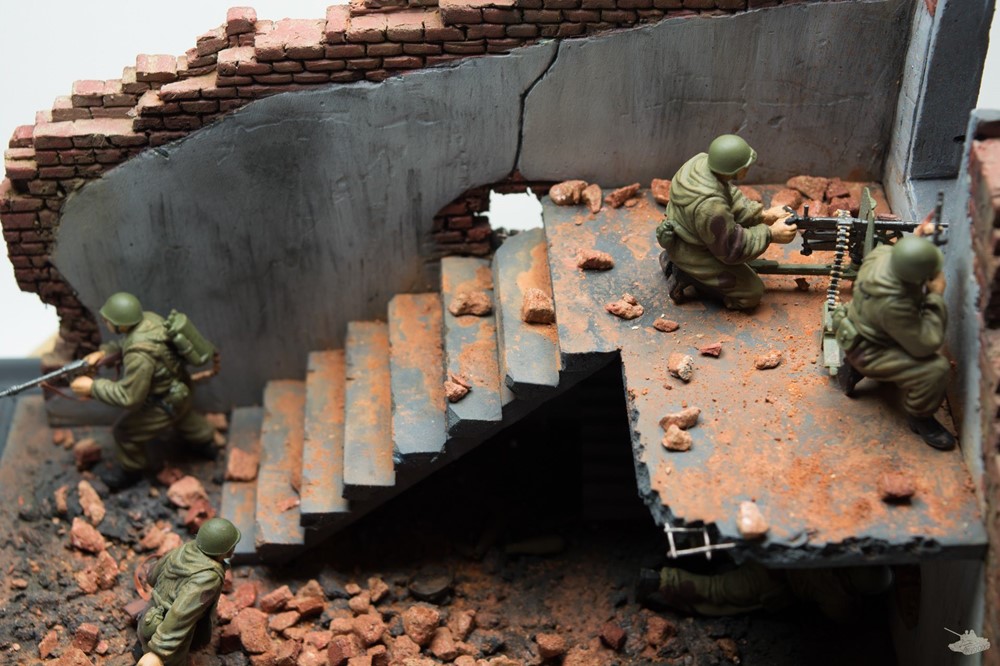
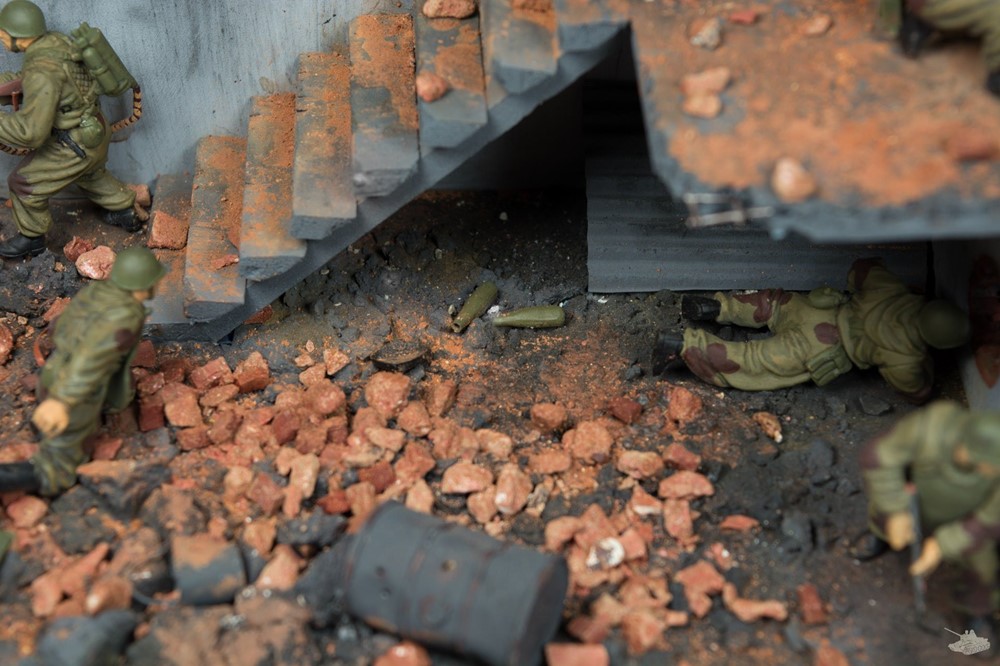
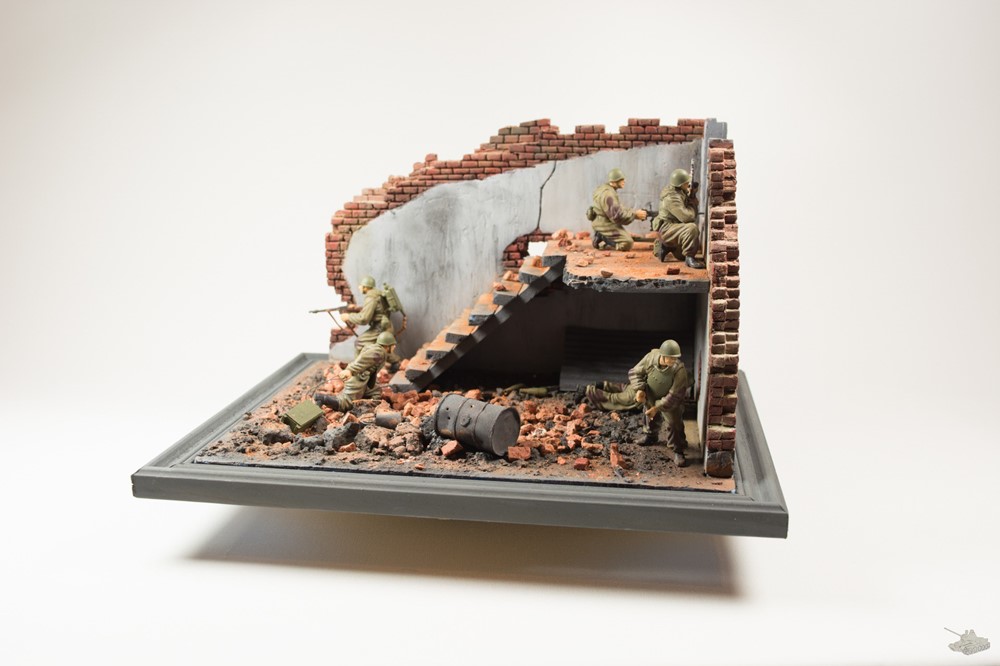
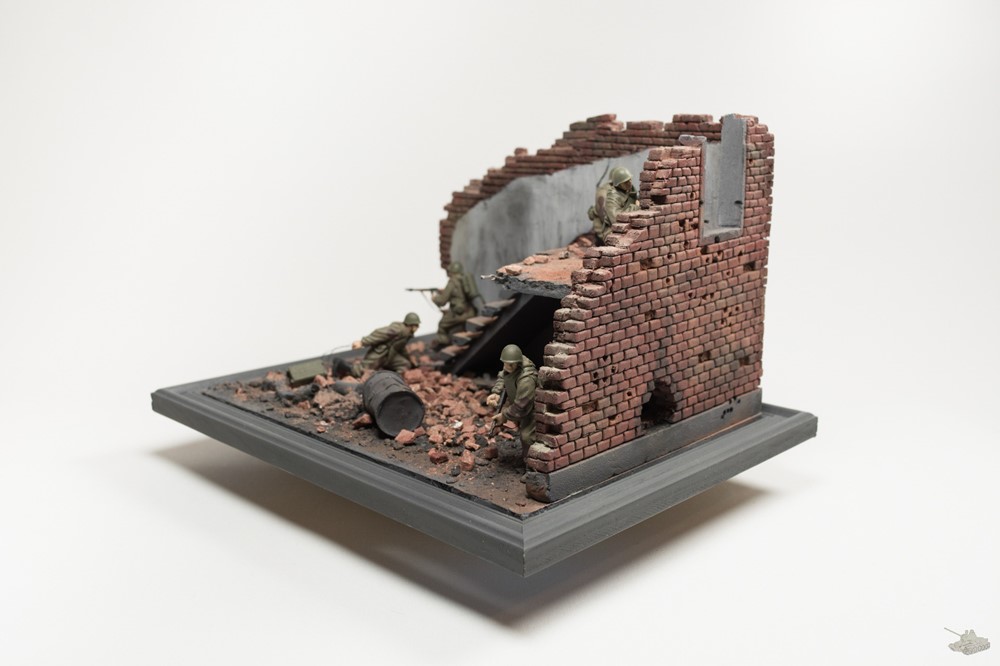
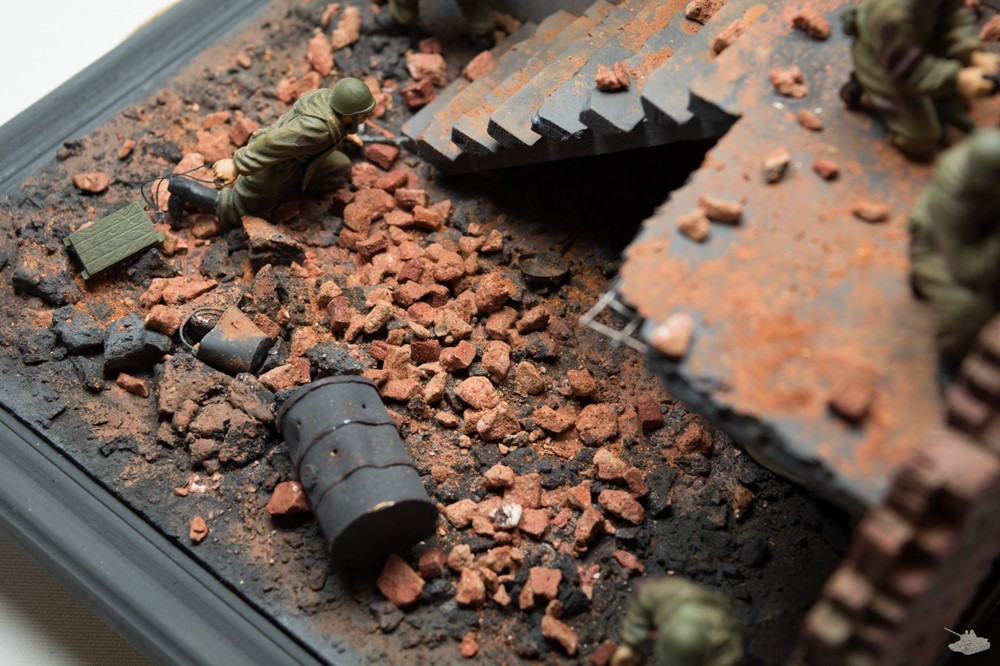
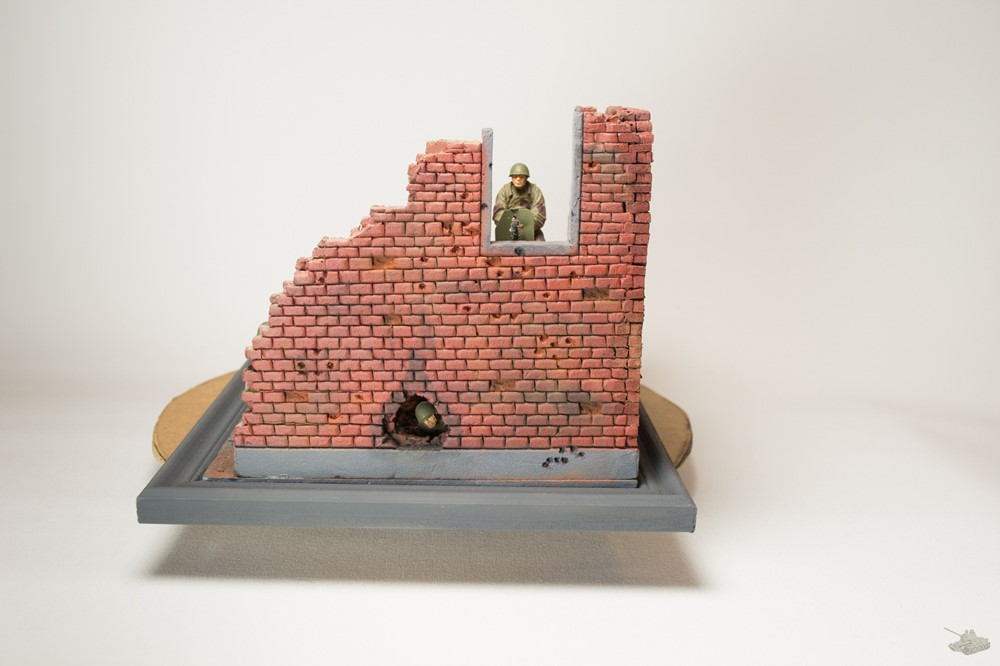
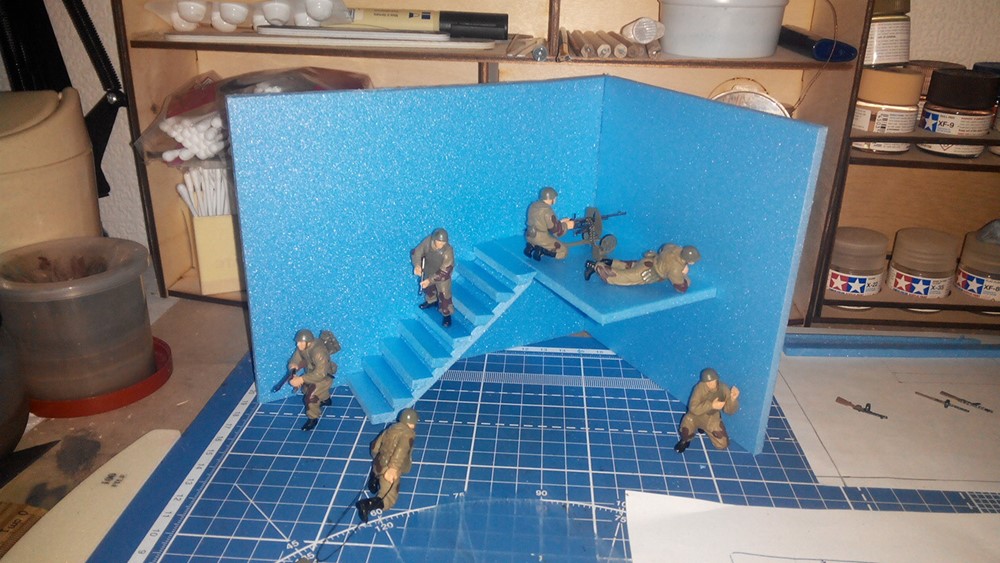
There already are lined walls, the plaster is applied and scattered debris. 
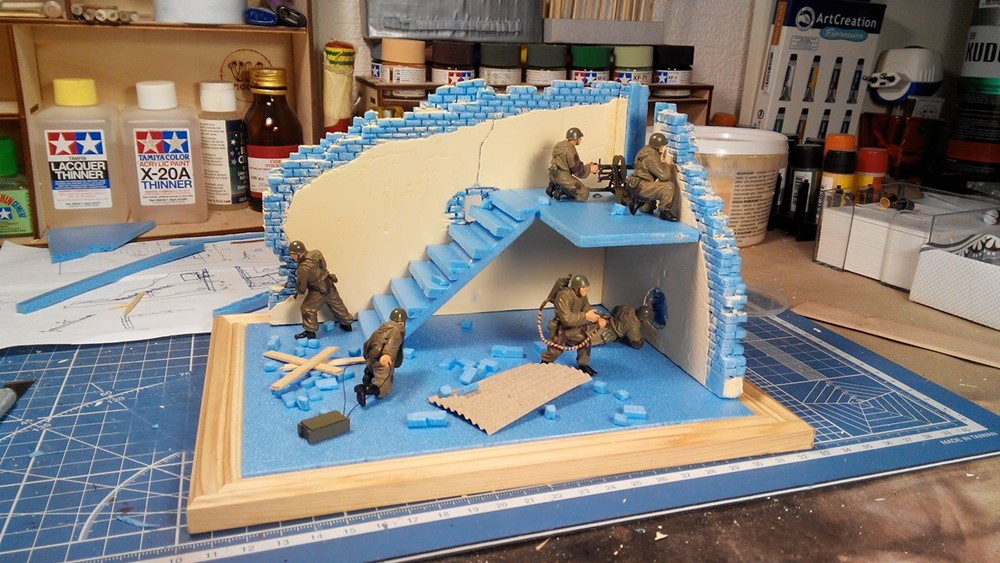
To «land» was not as flat, crumbled plaster. And secure it with the white glue (liquid PVA). 
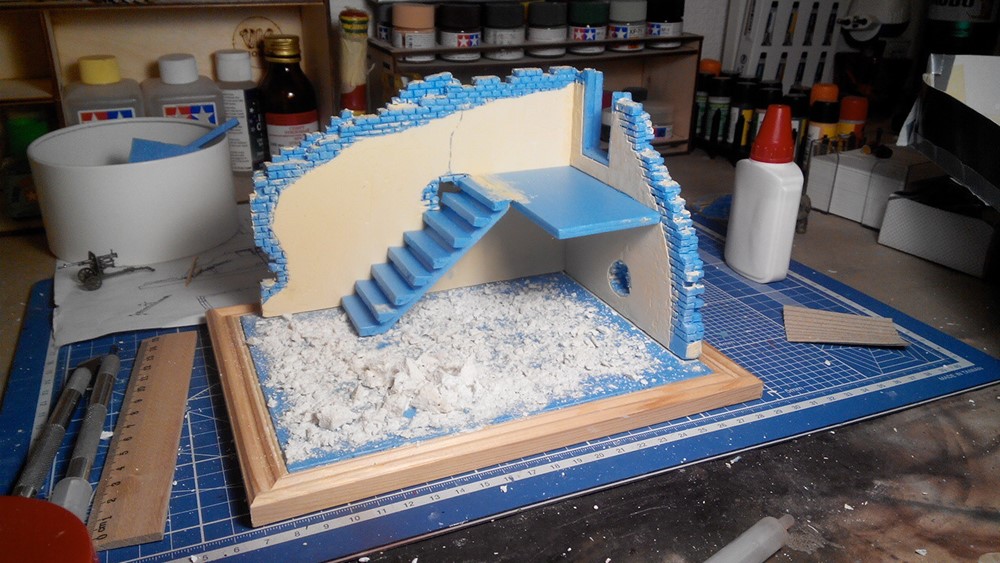
For the base color used Tamiya paints. It also plays the role of a primer. 
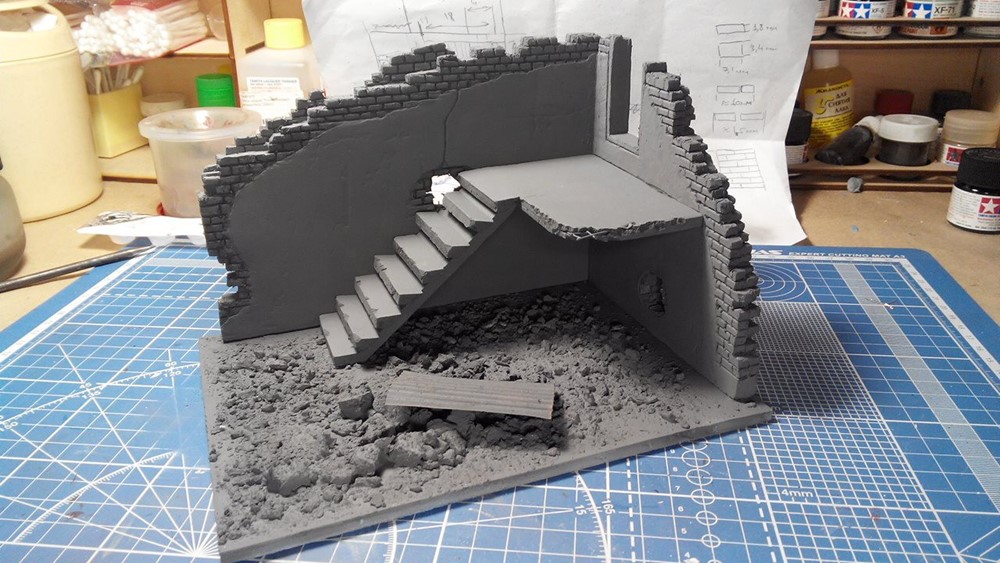
The walls are already painted in their colors, but without the effects. Self-made barrel appears in the frame)))
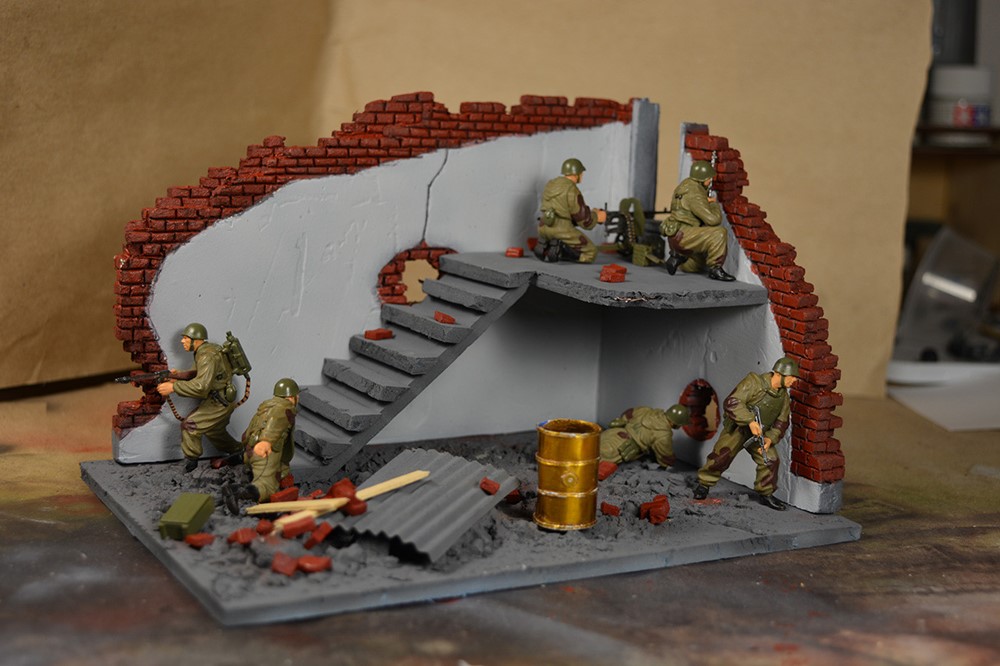
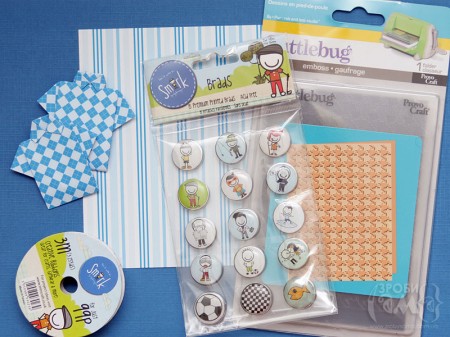
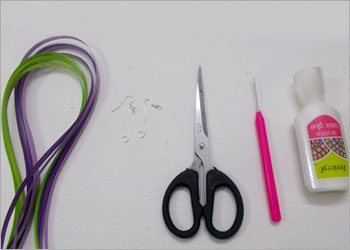
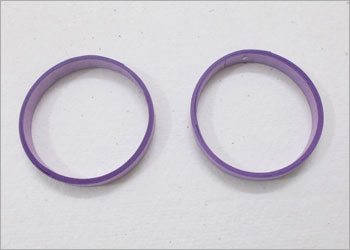
Slightly aged wall, dented and painted barrel, added dust.

Then the final photos of our awesome fathers day gift from different angles.

courtesy: DIY is FUN

RECYCLED Craft for World Environment Day

World Environment Day on the 5th of June, | Preschool Activities, crafts, lesson plans, coloring pages suitable for toddlers, preschoolers and kindergarten. it’s the day organizations and individuals the world over raise awareness on various topics related to our environment. This year, the theme is ‘Seven billion dreams. One planet. Consume with care’. The focus is on making our general consumption intelligent, without harming the planet and leaving behind resources for future generations.

Here are list of creative Environment Day Crafts:

1. Environment Day special Earth Sign Craft (Tutorial)

Supplies:

  • Blue construction paper
  • Glue
  • Dirt
  • Grass
  • Rocks
  • Flowers
  • Twigs

2. Let your little ones get in touch with the earth and search for natural materials to make these quaint little dragon flies.

Required Material:

  • small twig
  • 2 maple tree propeller seeds (dried out)
  • aqua colored paint (or choose a color of paint you would like to use)
  • glitter glue (color of your choice)
  • paintbrush
  • small black beads or stones
  • paper plate
  • tacky glue or glue gun (glue gun requires adult assistance)

3. You can’t celebrate environment day without keeping your surroundings clean!! Let this cute frog trash can help you; you can also use plastic canisters instead of milk jugs.

What you will need:

  • Empty Oatmeal Canister
  • Craft Foam
  • Matching Acrylic Paint
  • Construction Paper
  • Pom Poms
  • Wiggle Eyes
  • Glue, Sharpie Marker, Printer Paper, Yarn and Scissors

4. This gorgeous papier-mache globe requires just a balloon and lots of newspaper! A perfect way to remind us of the planet whose resources we’re using!

This activity is appropriate for: 1st – 4th grade / 6 – 10 years

You will need:

  • A round balloon
  • Recycled newspaper
  • Bowl of water-flour mixture (one part flour for two parts water) or use starch
  • Continent Outlines Template
  • Superbright Liquid Tempera Paint – 1 Gallon
  • All-Purpose Paintbrush Assortment – Set of 30
  • Washable Fine-Tip Markers – Class Pack

5. The best kind of music is the natural kind! Caress the wind with this one-of-its-kind recycled key wind chime.

You’ll need:

  • at least 5 old keys
  • a piece of drift wood or stick
  • string or fishing line
  • optional: acrylic paint

6. You won’t believe that this gorgeous flower arrangement is made out of nothing but egg cartons and paint! Recycling was never so pretty!

Raid your recyclables to create these six fun kids crafts made of paper towel rolls, egg cartons, recycled cereal boxes, and empty plastic bottles.

7. Spring Flower Pot Pudding Pie Dessert Embrace the flower power of  World Environment Day

Ingredients:

  • 6 Ripe Has Avocados
  • 3/4 cup of cocoa powder
  • 6 tablespoons of honey
  • 2 teaspoons of pure vanilla extract
  • 2 tablespoon of coconut milk
  • 2 cups of chocolate graham crackers

8. On World Environment Day, Mr. Potato Head dresses up as Mr. Recycle Head, and he looks great!! Repurpose an old can and other craft supplies to make this little guy!

Spread the fun out a little bit.

9. DIY Tissue Tree Craft for Environment Day

In honor of Environment Day, we are “branching out” and making a tissue paper tree. We came across Projects for Preschoolers post and just loved the idea.

Supplies you need:

  • Tissue paper
  • Cardboard tube
  • Glue
  • Single piece of paper as background

10. Who knew that you can turn rocks, yes plain rocks, into something as cute as these painted rock lady bugs! Just be sure to get smooth rocks to be safe.

You’ll need:

  • smooth round rocks
  • red paint
  • black paint or a permanent black marker
  • jiggly eyes
  • tacky glue

11. If you’ve got lots of little toys floating around but your kids don’t want to throw them away, here’s an idea – save them from the landfills and make a toy wreath!

Supplies:

  • 18” wire wreath
  • truckload of small toys
  • hot glue gun
  • 5 or so glue sticks
  • heavy duty wire
  • strips of fabric

12. How they are going to change the world for the better.

You’ll Need:
  • 2 sheets of paper per child
  • blue and green paint
  • red glitter glue
  • a pencil
  • marker
  • scissors

13. Inspire your children to plant a tree in honor of Earth Day with this free printable kit!

You could use Non Toxic, V.O.C. Free Acrylic Paints For Kids from Nature of Art for Kids!

You’ll need:

  • White T-shirt
  • Acrylic paint

14. If you’re replaced your plain bulbs with CFL ones, don’t throw them away yet! Use them to make these super cute recycled hot air balloons! Be careful though, and be with your child throughout.

15. How to Help Save the Environment

How to Help Save the Environment. Taking steps to conserve and reuse is easier than you might think. You can do your part just by changing your daily habits. To help save the environment, try decreasing energy and water consumption.

Hope you like these environmental day craft ideas & tutorials.

Which one you like most?We would love to hear your thoughts in the comment section below. And be sure to like us Facebook for more ideas!

Thank you for visiting our website. Keep Creating with Art & Craft!

DIY Hexagon Lap Weave Coaster (Tutorial)

Weave Coaster: On the frame pull the strings. Wrong side where cloves. First pull the thread that should be on the front side, then the other color. It is not necessary to pull very hard, because in the process of binding knots canvas will be stretched. The intersection point of the threads is usually associated nodules.

At each point becomes 3 nodule crosswise. For nodules must take strong sewing thread. Threads can take any, except for the stretch.

If you can not find such a hexagon, you can also use a square and a few nails, transformed into a hexagonal as below.

Hope you like this tutorial.


We would love to hear your thoughts in the comment section below. And be sure to like us Facebook for more ideas!

Thank you for visiting our website. Keep Creating with Art & Craft!

how to make Quilling Earrings

Learn how to make quilling earrings in just a few steps with the help of step by step tutorial.

Material Required to make the Quilled Hoop Earrings:
  • Quilling strips (5 mm) in green and purple colors
  • Quilling needle
  • Earring hooks
  • Jump rings
  • Scissors
  • Glue

Step 1: Paste and join two purple quilling strips.

Step 2: Take a cylindrical Object and roll to wrap this quilling strip 2-3 times around it and paste the end to make a purple colored ring.

Step 3: Make two purple colored rings like this.

Step 4: Take a green quilling strip and cut and divide it in two equal parts.

Step 5: Make tear drop shaped coils with them. Shape them properly using your fingers.
Step 6: Make multiple tear drop shaped coils.

Step 7: Place the purple rings flat on the table and apply some glue in the inner side of the purple ring.

Step 8: Paste the tear drop shaped coils in a designer form, making a pattern of your choice.

Step 9: Take 1/4th of a purple quilling strip and make a loose coil with it.

Step 10: Insert a jump ring in the loose coil.

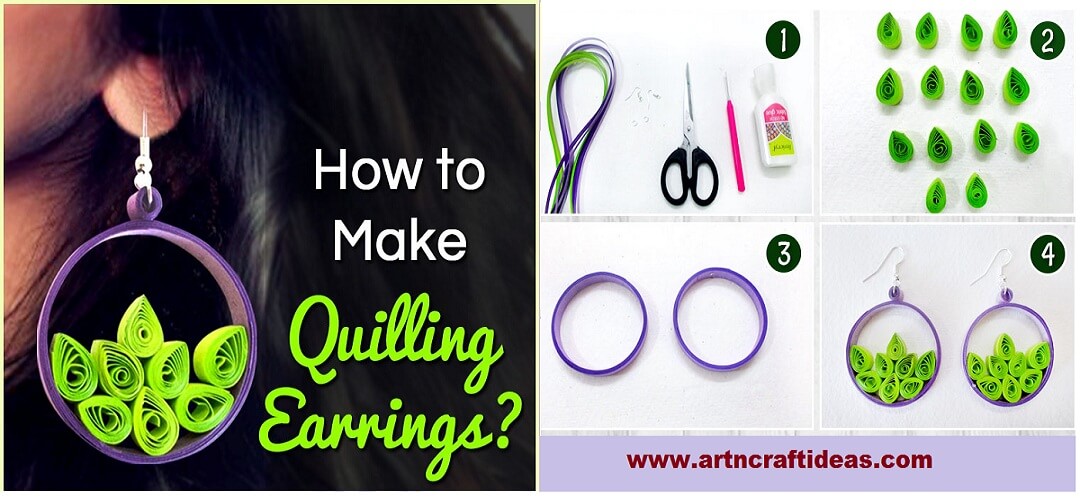
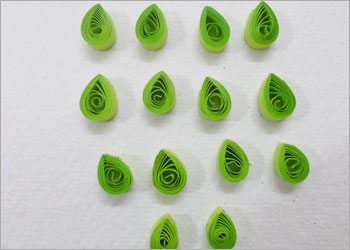
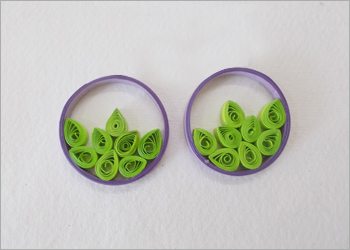
Step 11: Pass an earring hook in it. Similarly, make another earring and complete the pair.

How to decorate saree from fabric pompom

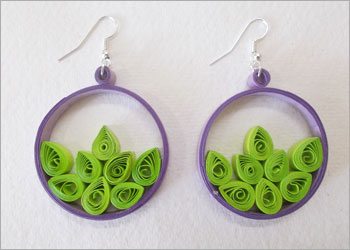
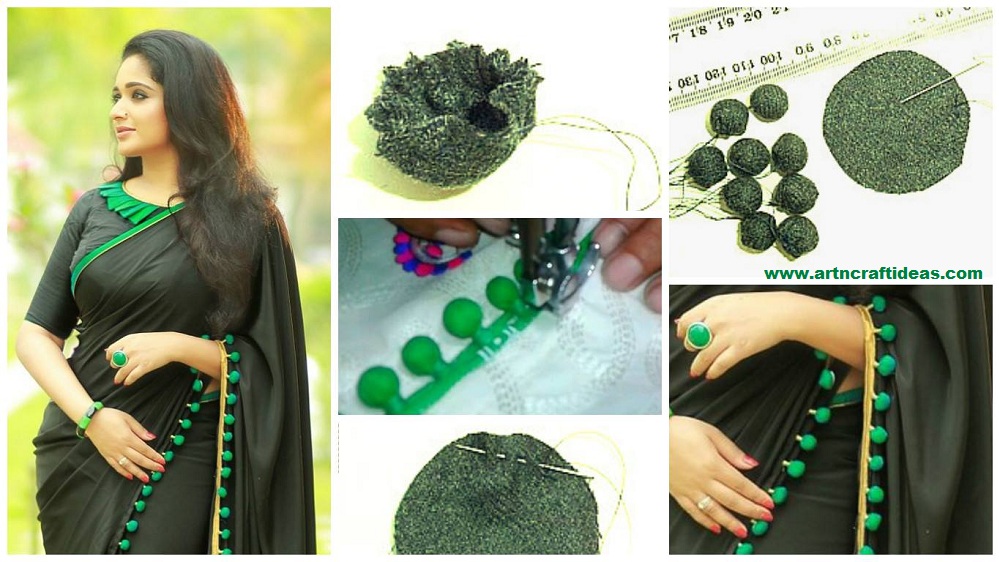
What you’ll need : :

  • Scrap fabric pieces measuring at least 2″x 2″ each
  • Purchased Pompoms
  • Pearl Cotton or DMC embroidery floss
  • Sharp scissors and an embroidery needle
  • Note * Click on any of my images for a larger picture

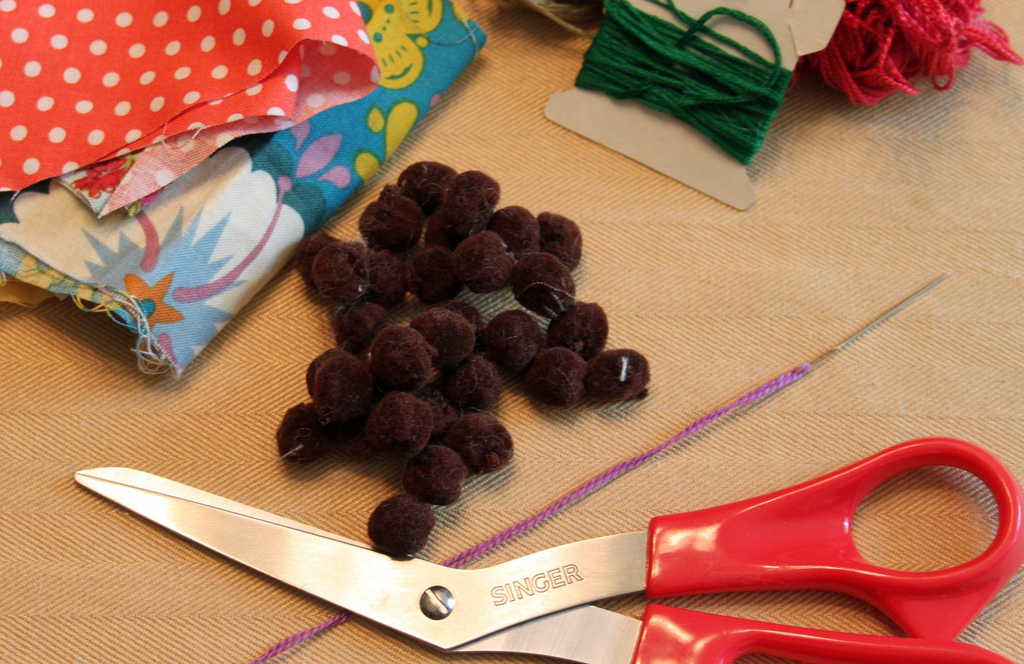
Making the Fabric Pompoms : :

1. Place the pompom in the center of the fabric scrap 
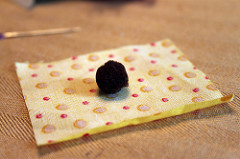
2. Fold the edges of the fabric up around the pompom 
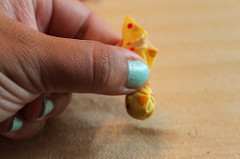
3. Wrap the floss around the fabric right above the pompom 
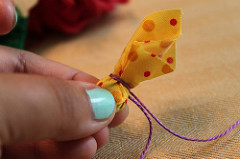
4. Knot thread ends together well, trim, and trim the fabric ends even 
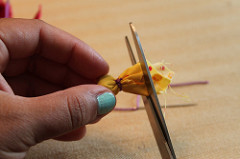
Continue making your Fabric Pompoms until you have the amount you need. 
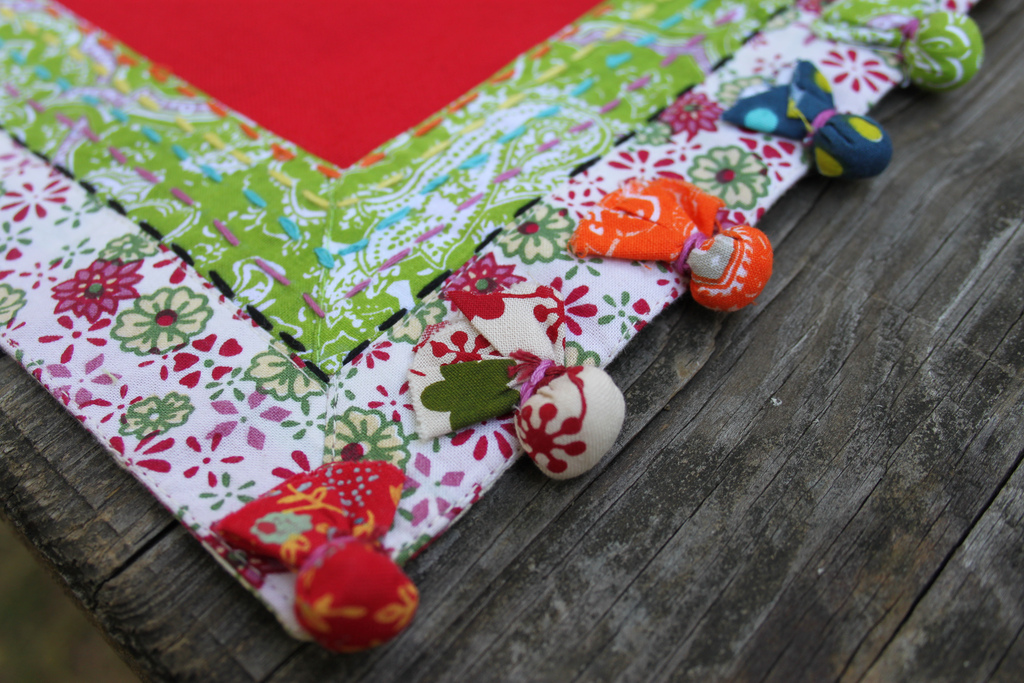
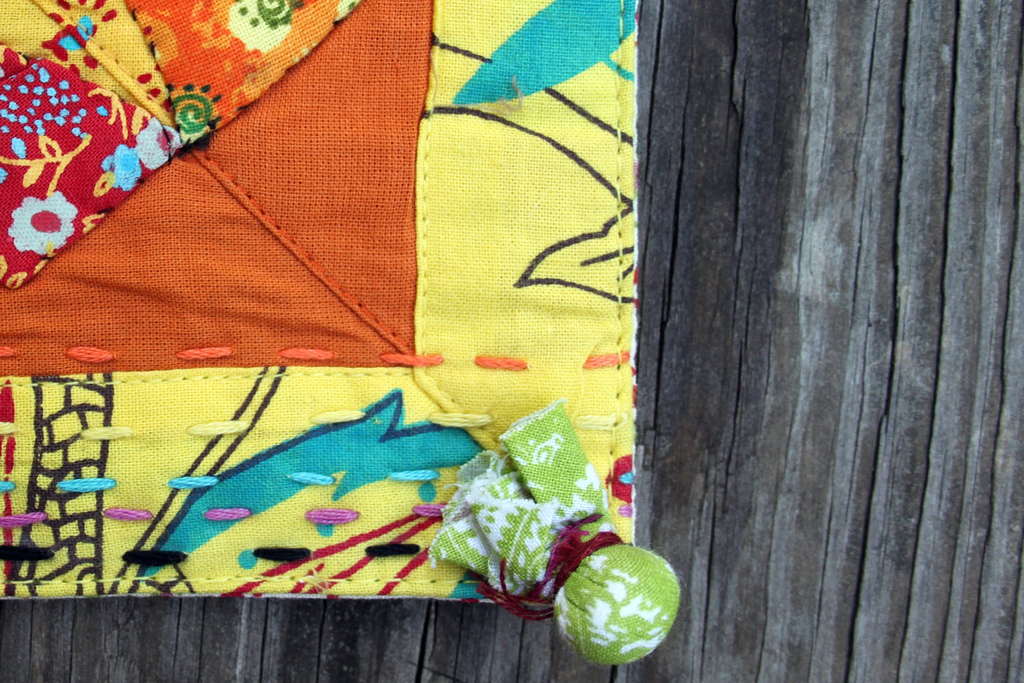
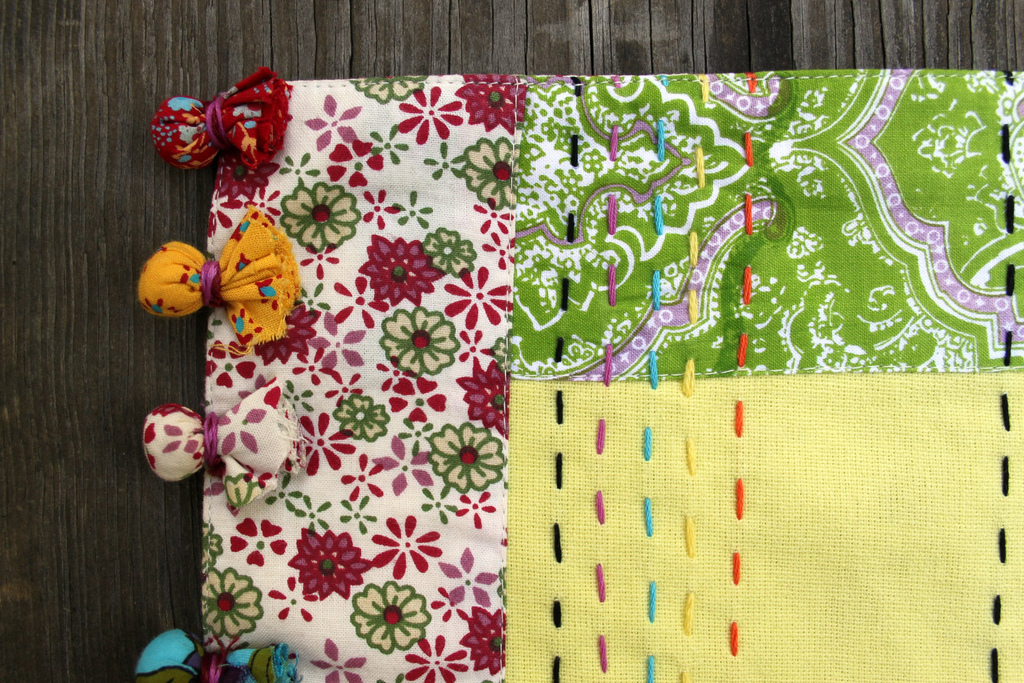
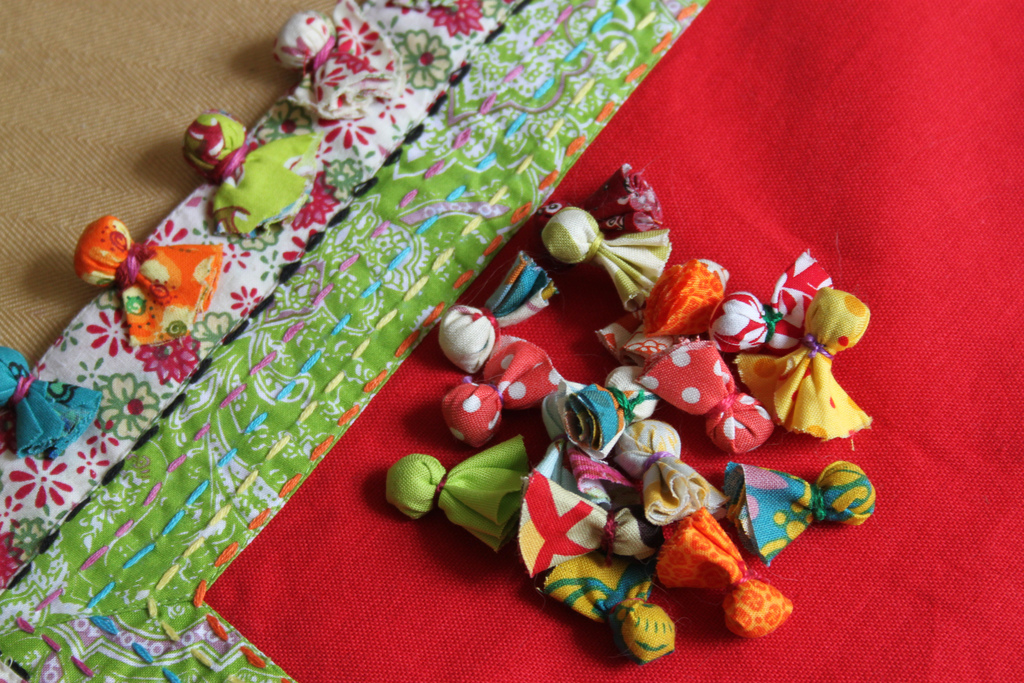
Fabric Pompoms Details : :

I’m adding mine to my Fabric Lover’s Apron, any item will use these same instructions.

1. Layout your design 
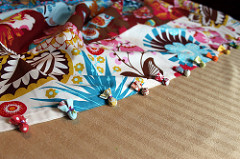
2. Place the Fabric Pompom onto the item 
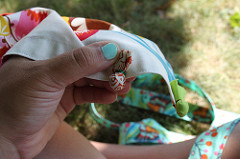
3. Using a needle threaded with floss and knotted at one end, insert the needle at one side of the pompom pulling up through the back of the fabric item 
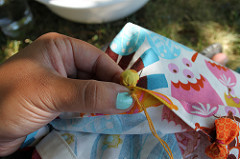
4. Pull thread all the way through until it catches the knot 5. Insert the needle on the other side of the pompom, pulling back though the fabric so the floss is holding the pompom tightly in place 
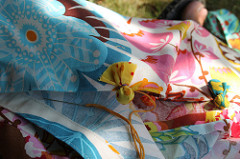
6. Knot well, close to the fabric, and trim away excess floss 
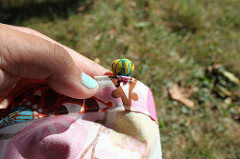
Continue until all of your Fabric Pompoms are attached. 
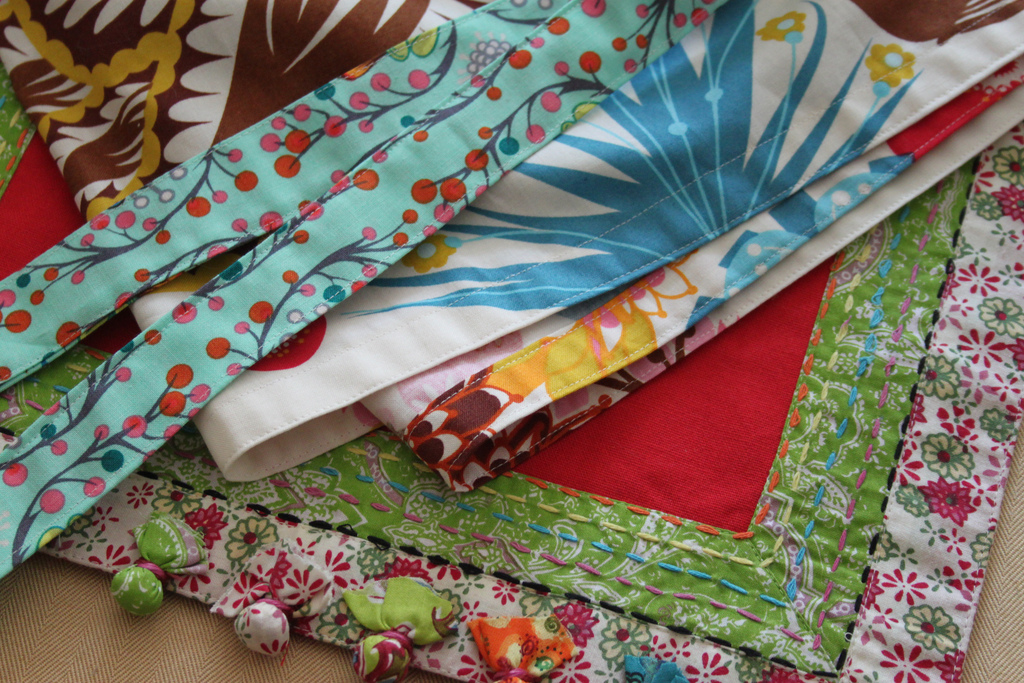
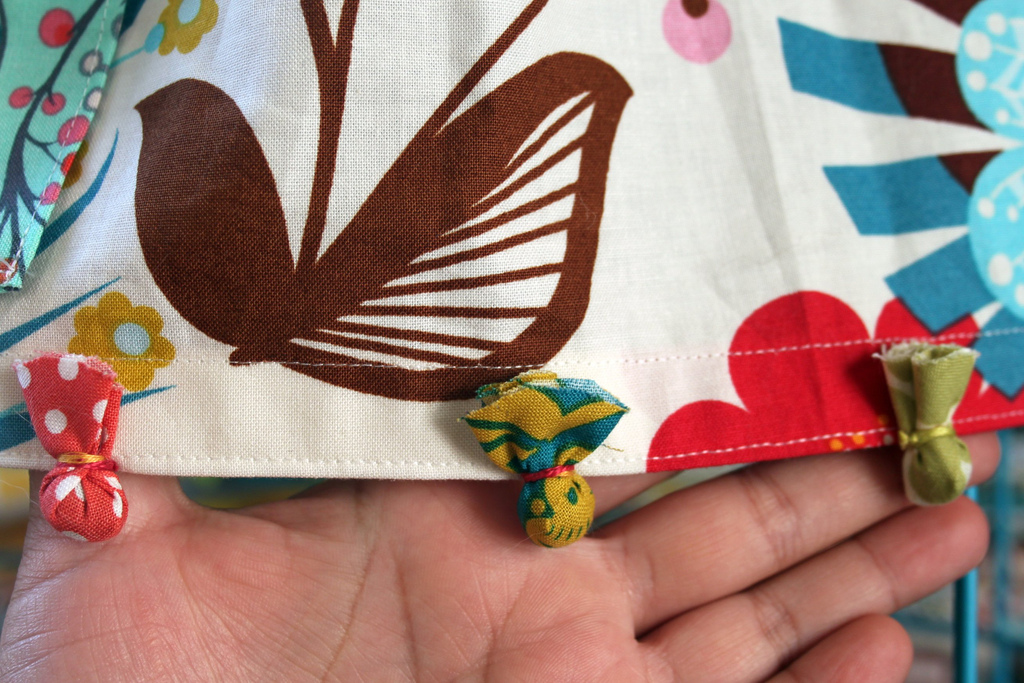
Voila! You’re finished!  
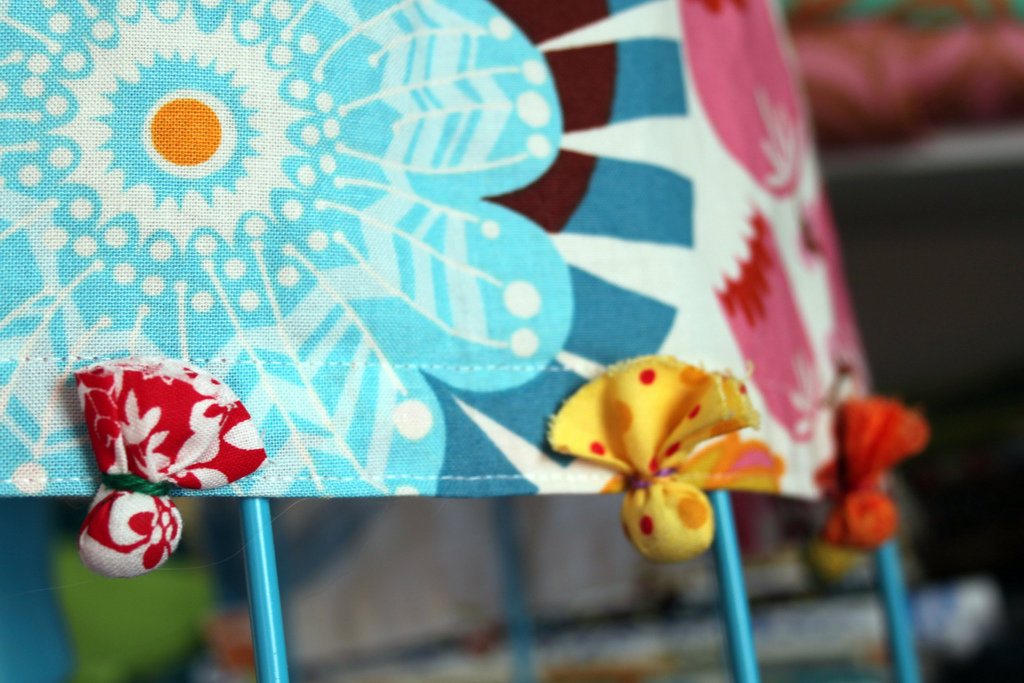
Variation ideas : : You can reverse how you attach them so only the Fabric Pompom ball is showing for a less funky look. You can add them to a pillow this way or attach these just as you would purchased pompom fringe. Here is an example of that on a pillow of mine from Pier1. 
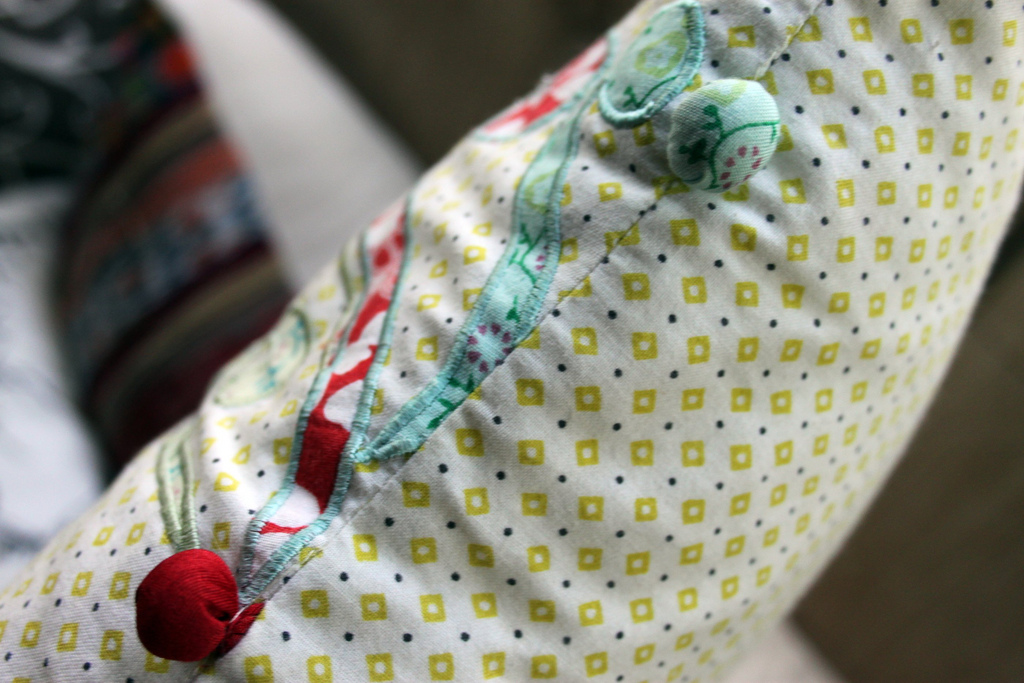
I hope you enjoy this tutorial!!! This Fabric Pompom detail is something I’ll certainly be adding to the edges of many of my own handmades!