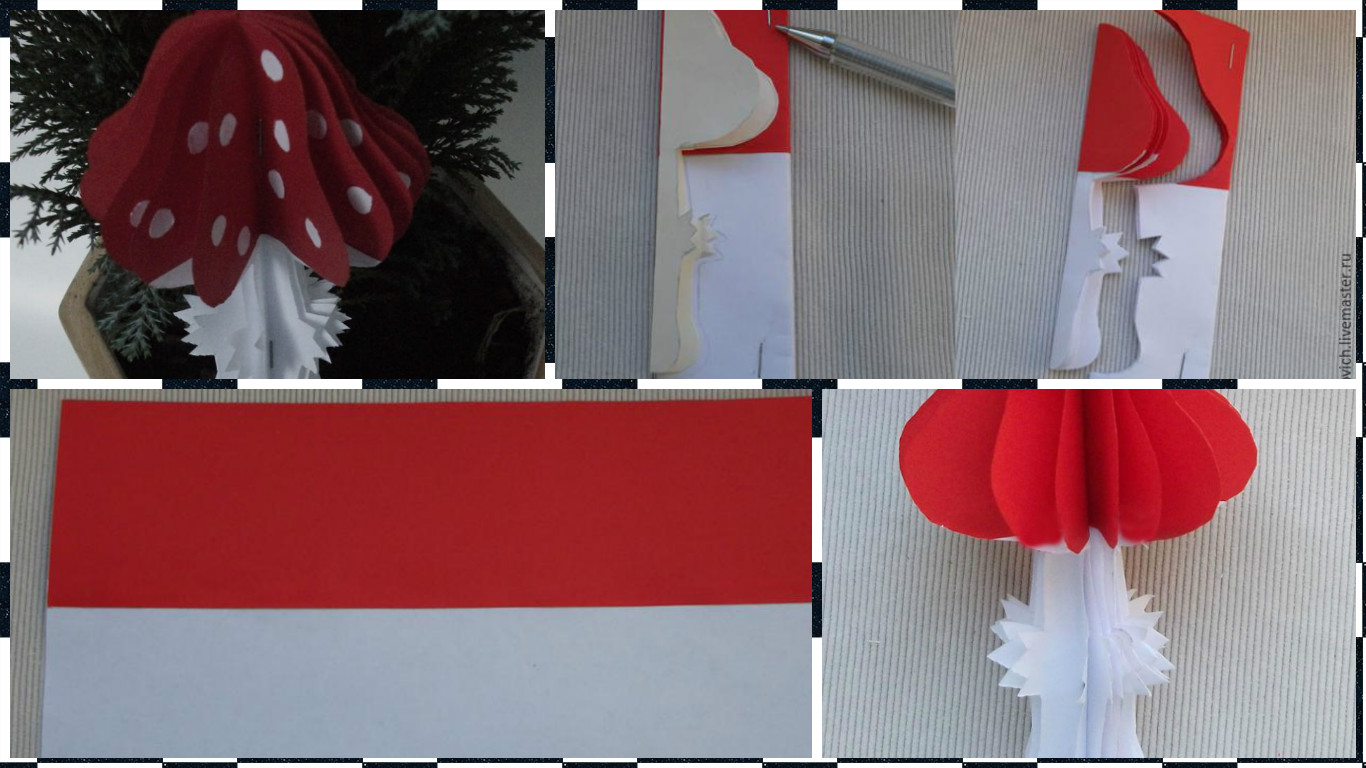
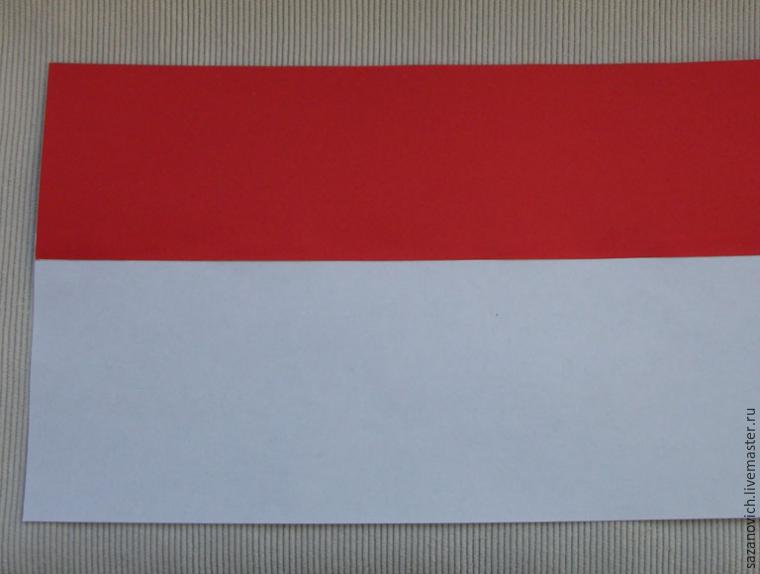
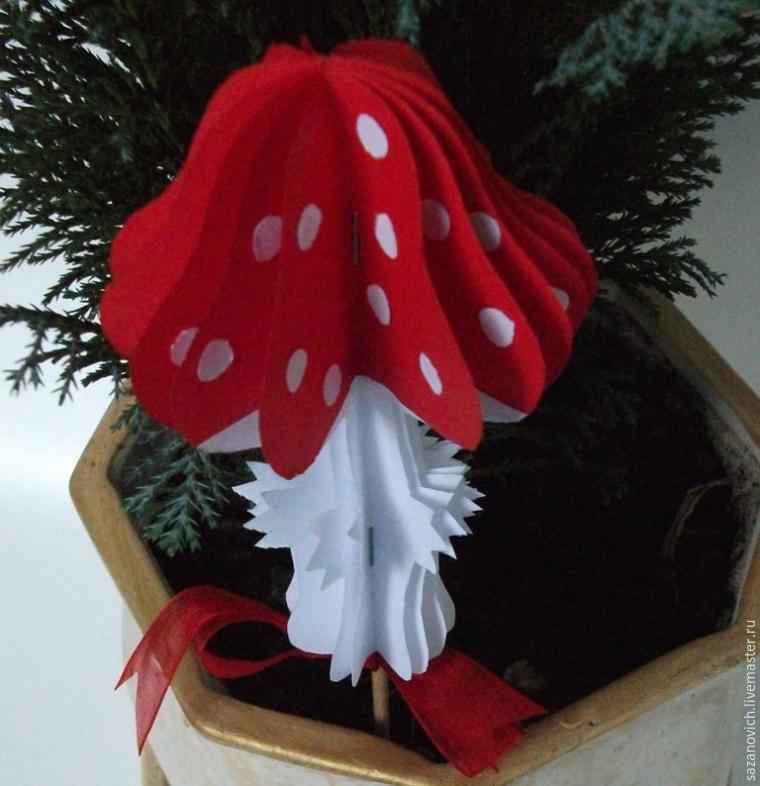
1. From a sheet of white paper on the long side, cut two strips 8 cm wide, and from red paper – two strips of width by 6 cm (red paper must necessarily be two-sided).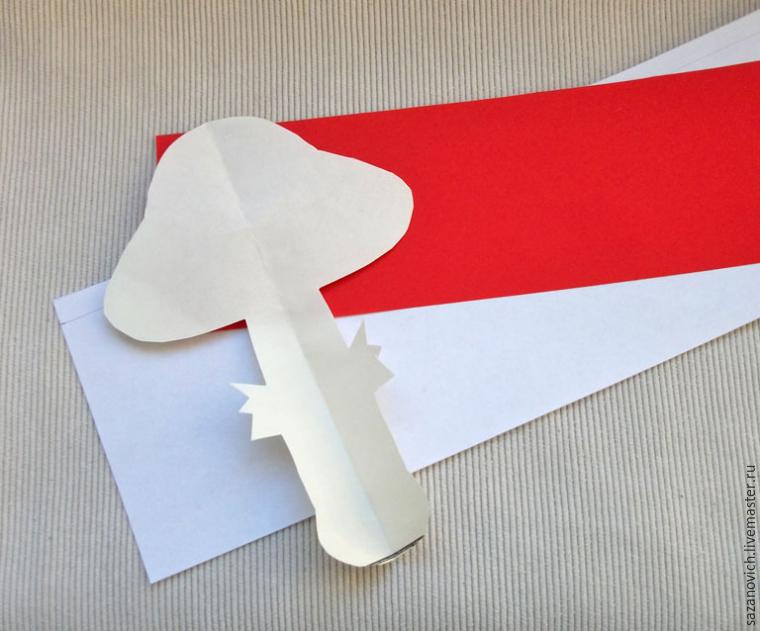
 Pattern (full size)
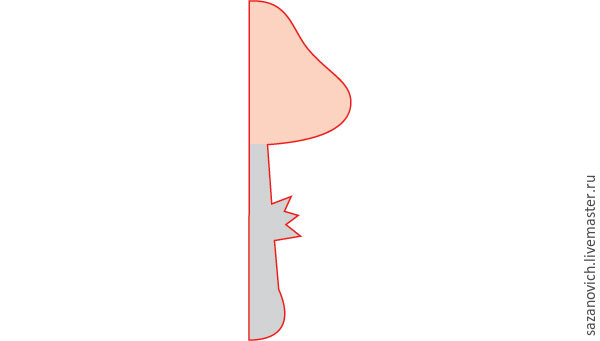 3. Pattern mushroom attaches to the fold of the resulting “little book” (hat – on a red field, foot – on white) and draw. To make it easier to cut several layers stapled divergent corners of paper, then cut along the contour.
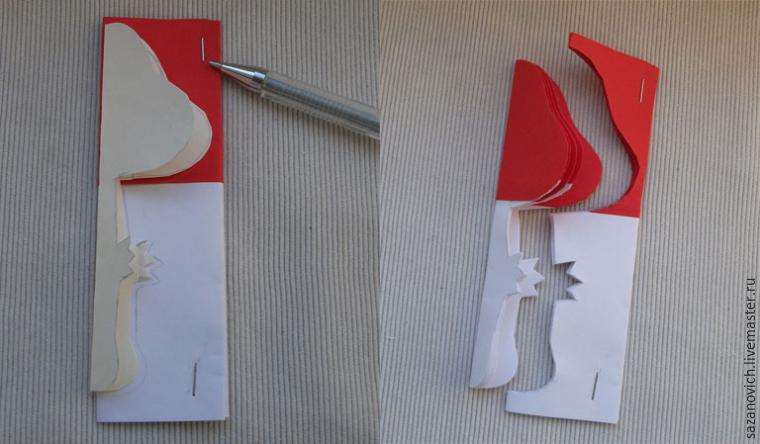 4. Get two piles, each with four mushrooms.
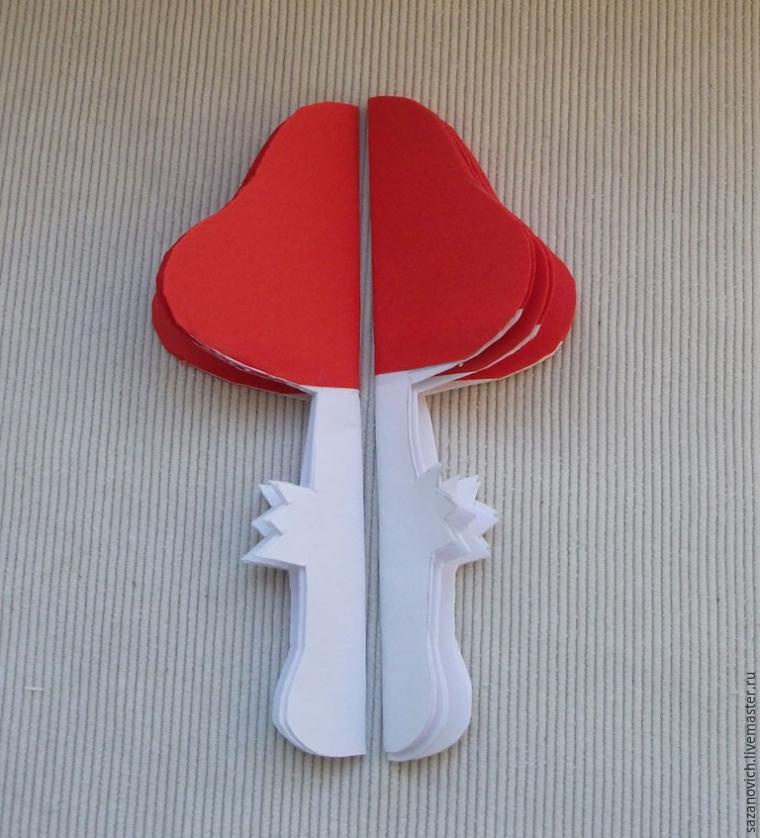 5. pile straighten, fold together and stapled to the leg and a hat.
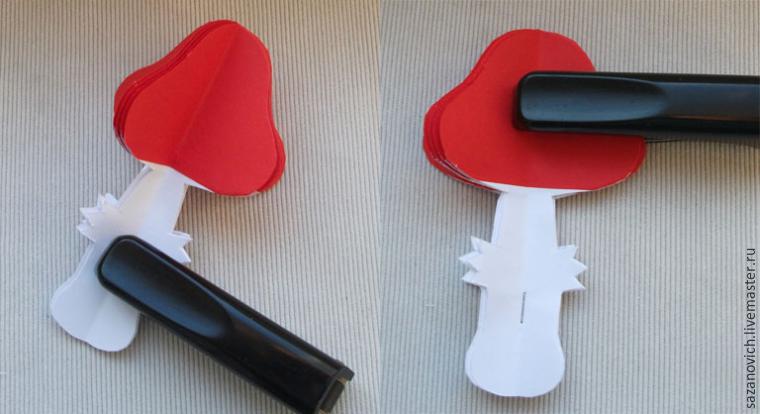
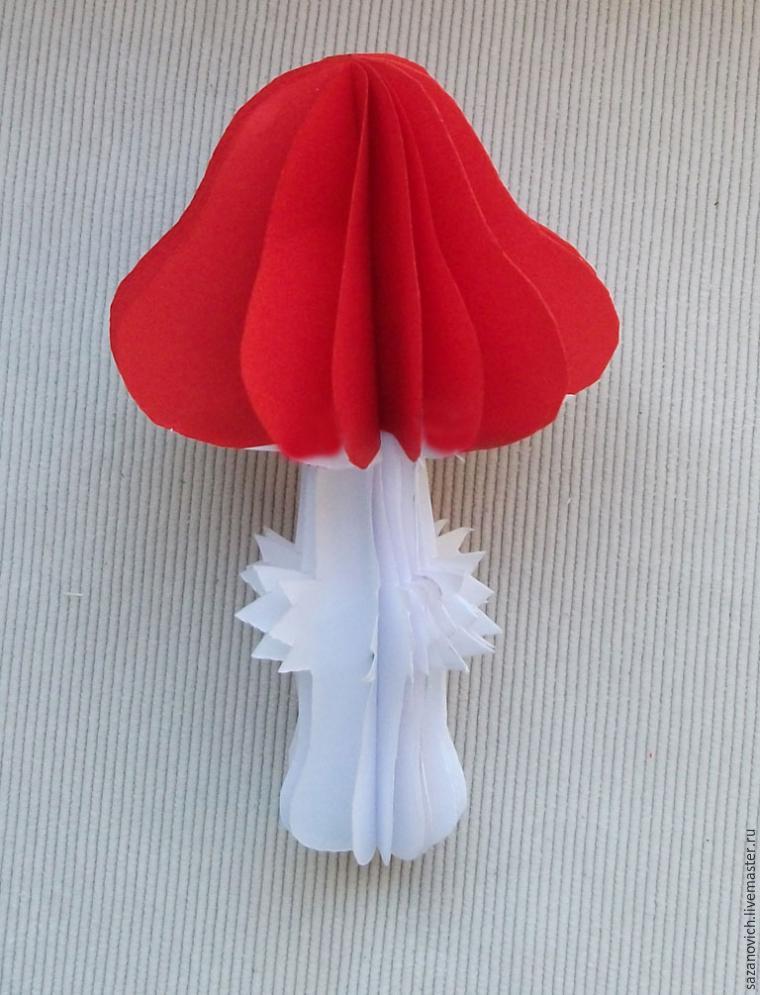
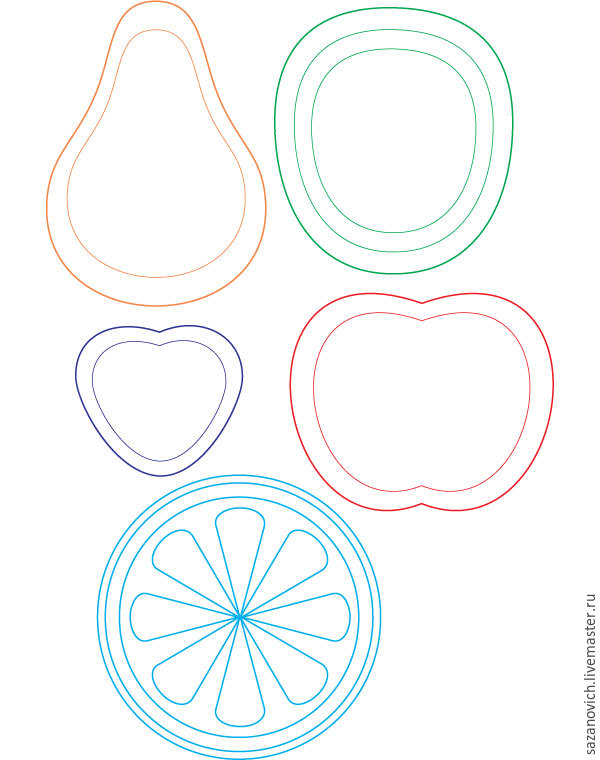
 The same principle can be made bright and juicy fruity.Tolko to uncover an interesting way to do applique “in the context of” closing its metal parenthesis.
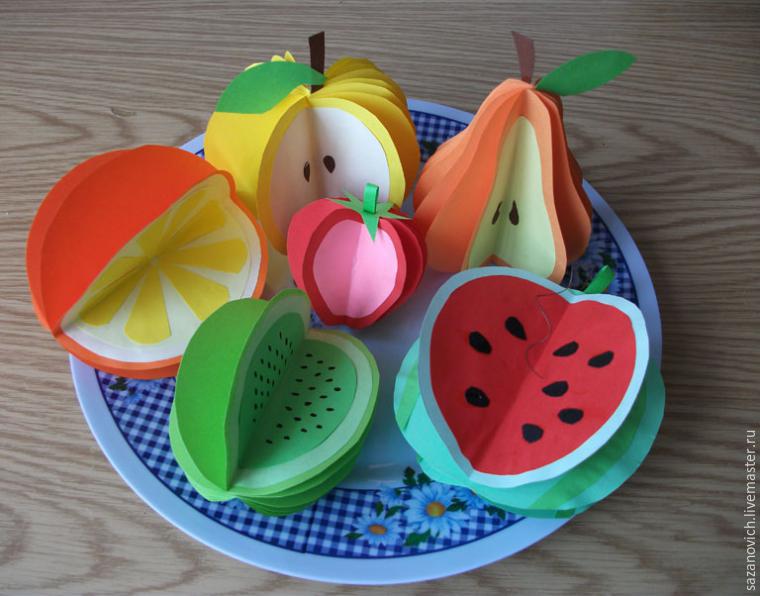 That pattern (full size):