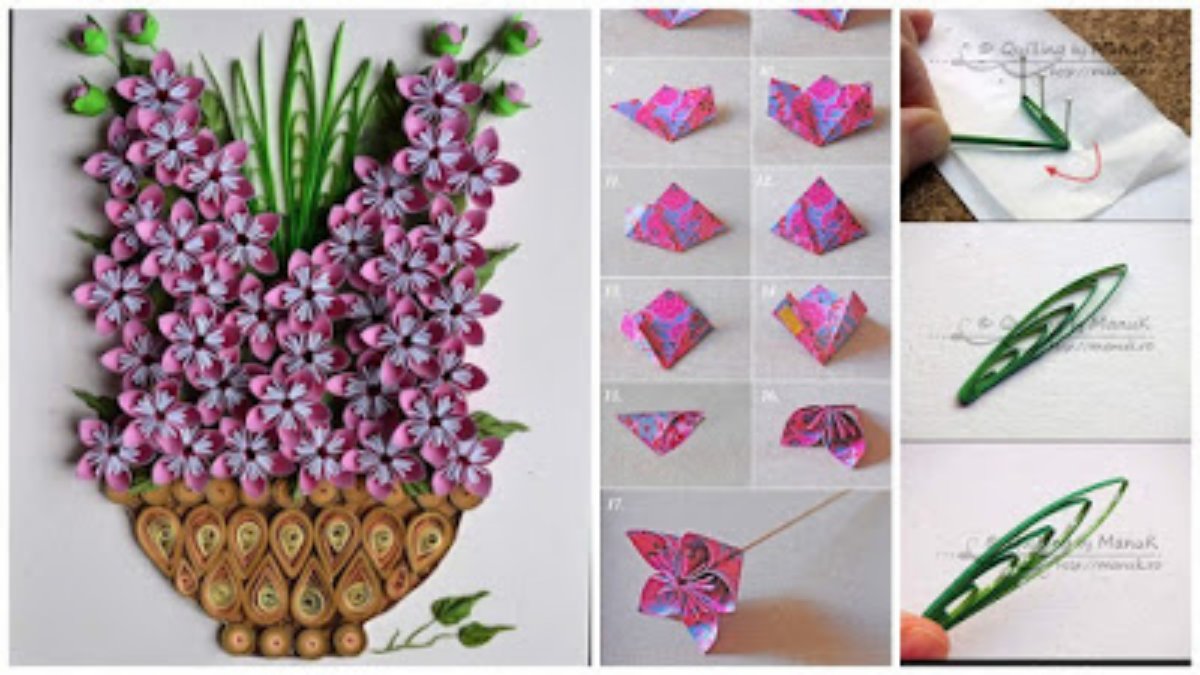
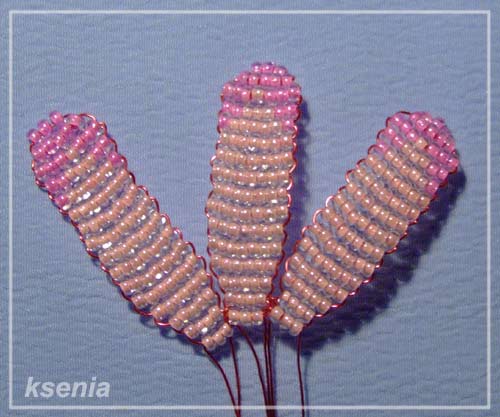
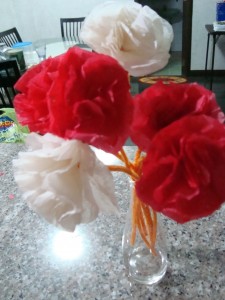
Today, we are showing how to make a origami kusudama flowers to create a very special centerpiece. 
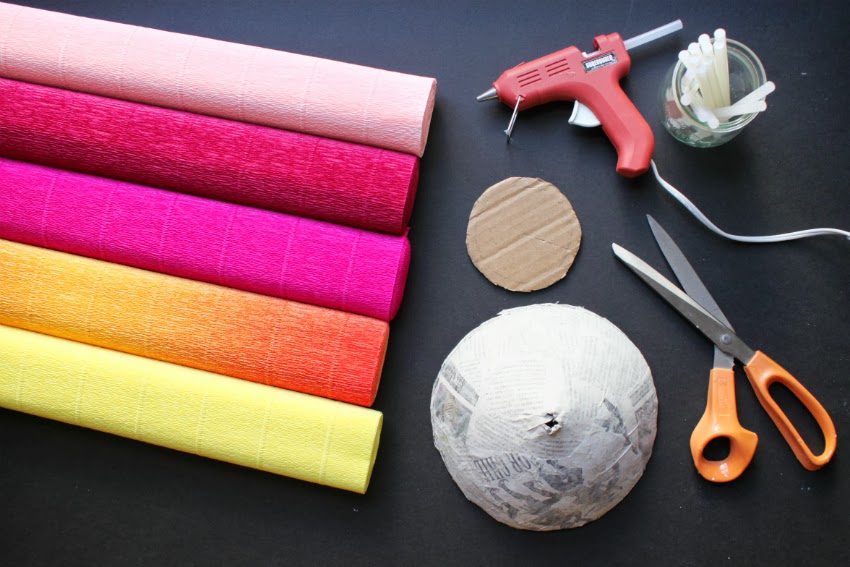
Required Materials:
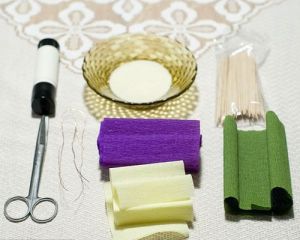
- Coloured or origami paper
- Double sided tape
- Wooden brochette skewers
- Glue
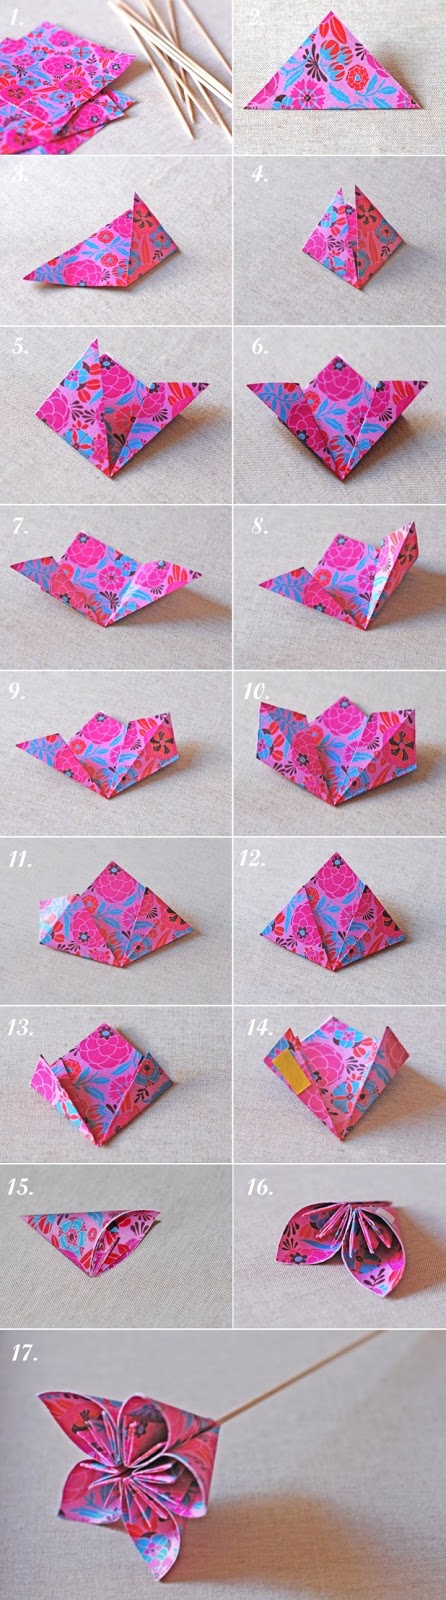
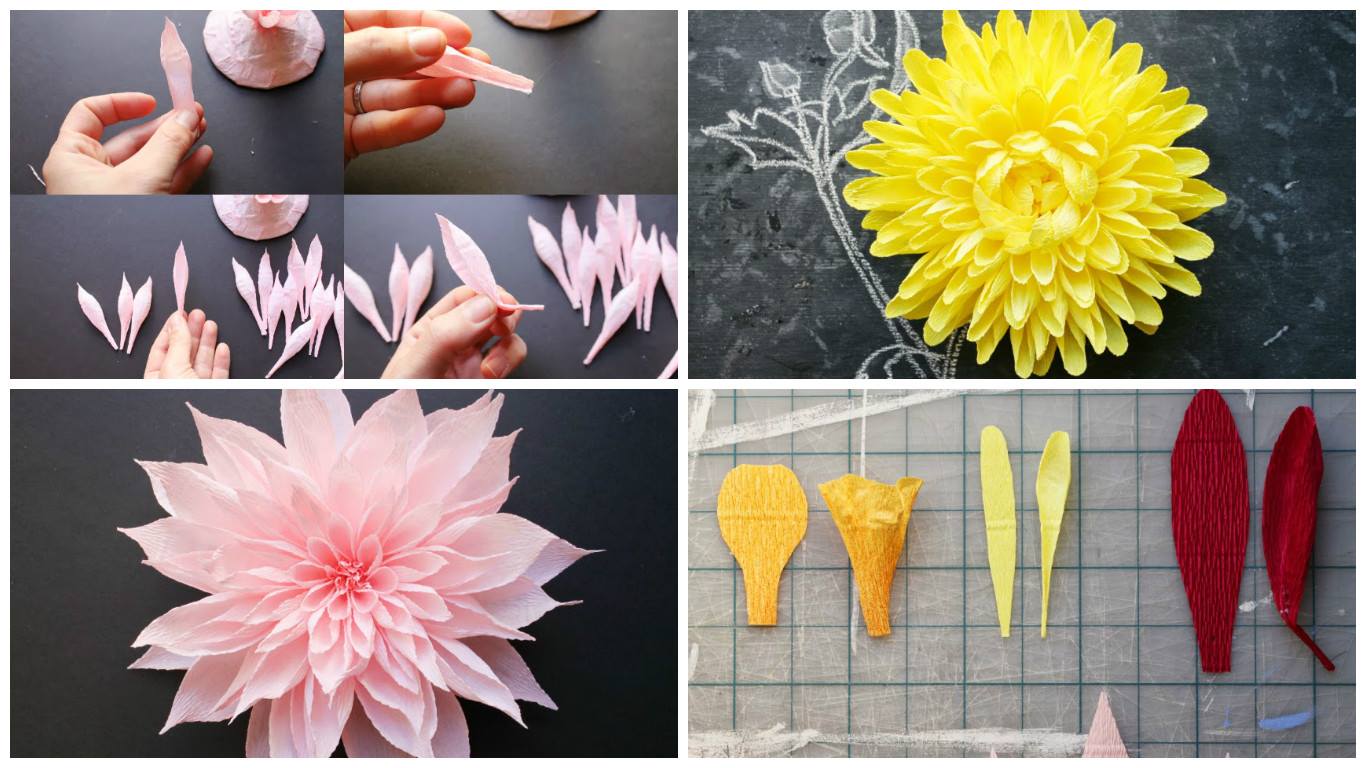
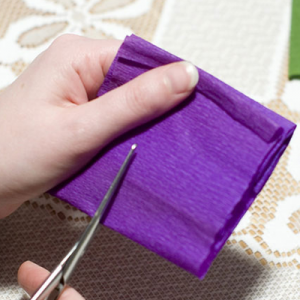
1. Cut paper making squares of 10 cm.
2. Fold squares diagonally.
3. Fold as shown in step 3 and 4 to make a square again.
4. Follow step 5 and 6 to make a figure as shown in the picture.
5. Follow steps 7,8 and 9 until you get to the figure shown in step 10.
6. Fold upper triangle on each side of the figure and tuck them well into the folds of paper, as shown in steps 11 and 12.
7 Now it’s time to fold again inwards, followin steps 13 and 14
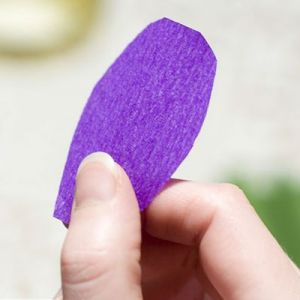
8. Stick a little piece of double sided tape on one end and join it to the other. You will get a petal.
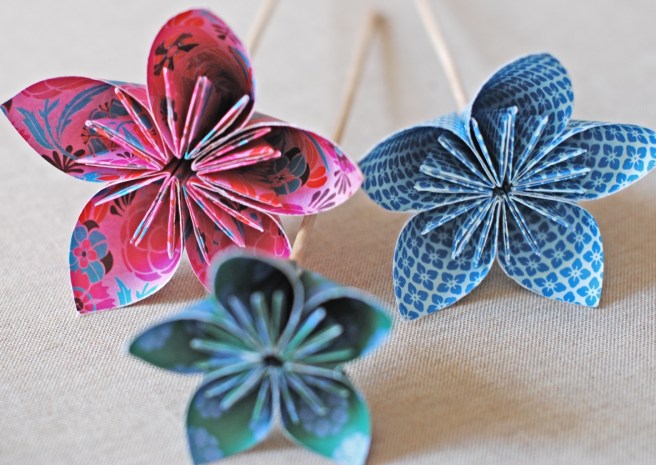
9. Do last instructions again 5 times and stick all petals together to make a flower.
10. Stick flower to a wooden brochette skewer and you’re done!
For leafs:
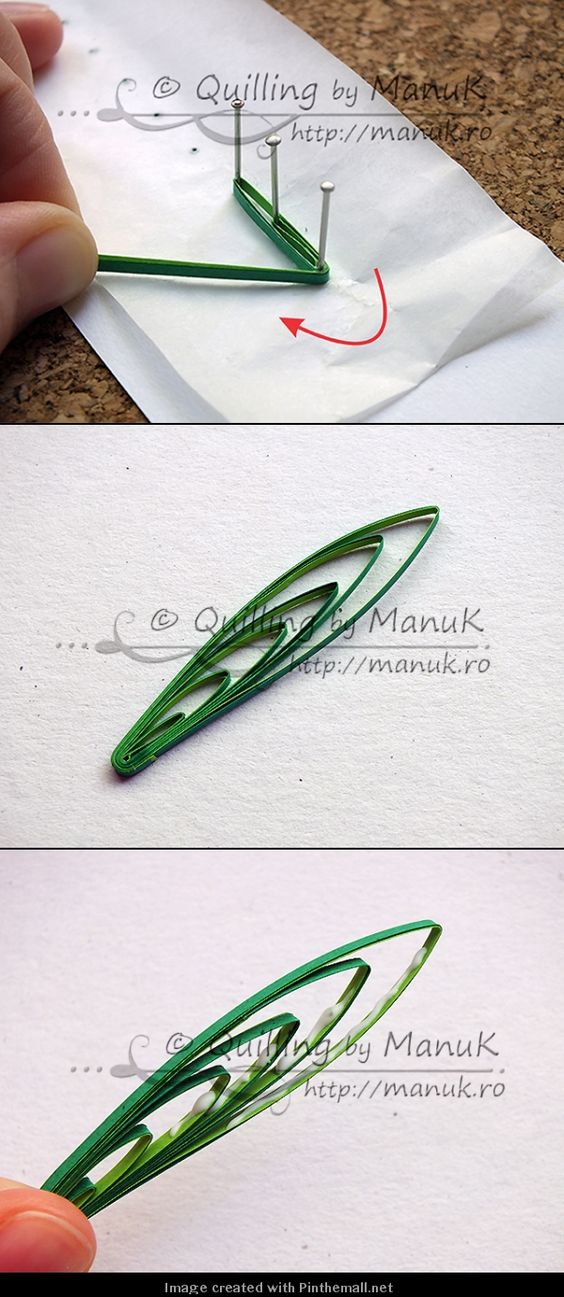
I used 2 mm wide strips, 2 shades of green for each leaf (120gsm combined with 80gsm). You will need very long paper strips, 40cm up to 80 cm, so glue 2-3 strips together before you start to weave them around the pins.
This quilling technique is called “husking”. Insert your first pin into the cork board and secure the paper strips by making a tiny loop. Insert the next pin and bring the paper strips around it, making sure to always add glue at the base of your first pin every time you come back to that point. Repeat the process until the desired grass leaf length is achieved.
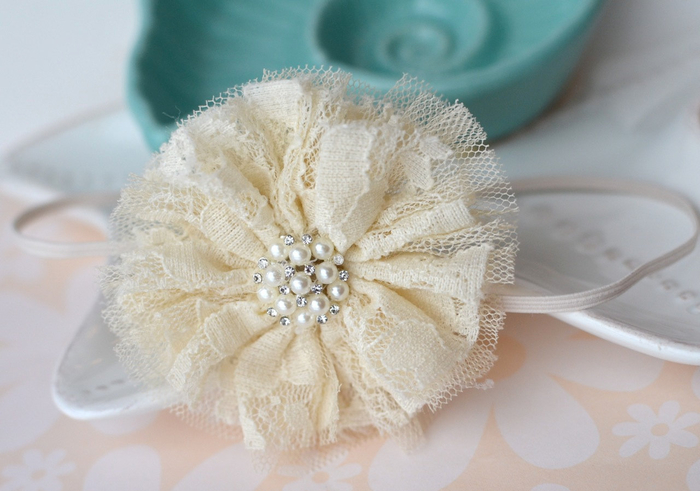

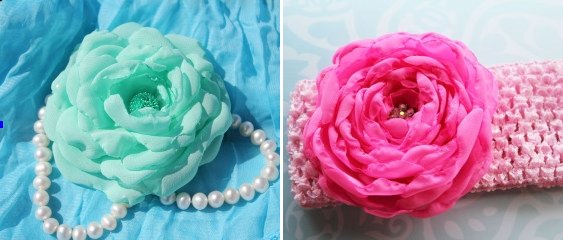


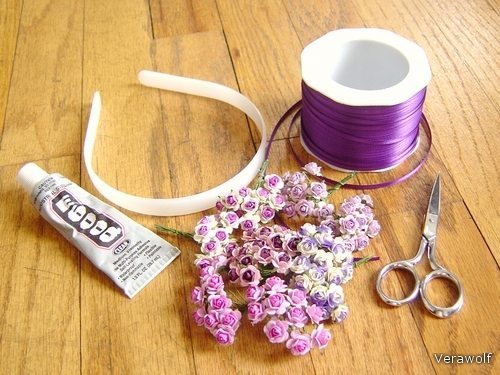 Glue the ribbon end on the back of the headband, let it set up for at least 15 minutes. You want it to be in a position to start wrapping around the headband as close to the end as possible. If you’re using a single sided satin ribbon be sure the pretty side is out.
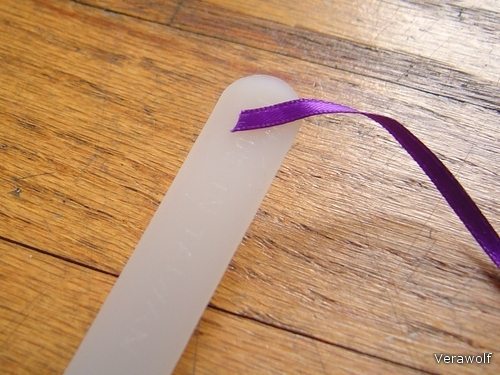 Start wrapping the ribbon around the headband, overlapping it slightly and gluing it on the back of the headband, until the point you’ve decided to start your flowers. Again give this some time to set up. Make sure that every wrap of ribbon is glued in place. You may be experiencing some web-like glue stands, try to minimize them as much as possible and you can clean off whatever is left when you finish the headband.
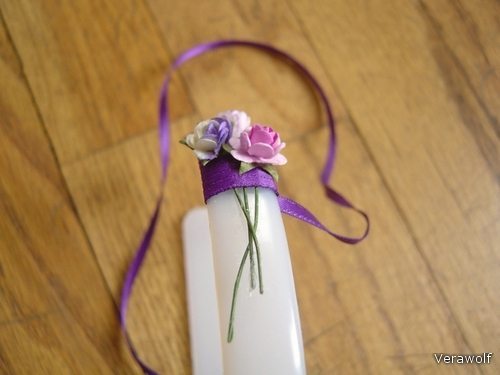
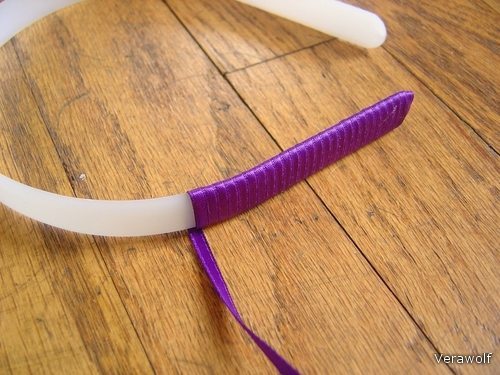 Prepare your flowers by bending the wire at a 90 degree angle to the front of the flower. This is so that the flower will face up when the stem is tucked under ribbon.
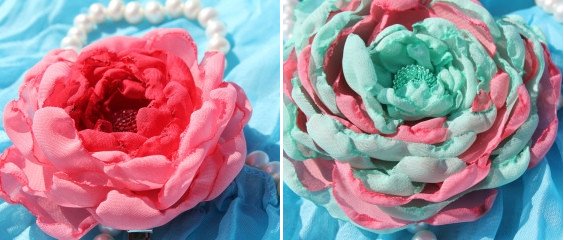
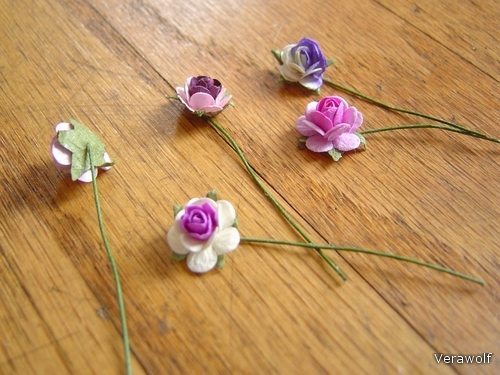 Place a flower on top of the ribbon that’s already wrapped with the stem on the unwrapped part of the headband. You can use a bit of glue to hold it if you need to. Wrap the ribbon around the stem, and glue it on the back. If you’re using 1/16” ribbon you’ll need to wrap it one or two more times, if you’re using 1/8” ribbon you probably won’t. Add another flower, wrap again. You might need a flower for every wrap, or more flowers/wraps depending on the materials you are working with and how densely packed you want the flowers to be. Continue placing flowers and wrapping until you get to the point at the other end of the headband where you want the flowers to end.
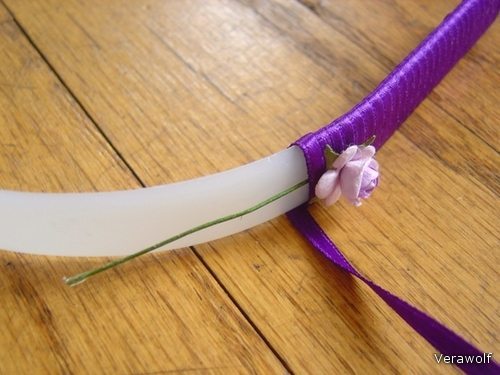
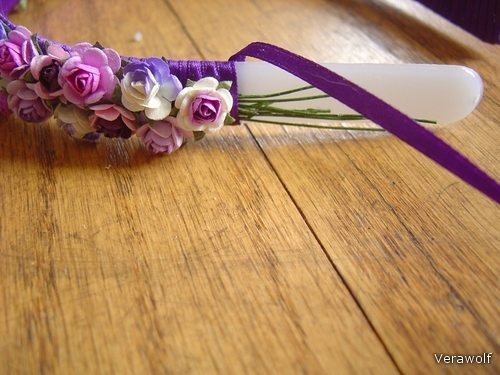
 Wrap the ribbon the rest of the way, continuing to glue it in place on the back of the headband, until you get to the end. Cut the ribbon and firmly glue the end of the ribbon on the back of the headband.
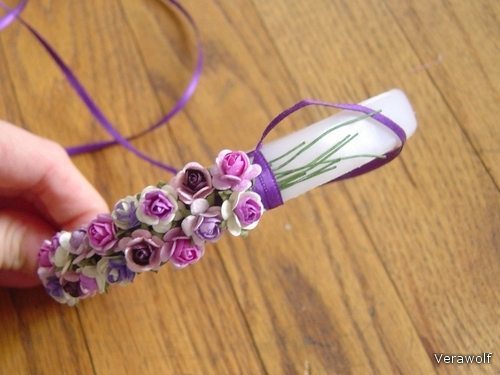
 Allow to dry for at least 24 hours before wearing. E6000 glues ribbon to plastic, it will do an even better job of gluing things to your hair.


 Midway
 LOWER
LOWER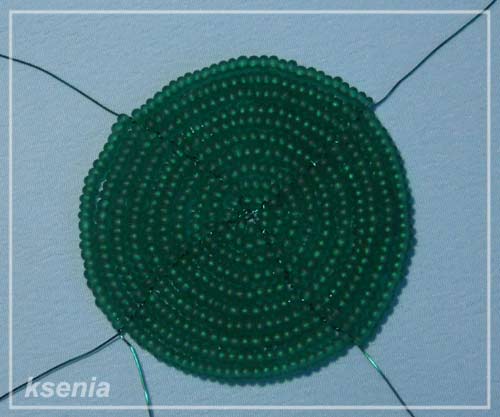

 ASSEMBLY
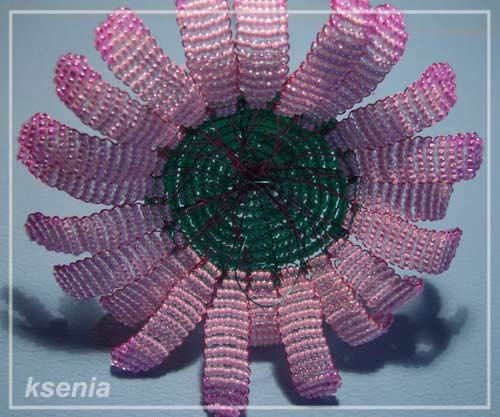

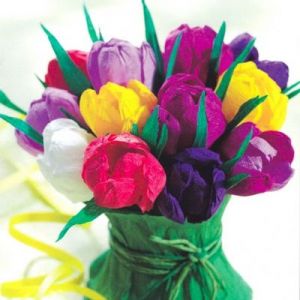
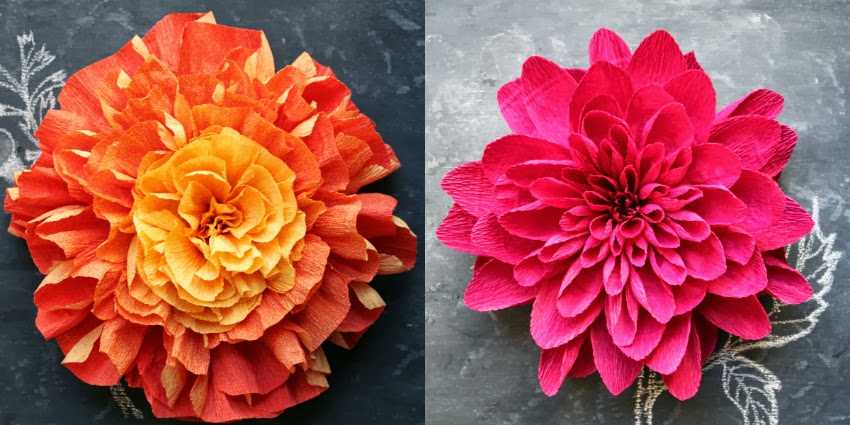
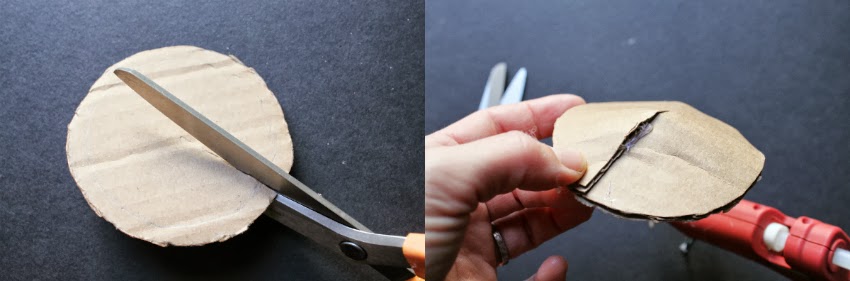
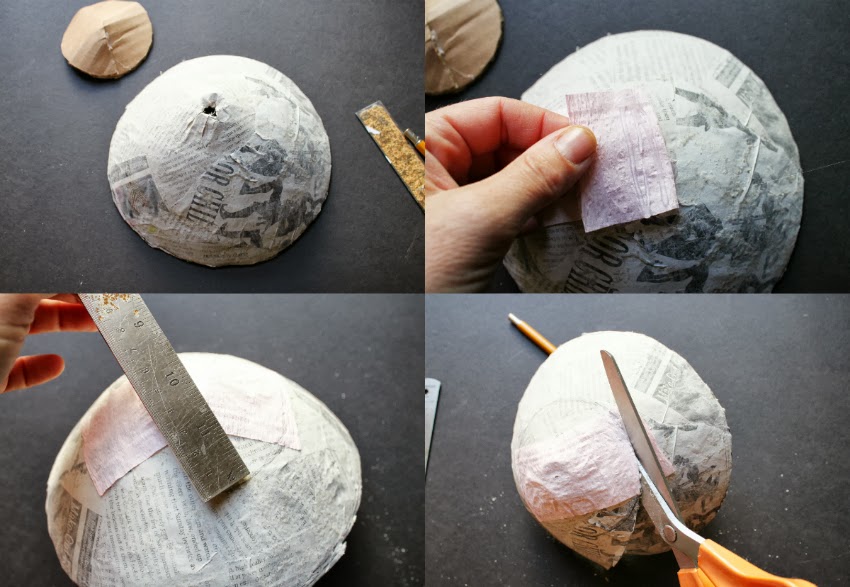
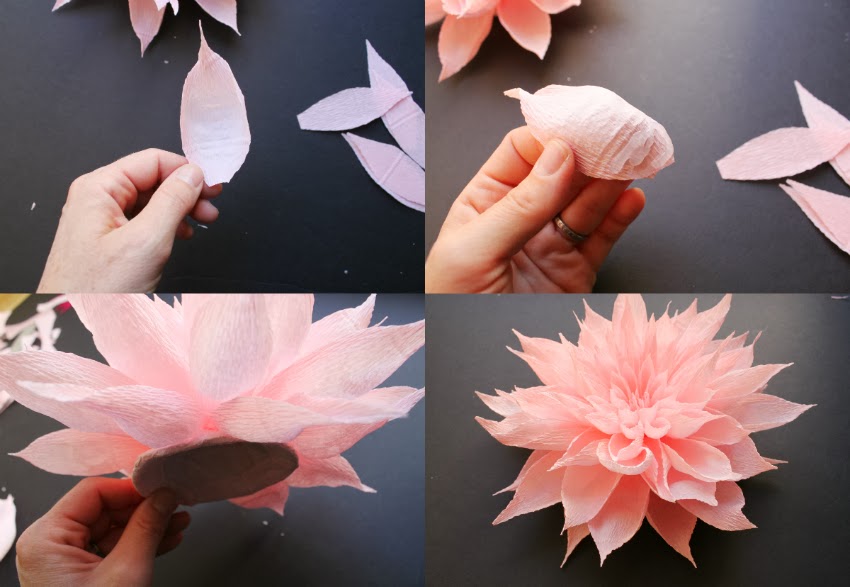
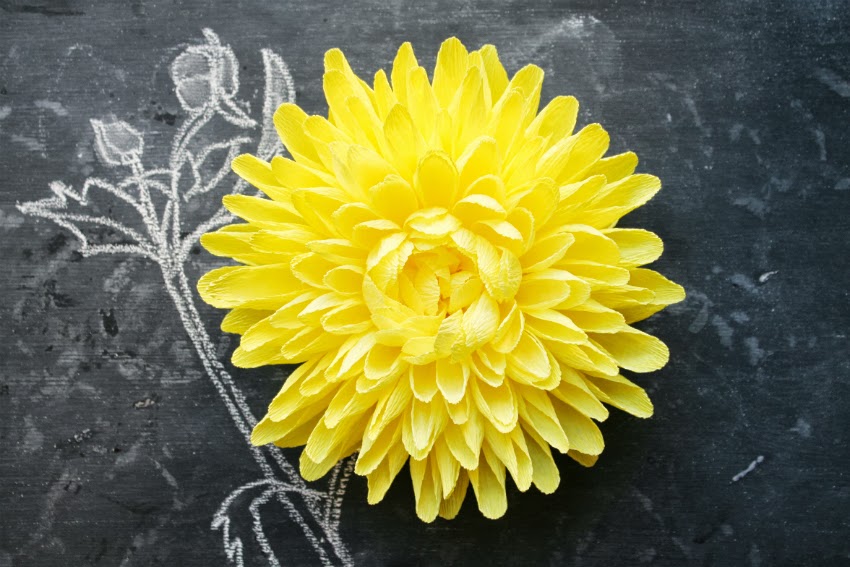
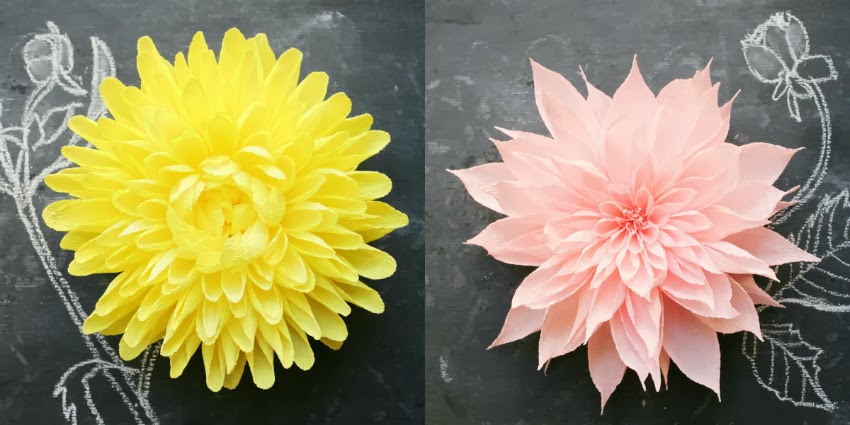
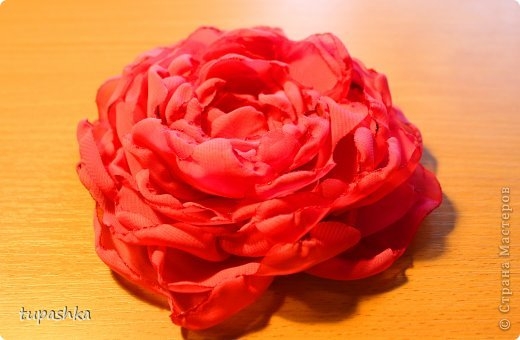
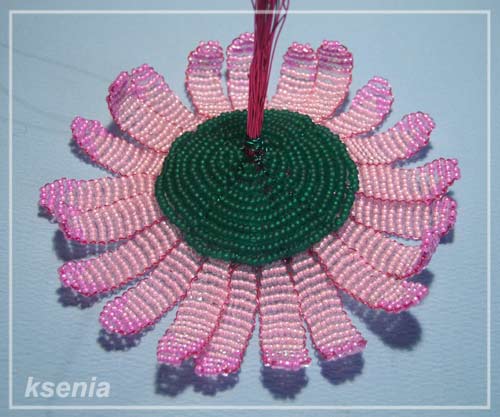
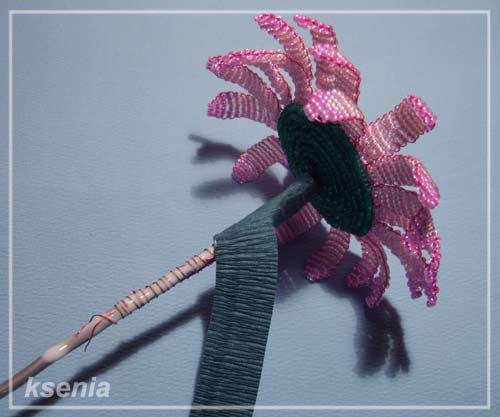 Attach the middle of a gerbera and carefully attach it with twine. Attach the flower on the hard rod tightly strapped to his ends of the wire from the petals (photo 11). Cut the crepe paper strips 1-1.5 cm. Spread glue and wrap the rod of his crepe paper, starting from the top (photo 12). To stem is smooth, you can wrap the rod twice. When the stem is all wrapped
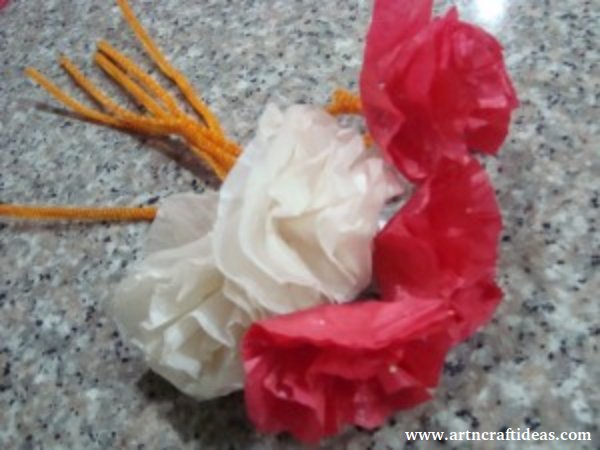
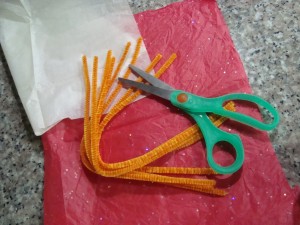
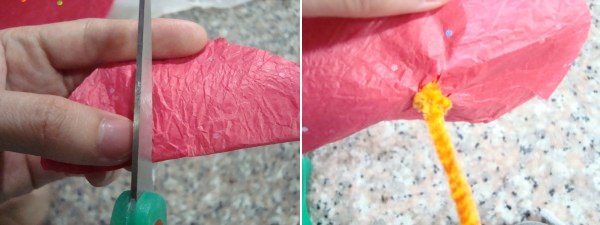
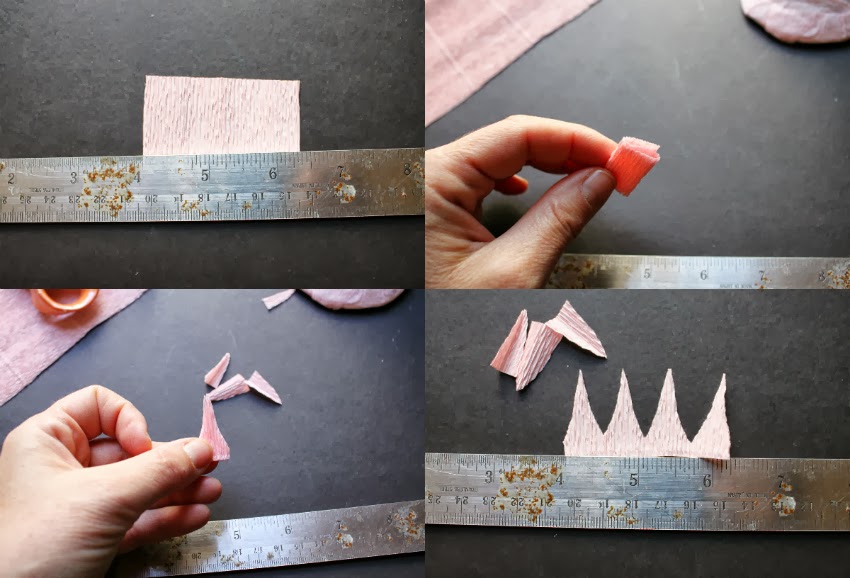
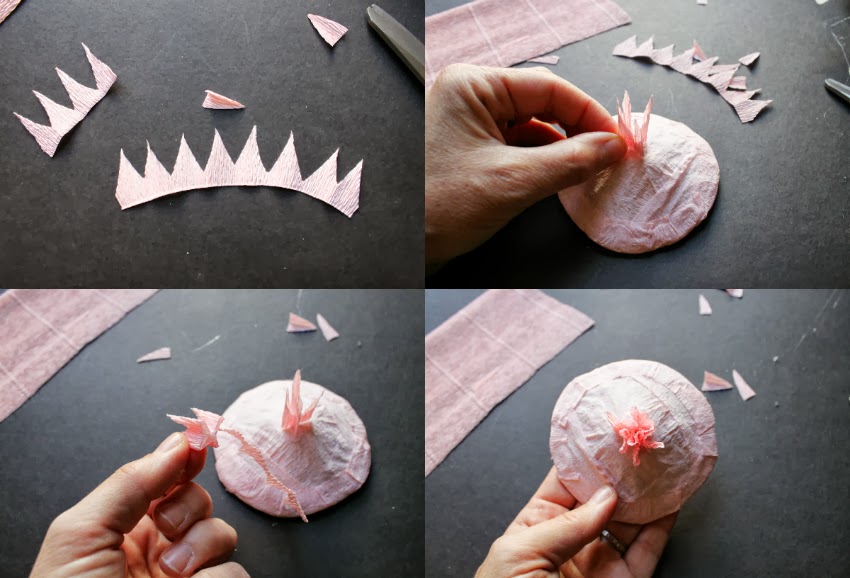
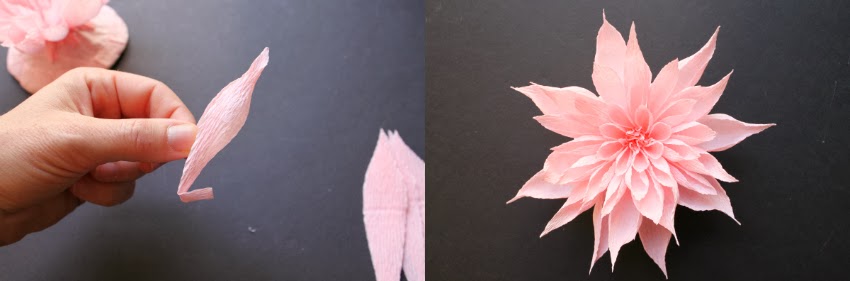
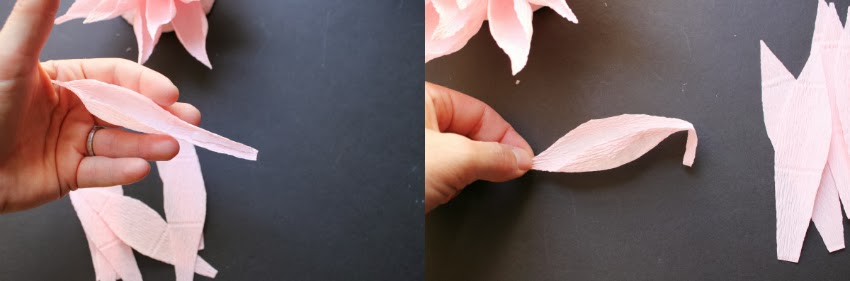
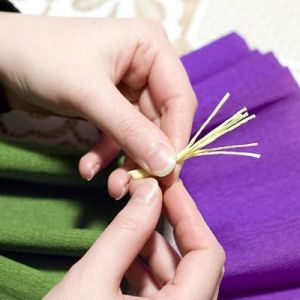
 2. Cut small squares of yellow, cut fringe on them, before reaching the edge of about a quarter of the size.
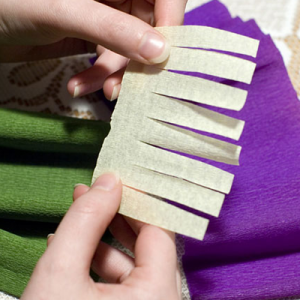 3. We turn off the item in a tube, tighter curl each narrow strip of fringe – it will flower stamens, dipped them in glue.
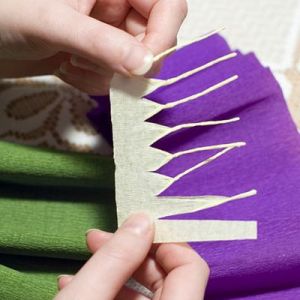
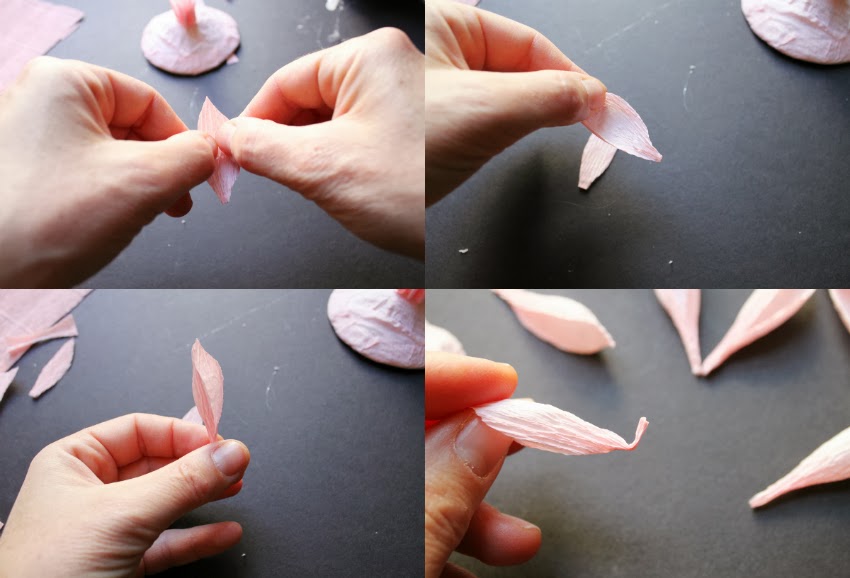
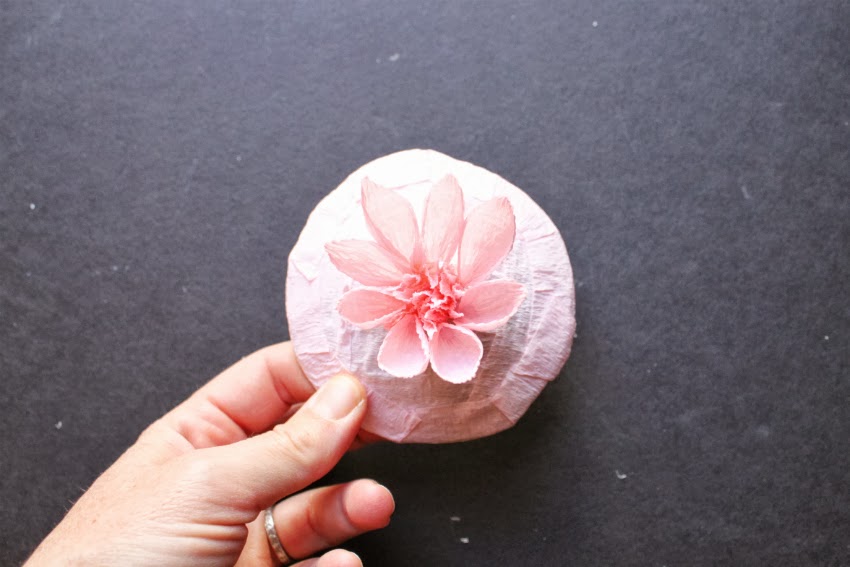
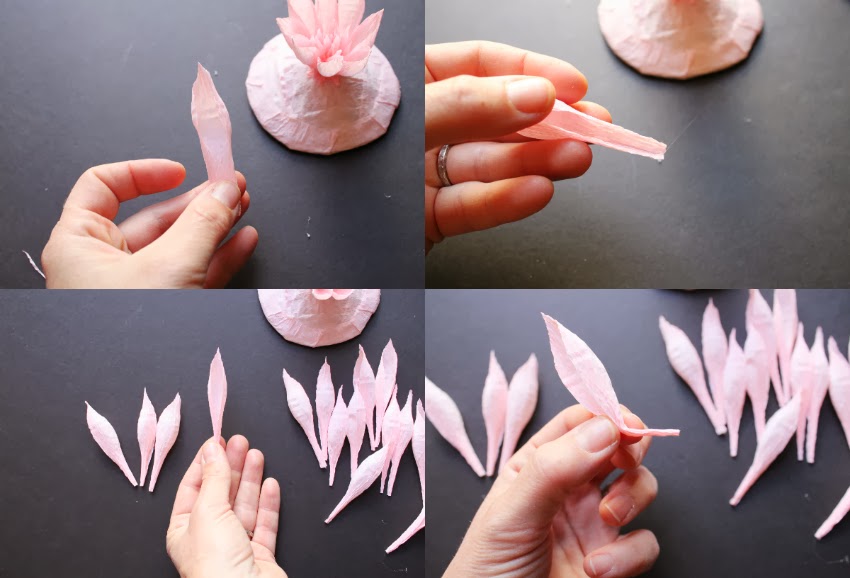
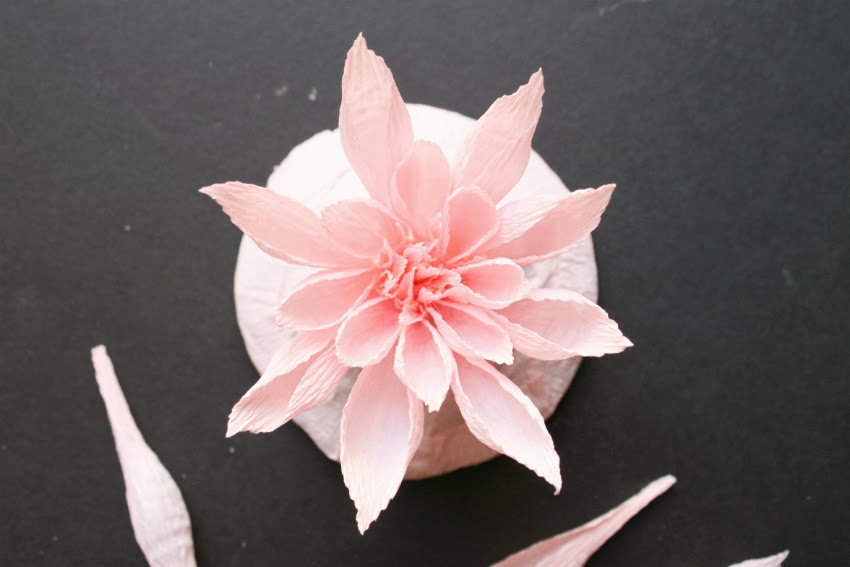
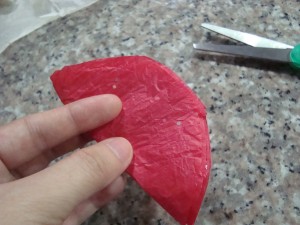
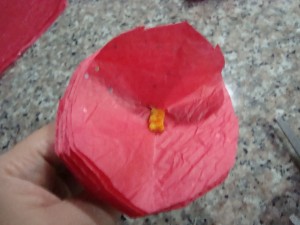
 4. Winding-serdtsevinki stamens of the flower petals, superimposing them and gradually consolidating each subsequent adhesive tab.
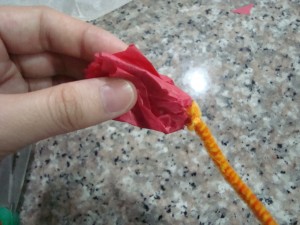
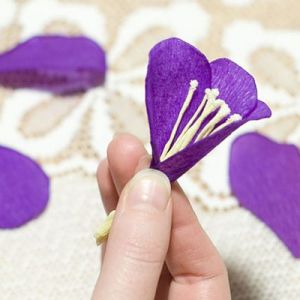 5. Insert the skewer, fixing the petals on a stick with a piece of wire.
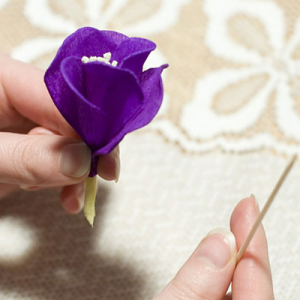
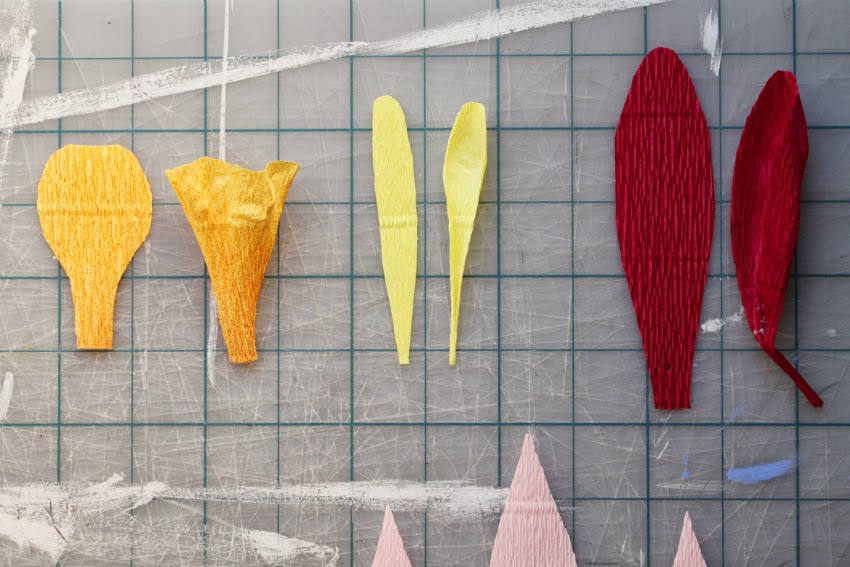
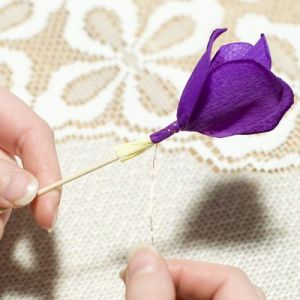 6. Wrapped with ribbon stalk, chopped of green crepe paper.
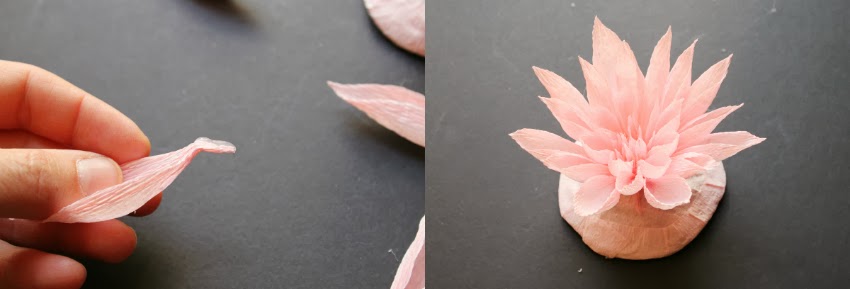
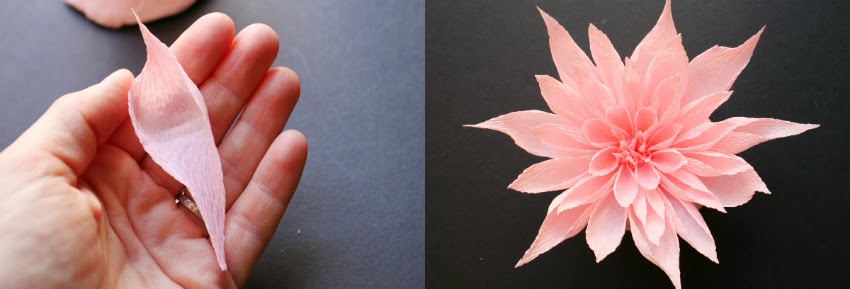
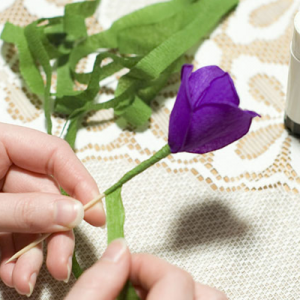 7. Cut pointy parts for leaves. To make bulk leaflets lightly wrap the edge of the perimeter.
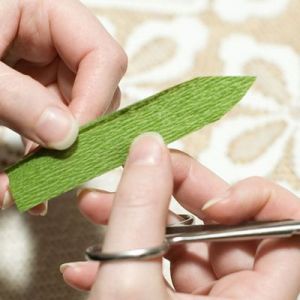
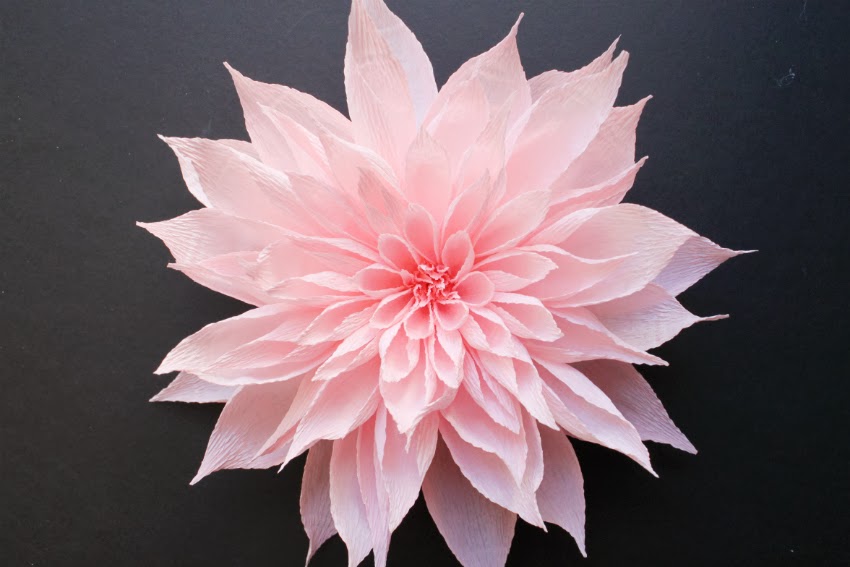
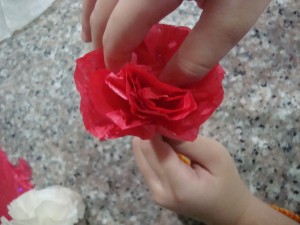
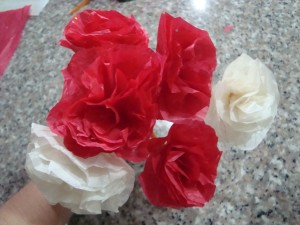
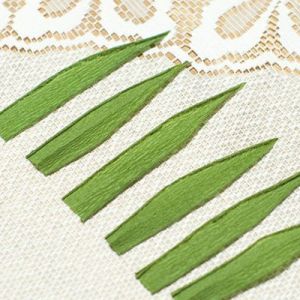 8. Imposing leaves at each other, glue on each stem leaves 3-5.
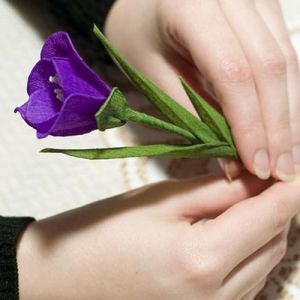 Our MC for the crocuses used corrugated paper in different shades of blue, but you can use paper of different colors.