DIY Plastic Spoons & Mirror Wall Decor

I love making Recycled DIY Projects! Now you can watch a complete step by step tutorial on how to make a DIY Plastic Spoons & Mirror Wall Decor. Adorn the mundane walls and add the best home decoration idea of a wall mirror decor to your interiors. Making this amazing plastic spoon and mirror wall decor is an awesome creative experience.

Get down on the floor and engage your kid’s in making this cool craft at home, as a fun craft activity for kids. It is a perfect way to reuse and recycle an old mirror with a new touch of creativity!

Step 1: Material Required for Making Plastic Spoon and Mirror Wall Decor.

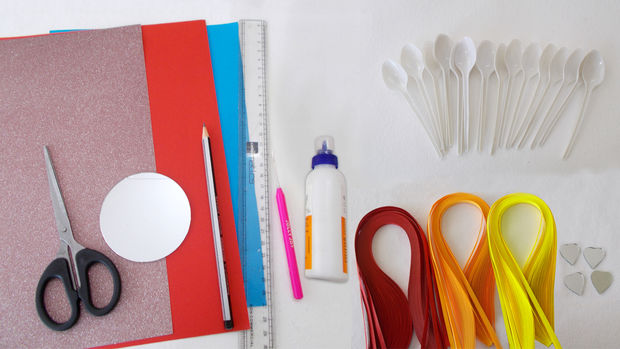
So here is a list of all the craft essentials required to make plastic spoon and mirror wall decor are:

  • Glitter paper
  • Scissors
  • Color papers
  • Mirror
  • Quilling needle
  • Scale
  • Glue
  • Quilling strips
  • Decorative mirror
  • Plastic spoons
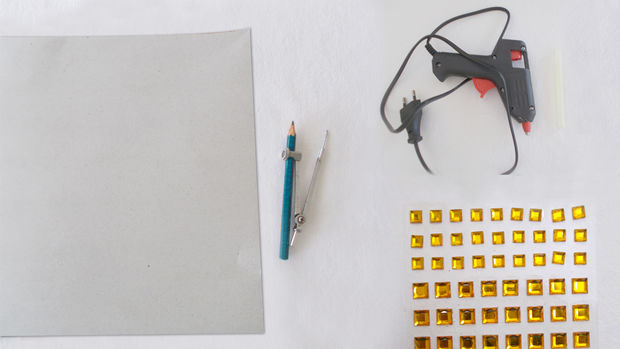
  • Cardboard
  • Glue gun
  • Glue stick
  • Decorative stones
  • Divider & pencil

Step 2: Let’s Begin!

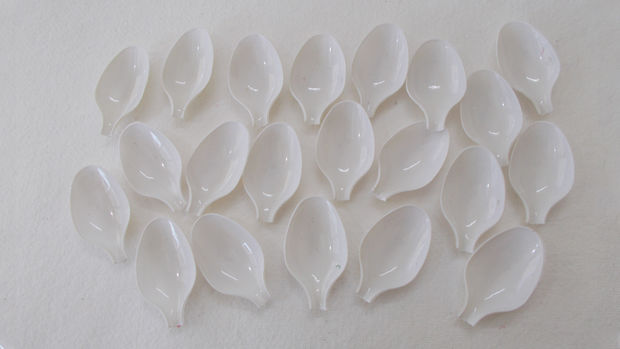
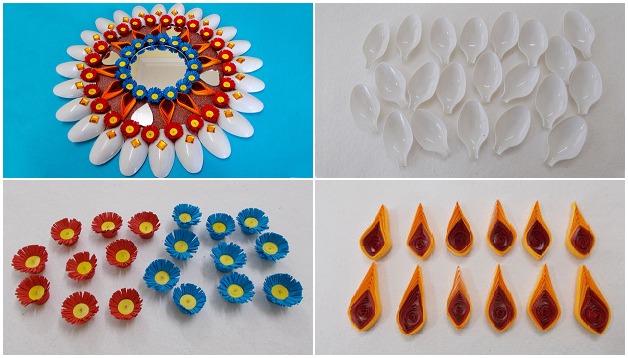
Cut and separate the handle and bowl part of the spoons and get rid of the handle.

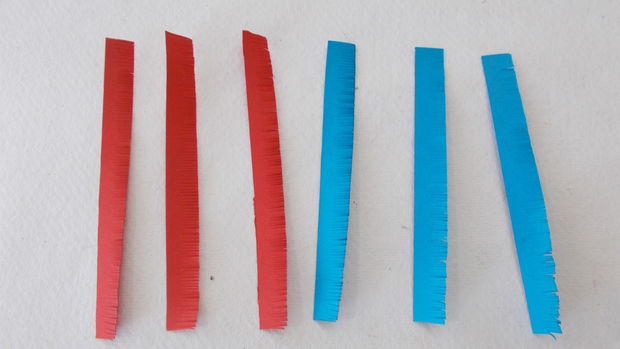
Cut red and blue strips of paper measuring 10 cm x 1 cm and make small incisions on the edges.

Step 3: Build Up Your Craft

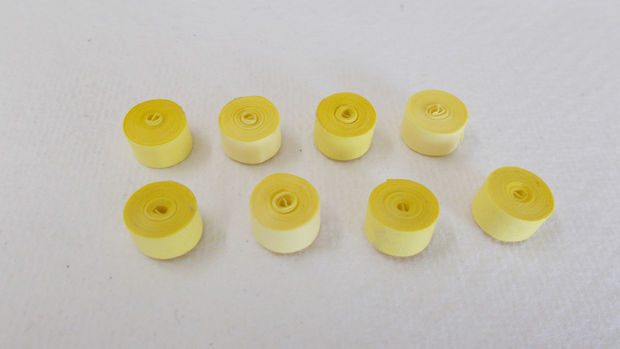
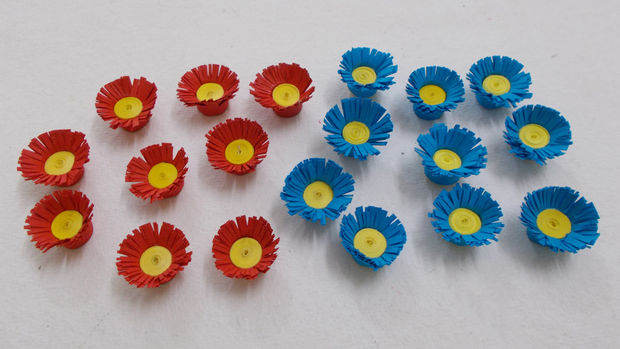
Make yellow coloured tight coils and wrap the red and blue around the yellow tight coils.

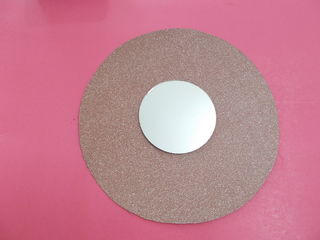
Cut out a cardboard measuring 10 cm radius with the help of a divider. Watch the complete tutorial to learn how to make Miniature Flowers.

Cover it with a glitter paper.

Step 4: Decorate Your Craft!

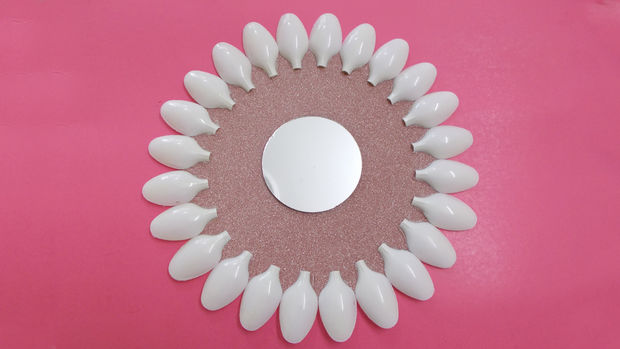
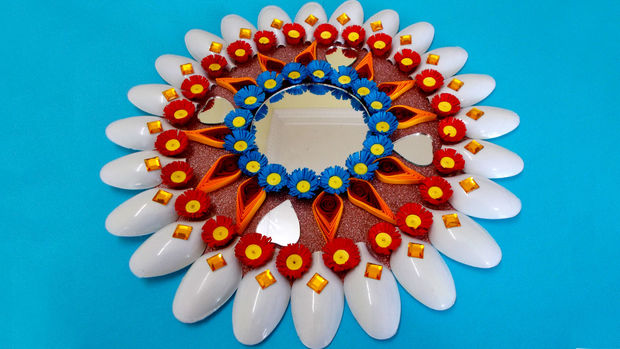
Paste a small mirror in the centre of the cardboard. and paste plastic spoons around.on the edge of the cardboard.

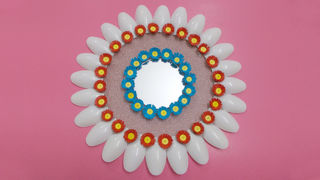
Paste the Miniature flowers around the mirror.

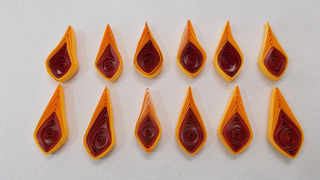
Make yellow and orange leaves with quilling strips.

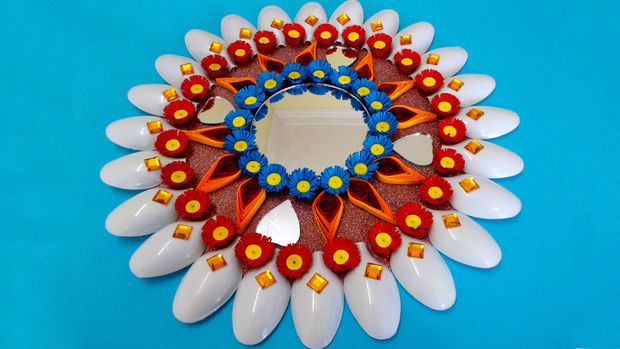
Add decorative mirrors and finish the craft with decorative stones.

Step 5: Your Mirror and Plastic Spoon Craft Wall Decor.

Don’t you love this Mirror and Plastic spoon wall decor? There is nothing as special as learning how to make this super easy craft idea that can be used as wall decor. A fantastic home decor idea that will surely get you loads of compliments.Recycled crafts as home decoration ideas work in a fabulous way and give your home a new look!

Do watch the complete tutorial on how to make plastic spoon and mirror wall decor and add a creative feather to your cap.

Courtesy: stylenrich

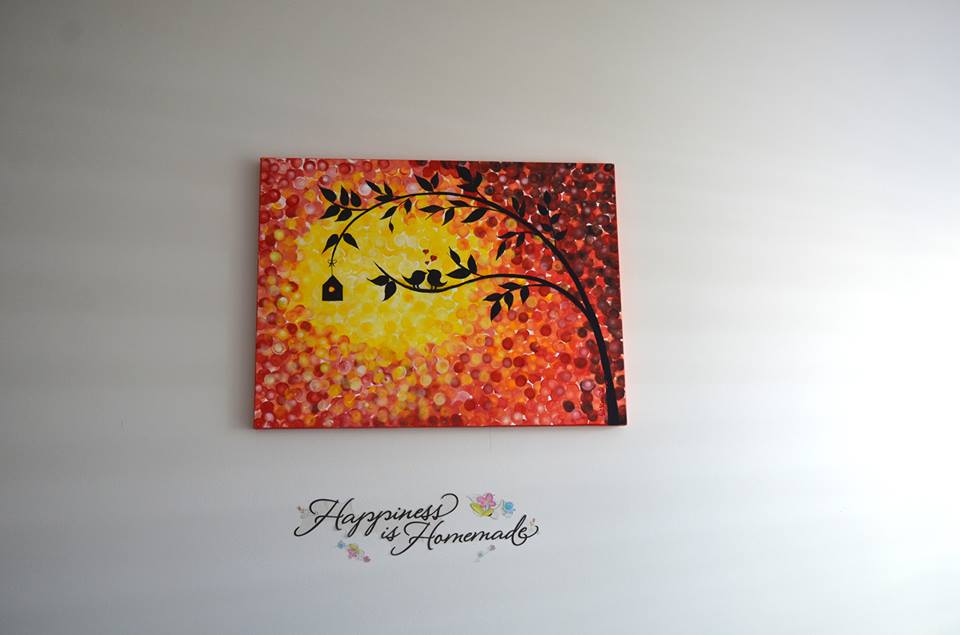
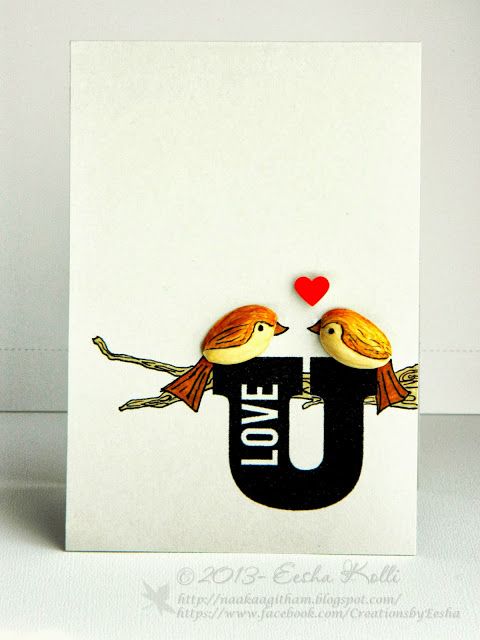
Love birds – Acrylics Painting on Canvas

Love birds – Acrylics Painting on Canvas:

Required Materials :

  • 3-4 different colours of paint – Red, Yellow, Black  & White
  • Canvas
  • Circular pouncers
  • Hanging supplies
  • Tray to hold the paint

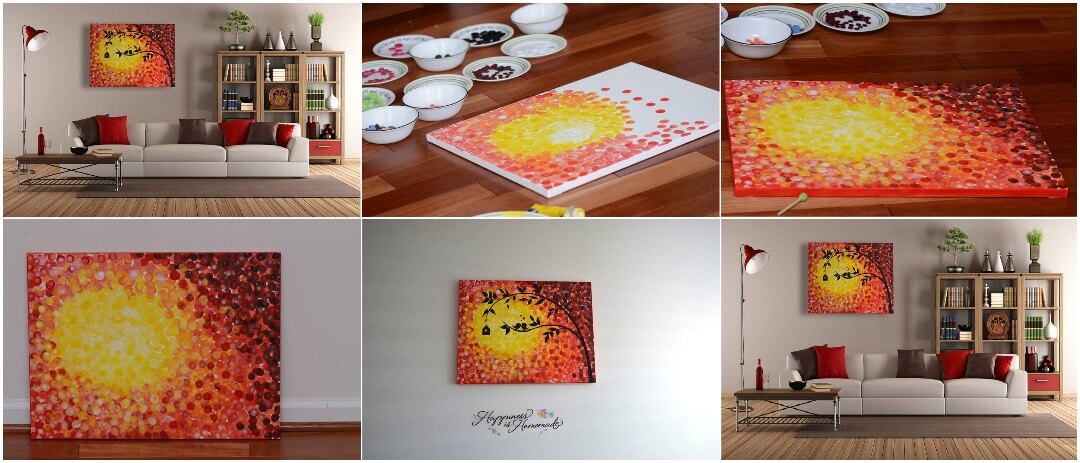
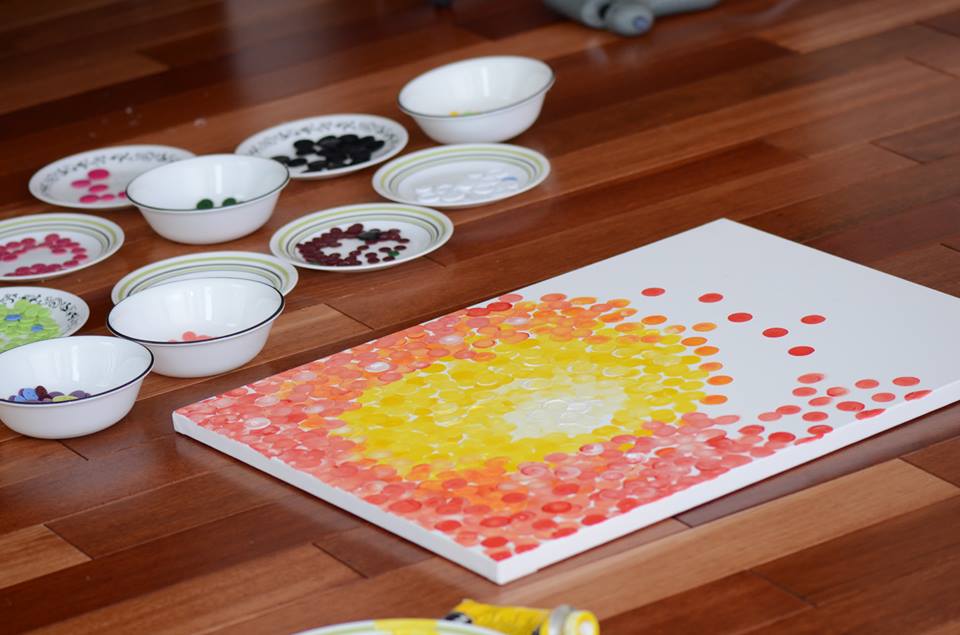
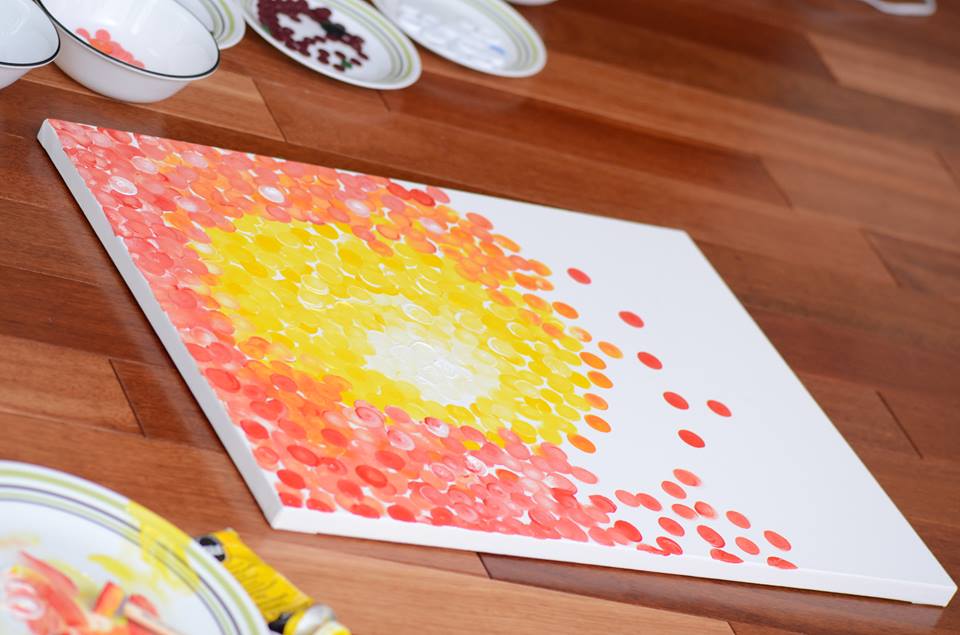
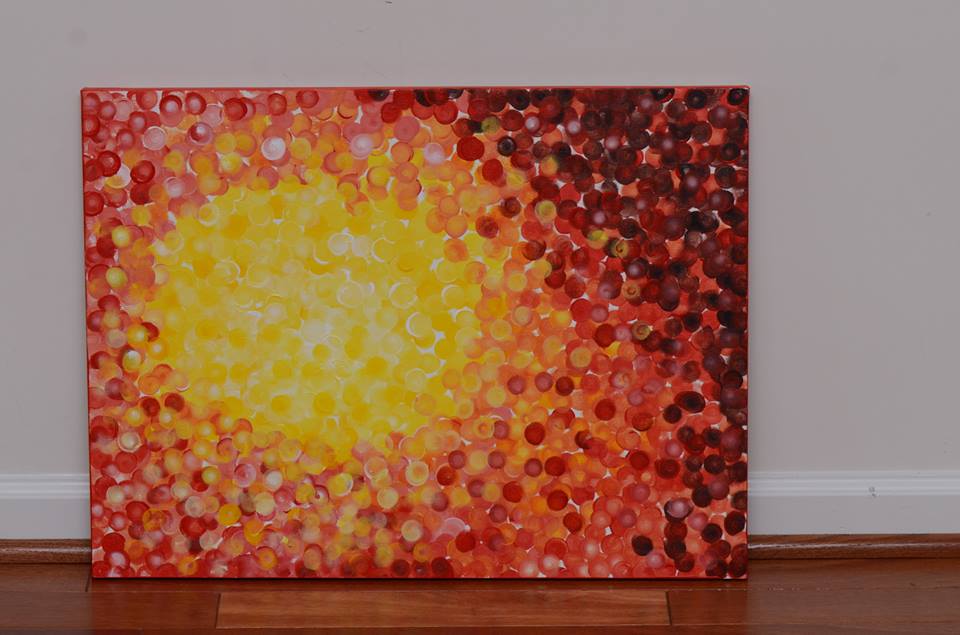
I used round flat tip sponge brushes(pouncers) for the background.. I was after bokeh affect of a sunset scene..
Start with white in the center of the sun and add yellow, and then eventually red.. try to blend the colors so that they wont appear like patches..

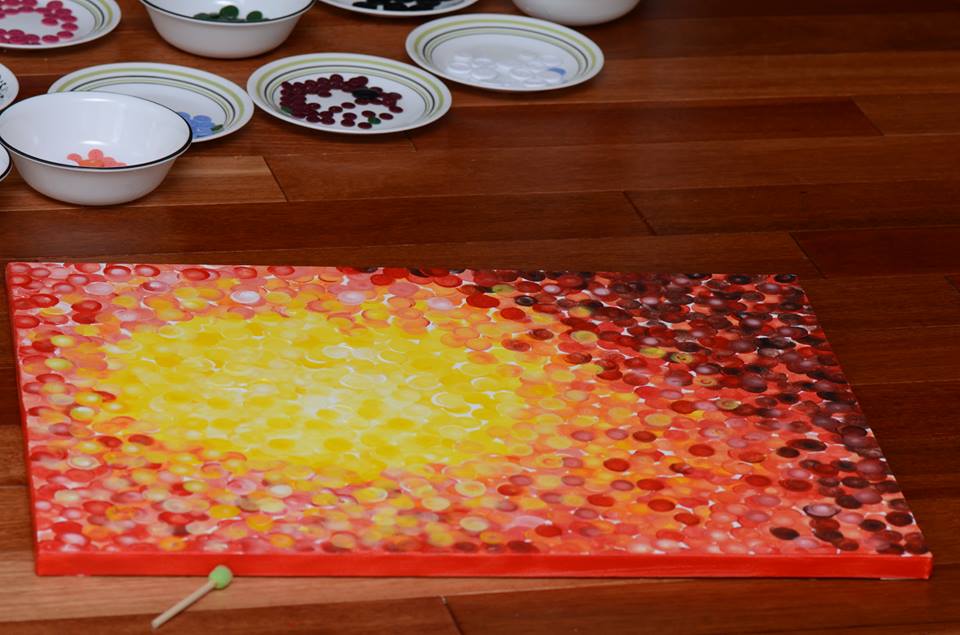
You can see the pouncer brush beside the painting, used different size brushes randomly..
The main colors used in this are yellow,red, white, and black.. Basically add black and white to your colors to make it dark and lighter..
For the stroke, you just dab the pouncer in the paint(Acrylics) and put it on the canvas, and rotate it so that you get a perfect round.. Keep repeating until you get the desired background…

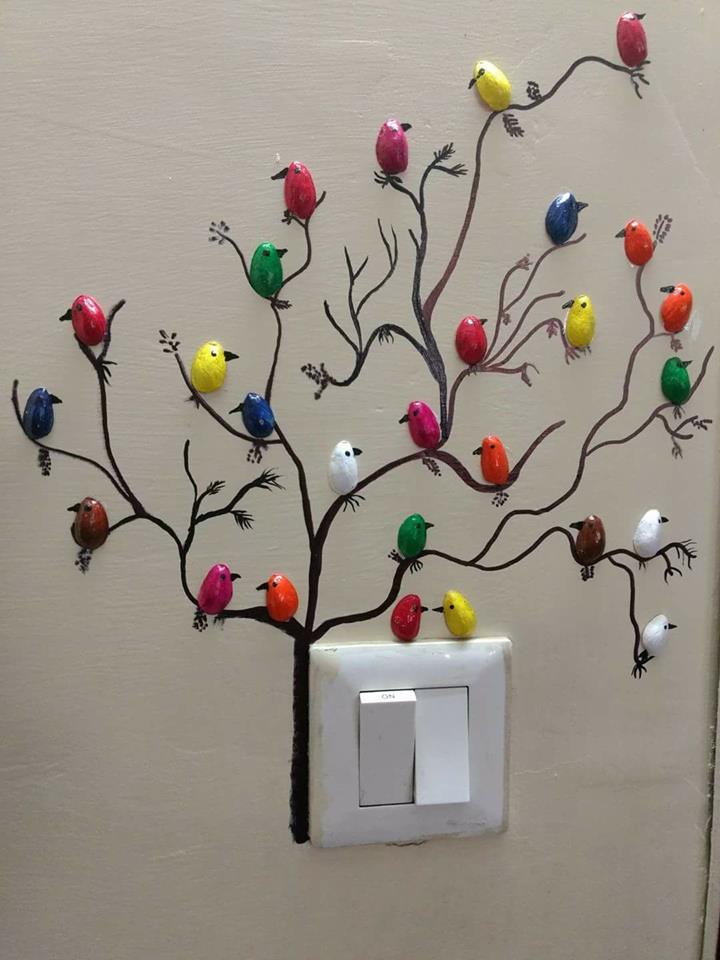
…plan was to use the buttons you see in the bowl, on the painting. but changed at the end and settled with just a silhouette of a tree and birds..

This is how the background looked before adding the silhouette…

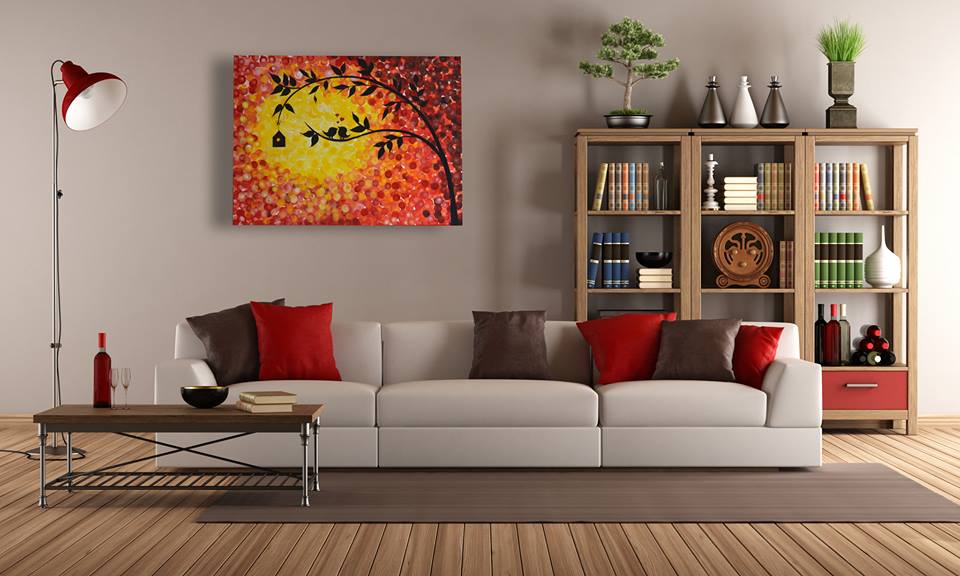
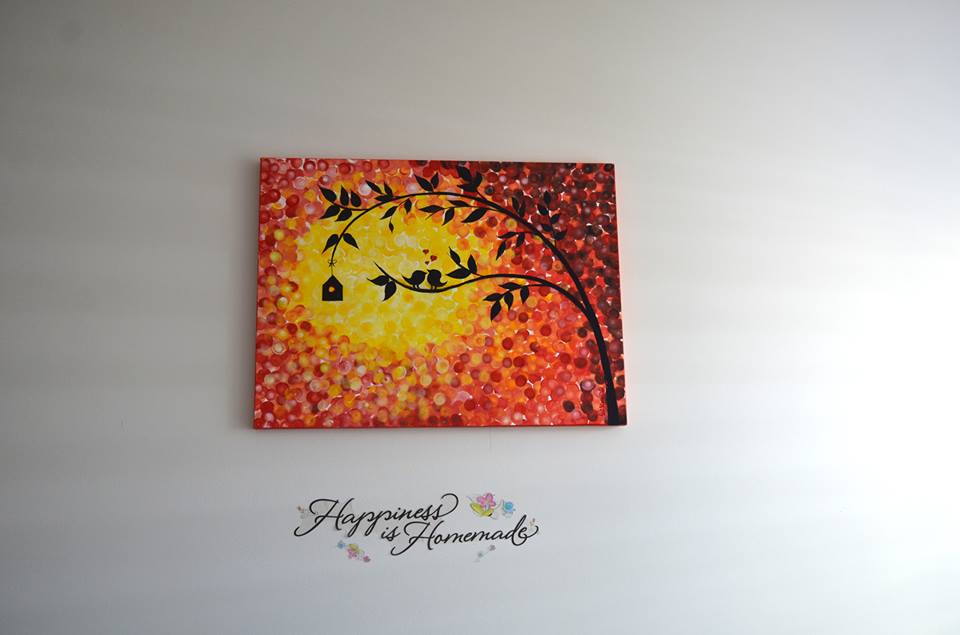
Finished version – After adding a simple silhouette of a tree with love birds.. it gave a real dimension to the background.. Just an illustration done in adobe to see how would the painting look on a wall…

Courtesy: Sriks Creative Corner

DIY Jingle Pillow Tutorial

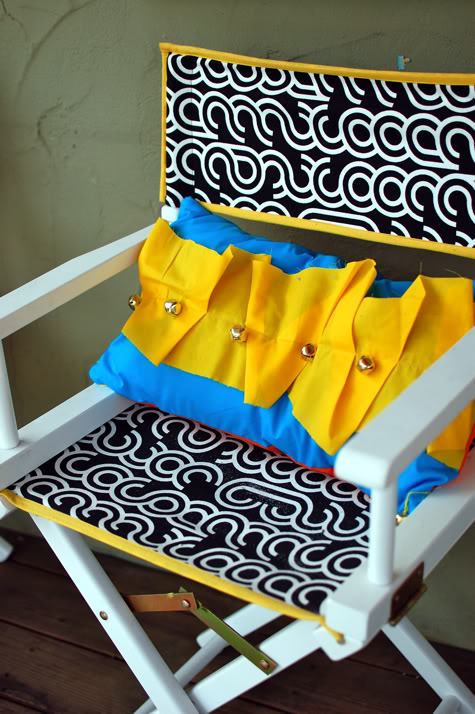
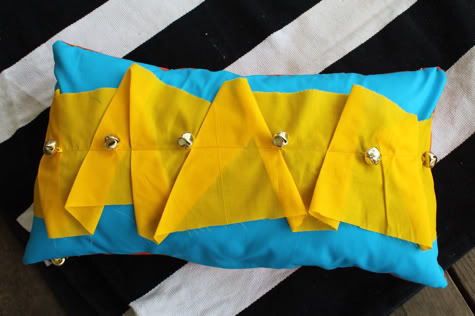
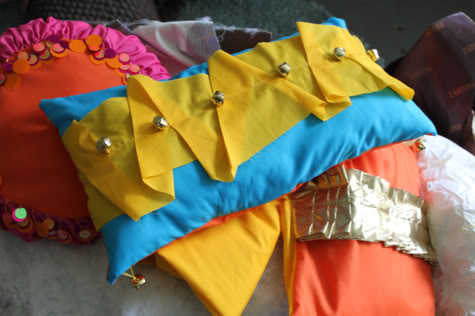
DIY Jingle Pillow Tutorial: Here’s another pillow from Scarlet’s Indian Elephant Party. The colors are a bit much attractive. I guess it wouldn’t be so comfortable to snuggle up to a pillow with metal bells on it, but it looks cute and that’s what really matters. Or you could replace the bells with buttons or ribbon flowers!

Get the full Jingle Pillow DIY after the jump…

DIY Jingle Pillow

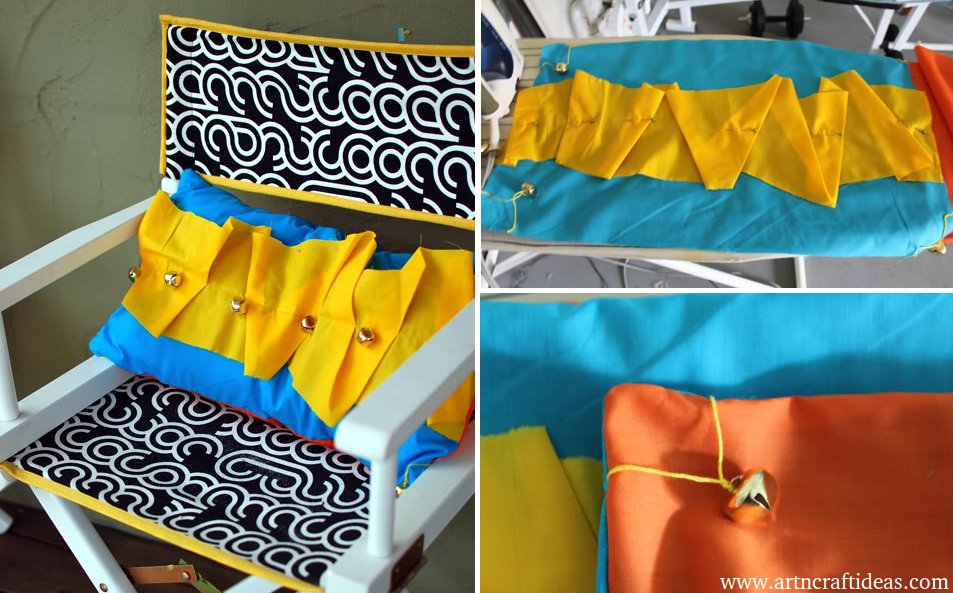
1.  Wash, iron and cut your fabric. You’ll need one piece the size of your pillow plus 1/2″ for the front.  For the back you’ll need two pieces the same length by half the width of your pillow plus 2.5″.  Then you’ll need one long strip of any fabric in any width and length for your ruffle, and some jingle bells or buttons or what not.  My pillow is 12″ X 21″ so I cut a pieces 12.5″X21.5″ for the front and two pieces 12″X13″ for the back.

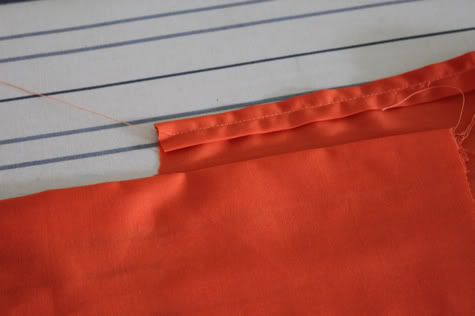
2.  Fold one short edge of each back piece in 1/4″ and iron, then another 1/4″ and iron, and sew in place.  On the side that will show, fold it in another 1/4″ and iron but don’t sew, so later on you won’t have a seam line showing on your pillow:

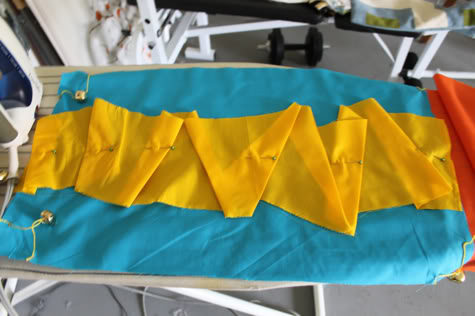
3. Take your long strip of fabric and fold it randomly across the front and pin in place.  Ignore the bells on the corner, I did it in the wrong order:

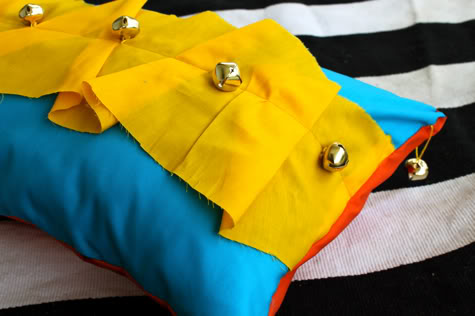
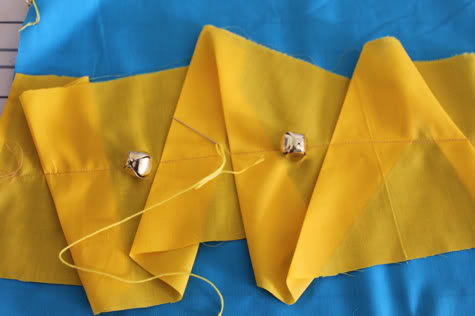
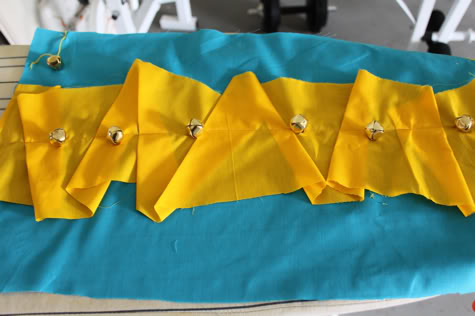
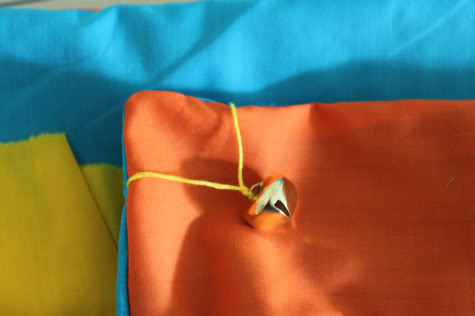
Sew the ruffle in place with one long line of stitches.  Then using embroidery thread hand sew your jingle bells or buttons to the front of the pillow:

There you go:

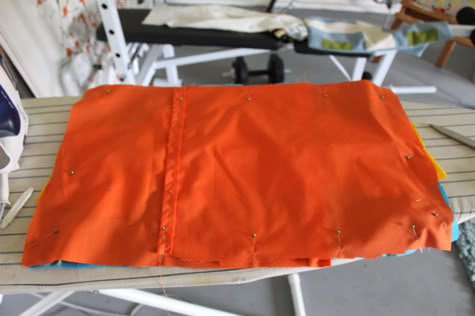
4. Now lay your pillow front right side up, your pillow back piece that will not be showing right side down, then the pillow back piece the will show right side down on top of that, making sure the outside edges of the front and back line up.  Pin in place:

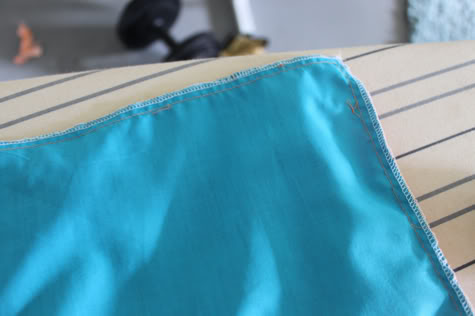
Sew all the way around and finish the edges by serging, sewing with an overlock or zig zag stitch or just trimming with pinking shears:

5. Turn your pillow right side out and using your embroidery thread and hand sewing needle, sew some dangly jingle bells to the corners:

Stuff with pillow form, you’re done!

Add to growing pile of bright pillows:

Hope you like this tutorial.

Source: prettyprudent

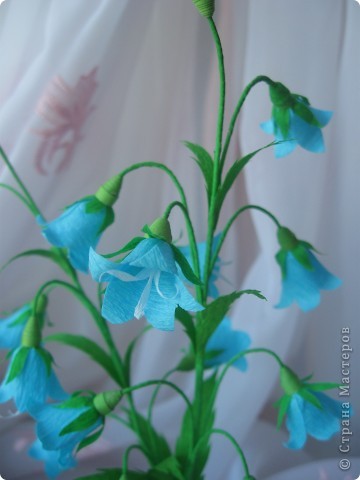
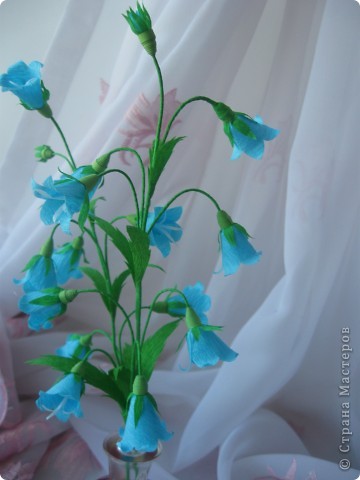
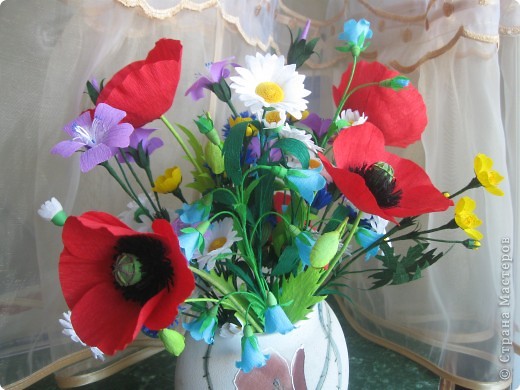
How to make paper flowers bells – Step by step

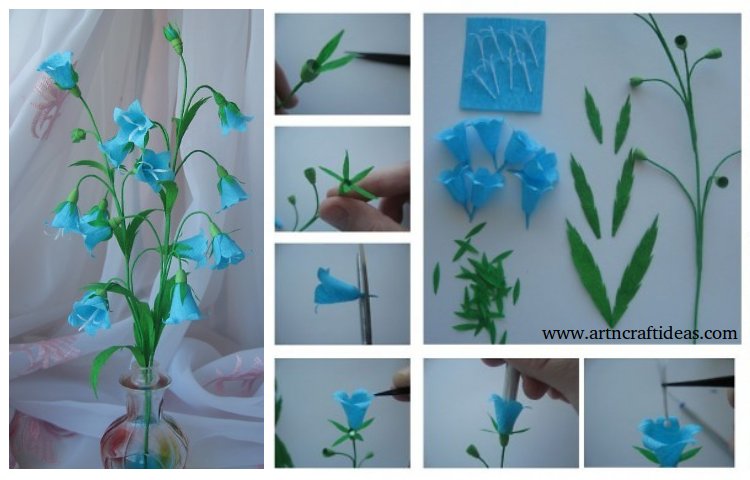
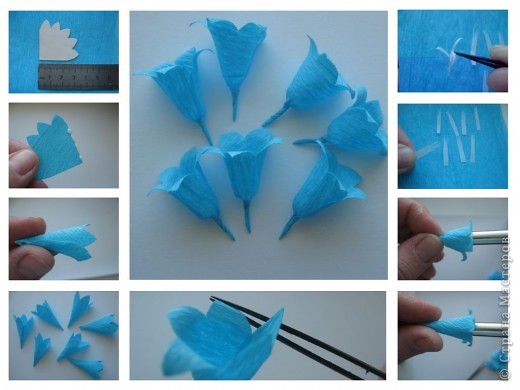
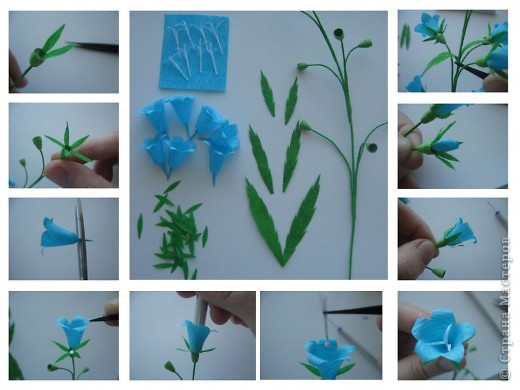
The bell of the paper with your hands out of paper. How to make flowers bells of paper with your hands.

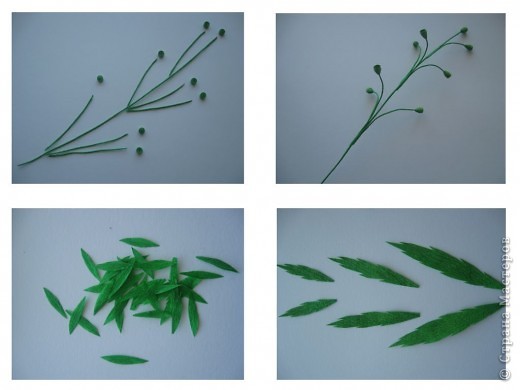
Since we do kolokolchik.Snachala prepare sprig (wire, wrapped in paper and corrugated rolls 0,5 funnel strip 3 mm. Wide)
More engrave leaves three dimensions (corrugation. Paper glued twice) smallest and sepals (gofr.bumaga in one layer)

Paper glue twice, after drying iron utyugom. Vyrezaem pattern (1/4 circle with five “teeth”) detali.Skleivaem their “kulechkom”, spin the teeth, whereby a circular shape of a bell to attach nozhke. Podgotovim stamens: cut fence (white gofr.bumaga in one layer), divide by three pieces of cloves, base curl, kinks and bends.

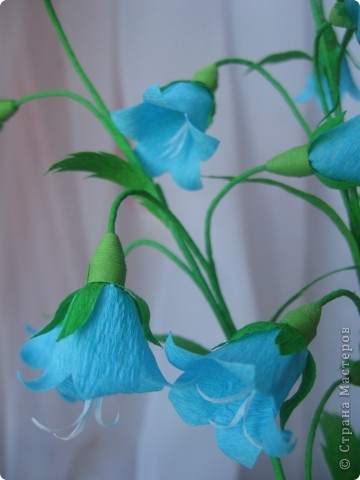
Here we are ready to assemble the flower: stamens themselves bells, sepals, leaves and twigs from the craters. All stages shown in the photo. And another point: for the tight buds of blue paper curl arbitrarily.

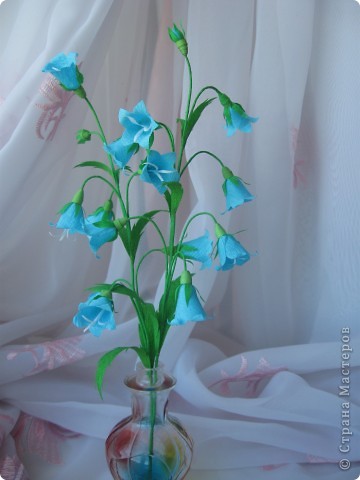
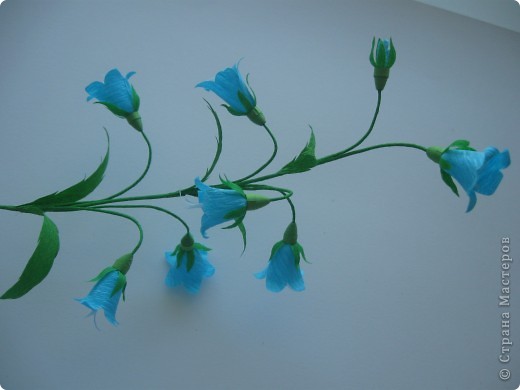
And here is the finished branch:

Thank you for your attention!

DIY Beautiful roses from watercolor paper – Step by step

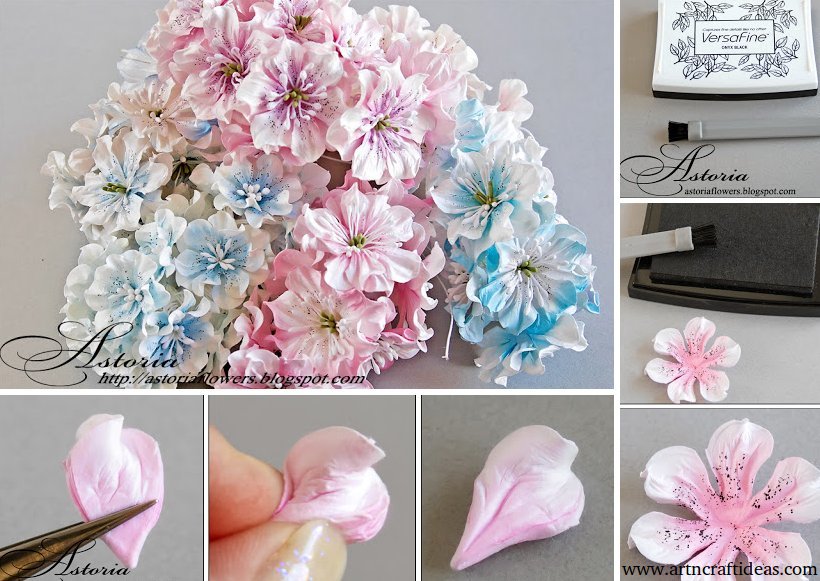
Beautiful roses can be made from the watercolor paper . The color scheme can be very different, and the use of such flowers in the decoration.

The paper – Whatman “Gosznak”.
These flowers I do of Korean paper, but in the master classes of special use drawing paper, so that you quickly determine the paper.

Prepare a lot of parts, score the petals fold stack. Take a spray bottle and spray water between the layers. Knead the stack of paper, like a slice of dough for dumplings. Periodically check the middle, it is necessary that the paper is soaked in water.
Or the second option – fast. Place a stack of paper under running water, dip a layer. Remove from the water. Use your fingers to distribute water, soak again until the paper gets wet completely. The second option I like the most 🙂
Not very pressing with a wet paper proceed to the next step.

PS: Who has difficulties with the purchase of a composter 5cm, use the template.

The small amount of water dilute the ink. Or sponge type paint with a pad, dip in water and wring out. You can use the printer ink.

Sponzhem (I cosmetic) promakivat movements (such as “Peck, Peck”), color seredinku upper layer stack, set aside, and then the next layer. Thus, gradually shifting into the second half stack of color. Do not be afraid of the excess water and flimsy parts.

Take the second half of the unpainted parts and barely touching the edge dip into the paint.

Painted stack parts mash fingers, evenly distributing the paint. Check the middle, if the paint is distributed poorly, squirts water spray between the layers.

Zakonchiv staining, good water press fabric.
Clutching a stack to one side, dry the hair dryer parts on all sides until almost dry. Do not use a hair dryer to embosinga.

Detail fold. Collecting accordion, make folds.
Hold fingers detail about the middle, hold the edge of the tweezers. Gently rotate only the tweezers until the paper does not slip out of it. If the paper is torn, the more dry the parts hairdryer. Conversely, if the fold is not laid soft – moisten.

Adjust the folds, holding fingers area.

Gently flatten the piece and leave to dry.

When the first deferred parts dried up. can be specks.
Take the ink pad black. Better ink resistant to water. Brush with a short stiff bristles (I from the vacuum cleaner to clean the filter can be pulled out of the tuft brushes).
Vertically holding the brush, make a point movement specks.

While the details have not yet dried completely, use the line with circles and tools, make an indentation in the center, dropping petals on the line.
Leave the parts to dry completely.

Glue the parts, pressing tool in the center.

Make a hole awl. Fold the stamens in half, using a wire.

Drag the stamen to the middle of using the line with the hole, so as not to deform the flower. Apply the adhesive so that then cut the excess, stamens are not dropped. Lower stamens to the desired length by gluing them to flower.

That this result was stained in the center and on the edges. The options really are so many and each flower is unique. Do a lot at once, in stages, it is very convenient and much less time than if you make one flower. The process is very exciting and challenging, boring only stamens inserted.While I was preparing for the master class, so I absorbed that made a huge bunch of flowers for 3 days – 236 pcs. Enough for a year or two 🙂

Keep flowers convenient threading a wire through the eyelets of the stamens. For works by suitable simply cut off.

Hope you like this tutorial.

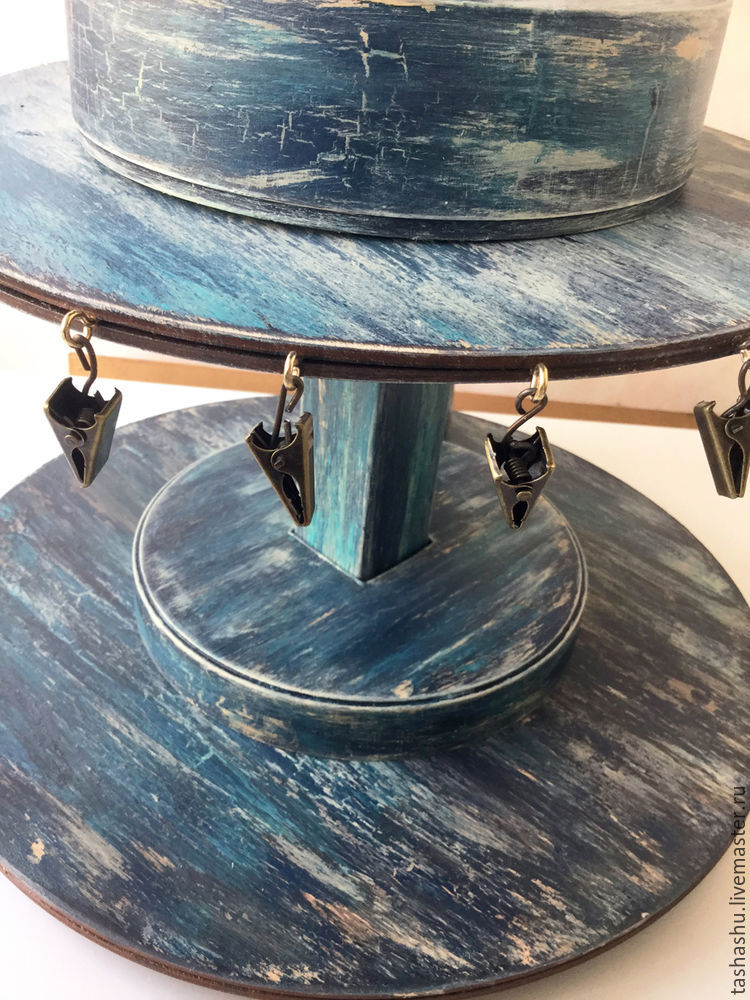
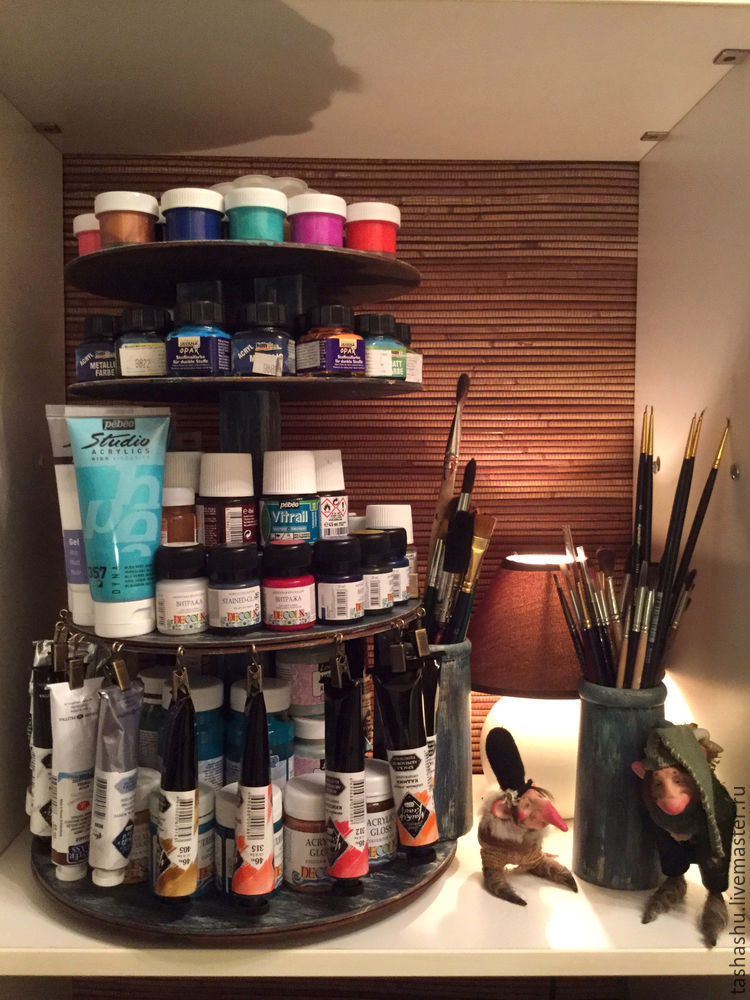
How to make a rotating organizer for paints

Rotating organizer paint: Jars, tubes and bottles of paint … and a lot of the heap. Find the right, it means to dig the entire drawer (but you can not
find … 🙂 Let’s try to put in order the chaos, and even to spread-to paint from the heart 🙂 It has long wanted to try.

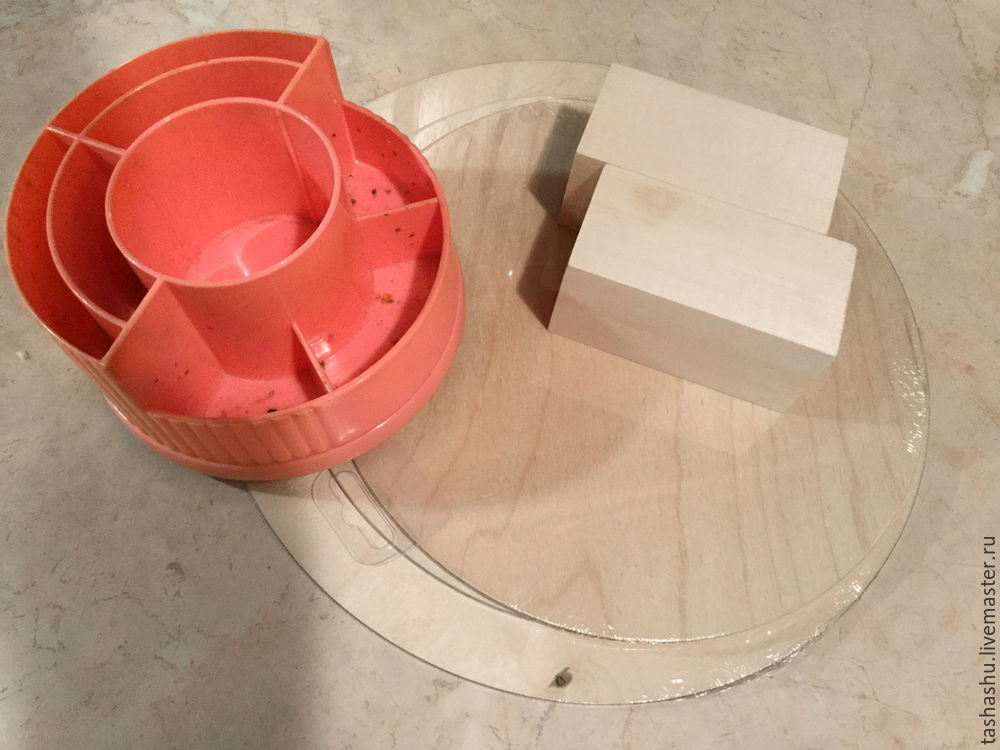
The idea began here with this old pencil holders

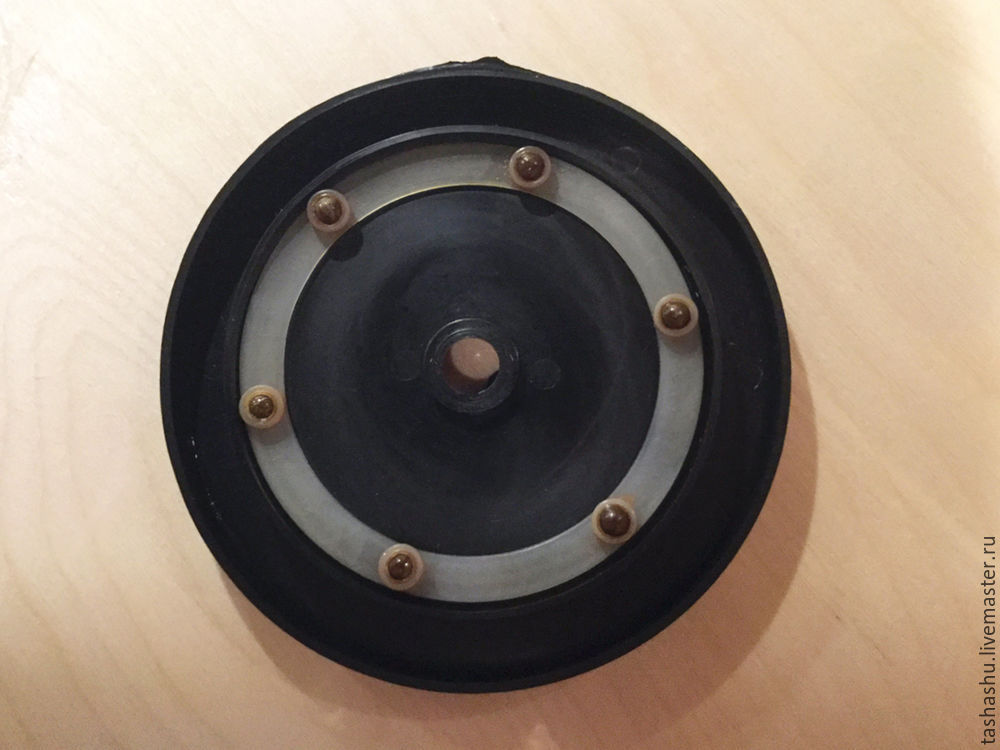
At the bottom of it showed up bearing.

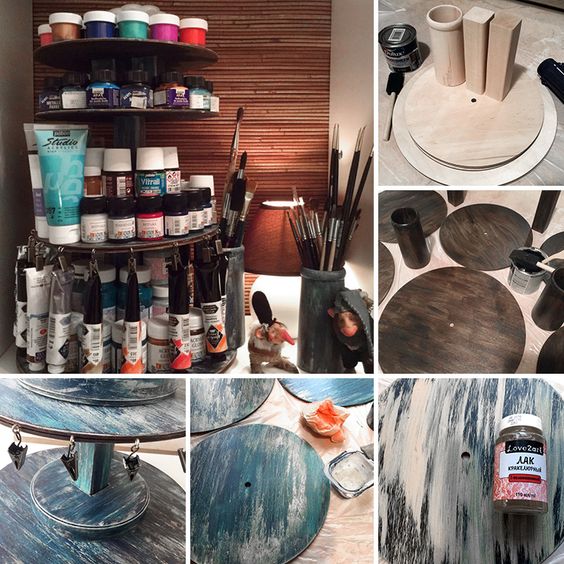
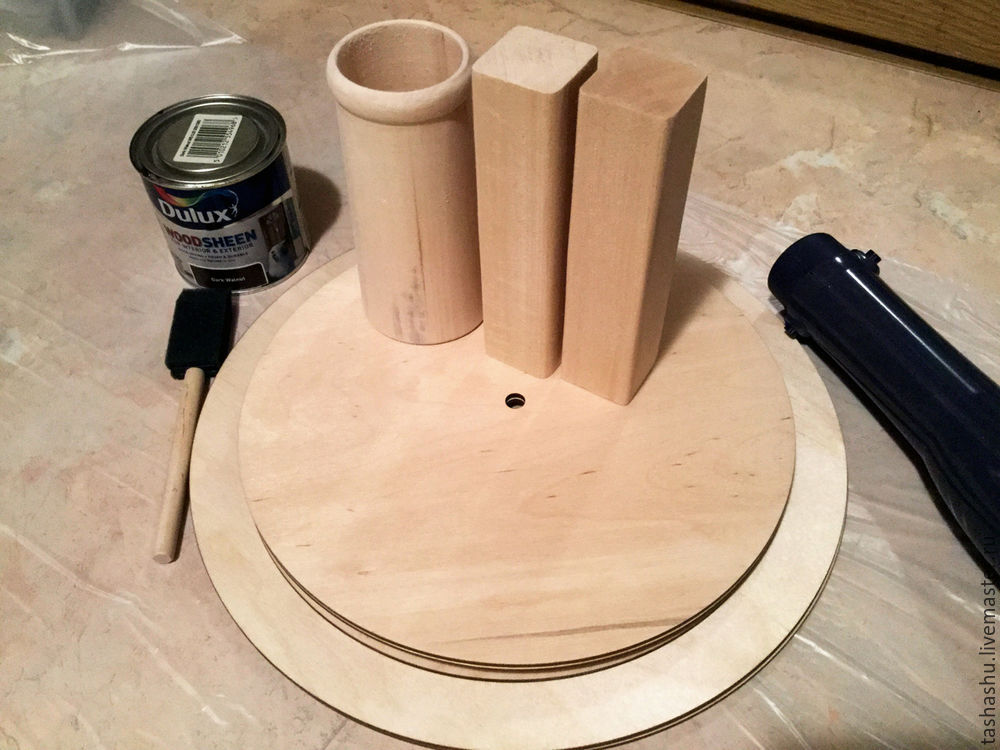
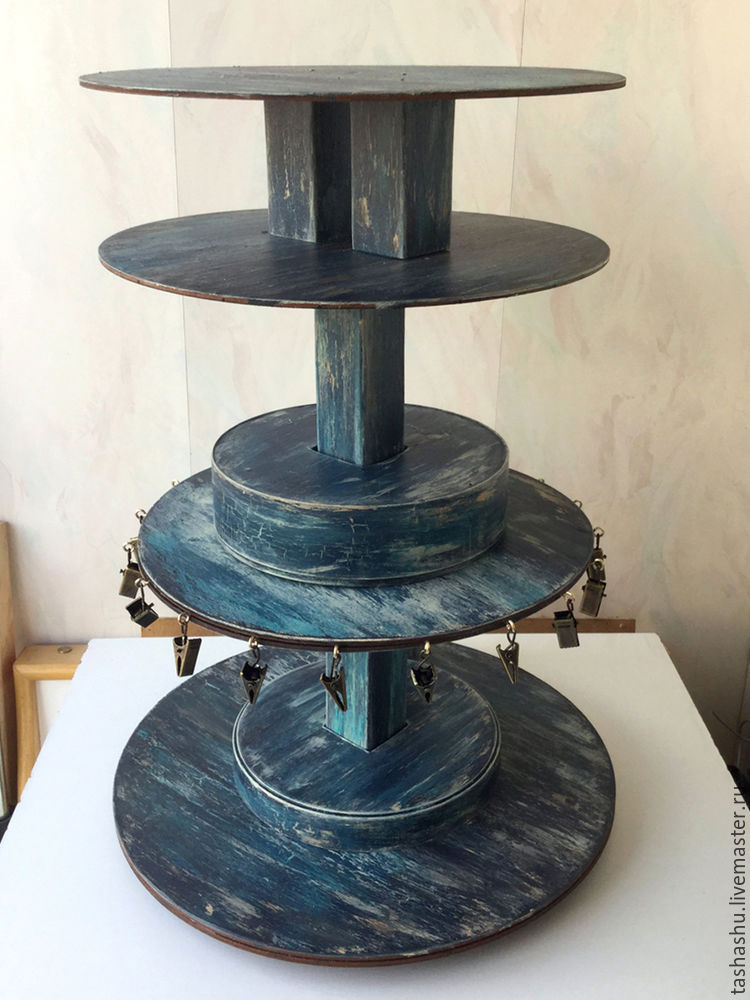
If the pencil holders are not there, you can buy a rotatable plate without any problems. So, decoupage shop bought wooden round bars for hours (shop for handicrafts within walking distance – the eternal temptation 🙂 Two circle – 30cm in diameter, four – with a diameter of 25cm, the three “bar thread” length of 15cm, and two wooden pencil holders (lynx tips, too, will need to live somewhere).

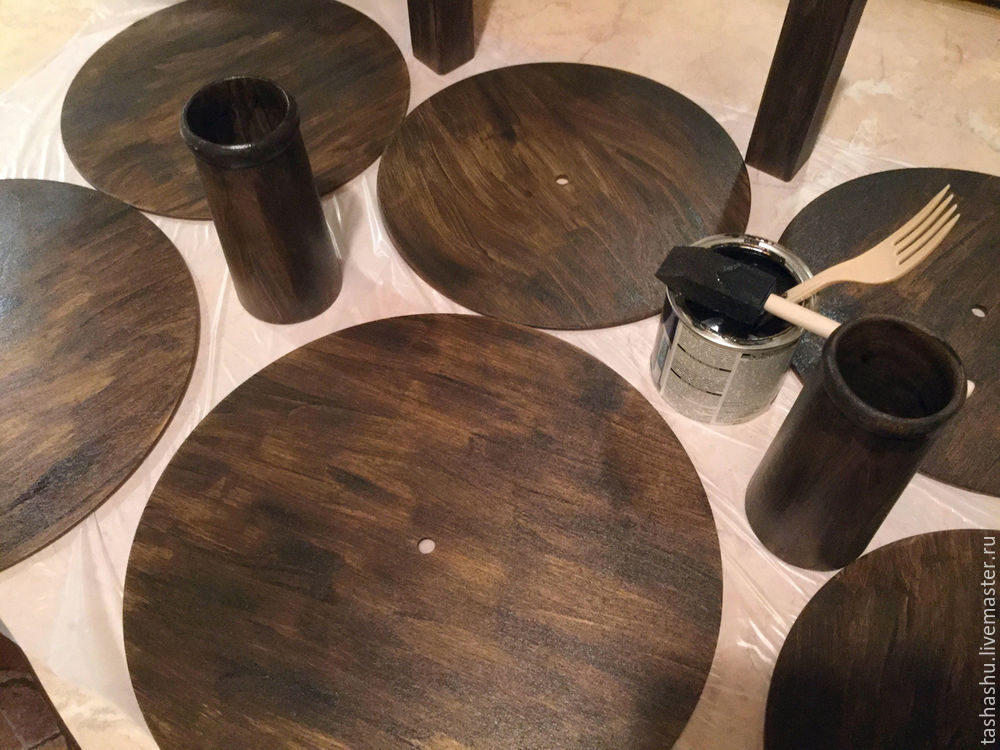
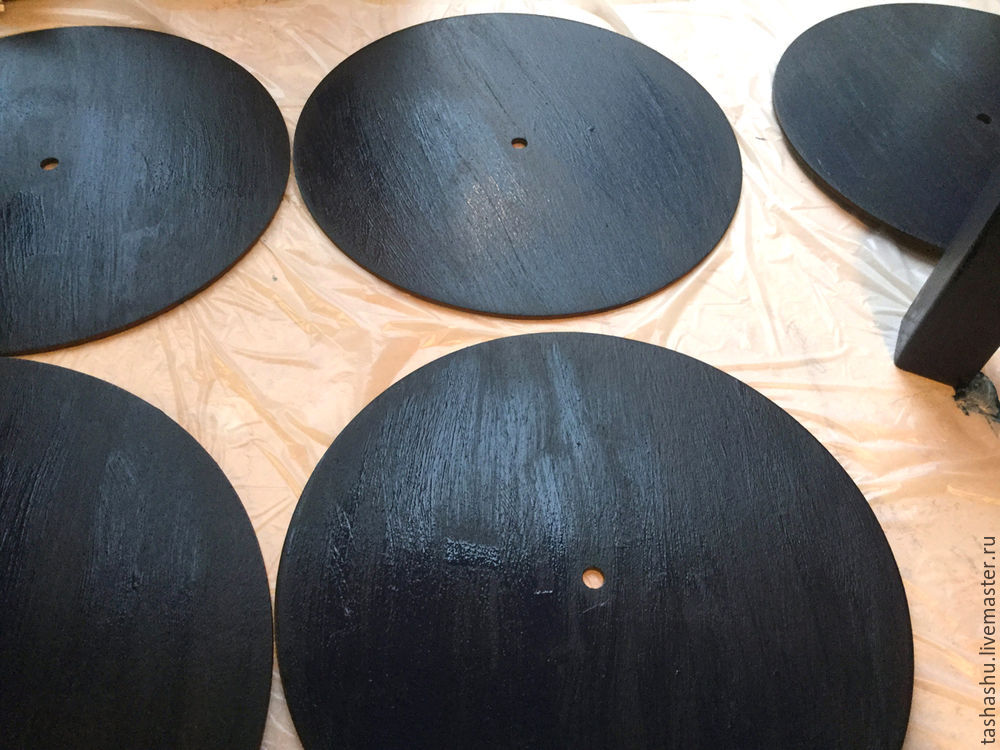
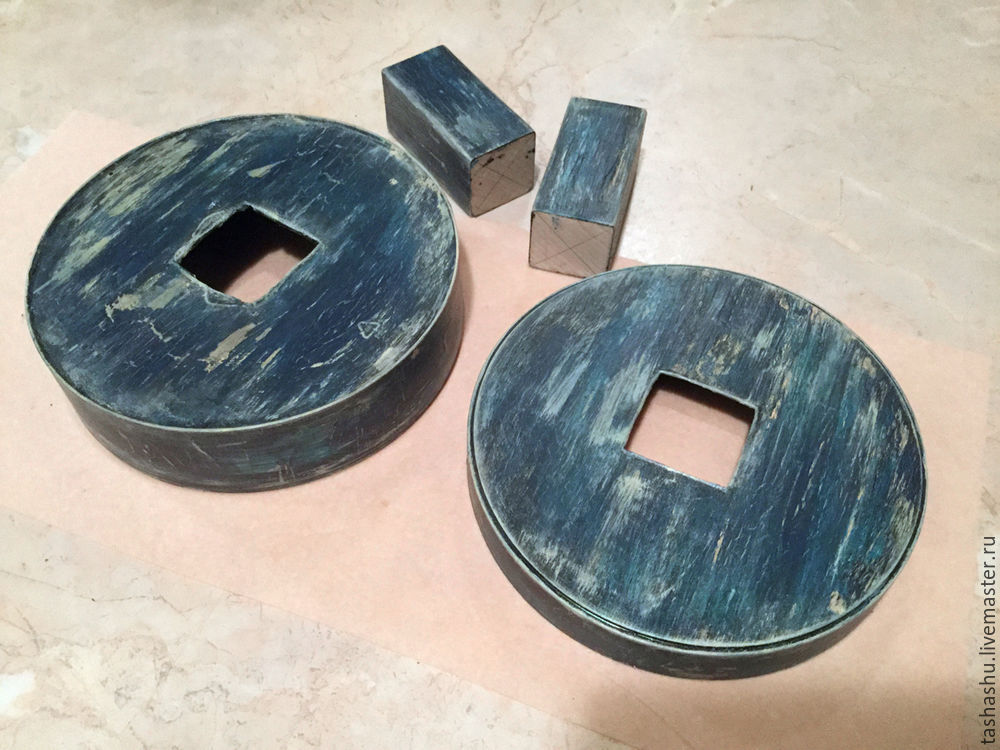
Bars along the edges slightly rounded sandpaper and a block sawed in half. I cover all that stuff a dark stain in the direction of the wood grain.

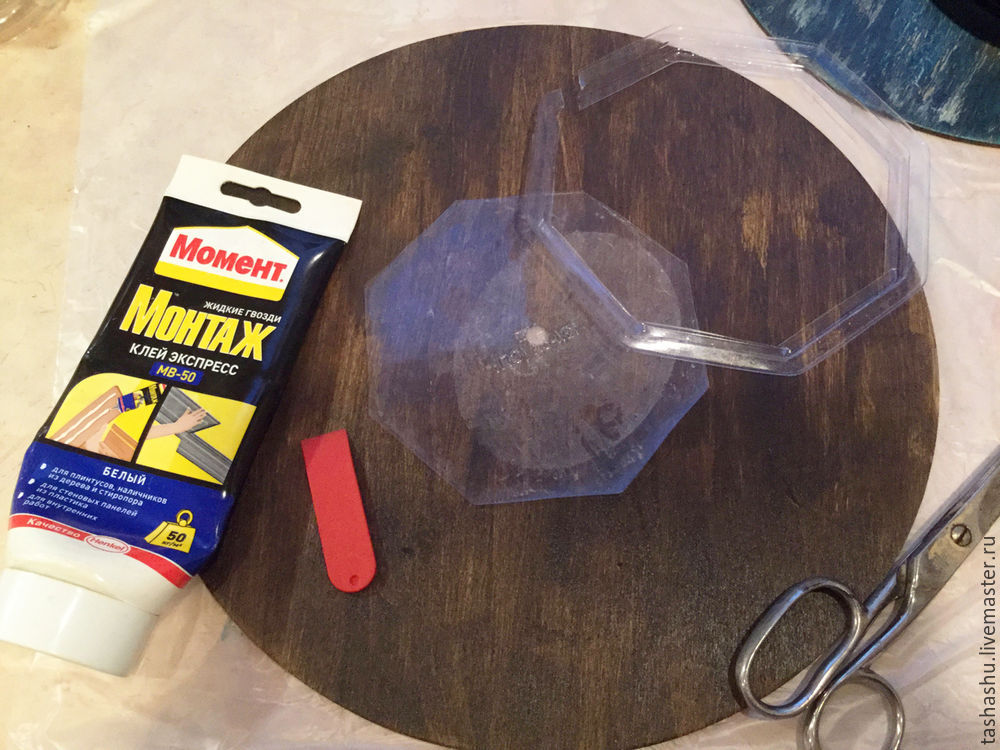
In order to rotate the ball bearings fun, one of the boards pasted adhesive Moment-assembling of the cover from plastic disposable food container, it is smooth and durable. This circle will be the base of the organizer.

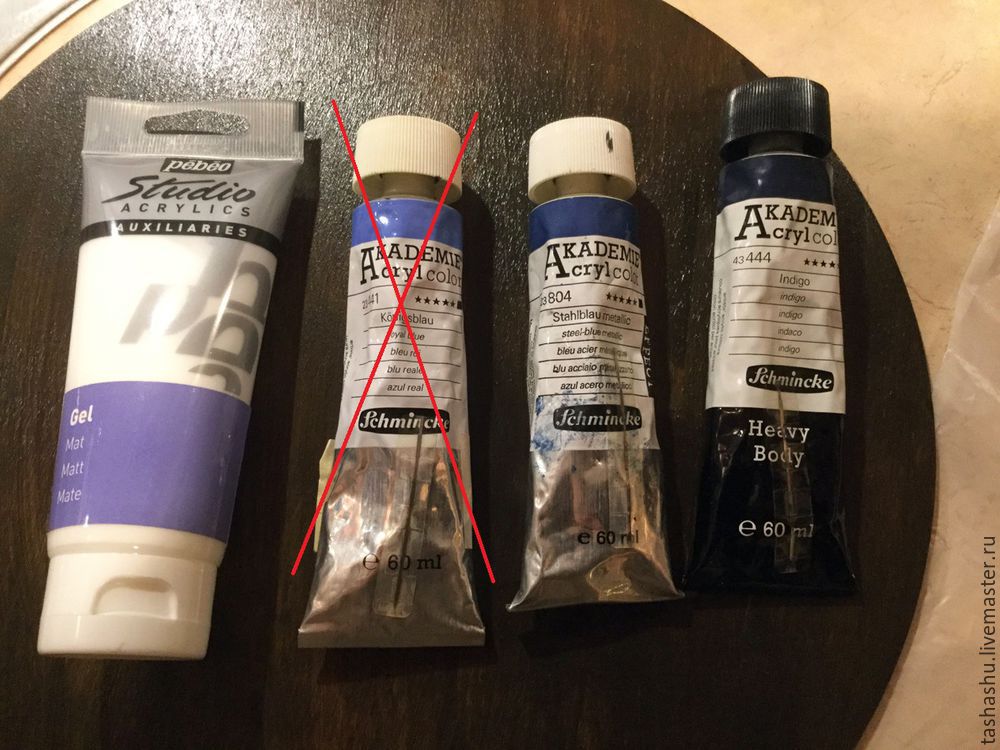
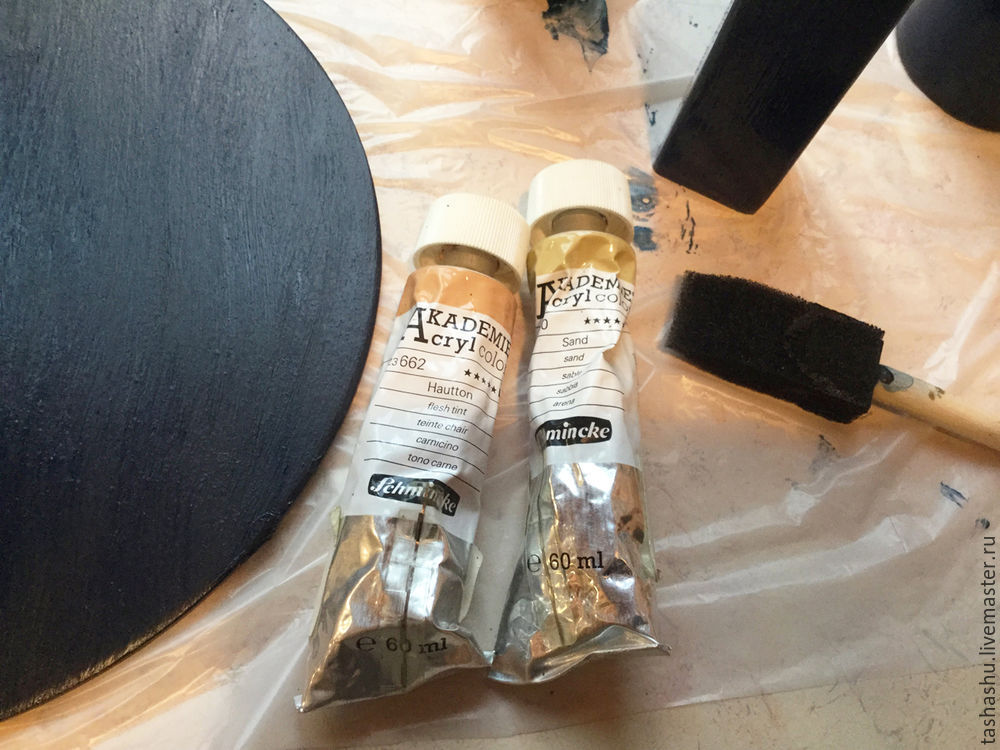
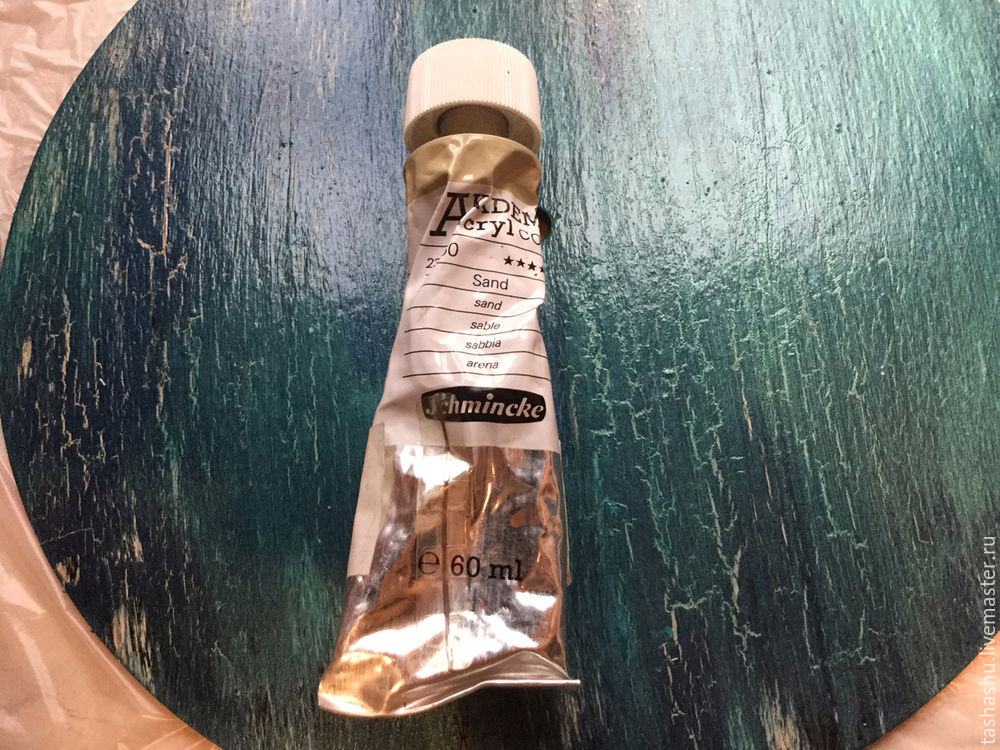
Probably there are many techniques of multi-layer dye, but I decided to just use an old fence principle. Paint with anything 🙂 I found three blue paint of those that do not mind. One of them gave a lilac and was rejected, the second gloss. Gloss me to anything and I mixed the paint with matting paste.

So first, dark blue paint across the surface (do not forget that the painting should be strictly in the direction of fibers
of wood). Thus all paint preform.

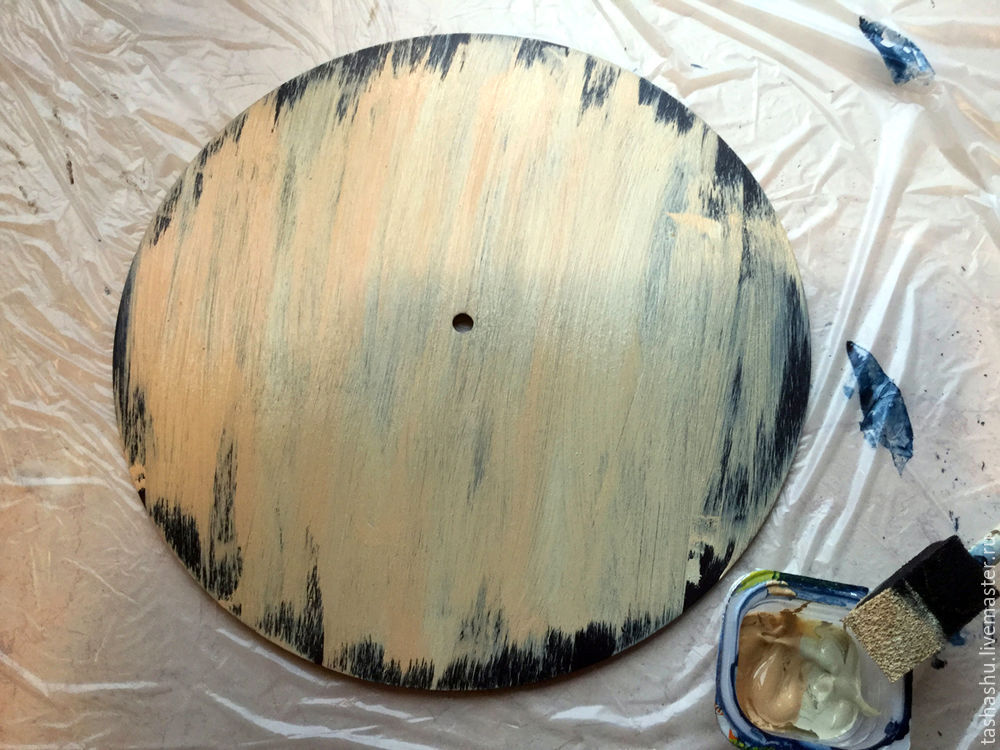
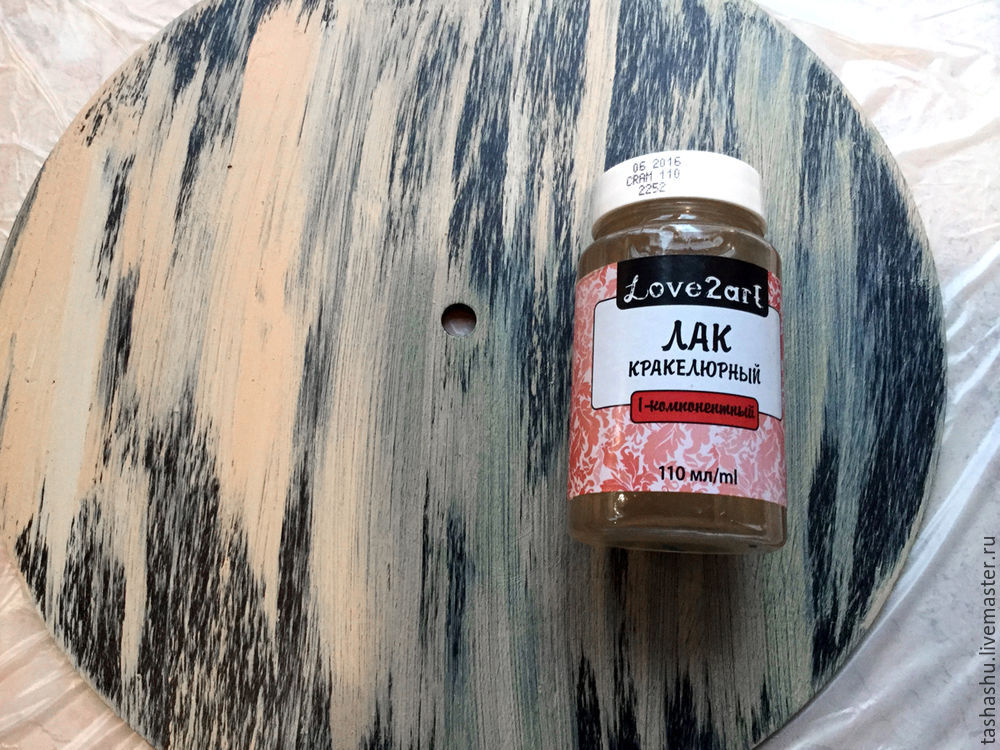
I was about to take up the second blue paint, lighter, but just remembered the old fence. We assume that the next time it decided to make a light. Therefore squeezed just two bright paint and sponge smeared before reaching the edges of the workpieces (edge ​​”shabby from time to time”).

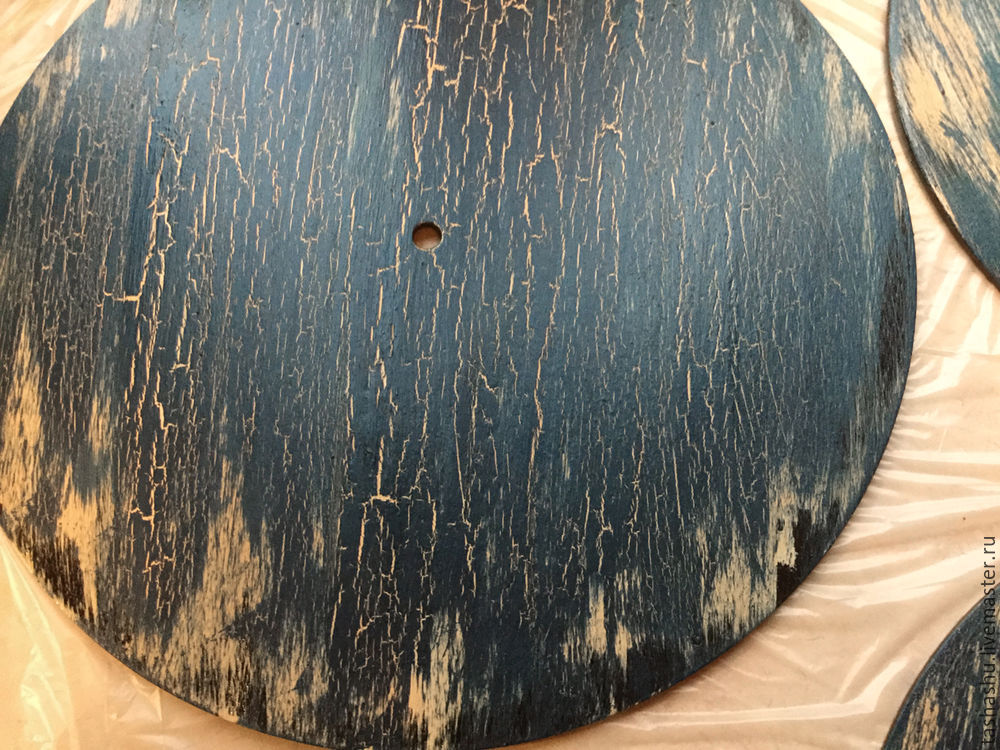
From time to time … Yes, it means more than not craquelure. I found one-component Crackle.

The following hypothetical fence owners decided to return to the blue and I painted over cracelures light blue paint.
Again, it did not reach the edges of the blanks. Eclipsed craquelure cracks.

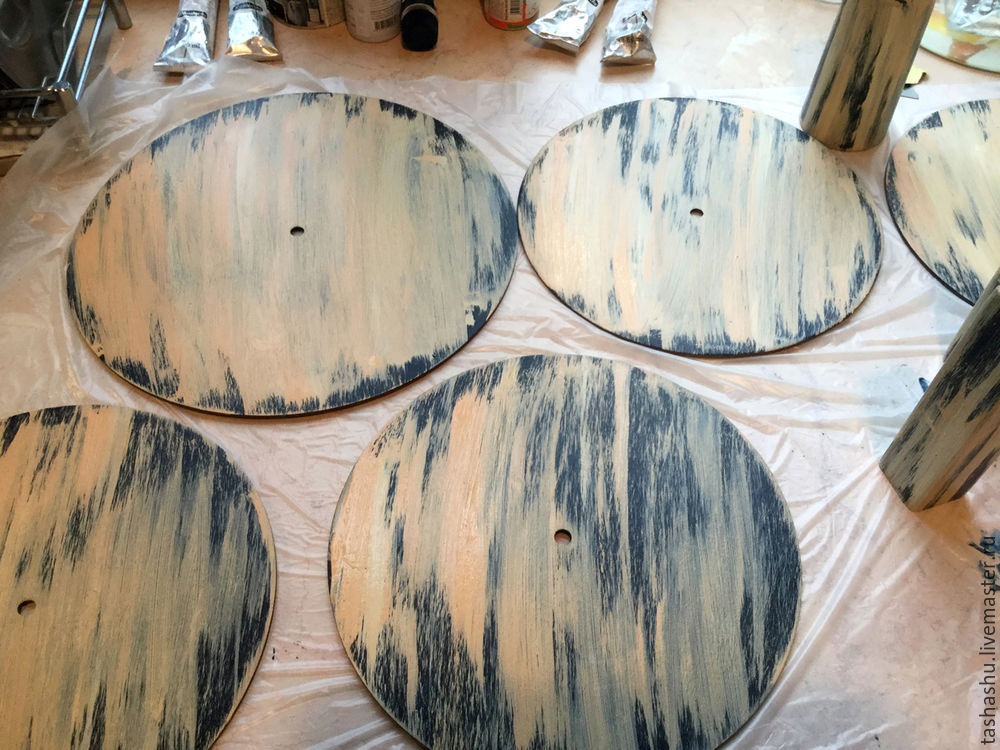
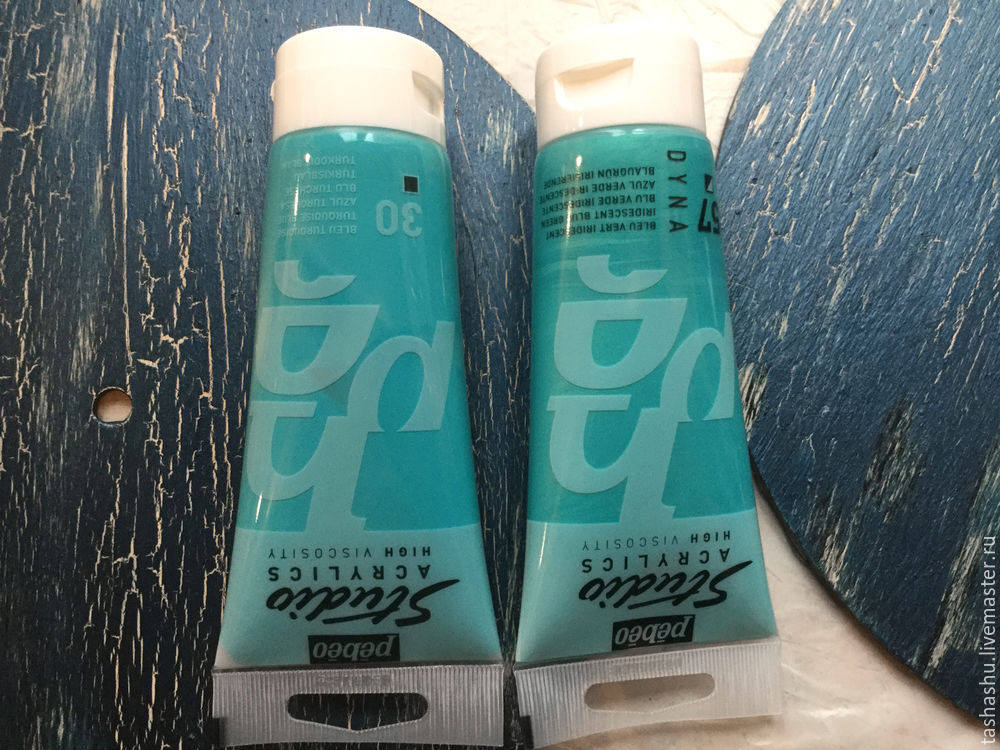
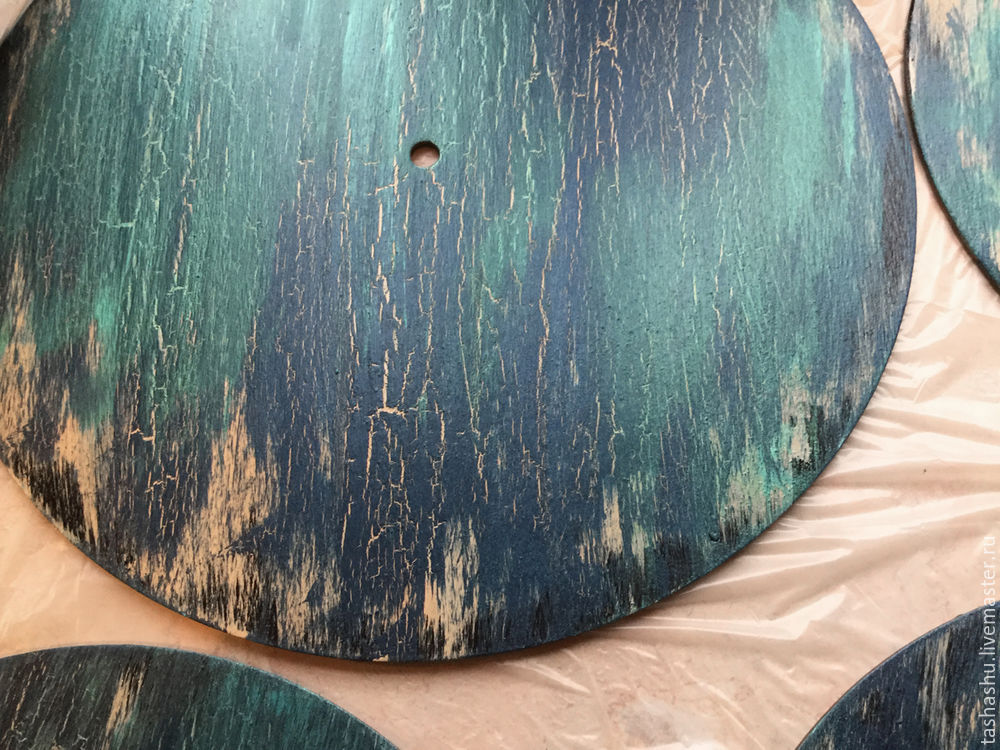
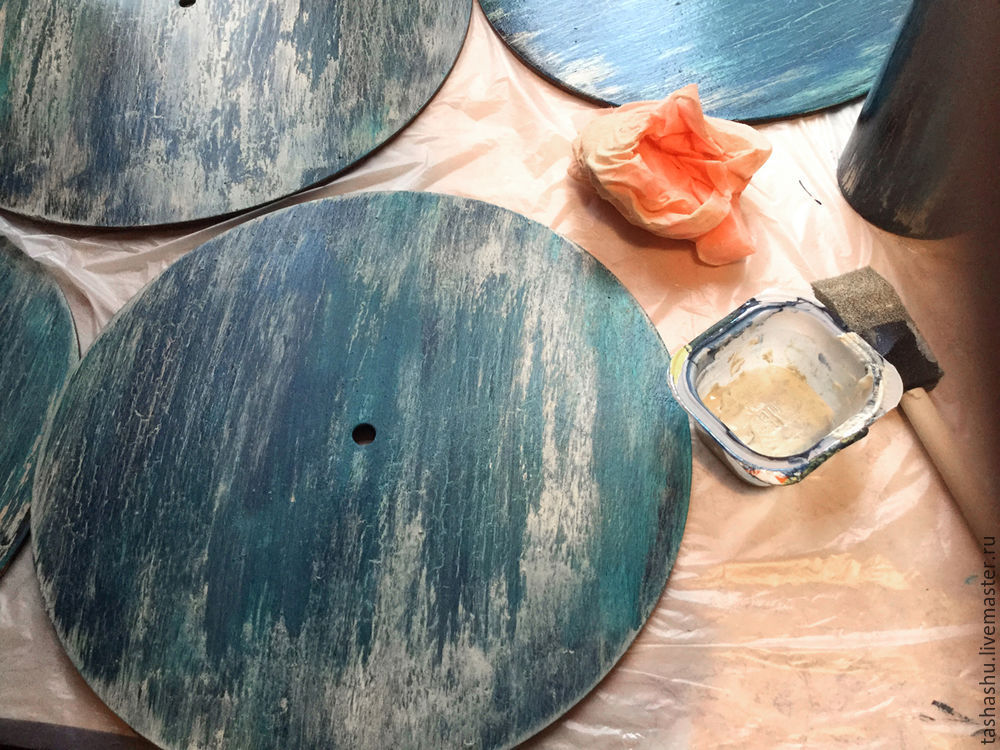
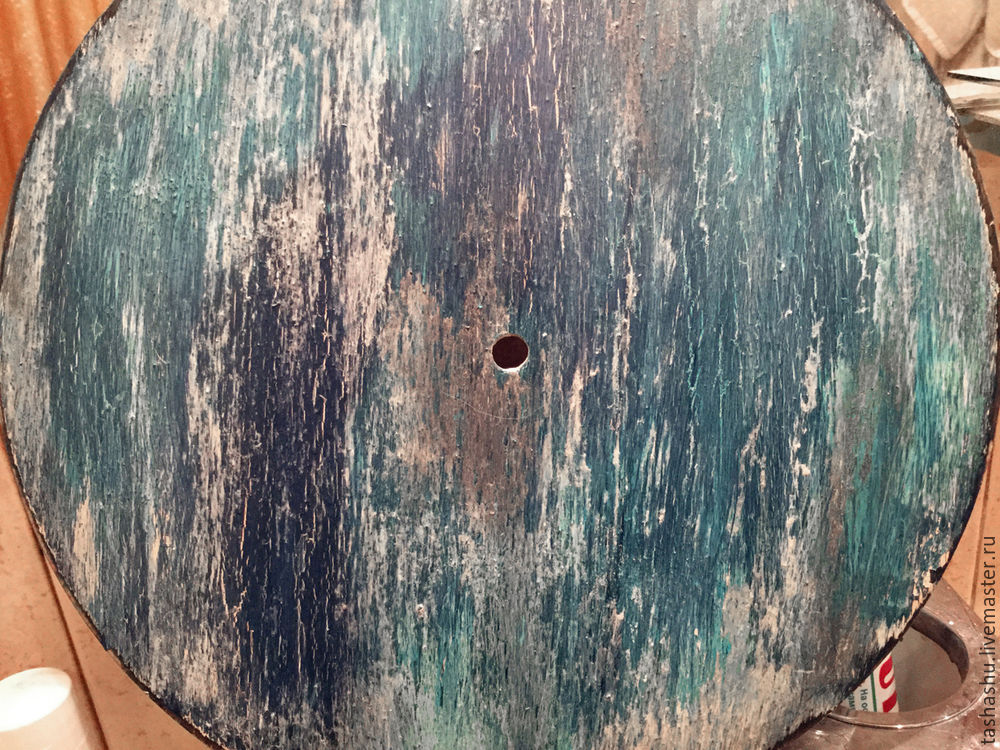
In general, it’s almost enough, but not a favorite turquoise? Held in places almost dry sponge.

And once again he walked the bright paint, barely touching almost dry sponge and immediately removing the excess with a damp
cloth.

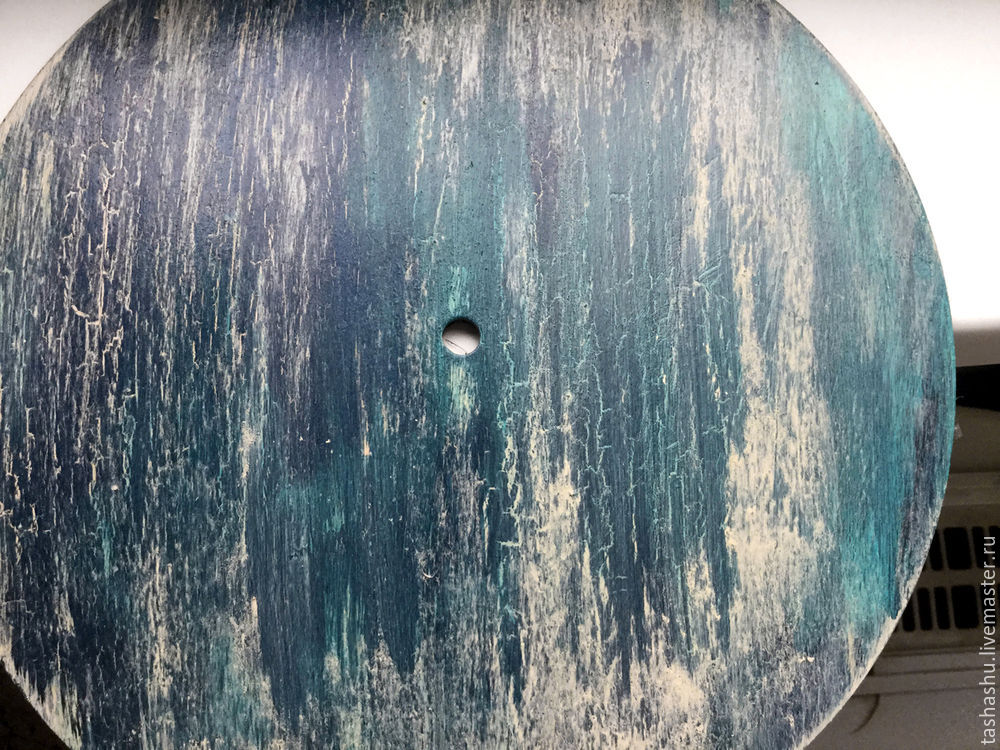
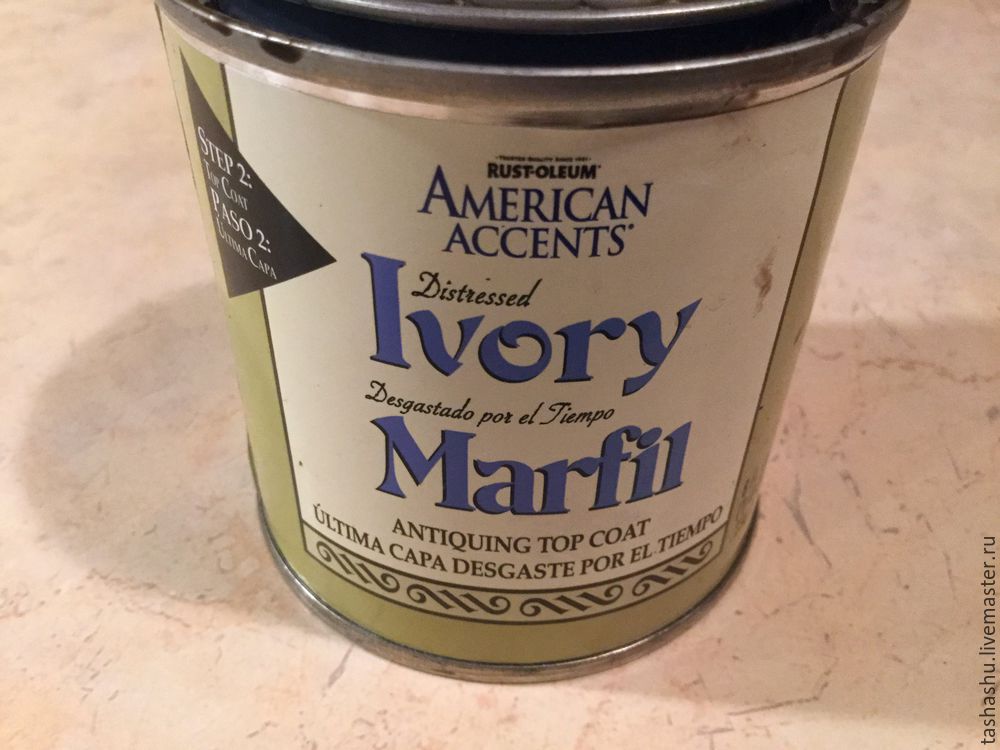
Old – so old! Without dirt can not do. This is my favorite American “dirt”. It is gray and brown, both
wonderful stain.

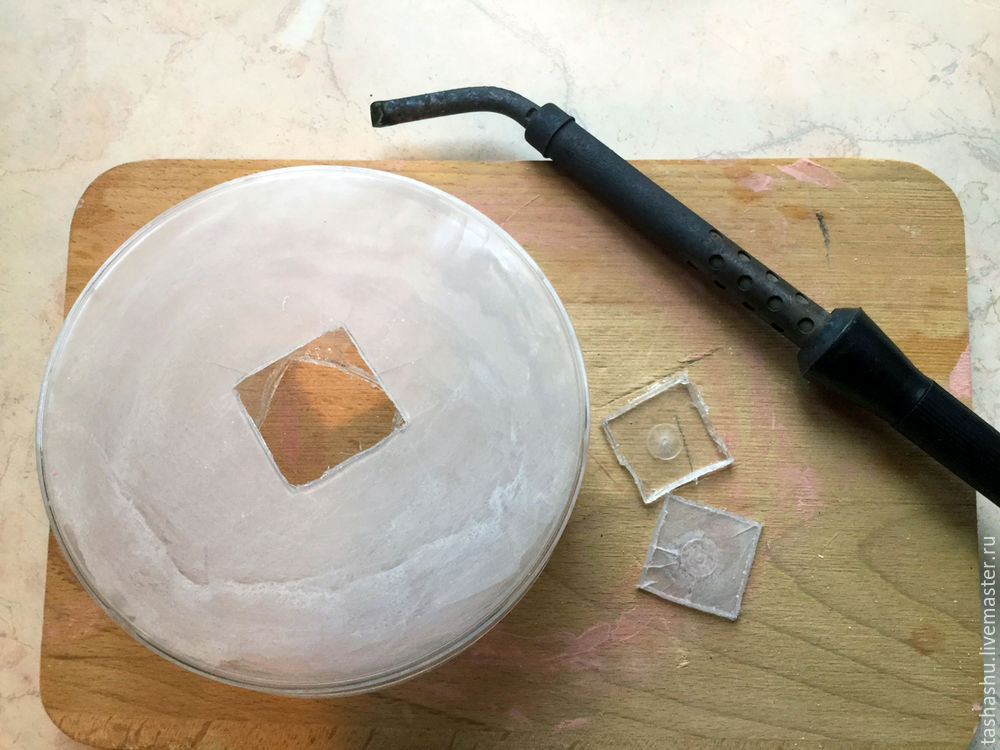
At this point I decided to add his future tower rise to jars not hide behind each other. To do this well it came from a box of chocolates (cherry chocolate was delicious :)) soldering iron to cut a hole the size of bars (first tried proskresti nail, but it is a very long-running process and the plastic began to crack). With a soldering iron I handled in five minutes.

Dyed both halves of the box as the same as the wooden workpiece, but without stain. All parts are covered matt acrylic varnish.

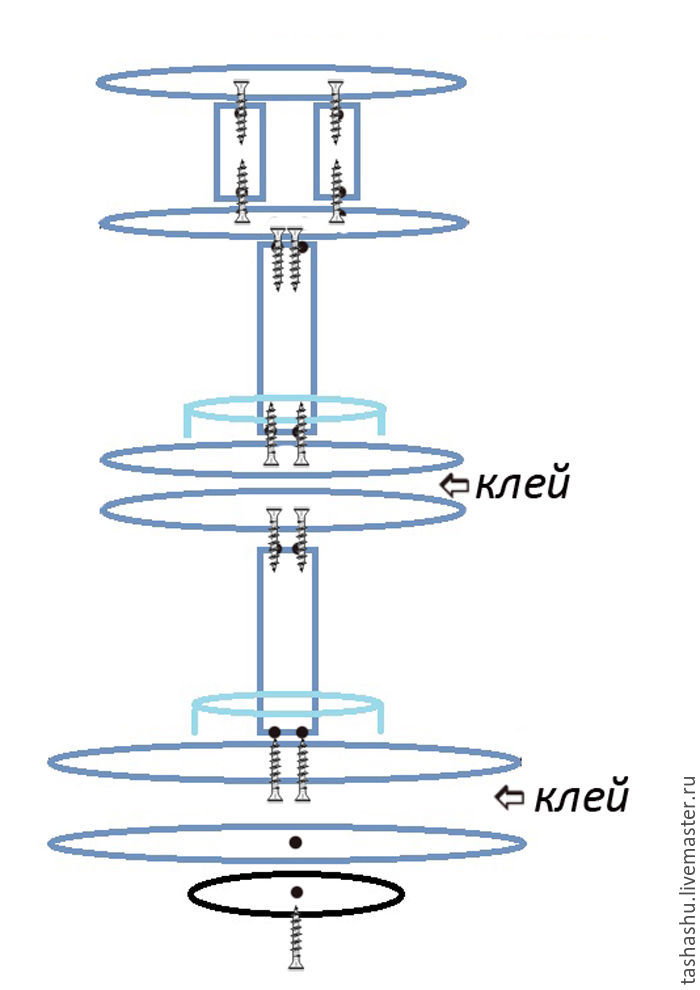
Well, that’s got to build. Moment need glue-mounting screws and washers.
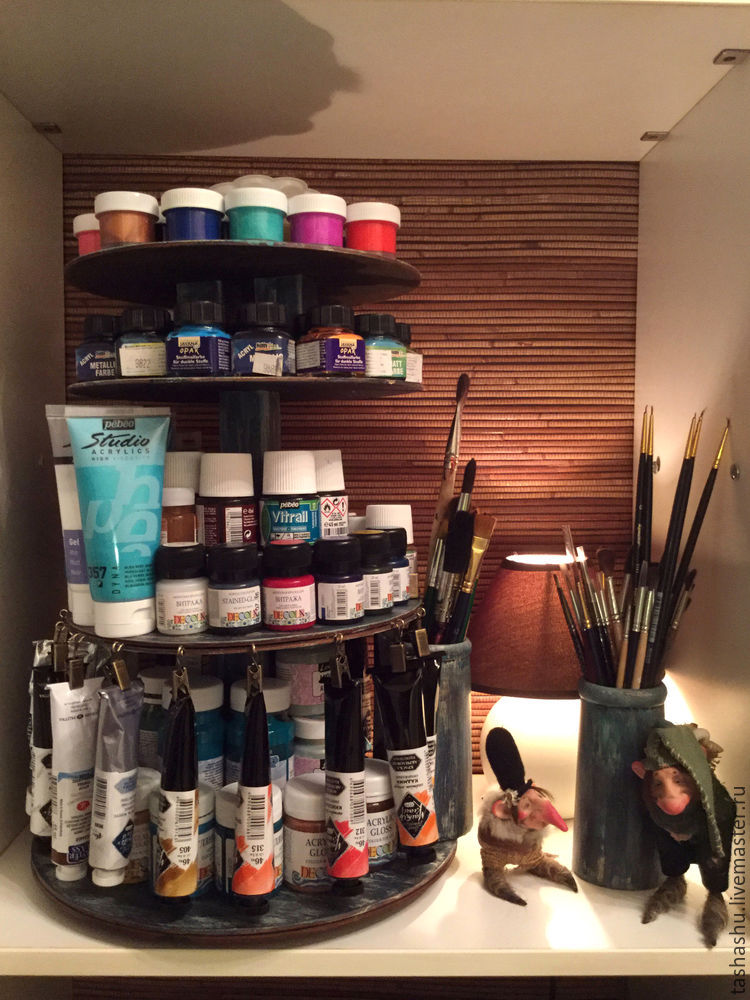
Assembly Diagram (starting from the bottom, “the podium” just worn on the bars).

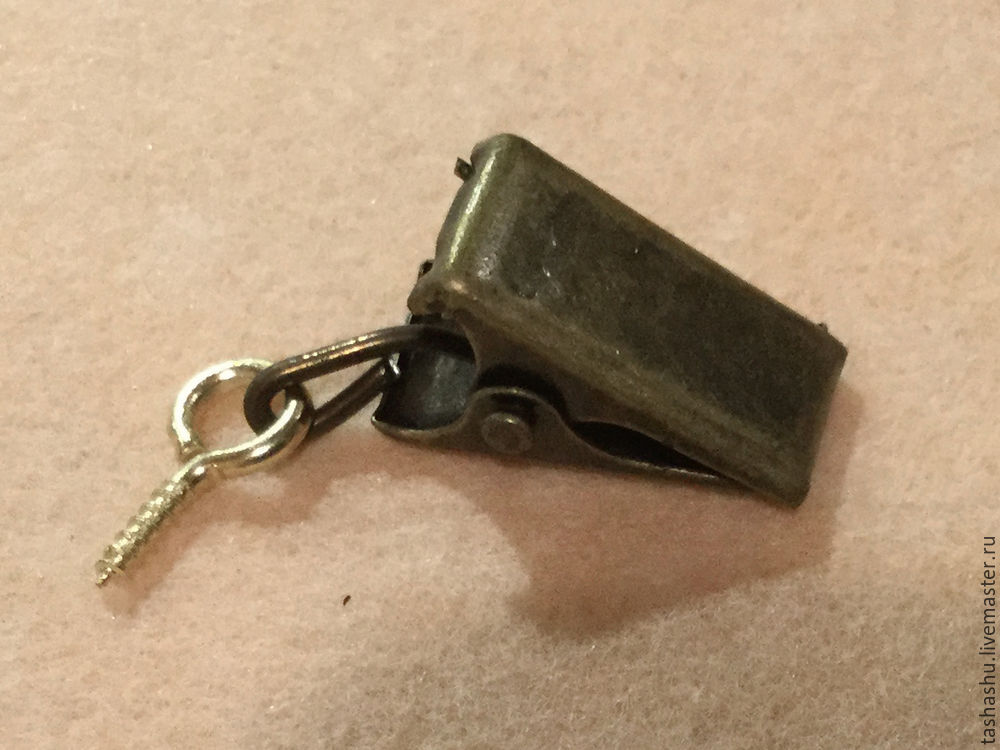
The lower tier of the double I made preparations, as heavy paint and boards seemed to me shaky. For tubes the diameter of the hard-boiled “crocodiles” for curtains that are cemented on the screws with rings. I do not know how they
are called, in the store were in the department for the manufacture of jewelry.

Well, that’s all rotating organizer is ready and you can celebrate the new home of my paints.

Thank you for attention!

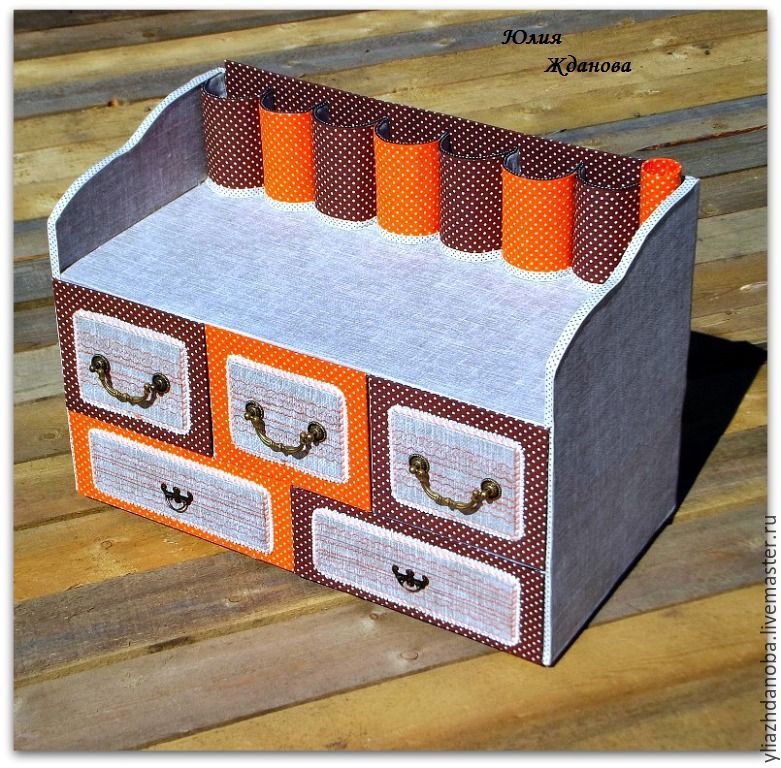
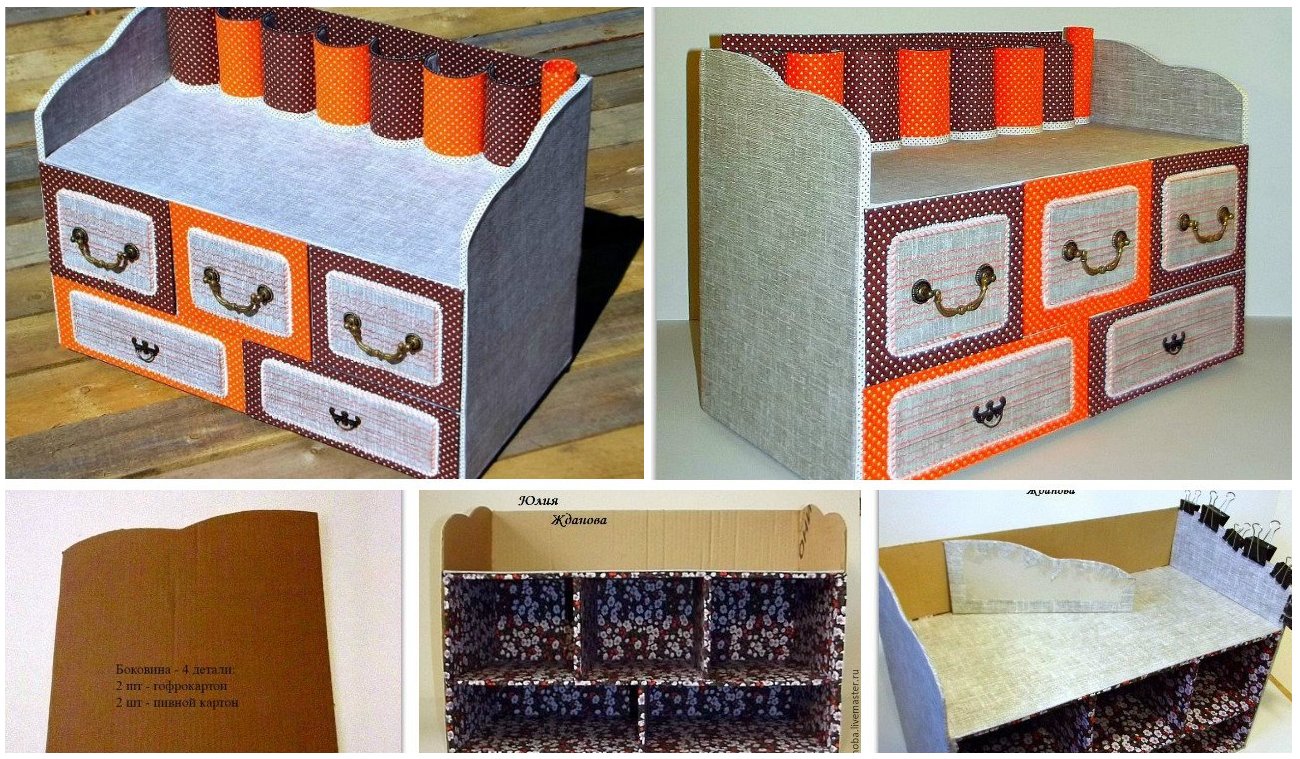
How to make a cardboard room dresser with drawers

Today is the story of how they took me to the “weak.” Background to this. My dear husband, watching from the sidelines as I have done for his future workshop organizers, somehow casually said: “A chest of drawers to make the most – weak?”.

And that’s not weak! The idea is good – it is necessary to embody.

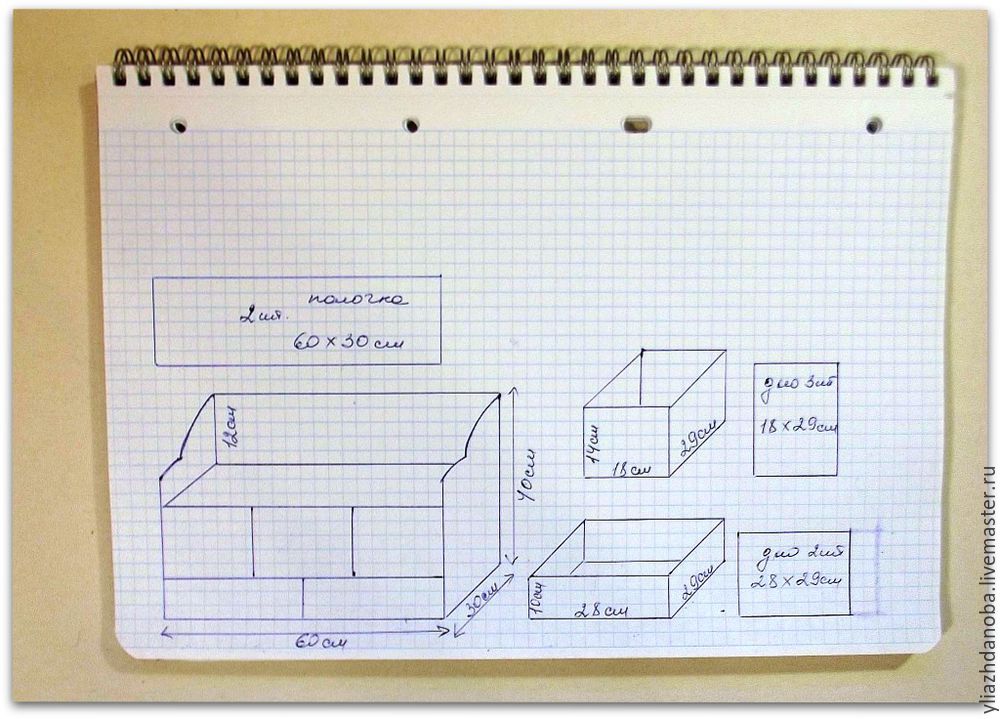
Making it big or small does not want to, so the size is determined to pretty thoroughly, as a result of it I turned 60 cm wide, 30 cm deep, 40 cm high.
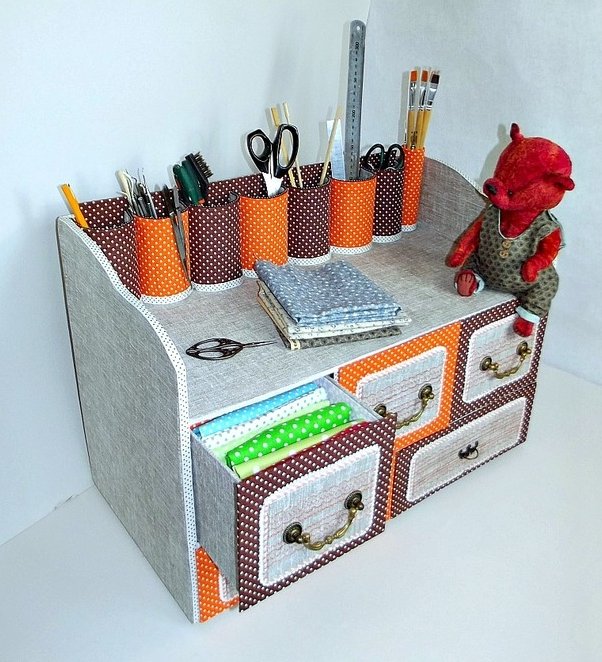
Required material for the manufacture of chest:

  • Bookbinding, beer and corrugated cardboard
  • Kraft paper
  • Calico, flax
  • Clay time carpenter, furniture PVA glue Moment Crystal
  • Decorative handles 5 pieces
  • A pair of scissors, a knife construction, square, steel ruler
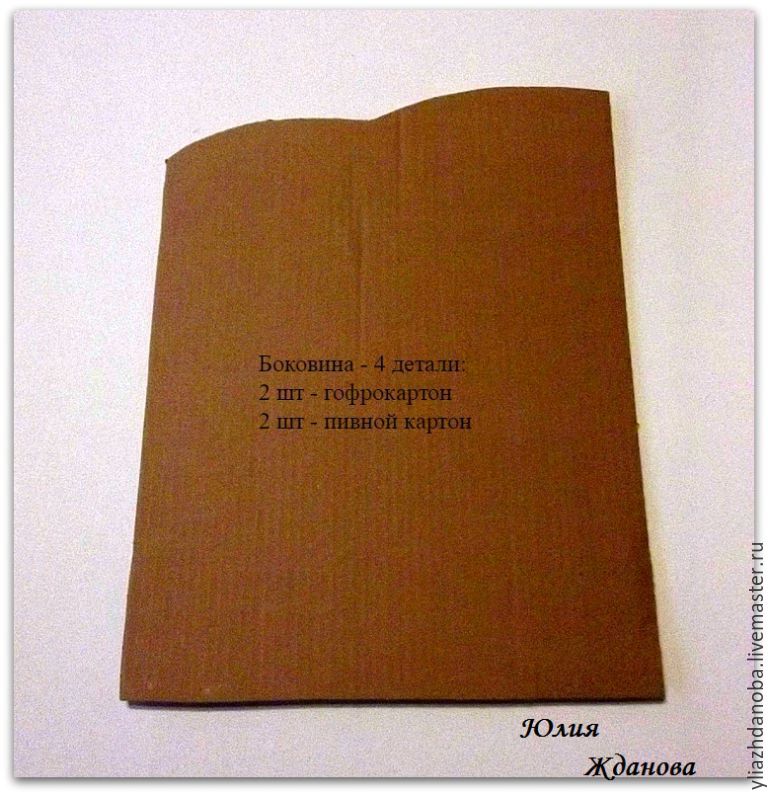
Sidewalls cut out and glued them together Because gofro-beer and cardboard.
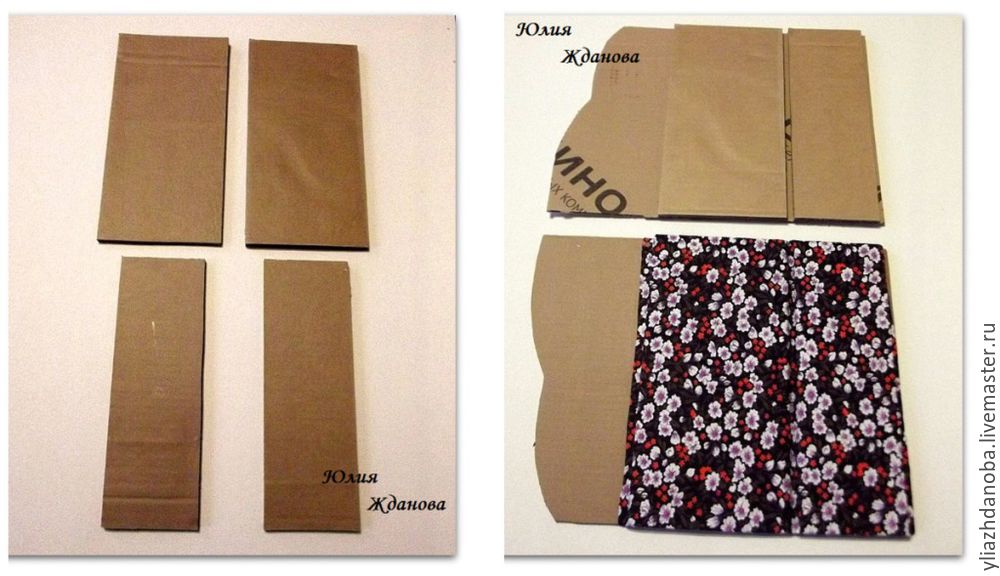
Then, under a shelf on which to stand the boxes, I cut out of thick corrugated double extra sidewall (if you do not have a double bellows, then glue the two sheets of corrugated among themselves) in height, they are the future of the boxes, between the sidewalls do gap of 0.7 see – is the thickness of the shelves when they dry out, paste them calico.
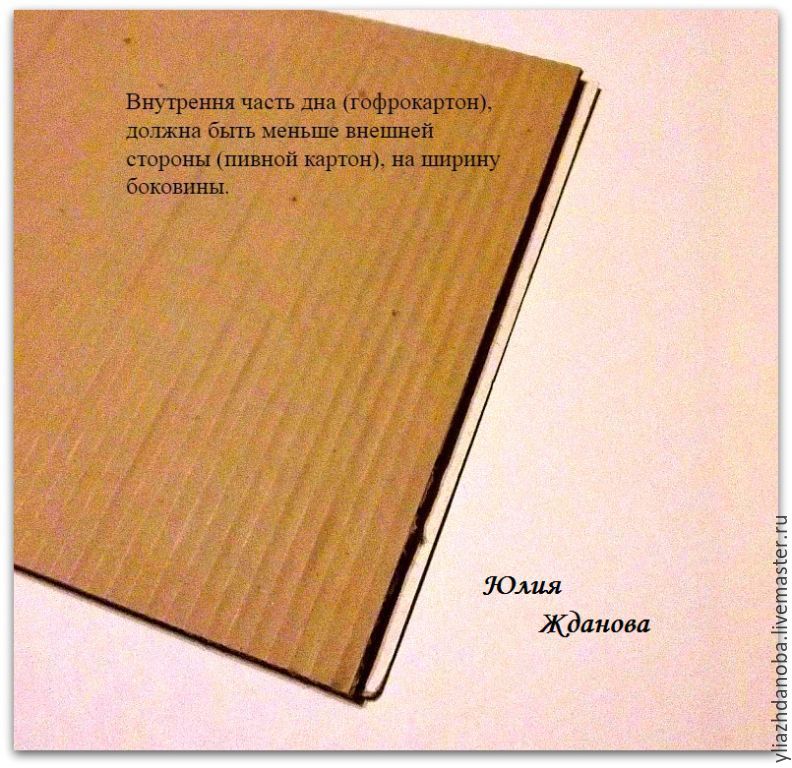
The thickness of the side wall of the chest turned I 1, see, here this centimeter inside of the bottom will be less, and the outer side of cardboard beer more, then the side walls arise, both in the groove and the outer angle is smooth and beautiful.
On the back wall pasted an additional panel of double corrugations, it will draw the top shelf, the panel is fitted a calico.
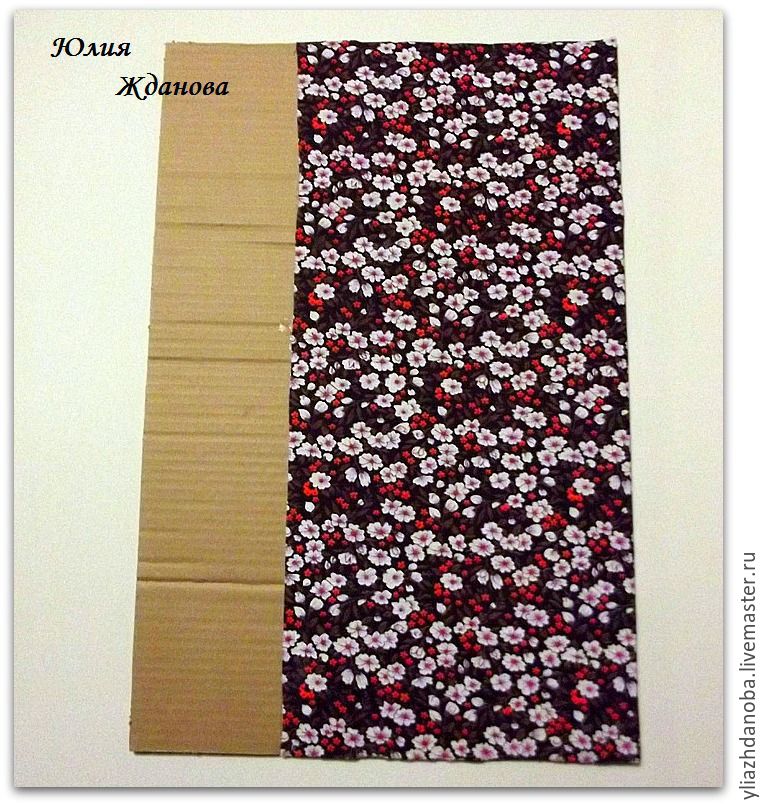
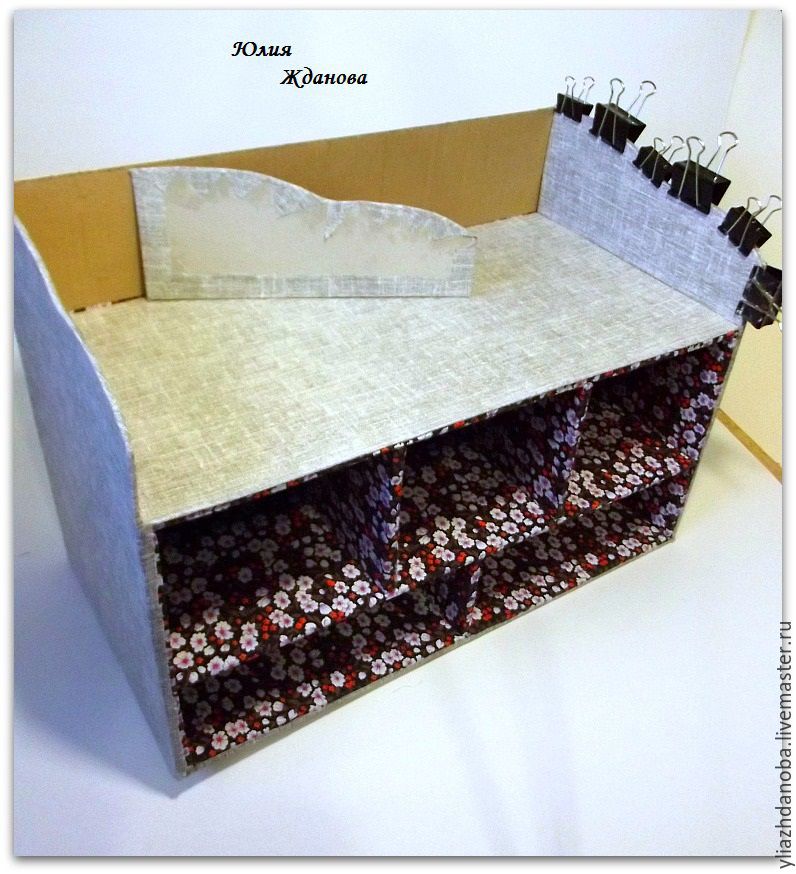
Middle shelf of double corrugations, covered with calico, but the top shelf has turned me into two parts – the lower side (calico) made of corrugated cardboard, and the upper side (county) of binding cardboard. I stuck to the fabric glue PVA furniture, it is quite thick and therefore does not soak the cardboard, besides dries leaves no residue on the fabric.

The slots and the end of the shelves smeared glue Moment Crystal base and gathered chest, here and form emerges. Honestly – time to dry out a lot of details, especially the need to ensure that the details are not led, so they dry under pressure. The main helpers in my dry parts were building a hairdryer and a conventional iron. I dried up details to iron an iron (no steam) and put everything under the press, all the details I then get smooth and the obvious-e-strong Yen.

Jumpers I made of several layers of cardboard – Binding cardboard, corrugated and then back Binding cardboard, fitted a calico and drying again 🙂
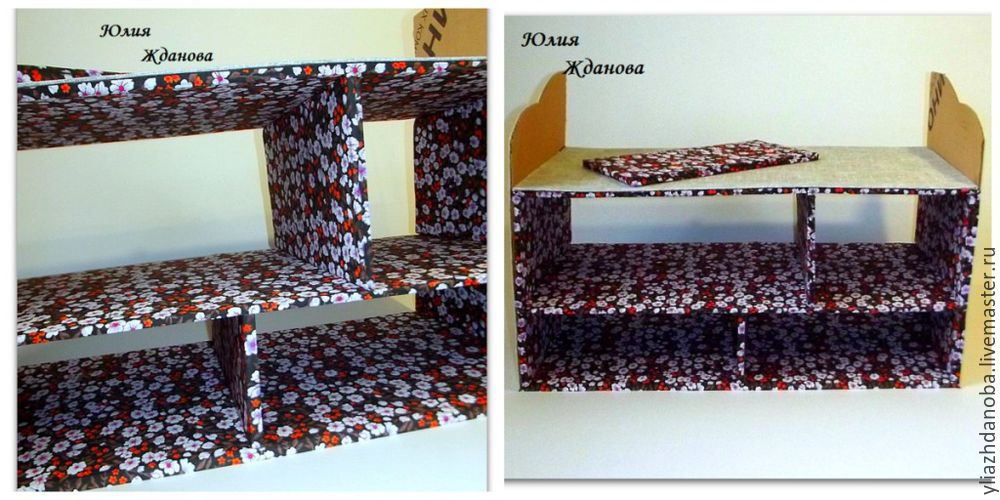
And here is the back wall – and if I had had doubts at the beginning of the production chest, now they are gone, and my husband has a sarcastic smiles, and looks with interest!
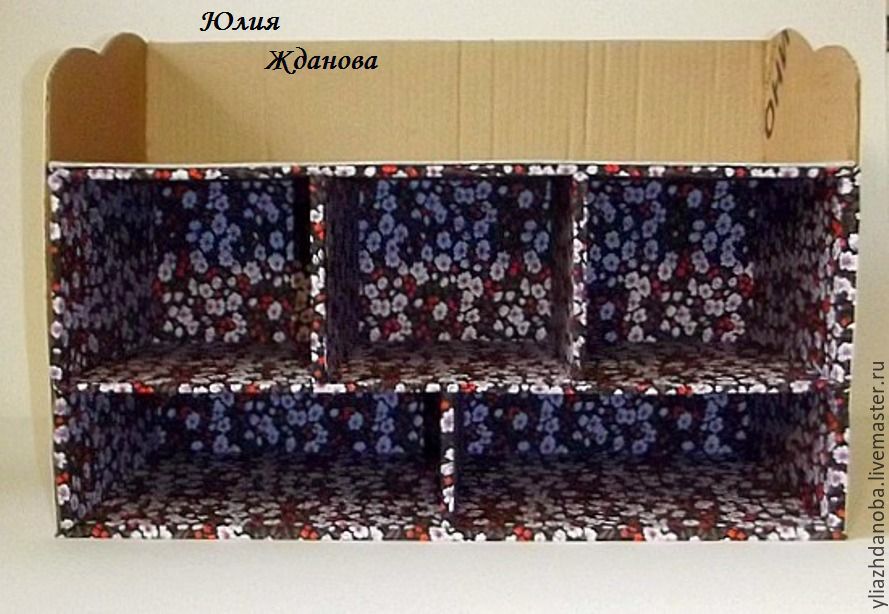
Now pull out a roll of kraft paper – which is an excellent paper, it really helps me in the construction of houses – and here is very, very useful, before she had to beg in the mail, and now it turns out you can buy at any hardware store. All angles on the dresser sizing kraft paper, flat area and at the same time securely fastened. The width of the side wall in my 30 cm, so the flax I cut width of 35 cm, was enough to bend to the rear wall, as well as 0.7 cm on the front side.
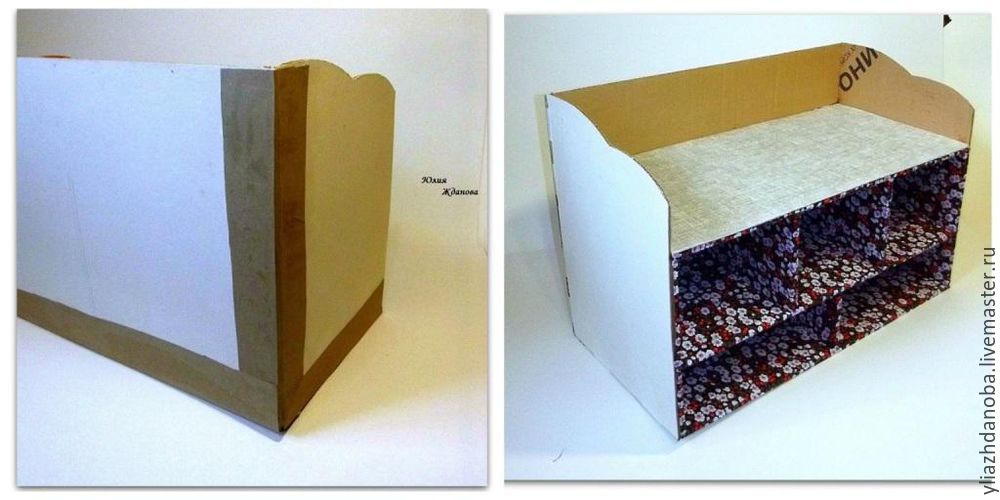
Sizing flax whole stripe – 40 cm + 60 cm + 40 cm, slightly pulling the sides, land dryer, and then makes an incision, but not completely, leaving 0.5 cm Nedorezov strip and are bent inward.
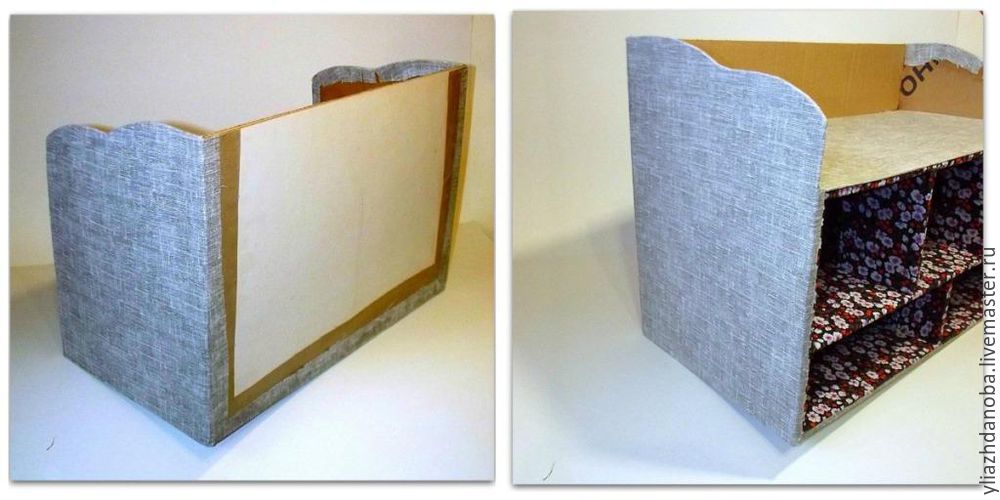
The inside of the sidewall I cut out of cardboard binding and it was stretched linen.
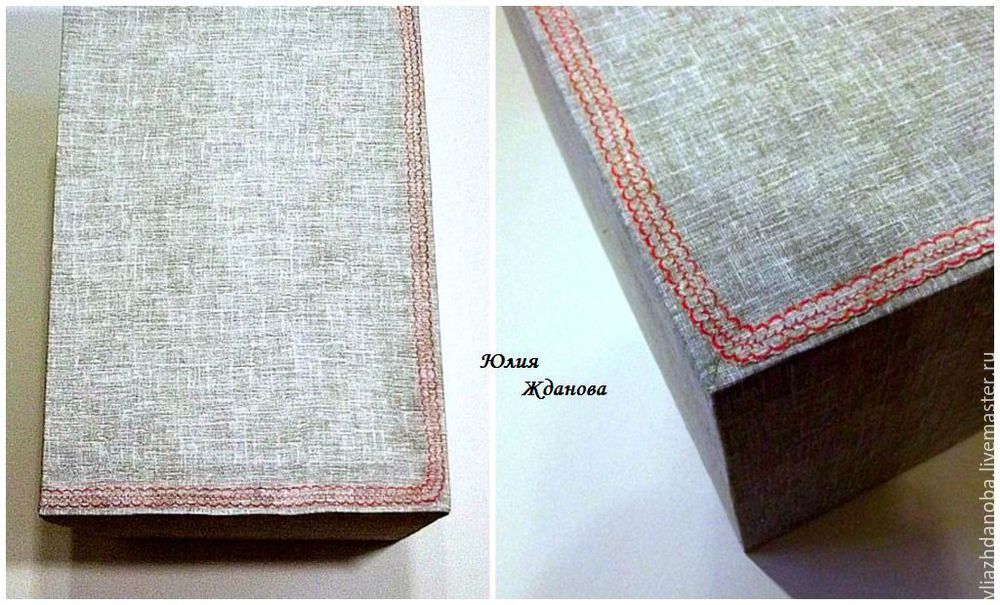
On the back wall, cut a piece of linen, tuck it did not, because getting unwanted thickness, so pull out the sewing machine and shoot on the edge of the rear part decorative stitch, it will prevent crumbling edges, and at the same time decorate the back wall.
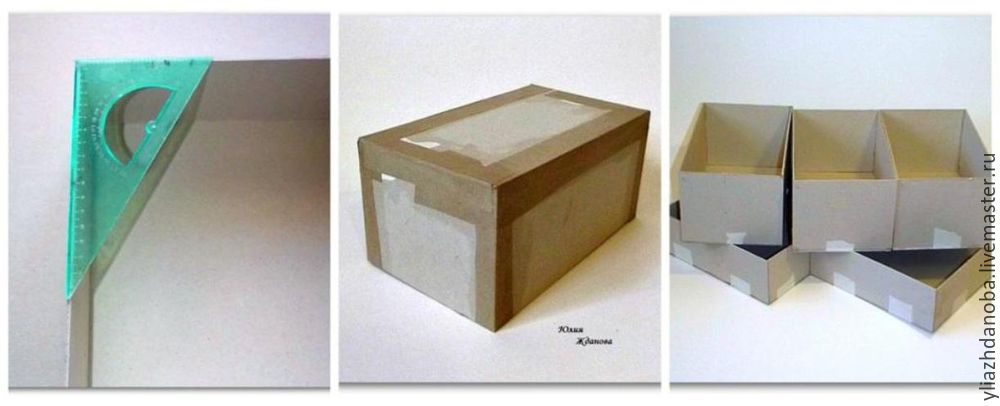
Well, the base is almost ready, and I will proceed to assemble the boxes.

Glue them from binding cardboard – glue Moment Crystal, most importantly, to sustain the angle when prikleivaetya bottom off the drawer. After drying, all the corners of the sizing kraft paper and glue Moment Joiner.
Then I take a piece of linen cloth, cut out so that at one end has the edge, paste starting from the middle of the end portion of the box, exactly where I will be out front. The edge should come about 1 cm, overlapping edge strips.
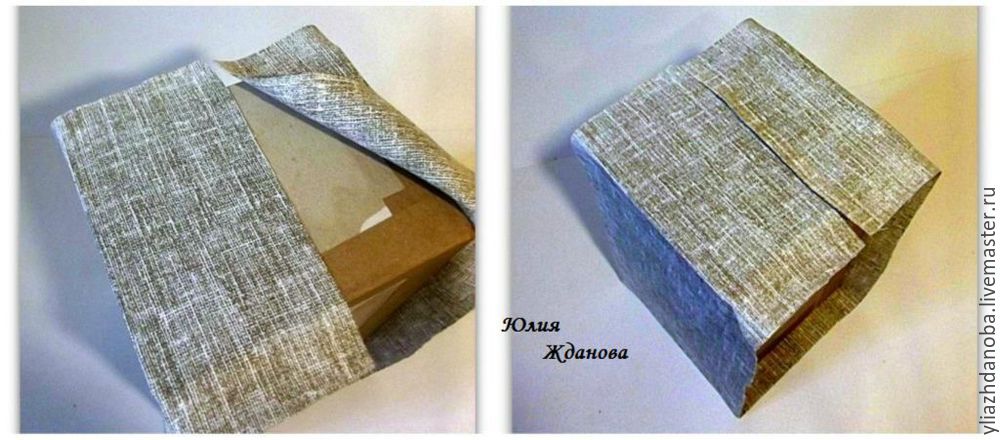
A neat corner is not difficult to obtain, most importantly, do not cut it off from the edge, and leave about 0.5 cm from the corner and glue corner of the overlap, but watch out for, so that an overlap was not large – 0.5 cm is sufficient crop of flax I have not thrown away, they gave me very useful to align the bottom of the box.
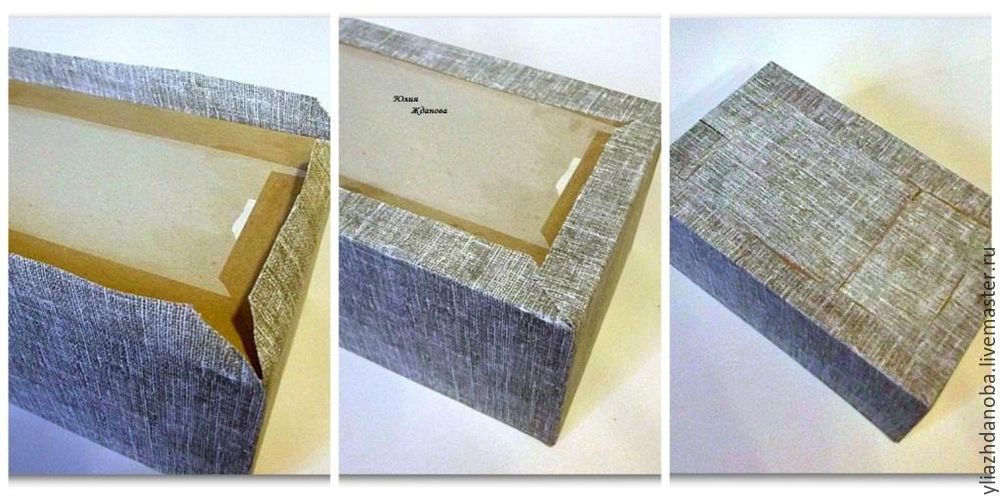
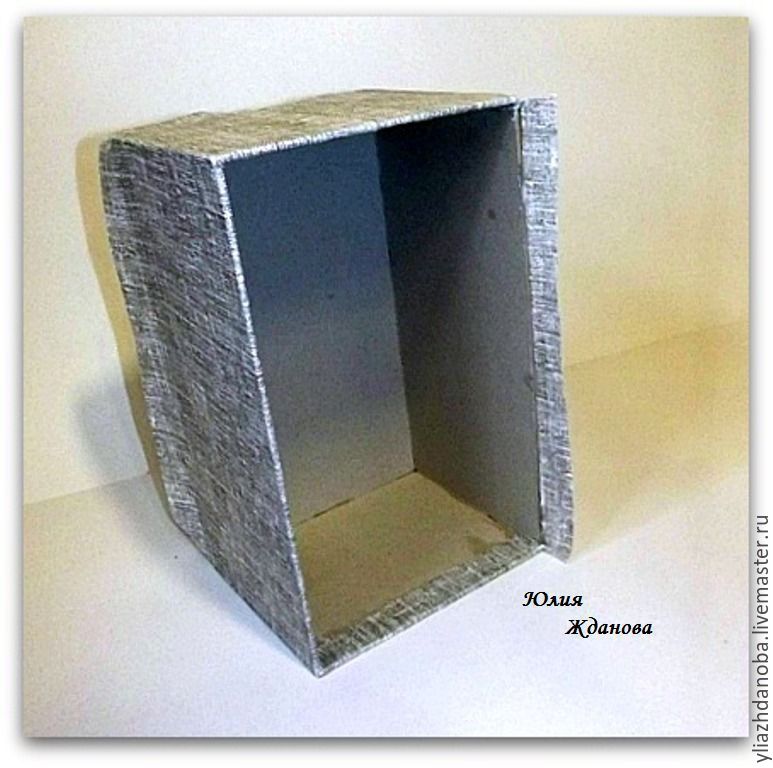
When drying linen to become very strong and the box, respectively, too.
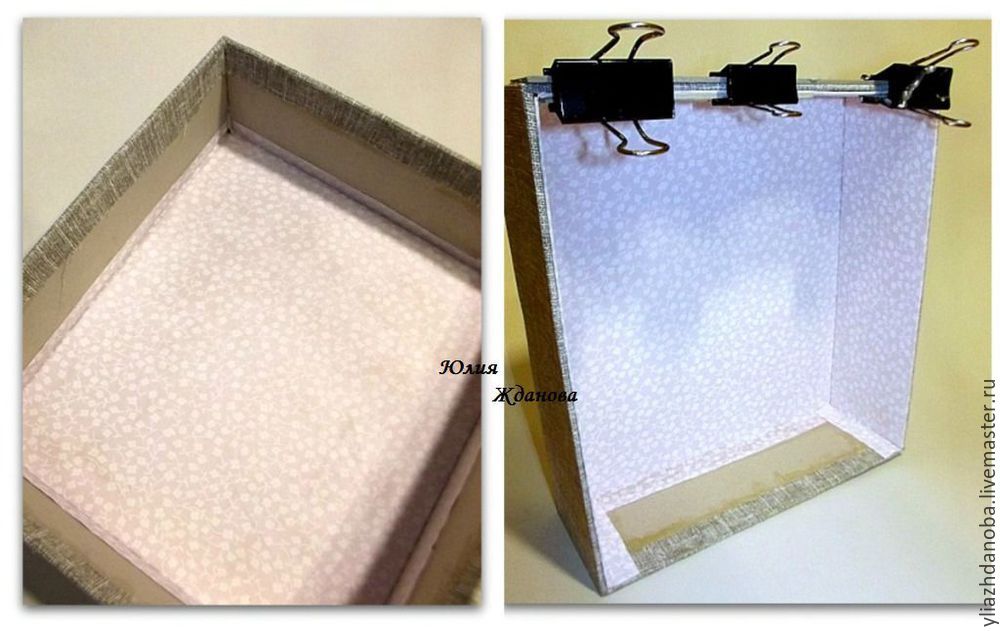
Now the beer from cardboard I cut and paste the internal parts of the bright calico, then pasted them in a drawer – first the bottom edge of the sheeting on the walls of the box infer and also sizing, extra bracing never hurts 🙂 then the side wall.
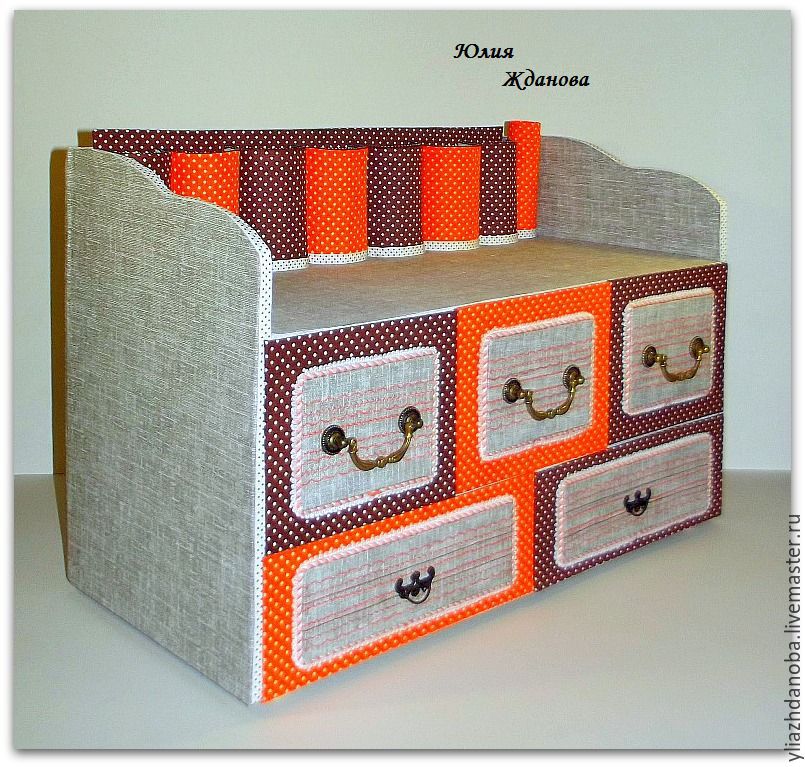
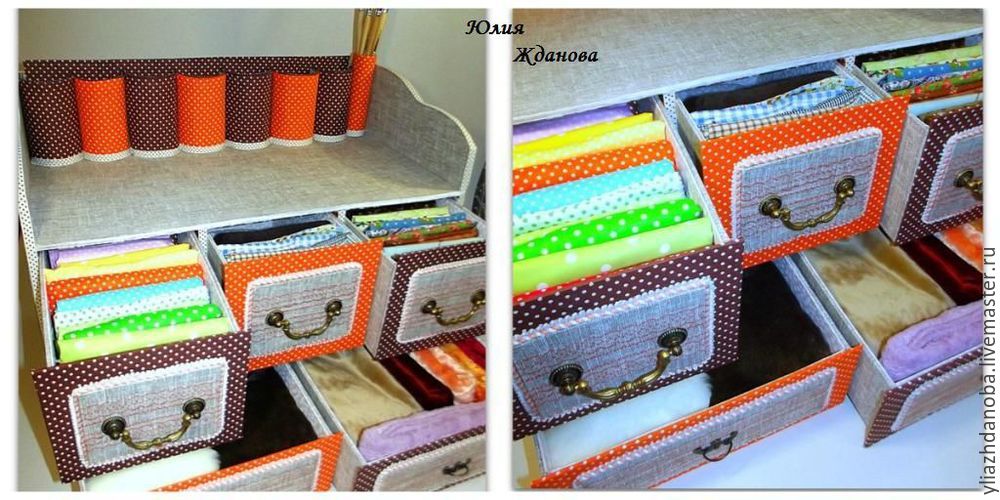
The bottom of the boxes I have to decorate in the same way as the back wall of the dresser – turned out smoothly and beautifully. The front panel is in the boxes will serve about 0.5 cm beyond the edge of the box, I cut them from binding cardboard and fitted a calico polka dot, two tones – red and brown. Decorates the front panel of a small insert of flax, I calculated how long needed a strip on one such box, multiply it by three, added centimeters to bend and cut a single strip of linen, then defer drawing on the machine, and then to cut the strip into three parts drawing all received the same. So I did the same on the lower drawers.
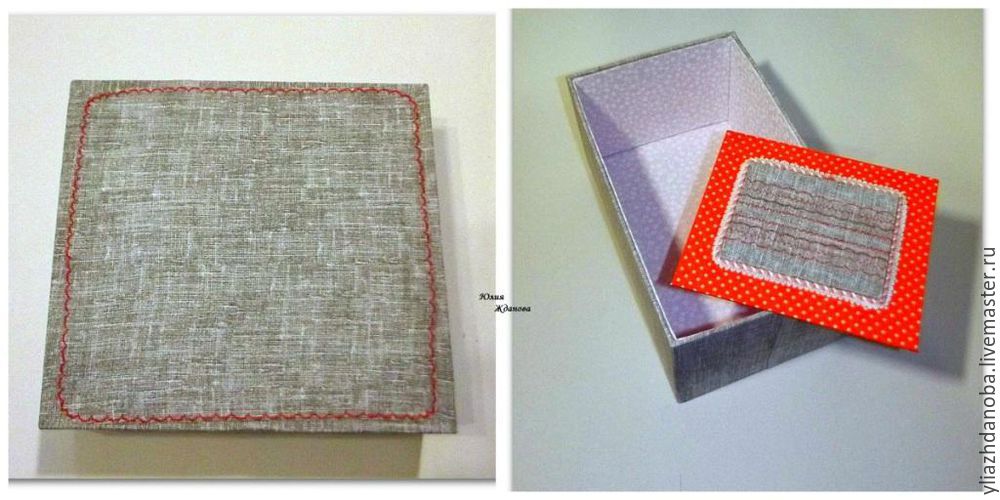
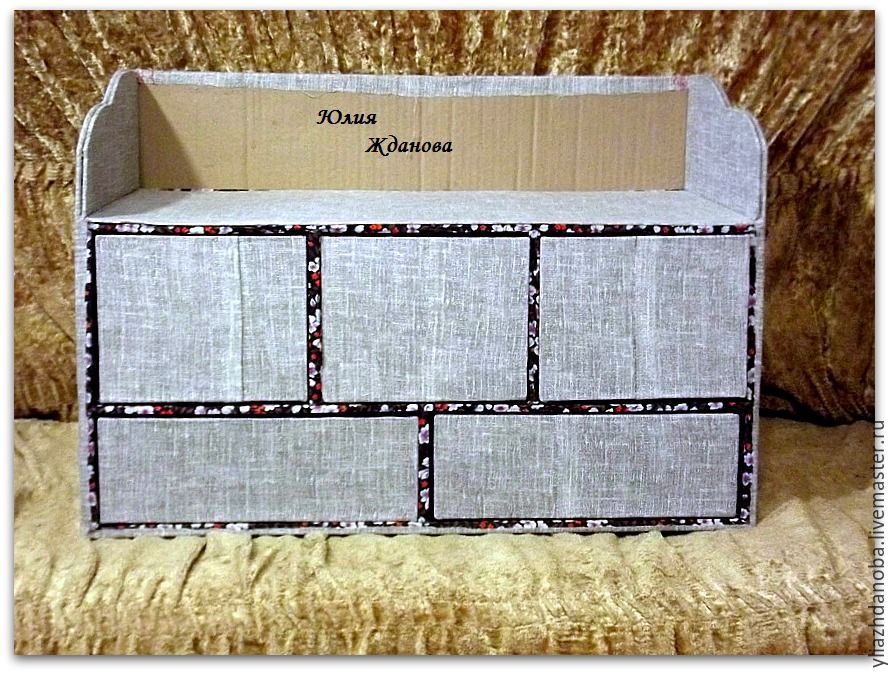
It remains only to paste faceplates on the boxes and screw the knob.
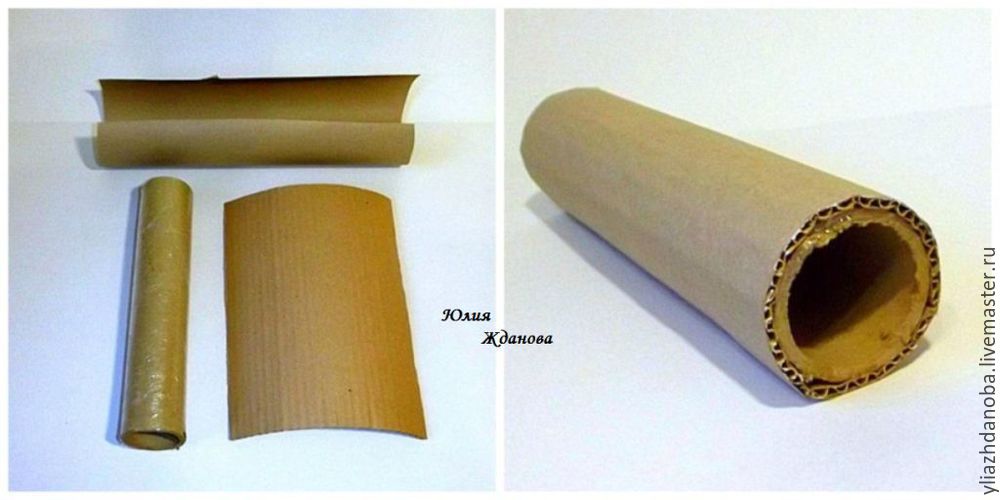
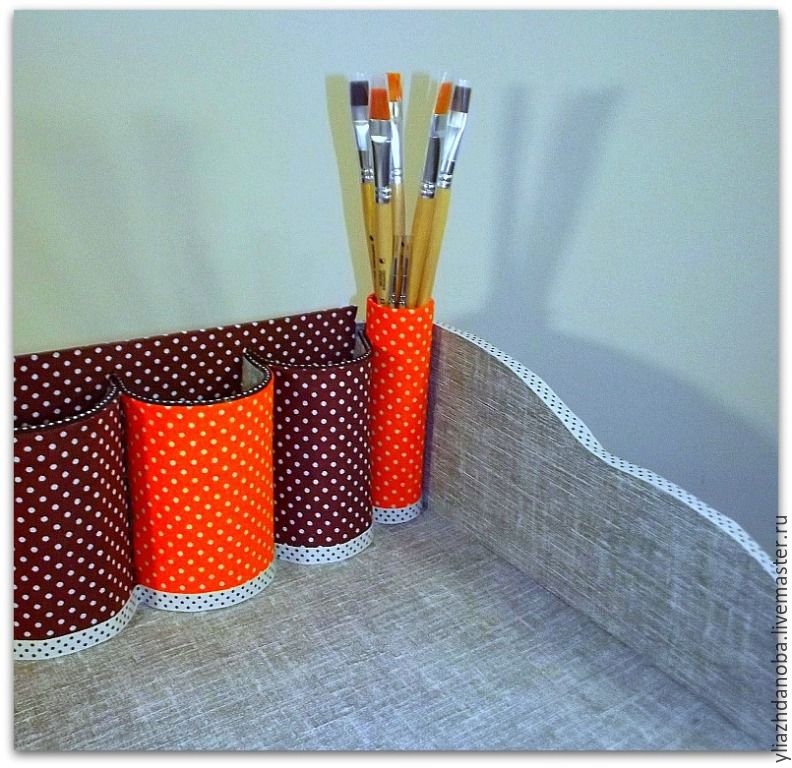
But I also have not yet made a small pocket under the instrument, first thought simply glue the rectangle and in it the cells, but not too interesting turns, and then my eye caught a paper tube, I did an example, look good, but it is only enough to two pockets, and they need me 7-8 pieces, that’s only because of what they do, turn the kraft paper is quite long and dry, again, hard, and then see how the husband gathered up all my scraps of cardboard and tries to shove the stove to clean up the mess and burn! Nightmare! Well, how can you – it’s a building material, my hamster fainted After a brief fight, winning, twist from scraps of corrugated tube!.

How I did it:

  • – Cut a strip of cardboard with a longitudinal section;
  • – then the strip of kraft paper is twice longer than the strip of corrugated cardboard;
  • – are coated with adhesive kraft paper;
  • – take the paper tube is wound on her corrugated;

– tightly pressed corrugation to the tube rolling on the smeared adhesive kraft paper, pick up a hot iron and then start to iron for this length of the tube, the corrugation becomes smooth, without corners, kraft paper is securely bonded, and I get a smart, smooth and I desired a strong tube diameter.
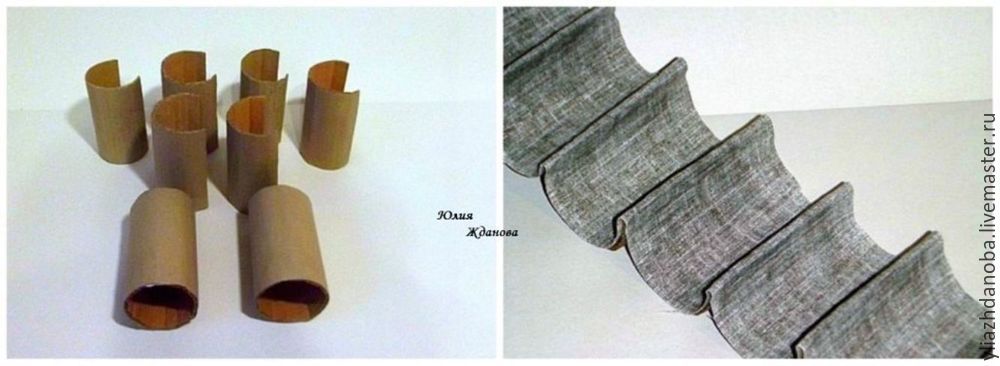
7 do such blanks, then trimmed to 4 cm and a polustolbik receive here. Adherend workpiece between a crystal and an adhesive torque cushioning inner piece flax. Then I got carried away and forgot to take a picture as is pasted strips of peas on the front side, but, in principle, it’s obvious that the edges of the strips come into the fold and they are not visible on the front side. And for the brushes I made a special glass higher.
All end of the rep I plastered my favorite band in the peas.
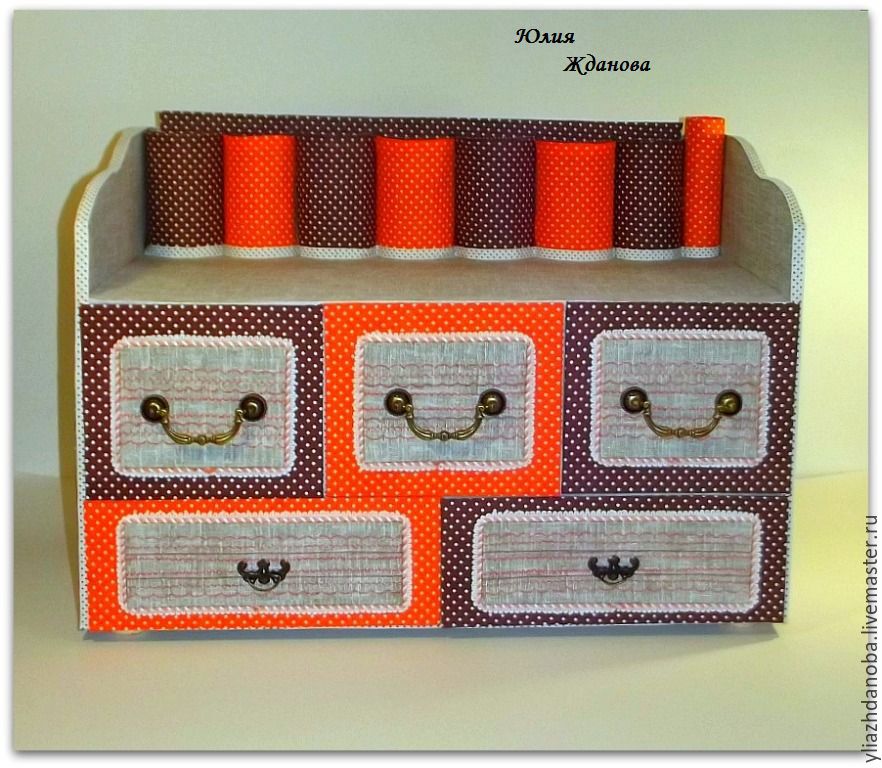
Well, that’s it – my chest is ready!
Even high brush finally found my place 🙂
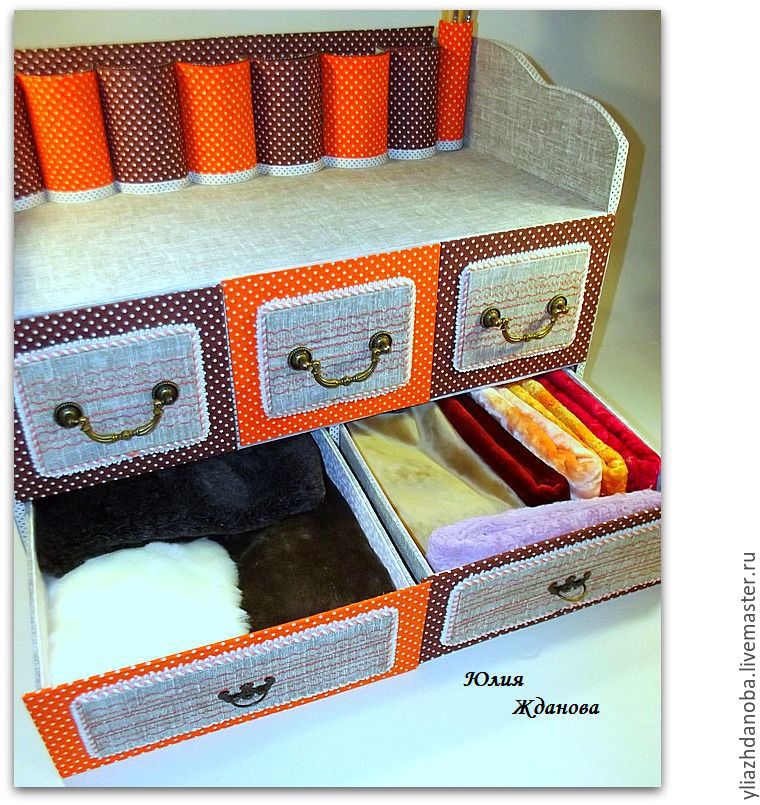
Chest turned out quite roomy, even the fur was a place.
Thank you that you had the patience to watch until the end!

I would be very glad to hear your opinion about this dresser!
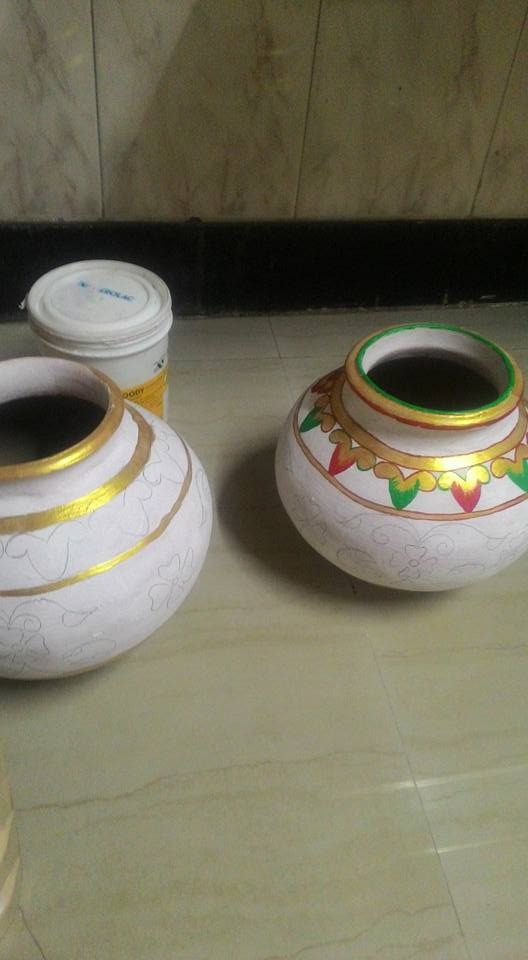
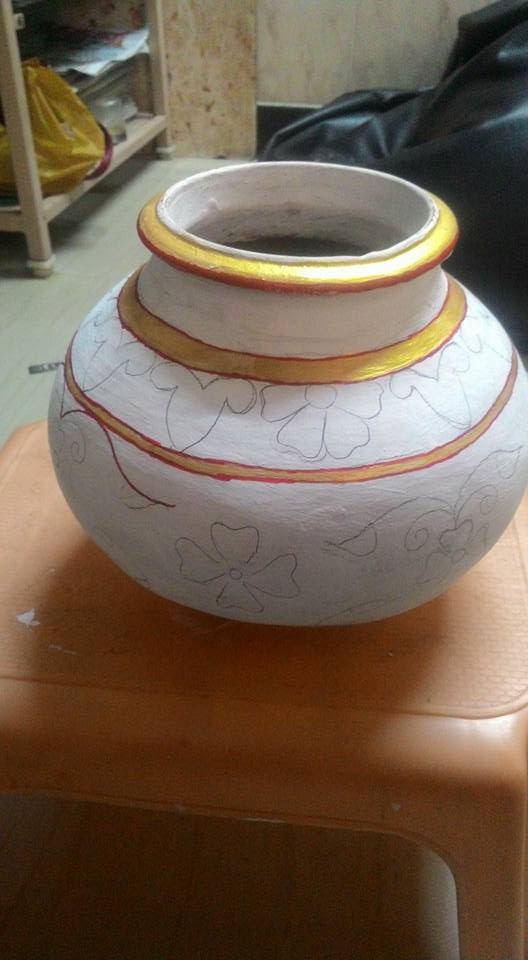
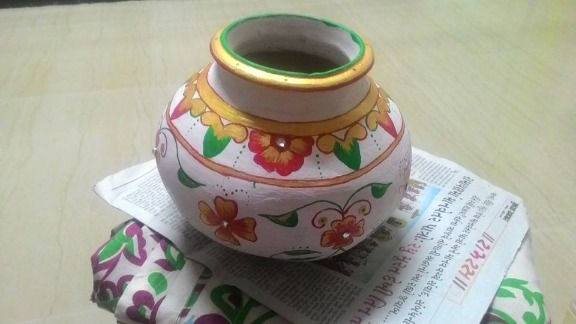
How to make terracotta hanging pots

Looking for something unique, handcrafted and affordable to decorate your home? Presenting some lovely handcrafted or hand painted decor products made by artists with passion and a whole lot of creativity!

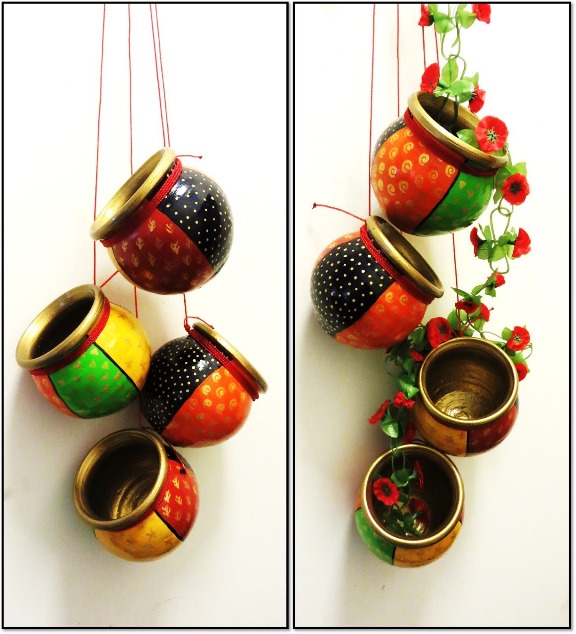
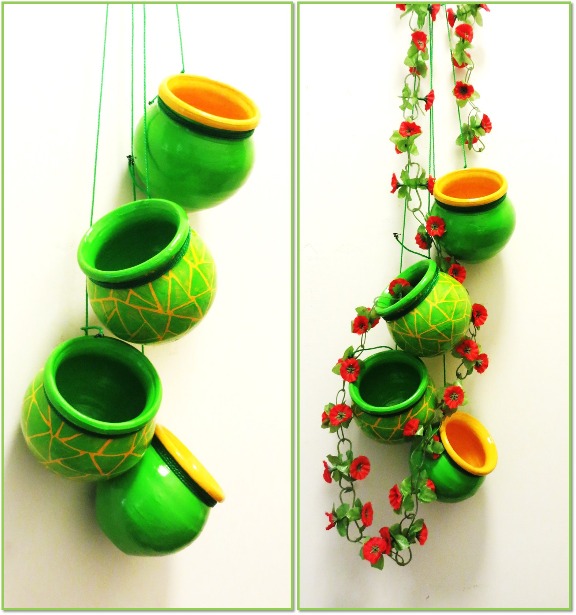
This set of 4 terracotta hand-painted pots, highlighted with gold, makes for a very attractive decor item in your house. You can use it as a decorative hanging or with artificial plants. The pots can be hung in same or different levels by adjusting the strings attached. The colors used are water safe.
Who says the mosaic look can be achieved only through broken tiles! Here is a nice way to get the same look on your pots and keep your surroundings bright. This set has 4 hand painted terracotta pots which are 9 cm in height, 10 cm in width and 130 gm in weight each. This simple hand-painted beautiful hanging can be used to decorate both your interiors or exteriors, as the colours used are water safe. This can be a beautiful colourful addition to your garden greenery or monotonous interiors or can spruce up the patio area. These pots can also be used as planters.The pots can be hung in same or different levels by adjusting the strings attached, as per your choice.
Source

Source