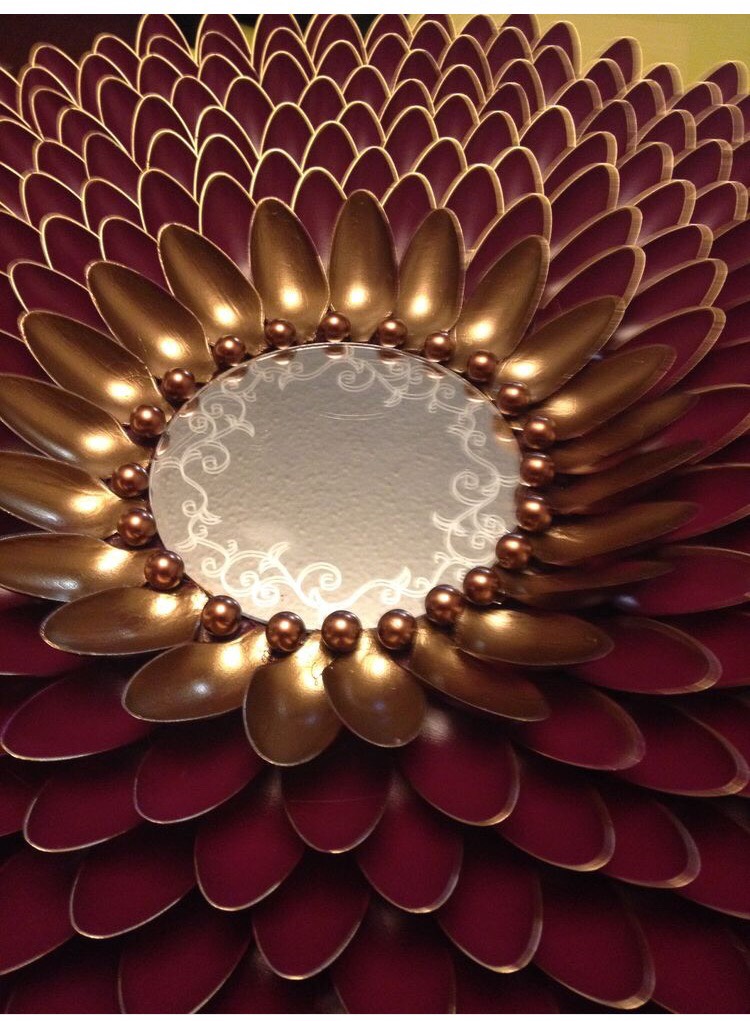
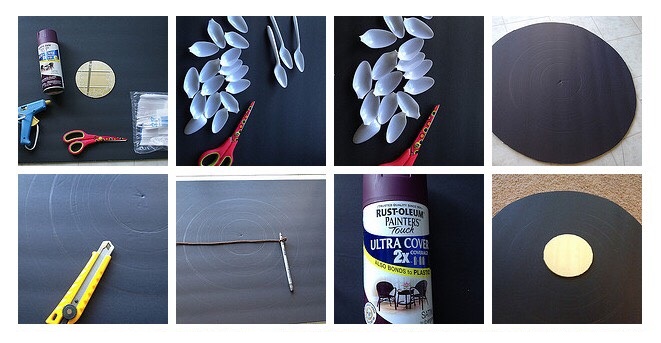
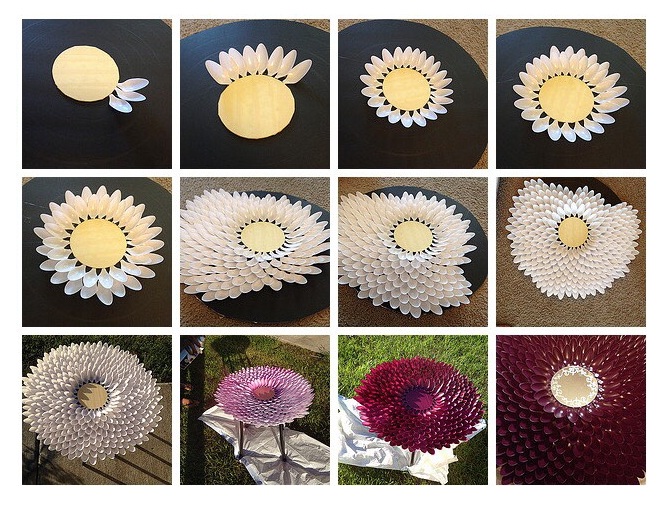
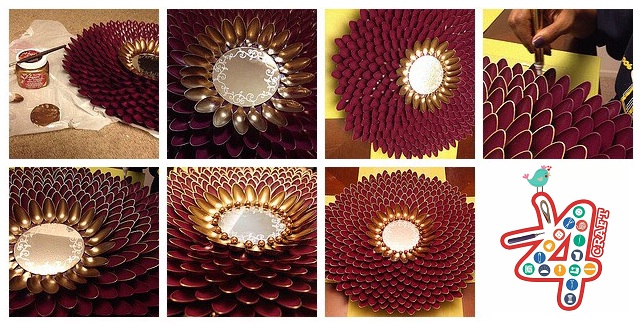
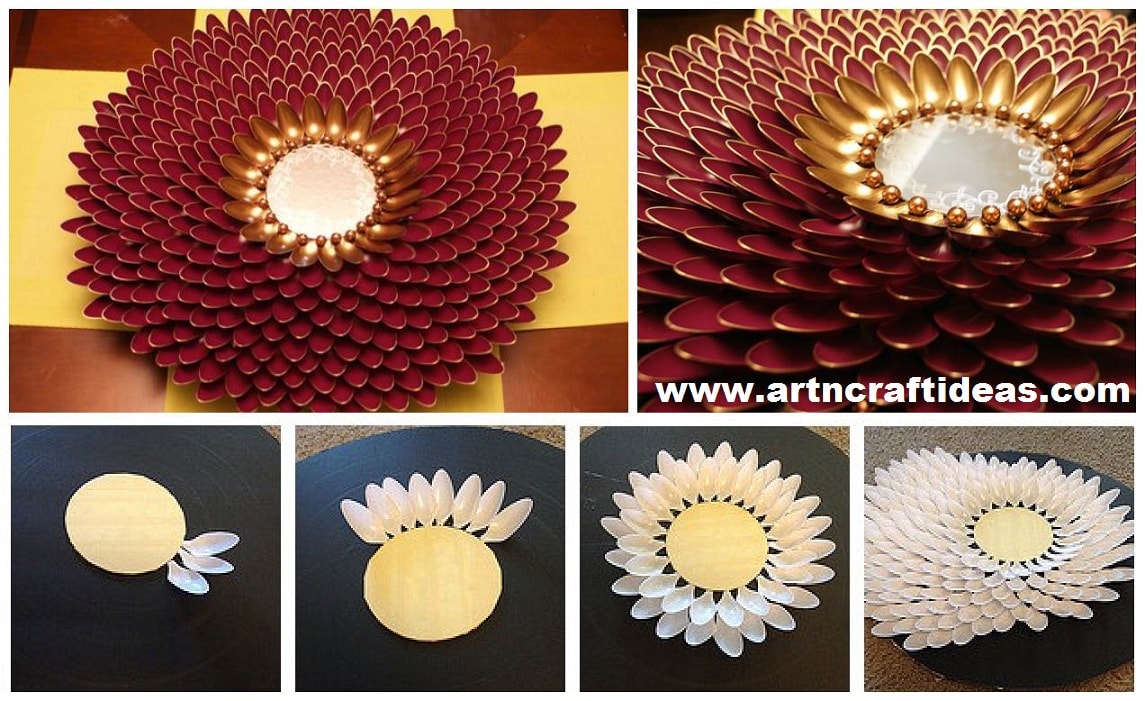
DIY Beautiful And Easy Spoon Sunflower:

courtesy: musely
Get Daily Art and Crafts Ideas & Tutorials…
DIY Beautiful And Easy Spoon Sunflower:
courtesy: musely
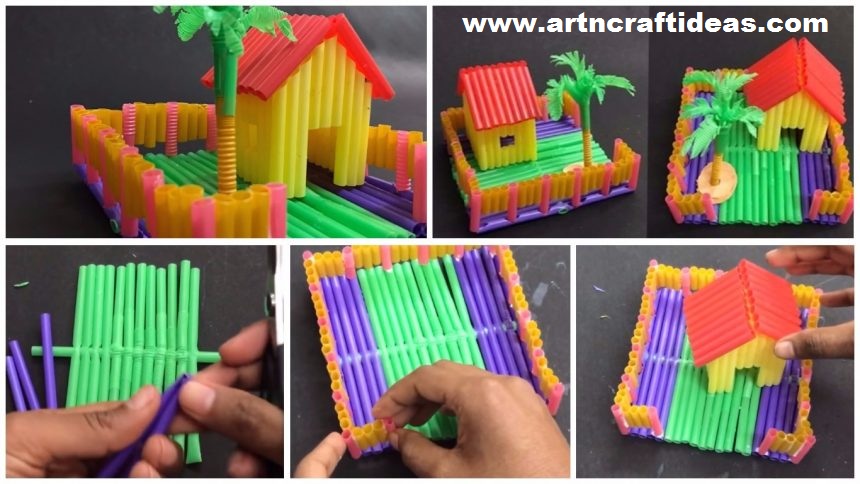
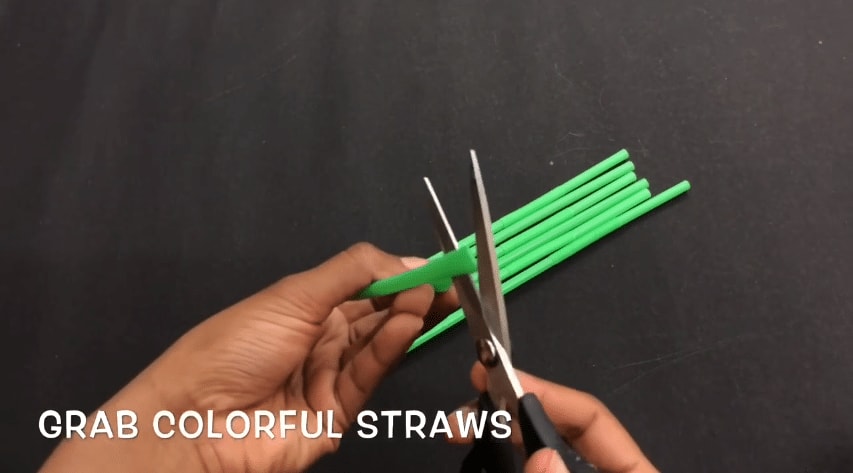
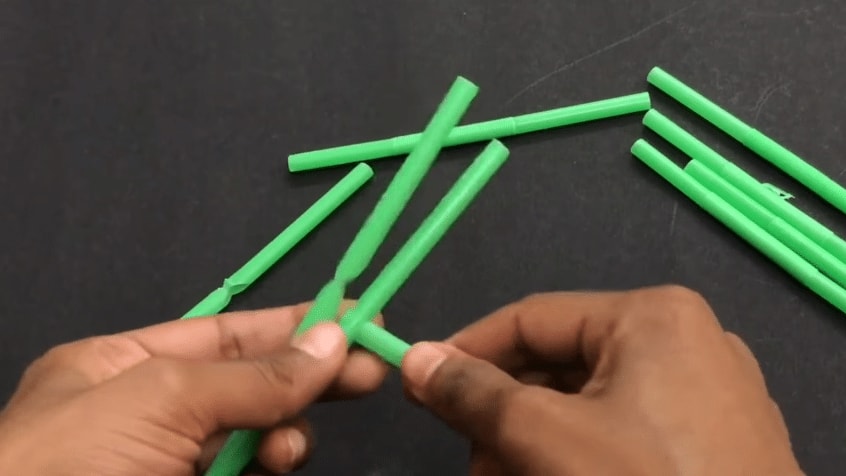
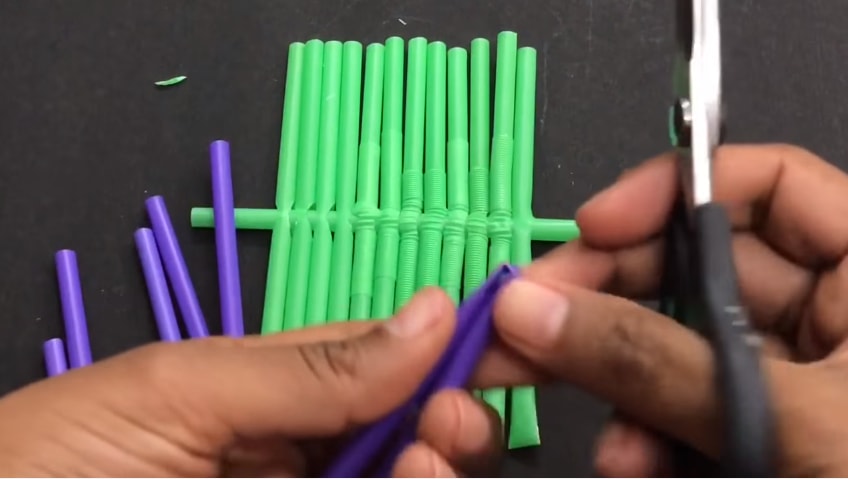
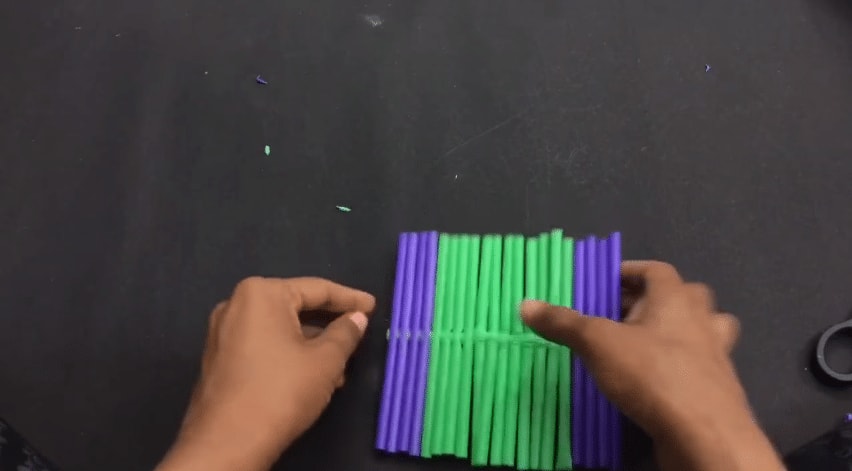
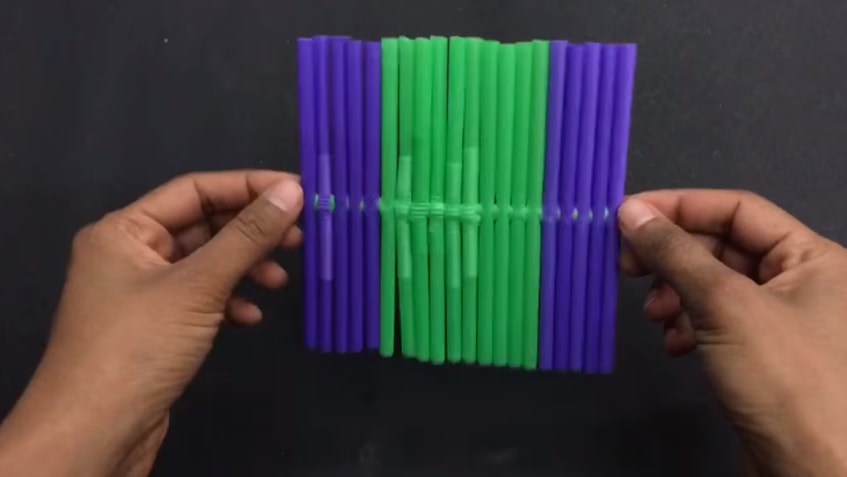
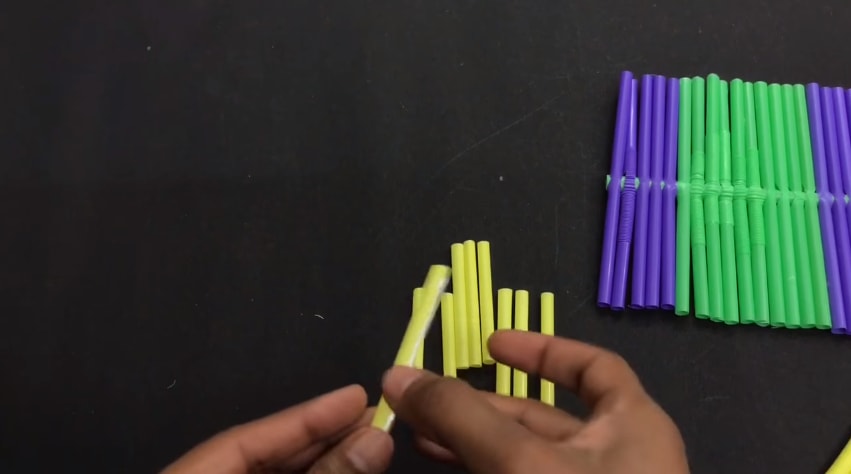
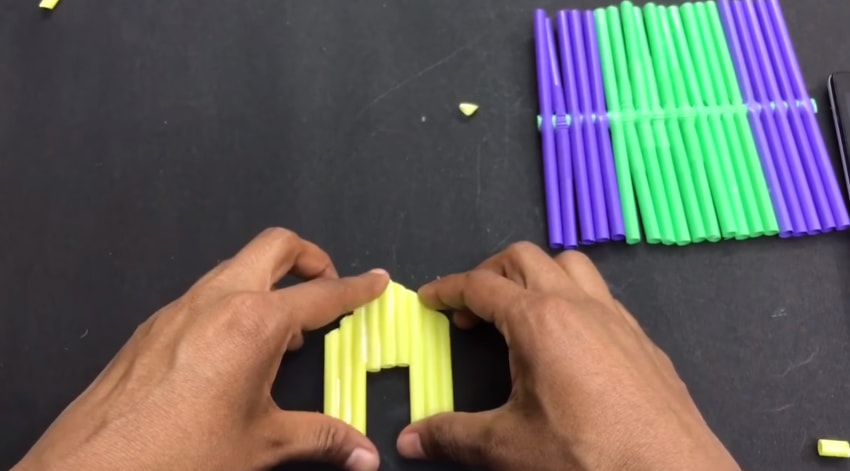
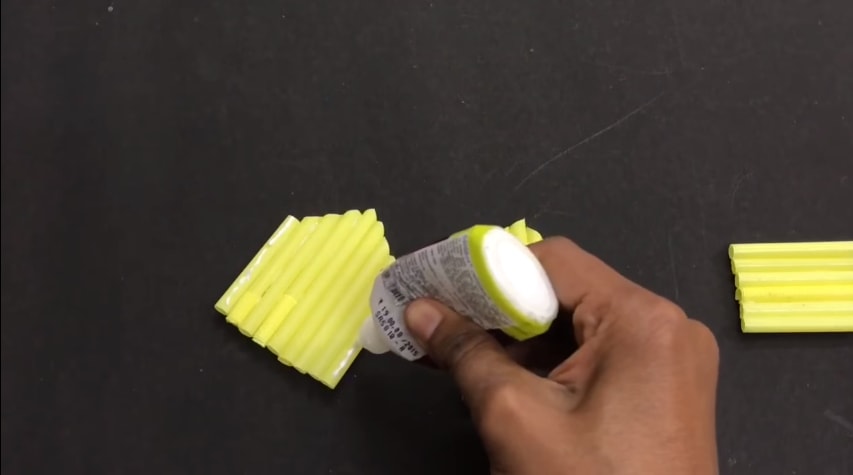
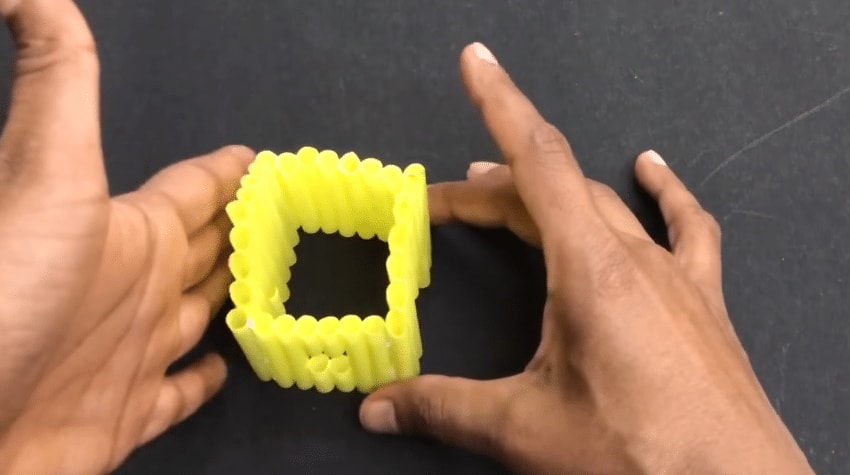
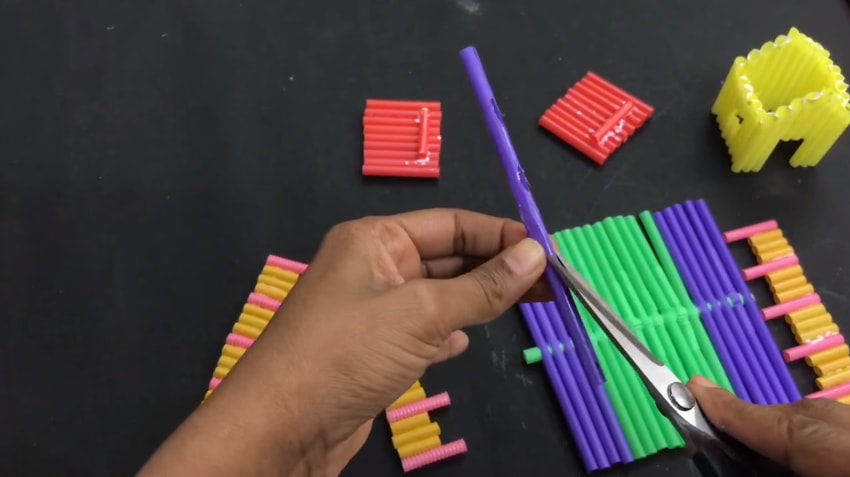
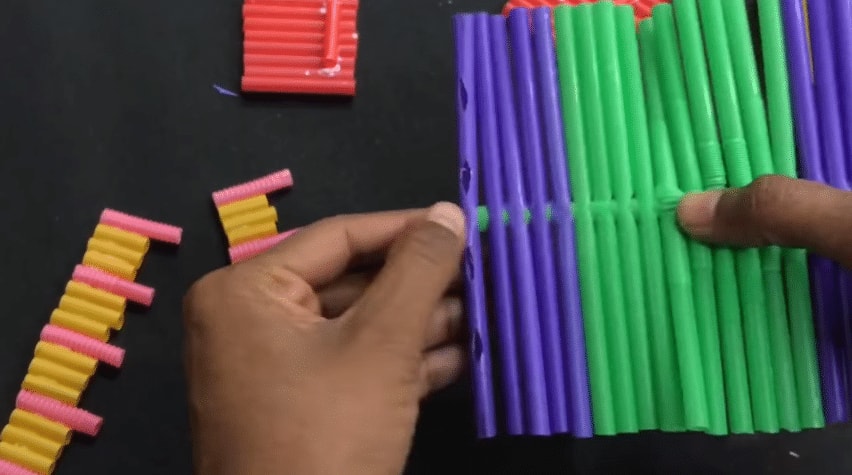
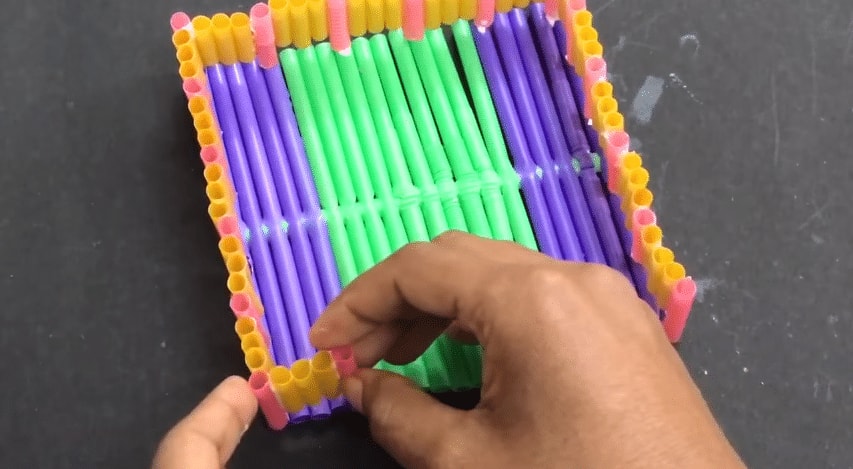
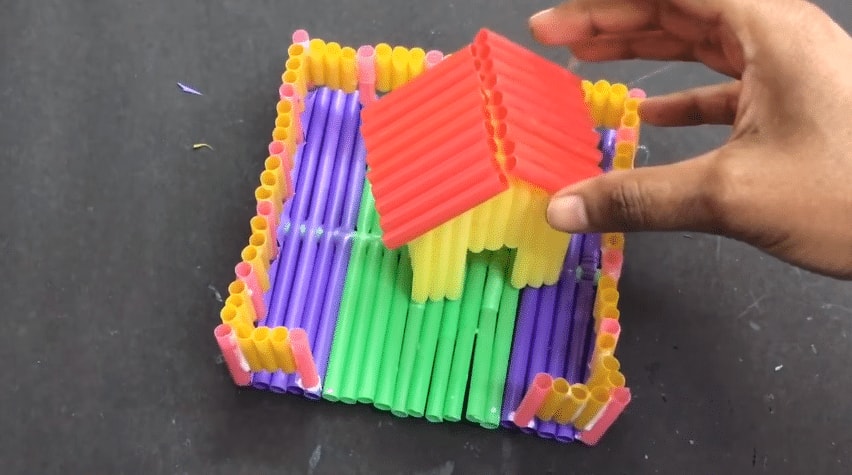
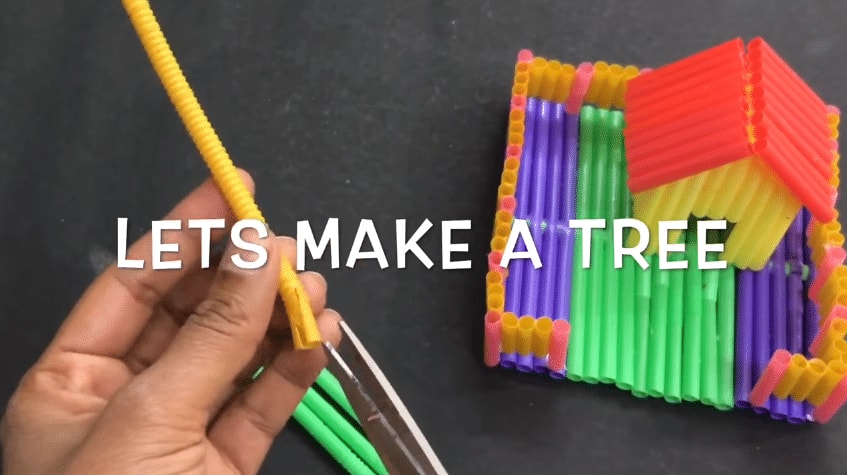
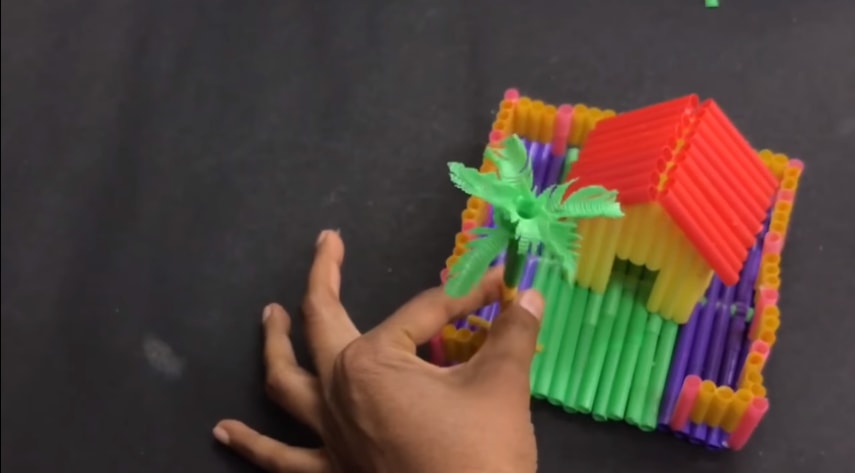
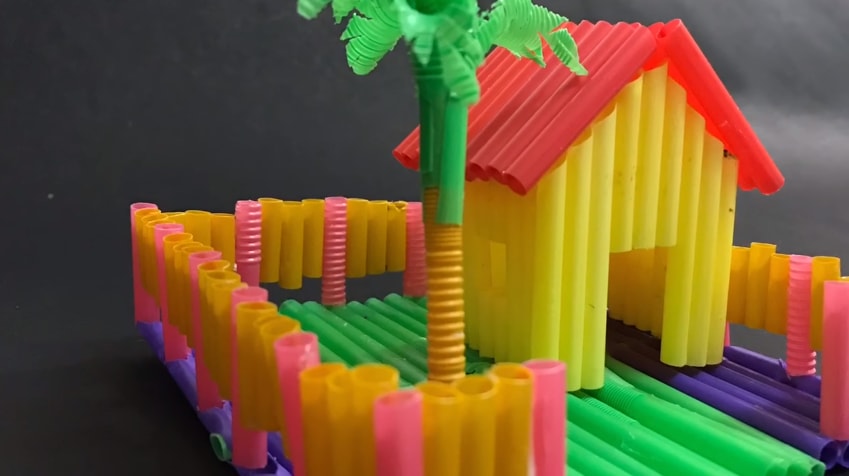
learn this very easy doll house made with straws for barbie life in the dream house. How to make Paper house or doll house with straws. Dollhouse with straws. Awesome doll house with straws. Miniature doll house. How to make a house using paper and straws. Awesome house for Barbie dream life.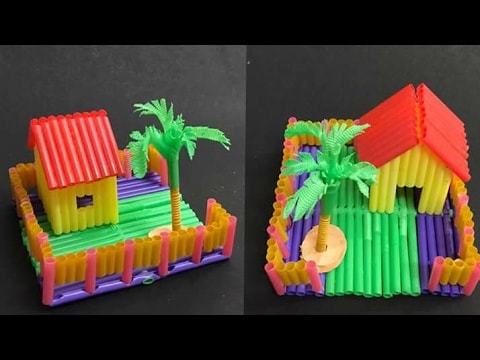

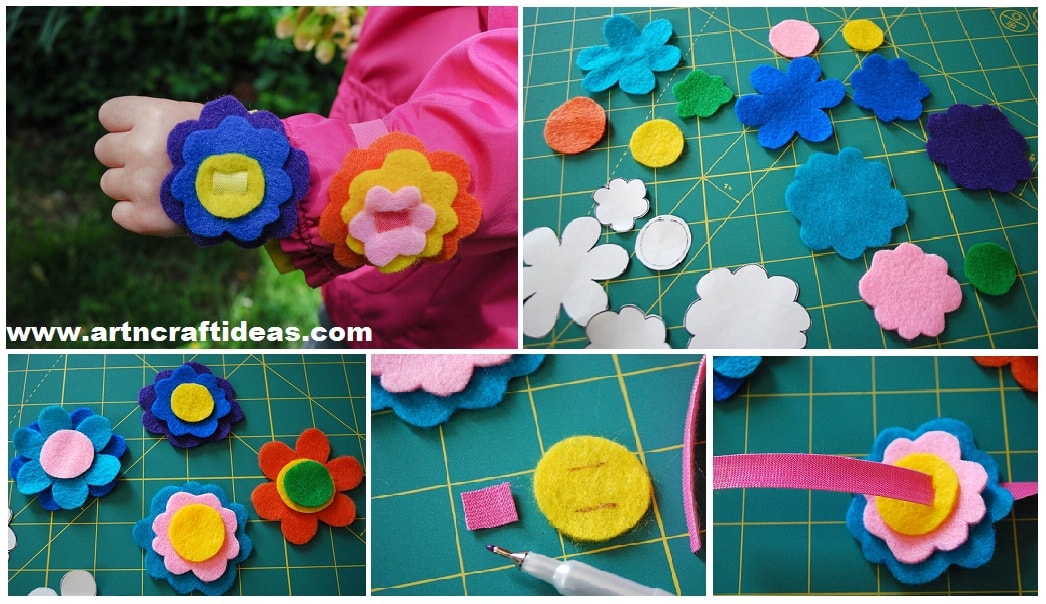
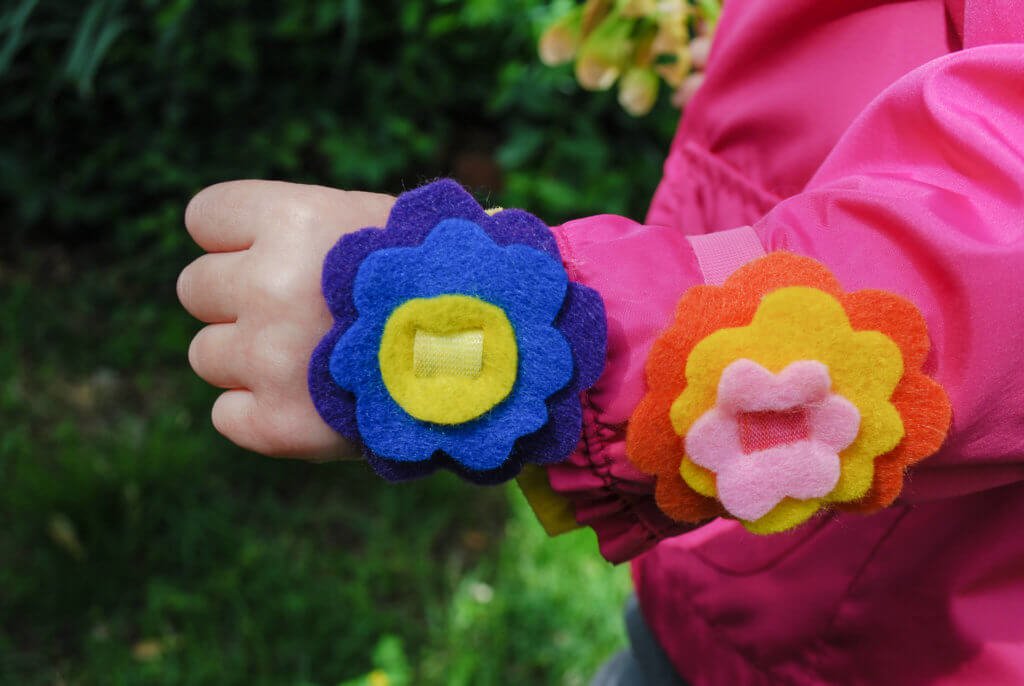
Here’s a super cute DIY spring and summer craft idea for kids that you can knock out in less than an hour: Easy no-sew felt flower bracelets.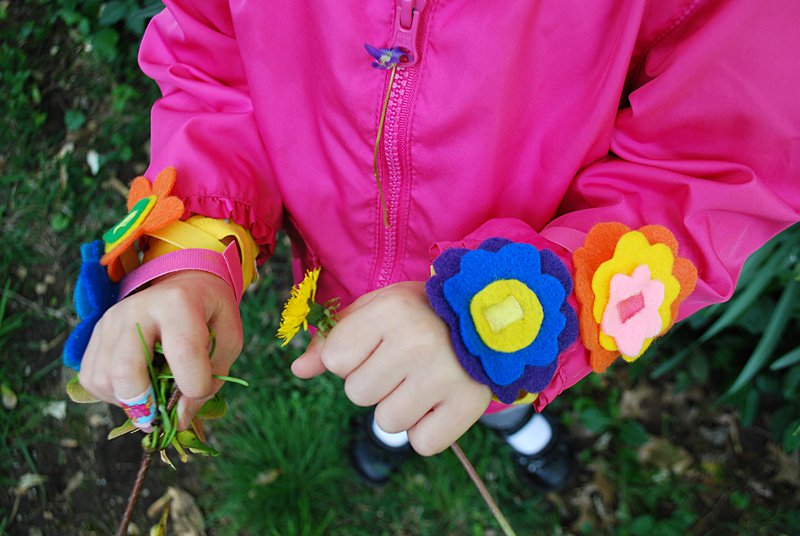 I love how cheery these no-sew felt flower bracelets look. And it’s nice to be able to make a cute project without having to drag out my sewing machine.
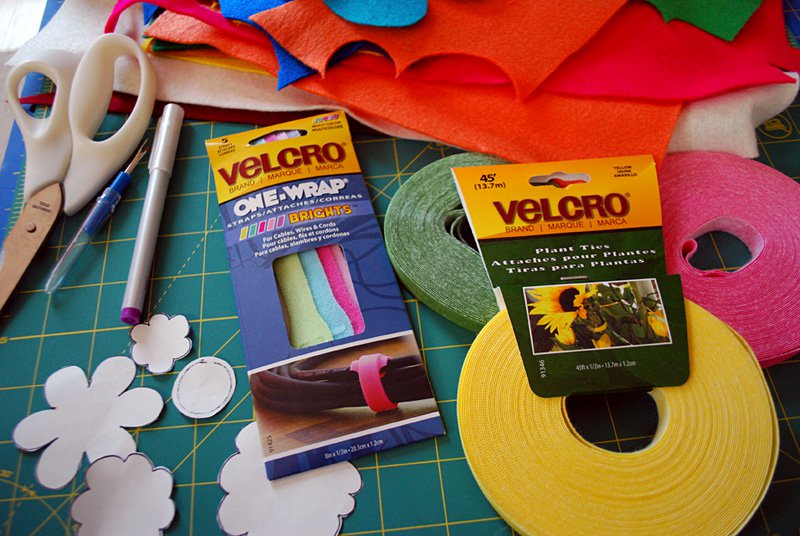
 The trick is VELCRO® Brand Plant Ties. So what are plant ties you ask? It’s basically a roll of colored thin VELCRO® Brand fasteners (I have these in yellow, pink, green and red and they also come in blue and black) that sticks to itself. Yep, IT STICKS TO ITSELF! So cool. You’re supposed to use to tie up your plants in the garden which I did last year to help my peas hang onto their trellis.
 I liked the VELCRO® Brand Plant Ties in the garden but I also thought it could make a great bracelet. It’s easy to cut and not the least scratchy on the back.
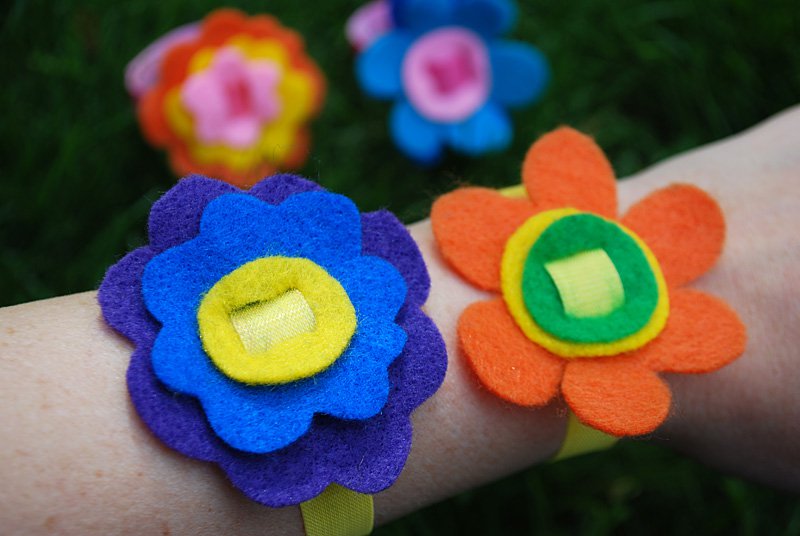 You could also make this project using VELCRO® One-Wrap Straps OR VELCRO® Get A Grip Straps in Multi-Colored, which are basically the same stick-to-itself concept that are used to keep cords and wires looking neater. Either way it’s a kid-friendly, no-sew craft to brighten your spring and summer days exploring outside.
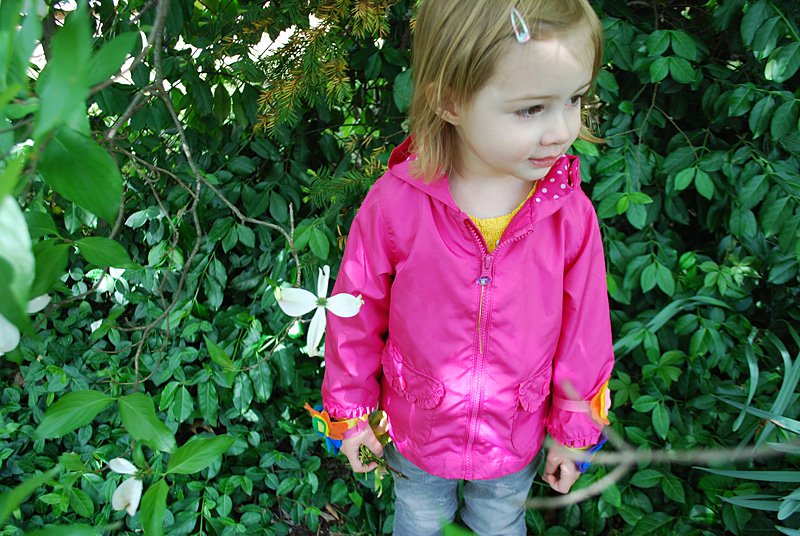
![How to make Easy DIY felt flower bracelets free no-sew pattern. Cute spring and summer craft activity to do with kids! [spring craft ideas| summer craft ideas | kids craft ideas | Easter craft for kids | no-sew crafts | felt crafts | DIY jewelry]](http://www.merrimentdesign.com/images/easy-diy-no-sew-felt-flower-bracelets-free-pattern-2-1024x686.jpg "How to make Easy DIY felt flower bracelets free no-sew pattern. Cute spring and summer craft activity to do with kids! [spring craft ideas| summer craft ideas | kids craft ideas | Easter craft for kids | no-sew crafts | felt crafts | DIY jewelry]")
Here’s a super cute DIY spring and summer craft idea for kids that you can knock out in less than an hour: Easy no-sew felt flower bracelets.

I love how cheery these no-sew felt flower bracelets look. And it’s nice to be able to make a cute project without having to drag out my sewing machine.

The trick is VELCRO® Brand Plant Ties. So what are plant ties you ask? It’s basically a roll of colored thin VELCRO® Brand fasteners (I have these in yellow, pink, green and red and they also come in blue and black) that sticks to itself. Yep, IT STICKS TO ITSELF! So cool. You’re supposed to use to tie up your plants in the garden which I did last year to help my peas hang onto their trellis.

I liked the VELCRO® Brand Plant Ties in the garden but I also thought it could make a great bracelet. It’s easy to cut and not the least scratchy on the back.

You could also make this project using VELCRO® One-Wrap Straps OR VELCRO® Get A Grip Straps in Multi-Colored, which are basically the same stick-to-itself concept that are used to keep cords and wires looking neater. Either way it’s a kid-friendly, no-sew craft to brighten your spring and summer days exploring outside.

Gather your supplies. Print and cut out my free printable flower bracelet template. The free pattern is sized for kids so just increase the size on a copier if you’d like them larger.
 Cut out flowers pieces in assorted felt colors. You can trace the pattern using disappearing ink pen onto the lighter colors, and for darker colors, just hold the pattern tightly to the felt and cut. No need to be perfect. You can even free-hand some pieces without using a pattern at all.
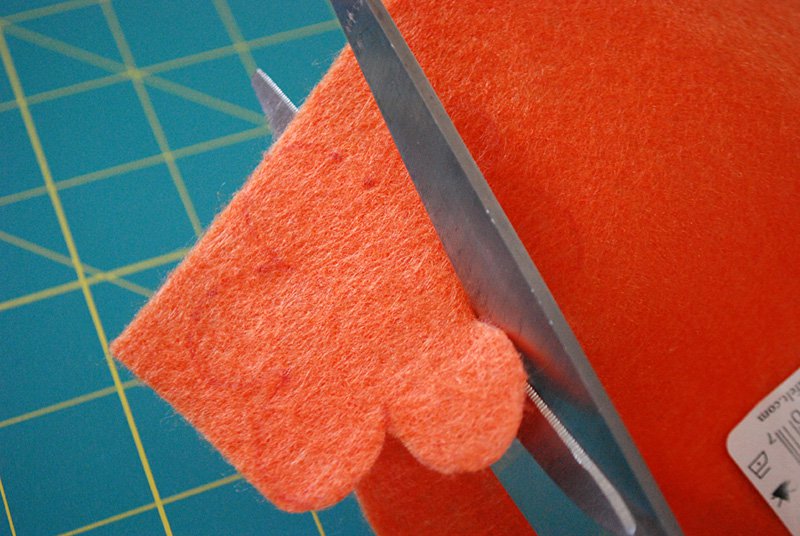 See all the cute felt flower pieces for the bracelets?
 Now just layer them up. Cut more as needed and play around to make the cute flower stacks for the bracelets.
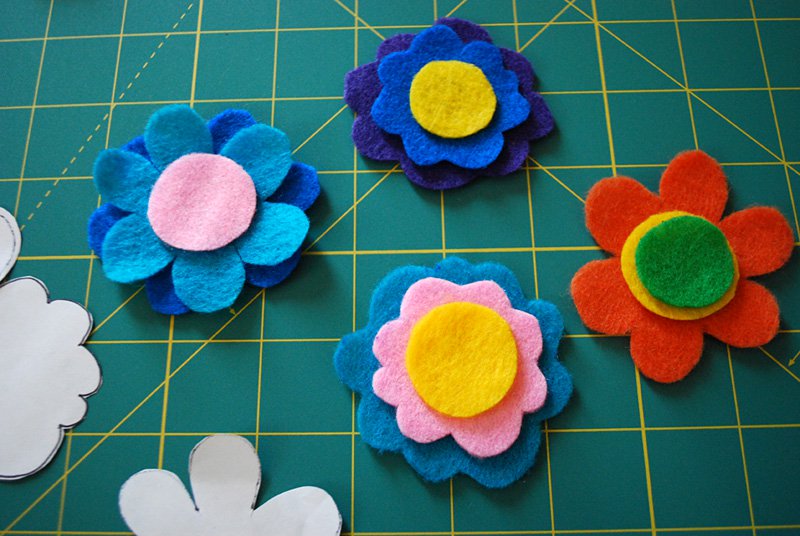 Cut a piece 3/8″ piece of VELCRO Plant Tie as a pattern for cutting slits in the felt flower pieces. Center it on your flower piece.
 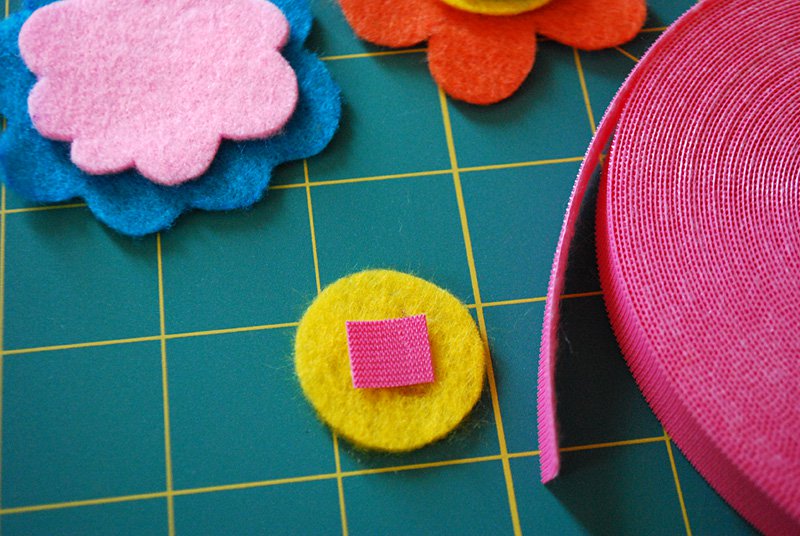 Mark slits above and below the pattern using a disappearing ink pen.
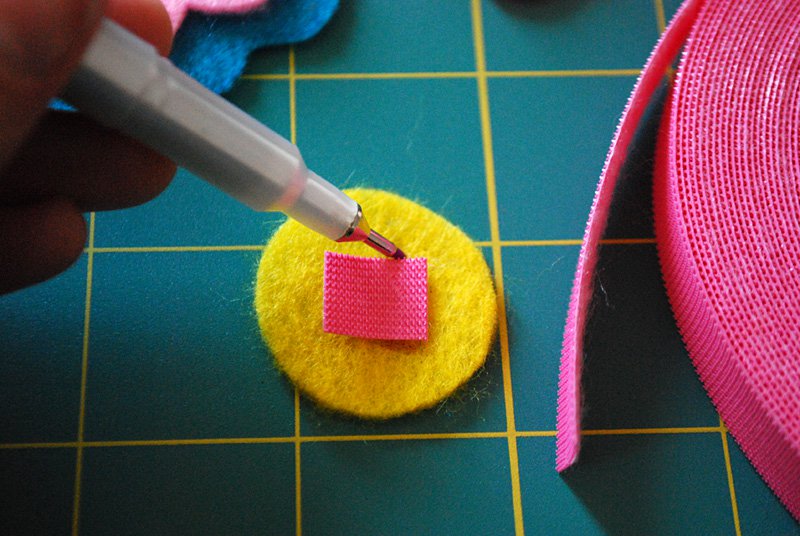 Now it’s time to cut the bracelet slits. First I tried using fabric scissors and I overshot big time – they’re just too big for me to handle on such a small cut.
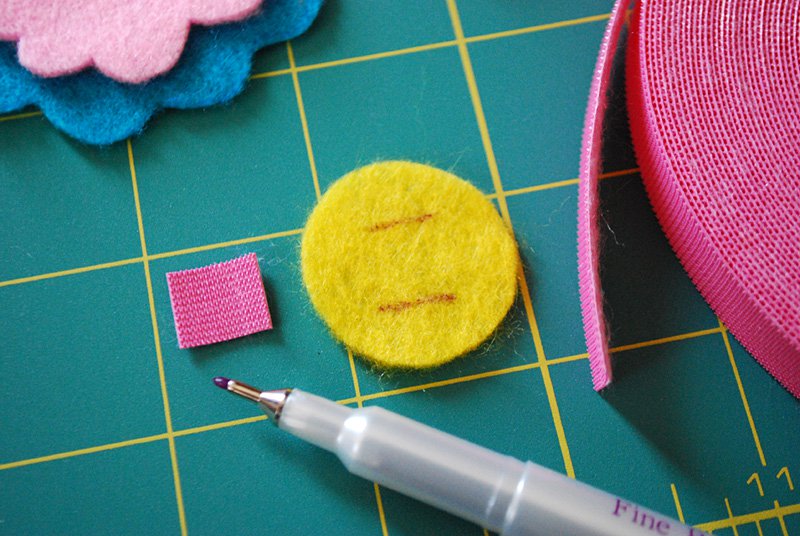 So then I used a seam ripper to get the bracelet slit started on each ends and followed up with tiny embroidery scissors to cut through the middle and it worked really well.
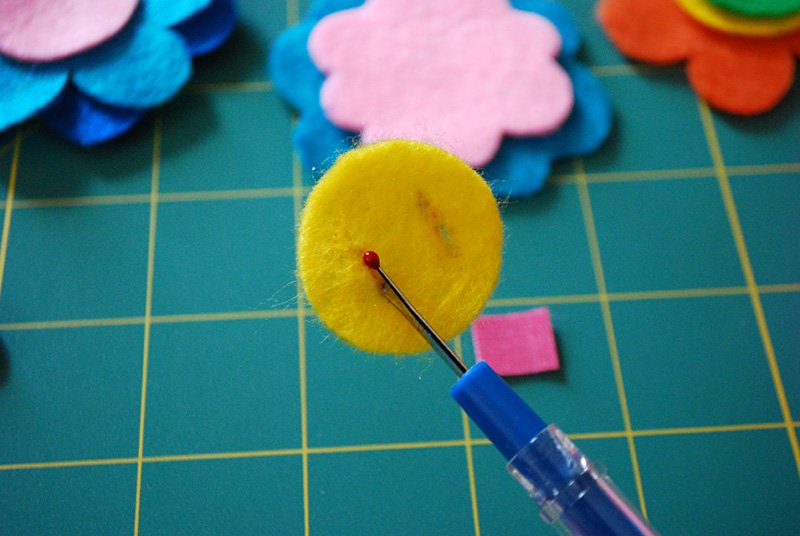 Repeat on your other flower pieces.
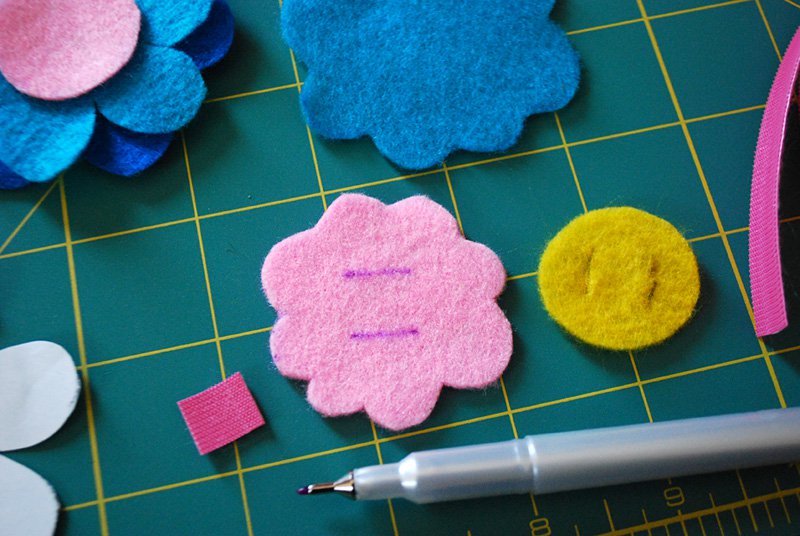 And here are three pieces ready to become a flower.
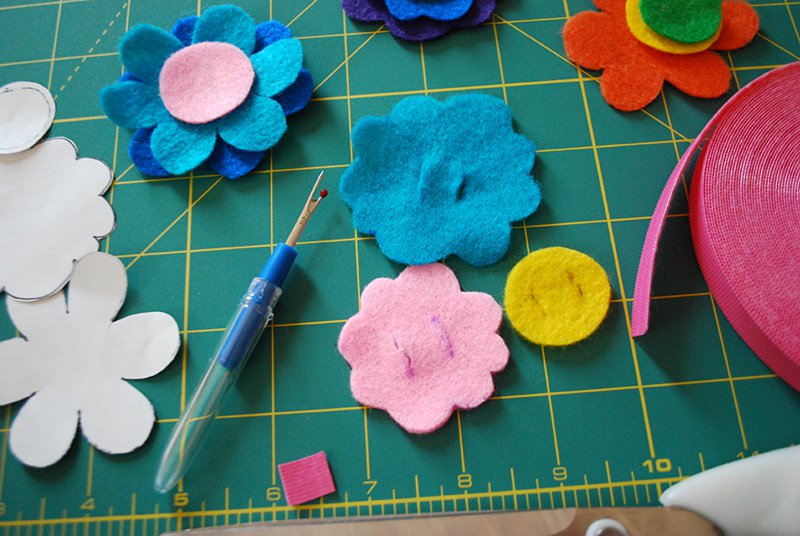 Measure your wrist and add about 1.5″-2″ to it for threading through the flower and overlap to close on your wrist. This batch of flower bracelets were for my 2-year-old Elise.
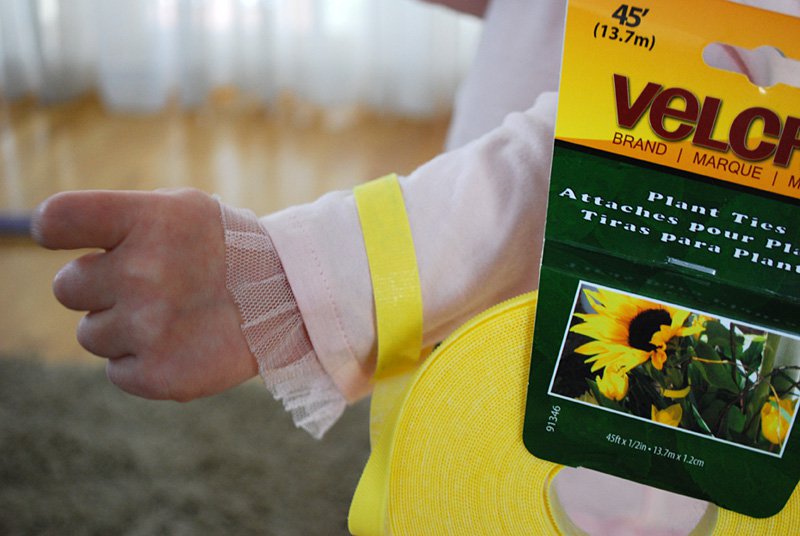 Cut a piece of VELCRO® plant tie to this length. Thread the end of the VELCRO® Plant Tie strip through the slit flower layers. Felt is naturally going to stick to the VELCRO® hook (scratchy) side, so when you thread it through, try to thread it so that the felt is touching the smooth side. Go slowly so to avoid tearing a bigger slit into your felt. Thread the flower onto the VELCRO® Plant Tie so that it’s almost in the middle of your Plant Tie — remember that you cut some extra for overlap so it should be slightly to one side.
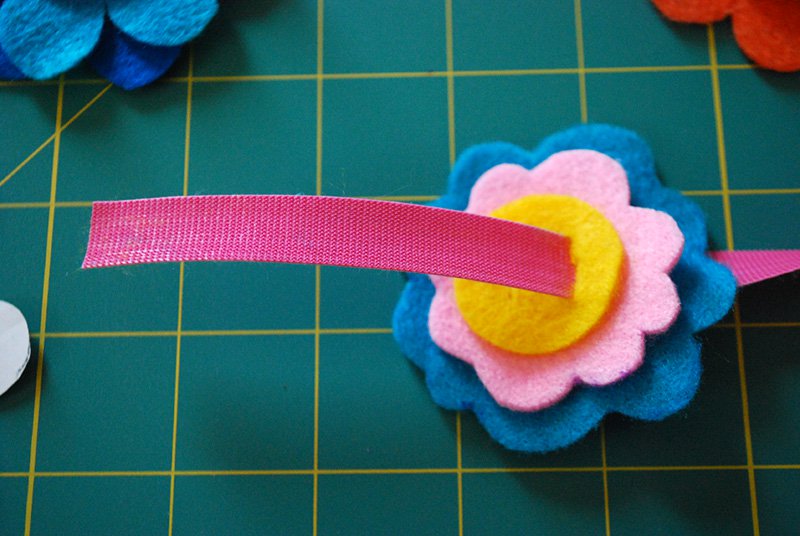 Now thread the end back through the other slit stack, which will make a cute little color in the middle of your flower. You can either try to match the color to your flower middle or choose a cute contrasting color. Now just wrap the felt flower bracelet around your wrist and overlap the VELCRO® Plant Tie to close. You can snip off any extra as needed.
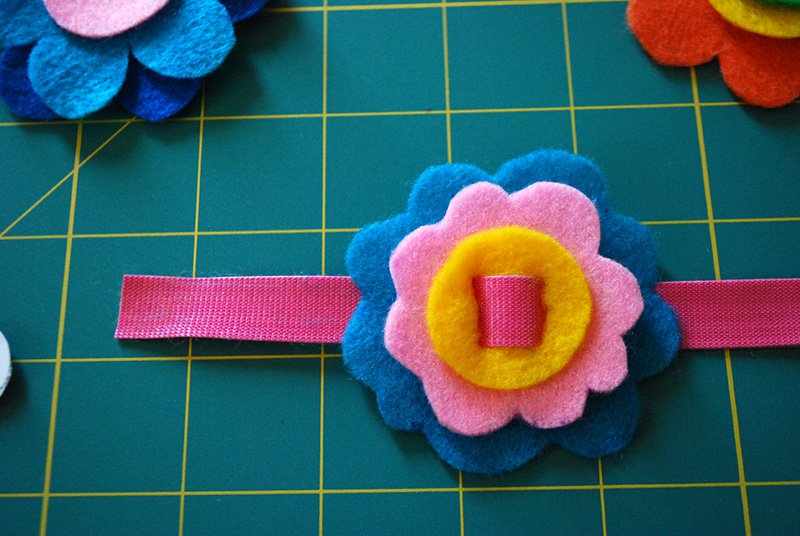
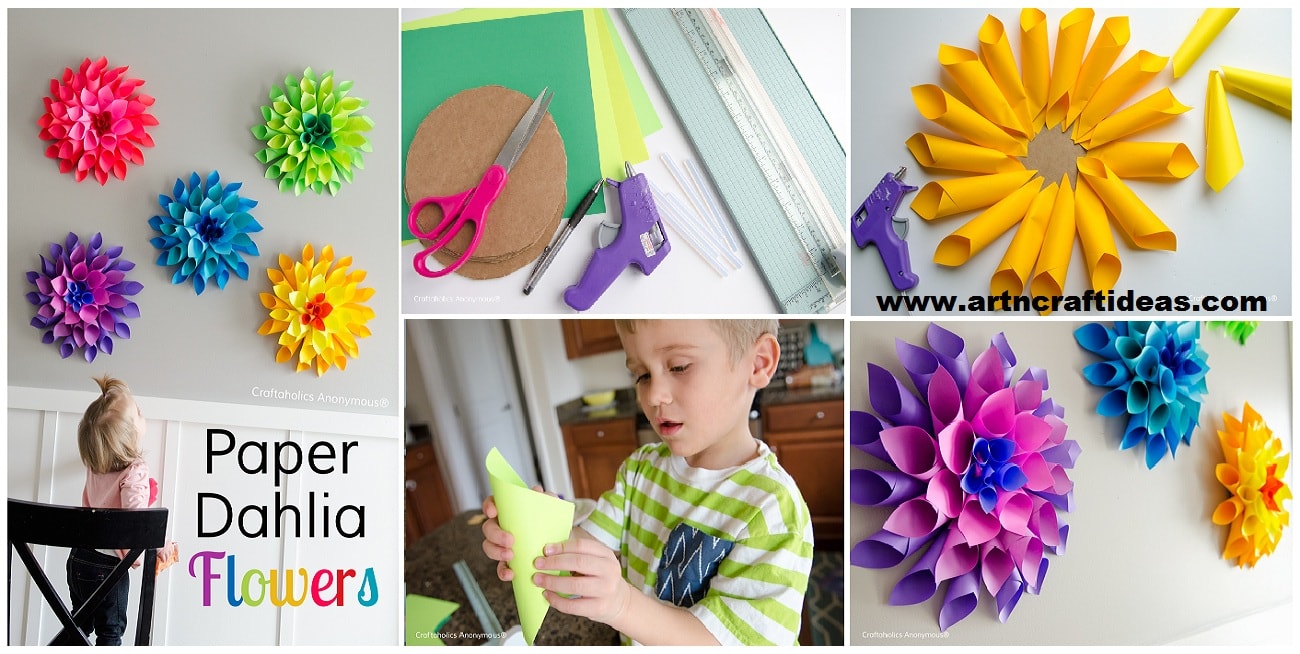
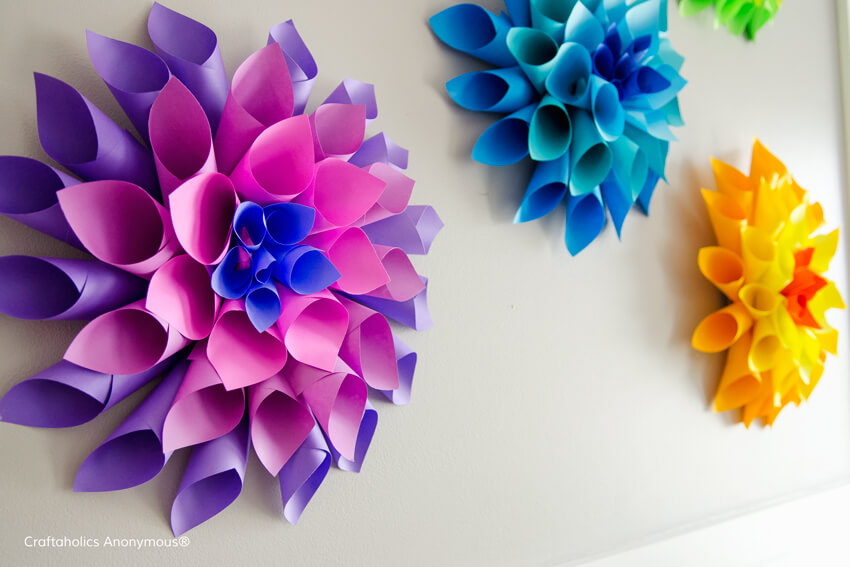
Paper Dahlia Flowers are easy to make, look fantastic on any wall, and they are an easy craft to get the kids involved in making!

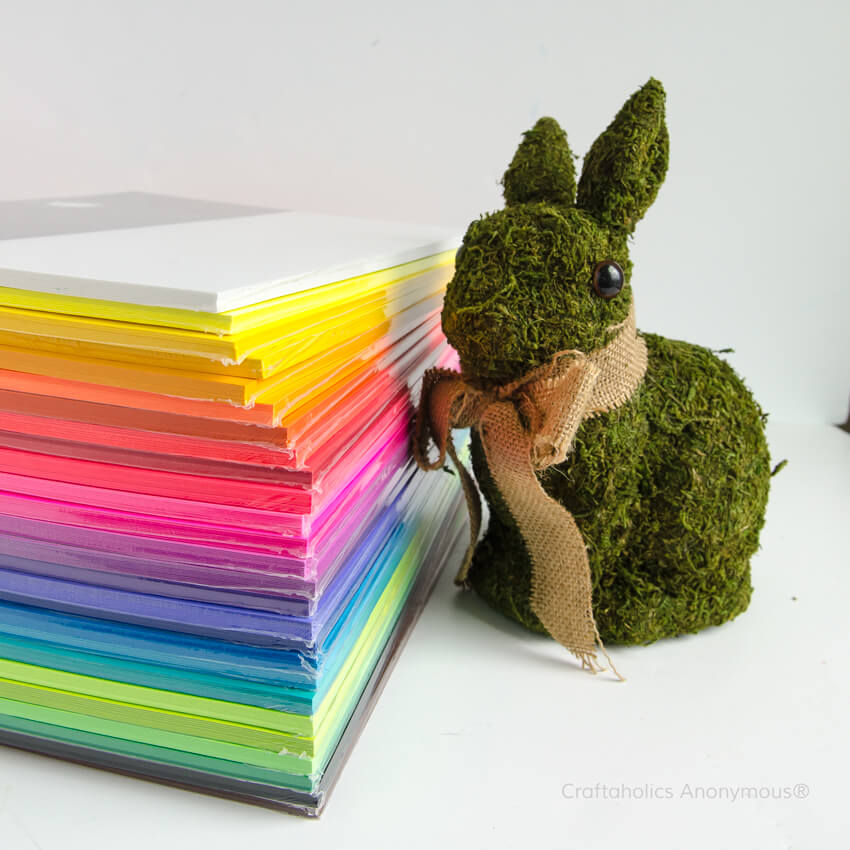
Required Material:
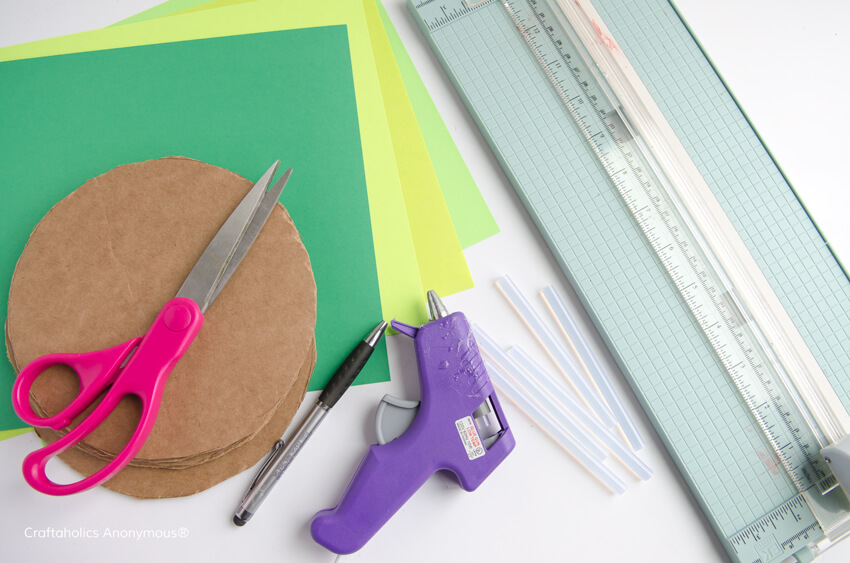 1. Cut a 6.5″ circle out of cardboard. I used a bowl and pen to trace a circle on the cardstock and then cut it out with scissors.
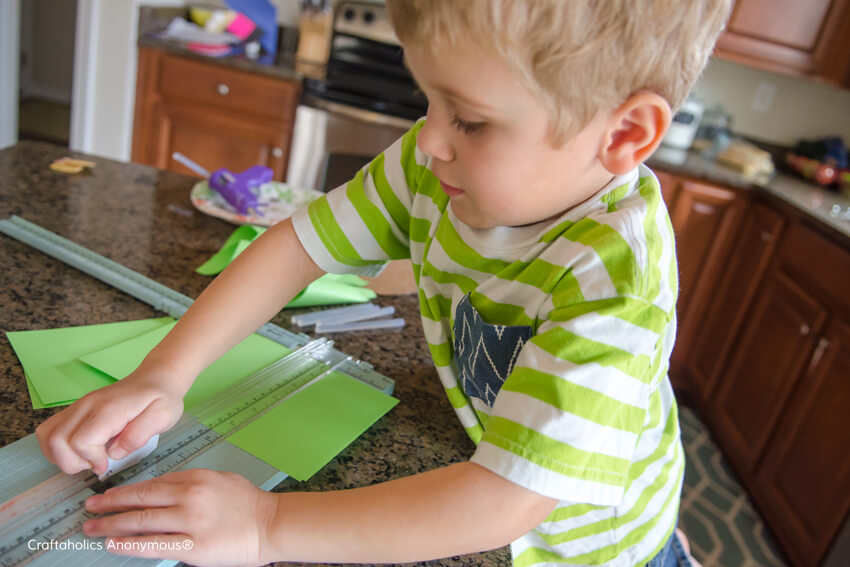 2. Use your paper trimmer to cut your colorful paper into rectangles. I cut all pieces of paper into 4.25″ x 5.5″, which is basically an 8.5×11 into fourths. My 4 year was great at helping me cut the papers. I would measure and then he loved to run the blade across to cut it.
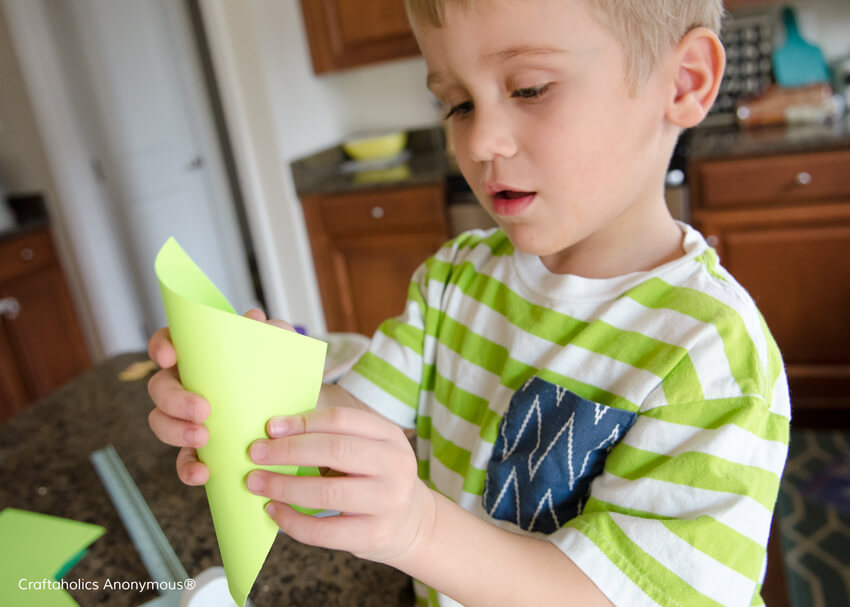 3. Then roll your pieces of paper into cone shape with a point in the center of one end and use a small dot of glue to hold in place. If you have kids helping you, I very highly recommend using a low temperature glue gun. Glue gun burns are not fun!
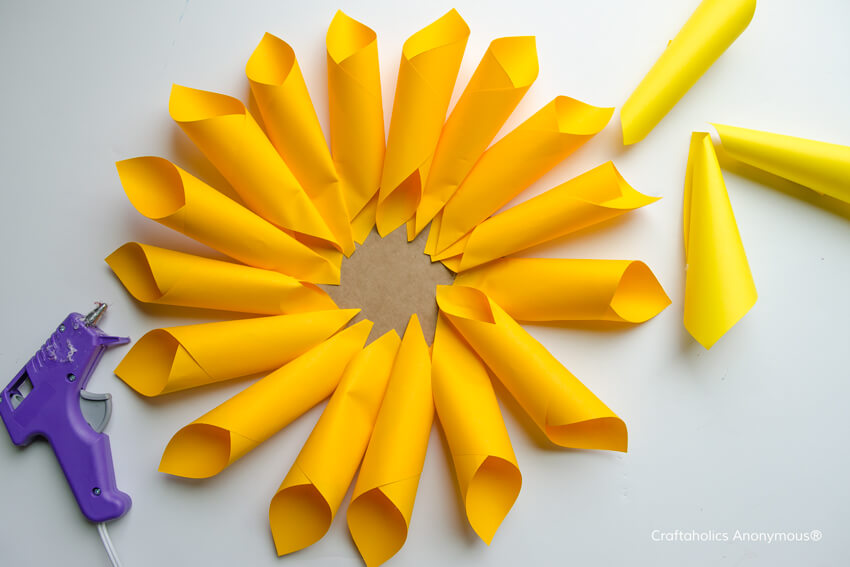 4. Then I started glueing the first layer of cones all the way around the edge of the cardboard circle. The next layer I glued the cones around a little inside of the outer layer, without cutting or trimming them. For the third layer, I trimmed off about 2-3″ off the cone before gluing them on. And then for the center, I cut off the tips of the cones and glued them into the center of the flower.
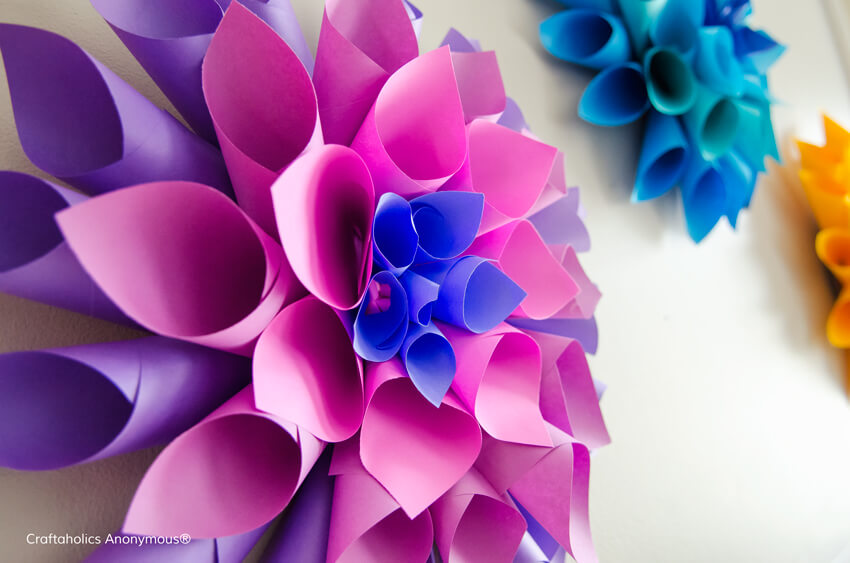 I love the texture and color these bright, happy paper Dahlia flowers offer as Easter Decor! My kids love looking at them

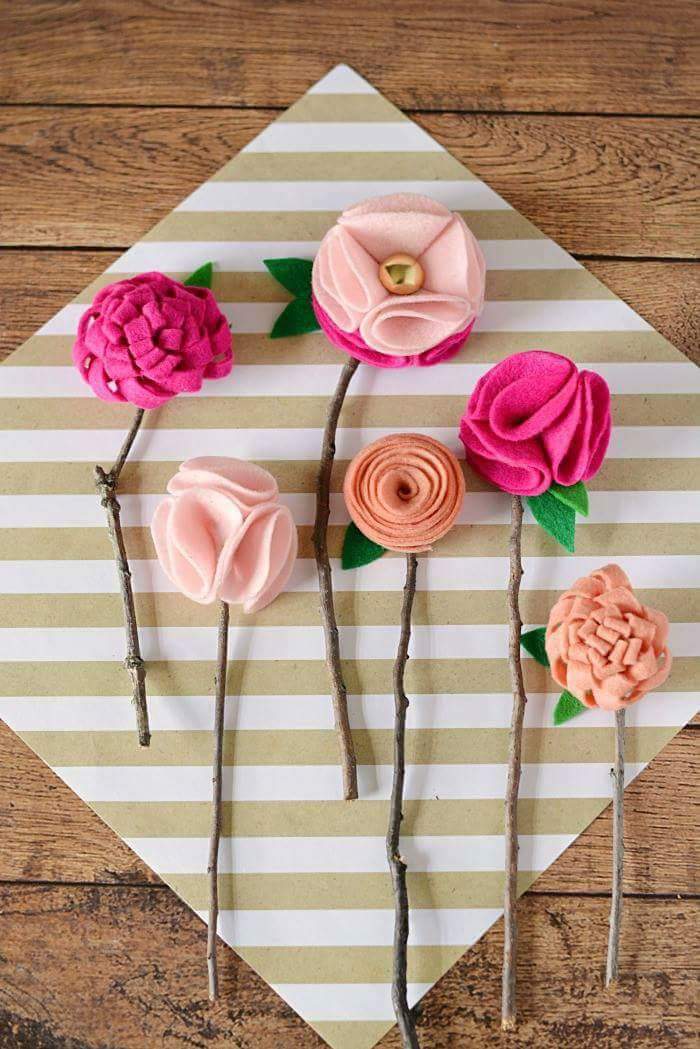
These DIY no sew felt flowers are the perfect homemade Mother’s Day gift – and the best part is, is that they’ll never wilt or die!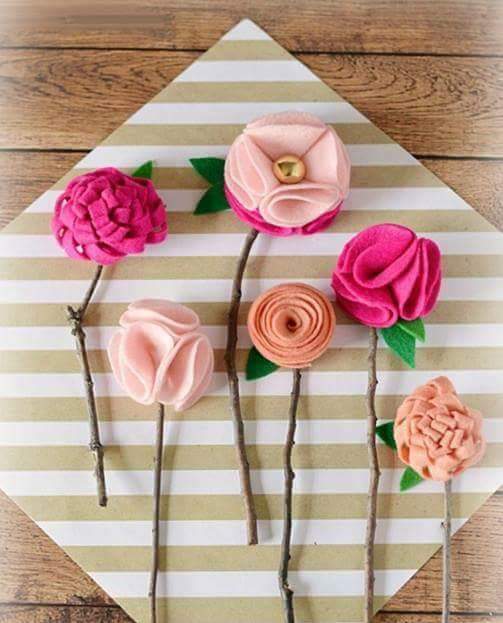 Required Material:
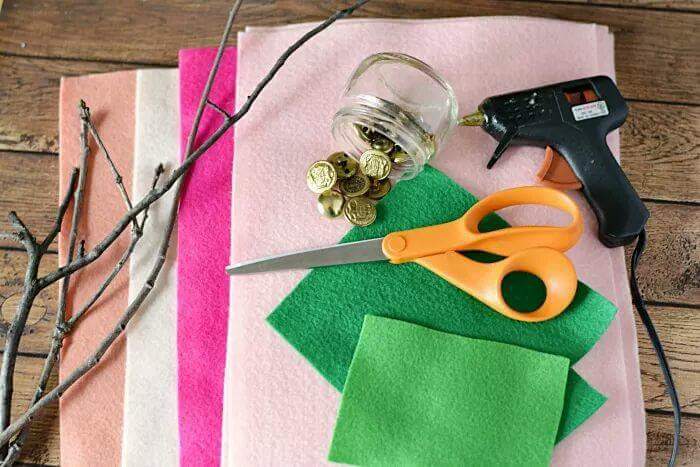
DIRECTIONS:
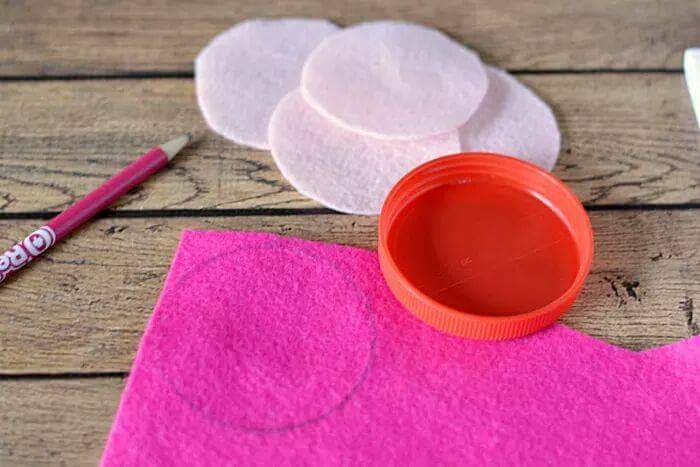
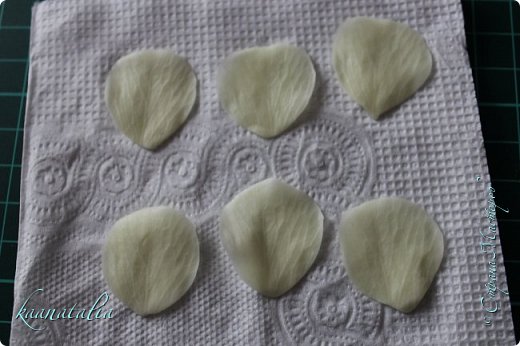
To make a flower with button: Cut 8 round 3″ circles out of felt – 4 of one color and 4 of another color.
 Fold the circle in half and in half again to create a quarter circle. Apply hot glue to the folded edges of one circle and attach it to the folded edge of another circle. Repeat until all four quarter circles are connected to create one circle.
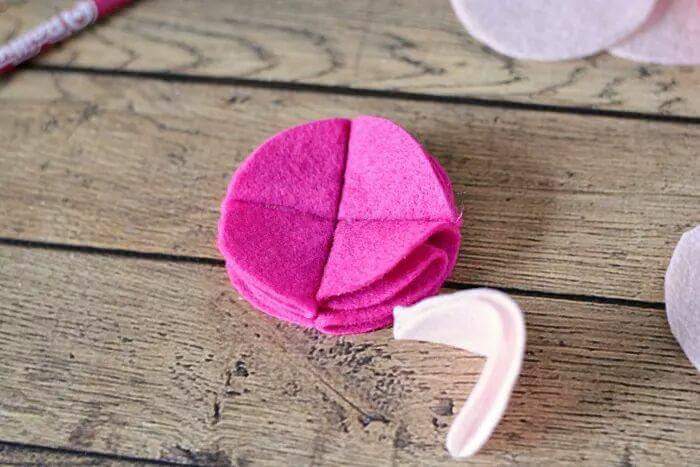
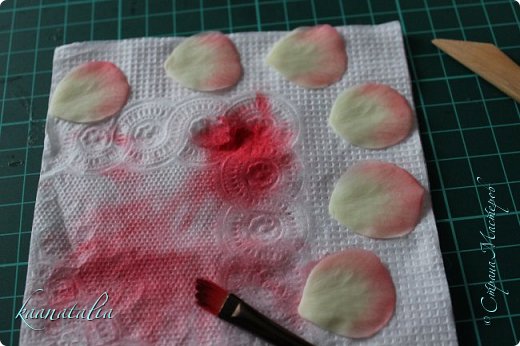
Do the same with the second color of felt, and glue the two flowers together. Attach a gold button in the center of the flower with hot glue
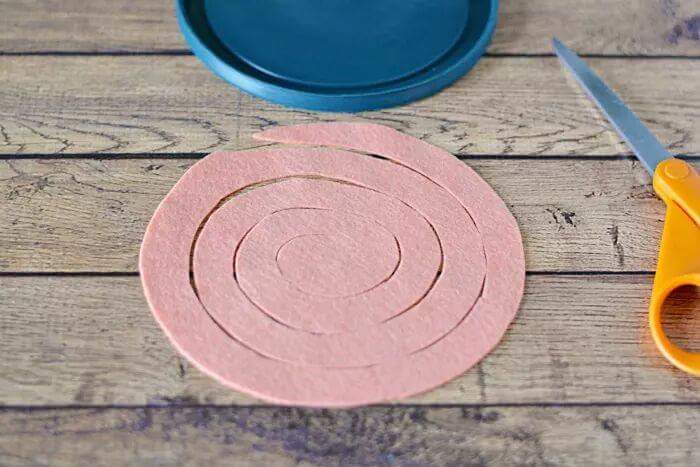
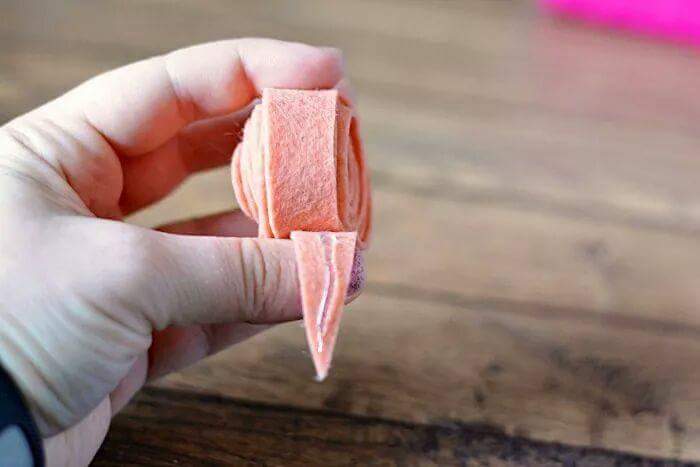
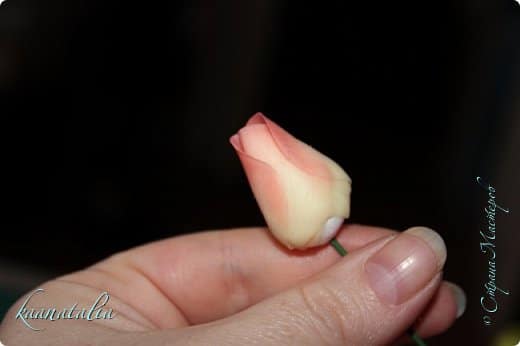
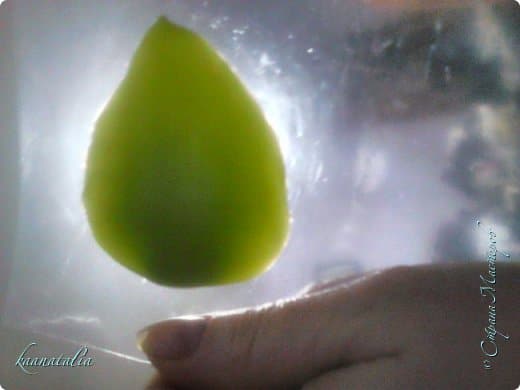
To make a rose, cut a 6″ diameter circle out of felt. Spiral cut the felt about 3/8″ wide. Roll up the felt from the center outward. Affix with hot glue at the end.
To make the “mum” flowers, Cut a piece of felt 12″ x 2.5″ and fold in half. Secure the seam if necessary with little dabs of hot glue. Cut slits at the fold about 1/2″ apart. Being careful not to cut through the entire flower. Roll from one end, and hot glue together as you go.
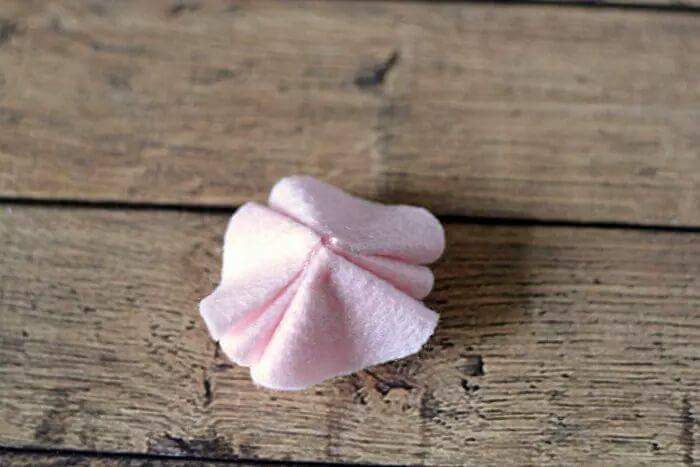
To make small buds: Cut 3-3″ circles and fold into quarters. Glue the three quarters together into a triangle like shape.
 Fold 9×2 or 12×2.5 rectangle in half lengthwise. Like a hot dog bun. Cut slits into the fold. About 3/8″ apart but not going all the way through the fold. Kind of like making fringe. But it’s on the fold.
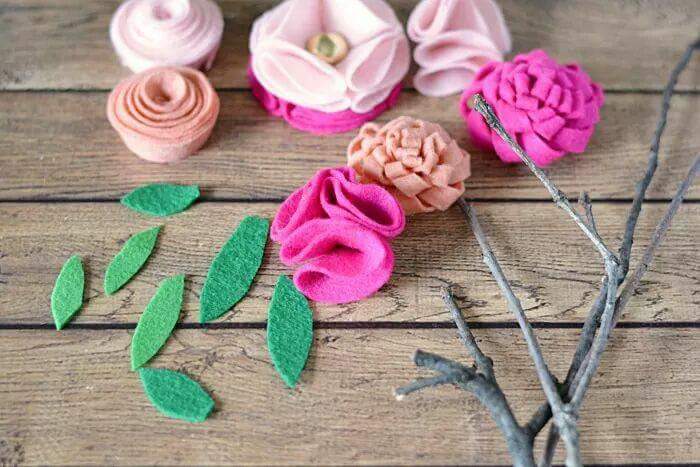
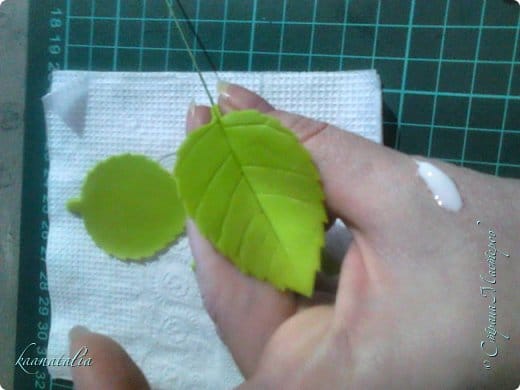
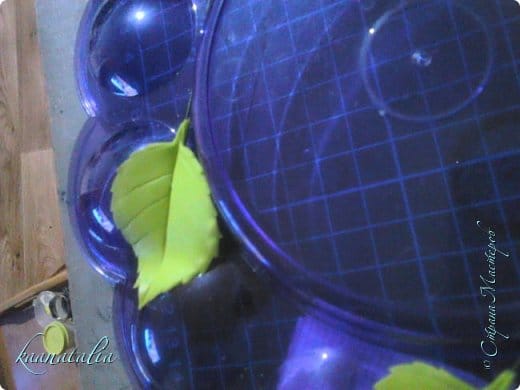
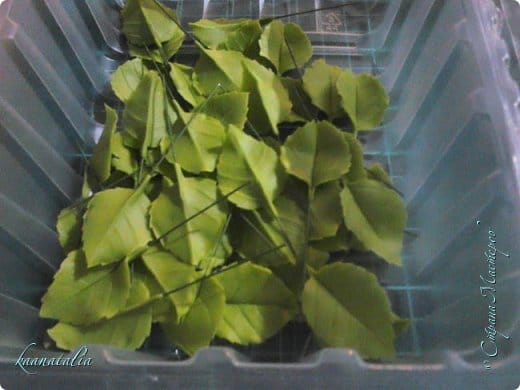
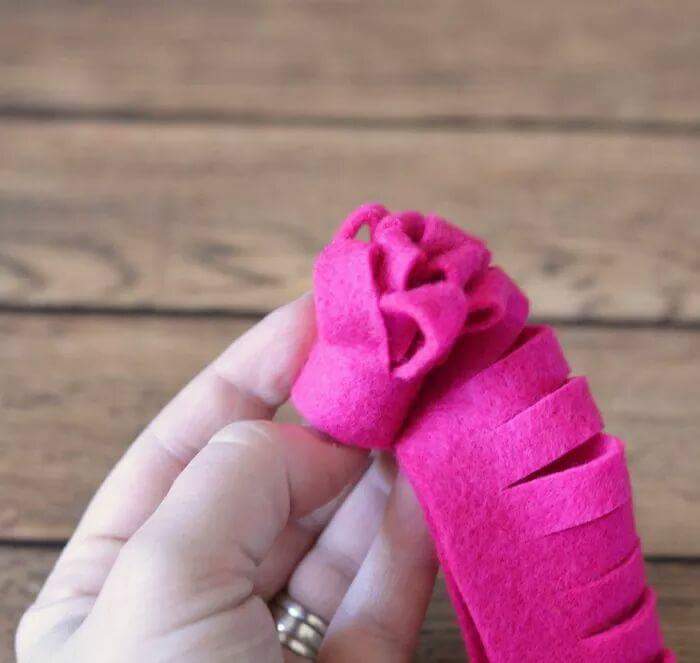 When finished making flowers, cut out leaf shapes. Affix to flowers with hot glue. Add stick stems.
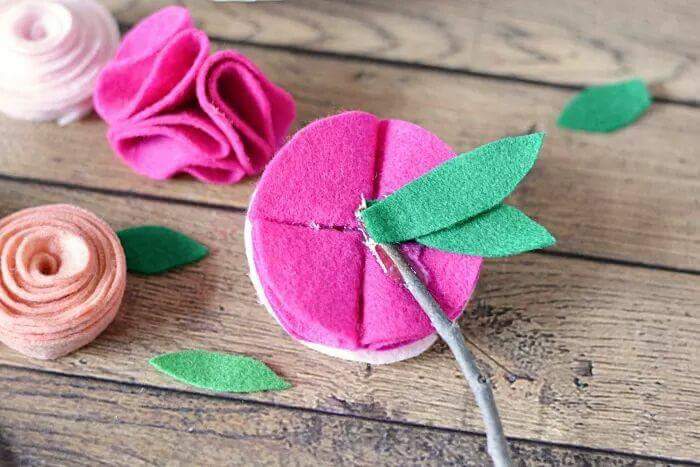

Procedure of an beautiful wall clock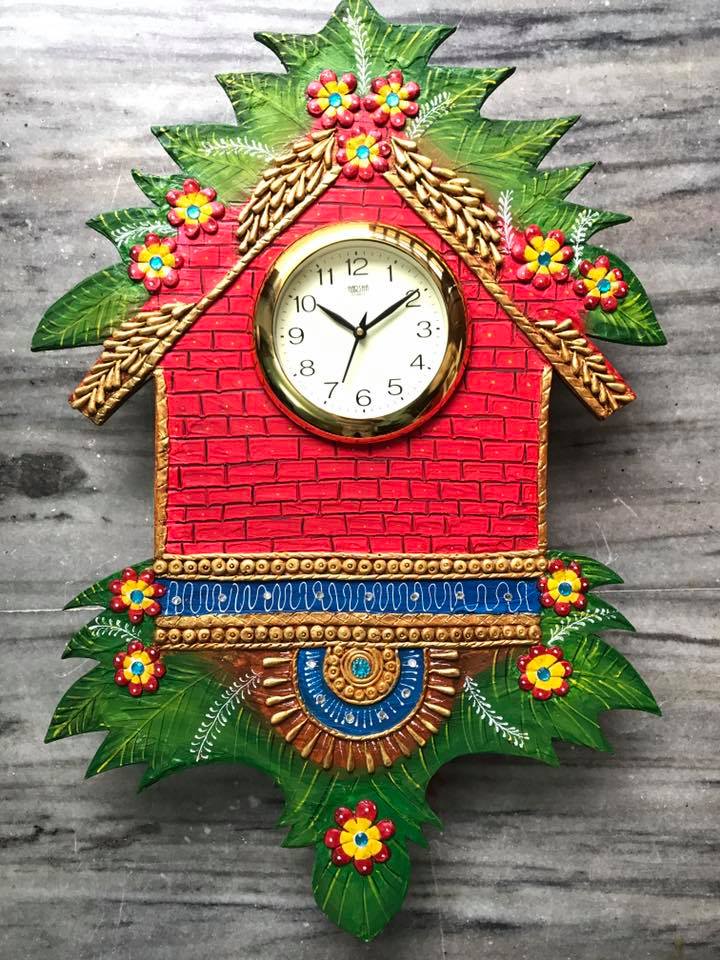 Take the desired clock base
 Prepare marble powder mixture
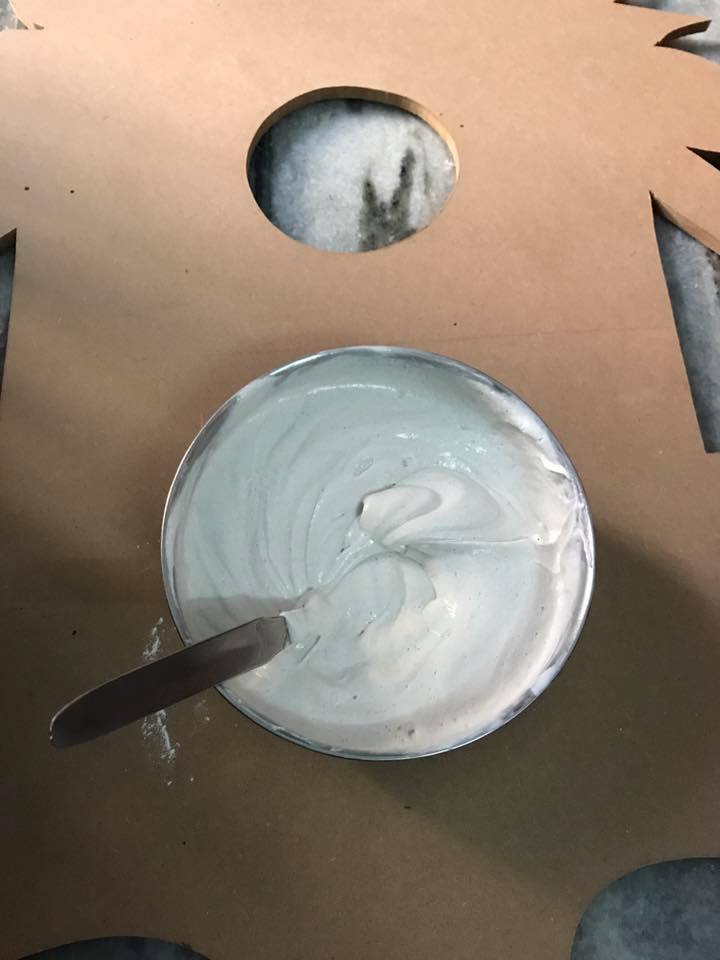 Apply the mixture and give texture
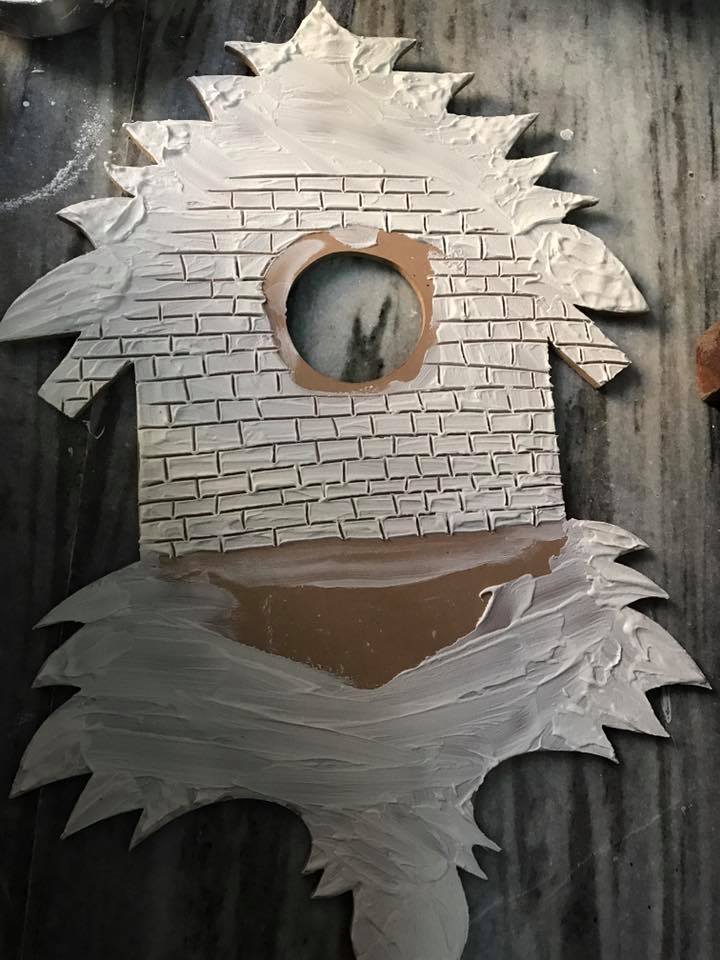 After it dries smoother the surface by a sand paper
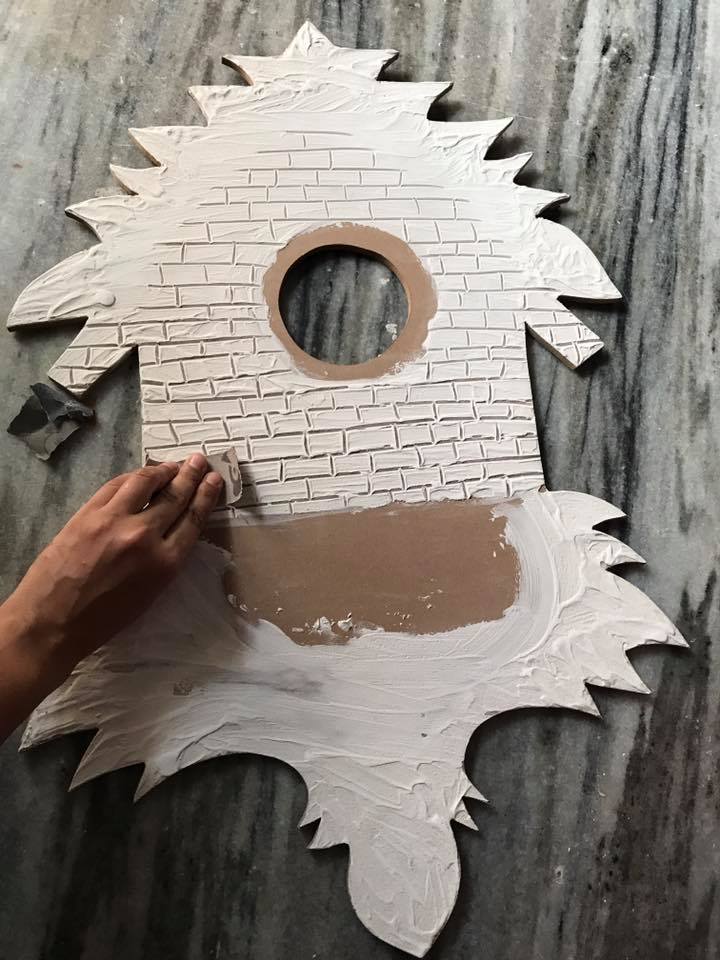 Make design with paper mache
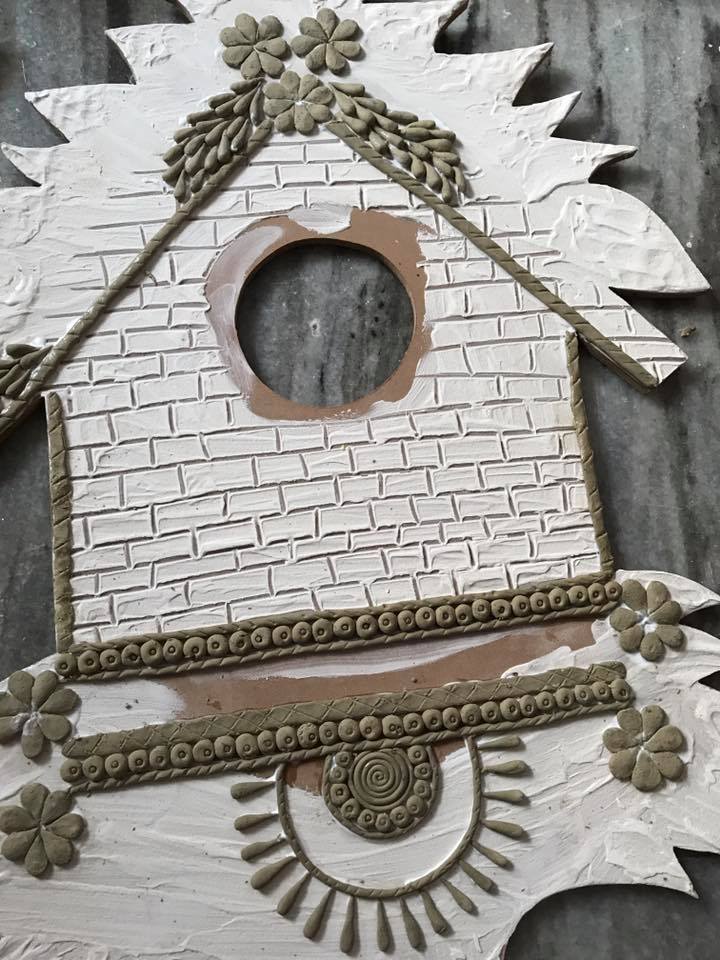 Apply primer on clay
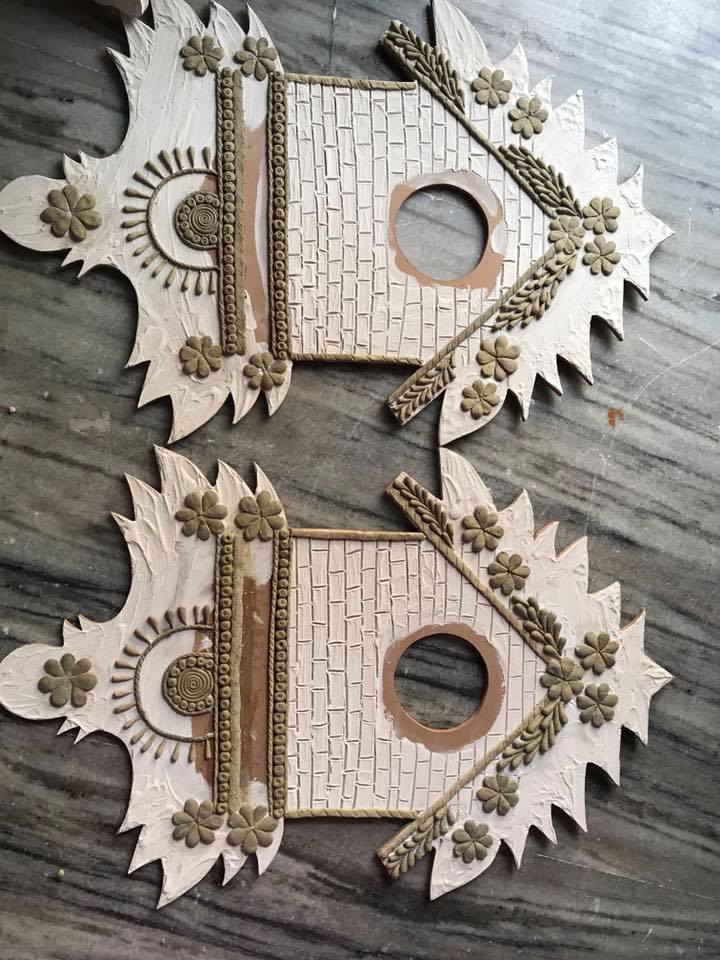 Add base colour
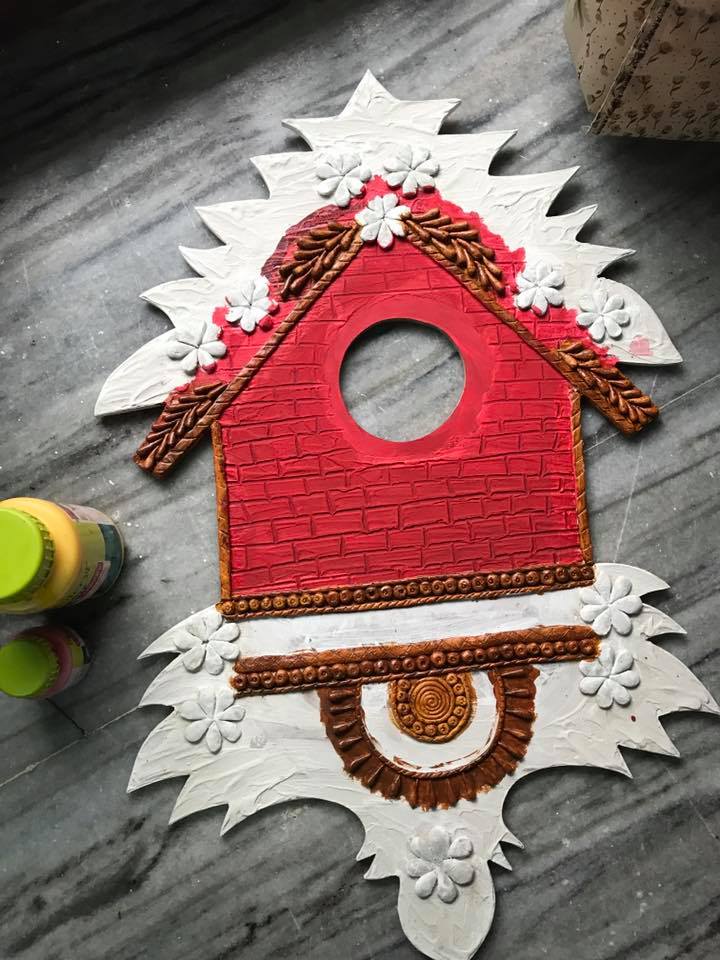
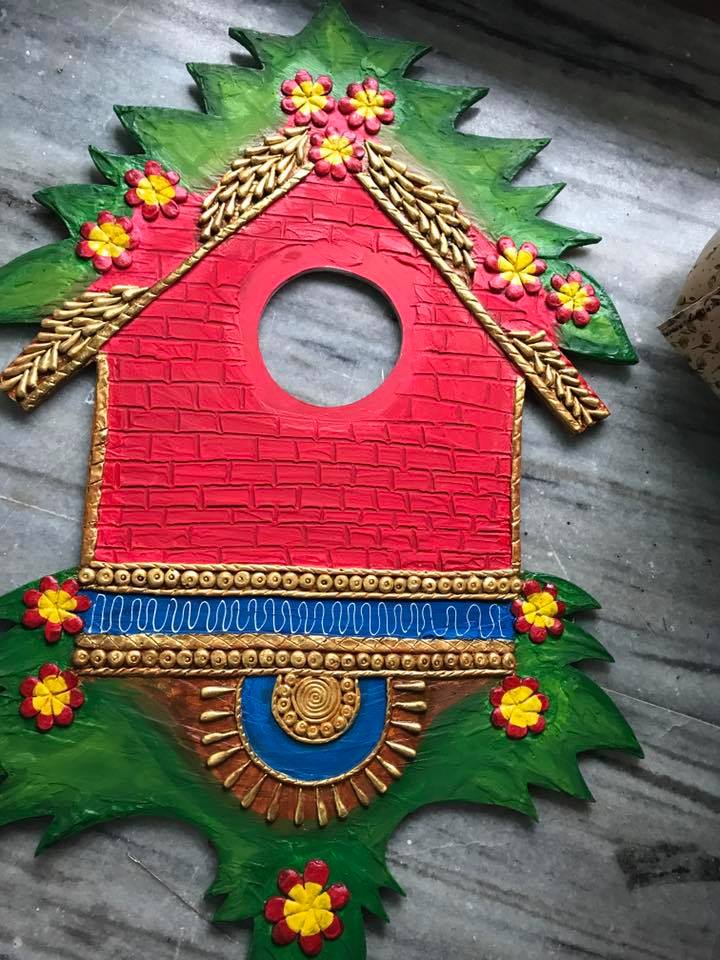 Do the details by outliner
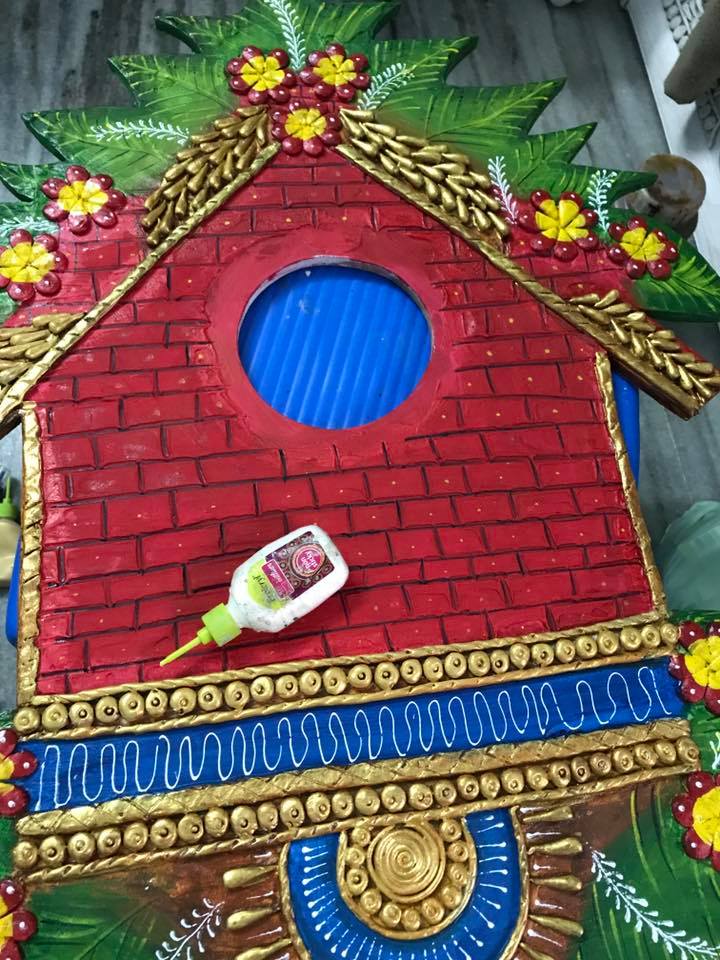 Apply varnish
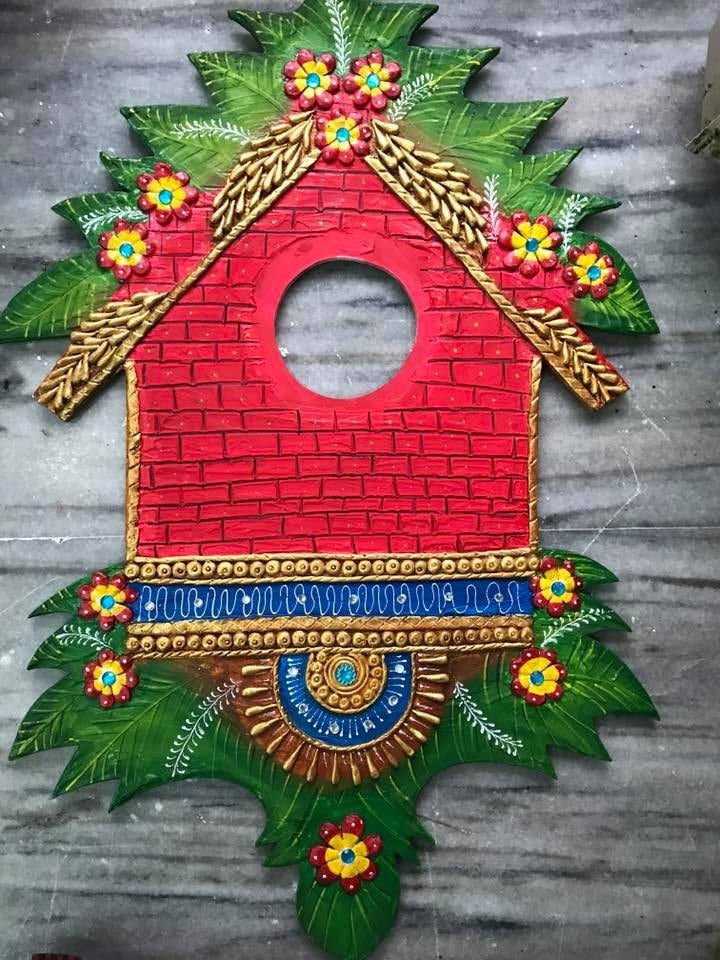 Paste the clock on the board
Courtesy: Kohsa: The Art Lab


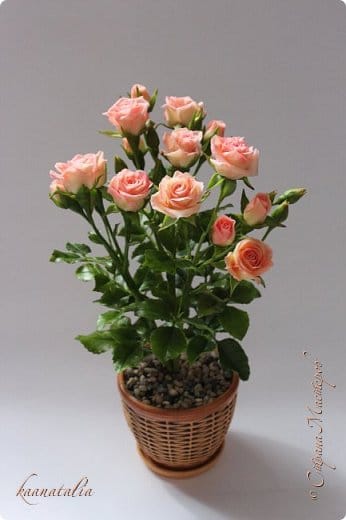
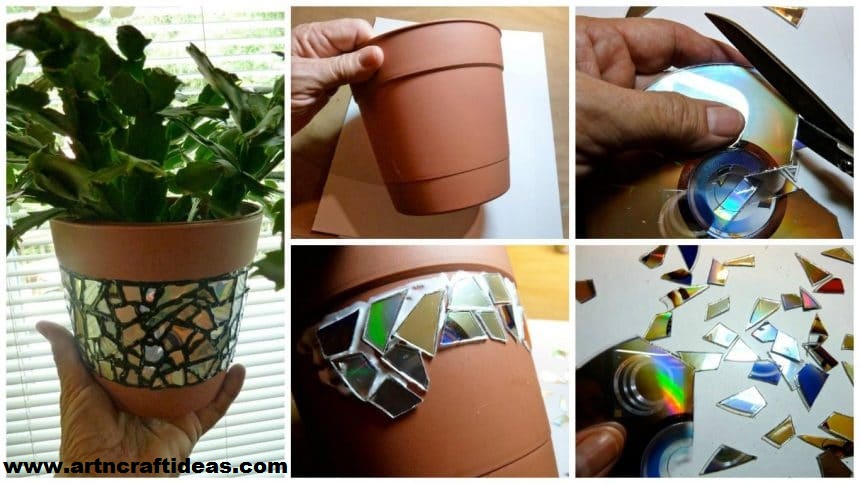
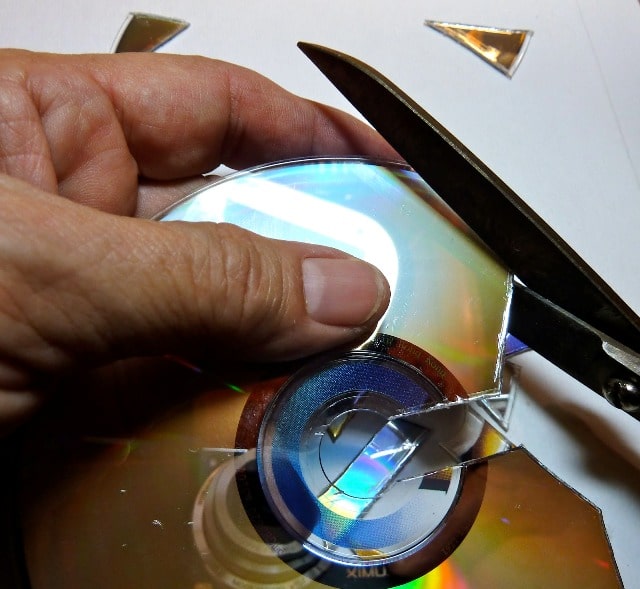
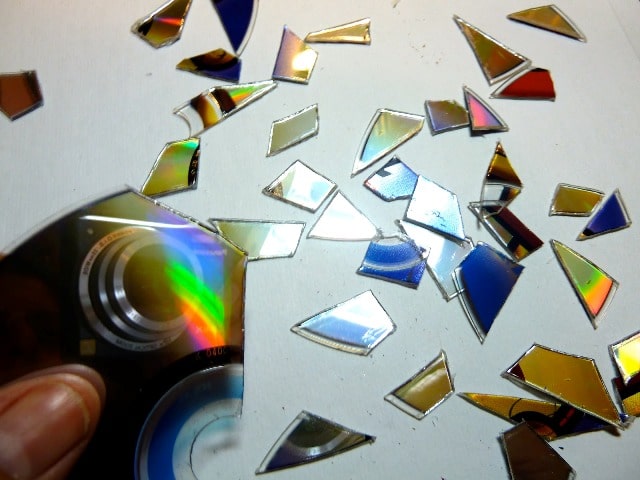
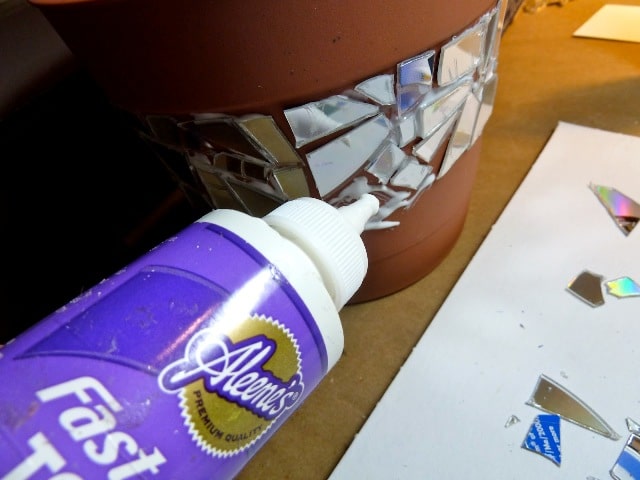
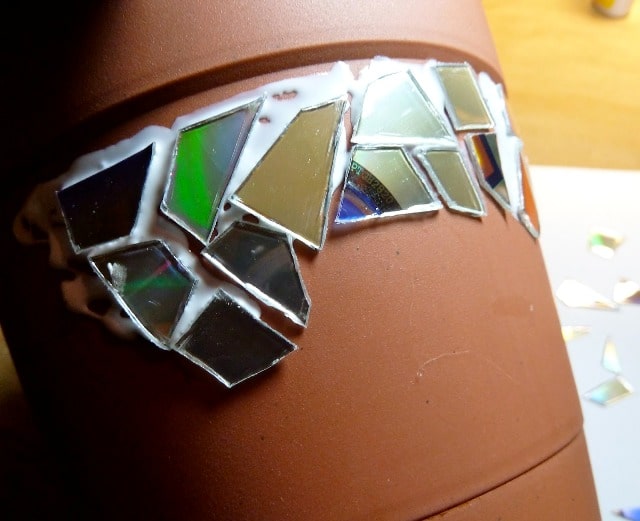
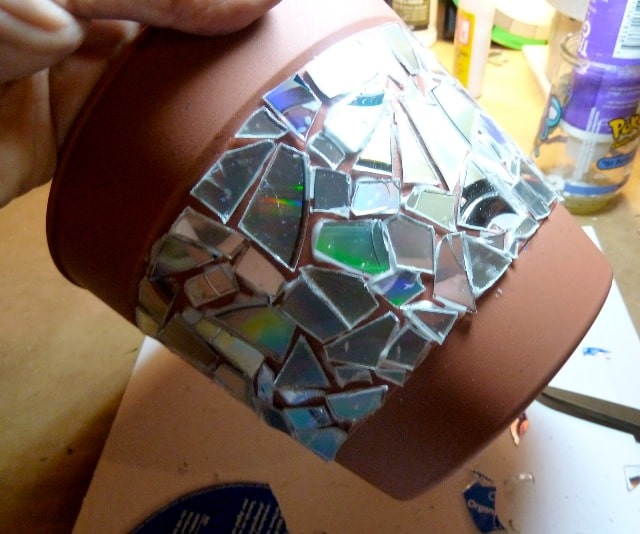
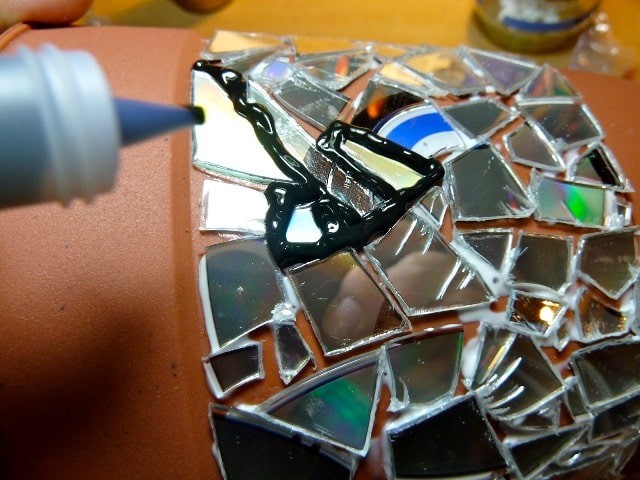
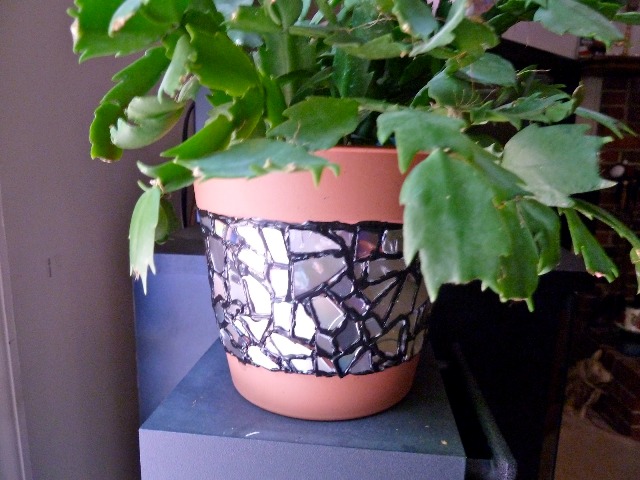
Brilliant DIY Ideas To Recycle Old CDs. Mosaic Flower Pots Recycled.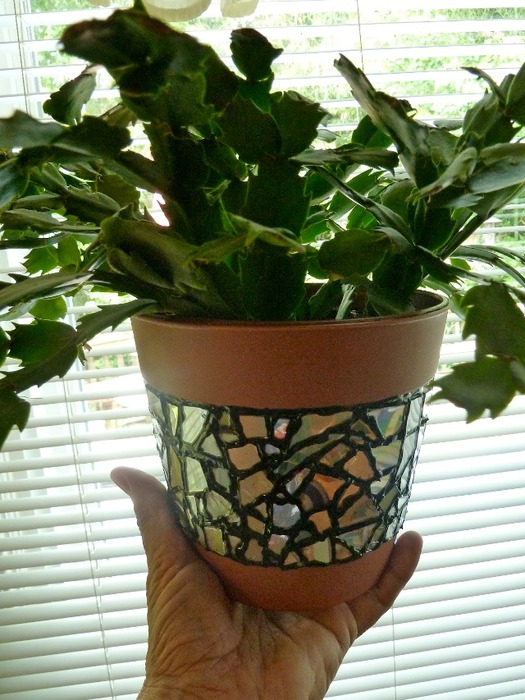
– scissors
– glue PVA (or superglue)
– plastic pot


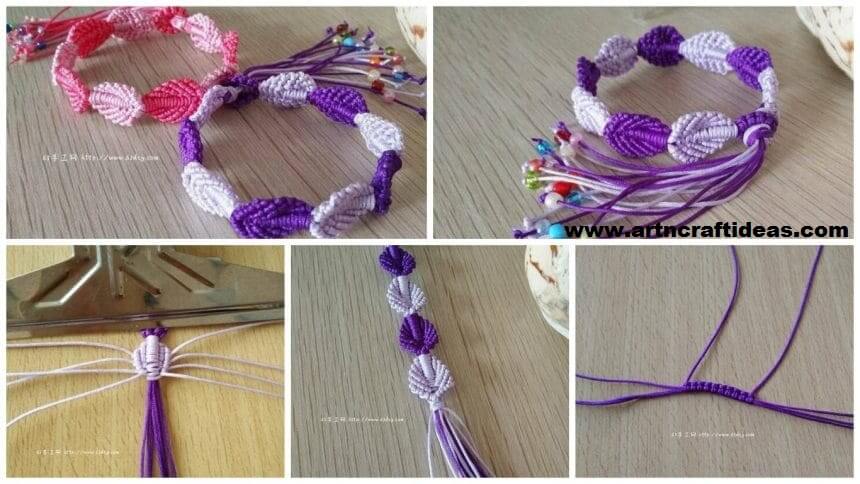
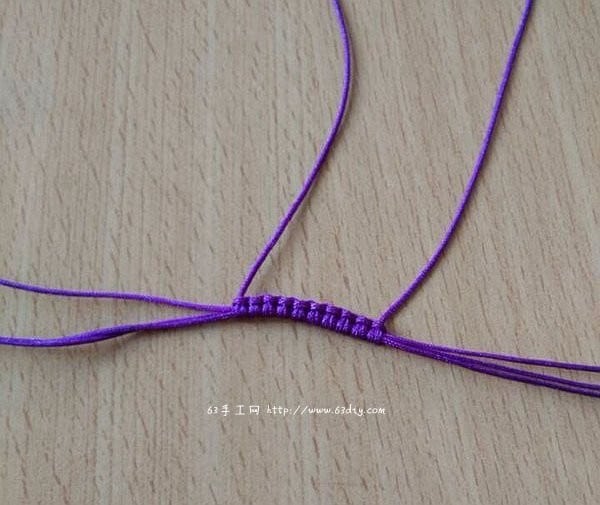
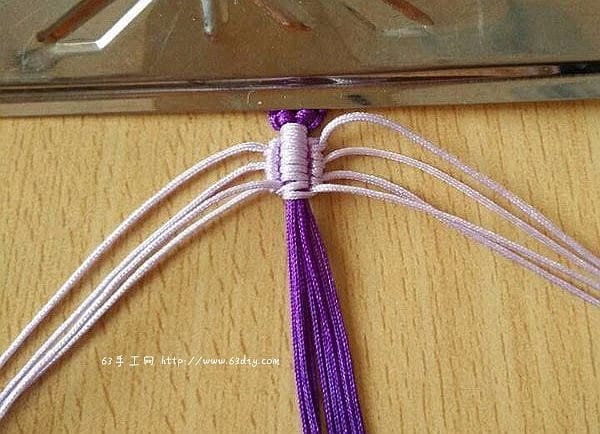
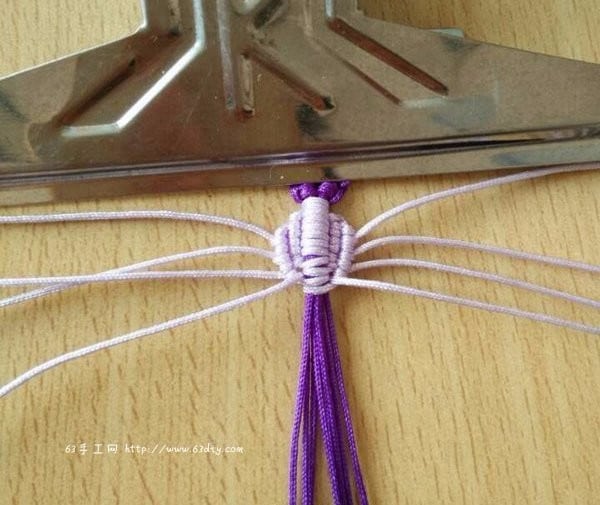
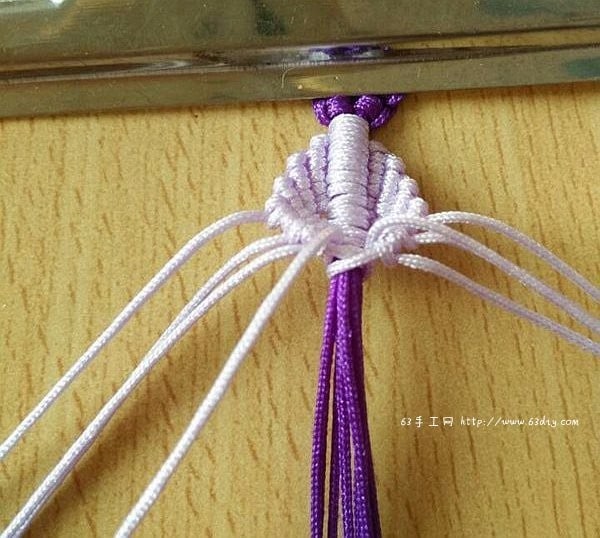
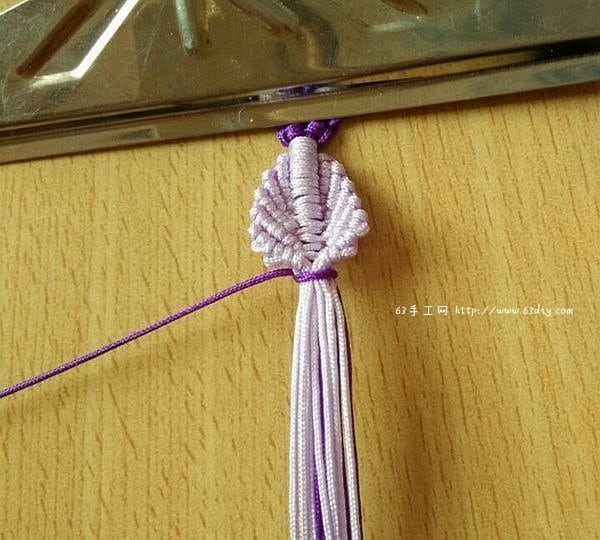
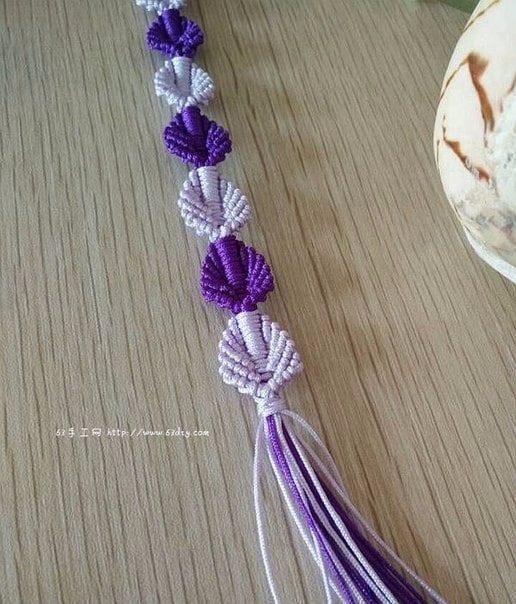
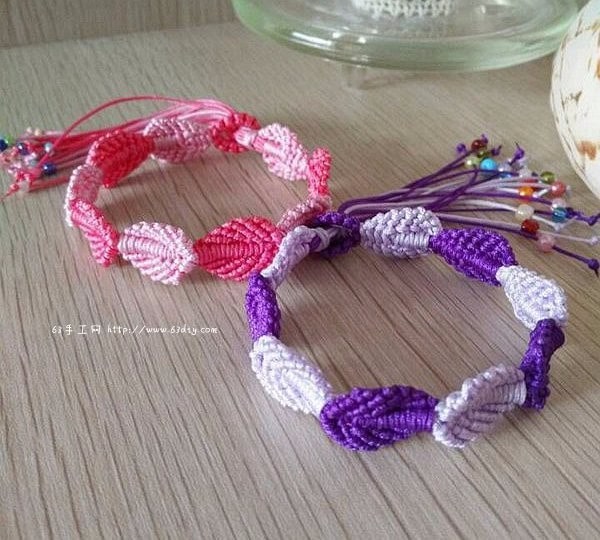
Beautiful macrame weave bracelet: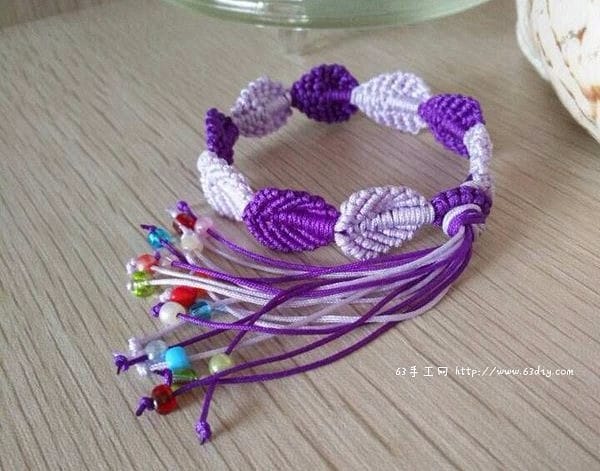
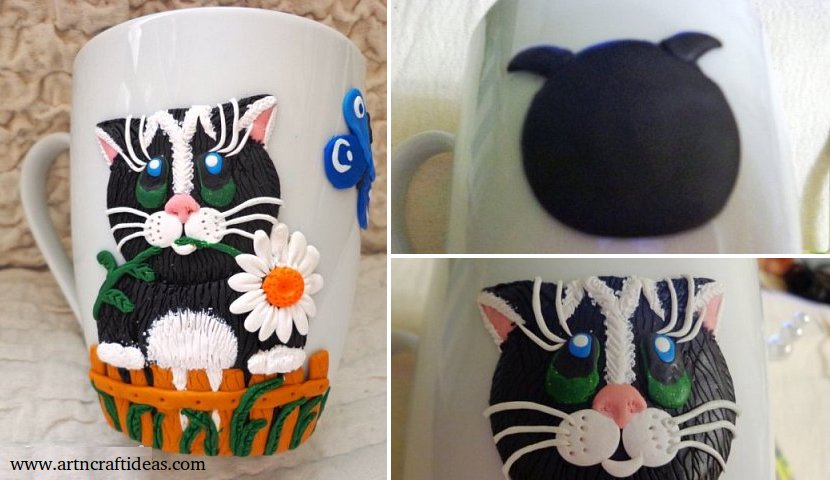
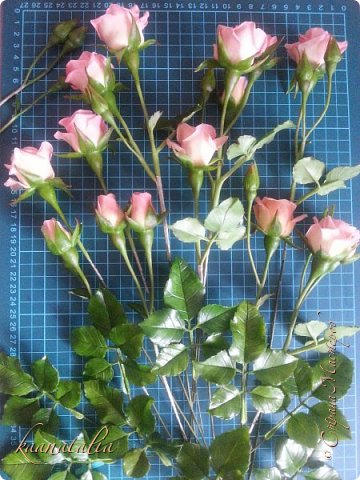
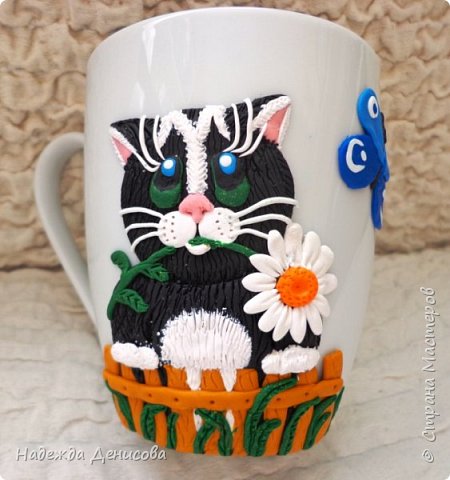
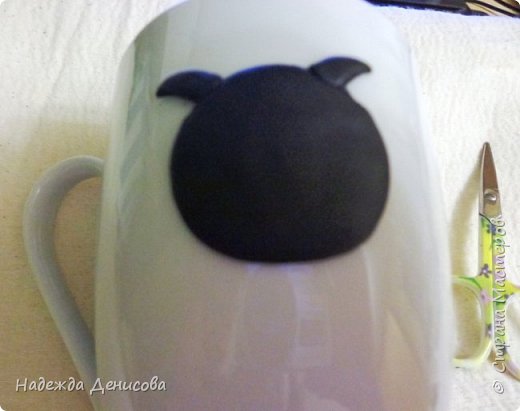
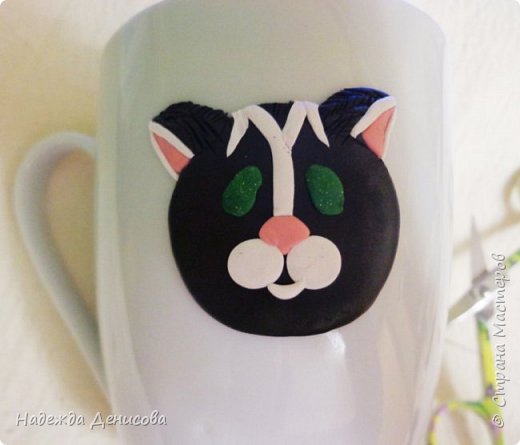
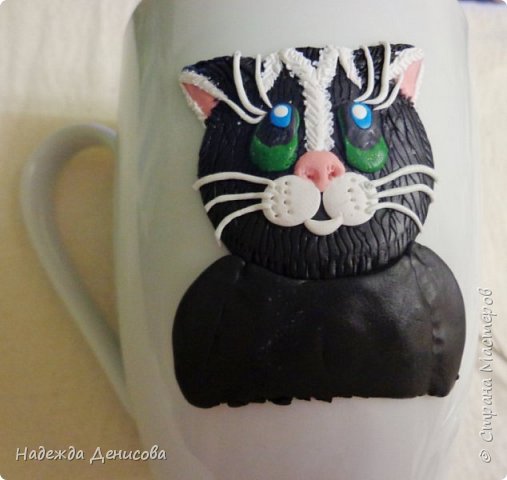
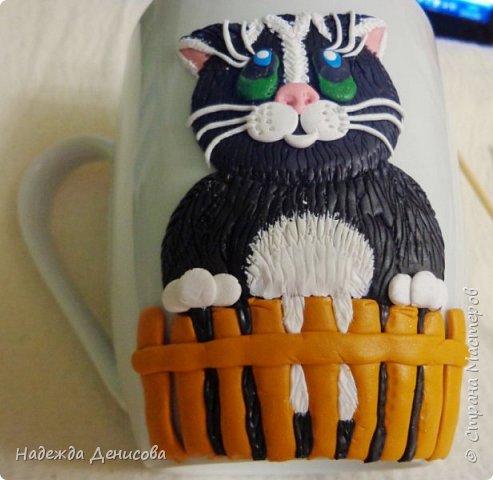
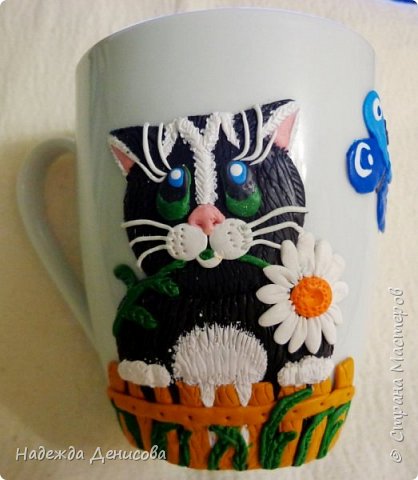
Beautiful “Cat” Coffee Mug from polymer clay.
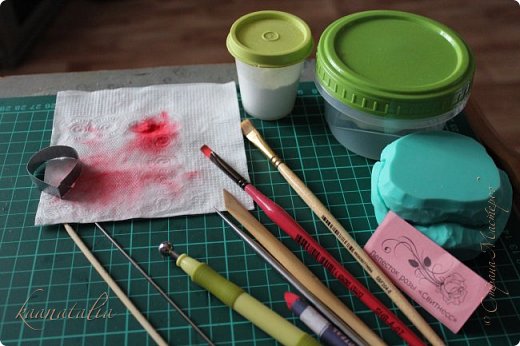
Required Material:
Note: Everything else is not necessary.
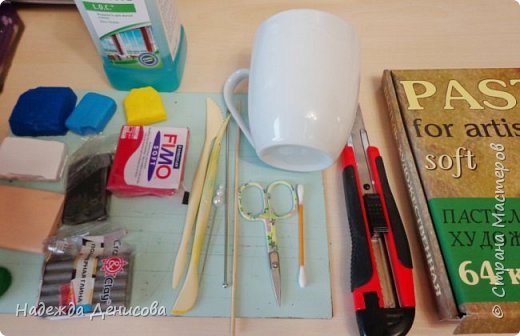
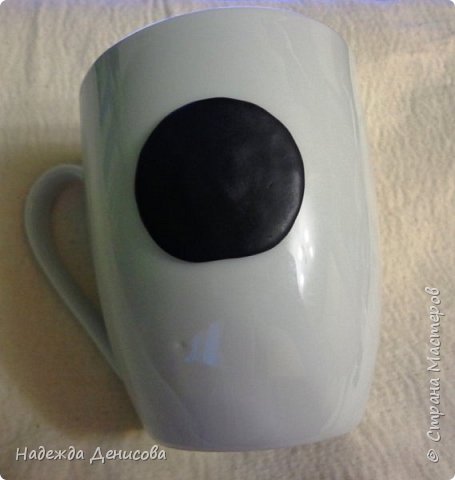
Wipe mug any of the liquids, for degreasing the surface.
From a piece of black plastic made round cake, and shall cleave it into a mug.
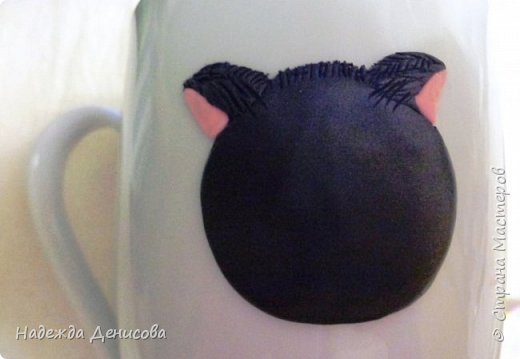
Prilep ears.
Add to ushkam pink triangles.
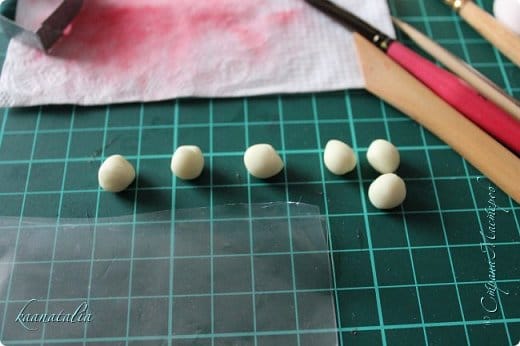
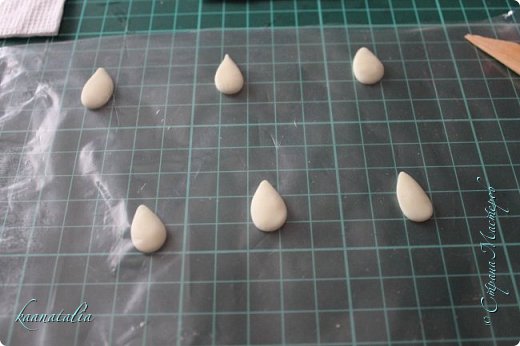
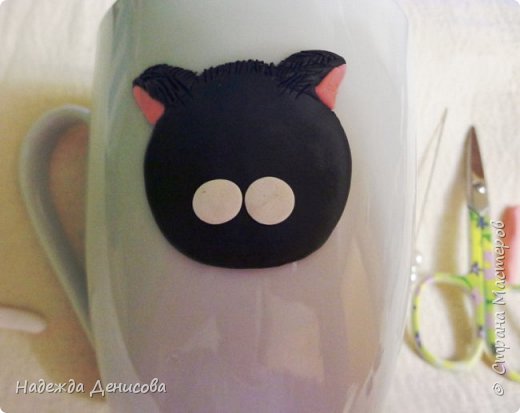
Of white plastic make two identical circles, and shall cleave in the photo.
Of pink plastic make a semi-circle and be united as in the photo – it’s nose seal. Of white plastic strips do and be joined as in the photo.
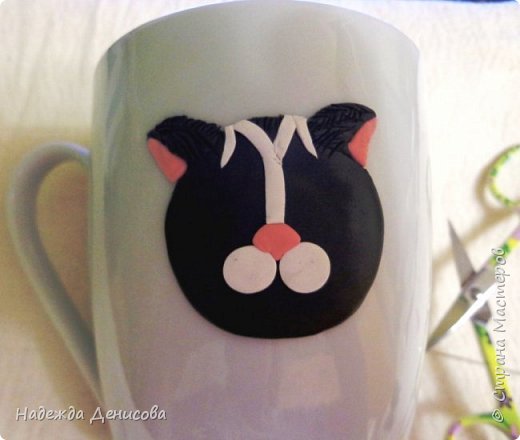
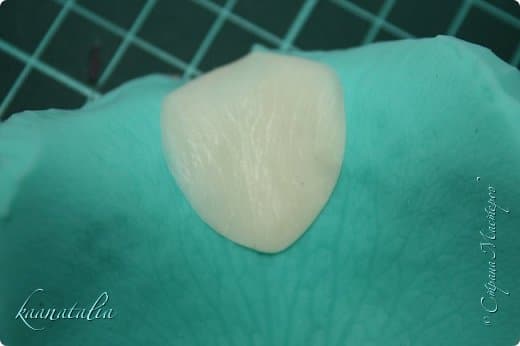
From white plastics do lip seal and edging on the ears. Of green plastics make oval cakes and shall cleave in the eye area.
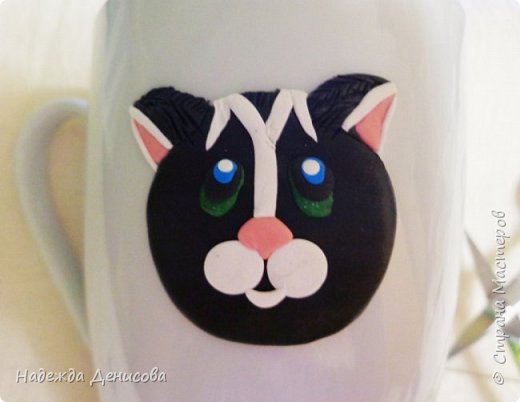
The sequence of modeling the eyes:
– green ovals
– oval black
-blue ovals
-white circles
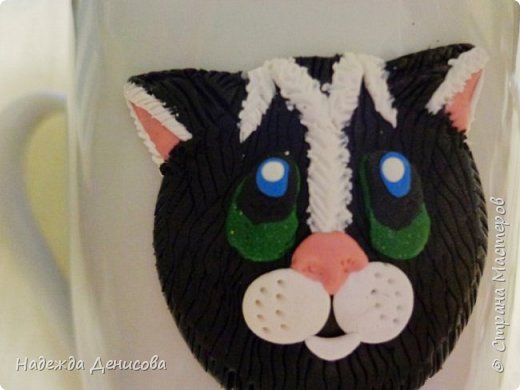
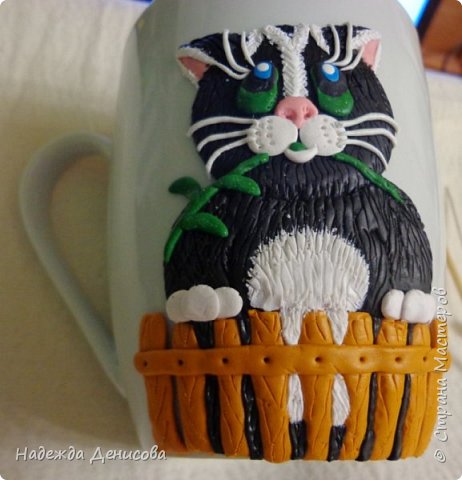
Take the needle and draw the hair, do needle point mustache.
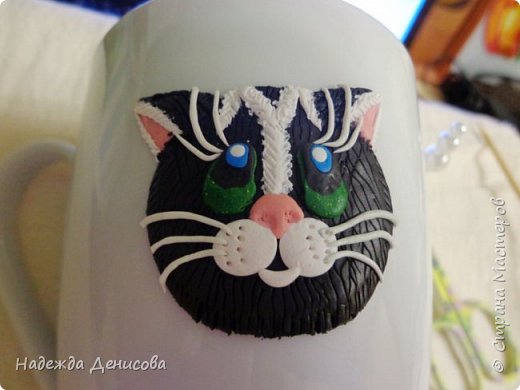
From white plastics do thin flagella. Prilep mustache in the photo.
Of black plastic seal body Prilep.
Of white plastic make a semi-circle, and shall cleave in the cat stomach. Make six similar circles of white and white to stick foot. By three circles on each foot.
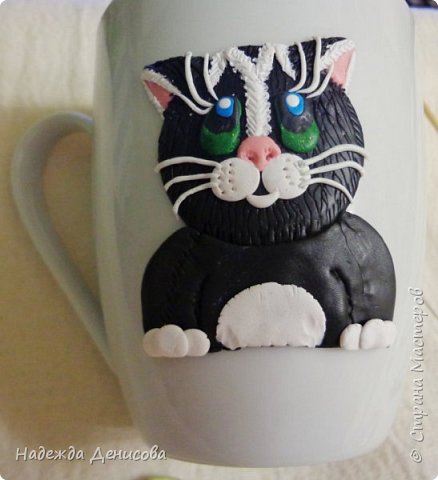
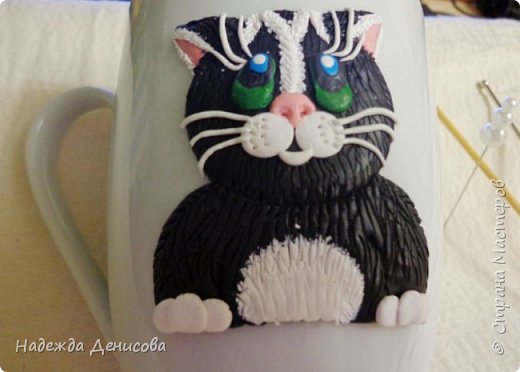
Needle paint coat.
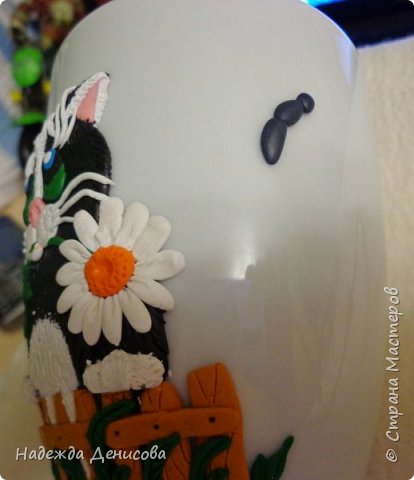
Of yellow plastic make sausage. Cut nine identical segments – a fence, and a long bar. Prilep on the mug as in the photo.
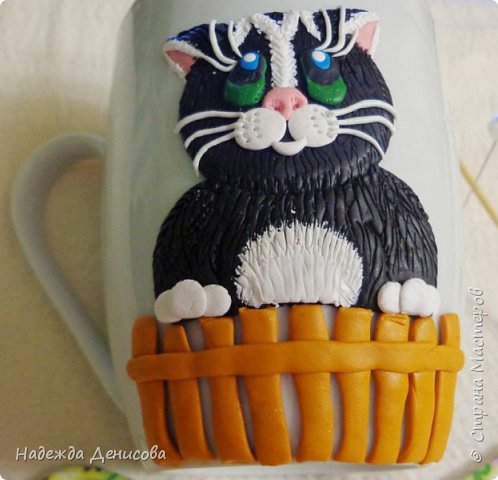
Thin flagella of white and black plastic seal shorstku add that shines between the picket fence.
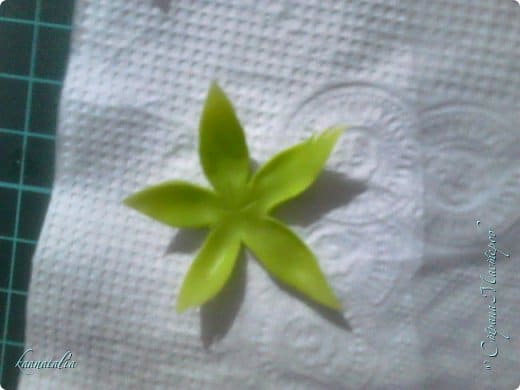
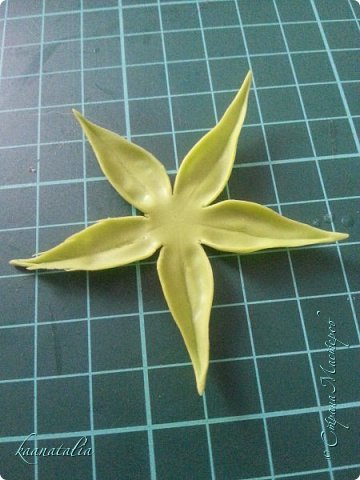
Take the needle and draw a pattern on wood fences and holes from the nails. Of green plastics make stem and leaves of a flower.
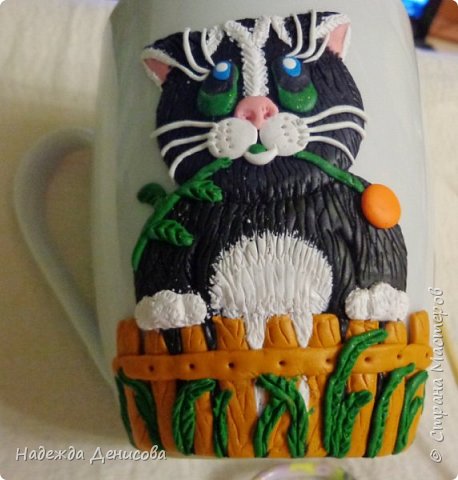
Make green thin flagella, Nalepa randomly grass behind the fence. Give the texture of needle blades of grass. Of orange plastic make the middle of a daisy.
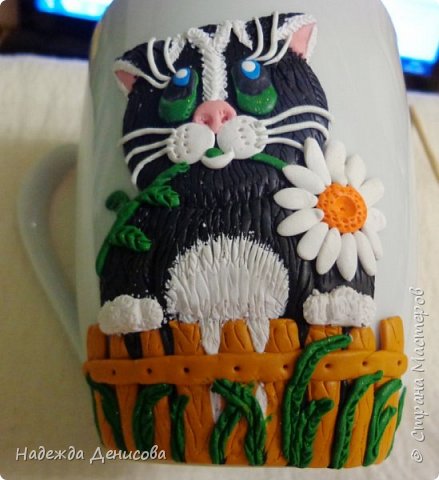
Of white plastic made thin flagellum and Nalepa daisy petals.
Work through a needle chamomile flower.
To Kitten was not sad one, add a moth. I chose shades of blue. You can make a pink butterfly.
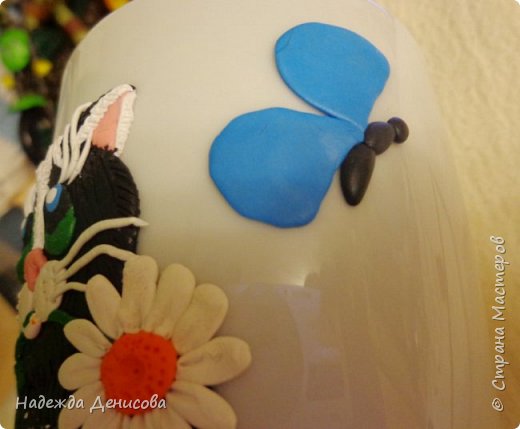
For Valentine’s day – red heart would be more appropriate.
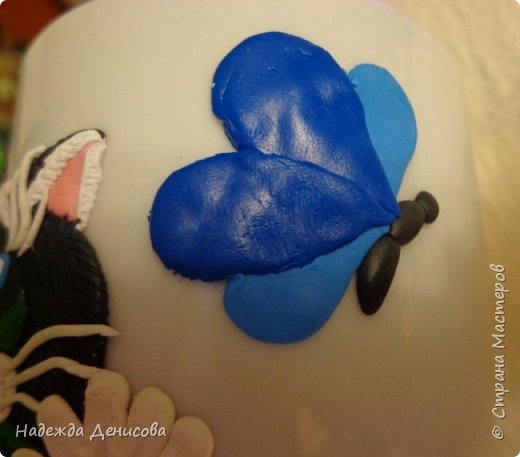
Or make a butterfly shape.
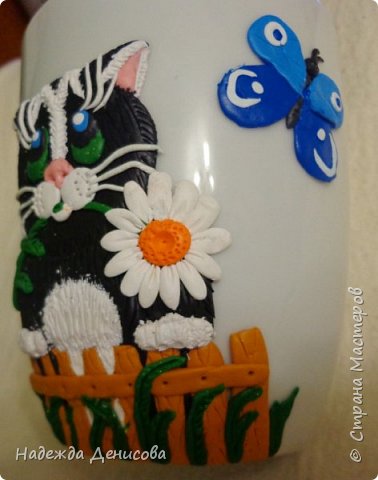
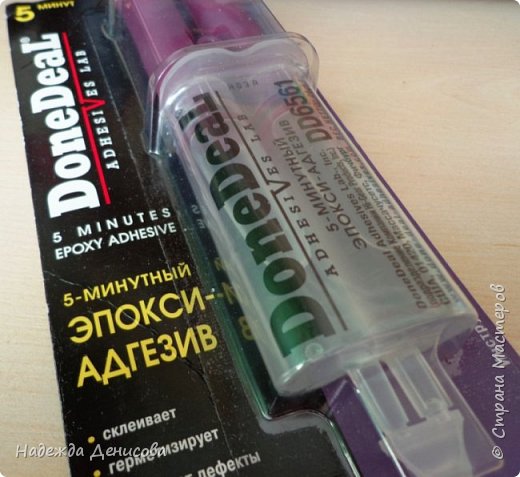
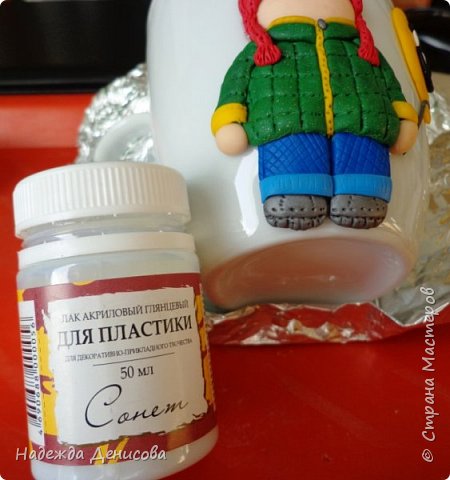
Now in the oven – 130 degrees for 10 minutes. After baking carefully mark application border, gently peel off the appliqué. Wipe the marked part of the inside of the cup and degreasing applications. Smear mug and applique with an epoxy adhesive, and join the circle of the appliqué. Appliqué coat matt lacquer for polymer clay.
Use such an adhesive because it can withstand high temperatures., Can be poured hot water.
The photo glossy varnish, but need a mat.
I think that from a cold porcelain is also possible to make such application.
Hope you like this tutorial.
Source: stranamasterov
We would love to hear your thoughts in the comment section below. And be sure to like us Facebook for more ideas!
Thank you for visiting our website. Keep Creating with Art & Craft!